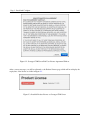
1
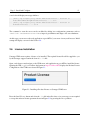
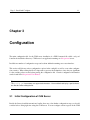
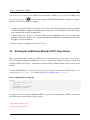
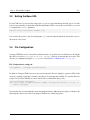
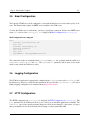
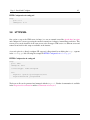
Step 1 - Install and Configure
Step 1 - Install and Configure
i
Step 1 - Install and Configure
ii
Contents
1
Introduction
1
2
Preparation and Installation
2
2.1
Hardware Prerequisites and Recommendations . . . . . . . . . . . . . . . . . . . . . .
2
2.2
Software Requirements . . . . . . . . . . . . . . . . . . . . . . . . . . . . . . . . . . .
3
2.2.1
Operating System and Java Runtime Environment . . . . . . . . . . . . . . . . .
3
2.2.2
Browser . . . . . . . . . . . . . . . . . . . . . . . . . . . . . . . . . . . . . . .
3
2.3
Download . . . . . . . . . . . . . . . . . . . . . . . . . . . . . . . . . . . . . . . . . .
3
2.4
Installation . . . . . . . . . . . . . . . . . . . . . . . . . . . . . . . . . . . . . . . . .
4
2.5
Starting CLM Server . . . . . . . . . . . . . . . . . . . . . . . . . . . . . . . . . . . .
4
2.6
License Installation . . . . . . . . . . . . . . . . . . . . . . . . . . . . . . . . . . . . .
5
2.7
CLM Server Directories . . . . . . . . . . . . . . . . . . . . . . . . . . . . . . . . . .
7
2.8
Running CLM Server as a Service . . . . . . . . . . . . . . . . . . . . . . . . . . . . .
7
Step 1 - Install and Configure
2.9
3
4
iii
Backup . . . . . . . . . . . . . . . . . . . . . . . . . . . . . . . . . . . . . . . . . . .
10
2.10 Upgrading . . . . . . . . . . . . . . . . . . . . . . . . . . . . . . . . . . . . . . . . . .
10
Configuration
11
3.1
Initial Configuration of CLM Server . . . . . . . . . . . . . . . . . . . . . . . . . . . .
11
3.2
Running the CLM Server Behind a HTTP Proxy Server . . . . . . . . . . . . . . . . . .
12
3.3
Setting the Base URL . . . . . . . . . . . . . . . . . . . . . . . . . . . . . . . . . . . .
13
3.4
File Configuration . . . . . . . . . . . . . . . . . . . . . . . . . . . . . . . . . . . . . .
13
3.5
Email Configuration . . . . . . . . . . . . . . . . . . . . . . . . . . . . . . . . . . . . .
14
3.6
Logging Configuration . . . . . . . . . . . . . . . . . . . . . . . . . . . . . . . . . . .
14
3.7
HTTP Configuration . . . . . . . . . . . . . . . . . . . . . . . . . . . . . . . . . . . .
14
3.8
HTTPS/SSL . . . . . . . . . . . . . . . . . . . . . . . . . . . . . . . . . . . . . . . . .
15
Conclusion
16
Step 1 - Install and Configure
iv
List of Figures
2.1
Installing a Product License on Sonatype CLM Server . . . . . . . . . . . . . . . . . . .
5
2.2
Sonatype CLM Server End User License Agreement Window . . . . . . . . . . . . . . .
6
2.3
Installed Product License on Sonatype CLM Server . . . . . . . . . . . . . . . . . . . .
6
Step 1 - Install and Configure
Return to the Nine Steps Main Page
v
Step 1 - Install and Configure
1
Chapter 1
Introduction
Welcome to Step 1, where it all begins. This guide is straightforward and will walk you through everything
you need to download, install and configure the Sonatype CLM Server
Step 1 - Install and Configure
2
Chapter 2
Preparation and Installation
2.1
Hardware Prerequisites and Recommendations
Sonatype CLM Server is typically deployed on a dedicated server. More specific hardware requirements
are ultimately a function of the deployment architecture, the primary usage patterns and the scale of
deployment.
With these influencing factors in mind, we recommend a modern processor speed with at least 8 CPU
cores and 8GB of physical RAM for initial setup. A minimum of 6GB of process space should be available
to the CLM server. Additional RAM can improve the performance due to decreased disk caching.
As an example a Sonatype CLM Server deployment at Sonatype is using a Dual Intel Xeon E5620 with
2.4Ghz, 12M Cache, 5.86 GT/s QPI, Turbo, HT.
Storage requirements range with the number of applications projected to use the CLM server. For less
than 1000 applications 200GB is recommended. Between 1000 and 2000 applications we suggest to use
500GB. Above 2000 applications we suggest to provide 1TB of storage.
Tip
Monitoring disk-space usage will help you gauge the storage needs in your actual deployment and react
to growing demands in time.
Step 1 - Install and Configure
3
Sonatype CLM Server is an I/O intensive application and disk speed will affect the performance of the
CLM server considerably. We therefore recommend to use local drives or SAN usage. Usage of network
mapped storage via NFS or similar is not recommended. It is important to consider the I/O load when
running CLM server in a virtual machine, especially when other virtual machines on the same host are
running other I/O intensive applications e.g. the Nexus repository manager.
Development, test or evaluation deployments can be scaled smaller than the above recommendations and
will continue to function, while a minor performance degradation can be observed.
2.2
2.2.1
Software Requirements
Operating System and Java Runtime Environment
Sonatype CLM server requires a 64bit operating system due to its memory requirements. Otherwise there
are no specific requirements besides the availability of a JRE.
Sonatype CLM requires a Java 7 runtime environment, Update 21 or higher from Oracle. We recommend
usage of the Server JRE.
A list of supported operating systems for the JRE is available from Oracle.
2.2.2
Browser
The Sonatype CLM Server exposes a web application for administration and configuration as well as for
viewing reports. Usage of this application requires Microsoft Internet Explorer 9 or higher or any other
modern browser like newer versions of Mozilla Firefox, Google Chrome or Apple Safari.
2.3
Download
The latest release of the CLM Server can be downloaded from the Sonatype support website and is available as .tar.gz or .zip archive. The contents of the two files are identical and you can choose to download either one. Successful download should result in files named sonatype-clm-server-xyz-bundle.tar.gz
Step 1 - Install and Configure
4
or sonatype-clm-server-xyz-bundle.zip, where xyz is the version of the latest release e.g.
1.9.0-03 or 1.10.2 .
2.4
Installation
After a successful download of the CLM server bundle archive, you should create an installation directory
in the desired location and move the archive into the directory.
cd /opt
mkdir sonatype-clm-server
mv ~/Downloads/sonatype-clm-server.* sonatpe-clm-server/
cd sonatype-clm-server
Moving into the directory and extracting the archive with either one of the commands:
unzip sonatype-clm-server*.zip
tar xfvz sonatype-clm-server*.tar.gz
should result in a directory with the following files:
README.txt
config.yml
demo.bat
demo.sh
eula.html
sonatype-clm-server-1.10.2-bundle.tar.gz
sonatype-clm-server-1.10.2.jar
2.5
Starting CLM Server
Once the CLM server is installed, it can be started with:
cd /opt/sonatype-clm-server
java -jar sonatype-clm-server-1.10.2.jar server config.yml
This command will start the server with the Sonatype CLM Server application using the configuration
from the config.yml file and logging any output straight to the console. After a complete start your
Step 1 - Install and Configure
5
console should display a message similar to:
... [main] org.eclipse.jetty.server.AbstractConnector - Started
[email protected]:8070
... [main] org.eclipse.jetty.server.AbstractConnector - Started
[email protected]:8071
←←-
The command to start the server can be modified by adding java configurations parameters such as
-Xmx1024m -XX:MaxPermSize=128m to improve performance and adapt to the server hardware.
At this stage you can access the web application at port 8070 of your server via any web browser. Initial
startup will display a screen for the Section 2.6.
2.6
License Installation
Sonatype CLM server requires a license to be installed. The required license file will be supplied to you
by the Sonatype support team in the form of a .lic file.
Open a web browser and navigate to the CLM server web application at port 8070 to install the license.
Opening the URL, e.g. for a localhost deployment at http://localhost:8070, displays the Product License
Configuration of the CLM server shown in Figure 2.1.
Figure 2.1: Installing a Product License on Sonatype CLM Server
Press the Install License button and select the .lic file in the file selector. As a next step you are required
to accept the end user license agreement shown in Figure 2.2 by pressing the I Accept button.
Step 1 - Install and Configure
6
Figure 2.2: Sonatype CLM Server End User License Agreement Window
After a success message you will be redirected to the Product License page, which will now display the
expiry date of the license as visible in Figure 2.3.
Figure 2.3: Installed Product License on Sonatype CLM Server
Step 1 - Install and Configure
2.7
7
CLM Server Directories
When the Sonatype CLM Server first starts, it creates a directory for the storage of all its data and configuration. This directory is configured in config.yml and defaults to ./sonatype-work/clm-server.
This path is relative to the location from which the invoking java command is used.
Using the default startup command from the installation directory, causes sonatype-work/clm-server
to be created within it.
If you would like to separate the installation and data directories you can set the sonatypeWork to a
different location.
Additionally a log directory is created within the installation directory and the currentLogFilename
parameter in config.yml can be used to change the location. Further information on logging configuration can be found in Section 3.6
2.8
Running CLM Server as a Service
For production usage, we strongly recommend to set up the CLM server as a service or daemon. This will
ensure that any operating system reboots will include starting up the CLM server.
A dedicated user for running a service is a well known best practice. This users should have reduced
access rights as compared to the root user. Configuration of this user will depend on the operating system
and security system used.
Once the user is configured, you need to ensure that full access rights to the CLM server installation
directory are granted. An example command to achieve this for a service user with the username clmserver
is:
chown -Rv clmserver /opt/sonatype-clm-server
If you have configured the sonatypeWork parameter in config.yml to point to a different directory,
you have to adjust the access rights for it as well.
The principal command for starting the CLM server can be used in a simple startup script as displayed in
Startup Script. The javaopts variable should be adjusted to suit the hardware used.
Step 1 - Install and Configure
8
Startup Script
#! /bin/sh
cd /opt/sonatype-clm-server
javaopts="-Xmx1024m -XX:MaxPermSize=128m"
java $javaopts -jar sonatype-clm-server-1.10.2.jar server config.yml
A running server can be stopped with a simple shutdown script in Shutdown script.
Shutdown script
#!/bin/sh
pid=‘ps aux | grep sonatype-clm-server | grep -v grep | awk ’{print
$2}’‘
kill $pid
←-
Typically these approaches are combined to a service script similar to the script listed in Simplistic Service
Script for Unix Systems. Saving this script as e.g. sonatype-clm-server allows you to start the
server with its log running to the current shell with
./sonatype-clm-server console
Starting as a background process can be initiated with:
./sonatype-clm-server start
and a running background server can be stopped with:
./sonatype-clm-server stop
This example script can be improved to be more robust against repeat invocations, long running stops and
potentially work better across different Unix flavours, but shows the principal functionality. A similar
script can be used for Windows.
Simplistic Service Script for Unix Systems
#!/bin/sh
SONATYPE_CLM_SERVER_HOME=/opt/tools/sonatype-clm-server
VERSION=1.10.2
JAVA_OPTIONS="-Xmx1024m -XX:MaxPermSize=128m"
# The user ID which should be used to run the CLM server
Step 1 - Install and Configure
# # IMPORTANT - Make sure that the user has the required privileges to
write into the CLM work directory.
RUN_AS_USER=clm
9
←-
do_start()
{
cd $SONATYPE_CLM_SERVER_HOME
su -m $RUN_AS_USER -c "java -jar $JAVA_OPTIONS sonatype-clm-server- ←$VERSION.jar server config.yml > /dev/null 2>&1 &"
echo "Started Sonatype CLM Server"
}
do_console()
{
cd $SONATYPE_CLM_SERVER_HOME
java -jar $JAVA_OPTIONS sonatype-clm-server-$VERSION.jar server config ←.yml
}
do_stop()
{
pid=‘ps aux | grep sonatype-clm-server | grep -v grep | awk ’{print $2 ←}’‘
kill $pid
echo "Killed Sonatype CLM Server - PID $pid"
}
do_usage()
{
echo "Usage: clm [console|start|stop]"
}
case $1 in
console) do_console
;;
start) do_start
;;
stop) do_stop
;;
*) do_usage
;;
esac
Setting up this script as a startup script will vary between operating systems and distributions depending
on the init system used. Generally the script would be copied to a dedicated startup directory and assigned
with run-levels and other characteristics for the start up. As an example on a Debian based systems the
following commands could be used:
Step 1 - Install and Configure
10
sudo su
cp sonatype-clm-server /etc/init.d/
cd /etc/init.d
update-rc.d sonatype-clm-server defaults
service sonatype-clm-server start
Depending on the requirements from your system administrator the scripts will have to be modified to fit
into your environment and exact deployment scenario.
2.9
Backup
The Sonatype CLM Server keeps all its configuration and data, besides the startup configuration, in the
sonatypeWork folder as configured in config.yml. In a default deployment this folder will be
the sonatype-work/clm-server folder in your installation directory. We recommend to use your
backup system of choice to ensure availability of backups.
2.10
Upgrading
The following steps would complete an upgrade procedure for the Sonatype CLM Server.
1. Stop the Sonatype CLM Server
2. Perform a backup
3. Make a copy of sonatype-clm-server/config.yml
4. Copy the new installation bundle into installation folder
5. Extract the bundle
6. Apply all modifications from the backup config.yml to the new config.yml file including e.g. server
ports
7. Update any startup scripts as needed
8. Start the Sonatype CLM Server
Step 1 - Install and Configure
11
Chapter 3
Configuration
The main configuration file for the CLM server installation is a YML formatted file called config.yml
found in the installation directory. CLM server is an application running on a Dropwizard server.
In addition a number of configuration steps can be taken within the running server user interface.
This section will discuss various configuration options in the config file as well as some other configuration scenarios. When editing the file it is important to preserve the indentations, since they are significant
for the resulting values created when parsing the configuration file. Generic configuration information
can be found in the Dropwizard User Manual.
Tip
The config.yml format does not support tab characters. Use an editor that displays special characters like tabs when editing the file.
3.1
Initial Configuration of CLM Server
Beside the license installation mentioned earlier, there are a few further configuration steps you should
consider before diving right into using the CLM server. You can configure various aspects in the CLM
Step 1 - Install and Configure
12
System Preferences section of the CLM server user interface, which you can access by clicking on the
System Preferences icon
located in the top right of the CLM Header/Screen (resembles a cog/gear)
and choose the desired option to configure:
• Configure Users and Global Roles in the Security section of the left hand navigation menu, potentially
combined with LDAP configuration available in the Configuration section. Read more about the security
setup outlined in the security documentation.
• Configure Proprietary Packages so that the CLM server can distinguish your own code from other
unknown components. Refer to the component match and identification documentation in the report
user guide for more information.
• Inspect or update or configure your Product License
3.2
Running the CLM Server Behind a HTTP Proxy Server
Many organizations filter, control and optimize access to the internet via a proxy server. Any server or
even any computer within the organization is forced to connect to the internet via the proxy server. The
Sonatype CLM Server needs to communicate with the Sonatype CLM backend services hosted on the
internet.
To allow the CLM server to connect via a proxy, you have to specify the connection details in the proxy
section of the config.yml file displayed in Proxy Configuration in config.yml.
Proxy Configuration in config.yml
proxy:
hostname: "127.0.0.1”
port: 80
username: "anonymous”
password: "guest"
If your proxy server is based on whitelisted URLs, you can use the following list of URLs to ensure that
the CLM server can reach all the required services.
• https://clm.sonatype.com
• http://cdn.sonatype.com/
Step 1 - Install and Configure
3.3
13
Setting the Base URL
If your CLM server is accessed via a https proxy or a proxy server that changes the http port or for other
reasons can potentially not determine what the authoritative URL to access the server itself is, you need
to configure the baseUrl parameter.
baseUrl: http://clm-server.example.com/
It is used by the server for any user facing links e.g. located in email notifications sent by the server to
direct users to the server.
3.4
File Configuration
Sonatype CLM Server stores various files and data related to its operations in a work directory. By default
this data is stored in a sonatype-work/clm- server/ directory in the path the server runs. The
directory is configurable using the sonatypeWork field in File Configuration in config.yml.
File Configuration in config.yml
sonatypeWork: ./sonatype-work/clm-server
In addition, Sonatype CLM Server uses the system temporary directory during its operation. This folder
varies by operating system but is usually controlled by an environmental variable. If a specific directory
needs to be used, the CLM Server can be started with a command line flag as such:
cd /opt/sonatype-clm-server
java -jar -Djava.io.tmpdir=/path/to/tmpdir sonatype-clm-server-1.10.2.jar
server config.yml
←-
Note that the user account which the server runs under must have sufficient access rights to both the work
and temporary directory in order for Sonatype CLM Server to function properly.
Step 1 - Install and Configure
3.5
14
Email Configuration
The Sonatype CLM Server can be configured to send email notifications for events such as policy violations. This functionality requires an SMTP server available to the CLM server.
To allow the CLM server to send emails, you have to specify the connection details to the SMTP server
in the mail section of the config.yml file displayed in Mail Configuration in config.yml.
Mail Configuration in config.yml
mail:
hostname: your.mailserver.com
port: 465
username: [email protected]
password: password
tls: true
ssl: true
systemEmail: "SonatypeCLM@localhost"
The connection details are established with hostname and port and optionally with the addition of
username, password, tls and ssl. The systemEmail parameter will be used as the sender
email for any emails the CLM server sends.
3.6
Logging Configuration
The CLM server application logging can be configured in the logging section of the config.yml file.
By default a log directory is created in the installation directory and the clm-server.log is rotated.
Further logging configuration is documented in the Dropwizard manual.
3.7
HTTP Configuration
The HTTP configuration in config.yml is displayed in HTTP Configuration in config.yml. The
port parameter for the CLM server allows you to set the port at which the application is available. The
adminPort exposes the operational menu. Both ports can be freely changed to other values, as long as
these port numbers are not used and in the allowed range of values greater than 1024.
Step 1 - Install and Configure
15
HTTP Configuration in config.yml
http:
port: 8070
adminport: 8071
3.8
HTTPS/SSL
One option to expose the CLM server via https, is to use an external server like Apache httpd or nginx
and configure it for reverse proxying the external connections via https to internal http connection. This
reverse proxy can be installed on the same server as the Sonatype CLM server or a different server and
numerous tutorials for this setup are available on the internet.
A second option is to directly configure SSL support for Dropwizard by modifying the http: segment
in the config.yml file following the example in HTTPS Configuration in config.yml.
HTTPS Configuration in config.yml
http:
port: 8443
adminport: 8471
connectorType: nonblocking+ssl
ssl:
keyStore: /path/to/your/keystore/file
keyStorePassword: yourpassword
The keystore file can be generated and managed with the keytool. Further documentation is available
in the Dropwizard documentation and the documentation for keytool.
Step 1 - Install and Configure
16
Chapter 4
Conclusion
Pat yourself on the back, the heavy lifting is mostly over, now you are ready to move on to the Step 2 Organizations and Applications.