1
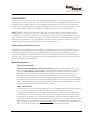
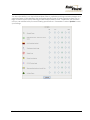
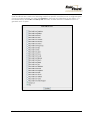
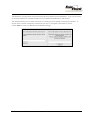
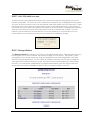
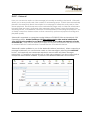
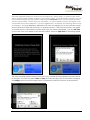
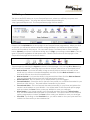
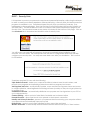
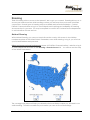
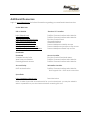
End User Control Panel
(EUCP)
User Manual
Version: 1.4
INTRODUCTION............................................................................................................. 2
Setting Up your Internet Service.................................................................................................2
Basic Requirements.....................................................................................................................2
END USER CONTROL PANEL ...................................................................................... 3
EUCP - Change Password ..........................................................................................................4
EUCP - Add or Remove Basic Services.....................................................................................4
EUCP - Modify Spam and Virus Settings ....................................................................................5
EUCP - Advanced Spam Settings / Content-Based Spam Filtering Options ..........................7
EUCP - Add / Edit child accounts ............................................................................................12
EUCP - Manage Website...........................................................................................................12
EUCP - Webmail.........................................................................................................................14
EUCP - Videomail ......................................................................................................................15
EUCP - Greymail ........................................................................................................................19
EUCP - Content/Parental Controls ...........................................................................................20
EUCP - Email Settings.................................................................................................................20
EUCP - Security Suite ................................................................................................................21
USING ACCELERATED DIALUP................................................................................. 22
ROAMING..................................................................................................................... 23
National Roaming .....................................................................................................................23
Roaming Access via 800 Number ...........................................................................................24
BANDWIDTH SPEED TEST......................................................................................... 25
ADDITIONAL RESOURCES ........................................................................................ 27
End User Control Panel Manual
1
Version: 1.4
Introduction
This document is a user manual for your email and Internet services. It provides instructions for
managing your email account(s) with the End User Control Panel, including personal information
and password changes, spam and virus settings, Webmail (email access from the World Wide
Web), Greymail (spam and virus repository), filtering of web content and security services. It also
covers features like Web Racer Accelerator, Roaming Access, and Personal Web Space.
NOTE: FairPoint Communications reserves the right to make these controls available to you or
manage these controls on your behalf. Therefore, you may or may not have access to the
controls mentioned in this manual. Screen shots used in this manual are for examples only. Your
actual screens may vary depending upon the controls and services made available to you by
FairPoint Communications. Contact FairPoint Communications Customer Service if you have
questions regarding controls and services that are available to you.
Setting Up your Internet Service
FairPoint Communications has several options for establishing your email and Internet service,
ranging from performing all of the necessary steps to providing you with a Sign-Up CD or other
software that guides you through the installation and account setup procedures. Contact
FairPoint Communications Customer Service if you have questions related to the initial setup of
your account. This manual is intended to cover managing your account and services after your
account(s) have been established.
Basic Requirements
Userid’s and Passwords
Userid’s should be entered in all lower case letters, since many email systems can only
accept email addresses in lower case and your userid is an email address in this system.
However, passwords are case sensitive, meaning upper or lower case letters used to
establish your password will be checked for matching case each time you log in. This
provides an increased level of security with less likelihood of your account(s) being
accessed by password generation technology employed by hackers and identity thieves.
Users must log in with their full userid ([email protected] for example) and password
when initiating email sessions in order to be able to send email as detailed below. Please
guard your userid and password information carefully.
SMTP Authentication
In order to reduce virus and spam proliferation, the outgoing email servers used to support
your email account(s) require SMTP Authentication. This will require that minor
configuration changes in your email program be updated to support and enable SMTP
Authentication, and that you log in with your full userid and password when initiating an
email session. Otherwise, you will not be authorized to send email and will receive error
notifications upon attempting to send email. This support only has to be enabled once for
each account. For information on how to update most email applications to implement
SMTP authentication, browse to www.fairpoint.net, click on the Technical Support link, then
click on the SMTP Authentication Instructions link to view these instructions.
End User Control Panel Manual
2
Version: 1.4
End User Control Panel
The End User Control Panel (EUCP) is a quick and easy way for you to manage your Internet
account and account settings via the web.
To access the EUCP, you must browse to http://myaccount.fairpoint.net. Once there, you must
enter your full userid and password to log in. You will then see the home page below which shows
your current usage for the month, your account information, as well as your mail, radius, and
personal website settings. This screen is known as Home in the drop down menu on the left.
Please take a look at the menu on the left side of the main page above. This menu gives you the
ability to make changes to the services you receive, as well as to add or cancel individual
services. You can make changes to the services listed in the menu above and below you will find
instructions on each one. As noted, some changes made using this interface may take up to 30
minutes to take effect.
End User Control Panel Manual
3
Version: 1.4
EUCP - Change Password
The screen shown below allows you to change your password. Remember that passwords are
case sensitive. You must input your existing password and then a new password; you will then
need to verify your new password. This will ensure that you do not mistype the new password.
Remember to click on Save after you have entered in your new information! It is important to
remember that it could take up to 30 minutes after you click Save for this change to take effect,
and it will affect all services that require you to login with userid and password. If you have a DSL
account, it may be necessary to match this password in your DSL modem or router. Contact
Technical Support for more information. Forgot your password? Contact Technical Support.
EUCP - Add or Remove Basic Services
This screen allows you to enable or disable your basic services. This can be useful if you add a child
account and need to go in and add services to it. You can turn Email and Web Space either on
or off by clicking the buttons that are labeled Turn On, or Turn Off. As the screen below mentions,
by disabling Email or Web Space, you will lose any mail or web files that are stored on the server.
Be sure to retrieve any mail or web files before you turn these services off.
End User Control Panel Manual
4
Version: 1.4
EUCP - Modify Spam and Virus Settings
With anti-spam and anti-virus services your time spent using the Internet is now much more
enjoyable! Your emails that are classified as spam and those containing viruses are quarantined in
one location for you which is called “Greymail”, so your inbox isn’t cluttered with spam and your
computer and valuable data aren’t at risk of being corrupted by dangerous viruses.
If your anti-spam and anti-virus services are not automatically set up for you, you may set them up
by visiting the End User Control Panel, and logging in to enable your service and manage your
settings. There is also a link to Greymail from the End User Control Panel for your convenience.
Once you have logged in to the EUCP with your userid and password, click on Modify Spam/Virus
Settings on the left-hand menu. You will then see the following items which you are allowed to
modify. A brief explanation of each item is below:
Email messages categorized as spam are left in your Greymail for 14 days as the default setting.
You are allowed to change this period of time. You can leave a message in Greymail for any
amount of time between 1 and 14 days. It is recommended to not set this time period too low so
that you will have enough time to retrieve any email from Greymail that you would actually like to
receive. Log in to Greymail, check the box beside the message(s) you would like to receive and
click forward. Selected messages are then forwarded to your inbox. Set the amount of days you
want messages to remain in your Greymail and then select Change.
You have the ability to turn your Spam Filtering service on (Content-Based) or Off by clicking the
item and then clicking Change. Content-Based filtering gives you the ability to determine which
types of email messages you want to block and which ones you would like to receive. ContentBased filtering will be detailed later in this document.
A Greymail Notification consists of an emailed report containing all of the emails you received
which were either classified as spam or classified as containing a virus and were sent to your
Greymail. You can decide to receive this report on a daily or weekly basis or not to receive it at all
by clicking on one of the options below and then clicking on Change.
End User Control Panel Manual
5
Version: 1.4
The Virus Filtering Section simply allows you to turn on or off your Virus Filtering service. (FairPoint
Communications may elect to have this function on at all times regardless of the user settings.)
The Virus Notification is an email which is sent to you each time an email is flagged as containing a
virus. You have the ability to turn this service on or off as shown below.
By selecting Content-Based Spam Filtering, you then have the ability to enter Advanced Spam
Settings, create a Blacklist, and a Whitelist. Advanced Spam Settings is the section you would use
to edit your spam sensitivity settings and specify types of spam to quarantine.
The Blacklist is a mechanism for blocking emails from specific email addresses. If you do not want
to receive emails from certain senders you may add their addresses in this section.
The Whitelist allows you to make sure that you always receive emails from specific senders. To
ensure that a certain someone’s emails are not sent to Greymail, add them to this list.
Both the Blacklist and Whitelist functions will accept “wildcards” using an asterisk “*” as the
wildcard. Using wildcards in an email address means every address that matches the rest of the
address will be affected.
Finally, you also have the option of having email sent from a Blacklisted sender either discarded
immediately or sent to Greymail. The default setting is Greymail, and is recommended.
End User Control Panel Manual
6
Version: 1.4
EUCP - Advanced Spam Settings / Content-Based Spam Filtering Options
Once you have logged into your Greymail via the EUCP or http://greymail.fairpoint.net, you can
modify your settings as detailed below. Please notice the two buttons listed at the top of the
screen shot. The first one is Message List. If you click on this button you will automatically be
shown all of the emails in your Greymail. If you click on the second button, labeled View Stats you
will see the number of messages quarantined into Greymail broken out on a monthly basis giving
you proof of how well this filter is working for you.
Every email you receive passes through the Spam filtering system, which analyzes the message,
looking for certain traits normally found in Spam. There are hundreds and hundreds of traits the
filtering system scans for; all capital letters in the body of the message, an Unsubscribe link, no
name in the From: line are just a few. If only one of these traits is found in a message it will be
assigned a low Spam score but if a message has many of these traits it will be assigned a higher
score. This is how it is decided whether a message should be sent to your Inbox or to Greymail. The
Spam Threshold point scale that you can adjust sets the bar for the delivery to your Inbox or
Greymail (Spam repository). We recommend most users leave this at 5.0.
When in Greymail, click the View Message Header icon. The line that reads X-X5: Spam: True; 6.4 /
5.0 means that this message scored a 6.4 because of the Spam traits that were found and your
Spam Threshold is set to 5.0, so this message was sent to Greymail rather than your Inbox. If you
find that legitimate email is being quarantined in Greymail check this X-X5: Spam: True line and
tweak your Spam Threshold setting until the messages clear filtering.
The Confidence Threshold lets you decide at what score a message should not appear in the
"Normal" confidence tab of the message list. Any message that scores above what you have set
in the Confidence Threshold should rarely need review, and will be listed under the "High"
confidence tab. All messages, regardless of score, will be shown together under the "Both"
confidence tab.
Experiment with the threshold levels until you are satisfied with your exact filtering specifications.
After making your changes, select Update in order for your settings to take effect.
End User Control Panel Manual
7
Version: 1.4
You have the ability to set the individual Spam filters to optimize receiving wanted messages and
capturing Spam. Individual filters that recognize specific types of Spam can be set from Low to
High or can be turned off by selecting the associated radius buttons. Experiment with the filters
until you are satisfied with your exact filtering specifications. Remember to select Update to save
your settings.
End User Control Panel Manual
8
Version: 1.4
Real Time Blocks are a method of blocking emails from specific countries known to originate spam.
Once you make changes, you must click Update so that your new selections go into effect. It is
recommended to leave RBL and Dial Up List checked, as these are lists of addresses known to
generate a lot of spam.
End User Control Panel Manual
9
Version: 1.4
The Blacklist is a mechanism for blocking emails from specific email addresses. If you do not want
to receive emails from certain senders you may add their addresses in this section.
The Whitelist allows you to make sure that you always receive emails from specific senders. To
ensure that a certain someone’s emails are not sent to Greymail, add them to this list.
Check Save to save your Blacklist and Whitelist settings.
End User Control Panel Manual
10
Version: 1.4
The screens below are used to select your Blacklist actions, Spam Life, Virus Notification, and
Greymail Notification settings as described earlier in this document.
End User Control Panel Manual
11
Version: 1.4
EUCP - Add / Edit child accounts
A child account is any additional email account opened through the main (parent) account’s
Internet accessibility. The main account is opened by the person who is designated as the parent
account, and then child accounts can be opened under that parent account information. These
email accounts can be used as a secondary account for the parent account, by the spouse of
the parent account holder or by children of the parent account holder. Exceeding the number of
child accounts allowed by your service provider may result in incremental charges. Contact
FairPoint Communications Customer Service if you have questions or concerns about how to
create child accounts and how many you can create at no additional charge.
EUCP - Manage Website
The Manage Website link will take you to the control panel shown below. Personal web space is a
repository for you to store a website, documents, images, or even photos. This space is “write”
accessible by you, the site owner, by using your Internet browser, Web Page Editor, or ftp (File
Transfer Protocol) Application. It is also “read” accessible to the rest of the world by typing the
web space URL (Uniform Resource Locator, also known as your web address) into their Internet
browser. Your web space administration is password protected so your files will stay safe and
secure and will only be available for others to view or copy by surfing to your URL.
End User Control Panel Manual
12
Version: 1.4
How do I put files into my web space?
In order for files to become available from your personal web space, you must first put
them there. The method of doing this is called “File Transfer Protocol” (ftp). FTP is the
method of delivery, but you must have a way to use this method known as an ftp client.
An ftp client is a software application that allows you to put files on the server (upload),
and get files from the server (download). There are several types of clients that can be
used, as mentioned below.
What clients can I use to put files in my web space?
As mentioned before, there are several types of ftp clients. Programs such as “WsFTP” and
“SmartFTP” are 100% ftp clients. This means that their only function is to put files on a server
and get files from a server. These are great for people who are only storing files in their
web space or are using a text editor (like notepad or WordPad) to create web pages and
then uploading them when they are done. Programs like “Dream Weaver” and
“FrontPage” are webpage editors (also known as HTML editors) that, in addition to
creating and editing web pages, also have a built-in ftp client. This is handy for creating
many web pages and then uploading them quickly. And lastly, there is the web based
software that you access from our ftp site. Our ftp tool allows you to upload files from your
Internet browser without the need for these third-party programs. Simply go to our ftp site,
log in with your userid and password, choose the directory that you would like to put your
files in and then upload. See details below:
What steps do I take to use the web-based ftp tool?
1. Surf to http://webftp.fairpoint.net
2. Enter your userid and password.
3. Click the link of the folder you want to upload your files
The ftp folder is accessible by anonymous ftp, which means a user can surf to
ftp://ftp.fairpoint.net/username. The “public_html” folder is where you would place all of
your webpage related files and images. “Username” is the portion of your email address in
front of the @symbol, for instance [email protected] would have a username of “bob”. This
folder is accessible to the rest of the world by surfing to http://www.fairpoint.net/~username
Once you are inside your desired folder, you are presented with three options:
• Upload A File: Allows you to put a file from your computer to your web space.
• Create A Directory: Organize your web space by creating additional folders.
• Advanced Mode: View important information about your files and change
permissions.
What are the addresses that I give to friends and family?
All addresses are composed of two things, the domain of your ISP and your userid.
Listed below is the format you would use to access these “sites”.
• I want to access my files directly from an Internet Browser using ftp:
o ftp://ftp.fairpoint.net/username
• I want my friends/family to see my webpage:
o http://www.fairpoint.net/~username
• I made a folder called “images” in my public_html directory, how do I access it:
o http://www.fairpoint.net/~username/images
End User Control Panel Manual
13
Version: 1.4
EUCP - Webmail
The Webmail link on the EUCP takes you to your Webmail account. You can also access your
Webmail account by browsing to http://webmail.fairpoint.net and logging in with your userid and
password. Webmail allows users to access their email from the Web. They can create and send
new messages, import contact lists, reply to or forward email, and set up folders to file and store
email on the server. They can use the personal calendar, create notes and reminders, or access
Greymail to check quarantined spam emails or emails containing viruses. For more information on
using Webmail, see the built in Help files.
End User Control Panel Manual
14
Version: 1.4
EUCP - Videomail
Now you can send an audio or video message just as easily as sending a text email. Videomail
allows you to record audio and video content to a streaming server. A link is then automatically
placed in the email that directs the recipient to a webpage to initiate the audio and/or video
stream playback. Email inboxes are never overloaded by large audio or video file attachments
because there are none! Audio and video messages simply "stream" across the Internet from
streaming servers. A broadband connection is recommended for recording and playback. Use
of dialup connection, wireless routers or other connectivity options may impact recording and
playback quality.
Videomail is supported on computers running Windows NT/2000/XP/Vista and MacIntosh OS X
Operating systems. Adobe FlashPlayer 9.0 (www.adobe.com) or later must be installed and
Java Script must be enabled in your Web Browser options for recording and playback of audio
and video files. There may be additional charges for using this service and it may be necessary
to contact FairPoint Communications Customer Service to enable this feature.
Videomail is made available to you via the Webmail Interface (see below). When composing a
message in Webmail, you can record an audio or video message by selecting the Add Video
button. A microphone and camera are required to record audio and video messages,
respectively. It is possible to send audio only or video only messages if you do not have both a
microphone and camera available. A portion of the Webmail interface is shown below:
End User Control Panel Manual
15
Version: 1.4
Enter the Webmail interface in order to record Videomail. The first step is to create a new email
with a recipient email address, a subject, and a body of text. Once the email is created, you can
insert video messages into the email by selecting the Add Video button, launching the recorder
window shown below. The first time you add video, you will be asked to review and agree on an
Acceptable Use Policy Agreement. Once this agreement is accepted, the following screens may
also appear. You may experience difficulties with video recording if you do not have the correct
device driver associated with the built in or external camera. Follow the instructions in the panel
on the left below to associate the correct driver with your camera hardware. You must left click
your mouse once in this panel to activate the controls, and then right click for the settings panel.
The video recorder panel may ask for access to your camera and microphone as shown above
on the right. The user may select Allow or Deny and can also right click on this panel to bring up
the settings option and tell the application to remember to allow this access as shown below:
End User Control Panel Manual
16
Version: 1.4
Click on the Record button to record a message; and click on the Stop button when you have
finished recording. You will then be asked to review the video, save the video, or start over as
shown below. If you click on the save button, then the recorder window will close and the link to
the video will be placed in the email. Start over will discard and begin re-recording the video. If
you select Exit, the recorder window will be closed and the video will not be saved.
Performance Recommendations
It is recommended that you have only
one browser window open to minimize
conflicts with the recorder. You should
not be running the computer’s CD player,
MP3 player, or other audio or video
software before starting the Videomail
recorder. If you have only a microphone
(many PC’s today have built-in
microphones), the recording page will
record an audio only message that can
be reviewed or saved just like a video
mail recording. You may need to click
the mouse inside the Recorder and
Playback panels once to activate the
controls.
Depending on your connection to the
Internet, you may experience problems
transmitting or uploading messages. The
items listed below could cause
transmission problems.
•
•
•
If using a modem, you should disable Call Waiting. If Call Waiting is NOT disabled, you may
experience an error in sending if Call Waiting tones are received during transmission.
If the Internet connection has been disconnected, this will cause an error while transmitting
your message. This may occur due to inactivity with your Web browser.
A valid email address in the “To:” field is required. You should not terminate your Internet
connection until you receive a confirmation that your message has been sent or video links
may not be properly sent to the recipient.
End User Control Panel Manual
17
Version: 1.4
Receiving Videomail
When others receive a Videomail, they will see a Web link URL similar to this:
(http://fms.faripoint.net.vd....,) embedded in the body of the email for playing back audio or
video via their Web Browser. They either click on this link or copy and paste the link into their Web
Browser and hit Enter to initiate the audio/video stream. There will be a brief delay while the
computer gets ready and the message is sent across the Internet, then the playback window
below will be displayed.
Users can control the volume setting, Play/Pause the playback, Restart the video or Auto Hide the
menu in order to view the full video. By selecting the Auto Hide box and moving the cursor outside
the window, this menu will hide and return when the cursor is returned within the window.
End User Control Panel Manual
18
Version: 1.4
EUCP - Greymail
This link on the EUCP takes you to your Greymail account, where you will find your spam, and
emails containing viruses. You may also access Greymail by browsing to
http://greymail.fairpoint.net. The Greymail home page is shown below.
Please note the OPTIONS link at the top right of the Greymail home page above. When you click
on this link, you will see the advanced spam settings detailed in the Advanced Spam Settings
section shown earlier in this manual. You can select Spam Confidence tabs to view messages
below (Normal) your Spam Confidence setting, above (High) your setting or select Both to view all
spam in Greymail, regardless of their spam score. Please note the icons at the top right of the
Greymail home page which are shown below. :
Tag messages by selecting the tag box to the left of the message. You can tag All or None using
these boxes in the header. Selecting the icons above will then take actions as described below.
• Mark as Read - You have the ability to tag an email (click on the box to the left of the
email and you will see a checkmark appear) and then click the Mark as Read icon and
that email will now show that it has been read.
• Mark as Unread - You have the ability to tag an email and then click the Mark as Unread
icon and that email will now show that it has never been opened.
• Delete Selected - This icon allows you to delete emails you have tagged.
• Forward Selected – Check the box to the left of any email you would like forwarded to your
inbox then click this icon. The email will be forwarded to your inbox.
• Forward and Allow – This icon forwards the selected email(s) to your inbox and places the
sender’s email address on your Whitelist. You will be taken to the Greymail options page
and must select the Save button under your Whitelist to save your changes.
• Allow Sender - If you tag an email in your Greymail and then click on the Allow Sender
icon, this email address will be placed on your Whitelist. You will be taken to the Greymail
options page and must select the Save button under your Whitelist to save your changes.
• View Stats - By clicking on the View Stats icon, you will be able to view your spam and virus
statistics for the months you have had service.
End User Control Panel Manual
19
Version: 1.4
EUCP - Content/Parental Controls
Password and email addresses are options for Tattlemail. Tattlemail is a mechanism that allows
parents to be notified if their children or someone using one of their child accounts is trying to
access the contents of Greymail. Oftentimes, the nature of the spam emails in your Greymail can
be unsuitable for children, and by providing an email address and password for Tattlemail, you will
be able to make sure your children don’t access Greymail and if they try, you will be notified via
email to the address you specify. Notification is provided for successful as well as unsuccessful
attempts to access Greymail in order to determine if the Talltemail password is compromised.
EUCP - Email Settings
In the Email Settings section you have the ability to set-up email aliases and to set-up email
forwards. FairPoint Communications reserves the right to make these controls available to you or
manage these controls on your behalf. Upon clicking on the Email Settings link, you will see a
screen like the one below:
The Email Alias section above allows you to add up to 100 different addresses for which email
arrives at your one main account. For example, if your userid is “Bob” and you make an alias
called “Jim”, any mail sent to “[email protected]” will be delivered to your “[email protected]”
account.
In the section labeled “Forward all mail to:” above, you can insert a new address for which you
would like all email addressed to your old address to be forwarded to. Your existing mail will be
removed from the mail server, and all new mail will be redirected to the email address that you
enter. It is very important to retrieve any existing mail from the server before you enable this
feature. To remove a forwarder, simply delete it, then click on Save.
End User Control Panel Manual
20
Version: 1.4
EUCP - Security Suite
It is important to protect your personal computer and personal information while using the Internet.
In order to make your Internet experience safer and less risky, a Security Suite of Internet protection
programs is available to you. ZoneAlarm Internet Security Suite, provided by ZoneLabs, is an
independent software package. From the End User Control Panel select the Security Suite link on
the main menu. This link will direct the user to a Features and System Requirements page for the
Security Suite. The download screen shown below is included at the bottom of this page. Click on
the download tab to download and install this suite of security tools.
You will be sent an email with a license key that must be entered during installation of the
software. Save this email. The install process will activate a Configuration Wizard that will help
configure your security suite. You may see some alerts soon after your installation. This is normal
for ZoneAlarm.
ZoneAlarm provides PC users with the following:
Triple Defense Firewall – makes your computer invisible to Internet users, blocks hackers, and
protects your programs and operating system from malicious programs and worms
Anti-Spyware/anti-virus – automatically updates, scans and removes Spyware viruses and worms
in a single operation, clears legitimate monitoring software (cookies) so they do not get picked up
in spyware scans
SmartDefense Advisor – automatically distributes new spyware and virus signatures to your PC for
up-to-date protection
Content Filtering – allows control of what kind of material can be viewed online
Parental Controls – allows time blocks to be placed on the Internet connection
Identity and Privacy Protection – prevents your personal data from leaving your computer without
your approval and automatically stops pop-up ads
IM Protection – protects your instant messages so they cannot be monitored
Wireless Protection - Automatically detects wireless networks and secures your PC from hackers
End User Control Panel Manual
21
Version: 1.4
Using Accelerated Dialup
With Web Racer Accelerator, you can now surf at near DSL speeds and still keep your dialup
connection. This service speeds up your Internet experience by up to five times, using your existing
dialup phone line and modem at just a fraction of the cost of DSL. Contact FairPoint
Communications or log in to www.fairpoint.net for pricing and availability of Web Racer
Accelerator in your area.
This high speed solution with the convenience of dialup is easy to install, runs seamlessly and
doesn’t alter any of your existing software. The compression process allows a smaller amount of
data to be sent, up to five times smaller in some cases, making the download time of your web
pages and your online experience that much faster.
In addition to accelerating web pages, images, animations, and email, Web Racer Accelerator is
bundled with a pop-up blocker and an integrated diagnostic support tool.
How do I get started?
Download
Web Racer Accelerator service is enabled by downloading a program from the FairPoint
Communications website. To download the program, visit www.fairpoint.net and click on
the link associated with Accelerated Dialup or Web Racer Accelerator. You may be
required to contact the Customer Service department to activate this service.
Install
Follow the instructions for installing the program. Once the installation finishes you will be
prompted for a userid and password. The userid should be in the form of your full email
address. Enter your email userid and password. In order to avoid having to keep entering
your userid and password each time, ensure that the Save password box is checked.
Starting Web Racer Accelerator
Web Racer Accelerator is automatically started when your computer starts up.
Acceleration will begin as soon as a supported browser (such as Internet Explorer or
Netscape) or a supported email client (such as Microsoft Outlook or Eudora) is started.
On some Windows platforms a bubble icon will appear when Web Racer Accelerator
service has been established. On other Windows platforms, you can verify that Web Racer
Accelerator has been established by hovering over the tray icon (you should see a
"Service Enabled..." message).
Using Web Racer Accelerator
Browse the web or download email as you normally would. Your web and email access
will be automatically accelerated. If you desire to stop the application, select Stop from
the pop-up menu, or if you desire to exit the application completely, click Exit from the
pop-up menu.
End User Control Panel Manual
22
Version: 1.4
Roaming
Tired of traveling with no access to the Internet? We’ve got you covered. Roaming allows you to
access your Internet services while traveling or when you are away from your home or business
connections. Several types of roaming may be available and are reviewed below. Contact
FairPoint Communications or log in to www.fairpoint.net for pricing and availability of Roaming
Access services in your area. You may be required to contact the Customer Service department
to activate either of these services.
National Roaming
With National Roaming, you can now travel all over the country with access to local dialup
numbers anywhere in the United States! Remember, even while roaming, to log in, you must use
your full email address and password.
Before you leave your local service area, please visit FairPoint Communications’s website or log in
to www.fairpoint.net and click on the Roaming or Remote Access link. You will then see the map
of the United States below:
The coverage map above will help you determine the local dialup number you will need to use
while traveling. To find the number for your location you can do one of three things:
End User Control Panel Manual
23
Version: 1.4
Interactive Map Search:
Click on the state in which you wish to find a local access number. If available, the
numbers will be listed below.
Search By Area Code:
Select an area code from the drop-down list below and click Go! to view a listing of all
access numbers in that area code
Search By State:
Select a state from the drop-down list below and click Go! to view a listing of all access
numbers in that state. An example is shown below:
Roaming Access via 800 Number
Roaming access via an 800 number will also enable traveling subscribers to access their email
account(s) while away from their home or business connections. Contact FairPoint
Communications or log in to www.fairpoint.net for pricing and availability of Roaming Access
services in your area. You may be required to contact the Customer Service department to
activate this service. Again remember, to log in, you must use your full email address and
password.
End User Control Panel Manual
24
Version: 1.4
Bandwidth Speed Test
Ever wonder what kind of speed you are really getting? With Speed Test you can find out easily
and quickly by running a test on your upload and download connection speeds. Here’s how….
To access the speed test, you must visit the following website: http://speedtest.fairpoint.net.
You must enter in your email address and click on Go! You will then be told that your connection
is being tested and to please wait while the revving speedometer is displayed. Once the test is
complete you will see the following screen where your speed is displayed…
End User Control Panel Manual
25
Version: 1.4
If you’d like to see your upload speed, click on Run Upload Speed Test at the bottom of the
previous page. Your speed will then be tested and displayed to you and you will also have the
option of running the tests again by clicking on either Retest Upload or Retest Download.
End User Control Panel Manual
26
Version: 1.4
Additional Resources
Log in to www.fairpoint.net for further information regarding your email and Internet services.
Useful WebLinks
URL or Weblink
“Resolves To” Location
http://fairpoint.net
http://fairpoint.com
http://myaccount.fairpoint.net
http://greymail.fairpoint.net
http://webmail.fairpoint.net
http://webftp.fairpoint.net
ftp://ftp.fairpoint.net/username
http://www.fairpoint.net/~username
FairPoint Communications Main Website
FairPoint Communications Main Website
End User Control Panel
Greymail Interface
Webmail Interface
Personal Webspace Webftp Access
Personal Webspace Anonymous ftp Access
Personal Webspace Read only access
Downloads
Download
Zonelabs Security Suite
Web Racer Accelerator
Roaming/Remote Access
Access Location
End User Control Panel Main Menu
FairPoint Communications Main Website
FairPoint Communications Main Website
Account Setup
Information Location
SMTP Authentication
FairPoint Communications Main Website
Tech Support Link – SMTP Auth. Instructions
SpeedTests
See Note below
http://speedtest.fairpoint.net
Note: In order to provide accurate results for your local network, you may be asked to
select a speedtest on your local network when accessing this tool.
End User Control Panel Manual
27
Version: 1.4