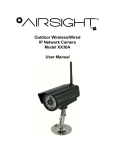
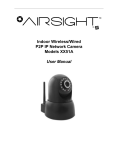
1
Wireless Surveillance
Camera
IP200
USER MANUAL
Questions?
Need some help?
This guide will help you
enjoy your new product
or visit
www.polaroid.com
For more information
consult the user
manual on the
included CD-ROM
Polaroid • Table of Contents
Polaroid • Introduction
Table of Contents
Welcome
Welcome 1.1 Features
1.2 Packing List
1.3 Product Views
1.4 PC System Requirements
1.5 Hardware Instruction
1.6 Software Installation 2 Sofware Operationl
2.1 IP Camera Tool
2.2 CAMERA LOGIN
2.3 TO USE IE BROWSER TO GAIN ACCESS
2.4 SAFARI, FIREFOX, GOOGLE CHROME BROWSER ACCESS
2.5 MOBILE PHONE ACCESS
2.6 ACTIVEX MODE FOR IE BROWSER ACCESS
2.7 VISITOR STATUS
2.8 OPERATOR ACCESS
ADMINISTRATOR ACCESS
3 ADMINSTRATOR SETTINGS
3.1 MULTI-DEVICE SETTINGS
3.2 Network Settings
3.3 Basic Network Settings
3.4 Wireless LAN Settings
3.5 ADSL Settings
3.6 UPnP Settings
3.7 DDNS Service Settings
3.8 System Settings
3.8.1 Device Info
3.9 Alias Settings
3.10 Date & Time Settings
3.11 User Settings
3.12 PT Settings
3.13 Indicator Settings
3.14 Backup and Restore
3.15 Other Settings
3.16 Mail Service Settings
3.17 FTP Service Settings
3.18 Alarm Settings
3.19 Send Mail on Alarm 3.20 Path Settings
3.21 Server Push Mode (for Safari, FireFox, Google Browser)
3.22 Sign in mobile phone
FREQUENTLY ASKED QUESTIONS.
2
3
3
4
4
6
7
8
10
10
14
17
20
21
22
22
25
28
28
29
32
33
35
37
37
37
43
43
44
44
44
45
46
46
48
48
50
51
55
56
58
59
60
You have purchased the Polaroid IP Camera solution because security is
extremely important to you.
So important, in fact, you have chosen a high quality video camera so easy to
install you can do it yourself. Once you do, you will be able to transmit powerful
clear images into the Cloud and monitor them from any digital device, including
your smart phone. Polaroid IP cameras transmit high quality video content at
30fps on the LAN/WAN utilizing MJPEG hardware compression technology.
Based on TCP/IP standard, every Polaroid IP camera contains a built-in server
which supports popular browser systems. Management and maintenance
of your security device can be done simply right over the network, You can
e-configure, start-up and even upgrade firmware in seconds. The net benefit
is you can now monitor your home or business anywhere in the world from
anywhere you happen to be.
Welcome to the new security. Welcome to Polaroid IP Security Camera systems.
PLEASE NOTE: WE MAINTAIN A HOTLINE TO PROVIDE BOTH CUSTOMER
SERVICE AND INSTALLATION GUIDANCE. THE NUMBER IS
1-877-836-1190
1.1 Features
•
•
•
•
•
•
•
•
•
•
•
•
•
•
•
IP200 Manual
Powerful high-speed video protocol processor
High-sensitivity 1/4” CMOS sensor
300k pixel picture quality
Supports PT control; Pan 270 degrees, Tilt 120 degrees
Optimized MJPEG video compression for transmission
Multi-level user management and password definition
Embedded web server to enable IE visitation
Supports wireless network (WI-FI/802.11/blg)
Supports Dynamic IP (DDNS) and UPNP LAN and Internet (ADSL, Cable
Modem)
Motion detection alarm
Provides image snapshot
Supports multiple protocols: HTTP/TCP/IP/UDP/SMTP/DDNS/SNTP/DHCP/
FTP
Supports WEP/WPA/WPA2 encryption
Supports 3G phone, Smart phone control and surveilance
Supports Internet Explorer, Firefox, Safari, Google Chrome browsers
3
Polaroid • Introduction
Polaroid • Introduction
1.2 Packing List
After unpacking, check that the following items are in your possession:
ITEM:
* IP Camera
* WI-FI Antenna * User Manual
* DC Power Supply
* CD
* Network Cable
3. Network Indicator LEDs
QUANTITY
(1)
(1) (only available for wireless models)
(1)
(1)
(1)
(1)
NOTE: If any items are missing, contact Polaroid immediately at 1-877-836-1190
4. Audio Output
1.3 Product Views
1.3.1 Front View
1. LAN
6. Antenna
5. I/O
Alarm
Pin
2. Power
Figure: 1.2
5W
ireless
Antenna
1. Light Sensor Holes
2. Lens
3. N
etwork
Indicator LED
1. LAN: RJ-45/10-100 base T
2. Power Supply: DC 5V/2A
3. Network Lights: Glows green when connected to network, yellow when
transmitting data
4. Audio Output: for external speaker
5. I/O PINS: 1) Output A; 2) Output B; 3) Alarm input; 4) Ground Input
6. Antenna
4. Microphone
Figure: 1.1
1. Light sensor holes
2. LENS: CMOS sensor with fixed focus lens (Default is 3.6mm, optional 6mm
available)
3. Network Indicator LED; blinks when in use
4. Built-in microphone
5. WI-FI Wireless Antenna
1.3.2 Rear Panel
4
IP200 Manual
5
Polaroid • Introduction
Polaroid • Introduction
1.5 Hardware Instruction
1.3.3 Bottom View
Figure 1.4
Figure 1.3
Beware: If your camera does not include several stickers, such as MAC address
and QC sticker, it could be a fake IPCAM and will not work with original
firmware or be able to be serviced by our after sales service. Make sure it has
the MAC address and serial number.
1.4 PC System Requirements
System configuration requirements for viewing multiple IPCAM camera feeds:
CPU: Memory capacity:
Network card:
Display card:
Recommended OS: 2.06 GHz or above
256M or above
10M or above
64M or above memory
Windows 2000/XP/Vista 7
6
To set up your camera hardware, follow each of the following steps carefully to
ensure optimum camera operation:
1. Install WI-FI antenna
2. Plug power adaptor into camera
3. Connect network cable into both camera and into router for initial set-up
(initial set-up is not over WiFi; please keep network cable inserted during
initial set-up. Later,, when you have established your camera on your wireless
network, the hard wire from the camera to the router may be removed, see
section 3.4. It should, however, remain connected during initial setup.)
4. Note: it takes approximately 30 seconds for camera to boot; once this is done,
find the “IP address” in
IP CAMERA TOOLS (see Figure 2.1)
5.Note: Once the proper software is installed and once both power and network
cables are connected to the camera unit, an led indicator should glow green
steadily to indicate the camera is now on. Later, when you establish your
wireless internet connections, an LED will flash yellow to indicate when the
camera is transmitting to the Cloud. Please note that the proper software must
be installed for these LEDs to function properly! SEE NEXT SECTION FOR
SOFTWARE INSTALLATION.
IP200 Manual
7
Polaroid • Introduction
Polaroid • Introduction
1.6 Software Installation
IMPORTANT: Before installing the Active X software to run your camera, make
certain both your Firewall and Anti-Virus are shut off. It is safe to do so and this
will ensure the software installs properly and without interference. Next:
IP CAMERA TOOL. The IP CAMERA TOOL is included in the CD that comes with
your camera. Insert the CD into your computer. Double click on IPCamASetup.
exe icon then click on Next (follow the prompts as they are shown in figures
1.6/1.7/1.8)
2. ActiveX : Double click Appinstall.exe; when promted, click on next, then
click on Install and then click on Finish. Upon completion of all software, an IP
Camera tool icon will appear on your computer desktop.
Figure 1.7
Figure 1.5
Figure 1.6
8
Figure 1.8
IP200 Manual
9
Polaroid • Software
Polaroid • Software
PRE-INSTALLATION PRECAUTIONS:
1. Use only the power adaptor that comes with the product. DO NOT attempt to
substitute it with any other as other adaptors may cause damage to your unit.
2. Make sure the camera unit is mounted in an indoor environment where rain
or other forms of moisture cannot get into it.
3. DO not touch or re-adjust the lens in any way. The focal point of the camera
was pre-set at the factory. If you turn the lens you may interfere with the way
the quality of the images are received.
4. DO not force the Pan/TIlt by hand
5. For any firmware upgrades or connection to any other external devices,
please read all instructions within the installation CD.
2. SOFTWARE OPERATION
2.1 IP Camera Tool
Once you’ve mounted your IP camera, and installed the software, it is time to
see if you can access it remotely.
Start by double clicking on IP Camera Icon
box will appear on your computer screen
3.You will discover that several of the IP cameras installed on the LAN do not
share the same subnet with the monitoring PC. This will be indicated by a
prompt that will tell you: Subnet does not match, double click to change.
Left click to choose the prompt and then right click to set the static IP address of
the camera to the same subnet as your PC over LAN. (see figure 2.3)
NOTE: If the subnet does not match, remember you can choose “Obtain IP from
DHCP Server”.The default of the camera is set to “Obtain IP from DHCP Server
“which means it will automatically get a dynamic IP for you (see figure 2.2)
SIX OPTIONS ARE AVAILABLE VIA THE IP CAMERA TOOL
Choose the IP Camera list and right click on your mouse for the following
options will appear in a window.
Options are: Basic Properties, Network Configuration, Upgrade
Firmware, Refresh Camera List, Flush Arp Buffer, About IP Camera
tool.
on your desktop. A dialog
Figure 2.0
Figure 1.9
Note: The software is designed to automatically search for IP Camera servers
over the LAN. One of the following 3 scenarios will present itself:
1. After about 1 minute, if the software does not find an appropriate IP camera
server on the LAN, it will indicate “No IP server found” and automatically shut
down the program.
2. After about a minute, the software will detect all the cameras on the LAN and
each camera will be listed on your computer screen as shown in figure 1.9. If
you’re installing your first camera, it will naturally be the only one listed.
10
IP200 Manual
11
Polaroid • Software
Polaroid • Software
2.1.1.1 Basic Properties
Under Basic Properties you will find three options. 1) Device ID 2)System
Firmware Version 3) Web UI version (see figure 2.1)
Figure 2.2
Figure 2.1
Device ID. This is the same ID as the one found on the sticker on the bottom
of your camera. It is called the MAC ID. If there are many IP Cameras on your
device list, you can cross check which camera is which by matching the sticker
numbers of each camera with the ID numbers on the list. If, however, no ID
number is shown on the IP Camera tool, it might be that it is being blocked
by your firewall. Shut Firewall to allow access to your computer or as ID as a
trusted site.
Note: There are two reference numbers. One is the Device MAC ID, the other is
the WI-FI MAC ID, this too is on the sticker at the bottom of the camera. If this
sticker is ever lost, you can recapture it by logging on to your host router and
check the status, the numbers will be found there listed as the IP Camera WI-FI
MAC ID.
2.1.1.2 NETWORK CONFIGURATION
In this Window you can configure your network parameter. If you click in the
window requesting an IP from the DHCP server, your camera will be a dynamic
IP (to do this, your router must have a DHCP function and it must be on)
IP Address. Fill in the IP address assigned and make sure it has the same
subnet as your gateway, your computer and your router. (the first three sets of
numbers should be the same)
Subnet Mask. The default subnet mask for your equipment is 255.255.255.0
Gateway. Make sure the subnet number correspond to your PC’s IO address.
DNS Server. Should be set with the same subnet numbers as the gateway.
Note: You can get subnet mask, gateway and DNS from your Router. Often the
DNS is optional.
Http port. Default port number is 80 but you should plug in the port number
assigned for your equipment (ie, 81.801.8001 etc.)
Password: No password.
NOTE; If prompt tells you “subnet doesn’t match, double click to change,” reset
the IP address, subnet mask, gateway and DNS server numbers once again or
enable “Obtain IP from the DHCP server.
2.1.1.3 UGRADE FIRMWARE
12
IP200 Manual
13
Polaroid • Software
Polaroid • Software
Safari, Firefox or Google Chrome browsers. To do so, follow the these
procedures:
1. Double click the IP address of the IP Camera listed on your computer (see
figure 1.9) Once you do this, whatever default browser you ordinarily use will
automatically run and bring up the camera login interface.
Figure 2.4
Begin by entering your correct User and Password to upgrade system firmware
and UI. Please note that you must upgrade the system firmware first and the
Web UI second or you could sustain damage to the camera.
Before downloading the firmware, make sure it is the correct and appropriate
type for your camera. Follow all the instructions in the Read Me First
instructions that came with your upgrade software.
NOTE: DO not upgrade freely. If your camera is working well, it is better to not
upgrade. If you must upgrade please keep the camera on during the process,
use the best wire mode and make sure you are connected to the network.
2.1.1.4 REFRESH CAMERA LIST
Refresh camera list manually.
2.1.1.5 FLUSH ARP BUFFER
In the event that you can search for the camera but cannot open the camera
web page, try to use the ARP Buffer to open.
2.1.1.6 ABOUT IP CAMERA TOOL
Use to check both IP Camera tool and ActiveX control software versions.
2.2 CAMERA LOGIN
Figure 2.6
(Note: Default user name: admin; Password: LEAVE BLANK)
2. If you choose to access the camera using the IE browser directly, simply type
in the camera’s IP address (for example if the address is 192.168.1.123 type that
into the provided window.)
Once the Windows Security box comes up, input your correct user name and
password.
The sign-in interface will pop up. See figure 2.7 to reference which user mode
you’d like to use in order to access the camera. There are three to choose from:
1. Active Mode (for IE browser) available in iE6.0 or above (Please note; Internet
Explorer will give you all options.)
2. “Server push mode” for user who wish to access with either Safari, Firefox or
Google Chrome
3. “sign in mobile phone” for user who wish to access through their mobile
devices.
Figure 2.5
Camera access can be made through IP camera tool or using Internet Explorer,
14
IP200 Manual
15
Polaroid • Software
Polaroid • Software
2.3 TO USE IE BROWSER TO GAIN ACCESS
Figure 2.7
Figure 2.8
The first time you login to a camera, it is possible to get the ActiveX prompt
with a box around it (as seen in fig. 2.8). In this case click this prompt first and
choose Run Add-on. This is telling you to refresh and login the camera again.
Once done, you will receive live video feed in the following windows:
16
IP200 Manual
17
Polaroid • Software
Polaroid • Software
NOTE: If live video stream does not come up, but instead a red cross
such as this appears on the screen or the screen goes black, follow
the following steps:
1. Close your computer’s firewall.
2. Change all the ActiveX settings to enable (including IE BROWSER,Tool,
Internet options, Security, Custom Levels, ActiveX controls and Plug-ins).
Critical to enable are:
Enable: Download unsigned ActiveX controls
Enable: Initialize all ActiveX controls not marked safe
Enable: Run ActiveX controls and plug-ins.
Figure 2.9
Figure 3.0
18
Figure 3.1
IP200 Manual
19
Polaroid • Software
Polaroid • Software
Here are some other things you can do if the video still does not appear.
1. Go to your computer’s Start menu and go to Internet Explorer, choose
internet attributes to enter, or go directly to your Control Panel, choose Internet
Explorer and go to security settings. If the red box continues to appear and
video does not appear after you’ve changed your security settings and if the
security camera’s LED is flashing yellow to indicate it is transmitting and you’re
still not receiving, try going back and changing your port number (see figure
3.2). You may use any port number except 80.
2.5 MOBILE PHONE ACCESS
Figure. 3.3
Choose Mobile Phone Sign in and sign in with the appropriate information.
If your mobile phone does not support ActiveX you will not get full access
features. However, the IP Camera is designed to support full video access on
such popular mobile devices as iphone, most Smart Phones, and 3G phones.
Figure 3.2
NOTE: Again, make certain the firewall and your anti-virus software is not
blocking the ActiveX and its software. Close both firewall and anti-virus and try
to access again.
2.4 SAFARI, FIREFOX, GOOGLE CHROME BROWSER ACCESS
If you choose the Server Push Mode (for the browser of your choice) and your
Push Mode does not support ActiveX, revert to using the IE browser choice.
(NOTE: ActiveX works best with Explorer, if you do not have Explorer or do not
wish to use it, the Push Mode will allow you to use other browser methods.)
Figure. 3.4
20
IP200 Manual
21
Polaroid • Software
Polaroid • Software
2.6 ACTIVEX MODE FOR IE BROWSER ACCESS
When you login the camera in ActiveX model you will be asked what level of
user you are: Visitor, Operator, or Administrator. Each of these user types come
with different levels of authority and usage privileges (see 3.11 for user settings,
figure 8.5)
Also, there are 9 color coded icons at the bottom of the UI to indicate the status
of each device. They are as follows:
Gray. Means no device is connected.
Green. Means a device is connected on this channel and works well.
Red. Means the device on this channel and is recording
Yellow. Means a device on this channel but fails to connect to main device.
2.7 VISITOR STATUS
On Screen Display (OSD) settings.
When you sign in as a visitor, yours is the lowest level of operation and is
limited to certain channels. Our IE software will give a visitor access to up to
color-coded 9 channels. They are as follows:
Figure 3.6
Go to OSD settings and click on “?Audio/Video OSD,
1. set time and date and click time stamp to apply to video
2. choose “disable” to clear any settings on OSD
3. set text color you wish (i.e. black, red, white, etc.)
Figure. 3.5
Click this one for main camera view only.
Click this one to view four connected cameras at once.
Click for views of 9 connected cameras at once.
NOTE: In order to view multiple cameras. you must first have set the MultiDevice Settings first ( see 3.1 Multi-Device Settings)
22
Figure 3.7
IP200 Manual
23
Polaroid • Software
Polaroid • Software
Rate and Resolution
Set rate or speed of frames per second from full speed to 1fp/5s (see figure 3.
8) Resolution: Set the resolution to 160*120/VGA (640*480) QVGA (320*240) as
in figure 3.9)
In order to listen to sounds in that area, speakers must be hooked up to the
device you are monitoring from (see figure 1.2). Click on the Talk icon and it will
turn red to indicate the talk mode is in operation. Click on it again when you
want to stop talk function.
NOTE: All of the above are functions you may access as a visitor. If you request
a function outside the visitor level of authority, a pop-up prompt will request
user name and password (see figure 2.6). It will request this 3 times before you
can login as a visitor again.
2.8 OPERATOR ACCESS
Login as an operator and you not only get all the functions allowed a visitor, but
you also have access to the following functions as well:
Figure 3.8
Figure 3.9
NOTE: You can reduce file size by setting the resolution lower, as in figure 3.9.
Top Menu
(LIVE VIDEO) Click to get live video. This is the only setting from
which you can get right click operations such as play, snapshot, stop etc.
(PLAY) Click when you want to play video, click again when you want
to stop play.
(STOP) Click to stop live video. Click play to start it again.
(SNAPSHOT) Click to get instant snapshot of live action. It will stamp
time and date if you choose to save.
(RECORD) Click to start recording manually, red button will appear
(SHOW BUTTON), Click red button to stop recording, Recordings will save to a
file the file your set up for them (see figures 10.8 and 11.0)
(AUDIO) Click to listen to input sounds near camera. IP Camera
has a built-in microphone. You can listen through the device your monitoring
remotely or through earphones plugged into that device. When you click the
icon to hear sound, icon will turn red, click it again and sound will stop.
(TALK) Click to use talk function. A microphone must be installed in
your computer or other remote digital device. The camera will broadcast your
words.
24
Figure 4.1
IP200 Manual
25
Polaroid • Software
Polaroid • Software
Figure 4.2
Audio Buffer. Click here and window box will give you a choice of 1,2,3,4,or 5
seconds’ buffer of audio. This will prevent dropouts, clicks, or pops.
Reversal: Click here and video image can be seen reversed (up or down; this
particularly important when camera is mounted on ceiling).
Mirror. Clcik to see mirror image. Click again to return image back to normal.
NOTE: Both Reversal and mirror images can be preset to remain if camera is in
a special position requiring a reverse or mirror image.
Figure 4.4
Click on and camera will pan (move from side to side) or tilt (go up or
down) making at least one full pan/tilt cycle automatically.
Click to move up. You can make small incremental moves with small clicks
or hold down to control the movement to the degree you wish.
Click to move down; use same methodology as Up icon.
Mode, Brightness, Contrast
Click to rotate camera up or down; click on
Click to rotate camera left or right; click on
This icon activates IO output switch. Click on
Figure 4.3
on/off.
PLEASE NOTE:
There are nine ways you can direct your camera. To enable this function, simply
right click on live video and a translucent directional arrow will appear on the
live video, then left click mouse to control the directional action. There are eight
clockwise positions you can choose manually. If you click in the center, the
camera will cycle through all pan/tilt directions automatically. Double click right
mouse to exit function.
Preset Positions
Mode: There is an optional mode for outdoor use of the camera. It is 50Hz/60Hz.
It should be noted that camera is not recommended for outdoor recording, but
if it is used as such, should be set to the 50Hz setting.
Brightness. Click +- to find the up or down value of brightness you desire.
Contrast. Click + - to find the up or down value if contrast you desire.
Default all: Click to return to factory settings.
NOTE: If you set up the camera on the network and you receive no video and
the brightness and contrast setting do not appear, you can go back to default all
to achieve video feed.
Figure 4.5
Pan/Tilt
26
to stop.
(SHOW ICON) to stop.
IP200 Manual
27
Polaroid • Settings
Polaroid • Settings
Click to support 15 positions. Begin by rotating camera to the position
you want. Then click the preset position icon and a pop-up will appear with 15
position slots. Keep moving camera to desired positions and set one at a time
much the same way you’d preset the radio stations in your car. Then whenever
you hit preset, the dialogue box with all the preset positions will appear and
you can choose any of the fifteen positions you’ve preset by clicking on the
appropriate number.
NOTE: If, as the operator, you request a control for which your level of authority
does not exist, a pop-up interface will appear (see figure 2.6) requesting user
name/password. Not until it requests 3 times can you return to operator login.
2.9 ADMINISTRATOR ACCESS
For all administrator settings, please see 3.1-3.22)
3 ADMINSTRATOR SETTINGS
When logged in as the Administrator you have access to all controls and
functions of the camera which include the following functions visitors and
operators cannot access:
3.1 MULTI-DEVICE SETTINGS
Polaroid IP Camera system software can support up to 9 devices on the network
at one time.
3.1.1 Set Multi-Device on LAN
When you call up the Multi-Service Device window, you can view all the devices
you have set up on the LAN. The first device is the default one. You can add up
to 9 cameras for monitoring. To add more devices, click on the next device (i.e.
2nd device), then click on a camera in the device list. It will fill in the camera
information; then add user name and password and then click.
Add. After you’ve set all devices in this manner, click on submit.
Figure 4.6
Figures 4.8
28
IP200 Manual
29
Polaroid • Settings
Polaroid • Settings
router’s identity, which means if you want to be able to access you camera from
anywhere but home, you will need to know this address.
The fourth step is to log into your wireless router. To do this, enter the IP
address of your router into your browser and then enter the username and
password when prompted. If you are unsure of your router’s name and
password, refer to your router manual or view a list of the most popular default
router IP addresses, usernames and passwords listed by Googling “Default
Router Passwords and IP Addresses” and you will get that info for almost all
routers.
Go through the options on you router until you find the “Virtual Server” , “Port
Forwarding”, or “port Mapping” option. (Your router’s manual will explain this
as well). Once you’re able to access the Port Forwarding options for your router,
you will then need to set the Local/Private IP address to your camera’s local IP
address, set the inbound port to 8090 and the outbound port to 8090 (you can
change port numbers later). Make sure the type is either “Both” or “TCP. Save
the configuration. (See examples for a couple of routers on page 40, 41 & 42).
To see if you are set up properly, open a browser and enter your external
internet IP address into the address bar, Put a colon sign (:) then enter the port
number e.g. 192.168.1.10:8090. That should bring you to your camera’s login
screen.
Figures 4.9
3.1.2 Set Multi-Device on WAN using Port Forwarding.
Port Forwarding will allow you to view your camera live on the internet from
anywhere, using your PC, smart phone or tablet device. To do this, start by
making sure you have your router’s manual in hand in order to understand
some of the terms we are referring to. Wait a second, you probably have no
idea where it is, right? Don’t worry! To get and get the information you will need
to Push Forward to your wireless devices, simply google : (brand of your router)
manual, i.e. Belkin manual. Once you have this information handy, follow these
five steps:
Write down the local IP address of your camera.. To find this, open IP Camera
Tools (Mac users open IP Scanner Tool) and it will display the IP address of
the camera as an http:// address (i.e. the numbers will appear in sets such as
192.168.1.10).
Log onto your camera and go to “Basic Network Settings” and change the
HTTP Port to 8090. The default port is 80 but you do not want to use this number
because it is a public port and can cause security problems. Port number 8090 is
generally not used and is therefore safe to use
(THIS IS JUST A RECOMMENDATION, YOU ARE FREE TO USE OTHER PORT
NUMBERS)
Note: if you have more than one camera, the port numbers should ascend
accordingly, i.e. 8090, 8091, 8092 etc.)
Next write down your router’s internet IP address. The easiest way to find this is
to google: “What is my IP address” and go to the first link which pops up which
is usually whatismyipaddress.com. This address is how the world sees your
30
3.1.3 Upgrade Device Firmware
Figure 5.4
If you wish to upgrade your camera, you must first upgrade the Firmware, then
upgrade Web UI (in that order). Click Browse to select the correct BIN file you
want, then click submit to upgrade.
NOTE: Before performing any upgrade from a browser, make sure the IP
Camera tool in your computer can locate the camera you wish to upgrade.
Also note that power must be on during the upgrade and it has to be in wired
mode. Upgrading freely without taking any of these precautions could do
damage to the camera.
IP200 Manual
31
Polaroid • Settings
Polaroid • Settings
3.1.4 Restore Factory Settings
3.3 Basic Network Settings
There are two places you can manually fix the camera’s IP address. One, as we
have mentioned earlier is the IP Camera Tool (figure 2.3) , the other is the Basic
Network Settings window below:
Figure 5.5
Clicking on Restore Factory Settings will cause a prompt to pop-up. Select OK
and the camera will return to original factory settings and the device will reboot.
3.1.5 Reboot Device
Clicking on Reboot the Device will cause a prompt to pop-up. Select OK and the
device will reboot.
Figure 5.7
NOTE: The default setting for your camera is “Obtain IP from DHCP server. If
you have this box checked, you will have to un-check it in order to change the IP
address numbers.
If you do not know the Subnet Mask, Gateway, or DNS Server check the Local
Area Connection Status of your computer. It will have all of this information.
Then, do the following steps:
1. Go to Control Panel >Network Connections > Local Area Connections
>Support > Details.
Figure 5.6
2. Find the local connection icon
Support and finally click on details.
from taskbar, click on it, then choose
3.2 Network Settings
Click on Network and it will cause the prompt below to pop-up:
Figure 5.8
32
IP200 Manual
33
Polaroid • Settings
Polaroid • Settings
3.4 Wireless LAN Settings
Figure 6.1
Figure 5.9
To find the DNS Server, follow similar instructions above as you did for
Gateway. If your router supports DHCP function, choose “Obtain IP from DHCP
Server” to get dynamic IP.
Figure 6.0
Figure 6.2
Note: Follow the instruction numbers as they appear in this figure.
1. You must have a wireless router.
2. Your wireless antenna must be installed on camera.
3. If your router is encrypted, you must ascertain and keep the key code.
4. To login in to a camera, click on Network, then go to Wireless LAN settings to
set-up and then Scan. Scan two times, the WAN LIST will appear and you may
choose the camera you wish to use.
5. If there is no encryption, simply click Submit.
6. If there is encryption, input the share key and click on Submit.
7. Wait about 30 seconds, until the camera reboots, and then unplug the network
cable. The camera will now transmit wirelessly.
Http Port. In most cases, you may leave the value that comes up as is. If it does
not work however, you may change the number to another value (i.e. 85)
34
IP200 Manual
35
Polaroid • Settings
Polaroid • Settings
3.5 ADSL Settings
When connect to the Internet through ADSL directly, simply enter ADSL user
name and password obtained from ISP. (see figure 6.6 and figure 6.7 below)
Figure 6.6
Figure 6.3
Figure 6.7
3.6 UPnP Settings
Click UPnP Settings to choose Using UPnP to Map Port
Figure 6.8
Figure 6.4
All you have to do is click Submit in order to automatically allow your camera
to utilize UPnP forwarding. If your router supports UPnP, you will not have to do
port forwarding.
Figure 6.9
NOTE: For UPnP, make sure your UPnP setting is on in your router. If your router
does not support UPnP, it will indicate an error. In this case, we recommend you
do port forwarding manually (see figure 7.4-7.9 for details).
3.7 DDNS Service Settings
Figure 6.5
36
Figure 7.0
IP200 Manual
37
Polaroid • Settings
Polaroid • Settings
You may choose to use a Third Party DDNS. (i.e. for example from Dynds, Oray,
3322 etc.)
Figure 7.3
Figure 7.1
Third Party DDNS
For third party DDNS, choose server (i.e. 3322 or dyndns.org). See figure below:
In order to do this you must have registered account before hand, have and
kept the user name, password, host, and then input the information.
NOTE: If your camera default port reads 80, it must be changed to another
number, clikck OK, and camera will reboot.
Figure 7.2
Figure 7.4
NOTE: Subnet Mask, Gateway, DNS Server should be the same as your router.
(YOUR ROUTER GATEWAY AND PC ADDRESSES CAN BE FOUND IN YOUR
COMPUTER BY GOING INTO YOUR CONTROL PANEL, GOING TO NETWORK
38
IP200 Manual
39
Polaroid • Settings
Polaroid • Settings
SETTINGS AND SEARCHING FOR THE NETWORK PATH, ONCE IT COMES UP
YOU CAN RUN YOUR MOUSE OVER THE ICONS FOR PC AND GATEWAY TO
ASCERTAIN YOUR SYSTEM ADDRESSES.)
Set Port Forwarding in the router. It is important to set the port forwarding in
your router to the IP of your camera directly in order for the camera to work
correctly. Because there are countless routers from around the world, it is
impossible to provide a universal method of set up. The following samples
however, do provide methods for several common router systems:
BELKIN:
1. Login router
2. Choose “Firewall”, select “Virtual Servers”
3. Input the port (except 80) and IP address, then click SAVE.
NOTE: The port and IP address should be same as camera.
TP-LINK:
1. Login the router.
2. Choose “Forwarding”, select “Virtual Servers”
3. Click the Add New Button (an example of the pop-up is below)
Figure 7.6
Figure 7.5
4. Fill in the service port (exception is 80), IP address of camera, then click SAVE.
NOTE: The port and IP address should be same as camera.
40
IP200 Manual
41
Polaroid • Settings
Polaroid • Settings
DLINK:
1. Login the router
2. Choose “Advanced”, select “Virtual Servers”
3. Input the port, IP address, Protocol, then click SAVE.
NOTE: The public port and the private port should be the same as the camera’s
port; choose protocol to be “both”
Figure 7.9
3.8 System Settings
Figure 7.7
After all steps are complete you may use DDSN freely. or check the DDNS status
from your camera and get the DDNS link for internet view. See figure below.
Steps: Login, System, Device Info in that order.
Figure 8.0
3.8.1 Device Info
This will give information about the following: Device ID, Firmware Version,
embedded Web UI Version, Alias, Alarm Status, DDNS Status and UPnP Status.
Figures 7.8
42
Figure 8.1
IP200 Manual
43
Polaroid • Settings
Polaroid • Settings
3.9 Alias Settings
Visitor: See figure 2.7 details of usage at this level.
Operator: You can control the direction of the IP Camera and set parameters.
Administrator: You can set up advanced configurations of the IP Camera.
(See 3.1.22)
Figure 8.2
You may assign your camera (or cameras) any name(s) you choose by entering
in the Alias box.
3.10 Date & Time Settings
Figure 8.5
3.12 PT Settings
Figure 8.3
Figure 8.6
Figure 8.4
Set time and date for your camera. Make sure you’re put in the Clock Time Zone
for your country. You can choose to Sync with NTP Server (fig. 8.3) or Sync with
PC Time (figure 8.4)
3.11 User Settings
You can have up to eight users on the Polaroid IP camera system. You can set up
users names, passwords. The users can be listed as Visitors, Administrators, or
Operators. Each is assigned a level of authority and permission to have access
to the system with different levels of access. For example:
44
1. Go center on boot. Automatically rotates camera at start.
2. PT (Pan/Tilt) Speed. Set Pan/Tilt Speed.
3. Upward patrol speed. Set cruising speed upward
4. Downward patrol speed. Set cruising speed downward.
5. Left patrol speed. Set cruising speed to left.
6. Rightward patrol speed. Set cruising to right.
NOTE: Value 0 is fastest speed. Value 10 is slowest. Recommended speed is 5.
IP200 Manual
45
Polaroid • Settings
Polaroid • Settings
MSN Settings.
3.13 Indicator Settings
Figure 8.7
You have three options for setting the pilot lamp.
1. N
on-connected network out. Twinkles while connected to network and shuts
off when connection is terminated.
2. N
on-connected network with more slow frequency flicker. Twinkles while
connected to network and slows when connection is shut down.
3. Been extinguished. Use to keep connections OFF.
3.14 Backup and Restore
Figure 8.8
1. B
ack up. Back up IP Camera and all parameter settings you’ve already set by
clicking on Submit. All parameters will be stored in BIN file.
2. R
estore. Restore IP Camera and all parameter settings. If you wish to change
camera settings to new status, click Browse and load new settings in BIN file,
then Submit.
NOTE: Before setting MSN, set port forwarding (see DDNS setting instructions
for details)
Go to MSN settings Page. File in correct user name and password, add MSN
buddies, up to ten friends. Once submitted, they will appear in MSN friend’s list.
For MSN status, click on Device info.
After you run your MSN page, open chat dialog, type in the word “url”. After
several seconds you will get a reply for remote access IP address for this
particular IP camera.
Figure 8.9
46
IP200 Manual
47
Polaroid • Settings
Polaroid • Settings
3.15 Other Settings
authorization selection.
SMTP User. Input correct SMTP user; usually his or her full email address.
Sometimes the address can be inputted without the suffix and just using the
user name.
SMTP Password. Input correct password.
NOTE: Click Submit before going to TEST.
Figure 9.0
Using the “other box, you can make settings for Motion Detection, Alarm. IO
Linkage, Schedule, FTP Upload, Alarm Mail Alert, Record Path and more.
3.16 Mail Service Settings
You can set Mail Service Settings to send you an email when motion is detected
in the camera range.
Figure 9.2
If clicking on TEST yields an error, recheck the information your entered to
ensure it was all correct. Then make corrections and click on TEST again. Here
are some possible problems:
1) Cannot connect to server.
2) Network error. Try again later
3). Server error.
4) Incorrect user or password
5) Sender is denied by server. Re-authenticate user and check again.
6) Receiver is denied by server. Anti-Spam privacy software could be blocking.
7) The message is denied by server. Again because of anti-span privacy
software.
8) Server does not support the authentication mode used by the device.
Figure 9.1
Sender. Make sure the senders mail box supports SMTP and does not enable
either SSL or TSL encryptions.
Receivers. You can set up to four receives. There are no SMTP limitations.
SMTP. Senders should have SMTP Server.
SMTP Port. Sender’s SMTP port is usually “25”, but it could have its own
special port number.
Authorization. SMTP needs SMTP user and password input and the then
48
At the bottom of figure 9.1, you will see a box for “Report Internet IP by Mail.”
If you check it, you will receive the camera’s internet IP information via email.
The camera must be on for this information to be transmitted. (For example, the
IPCAM’s URL is http://121.213.109.69:1008)
IP200 Manual
49
Polaroid • Settings
Polaroid • Settings
3.17 FTP Service Settings
Figure 9.3
Figure 9.5
Here are some errors you could receive after your FTP set-up:
1) Cannot connect to server. Check to see if FTP set-up was correct.
2) Network error. Please try again later.
3) Server error.
4) Incorrect user or password. Please check whether user name or password is
correct.
5) Cannot access folder. Make sure folder exists and is authorized.
6) Error in passive (PASV) mode. Make sure server supports PASV mode.
7) Error in (PORT) mode. Select (PASV) mode if device is behind a NAT box
which may be blocking IP information.
8) Cannot upload file. Make sure your account is authorized.
Figures 9.4
When you set up FTP Service, images will be uploaded to your FTP server when
motion is detected in the monitoring area.
Please check all parameters are set correctly. The format of image is
000DC5D008FA (IPCAM) _0_20101115152525_25.jpg. Please check if your FTP
supports this format.
3.18 Alarm Settings
FTP Server. To set up FTP server on LAN, refer to figure 9.3. To set it up for use
over the internet, refer to figure 9.4.
FTP Port. This is normally 21.
FTP Upload Folder. You must set up a folder that is capable of storing images.
The camera will not create a folder by itself. You must be able to erase files
within this folder.
FTP Mode. This will support both standard (POST) mode or passive (PASV)
mode.
Upload Image Now. Select this box and images will be uploaded.
Upload Interval. Set the time interval you wish between image uploads.
50
Figure 9.6
IP200 Manual
51
Polaroid • Settings
Polaroid • Settings
Enter Alarm Service Settings Page to set alarm to your specifications.
3.18.1 Motion Detection Armed
When you enable Motion Detection Armed, the camera will sound an alarm
when motion is detected and it will record the incident.
3.18.2 Motion Detection Sensitivity.
You may choose up to 10 settings of sensitivity for motion, 10 being the most
sensitive. See figure below:
Figure 9.9
Figure 9.7
3.18.3 Alarm Input Armed/ IO Linkage on Alarm
In the event that you want to connect external alarm devices to ward off or
frighten intruders, you must choose Alarm Input Armed to enable an input
device. For an output device, you must choose IO Linkage on Alarm.
Should motion be detected, the Alarm Status will automatically switch to Alarm
Detect Alarm.
Figure 9.8
Figure 10.0
In figure 10.0 you will notice a trigger box. There are two trigger level options
you can set.
52
IP200 Manual
53
Polaroid • Settings
Polaroid • Settings
Trigger Level
Option:
High for closed circuit external alarm devices.
Low for open circuit external alarm devices. When an object moves close to
camera, alarm will trigger.
When alarm is switching off, alarm will trigger as well.
3.19 Send Mail on Alarm
When you click on the “Send Mail On Alarm” box, an email with picture will
automatically be sent if alarm is triggered. (Make sure your Mail Service
Settings are correct, figure 9.1)
NOTE: Each time an alarm is triggered, 6 snapshots will be sent via email. Each
alarm will last for 60 seconds.
Upload Image on Alarm
Figure 10.1
There are also two options for output level.
High : if the I/O pins work as switch for closed circuit devices.
Low: if the I/O pins work as a switch for open circuit alarm devices.
Figure 10.4
Set Upload Image on Alarm to have all images sent to FTP file once alarm is
armed.
Upload Intervals. You can set the intervals at which images are uploaded (in
seconds). Please note the Total Alarm Time for each incident is 60 seconds.
Scheduler
When you arm your camera to alarm is up to you. Yu can set the schedule by
days, Monday through Friday, divide each day into 24 hours and even subdivide
hours into quarter. When you click on the times you want the camera armed, the
section will turn blue to indicate your times. Click again to undo schedule and
the field will return to original gray color.
NOTE: If you do not use the scheduler, the camera will alarm anytime motion is
detected.
3.18.4 IO Pins for IO Alarm Linkage
IO PINS: 1) Output 2) Output 3) Alarm Input 4) Input (GND)
Input Pins. Can be used for 1-way external output sensors (i.e. Person Infrared
Sensor for motion detection). When an external sensor is triggered, IP Camera
will either send an email with a recorded picture or will control the internal relay
output. You must use Pin3 or Pin4 for this and select Alarm.
Input Armed. When using the Inputs Pins in Figure 10.3, you are arming the
device.
Output Pins. These will arm the device when you enable IO linkage on alarm for
alarm over internet. You can also use (INFINITY ICON) and (SPLIT ECLIPTICAL
ICON) to control IO output switch ON/OFF (see figure 4.4)
NOTE: All Pins work as switches only.
54
Figure 10.5
IP200 Manual
55
Polaroid • Settings
Polaroid • Settings
Sound on Alarm
Whenever motion is detected, there will be a beeping sound. Click on enable to
maintain the beep when alarm is going off or cancel it and no alarm will sound.
Record on Alarm
If you want the camera to automatically record when alarm goes off, you must
enable Record on Alarm. If you do not, you must cancel Record on Alarm.
Alarm Record Path. Here you may choose the file on your PC you want the
alarm messaging to go to.
NOTE: If your could not set a path using Windows 7 or Vista, take the following
steps:
First, add the IP address to the IE’s trusted sites. The steps are IE browser to Tool
to Internet Proper to Security to trusted sites to Add.
You can also run the IE as the administrator and input the IP address of camera
manually (see figure 11.1).
Figure 10.6
Once an alarm has been engaged, the following will occur depending on your
settings:
Status Light turns red and keeps on blinking
If you set Sound on Alarm, alarm beeps will be audible over a speaker or
earphone attached to your computer .
If you set Record on Alarm, the camera will record the incident automatically for
60 seconds. You can then retrieve the image by going to your record folder.
If you set Sent Mail on Alarm, you’ll receive an email of event (see figure 10.0)
If you set Upload Image on Alarm, images of the incident will be sent to your
FTP server.
If the alarm goes off during time you set on the Scheduler, the camera will
automatically send emails during the time frames you selected.
NOTE: Camera record for 60 seconds once alarm is triggered.
REC Automatically and Save to PC
If you’ve enable motion detection and an event has occurred, when you open
the camera monitoring window, the recorded event will automatically be save
to your PC.
Figure 11.1
3.20 Path Settings
Figure 10.8
In figure 10.8 you will see slots to set the record path for any images being sent
to the PC from the Camera.
Record path. Set manually by clicking on record icon (SHOW REC BUTTON) to
start manual record. The file you import from your browser will automatically be
the one images are sent to.
56
IP200 Manual
57
Polaroid • Settings
Polaroid • Settings
3.21 Server Push Mode (for Safari, FireFox, Google Browser)
Choose Server Push Mode, login camera, and the following will appear on your
screen:
3.22 Sign in mobile phone
For monitoring using a mobile phone, you must first choose Sign in mobile
phone, login the camera, and the following will window and interface will
appear on your computer screen:
Figure 11.2
NOTE: Server Push Mode does not support ActiveX. That means functions that
are controlled by ActiveX will not work in Server Push Mode. These functions
include: Play, Stop, Record, Audio,
Talk, Multi-device settings, Path settings. You will not find these options if you
use Safari, Firefox, or Google Chrome browsers.
Figure 11.3
NOTE: Mobile phone does not support ActiveX, therefore, Mobile phone only
provides simple functions such as Resolution, Mode, Bright, Contrast, Pan/Tilt
Control. Snapshot, Reversal, Mirror, and IO Linkage functions.
58
IP200 Manual
59
Polaroid • FAQs
Polaroid • FAQs
FREQUENTLY ASKED QUESTIONS.
DOES POLAROID IP CAMERA WORK ON MAC OS SYSTEMS AS WELL
AS MICROSOFT WINDOWS?
Yes, the system is designed to work with both operating systems. You will find
information in your CD folders concerning MAC systems, however, the set-up to
a MAC computer should pretty much be plug and play if you follow the prompts
as they come up.
IF I NEED ASSISTANCE WHERE CAN I GET IT?
If you encounter difficulties set-up or running your IP Security Camera outside
the instructions in this manual, we suggest you contact your reseller. If they
cannot resolve your issues , then please contact our technical support team at
877-836-1190 or at Polaroid, 2 Bergen Turnpike, Ridgefield, New Jersey.
FORGOTTEN AMINSISTRATOR USERNAME AND/OR PASSWORD?
Press RESET BUTTON and hold for 15 seconds. After 15 seconds, the user
name and password will return to factory default which is username: admin,
password: No password. At this point you may add in a user name and
password of your choice.
IF YOU’RE TOLD SUBNET DOESN’T MATCH, DBCLICK TO CHANGE?
Once you click on the message, the settings box will appear. Click on the
“Obtain IP from DHCH server (fig 2.2). It should obtain the information and set
up automatically. If, however, it does not, go to the local area connection of
your computer to get proper subnet and gateway of your computer and then
change the camera numbers to these numbers exactly.
HOW DO I GET THE IP ADDRESS CONFIGURATION?
To see if your computer and camera chare the same subnet, click My Computer,
then Control Panel, then Network & Dial Up Connections, then LAN, then
Attributes, then go to Internet Protocols (TCP/IP) and check the IP address
and the Subnet Mask. Make sure the numbers here and the numbers for your
camera coincide. Do this manually in the camera set-up box.
REASONS CAMERA CANNOT BE ACCESSED OVER INTERNET?
There could be several reasons: 1) ActiveX controller is not installed properly.
Review Figures 2.9 through 3.1 of this manual. 2) Your firewall or anti-virus
software is blocking the port. Change port number. See figure 3.2 for reference.
3) Port forwarding is incorrect (refer to figure 7.4 through 7.9 of this manual and
make sure the settings are correct.
IP CAMERA TOOL CAN’T FIND CAMERA’S IP?
First check all camera connections. Make sure the DHCP in your router is
enabled; do not enable MAC address filter. Make sure firewall and anti-virus
software is not blocking camera by setting it as a “trusted device” in your
firewall and anti-virus settings.
60
UPnP ALWAYS FAILS?
Sometimes your firewall or anti-virus software fails to allow the connection. It is
recommended you try port forwarding manually in your router.
WHY ISN’T THE SHORTCUT TO IP CAMERA TOOL APPEARING?
If you use Windows7 or Vista it may be necessary to check if you installed it
properly. You should be looking for an icon that takes you to C:/Windows/
System32/IPCamera.exe, please direct the installation to C://Windows/
SysWOW64/IPCamera.exe
WHY CAN’T I CHANGE THE RECORD PATH?
Sometimes Windows7 or Vista will not allow you to change the record path.
To override this problem you must add camera as a trusted site. Go to IE
Browser, then to Tool, then click on Internet Proper, then click on Security, then
click on trusted sites, then sites and then click on Add. YOU CAN ALSO RUN AS
AMINISTRATOR AND INPUT IP ADDRESS MANUALLY.
CAN’T FIND MULTI-DEVICE SETTINGS AND RECORD ICON?
Remember that these functions are only available using ActiveX. If your running
your cameras on browsers such as Safari, Google Chrome or Firefox, these
functions are not available to you.
CAMERA STILL WON’T CONNECT WIRELESSLY?
If after you set wireless settings and disconnect cable to router, you still cannot
connect wirelessly, check that your settings are correct. See WIRELESS LAN
SETTINGS for details. Double click the SSID, go to the Encryption Share Key,
then Channel. Make sure they are all the same settings as your router. Note
that your Share key should not include special characters. Use only a word and
number are best. And make sure your MAC address filter is not on.
CAN’T SEE OTHER CAMERAS WHEN ACCESSING REMOTELY?
If you want to see all cameras in your system, you must make sure they are all
added into your multi-device settings using DDNS name and port number. Use
DDNS domain name in host check box, not camera’s LAN IP. See details in this
manual for Multi-Devices on WAN.
REMOTE LOG IN ONLY BRINGS ME TO BLACK SCREEN OR CODE?
If you were able to access your remote login page, your DDNS settings are
correct. However, there may be internet speed problems especially if you are
access on WI-FI.
YOUR USING ACTOVEX BUT STILL GETTING NO PICTURE?
First make sure you’ve clicked on ActiveX properly
IP200 Manual
61
Polaroid • FAQs
PROBLEMS WITH NETWORK BANDWIDTH?
The picture quality you are getting is subject to several factors: Network
bandwidth, PC performance, the number of visitors accessing at one time,
or whether your using a switch or a hub for access (use of a switch is
recommended for multiple cameras)
HOW DO I REGISTER A DDNS ACCOUNT ON WEB?
Go to http://www.dyndns.com and register.
WHY AM I GETTING FAILURE TO CONNECT TO DEVICE PROMPT?
This happens when you have multiple cameras. If it continues you should check
the status of your camera. A yellow indicator light on camera should be on to
indicate it is broadcasting.
WHAT ARE THE DEFAULT SETTINGS?
IP address: dynamic obtain
Subnet mask: dynamic obtain
Gateway: dynamic obtain
DHCP: Disabled
DDNS: factory DDNS or set third party DDNS
Username: admin
Password: No password
PLEASE NOTE: WE MAINTAIN A CALL CENTER FOR CUSTOMER SERVICE
ISSUES AND FOR INSTALLATION GUIDANCE AND HELP. SHOULD YOU NEED
OUR ASSISTANCE PLEASE CALL US AT
877-836-1190
Polaroid, Polaroid & Pixel, and Polaroid Classic Border Logo are trademarks of PLR IP Holdings,
LLC, used under license. All other trademarks are the property of the respective owner, who has not
sponsored, endorsed or approved this product. PLR IP Holdings, LLC does not manufacture this product
or provide any Manufacturer’s Warranty or support.
Distributed by:
C&A Licensing, LLC
2 Bergen Turnpike
Ridgefield Park, NJ 07660 USA
© 2012 All Rights Reserved
MADE IN CHINA
Instantly recognizable. Instantly
reassuring. The Polaroid Classic Border
lets you know you’ve purchased a product
that exemplifies the best qualities of our
brand and that contributes to our rich
heritage of quality and innovation.
62
IP200 Manual
63