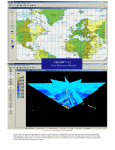
1
Licensed to: iChapters User
Licensed to: iChapters User
Microsoft Office PowerPoint 2007:
Introductory Concepts and Techniques
Gary B. Shelly
Thomas J. Cashman
Susan L. Sebok
Executive Editor: Alexandra Arnold
Product Manager: Heather Hawkins
Associate Product Manager: Klenda Martinez
Editorial Assistant: Jon Farnham
Senior Marketing Manager: Joy Stark-Vancs
Marketing Coordinator: Julie Schuster
Print Buyer: Julio Esperas
© 2008 Course Technology, Cengage Learning
ALL RIGHTS RESERVED. No part of this work covered by the copyright herein may be
reproduced, transmitted, stored or used in any form or by any means graphic, electronic, or mechanical, including but not limited to photocopying, recording, scanning,
digitizing, taping, Web distribution, information networks, or information storage and
retrieval systems, except as permitted under Section 107 or 108 of the 1976 United
States Copyright Act, without the prior written permission of the publisher.
For product information and technology assistance, contact us at
Cengage Learning Customer & Sales Support, 1-800-354-9706
For permission to use material from this text or product, submit all
requests online at cengage.com/permissions
Further permissions questions can be emailed to
[email protected]
Director of Production: Patty Stephan
Production Editor: Matthew Hutchinson
ISBN-13: 978-1-4188-4345-8
Developmental Editor: Laurie Brown
ISBN-10: 1-4188-4345-8
Proofreader: John Bosco
Indexer: Rich Carlson
QA Manuscript Reviewers: John Freitas,
Serge Palladino, Chris Scriver, Danielle Shaw,
Marianne Snow, Teresa Storch
Art Director: Bruce Bond
Cover and Text Design: Joel Sadagursky
Cover Photo: Jon Chomitz
Compositor: GEX Publishing Services
Course Technology
25 Thomson Place
Boston, Massachusetts 02210
USA
Cengage Learning is a leading provider of customized learning solutions with office
locations around the globe, including Singapore, the United Kingdom, Australia,
Mexico, Brazil, and Japan. Locate your local office at:
international.cengage.com/region
Cengage Learning products are represented in Canada by Nelson Education, Ltd.
For your lifelong learning solutions, visit course.cengage.com
Visit our corporate website at cengage.com
Purchase any of our products at your local college store or at our
preferred online store www.ichapters.com
Printed in the United States of America
3 4 5 6 7 8 9 10 09 08
Copyright 2009 Cengage Learning, Inc. All Rights Reserved. May not be copied, scanned, or duplicated, in whole or in part.
Licensed to: iChapters User
Microsoft Office PowerPoint 2007
1
Creating and Editing a
Presentation
Objectives
You will have mastered the material in this chapter when you can:
• Start and quit PowerPoint
• Describe the PowerPoint window
• Select a document theme
• Create a title slide and text slides
with single- and multi-level
bulleted lists
• Save a presentation
• View a presentation in Slide
Show view
• Open a presentation
• Display and print a presentation
in grayscale
• Check spelling
• Use PowerPoint Help
• Copy elements from one slide
to another
Copyright 2009 Cengage Learning, Inc. All Rights Reserved. May not be copied, scanned, or duplicated, in whole or in part.
Licensed to: iChapters User
1
Microsoft Offi
Office
ce PowerPoint
Word 2003 2007
Microsoft
Creating and Editing a
Presentation
What Is Microsoft Office PowerPoint 2007?
Microsoft Office PowerPoint 2007 is a complete presentation graphics program that
allows you to produce professional-looking presentations (Figure 1–1). A PowerPoint
presentation also is called a slide show.
PowerPoint contains several features to simplify creating a slide show. For example,
the results-oriented user interface can boost productivity by making tasks and options
readily accessible. Professionally designed standard layouts help you save time by formatting and creating content. You then can modify these layouts to create custom slides to fit
your specific needs. To make your presentation more impressive, you can add diagrams,
tables, pictures, video, sound, and animation effects. Additional PowerPoint features
include the following:
• Word processing — Create bulleted lists, combine words and images, find and
replace text, and use multiple fonts and type sizes.
• Outlining — Develop your presentation using an outline format. You also can
import outlines from Microsoft Word or other word processing programs.
• Charting — Create and insert charts into your presentations and then add effects
and chart elements.
• Drawing — Form and modify diagrams using shapes such as arcs, arrows, cubes,
rectangles, stars, and triangles. Then apply Quick Styles to customize and add effects.
Arrange these objects by sizing, scaling, and rotating.
• Inserting multimedia — Insert artwork and multimedia effects into your slide show.
The Microsoft Clip Organizer contains hundreds of media files, including pictures,
photos, sounds, and movies.
• Saving to the Web — Save presentations or parts of a presentation in HTML
format so they can be viewed and manipulated using a browser. You can publish your
slide show to the Internet or to an intranet.
• E-mailing — Send your entire slide show as an attachment to an e-mail message.
• Collaborating — Share your presentation with friends and coworkers. Ask them
to review the slides and then insert comments that offer suggestions to enhance the
presentation.
• Preparing delivery — Rehearse integrating PowerPoint slides into your speech by
setting timings, using presentation tools, showing only selected slides in a presentation,
and packaging the presentation for a CD.
This latest version of PowerPoint has many new features to increase your productivity. Graphics and other shape effects allow you to add glow, shadowing, 3-D effects,
and other appealing visuals. Typography effects enhance the design’s impact. PowerPoint
themes apply a consistent look to each graphic, font, and table color in an entire presentation. Digital signatures enable you to verify that no one has altered your presentation
since you created it, and the Document Inspector removes private data, such as comments
and hidden text.
PPT 2
Copyright 2009 Cengage Learning, Inc. All Rights Reserved. May not be copied, scanned, or duplicated, in whole or in part.
Licensed to: iChapters User
Microsoft Office PowerPoint 2007
PowerPoint gives you the flexibility to make presentations using a projection device
attached to a personal computer or using overhead transparencies. In addition, you can take
advantage of the World Wide Web and run virtual presentations on the Internet. PowerPoint
also can create paper printouts of the individual slides, outlines, and speaker notes.
Project Planning
Guidlines
The process of developing a presentation that communicates specific information requires
careful analysis and planning. As a starting point, establish why the presentation is needed.
Next, analyze the intended audience for the presentation and their unique needs. Then,
gather information about the topic and decide what to include in the presentation. Finally,
determine the presentation design and style that will be most successful at delivering the
message. Details of these guidelines are provided in Appendix A. In addition, each project in
this book provides practical applications of these planning considerations.
Project — Presentation with Bulleted Lists
In Project 1, you will follow proper design guidelines and learn to use PowerPoint to
create, save, and print the slides shown in Figures 1–1a through 1–1e on this page and the
next. The objective is to produce a presentation, called A World Beneath the Waves, to
help the Student Government Association (SGA) President, Dave Ehlin, promote the annual spring break diving and snorkeling trip to Cabo San Lucas, Mexico. This slide show
presents the highlights of this trip and promotes the included amenities, tour prices, and
the inviting Pacific waters. Some of the text will have formatting and color enhancements.
In addition, you will print handouts of your slides to distribute to students.
(a) Slide 1 (Title Slide)
(b) Slide 2 (Single-Level
Bulleted List)
(c) Slide 3 (Multi-Level Bulleted List)
Figure 1–1
PPT 3
Copyright 2009 Cengage Learning, Inc. All Rights Reserved. May not be copied, scanned, or duplicated, in whole or in part.
Licensed to: iChapters User
PPT 4 PowerPoint Chapter 1 Creating and Editing a Presentation
(d) Slide 4 (Multi-Level Bulleted List)
(e) Slide 5 (Closing Slide)
Figure 1–1 (continued)
PowerPoint allows you to produce slides to use in an academic, business, or other environment. One of the more common uses of these slides is to enhance an oral presentation.
A speaker may desire to convey information, such as urging students to participate in a
food drive, explaining first aid, or describing the changes in an employee benefit package. The PowerPoint slides should reinforce the speaker’s message and help the audience
members retain the information presented. An accompanying handout gives audience
members reference notes and review material after the presentation’s conclusion.
Overview
As you read this chapter, you will learn how to create the presentation shown in
Figure 1–1 by performing these general tasks:
• Select an appropriate document theme.
• Enter titles and text on slides.
• Change the size, color, and style of text.
• View the presentation on your computer.
• Save the presentation so you can modify and view it at a later time.
• Print handouts of your slides.
Plan
Ahead
General Project Guidelines
When creating a PowerPoint document, the actions you perform and decisions you make will
affect the appearance and characteristics of the finished document. As you create a presentation
such as the project shown in Figure 1–1, you should follow these general guidelines:
1. Find the appropriate theme. The overall appearance of a presentation significantly
affects its capability to communicate information clearly. The slides’ graphical appearance
should support the presentation’s overall message. Colors, fonts, and layouts affect how
audience members perceive and react to the slide content.
2. Choose words for each slide. Use the less is more principle. The less text, the more likely
the slides will enhance your speech. Use the fewest words possible to make a point.
(continued)
Copyright 2009 Cengage Learning, Inc. All Rights Reserved. May not be copied, scanned, or duplicated, in whole or in part.
Starting PowerPoint PPT 5
Plan
Ahead
(continued)
3. Format specific elements of the text. Examples of how you can modify the appearance,
or format, of text include changing its shape, size, color, and position on the slide.
4. Determine where to save the presentation. You can store a document permanently, or
save it, on a variety of storage media including a hard disk, USB flash drive, or CD. You
also can indicate a specific location on the storage media for saving the document.
When necessary, more specific details concerning the above guidelines are presented
at appropriate points in the chapter. The chapter also will identify the actions performed
and decisions made regarding these guidelines during the creation of the slides shown in
Figure 1–1.
BTW
Starting PowerPoint
If you are using a computer to step through the project in this chapter and you want
your screen to match the figures in this book, you should change your screen’s resolution
to 1024 ⫻ 768. For information about how to change a computer’s resolution, read
Appendix E.
Note: If you are using Windows XP, see Appendix F for alternate steps.
To Start PowerPoint
Decreasing Resolution
You may need to
decrease your computer’s
resolution if you know
you are going to run your
presentation on another
computer that uses a
lower resolution, such as
800 ⫻ 600 or 640 ⫻ 480.
This lower resolution,
however, may affect
the appearance of
your slides.
The following steps, which assume Windows Vista is running, start PowerPoint based on a typical
installation. You may need to ask your instructor how to start PowerPoint for your computer.
1
• Click the Start button on the
Windows Vista taskbar to display the
Start menu.
• Click All Programs at the bottom of
the left pane on the Start menu to
display the All Programs list.
• Click Microsoft Office in the All
Programs list to display the Microsoft
Office (Figure 1–2).
Microsoft Office
folder
Windows Vista displays
programs and folders
on the Start menu
above the Start button
Microsoft Office list
shows contents of
Microsoft Office folder
Microsoft Office
PowerPoint 2007
command
Start button
All Programs list
is displayed in
left pane of Start
menu
right pane
of Start
menu shows
commonly used
folders and
commands
Windows
taskbar
Figure 1–2
Copyright 2009 Cengage Learning, Inc. All Rights Reserved. May not be copied, scanned, or duplicated, in whole or in part.
PowerPoint Chapter 1
Licensed to: iChapters User
Licensed to: iChapters User
PPT 6 PowerPoint Chapter 1 Creating and Editing a Presentation
2
• Click Microsoft Office
title of blank document
is Presentation1
title bar
PowerPoint 2007 to
start PowerPoint and
display a new blank
document in the
PowerPoint window
(Figure 1–3).
Maximize button changed to a
Restore Down button because
window is maximized
Close button
• If the PowerPoint
Q&A
window is not
maximized, click the
Maximize button next
to the Close button on
its title bar to maximize
the window.
What is a maximized
window?
A maximized window
fills the entire screen.
When you maximize a
window, the Maximize
button changes to a
Restore Down button.
When you restore a
maximized window,
the Restore Down
button changes to a
Maximize button.
Windows Vista taskbar displays
Microsoft PowerPoint program
button, indicating PowerPoint
is running
Normal view button
is selected when you
start PowerPoint
Figure 1–3
Other Ways
1. Double-click PowerPoint
icon on desktop, if one
is present
BTW
2. Click Microsoft Office
PowerPoint 2007 on
Start menu
Portrait Page
Orientation
If your slide content
is dominantly vertical,
such as a skyscraper
or a person, consider
changing the slide
layout to a portrait page
orientation. To change
the orientation, click the
Slide Orientation button
in the Page Setup group
in the Design tab and
then click the desired
orientation. You can use
both slide and portrait
orientation in the same
slide show.
The PowerPoint Window
The PowerPoint window consists of a variety of components to make your work more
efficient and documents more professional. These include the document window, Ribbon, Mini toolbar and shortcut menus, Quick Access Toolbar, and Office Button. Some
of these components are common to other Microsoft Office 2007 programs; others are
unique to PowerPoint.
PowerPoint Window
The basic unit of a PowerPoint presentation is a slide. A slide may contain text and
objects, such as graphics, tables, charts, and drawings. Layouts are used to position this
content on the slide. When you open a new presentation, the default Title Slide layout
appears (Figure 1–4). The purpose of this layout is to introduce the presentation to the
audience. PowerPoint includes eight other built-in standard layouts.
The default (preset) slide layouts are set up in landscape orientation, where the
slide width is greater than its height. In landscape orientation, the slide size is preset to
10 inches wide and 7.5 inches high when printed on a standard sheet of paper measuring
11 inches wide and 8.5 inches high.
Copyright 2009 Cengage Learning, Inc. All Rights Reserved. May not be copied, scanned, or duplicated, in whole or in part.
The PowerPoint Window PPT 7
The PowerPoint window in Figure 1–4 contains placeholders, a mouse pointer, and
a status bar. Other elements that may appear in the window are discussed later in this and
subsequent chapters.
Slides tab
Outline tab
Title Slide
layout
scroll box
Slide pane
splitter bar
scroll bar
text
placeholders
scroll arrow
mouse pointer
total number
of slides
Normal view is
default view
document
theme identifier
Notes pane
Previous Slide
button
Next Slide
button
status bar
Figure 1–4
PLACEHOLDERS Placeholders are boxes with dotted or hatch-marked borders that
are displayed when you create a new slide. All layouts except the Blank slide layout contain
placeholders. Depending on the particular slide layout selected, title and subtitle placeholders
are displayed for the slide title and subtitle; a content text placeholder is displayed for text,
art, or a table, chart, picture, graphic, or movie. The title slide in Figure 1–4 has two text
placeholders where you will type the main heading, or title, of a new slide and the subtitle.
MOUSE POINTER The mouse pointer becomes different shapes depending on the
task you are performing in PowerPoint and the pointer’s location on the screen. The
mouse pointer in Figure 1–4 is the shape of a block arrow.
SCROLL BAR You use the vertical scroll bar to display different slides in the document
window. When you add a second slide to a presentation, this vertical scroll bar appears on
the right side of the Slide pane. On the scroll bar, the position of the scroll box reflects
the location of the slide in the presentation that is displayed in the document window. A
scroll arrow is located at each end of a scroll bar. To scroll through, or display different
portions of the document in the document window, you can click a scroll arrow or drag
the scroll box to move forward or backward through the presentation.
The Previous Slide button and the Next Slide button appear at the bottom of the vertical
scroll bar. Click one of these buttons to advance through the slides backwards or forwards.
Copyright 2009 Cengage Learning, Inc. All Rights Reserved. May not be copied, scanned, or duplicated, in whole or in part.
PowerPoint Chapter 1
Licensed to: iChapters User
Licensed to: iChapters User
PPT 8 PowerPoint Chapter 1 Creating and Editing a Presentation
The horizontal scroll bar also may appear. It is located on the bottom of the Slide pane
and allows you to display a portion of the slide when the entire slide does not fit on the screen.
BTW
STATUS BAR The status bar, located at the bottom of the document window above
the Windows Vista taskbar, presents information about the document, the progress of current tasks, and the status of certain commands and keys; it also provides controls for viewing the document. As you type text or perform certain commands, various indicators may
appear on the status bar.
The left edge of the status bar in Figure 1–4 shows the current slide number
followed by the total number of slides in the document and a document theme identifier. A document theme provides consistency in design and color throughout the entire
presentation by setting the color scheme, font and font size, and layout of a presentation.
Toward the right edge are buttons and controls you can use to change the view of a slide
and adjust the size of the displayed document.
Using the Notes Pane
As you create your
presentation, type
comments to yourself
in the Notes pane.
This material can be
used as part of the
spoken information you
will share with your
audience as you give
your presentation. You
can print these notes for
yourself or to distribute
to your audience.
PowerPoint Views
The PowerPoint window display varies depending on the view. A view is the mode
in which the presentation appears on the screen. PowerPoint has three main views:
Normal, Slide Sorter, and Slide Show, and also Notes Page. The default view is Normal
view, which is composed of three working areas that allow you to work on various aspects
of a presentation simultaneously. The left side of the screen has a Tabs pane that consists
of a Slides tab and an Outline tab that alternate between views of the presentation in a
thumbnail, or miniature, view of the slides and an outline of the slide text. You can type
the text of the presentation on the Outline tab and easily rearrange bulleted lists, paragraphs, and individual slides. As you type, you can view this text in the Slide pane, which
shows a large view of the current slide on the right side of the window. You also can enter
text, graphics, animations, and hyperlinks directly in the Slide pane. The Notes pane at
the bottom of the window is an area where you can type notes and additional information.
This text can consist of notes to yourself or remarks to share with your audience. If you want
to work with your notes in full page format, you can display them in Notes Page view.
In Normal view, you can adjust the width of the Slide pane by dragging the splitter
bar and the height of the Notes pane by dragging the pane borders. After you have created
at least two slides, scroll bars, scroll arrows, and scroll boxes will appear on the right edge
of the window.
Ribbon
The Ribbon, located near the top of the PowerPoint window, is the control center
in PowerPoint (Figure 1–5a). The Ribbon provides easy, central access to the tasks you
perform while creating a slide show. The Ribbon consists of tabs, groups, and commands.
Each tab surrounds a collection of groups, and each group contains related commands.
top-level tabs
Home tab
Ribbon
groups
Figure 1–5(a)
Copyright 2009 Cengage Learning, Inc. All Rights Reserved. May not be copied, scanned, or duplicated, in whole or in part.
The PowerPoint Window PPT 9
When you start PowerPoint, the Ribbon displays seven top-level tabs: Home,
Insert, Design, Animations, Slide Show, Review, and View. The Home tab, called the primary tab, contains the more frequently used commands. To display a different tab on the
Ribbon, click the top-level tab. That is, to display the Insert tab, click Insert on the Ribbon. To return to the Home tab, click Home on the Ribbon. The tab currently displayed
is called the active tab.
To display more of the document in the document window, some users prefer to
minimize the Ribbon, which hides the groups on the Ribbon and displays only the toplevel tabs (Figure 1–5b). To use commands on a minimized Ribbon, click the top-level tab.
Each time you start PowerPoint, the Ribbon appears the same way it did the last
time you used PowerPoint. The chapters in this book, however, begin with the Ribbon
appearing as it did at the initial installation of the software. If you are stepping through
this chapter on a computer and you want your Ribbon to match the figures in this book,
read Appendix E.
top-level tabs
minimized Ribbon
Figure 1–5(b)
In addition to the top-level tabs, PowerPoint displays other tabs, called contextual
tabs, when you perform certain tasks or work with objects such as pictures or tables. If
you insert a picture in a slide, for example, the Picture Tools tab and its related subordinate Format tab appear (Figure 1–6). When you are finished working with the picture, the
Picture Tools and Format tabs disappear from the Ribbon. PowerPoint determines when
contextual tabs should appear and disappear based on tasks you perform. Some contextual
tabs, such as the Chart Tools tab, have more than one related subordinate tab.
in-Ribbon
gallery
More button
contextual
tabs
button arrow
button
Dialog Box
Launcher
Figure 1–6
Commands on the Ribbon include buttons, boxes (text boxes, check boxes, etc.),
and galleries (Figure 1–6). A gallery is a set of choices, often graphical, arranged in a grid
or in a list. You can scroll through choices on an in-Ribbon gallery by clicking the gallery’s
scroll arrows. Or, you can click a gallery’s More button to view more gallery options on
the screen at a time. Some buttons and boxes have arrows that, when clicked, also display
a gallery; others always cause a gallery to be displayed when clicked. Most galleries support live preview, which is a feature that allows you to point to a gallery choice and see its
effect in the document - without actually selecting the choice (Figure 1–7).
BTW
gallery scroll
arrows
Minimizing the Ribbon
If you want to minimize
the Ribbon, right-click
the Ribbon and then click
Minimize the Ribbon
on the shortcut menu,
double-click the active
tab, or press CTRL+F1.
To restore a minimized
Ribbon, right-click the
Ribbon and then click
Minimize the Ribbon
on the shortcut menu,
double-click any top-level
tab, or press CTRL+F1.
To use commands on a
minimized Ribbon, click
the top-level tab.
Copyright 2009 Cengage Learning, Inc. All Rights Reserved. May not be copied, scanned, or duplicated, in whole or in part.
PowerPoint Chapter 1
Licensed to: iChapters User
Licensed to: iChapters User
PPT 10 PowerPoint Chapter 1 Creating and Editing a Presentation
as you move the
mouse pointer
from one gallery
option to the next,
PowerPoint shows
a preview of the
theme on the slide,
so you can decide
whether you want
to select the theme
clicking More
button displays
additional
gallery options
Figure 1–7
Some commands on the Ribbon display an image to help you remember their
function. When you point to a command on the Ribbon, all or part of the command
glows in shades of yellow and orange, and an Enhanced ScreenTip appears on the screen.
An Enhanced ScreenTip is an on-screen note that provides the name of the command,
available keyboard shortcut(s), a description of the command, and sometimes instructions
for how to obtain help about the command (Figure 1–8). Enhanced ScreenTips are more
detailed than a typical ScreenTip, which usually only displays the name of the command.
image of
slide helps to
identify New
Slide button
mouse pointer on New
Slide button arrow
Enhanced
ScreenTip for
New Slide button
Figure 1–8
Copyright 2009 Cengage Learning, Inc. All Rights Reserved. May not be copied, scanned, or duplicated, in whole or in part.
The PowerPoint Window PPT 11
The lower-right corner of some groups on the Ribbon has a small arrow, called a
Dialog Box Launcher, that when clicked displays a dialog box or a task pane with additional options for the group (Figure 1–9). When presented with a dialog box, you make
selections and must close the dialog box before returning to the document. A task pane,
by contrast, is a window that can remain open and visible while you work in the document.
clicking Dialog Box
Launcher in Clipboard
group displays
Clipboard task pane
clicking Dialog Box
Launcher in Font
group displays Font
dialog box
Mini Toolbar and Shortcut Menus
The Mini toolbar, which appears automatically based on tasks you perform, contains
commands related to changing the appearance of text in a slide. All commands on the
Mini toolbar also exist on the Ribbon. The purpose of the Mini toolbar is to minimize
mouse movement. For example, if you want to use a command that currently is not
displayed on the active tab, you can use the command on the Mini toolbar - instead of
switching to a different tab to use the command.
When the Mini toolbar appears, it initially is transparent (Figure 1–10a on
the next page). If you do not use the transparent Mini toolbar, it disappears from the
screen. To use the Mini toolbar, move the mouse pointer into the toolbar, which causes
the Mini toolbar to change from a transparent to bright appearance (Figure 1–10b on
the next page).
BTW
Figure 1–9
Turning Off the Mini
Toolbar
If you do not want the
Mini toolbar to display,
click the Office Button,
click the PowerPoint
Options button on the
Office Button menu, and
then clear the ‘Show Mini
Toolbar on selection’
check box in the Popular
panel.
Copyright 2009 Cengage Learning, Inc. All Rights Reserved. May not be copied, scanned, or duplicated, in whole or in part.
PowerPoint Chapter 1
Licensed to: iChapters User
Licensed to: iChapters User
PPT 12 PowerPoint Chapter 1 Creating and Editing a Presentation
transparent
Mini
toolbar
commands on
Mini toolbar are
also on Ribbon
(a) Transparent Mini Toolbar
bright Mini
toolbar
(b) Bright Mini Toolbar
Figure 1–10
A shortcut menu, which appears when you right-click an object, is a list of frequently
used commands that relate to the right-clicked object. When you right-click a scroll bar, for
example, a shortcut menu appears with commands related to the scroll bar. If you right-click
an item in the document window, PowerPoint displays both the Mini toolbar and a shortcut
menu (Figure 1–11).
Mini toolbar
right-clicked
text
shortcut menu
some commands
on Mini toolbar
are also on
shortcut menu
Figure 1–11
Copyright 2009 Cengage Learning, Inc. All Rights Reserved. May not be copied, scanned, or duplicated, in whole or in part.
The PowerPoint Window PPT 13
Quick Access Toolbar
The Quick Access Toolbar, located by default above the Ribbon, provides easy
access to frequently used commands (Figure 1–12a). The commands on the Quick Access
Toolbar always are available, regardless of the task you are performing. Initially, the Quick
Access Toolbar contains the Save, Undo, and Redo commands. If you click the Customize
Quick Access Toolbar button, PowerPoint provides a list of commands you quickly can
add to and remove from the Quick Access Toolbar (Figure 1–12b).
Undo button
Save button
Redo button
Quick Access
Toolbar positioned
above Ribbon
BTW
Figure 1–12(a) Quick Access Toolbar above Ribbon
Customize
Quick Access
Toolbar button
Customize
Quick Access
Toolbar menu
commands you
quickly can add to
or delete from Quick
Access Toolbar
Figure 1–12(b) Customize Quick Access Toolbar
Quick Access Toolbar
Commands
To add a Ribbon
command to the Quick
Access Toolbar, rightclick the command on
the Ribbon and then
click Add to Quick Access
Toolbar on the shortcut
menu. To delete a
command from the Quick
Access Toolbar, right-click
the command on the
Quick Access Toolbar and
then click Remove from
Quick Access Toolbar on
the shortcut menu. To
display the Quick Access
Toolbar below the Ribbon,
right-click the Quick Access
Toolbar and then click
Place Quick Access Toolbar
below the Ribbon on the
shortcut menu.
Copyright 2009 Cengage Learning, Inc. All Rights Reserved. May not be copied, scanned, or duplicated, in whole or in part.
PowerPoint Chapter 1
Licensed to: iChapters User
Licensed to: iChapters User
PPT 14 PowerPoint Chapter 1 Creating and Editing a Presentation
You also can add other commands to or delete commands from the Quick Access
Toolbar so that it contains the commands you use most often. As you add commands to
the Quick Access Toolbar, its commands may interfere with the document title on the
title bar. For this reason, PowerPoint provides an option of displaying the Quick Access
Toolbar below the Ribbon (Figure 1–12c).
Quick Access Toolbar
positioned below Ribbon
Figure 1–12(c) Quick Access Toolbar below Ribbon
Each time you start PowerPoint, the Quick Access Toolbar appears the same way it
did the last time you used PowerPoint. The chapters in this book, however, begin with the
Quick Access Toolbar appearing as it did at the initial installation of the software. If you
are stepping through this chapter on a computer and you want your Quick Access Toolbar
to match the figures in this book, you should reset your Quick Access Toolbar. For more
information about how to reset the Quick Access Toolbar, read Appendix E.
Office Button
Office
Button
While the Ribbon is a control center for creating documents, the Office Button
is a central location for managing and sharing documents. When you click the Office
Button, located in the upper-left corner of the window, PowerPoint displays the Office
Button menu (Figure 1–13). A menu contains a list of commands.
list of recently
created Office
documents will
appear here
Office
Button
menu
Figure 1–13
Copyright 2009 Cengage Learning, Inc. All Rights Reserved. May not be copied, scanned, or duplicated, in whole or in part.
The PowerPoint Window PPT 15
When you click the New, Open, Save As, and Print commands on the Office Button
menu, PowerPoint displays a dialog box with additional options. The Save As, Print,
Prepare, Send, and Publish commands have an arrow to their right. If you point to this
arrow, PowerPoint displays a submenu, which is a list of additional commands associated
with the selected command (Figure 1–14). For the Prepare, Send, and Publish commands
that do not display a dialog box when clicked, you can point either to the command or the
arrow to display the submenu.
submenu
pointing to the arrow to
the right of a command
causes a submenu to be
displayed
for the Prepare, Send,
and Publish commands,
pointing to the command
or to the arrow causes a
submenu to be displayed
Figure 1–14
Key Tips
If you prefer using the keyboard instead of the mouse, you can press the ALT key
on the keyboard to display a Key Tip badge, or keyboard code icon, for certain commands
(Figure 1–15). To select a command using the keyboard, press its displayed code letter, or
Key Tip. When you press a Key Tip, additional Key Tips related to the selected command
may appear. For example, to select the New command on the Office Button menu, press
the ALT key, then press the F key, then press the N key.
Key Tip badges
appear when
you press ALT
key on keyboard
Figure 1–15
Copyright 2009 Cengage Learning, Inc. All Rights Reserved. May not be copied, scanned, or duplicated, in whole or in part.
PowerPoint Chapter 1
Licensed to: iChapters User
Licensed to: iChapters User
PPT 16 PowerPoint Chapter 1 Creating and Editing a Presentation
To remove the Key Tip badges from the screen, press the ALT key or the ESC key until
all Key Tip badges disappear, or click the mouse anywhere in the PowerPoint window.
Choosing a Document Theme
You easily can give a presentation a professional and consistent appearance by using a
document theme. This collection of formatting choices includes a set of colors (the color
theme), a set of heading and content text fonts (the font theme), and a set of lines and fill
effects (the effects theme). These themes allow you to choose and change the appearance
of all the slides or individual slides in your presentation.
Plan
Ahead
Find the appropriate theme.
In the initial steps of this project, you will select a document theme by locating a particular
built-in theme in the Themes group. You could, however, apply a theme at any time while
creating the presentation. Some PowerPoint slide show designers create presentations using
the default Office Theme. This blank design allows them to concentrate on the words being
used to convey the message and does not distract them with colors and various text attributes.
Once the text is entered, the designers then select an appropriate document theme.
To Choose a Document Theme
The document theme identifier shows the theme currently used in the slide show. PowerPoint initially
uses the Office Theme until you select a different theme. The following steps change the theme for this
presentation from the Office Theme to the Flow document theme.
1
• Click Design on the
clicking More
button in Themes
gallery will show
more design themes
Design tab
Ribbon to display
the Design tab
(Figure 1–16).
themes inRibbon gallery
groups on Ribbon change
to show commands
related to design because
Design tab now is the
active tab
Figure 1–16
Copyright 2009 Cengage Learning, Inc. All Rights Reserved. May not be copied, scanned, or duplicated, in whole or in part.
Choosing a Document Theme PPT 17
2
• Click the More button in the Themes
gallery to expand the gallery, which
shows more Built-In theme gallery
options (Figure 1–17).
Flow theme
expanded
gallery
I Experiment
• Point to various document themes
Q&A
in the Themes gallery and watch
the colors and fonts change on the
title slide.
Are the themes displayed in a
specific order?
Q&A
Yes. They are arranged in
alphabetical order running from
left to right. If you point to a
theme, a ScreenTip with the design’s
name appears on the screen.
Office Theme is
default theme
currently applied
What if I change my mind and do
not want to select a new theme?
Click anywhere outside the All
Themes gallery to close the gallery.
Figure 1–17
3
• Click the Flow theme to apply this
title text
placeholder
border
Q&A
theme to Slide 1 (Figure 1–18).
If I decide at some future time that
this design does not fit the theme
of my presentation, can I apply a
different design?
title text
placeholder
label
Yes. You can repeat these steps at
any time while creating your
presentation.
Flow theme
applied to
Slide 1
subtitle text
placeholder
border
Figure 1–18
Copyright 2009 Cengage Learning, Inc. All Rights Reserved. May not be copied, scanned, or duplicated, in whole or in part.
PowerPoint Chapter 1
Licensed to: iChapters User
Licensed to: iChapters User
PPT 18 PowerPoint Chapter 1 Creating and Editing a Presentation
Creating a Title Slide
With the exception of a blank slide and a slide with a picture and caption, PowerPoint
assumes every new slide has a title. Many of PowerPoint’s layouts have both a title text
placeholder and at least one content placeholder. To make creating a presentation easier,
any text you type after a new slide appears becomes title text in the title text placeholder.
The following steps create the title slide for this presentation.
Plan
Ahead
Choose the words for the slide.
No doubt you have heard the phrase, “You get only one chance to make a first impression.”
The same philosophy holds true for a PowerPoint presentation. The title slide gives your
audience an initial sense of what they are about to see and hear. It is, therefore, extremely
important to choose the text for this slide carefully. Avoid stating the obvious in the title.
Instead, create interest and curiosity using key ideas from the presentation.
Some PowerPoint users create the title slide as their last step in the design process so that it
reflects the tone of the presentation. They begin by planning the final slide in the presentation so that they know where and how they want to end the slide show. All the slides in the
presentation should work toward meeting this final slide.
To Enter the Presentation Title
As you begin typing text in the title text placeholder, the title text also is displayed in the Slide 1 thumbnail in
the Slides tab. PowerPoint line wraps text that exceeds the width of the placeholder. The presentation title for
Project 1 is A World Beneath the Waves. This title creates interest by introducing the concept of exploring the life
under water. The following step creates the slide show’s title.
1
• Click the label, Click to add title,
located inside the title text placeholder to select the placeholder
(Figure 1–19).
dashed lines around
border indicate
placeholder is selected
sizing
handles
label disappears
when placeholder
is selected
I-beam
mouse
pointer
Figure 1–19
Copyright 2009 Cengage Learning, Inc. All Rights Reserved. May not be copied, scanned, or duplicated, in whole or in part.
Creating a Title Slide PPT 19
2
• Type A World Beneath the
Q&A
Waves in the title text placeholder.
Do not press the ENTER key
(Figure 1–20).
What if a button with two lines and
two arrows appears on the left side
of the title text placeholder?
title text entered
in placeholder
The AutoFit button displays because
PowerPoint attempts to reduce the
size of the letters when the title text
does not fit on a single line. If you are
creating a slide and need to squeeze
an extra line in the text placeholder,
you can click this button to resize the
existing text in the placeholder so the
spillover text will fit on the slide.
subtitle text
placeholder label
Figure 1–20
Correcting a Mistake When Typing
If you type the wrong letter, press the BACKSPACE key to erase all the characters back
to and including the one that is incorrect. If you mistakenly press the ENTER key after typing the title and the insertion point is on the new line, simply press the BACKSPACE key to
return the insertion point to the right of the letter s in the word Waves.
When you install PowerPoint, the default setting allows you to reverse up to the
last 20 changes by clicking the Undo button on the Quick Access Toolbar. The ScreenTip
that appears when you point to the Undo button changes to indicate the type of change
just made. For example, if you type text in the title text placeholder and then point to the
Undo button, the ScreenTip that appears is Undo Typing. For clarity, when referencing
the Undo button in this project, the name displaying in the ScreenTip is referenced. You
can reapply a change that you reversed with the Undo button by clicking the Redo button
on the Quick Access Toolbar. Clicking the Redo button reverses the last undo action. The
ScreenTip name reflects the type of reversal last performed.
Paragraphs
Subtitle text in the subtitle text placeholder supports the title text. It can appear on
one or more lines in the placeholder. To create more than one subtitle line, you press the
ENTER key after typing some words. PowerPoint creates a new line, which is the second
paragraph in the placeholder. A paragraph is a segment of text with the same format that
begins when you press the ENTER key and ends when you press the ENTER key again. This
new paragraph is the same level as the previous paragraph. A level is a position within a
structure, such as an outline, that indicates the magnitude of importance. PowerPoint allows
for five paragraph levels.
Copyright 2009 Cengage Learning, Inc. All Rights Reserved. May not be copied, scanned, or duplicated, in whole or in part.
PowerPoint Chapter 1
Licensed to: iChapters User
Licensed to: iChapters User
PPT 20 PowerPoint Chapter 1 Creating and Editing a Presentation
To Enter the Presentation Subtitle Paragraph
The first subtitle paragraph links to the title by giving specific details about the vacation location, and the
second paragraph gives information about the person who will be speaking to the audience. The following steps
enter the presentation subtitle.
1
• Click the label, Click to add subtitle,
located inside the subtitle text placeholder to select the placeholder
(Figure 1–21).
dashed lines around
border indicate
placeholder is selected
label disappears
when placeholder
is selected
Figure 1–21
2
• Type Spring Break in Cabo San
Lucas, Mexico and then press the
ENTER key.
• Type Presented by Dave Ehlin,
Q&A
SGA President but do not press
the ENTER key (Figure 1–22).
Why do red wavy lines appear below
the words, Cabo and Ehlin?
subtitle text
entered in
placeholder
red wavy lines
indicate possible
misspelled words
The lines indicate possible spelling
errors.
Figure 1–22
Plan
Ahead
Identify how to format specific elements of the text.
Most of the time, you use the document theme’s text attributes, color scheme, and layout.
Occasionally, you may want to change the way a presentation looks, however, and still keep
a particular document theme. PowerPoint gives you that flexibility.
Graphic designers use several rules when formatting text.
• Avoid all capital letters, if possible. Audiences have difficulty comprehending sentences
typed in all capital letters, especially when the lines exceed seven words. All capital letters
leaves no room for emphasis or inflection, so readers get confused about what material
deserves particular attention. Some document themes, however, have a default title text
style of all capital letters.
• Avoid text with a font size less than 24 point. Audience members generally will sit a
maximum of 50 feet from a screen, and at this distance 24-point type is the smallest size
text they can read comfortably without straining.
• Make careful color choices. Color evokes emotions, and a careless color choice may elicit
the incorrect psychological response. PowerPoint provides a color palette with hundreds of
colors. The built-in document themes use complementary colors that work well together.
If you stray from these themes and add your own color choices, without a good reason to
make the changes, your presentation is apt to become ineffective.
Copyright 2009 Cengage Learning, Inc. All Rights Reserved. May not be copied, scanned, or duplicated, in whole or in part.
Formatting Characters in a Presentation PPT 21
Formatting Characters in a Presentation
Fonts and Font Styles
Characters that appear on the screen are a specific shape and size. Examples of
how you can modify the appearance, or format, of these typed characters on the screen
and in print include changing the font, style, size, and color. The font, or typeface,
defines the appearance and shape of the letters, numbers, punctuation marks, and symbols.
Style indicates how the characters are formatted. PowerPoint’s text font styles include
regular, italic, bold, and bold italic. Size specifies the height of the characters and is
gauged by a measurement system that uses points. A point is 1/72 of an inch in height.
Thus, a character with a point size of 36 is 36/72 (or 1/2) of an inch in height. Color
defines the hue of the characters.
This presentation uses the Flow document theme, which uses particular font styles
and font sizes. The Flow document theme default title text font is named Calibri. It has
a bold style with no special effects, and its size is 56 point. The Flow document theme
default subtitle text font is Constantia with a font size of 26 point.
BTW
Recall that each document theme determines the color scheme, font and font size, and
layout of a presentation. You can use a specific document theme and then change the
characters’ formats any time before, during, or after you type the text.
Formatting Words
To format one word,
position the insertion
point anywhere in the
word. Then make the
formatting changes you
desire. The entire word
does not need to be
selected for the change
to occur.
To Select a Paragraph
You can use many techniques to format characters. When you want to apply the same formats to multiple
words or paragraphs, it is efficient to select the desired text and then make the desired changes to all the characters
simultaneously. The first formatting change you will make will apply to the second paragraph of the title slide subtitle. The following step selects this paragraph.
1
• Triple-click the paragraph, Presented
transparent Mini
toolbar appears
whenever you
select text
Q&A
by Dave Ehlin, SGA President, in the
subtitle text placeholder to select
the paragraph (Figure 1–23).
Can I select the paragraph using a
technique other than triple-clicking?
Yes. You can move your mouse
pointer to the left of the first
paragraph and then drag it to the
end of the line.
subtitle text
paragraph to
be formatted
is selected
Figure 1–23
Copyright 2009 Cengage Learning, Inc. All Rights Reserved. May not be copied, scanned, or duplicated, in whole or in part.
PowerPoint Chapter 1
Licensed to: iChapters User
Licensed to: iChapters User
PPT 22 PowerPoint Chapter 1 Creating and Editing a Presentation
To Italicize Text
Different font styles often are used on slides to make them more appealing to the reader and to emphasize
particular text. Italic type, used sparingly, draws the readers’ eyes to these characters. The following step adds
emphasis to the second line of the subtitle text by changing regular text to italic text.
1
• With the subtitle text still selected,
Q&A
click the Italic button on the Mini toolbar to italicize that text on the slide
and on the slide thumbnail
(Figure 1–24).
Italic button
selected
If I change my mind and decide
not to italicize the text, how can I
remove this style?
Select the italicized text and then click
the Italic button. As a result, the Italic
button will not be selected, and the
text will not have the italic font style.
selected paragraph
has italic font style
applied
Figure 1–24
Other Ways
1. Right-click selected text,
click Font on shortcut
menu, click Italic in Font
style list
2. Click Home tab, click Italic
in Font group
3. Press CTRL+I
To Select Multiple Paragraphs
Each of the subtitle lines is a separate paragraph. As previously discussed, PowerPoint creates a new paragraph
each time you press the ENTER key. To change the character formatting in both paragraphs, it is efficient to select the
desired text and then make the desired changes to all the characters simultaneously.
The next formatting change you will make will apply to both title slide subtitle paragraphs. The following step
selects the first paragraph so that you can format both paragraphs concurrently.
1
• With the second subtitle text
Q&A
paragraph selected, press the CTRL key
and then triple-click the first subtitle
text paragraph, Spring Break in Cabo
San Lucas, Mexico, to select both
paragraphs (Figure 1–25).
Can I use a different technique to
select both subtitle text paragraphs?
Yes. Click the placeholder border so
that it appears as a solid line. When
the placeholder is selected in this
manner, formatting changes will
apply to all text in the placeholder.
transparent Mini toolbar
appears when second
paragraph is selected
solid line indicates
both subtitle
text paragraphs
selected
Figure 1–25
Copyright 2009 Cengage Learning, Inc. All Rights Reserved. May not be copied, scanned, or duplicated, in whole or in part.
Formatting Characters in a Presentation PPT 23
Plan
Ahead
Identify how to format specific elements of the text.
When selecting text colors, try to limit using red. At least 15 percent of men have difficulty
distinguishing varying shades of green or red. They also often see the color purple as blue
and the color brown as green. This problem is more pronounced when the colors appear in
small areas, such as slide paragraphs or line chart bars.
To Change the Text Color
PowerPoint allows you to use one or more text colors in a presentation. To add more emphasis to the title slide
subtitle text, you decide to change the color. The following steps add emphasis to both subtitle text paragraphs by
changing the font color from white to dark blue.
1
• With both paragraphs selected, click
Font Color arrow
Q&A
the Font Color arrow on the Mini
toolbar to display the palette of
Theme Colors and Standard Colors
(Figure 1–26).
Theme Colors
row shows Flow
theme colors
orange border
indicates current
font color
If the Mini toolbar disappears from
the screen, how can I display it
once again?
Standard Colors
row has colors
associated with
every theme
Right-click the text, and the Mini
toolbar should appear.
color
palette
Dark Blue
button
Figure 1–26
2
• Click the Dark Blue button in the
Q&A
Standard Colors row on the
Mini toolbar (row 1, column 9) to
change the font color to dark blue
(Figure 1–27).
Font Color button
indicates current
text color
Why did I select the color, dark blue?
Dark blue is one of the 10 standard
colors associated with every document theme, and it works well with
the shades of blue already on the
slide. An additional consideration is
that dark colors print well.
subtitle text
paragraphs
color changed
to dark blue
Figure 1–27
3
• Click outside the selected area
to deselect the two paragraphs.
Other Ways
1. Right-click selected text,
click Font on shortcut
menu, click Font color
button, click Dark Blue
in Standard Colors row
2. Click Home tab, click
Font Color arrow in Font
group, click Dark Blue in
Standard Colors row
Copyright 2009 Cengage Learning, Inc. All Rights Reserved. May not be copied, scanned, or duplicated, in whole or in part.
PowerPoint Chapter 1
Licensed to: iChapters User
Licensed to: iChapters User
PPT 24 PowerPoint Chapter 1 Creating and Editing a Presentation
To Select a Group of Words
PowerPoint designers use many techniques to format characters. To apply the same formats to multiple words
or paragraphs, they select the desired text and then make the desired changes to all the characters simultaneously.
To add emphasis to the vacation destination, you want to increase the font size and change the font style to
bold for the words, Cabo San Lucas. You could perform these actions separately, but it is more efficient to select this
group of words and then change the font attributes. The following steps select a group of words.
1
• Position the mouse pointer
immediately to the left of the first
character of the text to be selected
(in this case, the C in Cabo)
(Figure 1–28).
mouse pointer
(I-beam) at
beginning of
text to select
Figure 1–28
2
• Drag the mouse pointer through
the last character of the text to be
selected (in this case, the s in Lucas)
(Figure 1–29).
words, Cabo San
Lucas, selected
mouse
pointer
Figure 1–29
To Increase Font Size
To add emphasis, you increase the font size for Cabo San Lucas. The Increase Font Size button on the Mini
toolbar increases the font size in preset increments. The following step uses this button to increase the font size.
1
• Click the Increase Font Size button
on the Mini toolbar once to increase
the font size of the selected text
from 26 to 28 point (Figure 1–30).
Increase Font Size
button selected
font size of
selected words
increased
Other Ways
Bold button
1. Click Home tab, click
Increase Font Size
button in Font group
2. Click Home tab, click
Font Size box arrow,
click new font size
Figure 1–30
3. Press CTRL+SHIFT+>
Copyright 2009 Cengage Learning, Inc. All Rights Reserved. May not be copied, scanned, or duplicated, in whole or in part.
Formatting Characters in a Presentation PPT 25
To Bold Text
Bold characters display somewhat thicker and darker than those that display in a regular font style. Clicking
the Bold button on the Mini toolbar is an efficient method of bolding text. To add more emphasis to the vacation
destination, you want to bold the words, Cabo San Lucas. The following step bolds this text.
1
• Click the Bold button on the Mini
toolbar to bold the three selected
words (Figure 1–31).
selected words
are bold
Bold button
selected
Other Ways
1. Click Home tab, click
Bold button in Font
group
Figure 1–31
2. Press CTRL+B
Identify how to format specific elements of the text.
Avoid line wraps. Your audience’s eyes want to stop at the end of a line. Thus, you must plan
your words carefully or adjust the font size so that each point displays on only one line.
Plan
Ahead
To Decrease the Title Slide Title Text Font Size
The last word of the title text, Waves, appears on a line by itself. For aesthetic reasons, it is advantageous to
have this word appear with the rest of the title on a single line. One way to fit text on one line is to decrease the font
size. The process is similar to increasing the font size. Clicking the Decrease Font Size button on the Mini toolbar
decreases the size in preset increments. The following steps decrease the font size from 56 to 48 point.
1
• Select the title slide title text, A
World Beneath the Waves
(Figure 1–32).
current
default font
size is 56 point
Decrease Font
Size button
title text
selected
Figure 1–32
Copyright 2009 Cengage Learning, Inc. All Rights Reserved. May not be copied, scanned, or duplicated, in whole or in part.
PowerPoint Chapter 1
Licensed to: iChapters User
Licensed to: iChapters User
PPT 26 PowerPoint Chapter 1 Creating and Editing a Presentation
2
• Click the Decrease Font Size
button on the Mini toolbar twice to
decrease the font size from 56 to
48 point (Figure 1–33).
font size is
now 48 point
Decrease Font
Size button
selected
font size of selected
text decreased, so
words appear on
one line
Figure 1–33
Other Ways
1. Click Home tab, click
Decrease Font Size
button in Font group
2. Click Home tab, click
Font Size box arrow,
click new font size
3. Press CTRL+SHIFT+<
Saving the Project
While you are building a presentation, the computer stores it in memory. When you
save a presentation, the computer places it on a storage medium such as a USB flash drive,
CD, or hard disk. A saved presentation is referred to as a file. A file name is the name
assigned to a file when it is saved.
It is important to save the presentation frequently for the following reasons:
• The presentation in memory will be lost if the computer is turned off or you lose
electrical power while PowerPoint is open.
• If you run out of time before completing your project, you may finish your presentation
at a future time without starting over.
BTW
Plan
Ahead
Saving in a Previous
PowerPoint Format
To ensure that your
presentation will open
in an earlier version
of PowerPoint, you
must save your file in
PowerPoint 97–2003
format. Files saved in
this format have the .ppt
extension.
Determine where to save the document.
When saving a document, you must decide which storage medium to use.
• If you always work on the same computer and have no need to transport your projects to
a different location, then your computer’s hard drive will suffice as a storage location. It
is a good idea, however, to save a backup copy of your projects on a separate medium in
case the file becomes corrupted or the computer’s hard drive fails.
• If you plan to work on your projects in various locations or on multiple computers, then
you should save your projects on a portable medium, such as a USB flash drive or CD. The
projects in this book use a USB flash drive, which saves files quickly and reliably and can
be reused. CDs are easily portable and serve as good backups for the final versions of
projects because they generally can save files only one time.
Copyright 2009 Cengage Learning, Inc. All Rights Reserved. May not be copied, scanned, or duplicated, in whole or in part.
Saving the Project PPT 27
To Save a Presentation
You have performed many tasks and do not want to lose the work completed thus far. Thus, you should save the
presentation. The following steps save a presentation on a USB flash drive using the file name, Cabo Package.
Note: If you are using Windows XP, see Appendix F for alternate steps.
1
• With a USB flash drive connected
Save
button
Save As
dialog box
to one of the computer’s USB ports,
click the Save button on the Quick
Access Toolbar to display the Save As
dialog box. (Figure 1–34).
Documents is default
folder (your default
folder may differ)
• If the Navigation pane is not
displayed in the Save
As dialog box, click
the Browse Folders
button to expand
the dialog box.
Navigation
pane (your list
may differ)
Folders button is a
toggle that causes
Folders list to appear
or disappear each
time you click it
• If a Folders list is displayed below
Q&A
the Folders button, click the Folders
button to remove the Folders list.
words in title text
placeholder on title
slide are displayed
as default file name
and are selected in
File name text box
Do I have to save to a USB flash drive?
No. You can save to any device or
folder. A folder is a specific location
on a storage medium. You can save to
the default folder or a different folder.
You also can create your own folders,
which is explained later in this book.
Details pane
default file type
is PowerPoint
Presentation
Browse Folders button
changed to Hide Folders
button because dialog
box is expanded
Figure 1–34
2
• Type Cabo Package in the File
Q&A
name box to change the file
name. Do not press the ENTER
key after typing the file name
(Figure 1–35).
What characters can I use in a
file name?
Q&A
A file name can have a maximum
of 260 characters, including spaces. The only invalid characters are
the backslash (\), slash (/), colon (:),
asterisk (*), question mark (?),
quotation mark (“), less than symbol (<), greater than symbol (>),
and vertical bar (|).
What are file properties and tags?
selected words in default
file name automatically
are replaced when you
type the new file name
text boxes allow you to add
to or change Authors and
Tags file properties, which
can be displayed in dialog
boxes that have a File list
clicking Cancel
button will
close the Save
As dialog box
Figure 1–35
File properties contain information
about a file such as the file name, author name, date the file was modified, and tags. A
tag is a file property that contains a word or phrase about a file. You can organize and
locate files based on their file properties.
Copyright 2009 Cengage Learning, Inc. All Rights Reserved. May not be copied, scanned, or duplicated, in whole or in part.
PowerPoint Chapter 1
Licensed to: iChapters User
Licensed to: iChapters User
PPT 28 PowerPoint Chapter 1 Creating and Editing a Presentation
3
• If Computer is not displayed in the
Favorite Links section, drag the
top or bottom edge of the Save
As dialog box until Computer is
displayed.
Favorite
Links section
• Click Computer in the Favorite
Links section to display a list of available
drives (Figure 1–36).
Navigation
pane
list of available
drives (your list
may differ)
• If necessary, scroll
Q&A
until UDISK 2.0 (E:) appears in the
list of available drives.
Why is my list of drives arranged
and named differently?
Q&A
The size of the Save As dialog box
and your computer’s configuration
determine how the list is displayed
and how the drives are named.
computer
selected
project to be
saved on USB
flash drive
How do I save the file if I am not
using a USB flash drive?
Use the same process, but select
your desired save location in the
Favorite Links section.
Figure 1–36
4
• Double-click UDISK 2.0 (E:) in the
Q&A
Computer list to select the USB flash
drive, Drive E in this case, as the new
save location (Figure 1–37).
What if my USB flash drive has a
different name or letter?
It is very likely that your USB flash
drive will have a different name and
drive letter and be connected to a
different port. Verify the device in
your Computer list is correct.
USB flash drive is new
save location displayed
in Address bar
no PowerPoint files currently
saved on USB flash drive,
(Data Files for Students), so
no file names are displayed
Save
button
Figure 1–37
Copyright 2009 Cengage Learning, Inc. All Rights Reserved. May not be copied, scanned, or duplicated, in whole or in part.
Adding a New Slide to a Presentation PPT 29
5
• Click the Save button in the Save As
Q&A
dialog box to save the presentation
on the USB flash drive with the file
name, Cabo Package (Figure 1–38).
How do I know that the project is
saved?
project name changed
from Presentation1 to new
file name, Cabo Package
Q&A
While PowerPoint is saving your
file, it briefly displays a message
on the status bar indicating the
amount of the file saved. In addition, your USB drive may have a
light that flashes during the save
process.
saved document
remains in memory
and is displayed on
the screen
Why is .pptx displayed immediately
to the right of the file name?
Depending on your Windows Vista
settings, .pptx may be displayed
after you save the file. The file
type .pptx is a PowerPoint 2007
document. Previous versions of
PowerPoint had a file type of .ppt.
Figure 1–38
Other Ways
Adding a New Slide to a Presentation
With the title slide for the presentation created, the next step is to add the first text slide
immediately after the title slide. Usually, when you create a presentation, you add slides with
text, graphics, or charts. Some placeholders allow you to double-click the placeholder and
then access other objects, such as media clips, charts, diagrams, and organization charts. You
can change the layout for a slide at any time during the creation of a presentation.
1. Click Office Button, click
Save, type file name,
click Computer, select
drive or folder, click
Save button
2. Press CTRL+S or press
SHIFT+F12, type file
name, click Computer,
select drive or folder,
click Save button
To Add a New Text Slide with a Bulleted List
When you add a new slide, PowerPoint uses the Title and Content slide layout. This layout provides a
title placeholder and a content area for text, art, charts, and other graphics. A vertical scroll bar appears in
the Slide pane when you add the second slide so that you can move from slide to slide easily. A thumbnail
of this slide also appears in the Slides tab. The following steps add a new slide with the Title and Content
slide layout.
Copyright 2009 Cengage Learning, Inc. All Rights Reserved. May not be copied, scanned, or duplicated, in whole or in part.
PowerPoint Chapter 1
Licensed to: iChapters User
Licensed to: iChapters User
PPT 30 PowerPoint Chapter 1 Creating and Editing a Presentation
1
• Click Home on the Ribbon to display
Home tab
the Home tab (Figure 1–39).
Figure 1–39
2
• Click the New Slide
New Slide
button
Q&A
button in the Slides
group to insert a new
slide with the Title
and Content layout
(Figure 1–40).
Why does the bullet
character display a
blue dot?
The Flow document
theme determines the
bullet characters. Each
paragraph level has
an associated bullet
character.
Q&A
title text
placeholder
label
I clicked the New
Slide arrow instead
of the New Slide
button. What
should I do?
orange border
indicates current
slide is displayed
vertical scroll bar
appears when second
slide is added to
presentation
Title and Content
layout has two
placeholders
default
bullet
character
scroll
box
Slide 2 added
to presentation
scroll arrow
Previous
Slide button
Click the Title and
Content slide thumbnail in the layout
gallery.
Next Slide button
Figure 1–40
Other Ways
1. Press CTRL+M
Copyright 2009 Cengage Learning, Inc. All Rights Reserved. May not be copied, scanned, or duplicated, in whole or in part.
Creating a Text Slide with a Single-Level Bulleted List PPT 31
Plan
Ahead
Choose the words for the slide.
All presentations should follow the 7 ⫻ 7 rule which states that each slide should have a
maximum of seven lines, and each line should have a maximum of seven words. PowerPoint
designers must choose their words carefully and, in turn, help viewers read the slides easily.
Creating a Text Slide with a Single-Level
Bulleted List
The information in the Slide 2 text placeholder is presented in a bulleted list. All the bullets
appear at the same paragraph level, called the first level.
To Enter a Slide Title
PowerPoint assumes every new slide has a title. The title for Slide 2 is Package Highlights. The following step
enters this title.
1
• Click the label, Click to add title,
Slide 2 title text appears
in title text placeholder
and Slide 2 thumbnail
Q&A
to select it and then type Package
Highlights in the placeholder. Do
not press the ENTER key (Figure 1–41).
What are those six icons grouped in
the middle of the slide?
You can click one of the icons to
insert a specific type of content:
table, chart, SmartArt graphic,
picture, clip art, or media clip.
bulleted
paragraph label in
text placeholder
icon
group
Figure 1–41
To Select a Text Placeholder
Before you can type text into the text placeholder, you first must select it. The following step selects the text
placeholder on Slide 2. 1
1
• Click the label, Click to add text,
dashed-line border
indicates placeholder
is selected
Q&A
to select the text placeholder
(Figure 1–42).
Why does my mouse pointer have a
different shape?
If you move the mouse pointer away
from the bullet, it will change shape.
I-beam mouse
pointer
bulleted
paragraph label
disappears when
placeholder is
selected
Figure 1–42
Other Ways
1. Press CTRL+ENTER
Copyright 2009 Cengage Learning, Inc. All Rights Reserved. May not be copied, scanned, or duplicated, in whole or in part.
PowerPoint Chapter 1
Licensed to: iChapters User
Licensed to: iChapters User
PPT 32 PowerPoint Chapter 1 Creating and Editing a Presentation
To Type a Single-Level Bulleted List
The content placeholder provides an area for the text characters. When you click inside a placeholder, you
then can type or paste text. If your text exceeds the size of the placeholder, PowerPoint will attempt to make the text
fit by reducing the text size and line spacing. Line spacing is the amount of vertical space between the lines of text.
As discussed previously, a bulleted list is a list of paragraphs, each of which is preceded by a bullet. A
paragraph is a segment of text ended by pressing the ENTER key. The next step is to type the single-level bulleted
list, which consists of five paragraphs (Figure 1–1b on page PPT 3). The following steps create a single-level
bulleted list.
Bullets
button
selected
1
• Type Four nights at the Azure
Q&A
Seas Resort and then press the
ENTER key to begin a new bulleted
first-level paragraph (Figure 1–43).
Can I delete bullets on a slide?
Yes. If you do not want bullets to
display on a particular paragraph,
click the Bullets button in the
Paragraph group on the Home tab
or right-click the paragraph and
then click the Bullets button on the
Mini toolbar.
first-level
paragraph
Figure 1–43
2
• Type Breakfast buffet, lunch,
dinner, and snacks and then
press the ENTER key.
• Type Two large swimming pools
and then press the ENTER key.
• Type Round-trip airfare and
hotel transfers and then press
the ENTER key.
• Type Daily activities,
Q&A
including water sports
but do not press the ENTER key
(Figure 1–44).
I pressed the ENTER key in error, and
now a new bullet appears after the
last entry on this slide. How can I
remove this extra bullet?
first-level
paragraph
text entered
Press the BACKSPACE key.
Figure 1–44
Copyright 2009 Cengage Learning, Inc. All Rights Reserved. May not be copied, scanned, or duplicated, in whole or in part.
Creating a Text Slide with a Multi-Level Bulleted List
PPT 33
Creating a Text Slide with a Multi-Level
Bulleted List
Slides 3 and 4 in Figure 1–1 on pages PPT 3–4 contain more than one level of
bulleted text. A slide that consists of more than one level of bulleted text is called a
multi-level bulleted list slide. Beginning with the second level, each paragraph indents
to the right of the preceding level and is pushed down to a lower level. For example, if you
increase the indent of a first-level paragraph, it becomes a second-level paragraph.
Creating a text slide with a multi-level bulleted list requires several steps. Initially,
you enter a slide title in the title text placeholder. Next, you select the content text placeholder. Then, you type the text for the multi-level bulleted list, increasing and decreasing
the indents as needed. The next several sections add a slide with a multi-level bulleted list.
To Add a New Slide and Enter a Slide Title
When you add a new slide to a presentation, PowerPoint keeps the same layout used on the previous slide.
PowerPoint assumes every new slide has a title. The title for Slide 3 is Rates and Booking. The following steps add a
new slide (Slide 3) and enter a title.
1
• Click the New Slide
New Slide
button
button in the Slides
group on the Home
tab to insert a new
slide with the Title
and Content layout
(Figure 1–45).
title text
placeholder
orange border
indicates current
slide is displayed
Slide 3 added
to presentation
Figure 1–45
Copyright 2009 Cengage Learning, Inc. All Rights Reserved. May not be copied, scanned, or duplicated, in whole or in part.
PowerPoint Chapter 1
Licensed to: iChapters User
Licensed to: iChapters User
PPT 34 PowerPoint Chapter 1 Creating and Editing a Presentation
2
• Click the title text placeholder and
then type Rates and Booking in
this placeholder. Do not press the
ENTER key (Figure 1–46).
title entered
in title text
placeholder
bulleted paragraph
label in text
placeholder
Figure 1–46
Other Ways
1. Press SHIFT+CTRL+M
To Type a Multi-Level Bulleted List
In a multi-level bulleted list, a lower-level paragraph is a subset of a higher-level paragraph. It usually contains
information that supports the topic in the paragraph immediately above it.
The next step is to select the content text placeholder and then type the multi-level bulleted list, which consists of
six entries (Figure 1–1c on page PPT 3). Creating a lower-level paragraph is called demoting text; creating a higher-level
paragraph is called promoting text. The following steps create a list consisting of three levels.
1
• Click the bulleted paragraph text
placeholder.
• Type Only $495 double
occupancy and then press the
ENTER key (Figure 1–47).
first-level
paragraph
Figure 1–47
Copyright 2009 Cengage Learning, Inc. All Rights Reserved. May not be copied, scanned, or duplicated, in whole or in part.
Creating a Text Slide with a Multi-Level Bulleted List PPT 35
Increase List
Level button
2
• Click the Increase List Level button
Q&A
in the Paragraph group to indent
the second paragraph below the
first and create a second-level
paragraph (Figure 1–48).
Why does the bullet for this
paragraph have a different size
and color?
A different bullet is assigned to each
paragraph level.
second-level
paragraph
bullet
indented
paragraph
Figure 1–48
3
• Type Non-diver rate: $275 and
then press the ENTER key to add a
new paragraph at the same level as
the previous paragraph.
• Type Single occupancy: add
$150 and then press the ENTER key
(Figure 1–49).
second-level
paragraph
text entered
second-level
bullet
Figure 1–49
4
• Click the Decrease List
Decrease List Level
button not selected
because paragraph level
cannot be decreased
Level button in the
Paragraph group so
that the second-level
paragraph becomes a
first-level paragraph
(Figure 1–50).
first-level
bullets
Other Ways
1. Press TAB to promote
paragraph; press
SHIFT+TAB to demote
paragraph
Figure 1–50
Copyright 2009 Cengage Learning, Inc. All Rights Reserved. May not be copied, scanned, or duplicated, in whole or in part.
PowerPoint Chapter 1
Licensed to: iChapters User
Licensed to: iChapters User
PPT 36 PowerPoint Chapter 1 Creating and Editing a Presentation
To Type the Remaining Text for Slide 3
The following steps complete the text for Slide 3.
1 Type Nonrefundable $150 deposit required and then press the ENTER key.
2 Click the Increase List Level button in the Paragraph group to demote the paragraph.
3 Type Due by October 1 and then press the ENTER key.
4 Click the Decrease List Level button in the Paragraph group to promote the paragraph.
5 Type Travel insurance highly recommended but do not press the ENTER key
(Figure 1–51).
multi-level
bulleted list
text added
to slide
Figure 1–51
Copyright 2009 Cengage Learning, Inc. All Rights Reserved. May not be copied, scanned, or duplicated, in whole or in part.
Creating a Text Slide with a Multi-Level Bulleted List PPT 37
To Create Slide 4
Slide 4 is the final multi-level bulleted text slide in this presentation. It has three
levels. The following steps create Slide 4.
1 Click the New Slide button in the Slides group.
2 Type Snorkeling and Diving in the title text placeholder.
3 Press CTRL+ENTER to move the insertion point to the text placeholder.
4 Type Three days of two-tank boat dives and then press the ENTER key.
5 Click the Increase List Level button. Type Weights and tanks included and then press
the ENTER key (Figure 1–52).
text added to
title and text
placeholders
second-level
paragraph bullet
Slide 4 added to
presentation
Figure 1–52
To Create a Third-Level Paragraph
Slide 4 contains detailed information about the particular dives. Each additional paragraph becomes more
specific and supports the information in the paragraph above it.
The next line in Slide 4 is indented an additional level, to the third level. The following steps demote the text to a
third-level paragraph.
Copyright 2009 Cengage Learning, Inc. All Rights Reserved. May not be copied, scanned, or duplicated, in whole or in part.
PowerPoint Chapter 1
Licensed to: iChapters User
Licensed to: iChapters User
PPT 38 PowerPoint Chapter 1 Creating and Editing a Presentation
Increase List
Level button
1
• Click the Increase List Level button
so that the second-level paragraph
becomes a third-level paragraph
(Figure 1–53).
third-level
paragraph bullet
Figure 1–53
2
• Type Instructors available
for beginners and then press the
ENTER key to create a second thirdlevel paragraph (Figure 1–54).
third-level
paragraphs
Figure 1–54
3
• Click the Decrease List Level button
two times so that the insertion point
appears at the first level (Figure 1–55).
Decrease List
Level button
first-level
paragraph
bullets
Figure 1–55
Copyright 2009 Cengage Learning, Inc. All Rights Reserved. May not be copied, scanned, or duplicated, in whole or in part.
Creating a Text Slide with a Multi-Level Bulleted List PPT 39
To Type the Remaining Text for Slide 4
The next three paragraphs concern what divers and snorkelers will view. The following
steps type the remaining text for Slide 4.
1 Type Various locations based on diving skills and then press the ENTER key.
2 Press the TAB key to increase the indent to the second level.
3 Type Spectacular underwater wildlife and landscapes and then press the ENTER key.
4 Press the TAB key to increase the indent to the third level.
5 Type See squids, sea turtles, snakes, barracudas, and stingrays but do
not press the ENTER key (Figure 1–56).
multi-level
bulleted list
text added
to slide
Figure 1–56
Choose the words for the slide.
After the last bulleted list slide in the slide show appears during a slide show, the default
PowerPoint setting is to end the presentation with a black slide. This black slide appears
only when the slide show is running and concludes the slide show, so your audience never
sees the PowerPoint window. It is a good idea, however, to end the presentation with a
final, closing slide to display at the end of the presentation. This slide ends the presentation gracefully and should be an exact copy, or a very similar copy, of your title slide.
The audience will recognize that the presentation is drawing to a close when this slide
appears. It can remain on the screen when the audience asks questions, approaches the
speaker for further information, or exits the room.
Plan
Ahead
Copyright 2009 Cengage Learning, Inc. All Rights Reserved. May not be copied, scanned, or duplicated, in whole or in part.
PowerPoint Chapter 1
Licensed to: iChapters User
Licensed to: iChapters User
PPT 40 PowerPoint Chapter 1 Creating and Editing a Presentation
Ending a Slide Show with a Closing Slide
All the text slides are created for the Cabo Package slide show. This presentation thus far
consists of a title slide, one text slide with a single-level bulleted list, and two text slides
with a multi-level bulleted list. A closing slide that resembles the title slide is the final slide
to create.
To Duplicate a Slide
When two slides contain similar information and have the same format, duplicating one slide and then making
minor modifications to the new slide saves time and increases consistency.
Slide 5 will have the same layout and design as Slide 1. The most expedient method of creating this slide is to
copy Slide 1 and then make minor modifications to the new slide. The following steps duplicate the title slide.
1
• Click the Slide 1 thumbnail in the
Slides tab to display Slide 1
(Figure 1–57).
Slides tab
Slide 1 is
displayed
Slide 1
thumbnail
is selected
Figure 1–57
2
• Click the New Slide arrow in the
Slides group on the Home tab to
display the Flow layout gallery
(Figure 1–58).
New Slide
arrow
Flow layout
gallery
clicking Duplicate
Selected Slides
creates copy of
selected Slide 1
Figure 1–58
Copyright 2009 Cengage Learning, Inc. All Rights Reserved. May not be copied, scanned, or duplicated, in whole or in part.
Ending a Slide Show with a Closing Slide PPT 41
3
• Click Duplicate Selected Slides in
the Flow layout gallery to create
a new Slide 2, which is a duplicate
of Slide 1 (Figure 1–59).
Slide 2 is
selected and
is duplicate
of Slide 1
presentation
consists of
five slides
Figure 1–59
To Arrange a Slide
The new Slide 2 was inserted directly below Slide 1 because Slide 1 was the selected slide. This duplicate slide
needs to display at the end of the presentation directly after the final title and content slide.
Changing slide order is an easy process and is best performed in the Tabs pane. When you click the slide
thumbnail and begin to drag it to a new location, a line indicates the new location of the selected slide. When you
release the mouse button, the slide drops into the desired location. Hence, this process of dragging and then dropping the thumbnail in a new location is called drag and drop. You can use the drag-and-drop method to move any
selected item, including text and graphics. The following step moves the new Slide 2 to the end of the presentation
so that it becomes a closing slide.
Copyright 2009 Cengage Learning, Inc. All Rights Reserved. May not be copied, scanned, or duplicated, in whole or in part.
PowerPoint Chapter 1
Licensed to: iChapters User
Licensed to: iChapters User
PPT 42 PowerPoint Chapter 1 Creating and Editing a Presentation
1
• With Slide 2 selected, drag the Slide 2
slide thumbnail in the Slides pane
below the last slide thumbnail
(Figure 1–60).
duplicate slide
in new location
at end of
presentation
Other Ways
1. Click slide icon on
Outline tab, drag icon
to new location
2. In Slide Sorter view
click slide thumbnail,
drag thumbnail to new
location
Figure 1–60
To Delete All Text in a Placeholder
To keep the ending slide clean and simple, you want only the slide show title, A World Beneath the Waves, to
display on Slide 5. The following steps delete both paragraphs in the subtitle placeholder.
1
• With Slide 5 selected, click the
subtitle text placeholder to select it
(Figure 1–61).
dashed line
indicates subtitle
text placeholder
selected
Slide 5 is
selected
Figure 1–61
Copyright 2009 Cengage Learning, Inc. All Rights Reserved. May not be copied, scanned, or duplicated, in whole or in part.
Changing Document Properties and Saving Again PPT 43
2
• Click the subtitle text placeholder
border to change the border from
a dashed line to a solid line
(Figure 1–62).
clicking placeholder
border changes
border to solid line
Figure 1–62
3
• Click the Cut button in the Clipboard
Cut button
group on the Home tab to delete
all the text in the subtitle text
placeholder (Figure 1–63).
subtitle
paragraphs are
deleted from
placeholder
Figure 1–63
Other Ways
1. Right-click selected text,
click Cut on shortcut
menu
Changing Document Properties and Saving Again
• Users can save time locating a particular file because they can view a document’s
properties without opening the document.
• By creating consistent properties for files having similar content, users can better
organize their documents.
• Some organizations require PowerPoint users to add document properties so that
other employees can view details about these files.
Five different types of document properties exist, but the more common ones used
in this book are standard and automatically updated properties. Standard properties
3. Select text, press CTRL+X
BTW
PowerPoint helps you organize and identify your files by using document properties,
which are the details about a file. Document properties, also known as metadata, can
include such information as the project author, title, or subject. Keywords are words or
phrases that further describe the document. For example, a class name or document topic
can describe the file’s purpose or content.
Document properties are valuable for a variety of reasons:
2. Select text, press
DELETE key
Converters for Earlier
PowerPoint Versions
The Microsoft Web
site has updates and
converters if you are
using earlier versions
of PowerPoint. The
Microsoft Office
Compatibility Pack
for Word, Excel and
PowerPoint 2007 File
Format will allow you
to open, edit, and save
Office 2007 documents
that you receive without
saving them in the earlier
version’s file format.
Copyright 2009 Cengage Learning, Inc. All Rights Reserved. May not be copied, scanned, or duplicated, in whole or in part.
PowerPoint Chapter 1
Licensed to: iChapters User
Licensed to: iChapters User
PPT 44 PowerPoint Chapter 1 Creating and Editing a Presentation
are associated with all Microsoft Office documents and include author, title, and subject.
Automatically updated properties include file system properties, such as the date you
create or change a file, and statistics, such as the file size.
To Change Document Properties
The Document Information Panel contains areas where you can view and enter document properties. You
can view and change information in this panel at any time while you are creating a document. Before saving the
presentation again, you want to add your name and class name as document properties. The following steps use the
Document Information Panel to change document properties.
1
• Click the Office Button to display
Office Button
the Office Button menu.
clicking Properties
command will open
the Document
Information Panel
• Point to Prepare on the Office
Q&A
Button menu to display the
Prepare submenu (Figure 1–64).
What other types of actions besides
changing properties can you take to
set up a document for
distribution?
Office
Prepare submenu
displays a list of tasks
that can be used to set
up files for distribution
Button
The Prepare submenu
menu
provides commands
related to sharing a document
with others, such as allowing or
restricting people to view and modify
your document, checking to see if
your presentation will run in earlier
versions of PowerPoint, and searching
for hidden personal information.
Figure 1–64
2
• Click Properties on the Prepare
Q&A
submenu to display the Document
Information Panel (Figure 1–65).
Why are some of the document
properties in my Document
Information Panel already filled in?
The person who installed Microsoft
Office 2007 on your computer
or network may have set or
customized the properties.
Document
Information Panel
is displayed at top
of document
student name
will be typed in
Author text box
course number and
section will be typed
in Subject text box
Figure 1–65
Copyright 2009 Cengage Learning, Inc. All Rights Reserved. May not be copied, scanned, or duplicated, in whole or in part.
Changing Document Properties and Saving Again
PPT 45
3
• Click the Author text
box, if necessary,
and then type your
name as the Author
property. If a name
already is displayed in
the Author text box,
delete it before typing
your name.
student name
entered
course number
and section
entered
Close the
Document
Information
Panel button
• Click the Subject text
Q&A
box, if necessary delete
any existing text, and
then type your course
number and section as
the Subject property
(Figure 1–66).
What types of
document properties
does PowerPoint
collect automatically?
PowerPoint records
such details as how
long you worked at
creating your project,
how many times you
revised the document,
and what fonts and
themes are used.
Figure 1–66
4
• Click the Close the Document Information Panel button so that the Document Information
Panel no longer is displayed.
To Save an Existing Presentation with the Same File Name
Saving frequently cannot be overemphasized. You have made several modifications to the presentation since
you saved it earlier in the chapter. When you first saved the document, you clicked the Save button on the Quick
Access Toolbar, the Save As dialog box appeared, and you entered the file name, Cabo Package. If you want to use
the same file name to save the changes made to the document, you again click the Save button on the Quick Access
Toolbar. The following step saves the presentation again.
Copyright 2009 Cengage Learning, Inc. All Rights Reserved. May not be copied, scanned, or duplicated, in whole or in part.
PowerPoint Chapter 1
Licensed to: iChapters User
Licensed to: iChapters User
PPT 46 PowerPoint Chapter 1 Creating and Editing a Presentation
1
• Click the Save button on the Quick
Q&A
Access Toolbar to overwrite the
previous Cabo Package file on the
USB flash drive (Figure 1–67).
Why did the Save As dialog box not
appear?
Save button
PowerPoint saved
document with
same file name,
Cabo Package
PowerPoint overwrites the document
using the settings specified the first
time you saved the document. To save
the file with a different file name or
on different media, display the Save
As dialog box by clicking the Office
Button and then clicking Save As on
the Office Button menu. Then, fill in
the Save As dialog box as described
in Steps 2 through 5 on pages PPT 27
through PPT 29.
Figure 1–67
Other Ways
1. Press CTRL+S or press
SHIFT+F12, press ENTER
Moving to Another Slide in Normal View
When creating or editing a presentation in Normal view, you often want to display a slide
other than the current one. You can move to another slide using several methods.
• Drag the scroll box on the vertical scroll bar up or down to move through the slides
in the presentation.
• Click the Next Slide or Previous Slide button on the vertical scroll bar. Clicking
the Next Slide button advances to the next slide in the presentation. Clicking the
Previous Slide button backs up to the slide preceding the current slide.
• On the Slides tab, click a particular slide to display that slide in the Slide pane.
Copyright 2009 Cengage Learning, Inc. All Rights Reserved. May not be copied, scanned, or duplicated, in whole or in part.
Moving to Another Slide in Normal View PPT 47
To Use the Scroll Box on the Slide Pane to Move to Another Slide
Before continuing with developing this project, you want to display the title slide by dragging the scroll box on
the vertical scroll bar. When you drag the scroll box, the slide indicator shows the number and title of the slide you
are about to display. Releasing the mouse button shows the slide. The following steps move from Slide 5 to Slide 1
using the scroll box on the Slide pane.
1
• Position the mouse
pointer on the scroll box.
• Press and hold down
the mouse button so
that Slide: 5 of 5 A
World Beneath the
Waves appears in
the slide indicator
(Figure 1–68).
vertical scroll bar
scroll box
slide indicator
Slide 5 has
an orange
border
Previous Slide
button
Next Slide
button
Figure 1–68
2
• Drag the scroll box
up the vertical scroll
bar until Slide: 1 of 5
A World Beneath the
Waves appears in
the slide indicator
(Figure 1–69).
drag scroll
box up
slide indicator
Slide 5 is
displayed
Figure 1–69
Copyright 2009 Cengage Learning, Inc. All Rights Reserved. May not be copied, scanned, or duplicated, in whole or in part.
PowerPoint Chapter 1
Licensed to: iChapters User
Licensed to: iChapters User
PPT 48 PowerPoint Chapter 1 Creating and Editing a Presentation
3
• Release the mouse button so that
Slide 1 appears in the Slide pane
and the Slide 1 thumbnail has an
orange border in the Slides tab
(Figure 1–70).
orange border
surrounds Slide 1
Slide 1 is
displayed
Figure 1–70
Other Ways
1. Click Next Slide button
or Previous Slide button
to move forward or
back one slide
2. Press PAGE DOWN
or PAGE UP to move
forward or back
one slide
Viewing the Presentation in Slide Show View
The Slide Show button, located in the lower-right corner of the PowerPoint window
above the status bar, allows you to show a presentation using a computer. The computer
acts like a slide projector, displaying each slide on a full screen. The full-screen slide hides
the toolbars, menus, and other PowerPoint window elements.
Copyright 2009 Cengage Learning, Inc. All Rights Reserved. May not be copied, scanned, or duplicated, in whole or in part.
Viewing the Presentation in Slide Show View PPT 49
To Start Slide Show View
When making a presentation, you use Slide Show view. You can start Slide Show view from Normal view or Slide
Sorter view. Slide Show view begins when you click the Slide Show button in the lower-right corner of the PowerPoint
window on the status bar. PowerPoint then shows the current slide on the full screen without any of the PowerPoint
window objects, such as the menu bar or toolbars. The following steps start Slide Show view.
1
• Point to the Slide Show button
in the lower-right corner of the
PowerPoint window on the status
bar (Figure 1–71).
Slide Show button
Normal view
button is
selected
Figure 1–71
2
• Click the Slide Show
Q&A
button to display the
title slide (Figure 1–72).
Where is the
PowerPoint window?
title slide
in Slide
Show view
When you run a slide
show, the PowerPoint
window is hidden. It
will reappear once you
end your slide show.
Other Ways
1. Click Slide Show tab,
click From Beginning
button in Start Slide
Show group
Figure 1–72
2. Press F5
Copyright 2009 Cengage Learning, Inc. All Rights Reserved. May not be copied, scanned, or duplicated, in whole or in part.
PowerPoint Chapter 1
Licensed to: iChapters User
Licensed to: iChapters User
PPT 50 PowerPoint Chapter 1 Creating and Editing a Presentation
To Move Manually through Slides in a Slide Show
After you begin Slide Show view, you can move forward or backward through the slides. PowerPoint allows
you to advance through the slides manually or automatically. During a slide show, each slide in the presentation
shows on the screen, one slide at a time. Each time you click the mouse button, the next slide appears. The following
steps move manually through the slides.
1
• Click each slide until
Q&A
Slide 5 (A World
Beneath the Waves) is
displayed (Figure 1–73).
I see a small toolbar in
the lower-left corner
of my slide. What is
this toolbar?
Slide 5 is
displayed in
Slide Show view
The Slide Show
toolbar appears when
you begin running a
slide show and then
move the mouse
pointer. The buttons
on this toolbar allow
you to navigate to the
next slide, the previous slide, to mark up
the current slide, or
to change the current
display.
Figure 1–73
2
• Click Slide 5 so that the black slide
Q&A
appears with a message announcing
the end of the slide show
(Figure 1–74).
message
announces end
of slide show
How can I end the presentation at
this point?
Click the black slide to return to
Normal view in the PowerPoint
window or press the ESC key.
Figure 1–74
Other Ways
1. Press PAGE DOWN to
advance one slide at a time,
or press PAGE UP to go back
one slide at a time
2. Press RIGHT ARROW or DOWN
ARROW to advance one
slide at a time, or press LEFT
ARROW or UP ARROW to go
back one slide at a time
3. If Slide Show toolbar is
displayed, click Next Slide
or Previous Slide button on
toolbar
Copyright 2009 Cengage Learning, Inc. All Rights Reserved. May not be copied, scanned, or duplicated, in whole or in part.
Viewing the Presentation in Slide Show View PPT 51
To Display the Pop-Up Menu and Go to a Specific Slide
Slide Show view has a shortcut menu, called a pop-up menu, that appears when you right-click a slide in
Slide Show view. This menu contains commands to assist you during a slide show.
When the pop-up menu appears, clicking the Next command moves to the next slide. Clicking the Previous
command moves to the previous slide. Pointing to the Go to Slide command and then clicking the desired slide
allows you to move to any slide in the presentation. The Go to Slide submenu contains a list of the slides in the presentation. You can go to the requested slide by clicking the name of that slide. Additional pop-up menu commands
allow you to change the mouse pointer to a ballpoint or felt tip pen or highlighter that draws in various colors, make
the screen black or white, create speaker notes, and end the slide show. The following steps go to the title slide
(Slide 1) in the Cabo Package presentation.
1
• With the black slide
displaying in Slide
Show view, right-click
the slide to display the
pop-up menu.
2
• Point to Go to Slide
Q&A
on the pop-up menu,
and then point to 2
Package Highlights
in the Go to
Slide submenu
(Figure 1–75).
Next command
pop-up menu
Go to Slide
submenu
Go to Slide
command
Slide 2 is
desired slide
Why does my pop-up
menu appear in a different location on my
screen?
The pop-up menu
appears near the
location of the mouse
pointer at the time
you right-click.
3
• Click 2 Package
Highlights to display
Slide 2.
Figure 1–75
Copyright 2009 Cengage Learning, Inc. All Rights Reserved. May not be copied, scanned, or duplicated, in whole or in part.
PowerPoint Chapter 1
Licensed to: iChapters User
Licensed to: iChapters User
PPT 52 PowerPoint Chapter 1 Creating and Editing a Presentation
To Use the Pop-Up Menu to End a Slide Show
The End Show command on the pop-up menu ends Slide Show view and returns to the same view as when
you clicked the Slide Show button. The following steps end Slide Show view and return to Normal view.
1
• Right-click Slide 2 and
then point to End
Show on the pop-up
menu (Figure 1–76).
Slide 2 is displayed in
Slide Show view
2
• Click End Show
to return to Slide 2
in the Slide pane in
Normal view.
• If the Microsoft Office
PowerPoint dialog
box appears, click
the Yes button.
End Show
command
Figure 1–76
Other Ways
1. Press ESC (shows slide
last viewed in Slide
Show view)
Quitting PowerPoint
When you quit PowerPoint, if you have made changes to a presentation since the last time
the file was saved, PowerPoint displays a dialog box asking if you want to save the changes
you made to the file before it closes that window. The dialog box contains three buttons
with these resulting actions:
• Yes button — Saves the changes and then quits PowerPoint
• No button — Quits PowerPoint without saving changes
• Cancel button — Closes the dialog box and redisplays the presentation without saving the changes
If no changes have been made to an open presentation since the last time the file
was saved, PowerPoint will close the window without displaying a dialog box.
Copyright 2009 Cengage Learning, Inc. All Rights Reserved. May not be copied, scanned, or duplicated, in whole or in part.
Starting PowerPoint and Opening a Presentation PPT 53
To Quit PowerPoint with One Document Open
You saved the presentation prior to running the slide show and did not make any changes to the project.
The presentation now is complete, and you are ready to quit PowerPoint. When you have one document open, the
following steps quit PowerPoint.
1
Point to the Close button on the
right side of the PowerPoint title
bar (Figure 1–77).
Close button
2
• Click the Close button to quit
Q&A
PowerPoint.
What if I have more than one
PowerPoint document open?
You would click the Close button
for each open document. When you
click the last open document’s Close
button, PowerPoint also quits. As
an alternative, you could click the
Office Button and then click the Exit
PowerPoint button on the Office
Button menu, which closes all open
PowerPoint documents and then
quits PowerPoint.
Figure 1–77
Other Ways
1. With one document open,
double-click Office Button
2. Click Office Button, click
Exit PowerPoint on Office
Button menu
PowerPoint button on
Windows Vista taskbar, click
Close on shortcut menu
4. With one document open,
press ALT+F4
3. With one document
open, right-click Microsoft
Starting PowerPoint and Opening a Presentation
Once you have created and saved a presentation, you may need to retrieve it from your
storage medium. For example, you might want to revise the document or print it.
Opening a presentation requires that PowerPoint is running on your computer.
To Start PowerPoint
The following steps, which assume Windows Vista is running, start PowerPoint.
1 Click the Start button on the Windows Vista taskbar to display the Start menu.
Note: If you are using
Windows XP, see
Appendix F for
alternate steps.
2 Click All Programs at the bottom of the left pane on the Start menu to display the
All Programs list and then click Microsoft Office in the All Programs list to display the
Microsoft Office list.
3 Click Microsoft Office PowerPoint 2007 on the Microsoft Office list to start PowerPoint and
display a new blank presentation in the PowerPoint window.
4 If the PowerPoint window is not maximized, click the Maximize button on its title bar to
maximize the window.
Copyright 2009 Cengage Learning, Inc. All Rights Reserved. May not be copied, scanned, or duplicated, in whole or in part.
PowerPoint Chapter 1
Licensed to: iChapters User
Licensed to: iChapters User
PPT 54 PowerPoint Chapter 1 Creating and Editing a Presentation
To Open a Presentation from PowerPoint
Earlier in this chapter you saved your project on a USB flash drive using the file name, Cabo Package. The
following steps open the Cabo Package file from the USB flash drive.
1
• With your USB flash drive
Office Button
Q&A
connected to one of the computer’s USB ports, click the Office
Button to display the Office
Button menu (Figure 1–78).
Open command
Recent Documents
list displays names
of recently opened
PowerPoint files
blank Presentation1 is
opened in Microsoft
PowerPoint window
What files are shown in the
Recent Documents list?
Office
Button
PowerPoint displays the
menu
most recently opened
document file names in this list.
If the name of the file you want
to open appears in the Recent
Documents list, you could click it
to open the file.
Figure 1–78
Open dialog box
2
• Click Open on the Office Button
menu to display the Open
dialog box.
Address bar shows
USB flash drive as
selected device
• If the Folders list is displayed
below the Folders button, click
the Folders button to remove the
Folders list.
selected file
• If necessary, click Computer in
the Favorite Links section and
then scroll until UDISK 2.0 (E:)
appears in the list of available
drives.
Computer selected
File list shows files on
USB flash drive (your
list may differ)
• Double-click UDISK 2.0 (E:) to
select the USB flash drive, Drive
E in this case, as the new open
location.
• Click Cabo Package to select the
Q&A
file name (Figure 1–79).
How do I open the file if I am not
using a USB flash drive?
Use the same process, but be
certain to select your device in the
Computer list.
Folders button is a
toggle that causes
Folders list to appear
or disappear each
time you click it
Open button
Figure 1–79
Copyright 2009 Cengage Learning, Inc. All Rights Reserved. May not be copied, scanned, or duplicated, in whole or in part.
Checking a Presentation for Spelling Errors PPT 55
3
• Click the Open button to open the
Q&A
selected file and display Slide 1 in the
PowerPoint window (Figure 1–80).
Why are the PowerPoint icon and
name on the Windows Vista
taskbar?
title of saved
document is
displayed on
title bar
Slide 1 appears in
Slide pane and on
Slides tab
When you open a PowerPoint file,
a PowerPoint program button is
displayed on the taskbar. The button
contains an ellipsis because some of
its contents do not fit in the allotted button space. If you point to a
program button, its entire contents
appear in a ScreenTip, which in this
case would be the program name
followed by the file name.
Figure 1–80
Other Ways
Checking a Presentation for Spelling Errors
After you create a presentation, you should check it visually for spelling errors and style
consistency. In addition, you use PowerPoint’s Spelling tool to identify possible misspellings. Do not rely on the spelling checker to catch all your mistakes. While PowerPoint’s
spelling checker is a valuable tool, it is not infallible. You should proofread your presentation carefully by pointing to each word and saying it aloud as you point to it. Be mindful
of commonly misused words such as its and it’s, through and though, and to and too.
PowerPoint checks the entire presentation for spelling mistakes using a standard
dictionary contained in the Microsoft Office group. This dictionary is shared with the
other Microsoft Office applications such as Word and Excel. A custom dictionary is
available if you want to add special words such as proper names, cities, and acronyms.
When checking a presentation for spelling errors, PowerPoint opens the standard dictionary and the custom dictionary file, if one exists. When a word appears in the Spelling
dialog box, you can perform one of several actions.
1. Click Office Button,
double-click file
name in Recent
Documents list
2. Press CTRL+O, select file
name, press ENTER
Copyright 2009 Cengage Learning, Inc. All Rights Reserved. May not be copied, scanned, or duplicated, in whole or in part.
PowerPoint Chapter 1
Licensed to: iChapters User
Licensed to: iChapters User
PPT 56 PowerPoint Chapter 1 Creating and Editing a Presentation
Table 1–1 Spelling Dialog Box Buttons and Actions
Button Name
When To Use
Action
Ignore
Word is spelled correctly but
not found in dictionaries
Continues checking rest of the presentation but will flag
that word again if it appears later in document
Ignore All
Word is spelled correctly but
not found in dictionaries
Ignores all occurrences of the word and continues checking
rest of presentation
Change
Word is misspelled
Click proper spelling of the word in Suggestions list.
PowerPoint corrects word, continues checking rest of
presentation, but will flag that word again if it appears later
in document.
Change All
Word is misspelled
Click proper spelling of word in Suggestions list. PowerPoint
changes all occurrences of misspelled word and continues
checking rest of presentation.
Add
Add word to custom dictionary
PowerPoint opens custom dictionary, adds word, and
continues checking rest of presentation.
Suggest
Correct spelling is uncertain
Lists alternative spellings. Click the correct word from the
Suggestions box or type the proper spelling. Corrects the
word and continues checking the rest of the presentation.
AutoCorrect
Add spelling error to
AutoCorrect list
PowerPoint adds spelling error and its correction to
AutoCorrect list. Any future misspelling of word is corrected
automatically as you type.
Close
Stop spelling checker
PowerPoint closes spelling checker and returns to
PowerPoint window.
To Check Spelling
The standard dictionary contains commonly used English words. It does not, however, contain many proper
names, abbreviations, technical terms, poetic contractions, or antiquated terms. PowerPoint treats words not
found in the dictionaries as misspellings. The following steps check the spelling on all slides in the Cabo Package
presentation.
1
• Click Review on the Ribbon to display
Review tab
the Review tab (Figure 1–81).
Figure 1–81
Copyright 2009 Cengage Learning, Inc. All Rights Reserved. May not be copied, scanned, or duplicated, in whole or in part.
Checking a Presentation for Spelling Errors PPT 57
2
• Click the Spelling button
in the Proofing group to
start the spelling checker
and display the Spelling
dialog box (Figure 1–82).
Spelling
button
Proofing
group
flagged word
appears in Not in
Dictionary box as
possible misspelling
Ignore
button skips
one word
Figure 1–82
3
• Click the Ignore button
Q&A
to skip the word, Cabo
(Figure 1–83).
Cabo is not flagged as
a possible misspelled
word. Why not?
Your custom dictionary
contains the word, so
it is recognized as a
correct word.
red wavy line removed
because PowerPoint now
ignores the word, Cabo
flagged word
appears in Not in
Dictionary box as
possible misspelling
Figure 1–83
Copyright 2009 Cengage Learning, Inc. All Rights Reserved. May not be copied, scanned, or duplicated, in whole or in part.
PowerPoint Chapter 1
Licensed to: iChapters User
Licensed to: iChapters User
PPT 58 PowerPoint Chapter 1 Creating and Editing a Presentation
4
• Click the Ignore button to skip the
word, Ehlin.
• When the Microsoft Office
PowerPoint dialog box appears, click
the OK button to close the spelling
checker and return to the current
slide, Slide 1, or to the slide where a
possible misspelled word appeared.
• Click the slide to remove the box
from the word, Ehlin (Figure 1–84).
red wavy line removed
because PowerPoint now
ignores the word, Ehlin
Figure 1–84
Other Ways
1. Press F7
Correcting Errors
BTW
After creating a presentation and running the spelling checker, you may find that you must
make changes. Changes may be required because a slide contains an error, the scope of
the presentation shifts, or the style is inconsistent. This section explains the types of errors
that commonly occur when creating a presentation.
Certification
The Microsoft Certified
Application Specialist
(MCAS) program provides
an opportunity for you
to obtain a valuable
industry credential –
proof that you have the
PowerPoint 2007 skills
required by employers.
For more information
see Appendix G or visit
the PowerPoint 2007
Certification Web page
(scsite.com/ppt2007/cert).
Types of Corrections Made to Presentations
You generally make three types of corrections to text in a presentation: additions,
deletions, and replacements.
• Additions are necessary when you omit text from a slide and need to add it later.
You may need to insert text in the form of a sentence, word, or single character. For
example, you may want to add the presenter’s middle name on the title slide.
• Deletions are required when text on a slide is incorrect or no longer is relevant to the
presentation. For example, a slide may look cluttered. Therefore, you may want to
remove one of the bulleted paragraphs to add more space.
• Replacements are needed when you want to revise the text in a presentation. For
example, you may want to substitute the word, their, for the word, there.
Editing text in PowerPoint basically is the same as editing text in a word processing
program. The following sections illustrate the most common changes made to text in a
presentation.
Deleting Text
You can delete text using one of three methods. One is to use the BACKSPACE key to
remove text just typed. The second is to position the insertion point to the left of the text
you wish to delete and then press the DELETE key. The third method is to drag through
the text you wish to delete and then press the DELETE key. Use the third method when
deleting large sections of text.
Copyright 2009 Cengage Learning, Inc. All Rights Reserved. May not be copied, scanned, or duplicated, in whole or in part.
Displaying a Presentation in Grayscale PPT 59
Replacing Text in an Existing Slide
When you need to correct a word or phrase, you can replace the text by selecting
the text to be replaced and then typing the new text. As soon as you press any key on the
keyboard, the selected text is deleted and the new text is displayed.
PowerPoint inserts text to the left of the insertion point. The text to the right of the
insertion point moves to the right (and shifts downward if necessary) to accommodate the
added text.
Displaying a Presentation in Grayscale
Printing handouts of a presentation allows you to use them to make overhead transparencies.
The Color/Grayscale button on the Color/Grayscale group on the View tab shows the presentation in black and white before you print. Pure Black and White alters the slides’ appearance so that black lines display on a white background. Shadows and other graphical effects
are hidden. Grayscale shows varying degrees of gray.
To Display a Presentation in Grayscale
The Color/Grayscale button on the Color/Grayscale group on the View tab changes from color bars to shades
of black, called grayscale, and white. After you view the text objects in the presentation in grayscale, you can make
any changes that will enhance printouts produced from a black and white printer or photocopier. The following
steps display the presentation in grayscale.
1
• Click View on the Ribbon to display
View tab
the View tab (Figure 1–85).
default
display is
in color
Grayscale
button
Figure 1–85
Copyright 2009 Cengage Learning, Inc. All Rights Reserved. May not be copied, scanned, or duplicated, in whole or in part.
PowerPoint Chapter 1
Licensed to: iChapters User
Licensed to: iChapters User
PPT 60 PowerPoint Chapter 1 Creating and Editing a Presentation
2
• Click Grayscale in the Color/Grayscale
group to display Slide 1 in grayscale
in the Slide pane (Figure 1–86).
Slide 1 is
displayed in
Grayscale view
Figure 1–86
3
• Click the Next Slide button four times
to view all slides in the presentation
in grayscale (Figure 1–87).
Back To Color
View button
Slide 5 is
displayed in
Grayscale view
Next Slide button
Figure 1–87
Copyright 2009 Cengage Learning, Inc. All Rights Reserved. May not be copied, scanned, or duplicated, in whole or in part.
Printing a Presentation PPT 61
4
• Click the Back To Color View button
in the Close group to return to the
previous tab and display Slide 5
with the default Flow color scheme
(Figure 1–88).
Slide 5 is
displayed
in color
Figure 1–88
Printing a Presentation
After you create a presentation, you often want to print it. A printed version of the
presentation is called a hard copy or printout.
Printed copies of your presentation can be useful for the following reasons:
• Many people prefer proofreading a hard copy of the presentation rather than viewing
the slides on the screen to check for errors and readability.
• Someone without computer access or who could not attend your live presentation
can view the slides’ content.
• Copies can be distributed as handouts to people viewing your presentation.
• Hard copies can serve as reference material if your storage medium is lost or becomes
corrupted and you need to re-create the presentation.
It is a good practice to save a presentation before printing it, in the event you
experience difficulties with the printer.
To Print a Presentation
With the completed presentation saved, you may want to print it. The following steps print all five completed
presentation slides in the saved Cabo Package project.
1
• Click the Office Button to display
the Office Button menu.
• Point to Print on the Office
Q&A
Button menu to display the Print
submenu (Figure 1–89).
Can I print my presentation in
black and white to conserve ink or
toner?
Quick Print
button prints
slides directly
Yes. Click the Office Button, point
pointing to Print
button displays
to the arrow next to Print on the
Print submenu
Office Button menu, and then
click Print Preview on the Print
submenu. Click the Options button
Figure 1–89
on the Print Preview tab, point to
Color/Grayscale on the Options button menu, and then click Pure Black and White on the
Color/Grayscale submenu. Click the Print button on the Print submenu.
Print
submenu
Copyright 2009 Cengage Learning, Inc. All Rights Reserved. May not be copied, scanned, or duplicated, in whole or in part.
PowerPoint Chapter 1
Licensed to: iChapters User
Licensed to: iChapters User
PPT 62 PowerPoint Chapter 1 Creating and Editing a Presentation
2
• Click Quick Print on
the Print submenu to
print the slides.
• When the printer
Q&A
stops, retrieve the hard
copy of the five Cabo
Package slides (Figures
1–90a through 1–90e).
How can I print multiple
copies of my document
other than clicking the
Print button twice?
Q&A
Click the Office Button,
point to Print on the
Office Button menu,
click Print on the Print
submenu, increase the
number in the Number
of copies box, and then
click the OK button.
(a) Slide 1
(b) Slide 2
(c) Slide 3
(d) Slide 4
Do I have to wait until
my presentation is
complete to print it?
No, you can follow
these steps to print
your slides at any time
while you are creating
your presentation.
Other Ways
1. Press CTRL+P
(e) Slide 5
BTW
Figure 1–90
Quick Reference
For a table that lists how
to complete the tasks
covered in this book
using the mouse, Ribbon,
shortcut menu, and
keyboard, see the Quick
Reference Summary at
the back of this book, or
visit the PowerPoint 2007
Quick Reference Web
page (scsite.com/
ppt2007/qr).
Making a Transparency
With the handouts printed, you now can make overhead transparencies using one of
several devices. One device is a printer attached to your computer, such as an inkjet printer
or a laser printer. Transparencies produced on a printer may be in black and white or color,
depending on the printer. Another device is a photocopier. Because each of these devices
requires a special transparency film, check the user’s manual for the film requirement of
your specific device, or ask your instructor.
Copyright 2009 Cengage Learning, Inc. All Rights Reserved. May not be copied, scanned, or duplicated, in whole or in part.
PowerPoint Help PPT 63
BTW
PowerPoint Help
At any time while using PowerPoint, you can find answers to questions and display
information about various topics through PowerPoint Help. Used properly, this form
of assistance can increase your productivity and reduce your frustrations by minimizing
the time you spend learning how to use PowerPoint.
This section introduces you to PowerPoint Help. Additional information about
using PowerPoint Help is available in Appendix C.
PowerPoint Help
The best way to
become familiar with
PowerPoint Help is to use
it. Appendix C includes
detailed information
about PowerPoint Help
and exercises that will
help you gain confidence
in using it.
To Search for PowerPoint Help
Using PowerPoint Help, you can search for information based on phrases such as save a presentation or format
a chart, or key terms such as copy, save, or format. PowerPoint Help responds with a list of search results displayed as
links to a variety of resources. The following steps, which use PowerPoint Help to search for information about using
document themes, assume you are connected to the Internet.
1
• Click the Microsoft
Office PowerPoint Help
button near the upperright corner of the
PowerPoint window
to open the PowerPoint
Help window.
• Type document theme
PowerPoint Help window
allows you to search for
information based on
phrases or key terms
Maximize
button
Microsoft Office
PowerPoint
Help button
Type words
to search for
text box
in the Type words to
search for text box
at the top of the
PowerPoint Help
window (Figure 1–91).
Figure 1–91
Copyright 2009 Cengage Learning, Inc. All Rights Reserved. May not be copied, scanned, or duplicated, in whole or in part.
PowerPoint Chapter 1
Licensed to: iChapters User
Licensed to: iChapters User
PPT 64 PowerPoint Chapter 1 Creating and Editing a Presentation
PowerPoint
Help window
maximized
2
• Press the ENTER key
clicking these links
will display other
pages with links about
document themes
to display the search
results.
• Click the
first 25 results
of search are
displayed
Q&A
Maximize
button on the
PowerPoint Help
window title bar to
maximize the Help
window (Figure 1–92).
Apply or
customize a
document
theme link
Where is the PowerPoint
window with Slide 1?
search results
display different
icons, depending
on type of link
PowerPoint is open in
the background, but
the PowerPoint Help
window is overlaid on
top of the Microsoft
PowerPoint window.
When the PowerPoint
Help window is closed,
the slide will reappear.
PowerPoint
window in
background
Figure 1–92
3
• Click the ‘Apply or
Back, Forward,
Stop, Refresh, and
Home buttons
Q&A
customize a
document theme’
link to display information regarding
applying or customizing themes
(Figure 1–93).
Close
button
Print button
What is the purpose
of the buttons at the
top of the PowerPoint Help window?
Use the buttons in the
upper-left corner of
the PowerPoint Help
window to navigate
Figure 1–93
through the Help
system, change the display,
show the PowerPoint Help table of contents, and print the contents of the window.
4
• Click the Close button on the PowerPoint Help window title bar to close the PowerPoint Help
window and display Slide 5.
Other Ways
1. Press F1
Copyright 2009 Cengage Learning, Inc. All Rights Reserved. May not be copied, scanned, or duplicated, in whole or in part.
Chapter Summary PPT 65
To Quit PowerPoint
The following steps quit PowerPoint.
1 Click the Close button on the right side of the title bar to quit PowerPoint; or, if you
have multiple PowerPoint documents open, click the Office Button and then click the
Exit PowerPoint button on the Office Button menu to close all open documents and quit
PowerPoint.
2 If necessary, click the No button in the Microsoft Office PowerPoint dialog box so that any
changes you have made are not saved.
Chapter Summary
In this chapter you have learned how to apply a document theme, create a title slide and text slides with bulleted
lists, format text, view the presentation in Slide Show view, and print slides as handouts. The items listed below
include all the new PowerPoint skills you have learned in this chapter.
1.
2.
3.
4.
5.
6.
7.
8.
9.
10.
11.
12.
13.
14.
15.
16.
17.
18.
19.
20.
Start PowerPoint (PPT 5)
Choose a Document Theme (PPT 16)
Enter the Presentation Title (PPT 18)
Enter the Presentation Subtitle Paragraph (PPT 20)
Select a Paragraph (PPT 21)
Italicize Text (PPT 22)
Select Multiple Paragraphs (PPT 22)
Change the Text Color (PPT 23)
Select a Group of Words (PPT 24)
Increase Font Size (PPT 24)
Bold Text (PPT 25)
Decrease the Title Slide Title Text Font Size
(PPT 25)
Save a Presentation (PPT 27)
Add a New Text Slide with a Bulleted List
(PPT 29)
Enter a Slide Title (PPT 31)
Select a Text Placeholder (PPT 31)
Type a Single-Level Bulleted List (PPT 32)
Add a New Slide and Enter a Slide Title (PPT 33)
Type a Multi-Level Bulleted List (PPT 34)
Create a Third-Level Paragraph (PPT 37)
21.
22.
23.
24.
25.
26.
27.
28.
29.
30.
31.
32.
33.
34.
35.
36.
Duplicate a Slide (PPT 40)
Arrange a Slide (PPT 41)
Delete All Text in a Placeholder (PPT 42)
Change Document Properties (PPT 44)
Save an Existing Presentation with the Same File
Name (PPT 45)
Use the Scroll Box on the Slide Pane to Move to
Another Slide (PPT 47)
Start Slide Show View (PPT 49)
Move Manually through Slides in a Slide Show
(PPT 50)
Display the Pop-Up Menu and Go to a Specific
Slide (PPT 51)
Use the Pop-Up Menu to End a Slide Show
(PPT 52)
Quit PowerPoint with One Document Open
(PPT 53)
Open a Presentation from PowerPoint (PPT 54)
Check Spelling (PPT 55)
Display a Presentation in Grayscale (PPT 59)
Print a Presentation (PPT 61)
Search for PowerPoint Help (PPT 63)
If you have a SAM user profile, you may have access to hands-on instruction, practice, and
assessment. Log in to your SAM account (http://sam2007.course.com) to launch any assigned
training activities or exams that relate to the skills covered in this chapter.
Copyright 2009 Cengage Learning, Inc. All Rights Reserved. May not be copied, scanned, or duplicated, in whole or in part.
PowerPoint Chapter 1
PowerPoint
Licensed to: iChapters User
Licensed to: iChapters User
PPT 66 PowerPoint Chapter 1 Creating and Editing a Presentation
Learn It Online
STUDENT ASSIGNMENTS
Test your knowledge of chapter content and key terms.
Instructions: To complete the Learn It Online exercises, start your browser, click the Address bar, and
then enter the Web address scsite.com/ppt2007/learn. When the Office 2007 Learn It Online
page is displayed, click the link for the exercise you want to complete and then read the instructions.
Chapter Reinforcement TF, MC, and SA
A series of true/false, multiple choice, and short
answer questions that test your knowledge of the
chapter content.
Who Wants To Be a Computer Genius?
An interactive game that challenges your
knowledge of chapter content in the style of a
television quiz show.
Flash Cards
An interactive learning environment where
you identify chapter key terms associated with
displayed definitions.
Wheel of Terms
An interactive game that challenges your
knowledge of chapter key terms in the style of the
television show Wheel of Fortune.
Practice Test
A series of multiple choice questions that test your
knowledge of chapter content and key terms.
Crossword Puzzle Challenge
A crossword puzzle that challenges your
knowledge of key terms presented in the chapter.
Apply Your Knowledge
Reinforce the skills and apply the concepts you learned in this chapter.
Modifying Character Formats and Paragraph Levels
Instructions: Start PowerPoint. Open the presentation, Apply 1-1 Keep Your Cool, from the Data Files
for Students. See the inside back cover of this book for instructions on downloading the Data Files for
Students, or contact your instructor for more information about accessing the required files.
The two slides in the presentation stress the importance of drinking plenty of water on hot days.
The document you open is an unformatted presentation. You are to modify the document theme and
text, indent the paragraphs, and format the text so the slides look like Figure 1–94.
Perform the following tasks:
1. Change the document
theme to Trek. Note that
the Trek theme uses all
capital letters for the title
text. On the title slide,
use your name in place of
Student Name and bold
and italicize your name.
Increase the title text font
size to 44 point.
bold and
italicize name
Trek
document
theme
substitute
your name
44-point
font size
(a) Slide 1 (Title Slide)
Figure 1–94
Copyright 2009 Cengage Learning, Inc. All Rights Reserved. May not be copied, scanned, or duplicated, in whole or in part.
Extend Your Knowledge PPT 67
third-level
paragraphs
STUDENT ASSIGNMENTS
second-level
paragraph
2. On Slide 2, increase the indent
of the second, fifth, and sixth
paragraphs (Drink throughout the
day; Do not substitute caffeinated
beverages; Cool water is best for
keeping hydrated) to secondlevel paragraphs. Then change
paragraphs three and four (Start
and end your day with water; Do
not wait until you are thirsty) to
third-level paragraphs.
3. Check the spelling, and then
display the revised presentation in
grayscale.
(b) Slide 2 (Multi-Level Bulleted List)
Figure 1–94 (continued)
4. Change the document properties,
as specified by your instructor.
Save the presentation using the
file name, Apply 1-1 Drink Water.
Submit the revised document
in the format specified by your
instructor.
Extend Your Knowledge
Extend the skills you learned in this chapter and experiment with new skills. You may need to
use Help to complete the assignment.
Changing Slide Theme and Text
Instructions: Start PowerPoint. Open the presentation, Extend 1-1 Nutrition, from the Data Files for
Students. See the inside back cover of this book for instructions on downloading the Data Files for
Students, or contact your instructor for more information about accessing the required files.
You will choose a theme (Figure 1–95), format slides, and create a closing slide.
Perform the following tasks:
1. Apply an appropriate document
theme.
choose a document
theme from the
built-in gallery
PowerPoint Chapter 1
Licensed to: iChapters User
2. On Slide 1, use your name in place
of Student Name. Format the
text using techniques you learned
in this chapter, such as changing
the font size and color and also
bolding and italicizing words.
Figure 1–95
Continued >
Copyright 2009 Cengage Learning, Inc. All Rights Reserved. May not be copied, scanned, or duplicated, in whole or in part.
Licensed to: iChapters User
PPT 68 PowerPoint Chapter 1 Creating and Editing a Presentation
Extend Your Knowledge
continued
3. On Slide 2, adjust the paragraph levels so that the lines of text are arranged under vegetable and fruit
categories. Edit the text so that the slide meets the 7 ⫻ 7 rule, which states that each line should have a
maximum of seven words, and each slide should have a maximum of seven lines.
4. On Slides 3 and 4, create paragraphs and adjust the paragraph levels.
STUDENT ASSIGNMENTS
5. Create an appropriate closing slide using the title slide as a guide.
6. Change the document properties, as specified by your instructor. Save the presentation using the
file name, Extend 1-1 Fruit and Vegetables.
7. Add the Print button to the Quick Access Toolbar and then click this button to print the slides.
8. Delete the Print button from the Quick Access Toolbar.
9. Submit the revised document in the format specified by your instructor.
Make It Right
Analyze a presentation and correct all errors and/or improve the design.
Correcting Formatting and List Levels
Instructions: Start PowerPoint. Open the presentation, Make It Right 1-1 Indulge, from the Data Files
for Students. See the inside back cover of this book for instructions on downloading the Data Files for
Students, or contact your instructor for more information about accessing the required files.
Correct the formatting problems and errors in the presentation while keeping in mind the
guidelines presented in this chapter.
Perform the following tasks:
1. Change the document theme from
Metro, shown in Figure 1–96, to
Opulent.
substitute your
name, and then
format the text
2. On Slide 1, replace the words, Fall
Semester, with your name. Format your
name so that it displays prominently on
the slide.
3. Move Slide 2 to the end of the
presentation so that it becomes the new
Slide 4.
4. Use the spell checker to correct the
misspellings. Analyze the slides for
other word usage errors that the spell
checker did not find.
change document
theme to Opulent
Figure 1–96
5. On Slide 2, increase the Slide 2 title (Athletic Events) font size to 40. Make the indent levels for
paragraphs 2, 4, and 6 the same level.
6. On Slide 3, change the title text (Awards Ceremony) font size to 40. Make the indent levels for
paragraphs 3 and 5 the same level.
7. Change the document properties, as specified by your instructor. Save the presentation using the
file name, Make It Right 1-1 Intramurals.
8. Submit the revised document in the format specified by your instructor.
Copyright 2009 Cengage Learning, Inc. All Rights Reserved. May not be copied, scanned, or duplicated, in whole or in part.
In the Lab PPT 69
In the Lab
Design and/or create a presentation using the guidelines, concepts, and skills presented in this
chapter. Labs 1, 2, and 3 are listed in order of increasing difficulty.
STUDENT ASSIGNMENTS
Lab 1: Creating a Presentation
with Bulleted Lists
Problem: Many of the important
steps you will take in your life are
influenced by your credit report.
Buying a car, renting an apartment,
and even applying for a job often
require a credit check. Your credit
score can make or break your ability
to obtain the goods you truly want
and need. One of your assignments
in your economics class is to give
a speech about establishing credit.
You develop the outline shown in
Figure 1–97 and then prepare the
PowerPoint presentation shown in
Figures 1–98a through 1–98d.
PowerPoint Chapter 1
Licensed to: iChapters User
Instructions: Perform the
following tasks.
1. Create a new presentation using
the Aspect document theme.
2. Using the typed notes
illustrated in Figure 1–97,
create the title slide shown in
Figure 1–98a using your name
in place of Marc Kantlon.
Figure 1–97
Italicize your name. Decrease
the font size of the title paragraph,
Give Yourself Some Credit, to 40. Increase the font size of the first paragraph of the subtitle text,
Understanding Your Credit Report, to 28.
3. Using the typed notes in Figure 1–97, create the three text slides with bulleted lists shown in
Figures 1–98b through 1–98d.
Continued >
Copyright 2009 Cengage Learning, Inc. All Rights Reserved. May not be copied, scanned, or duplicated, in whole or in part.
Licensed to: iChapters User
PPT 70 PowerPoint Chapter 1 Creating and Editing a Presentation
In the Lab
continued
4. On Slide 3, change the font color of the number, 760, to green and the number, 620, to red.
5. Check the spelling and correct any errors.
6. Drag the scroll box to display Slide 1. Click the Slide Show button to start Slide Show view. Then
click to display each slide.
STUDENT ASSIGNMENTS
7. Change the document properties, as specified by your instructor. Save the presentation using the
file name, Lab 1-1 Credit.
8. Submit the document in the format specified by your instructor.
Aspect
document
theme
40-point
font size
28-point
font size
substitute
your name
italicized
name
(a) Slide 1 (Title Slide)
(b) Slide 2
Figure 1–98
Copyright 2009 Cengage Learning, Inc. All Rights Reserved. May not be copied, scanned, or duplicated, in whole or in part.
In the Lab PPT 71
green
font color
STUDENT ASSIGNMENTS
red font
color
PowerPoint Chapter 1
Licensed to: iChapters User
(c) Slide 3
(d) Slide 4
Figure 1–98 (continued)
In the Lab
Lab 2: Creating a Presentation with Bulleted Lists and a Closing Slide
Problem: Hybrid vehicles
have received much attention
in recent years. Everyone from
environmentalists to movie stars
are driving them, and potential
buyers wait for months until
the vehicles arrive in dealers’
showrooms. You work part-time
at Midwest State Bank, and the
loan department manager, Jen
Westbrook, has asked you to
develop a PowerPoint presentation
to accompany her upcoming
speech. She hands you the outline
shown in Figure 1–99 and asks you
to create the presentation shown in
Figures 1–100a through 1–100e.
Figure 1–99
Continued >
Copyright 2009 Cengage Learning, Inc. All Rights Reserved. May not be copied, scanned, or duplicated, in whole or in part.
Licensed to: iChapters User
PPT 72 PowerPoint Chapter 1 Creating and Editing a Presentation
In the Lab
continued
Technic
document
theme
STUDENT ASSIGNMENTS
bold
text
yellow
font color
italic
text
substitute
your name
green
font color
54-point
font size
(a) Slide 1 (Title Slide)
Instructions: Perform the
following tasks.
1. Create a new presentation
using the Technic document
theme.
2. Using the typed notes
illustrated in Figure 1–99,
create the title slide shown
in Figure 1–100a using
your name in place of Jan
Westbrook. Bold your name.
Italicize the title, Is a Hybrid
Car Right for You?, and
increase the font size to 54.
Change the font color of the
title text to green and the
subtitle text to yellow.
3. Using the typed notes in
Figure 1–99, create the three
text slides with bulleted lists
shown in Figures 1–100b
through 1–100d. Change the
color of all the bulleted list
paragraph text to yellow.
yellow
font color
4. Duplicate the title slide and
then move the new closing
slide to the end of the
presentation. Change the
Slide 5 title text, increase the
font size to 66, and remove the
italics.
5. Check the spelling and
correct any errors.
(b) Slide 2
Figure 1–100
6. Drag the scroll box to display
Slide 1. Click the Slide Show
button to start Slide Show
view. Then click to display
each slide.
7. Change the document properties, as specified by your instructor. Save the presentation using the
file name, Lab 1-2 Hybrids.
8. Submit the revised document in the format specified by your instructor.
Copyright 2009 Cengage Learning, Inc. All Rights Reserved. May not be copied, scanned, or duplicated, in whole or in part.
In the Lab PPT 73
STUDENT ASSIGNMENTS
yellow
font color
PowerPoint Chapter 1
Licensed to: iChapters User
yellow
font color
(c) Slide 3
new
closing
slide
(d) Slide 4
text not
italicized
66-point
font size
(e) Slide 5 (Closing Slide)
Figure 1–100 (continued)
Copyright 2009 Cengage Learning, Inc. All Rights Reserved. May not be copied, scanned, or duplicated, in whole or in part.
Licensed to: iChapters User
PPT 74 PowerPoint Chapter 1 Creating and Editing a Presentation
STUDENT ASSIGNMENTS
In the Lab
Lab 3: Creating and Updating Presentations
Problem: Bobbie Willis, the public relations director for the South Haven Park District, plans
activities every season for community residents and promotes the offerings using a PowerPoint
presentation. The new seminars for senior citizens this spring are quilting and t’ai chi. Adults can
register for gourmet cooking lessons and kickball. Teens can enroll in sailing and fencing lessons.
Figure 1–101
Oriel
document
theme
Instructions Part 1: Using the
outline in Figure 1–101, create
the presentation shown in
Figure 1–102. Use the Oriel
document theme. On the title slide
shown in Figure 1–102a, type your
name in place of Bobbie Willis,
increase the font size of the title
paragraph, South Haven Park
District, to 60 and change the text
font style to italic. Increase the
font size of the subtitle paragraph,
New Spring Seminars, to 32, and
change the font size of the subtitle
paragraph with your name to 37
or to a size that displays all the text
on one line. Create the three text
slides with multi-level bulleted lists
shown in Figures 1–102b through
1–102d.
Correct any spelling mistakes.
Change the document properties,
as specified by your instructor. Save
the presentation using the file
name, Lab 1-3 Part One Spring
Seminars. Display the presentation
in grayscale.
60-point
font size
italic
text
32-point
font size
substitute
your name
(a) Slide 1 (Title Slide)
Figure 1–102
Copyright 2009 Cengage Learning, Inc. All Rights Reserved. May not be copied, scanned, or duplicated, in whole or in part.
STUDENT ASSIGNMENTS
In the Lab PPT 75
PowerPoint Chapter 1
Licensed to: iChapters User
(b) Slide 2
(c) Slide 3
(d) Slide 4
Figure 1–102 (continued)
Instructions Part 2: The South Haven Park District staff members want to update this presentation to
promote the new Fall seminars. Modify the presentation created in Part 1 to create the presentation
shown in Figure 1–103. To begin, save the current presentation with the new file name, Lab 1-3 Part
Two Fall Seminars. Change the document theme to Civic. On the title slide, remove the italics from the
title paragraph, South Haven Park District, decrease the font size to 44, and bold the text. Change the
first subtitle paragraph to New Fall Seminars. Then change your title in the second subtitle paragraph to
Executive Director and change the font size of the entire paragraph to 28.
On Slide 2, change the first first-level paragraph, Quilting, to Quilting for the Holidays. Change
the first second-level paragraph, Quilts made from donated fabrics, to Quilts will be raffled at Annual
Bazaar. Change the title of the second seminar to Intermediate T’ai Chi.
On Slide 3, change the first second-level paragraph under Almost Gourmet to Holiday feasts and
parties. Then change the second-level paragraph under Kickball to Seminar concludes with single elimination
tournament.
On Slide 4, change the first class from Sailing to Climbing and then change the course description
second-level paragraph to Covers verbal signals, rope, knots, harnesses, belaying.
Continued >
Copyright 2009 Cengage Learning, Inc. All Rights Reserved. May not be copied, scanned, or duplicated, in whole or in part.
Licensed to: iChapters User
PPT 76 PowerPoint Chapter 1 Creating and Editing a Presentation
In the Lab
continued
STUDENT ASSIGNMENTS
Correct any spelling mistakes, and then view the slide show. Change the document properties, as
specified by your instructor. Display the presentation in grayscale. Submit both Part One and Part Two
documents in the format specified by your instructor.
Civic
document
theme
text not
italicized
bold
text
44-point
font size
revised
paragraph
text
28-point
font size
(a) Slide 1 (Title Slide)
revised
paragraph
text
(b) Slide 2
Figure 1–103
Copyright 2009 Cengage Learning, Inc. All Rights Reserved. May not be copied, scanned, or duplicated, in whole or in part.
In the Lab PPT 77
STUDENT ASSIGNMENTS
revised
paragraph
text
PowerPoint Chapter 1
Licensed to: iChapters User
(c) Slide 3
revised
paragraph
text
(d) Slide 4
Figure 1–103 (continued)
Copyright 2009 Cengage Learning, Inc. All Rights Reserved. May not be copied, scanned, or duplicated, in whole or in part.
Licensed to: iChapters User
PPT 78 PowerPoint Chapter 1 Creating and Editing a Presentation
Cases and Places
Apply your creative thinking and problem solving skills to design and implement a solution.
• EASIER •• MORE DIFFICULT
STUDENT ASSIGNMENTS
Note: Remember to use the 7 ⫻ 7 rule as you design the presentations: a maximum of seven
words on a line and a maximum of seven lines on one slide.
• 1: Design and Create an Ocean and Seas Presentation
Salt water covers more than two-thirds of the Earth’s surface. This water flows freely between
the Earth’s five oceans and seas, which all are connected. In preparation for your next snorkeling
and diving adventure, you have been reading about the oceans and seas. You decide to prepare a
PowerPoint presentation to accompany a speech that is required in your Earth Science class. You
create the outline shown in Figure 1–104 about these waters. Use this outline along with the concepts
and techniques presented in this chapter to develop and format a slide show with a title slide and three
text slides with bulleted lists. Be sure to check spelling.
Figure 1–104
Copyright 2009 Cengage Learning, Inc. All Rights Reserved. May not be copied, scanned, or duplicated, in whole or in part.
Cases and Places PPT 79
STUDENT ASSIGNMENTS
• 2: Design and Create an Industrial Revolution Presentation
The Industrial Revolution changed the way people worked and lived in many parts of the world. With
its roots in Britain in the 18th century, the Industrial Revolution introduced new machines, steam power,
and trains. As part of your World History homework assignments, you develop the outline shown in
Figure 1–105 about the Industrial Revolution and then create an accompanying PowerPoint presentation.
Use the concepts and techniques presented in this chapter to develop and format this slide show with a
title slide, three text slides with bulleted lists, and a closing slide. Be sure to check spelling.
PowerPoint Chapter 1
Licensed to: iChapters User
Figure 1–105
Continued >
Copyright 2009 Cengage Learning, Inc. All Rights Reserved. May not be copied, scanned, or duplicated, in whole or in part.
PPT 80 PowerPoint Chapter 1 Creating and Editing a Presentation
STUDENT ASSIGNMENTS
Cases and Places
continued
•• 3: Design and Create a Recycling Presentation
Many communities require recycling of household waste. Residents are required to separate paper,
plastics, and glass and put each material in special bins or bags. Electronic equipment also can be
recycled. Your community has developed a special program for broken or obsolete computers and
peripherals, office equipment and products, small home appliances, and entertainment equipment.
These items include personal computers, printers, cellular telephones, toasters, televisions, DVD
players, and video game consoles. Community officials will be collecting these items during the
next two Fridays at your local police station and a nearby shopping center. They will not accept air
conditioners, humidifiers, and hazardous wastes. Using the concepts and techniques presented in
this chapter, develop a short PowerPoint presentation to show at various businesses and offices in
your community. Emphasize that recycling is important because electronic products have very short
useful lives. They produce waste and may contain hazardous materials, but many components can be
salvaged. Include one slide with acceptable products and another with unacceptable products.
•• 4 Design and Create Your Favorite or Dream Car Presentation
Make It Personal
Ever since Henry Ford rolled the first Model T off his assembly line in 1908, people have been
obsessed with cars. From the sporty Corvette to the environmentally friendly Prius, everyone has a
favorite car or dream car. Use the concepts and techniques presented in this chapter to create a slide
show promoting a particular vehicle. Include a title slide, at least three text slides with bulleted lists,
and a closing slide. Format the text using colors, bolding, and italics where needed for emphasis. Be
sure to check spelling.
•• 5: Design and Create a Financial Institutions Presentation
Working Together
Financial institutions such as banks, savings and loans, and credit unions offer a variety of products.
Have each member of your team visit, telephone, or view Web sites of three local financial institutions.
Gather data about:
1) Savings accounts
2) Checking accounts
3) Mortgages
4) Certificates of deposit
After coordinating the data, create a presentation with at least one slide showcasing each financial
institution. As a group, critique each slide. Submit your assignment in the format specified by your
instructor.
Copyright 2009 Cengage Learning, Inc. All Rights Reserved. May not be copied, scanned, or duplicated, in whole or in part.