1
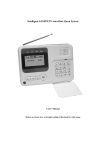
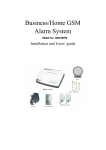
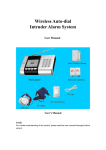
GSM Alarm System
With built-in PIR sensor
Installation and Users’ Guide
1
PDF 文件使用 "pdfFactory Pro" 试用版本创建 www.fineprint.cn
Brief Introduction:
◆
◆
◆
◆
◆
◆
◆
◆
◆
◆
◆
GSM 900/1800/1900 bands, can be used in most parts of the world
Monitor the scene environment
Voice and message alert
Set alarm ON or OFF by remote controller
Can set Home Arm and Out Arm mode
Call in to set alarm ON, OFF, Monitor, Output, and Intercom.
Send SMS to set alarm ON, OFF, Monitor, Output
5 group phone
Can program 7 groups of alarm messages
16 zones for wireless detector
SMS inform if external power failure or recovery
Basic Kit contains:
-
Alarm system (control unit) – 1 pc.
Remote controller – 2 pc.
Antenna – 1pc.
Door magnet– 1pc.
Power supply with back-up – 1pc.
Installation/user manual – 1pc.
Installation guide:
1. Insert SIM into the alarm unit.
Open the back cover of the unit. slide the SIM card carefully into the tray, and make sure the metal contacts of the
SIM to be down.(see picture 1)
Note: Before inserting SIM card into alarm unit, using a regular mobile phone to do the following steps:
- Set PIN code requested to off.
- Delete all stored numbers.
2. Connect the antenna.
Screw the antenna to the connection on the back of the main unit. Take care not to over tight the nut or let it
2
PDF 文件使用 "pdfFactory Pro" 试用版本创建 www.fineprint.cn
loose!
3. Insert the power supply.
Connect the host with the adaptor. The host need 9V-12V DC, must be over 1000mA current.
l The signal status LED on the main unit panel will turn to red and last for 20 seconds, this is code learning
mode, system is waiting for wireless detectors to be coded into the host;
l After 20 seconds, the signal status LED will turn to orange, and begin to flash, indicating system is checking
SIM card and search for GSM network;
l After the main unit finishing checking the host, if the signal status LED turns to green and flashes slowly, it
shows alarm phone number have been saved in the host, and the host is in arm status. If the signal status LED
keeps on in green, it shows phone numbers have not been saved in the host, and the host is in disarm status.
You can dial in the host or send SMS to program the phone number.
How to setup the alarm phone numbers and SMS
1. You can send command to the host to setup 5 groups of alarm phone numbers. The format is:
Password #operation code#content #
123456#51#13907550001#. save first group alarm phone number into the host.
123456#52#13907550002#. save second group alarm phone number into the host.
123456#53#13907550003#. save third group alarm phone number into the host.
123456#54#13907550004#. save fourth group alarm phone number into the host.
123456#55#13907550005#. save fifth group alarm phone number into the host.
2. There are 7 kinds of alarm messages in the host: The first five messages are for wireless detectors of zone 1-5; the
sixth message is for wireless detectors of zone 6-16; and the seventh message is for built-in PIR sensor
If the first wireless detector is triggered, the alarm message is: Wireless Activated (01)
If the second wireless detector is triggered, the alarm message is: Wireless Activated (02)
If the third wireless detector is triggered, the alarm message is: Wireless Activated (03)
If the fourth wireless detector is triggered, the alarm message is: Wireless Activated (04)
If the fifth wireless detector is triggered, the alarm message is: Wireless Activated (05)
If the sixth to sixteen wireless detector is triggered, the alarm message is: Wireless Activated (i); i=6-16
If the built-in PIR detector is triggered, the alarm message is: Wired Activated (1);
3. Users can send command to the host to change these 6 kinds of alarm messages. The alarm message cannot be
more than 24 English characters.
123456#81#Front door open#: save first group message into the host as first wireless detector is triggered
123456#82#Middle door open#: save second group message into the host as second wireless detector is triggered.
123456#83#Back door open#: save third group message into the host as third wireless detector is triggered.
123456#84#Front window open#: save fourth group message into the host as fourth wireless detector is triggered.
123456#85#Back window open#: save fifth group message into the host as fifth wireless detector is triggered.
123456#86#Middle window open#: save sixth group message into the host as sixth- sixteenth wireless detector is
triggered.
123456#87# PIR sensor triggered#. save seventh group message into the base as PIR sensor triggered.
3
PDF 文件使用 "pdfFactory Pro" 试用版本创建 www.fineprint.cn
How to operate when the host is alarming
In normal usage, if the host is in disarm status, the signal LED keeps on in green. You can use remote controller to
change the host into arm status, or you may send command (123456#1#1#) to the host to change the host into arm
status, the signal LED will flash in green in arm status.
1. Under arm status, any wireless detectors activated, or press of alarm key of the controller, the alarm system
will send alarm information by SMS, and dial out stored telephone numbers.
2. The system will send preset alarm message before dialing alarm phone numbers. If the SMS has been closed
or limited, it will only dial out the alarm telephone numbers.
3. When there is alarm, you can answer the phone (no need to input password) for listen-in, remote control.
Press 3#1# to sound the siren and press 3#0# to stop it, press 4#1# to start to listen-in and press 4#0# to stop
it.
4. After picking up alarming calls, if you do not need the host dial next phone number programmed in the host,
just press 1#1# or 1#2# to re-turn the host to arm status.
5. When there is alarm, users can also use the controller to disarm the host if they are near by.
6. In normal usage, with inside recharge battery on, you will receive the message “external power failure” or
“external power recovery” when external power supply lost or recovered.
How to control the host
1. Sending message to the host phone number (SIM Card number)
Send the message to the host: enter password 123456#, add the following command to set the host;
2. Calling the host phone number (SIM Card number)
Call in the host and enter password 123456#, then input the following command to set the host:
Com
Function
Com
Function
1#1#
Outdoor arm* (all detectors work)
1#2#
Indoor arm (part detectors work)
1#0#
Disarm *(all detectors not work)
3#1#
Sounding immediately
3#0#
Stop sounding
4#1#
Open listen-in (use phone key )*
4#0#
Closed listen-in (use phone key )
12#1#
Sending SMS when alarming *
12#0#
No SMS when alarming
15#1#
Dial phone number when alarming *
15#0#
Just alarm and no dialing
30##
show the arm and disarm status of every zone (SMS command applicable only)
31#--#
Change password. Enter a new password (1-6 bit).
38#--#
Set up alarm of zone (wireless zone: 1-16; Built-in PIR zone: 21)(NOTE: arm of single defense zone)
39#--#
Turn off alarm of zone (wireless zone: 1-16; Built-in PIR zone: 21) (NOTE: disarm of single defense
zone)
50##
show preset phone number in the host (SMS command applicable only)
51#--#
First group phone number(0-15bit)
52#--#
Second group phone number(0-15bit)
53#--#
Third group phone number(0-15bit)
54#--#
fourth group phone number(0-15bit)
55#--#
Fifth group phone number(0-15bit)
80##
show preset SMS in the host (SMS command applicable only)
81#--#
First group Message(0-24bit)
82#--#
Second group Message(0-24bit)
83#--#
Third group Message(0-24bit)
84#--#
Fourth group Message(0-24bit)
4
PDF 文件使用 "pdfFactory Pro" 试用版本创建 www.fineprint.cn
85#--#
Fifth group Message(0-24bit)
87#--#
Seventh group Message(0-24bit)
86#--#
Sixth group Message(0-24bit)
Note:
1.
2.
3.
4.
5.
Above table, ‘ * ’ stands for default setting.
In the above phone operation, one beep shows the number your input is successful, a long beep shows the sentence
you input is successful, two short beeps show sentence you input is failed, you should try again.
In the above SMS operation, you will receive a reply message for confirmation after sending message command to
the host. Such as:
DisArm, Sms:ON, Phone:ON, Siren:ON, Center Tel:OFF, Arm Center Tel:OFF, DisArm Center Tel:OFF
If the replied message is about the current status of the host, you may have sent wrong command.
You can also send inquiry command to check out the present status of the host.
When the external power is cut off, the system will send SMS “Power changer off” to inform. When the external
power resumed, the system will send SMS “Power changer on” to inform.
How to use remote controllers
Disarm
Out Arm
Alarm
Home Arm
There are four buttons on the remote controller:
Out Arm key. Press this button, the signal LED flash slowly in orange for 10 seconds, system is in arm wait status. 10
seconds later, the signal LED flash slowly in green, system is in out arm status now. You can set out arm mode when no
one is at home, all the detectors at home will be in working mode.
Home Arm key. Press this button, the signal LED flash slowly in orange for 10 seconds, system is in arm wait status.
10 seconds later, the signal LED will flash quickly in green, system is in home arm status now. You can set home arm
mode when there is some one at home, sensors in inner defense zone will be invalid, but sensors in other defense zones
still work normally.
Disarm key. Press this button, all the detectors are disarmed, the light on panel will keep on in green.
Alarm key. Press this button, the light on panel will flash in red; the system will be alarming, and the host will send the
SMS and dial out.
How to add more detectors
You can add more sensors and detectors, such as wireless door sensors, PIR sensors, gas and smoke detectors into the
host.
1) Add sensors ready to work when you set both Out Arm and Home Arm:
When the GSM host begins to be powered on, the status LED light on panel will be red for 20 seconds, this is code
learning mode. You can trigger the sensors or detectors, and the red LED will flash to show it is coded successfully into
the host.
The coding mode ends 20 seconds later automatically, and system enters into working mode, status LED light on panel
will change to yellow, then to green.
2) Add sensors into inner defense zone. (Detectors in this zone are ready to work when you set Out Arm, and will not
work when you set Home Arm)
5
PDF 文件使用 "pdfFactory Pro" 试用版本创建 www.fineprint.cn
When the GSM host begins to be powered on, the status LED light on panel will be red. Push the reset button for one
second, the status LED light will light up in orange for 20 seconds. This is code learning mode of inner defense zone.
You can trigger the sensors or detectors, the LED will flash in red to show it is coded successfully into inner defense
zone.
For above operation, the host will exit code learning mode 20 seconds later automatically, and enters into working
mode, the light on panel changes to orange to search for GSM network, then to green.
Note: If there were 4 wireless sensors in the host, stand for zone 1 to zone 4, then the new added sensor will be 5th
zone in the host.
How to cancel the lost detectors?
In case some of the coded detectors are lost, you can cancel the coded information of this detector so that it can not
control your alarm system. Follow the below operation to reset the alarm system:
Keep pressing the reset button, then power on the system. Siren beeps once or LED flashes once, it shows reset is
successful. All registered detectors have been deleted. You can register them again with the above mentioned process.
System reset will not change SMS message.
SOME NOTES:
1) About (Status) light
(SIGNAL) light keeps on red in 20 seconds after the host is powered on, wireless detectors can be coded into the host
this time. The light flash in red if coded successfully. 20 seconds later, (SIGNAL) light flash in orange to show it starts
to search for GSM network. If (SIGNAL) light still flashes in orange, it shows SIM card is fixed incorrectly or GSM
network is poor. If (SIGNAL) light still on in green, it shows no name or phone numbers in SIM card. If every thing is
ok, (SIGNAL) light will flash slowly in green (out arm mode) or flash quickly in green (home arm mode), or keeps on
in green (disarm mode). If alarm happened, (SIGNAL) light will flash in red and start to dial out and send SMS.
2) About (Speaker) light
If the host speaker is in working mode, the output 3 will be on, showing you can talk or speak to scene.
3) About (Alarm) light
When this light’s on means wireless scene alarm siren will alarm,if the light’s off,which means the wireless scene alarm
siren won’t alarm.(You can connect extra wireless siren to this system by code command).
6
PDF 文件使用 "pdfFactory Pro" 试用版本创建 www.fineprint.cn
4) About (MONINTOR) light
If the monitor function is opened, the monitor light will be on. If the monitor function is closed, the monitor light will
be off.
How to install
1)Installation of the Host
a. Try to install the host in the center of the defense zone and prolong the antenna for getting more wireless signal
receiving distance.
b. The installation position should be far away with huge metal objects and wireless devices.
C.this host used for detecting if someone moves within in a certain place. Fix it on the wall, 2—2.2meters high and you
should adjust the position to make it face to the defense zone.
NOTE:
a.Adjust the detecting angle, try to make the detecting window plumb to the direction of people’s walking.
b.Keep away from the heat or air-conditioner blowing and air convection area(close the window & door when alarm the
detector)
c.Make the obstacles and floating objects away from the detecting area, such as the clothes, durtain and flowers.
d.Make the detector steadily installed, without any shake and trembling.
e.Keep away from the direct sunlight irradiation.
f.If the light in the PIR keep on, it shows battery fails. So please replace it as soon as possible.
2) Installation of Door Sensor
We define the Magnetic door/window contact for 2 parts : part A and part B. First pack the battery into the part A ,
and then according to the show of sketch map to fis part A and part B (with screws) on the monitored door/window. It is
7
PDF 文件使用 "pdfFactory Pro" 试用版本创建 www.fineprint.cn
better if the distance between them is closer (≤15mm between part A and part B )
NOTE:
a. Magnet should be close to signal status and make the transmitter box and magnet as close as possible (<10mm).
b. In order to get the best receiving distance, you should pull the antenna and make it upwards.
c. If the indicator lights of door sensor are still blinking, it shows battery fails. So please replace it as soon as possible.
Standard components and optional available components
The following sensors can be optional:
-Additional wireless products
Optional sensors/detectors are packed separately. It includes remote controllers, wireless PIR, wireless gap sensor,
wireless gas detector, wireless smoke detector, panic button, baluster, etc. You may purchase according your specific
requirements
8
PDF 文件使用 "pdfFactory Pro" 试用版本创建 www.fineprint.cn
SOME TECHNIQUE PARAMETER
1) Static current:20mA
2) Power:9V-12V DC
3) Working temperature:-20℃- +85℃
4) GSM850/900/1800/1900MHz band
5) Receiving code: ASK
6) Frequence:315/433/868/915MHZ
7) wireless distance: 100 M
8) wireless detectors:16
9) wire detectors:3
Outer Alarm Siren
Volume: 110 dB
Working Condition: Temperature –10 ℃+ 40 ℃
Humidity ≤ 90% rh
Wireless Gap Detector (Door / Window Contact)
Power Supply: DC12V (inner 12V battery)
Static Current: ≤20 mA
Transmission Current: ≤15mA
Transmission Frequency: 315/433MHZ±0.5MHZ
Transmission Distance: No obstacle 80m
Internal Distance: 15 mm
Working Condition: Temperature –10℃+ 40 ℃
Humidity ≤ 90% rh
Wireless P.IR Detector
Power Supply: DC9V (inner 9V battery)
Static Current: ≤100 mA
Transmission Current: ≤20mA
Transmission Frequency: 315/433MHZ±0.5MHZ
Transmission Distance: No obstacle 80m
Detective Speed: 0.3 - 3m/s
Detective Distance: 5 - 12m
Detective Range: Horizontal 110° Vertical 60°
Working Condition: Temperature –10 ℃+ 40 ℃
Humidity ≤ 90 rh
Remote Control
Power Supply: DC12V (inner DC12V battery)
Transmission Current: ≤15mA
Transmission Frequency: 315/433MHZ±0.5MHZ
Transmission Distance: No obstacle 80m
9
PDF 文件使用 "pdfFactory Pro" 试用版本创建 www.fineprint.cn