1
11.4.3 Spring Mass Models
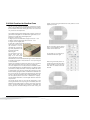
To make realistic 3D models of deformation of materials like
paper, a spring-mass physical model has been implemented.
The spring mass model is only used if more than 1 slice is applied, and in combination with a rectangular grid (although
warping is NOT used here)
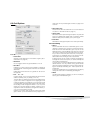
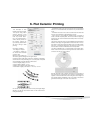
• Slice Material Properties
The Slice Material Properties define how the material will behave.
The Stretch, Shear and Bend properties allow to define how
strong the force will be to stretch, shear or bend the material
between two slices. The values range from 0 (rubber balloon)
to 100% (paper).
The pressure defines the pressure inside the volume between the slices.
In between the different slices, the stretch, shear and bend
properties of the material will be the linear average of those
of the adjacent slices. The pressure will be the square root of
the product of the pressure values of the adjacent slices.
• Vertical Spring Mass Model
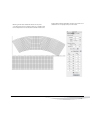
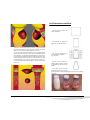
To create a Vertical Spring Mass Model, the slices need to be
placed next to the chosen grid (as it is for slices with cups,
see above).
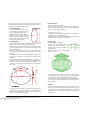
The start position of a slice is the top center of the slice. This
Start position point needs to be positioned vertically between
the top and the bottom of the grid. Slices with a start position
point outside of the grid, will be ignored.
The vertical position of the Start position point will be rounded to the nearest grid position, and define the shape and material properties of the grid at that point.
The slice will be scaled internally so that the circumference of
the slice matches the width of the grid at that position.
This means the original size of the slice does NOT have any
influence on the result !
The design will then be wrapped counter-clockwise around
the slice, starting at the Start Position point.
The different Slices will be positioned at their vertical location,
and placed with their center of gravity exactly above each
other.
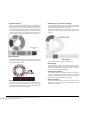
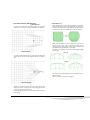
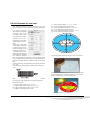
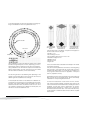
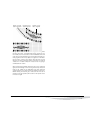
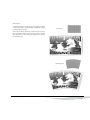
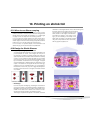
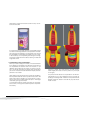
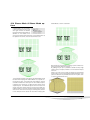
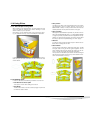
The illustration underneath shows the original slice objects in
ArtPro (original), a 3D representation on how they are placed
on top of each other (3D) and a top view. You can clearly see
the center of gravity (gray square) of every object is placed
on top of each other. The Start Position point is indicated in
red.
In between these slices, the shape will be extruded from one
slice to another, using the Stretch, Shear, Bend and Pressure values.
Above the top slice and below the bottom slice, there is no
spring-mass model applied.
• Horizontal Spring Mass Model
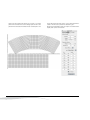
To create a Horizontal Spring Mass Model, the slices need to
be placed above or below the chosen grid.
The start position will be the left center of the slice, and the
grid will be wrapped clockwise around the slices starting at
the start position point.
The rest of the model is analogous to the vertical model.
— p. 43 —
PowerWarp on ArtPro 8.6