1
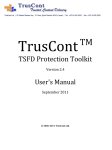
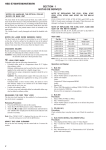
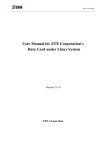
ZTE AC8720 Table of Contents Introduction ............................................................................................................................................................ 3 Know Your Device................................................................................................................................................. 3 System Requirements ......................................................................................................................................... 4 Technical Specifications ..................................................................................................................................... 5 Installation Guide For Windows ..................................................................................................................... 5 Activation ................................................................................................................................................... 9 Using The Interface ............................................................................................................................. 10 Un-install ................................................................................................................................................. 18 Troubleshooting ................................................................................................................................................. 19 INTRODUCTION Thank you for choosing AC8720 CDMA2000 1X Wireless USB Modem (hereinafter referred to as USB Modem) of ZTE Corporation The USB Modem equips with a standard USB interface and supports CDMA2000 1X network. In the area where there is signal, it allows you to go surf the Internet, send & receive short messages, and make & receive phone calls. The pictures in this guide are only used to demonstrate your USB Modem’s functions, so they are maybe different from what you see on your USB Modem. Please refer to your USB Modem if they are differences. This guide will assist you in installing USB Modem quickly and in getting started to use it. You can click the “Help” icon in the main window to read the help document. KNOW YOUR DEVICE 1. Appearance 2. Operation guide of Data Cable Generally, the USB Modem could be directly connected with USB port. You could also connect the USB Modem with PC by using the accompanying data cable, as shown in the following figure. Connect Interface with USB Modem, and interface with PC's USB port. If the power supply from USB port is insufficient, connect both interface and with USB port together. SYSTEM REQUIREMENTS The USB Modem supports the following operating system: Windows 2000/XP/Vista/7 MAC OS 10.5.x / 10.6.0/10.6.1/10.6.2 Linux Ubuntu 8.04/9.04/9.10 Fedora 9/10/11/12 OpenSuse 11.1 PC minimum configurations: CPU Pentium-II/233MHz USB interface 2.0 (USB1.0 and 1.1 compatible) Optical Drive CD-ROM (for installation only) Memory 64 MB 50 MB (used for installation of application) Disk Space TECHNICAL SPECIFICATIONS Technical Standard: CDMA2000 1X USB Interface Standard: USB 2.0 Full Speed Data Rate: 153.6kbps Frequency Band: 800 MHz Dimensions: 91 x 25 x 11 mm Weight: 25g INSTALLATION GUIDE FOR WINDOWS Please connect USB Modem to PC through USB interface. You could use the data cable to connect. Find “setup.exe” in the USB Modem CD-ROM, double-click it to display the Welcome picture, and then click “Next”. Select the location where you want the program to be installed, and then click “Next”. Select Start Menu folder, and then click “Next”. When you see the window below, please click “Install”. Please wait for installation. Please insert the USB Modem into USB interface if the system prompts you to insert the hardware. (If it has been inserted, please unplug it and insert again.) The system shall find the new hardware and install the driver automatically. This may a few minutes. The driver is installed successfully. Pleas click “OK”. Click “Finish” to close the last screen of the wizard. Now you can start running USB Modem application. Note: Please connect the USB Modem and PC with USB extension cable under weak signal to obtain the optimal performance. If necessary, adjust the USB Modem's position and antenna. ACTIVATION After the application is installed successfully, the application icon will appear on your desktop. In order to access internet, please activate the USB modem first. Please click on the icon to activate the modem. The following screen appears. Depending on the choice of service type, choose Prepaid/Postpaid. Enter the 14-digit PIN number which will be available on the “Activation Card/Get Connected Card” by scratching the silver strip. On successful activation, you will see a prompt informing you of the same. In case activation fails, retry after sometime USING THE INTERFACE After the application is installed successfully, the application icon will appear on your desktop. Double-click this icon or select from Start -> Programs ->(Appropriate Application). Run the application to display the user interface. The icons on the interface are used to access the function, which indicate as below: Open URL Service Voice Call Call Log SMS NetConnect NetConnect Log Phonebook Settings Help Status Bar: 1X indication Call indication Signal strength indication, the more bars there are, the stronger the signal is Missed call indication CDMA network unavailable Unread message indication Connection indication Inbox full indication Sleep indication No R-UIM card inserted indication Roaming indication R-UIM card inserted indication Note: Some features like Voice Call, Call Log, SMS, and Phonebook may not be supported by your USB Modem; the corresponding icons will not appear in the main window. 4. OPEN URL Click button to directly connect the URL you set in “Settings”. For details on the URL settings, please refer to Chapter “Settings”. 5. SERVICE Click icon to enter the value-added services such as Google searching. 6. VOICE CALL (If this feature is not supported by your USB Modem, please skip over this chapter.) Click to enter Voice Call interface. Make a call Click the digits in the right side of the interface, or input the digits directly from keyboard. Press button or press “Backspace” to delete the previous input digit; press button or press “Esc” to clear all the inputs. Click button in the right side of the interface or press “Enter” to make a call. Receive a call When there is an incoming call, your computer will alert and the incoming caller ID will appear on the interface. Click button in the right side of the interface or press “Enter” to receive the call. Click button or press “Esc” to reject the call. Redial the latest outgoing call Click button in the right side of the interface. Call Waiting During a call, you could select to answer the second incoming call, and then you could switch between the two incoming calls. Please firstly apply for this service from your local telecom operator. During a call, if there is a new incoming call, a pop-up window will prompt you that you have the second incoming call. If you select to answer, please click “Accept waiting call” button. The previous call won’t be ended, but temporarily paused. You could switch between two incoming calls by clicking “Switch call”. Three-way Call This function allows for the call among three parties. Please firstly apply for this service from your local telecom operator. You need set “Show 3 way call button during calling”. Please perform the setting according to “Settings”. You could click “Dial second call” button during a call, input the third-party number in the pop-up window, and then press “OK” button to call the third party. In this case, the original call won’t be ended, but temporarily paused. If the third party answers the call, click “Start conference” to enter the conference call. During three-way conference call, click “Hangup second call” button to end the conference call, and return to the original call. 7. CALL LOG (If this feature is not supported by your USB Modem, please skip over this chapter.) Click icon to view the Call Log. The outgoing/incoming calls are saved in Call Log, including missed calls, incoming calls, outgoing calls, and talk duration. You could select the type you want to view. Missed/Accepted/Called Calls Click button to delete your selected record. Click button to delete all records in Missed/ Accepted/Called catalog. Click button to dial the number. Click button to send a short message to this number. Click button to save this number to the phonebook. Statistic Click button to clear the talk duration. 8. SMS (If this feature is not supported by your USB Modem, please skip over this chapter.) Click icon to enter SMS interface. Send a Message 1.Input the text and the recipient’s number. 2.Input the recipient’s number or click button to select the recipient from phonebook. 3.Add more recipients if you like. 4.Click button to send a message. 5.Click button to save the text into Draftbox. The received messages will be saved in the USB Modem In-box. You could copy the messages from the USB Modem In-box to PC In-box by selecting Copy or Copy All; you could also copy the messages from PC In-box to the USB Modem In-box by selecting Copy. Take USB Modem In-box as an example: Reply Click to reply to the sender. Forward Click to forward this message to other recipients. Dial Sender’s Number Click to dial the sender’s phone number. Save Sender’s Number Click to save the sender’s number into phonebook. Delete Click to delete your selected records. Clear Click to delete all the records in the inbox. Copy Click to copy your selected record into PC. Copy All Click to copy all the records from the USB Modem to PC. 9. NETCONNECT Connect 1. Click icon to set the relevant parameters. For details, please refer to “Settings”. 2. Click to enter the interface. 3. Click . 4. After connecting to Internet, the LED on the interface turns green. Under Connected status, move the cursor to the LED to display the network flow information. Disconnect Click to disconnect from Internet. Under this status, the LED on the interface turns red. 10. NETCONNECT LOG Click icon to view NetConnect Log . Connection records save the previous relevant information including Start at, Duration and Transmit bytes, which will help you to know the status easily. By switching among “List”, “Month” and “Statistic”, you could inquire the records every time, by month or by time. Note:The relevant information contained in connection records are just for user’s reference rather than the charging basis. Delete Connection Records Click button to delete the records you have selected on the interface. Clear Connection Records Click button to delete all the records. 11. PHONEBOOK (If this feature is not supported by your USB Modem, please skip over this chapter.) Click to view the Phonebook. You could select to save the contacts in the PC, Normal (USB Modem), R-UIM card and Emergent. Take “Save the call history in PC” for example in the following: Add Click then input the contents and select “OK” to add a new contact. Edit Click then edit the contents and select “OK” to edit the contact information. Search for contacts Click to search for the contacts by name or number. Delete Click to delete your selected contact. Delete All Click to delete all the contacts. Send messages from the Phonebook Click to compose the text. You could send the message to multiple recipients. Dial from the Phonebook Click to dial your selected phone number. Copy Click to copy your selected contacts to other storage location. Copy All Click to copy all contacts to other storage location. Import the phonebook Click to import the phonebook (*.txt format) in PC to the terminal. Export the phonebook Click to export the phonebook (*.txt format) in the terminal to PC. 12. SETTINGS Click to enter the settings interface. Network Connection Settings Set the network parameters (phone number, username, password), work mode, etc. After the setting, click “Apply” button to save the settings on the current interface. Click “Default” button and then “Apply” button to restore the settings on the current interface to factory default. Note: The default network setup parameters are as below. Different regions may have different network setup parameters, so please consult your local telecom operator. Phone: #777 User: internet Password: internet If your USB Modem does not support some following functions, please neglect relevant description. Other Settings Click “Options” to switch the interface, and you could set URL and language, etc. If you want to use conference call, please select “Show 3 way call button during calling”; After the setting, click “Apply” button to save the settings on the current interface. Click “Change Password” button to set lock device. The password is required when you start the application. The setting has nothing to do with “Default” button. Click the button “Enable Pin”. PIN code is needed when the application is started. The setting has nothing to do with “Default” button. Click “Default” button and then “Apply” button to restore the settings on the current interface to factory default. Select ring tone After clicking “Ring”, you could set different ring tones for Unconditional forwarding, No answer forwarding, Busy forwarding and Call waiting. After the setting, click “Apply” button to save the settings on the current interface. Click “Default” button and then “Apply” button to restore the settings on the current interface to factory default. Supplementary Services After clicking “Service”, you could set “Busy Forwarding”, “No answer forwarding”, “Unconditional forwarding”, “Call waiting”, etc. Double-click the selected option to modify the service number and forwarding number. After the setting, click “call” button to send the corresponding request to the network system. After the setting, click “Apply” button to save the settings on the current interface. Click “Default” button and then “Apply” button to restore the settings on the current interface to factory default. 13. HELP Click button to view the help file. Click ““Help” button to view the relevant help file; click “Help Online and Technical Support“ to enter our company’s website. You could view the software version information under “About”. UN-INSTALL Select Start The System will prompt you to ask whether you want to remove the program. Click “Yes”. Please wait and then click “OK” when un-installation is completed. Programs ZTEMT Uninstall ZTEMT UI. TROUBLESHOOTING Failures Error occurs during the program installation. Open port failed. No signal indicated. Dialing failed Internet connection failure. The installation program can't auto run. (If the USB Modem supports auto setup function.) Causes Solutions The setup file may be damaged. Please download the program at website WWW.ZTEMT.COM and reinstall it. Directly run the software before the USB Modem is plugged in. Close the software, plug in the USB Modem and run it again. The port is occupied by other applications, such as “Hyper terminal”, or the software is already running. Close relevant software and run the software again. Out of the network service area. Make sure it is in the CDMA network service area. Wrong setting of parameters. (Phone, User, Password.) Correct the parameter settings. Consult your service provider for details. Network congestion or failure. Try again later. The USB Modem is already connected. Disconnect and Reconnect. The program has already been installed in current system. Firstly remove the original program and insert the modem again. Autorun function in CD-ROM is disabled because of installation of anti-virus software in the system, or Windows Vista system itself disables Autorun function by CD-ROM by default. Open “My Computer” to enter CD-ROM disk icon, and double-click Setup.exe to install manually. Failures Causes Solutions This is normal. If you want to display CD-ROM disk CD-ROM icon will automatically icon, you could firstly disappear once the program is remove the program and installed successfully. then insert the modem again. No CD-ROM disk icon in “My Computer”. The program is not yet installed, and no other previous version was installed in the system. The driver might be unable to work and the application is unable to run normally if the modem is pulled out and plugged in again when the application is being used under Win2000 operating system (SP4).In this case, the device in device manager will be marked with yellow exclamation mark, and the system must be restarted to run normally. Please restart your computer. Please contact your local operator or product technical support center if CD-ROM disk icon doesn't appear after your computer is restarted. Please download the patch from the following web site and install it. The operating system needs installing Update Roll 1 patch for Win2K SP4. http://www.microsoft.com /downloads/details.aspx?fa milyid=B54730CF-88504531-B52BBF28B324C662&displaylan g=en