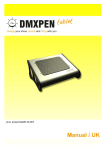
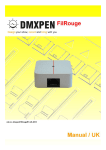
Download DMXPen Live User Manual
Transcript
Table of Contents
Introduction............................................................................ page
3
Warnings................................................................................. page
4
Technical Specification............................................................. page
5
Setup / Connections................................................................. page
6
Description.............................................................................. page
8
Functionality............................................................................ page
9
Configuration........................................................................... page
11
Selector Switch DMX recording mode ....................................... page
16
Selector Switch ArtNet recording mode .................................... page
17
PenSuite Recording Mode ........................................................ page
17
Selector Switch Playback Mode ................................................ page
18
MIDI Playback Mode ............................................................... page
19
PenSuite Playback Mode........................................................... page
19
Recording Session Handling ..................................................... page
20
Quick Manuals ........................................................................ page
20
Warranty................................................................................. page
20
Maintenance and Cleaning....................................................... page
20
Introduction
Thank you for your purchase of this DMXPen series product. The
correct use of this product, will ensure functionality, long life and
will avoid product failure.
Please read this manual carefully and be sure to understand the
information provide to ensure safe and reliable operation. A
through knowledge of the product is helpful before attempting to
using it.
Manual – US
3
DMXPen Live
Warnings
1.
This manual describes the DMXPen Live operating functions. The user must
operate the product according to the performance specifications described
in this operation manuals.
2.
While every effort has been made to ensure that the information in this
manual is accurate and complete, we would appreciate that you bring to our
attention any errors or omissions.
3.
Maintenance, inspection, and replacement of parts must be performed only
by authorized personnel.
4.
We reserve the right to change the specifications of the hardware and
software described in this manuals at any time and without prior notice.
5.
After opening the package, please make this check:
• The received product corresponds with the ordered one.
• No part are missing on the received product.
• The product is not damaged.
• Contact immediately your DMXPen distributor in case of problem.
Manual US
4
DMXPen Live
Technical Specifications
DMXPEN Live is a portable product and is supplied with an XLR Male-Male adapter, a
USB-MicroSD reader, a 2 GB MicroSD card and a power adapter.
Technical Specification
Dimension ( L x W x H )
5.4 x 1.2 x 2 in (138 x 30 x 52,5 mm)
Weight
2.65 oz (75 g)
Housing Type
Satin-Finished black plastic
10Base-T IEEE 802.3 Ethernet Interface
USITT DMX512 Interface
General MIDI Interface
Manual Recording and Playback control through 25 position knob
One complete DMX512 universe recording / playback
One complete ArtNet universe recording / playback
ArtNet to DMX / DMX to ArtNet Conversion
Remote Playback control through General MIDI Port
Automatic Loop Handling
2GB microSD card
XLR M/M adapter and microSD Card reader included
Degree protection
IP 30
Operating Relative Humidity : from 30% to 85% without condensation
Operating Temperature
-5°C + 50°C
Power Adapter (included)
9 VDC – 500 mA
Power Supply Requirement
250 mA @ 9 VDC
Setup / Connections
2
1
3
6
1.
2.
3.
4.
5.
6.
7.
DMXPen Live
XLR M/M Adapter
MIDI Connection
Ethernet Connection
MicroSD Card
Power Supply
MicroSD/USB Adapter
7
5
4
DMXPen Live can be connected to a PC or Lighting Console in two ways:
1. Direct connection using an Ethernet cross cable
2. Through HUB connection using an Ethernet patch cable
Setup / Connections
Figure 1: Direct connection to a PC using a cross cable
Figure 2: Connection to PC through HUB using patch cable
With the device powered and connected, the Link LED will light red to confirm
a correct connection.
Manual – US
7
DMXPen Live
Description
DMXPen Live is a portable device with the following features:
–
–
–
–
–
–
–
DMX512 Signal Recording and Playback
ArtNet Signal Recording and Playback
ArtNet → DMX Conversion
DMX → ArtNet Conversion
Recording and Playback remote control through Ethernet port
Playback remote control through MIDI port
Recording and Playback control through a 25 position knob
Briefly the DMXPen product line mission is record and carry DMX shows:
“Design your show, record and bring with you”.
Why recording? The first goal of a professional light programmer is to select a
Lighting Console and learn to use it well, because this means freedom of
expression and greater productivity.
The DMXPen products range improve this concept taking care of recording
what the light programmer has realize while using his/her preferred
equipment.
Why carry? Often the lighting programmer's presence is not necessary during
the show playback, so s/he can program the show and record it so the end
user has only the duty to activate the playback (i.e. trade show stands, retail
spaces, clubs, etc.).
To do this with a Lighting Console, means carrying heavy and expensive
equipment that is usually not so familiar to the end users (i.e. exhibitor,
barman, custodian, etc.).
For all of these reasons the DMXPen products are the right choice because the
DMXPen Live contains only the show engine with a simple user interface, that
can provide show playback at a very low cost.
Manual US
8
DMXPen Live
Functionality
Conversion
Many lighting consoles today are PC based and it is their function to edit the shows and
calculate the light values on a step-by-step, frame per frame rate in real time. Then it is
necessary to transmit these values to the lighting fixtures or dimmers using the
DMX512 protocol. PC's are not provided with DMX512 ports, but in almost most every
case are provided with Ethernet ports, so the connection to the lighting system is
achieved via protocol conversion.
This concept can be also be applied to many lighting consoles that are equipped with
Ethernet ports.
One of the most used protocols for the transport of DMX512 data over the Ethernet is
the ArtNet protocol (designed and copyrighted to Artistic Licence (UK) Ltd). The DMXPen
Live is is a complete ArtNet Node, able to translate ArtNet protocol to DMX512 protocol
and DMX512 protocol to ArtNet protocol.
The Ethernet port availability allow us to:
–
–
–
–
see the light programming activities in real time
develop a device network very easily (we can find on the market a wide range
of Ethernet Hubs, Switch and Access Points that allow us to: make a wireless or
wired ArtNet network).
implement ArtNet on a lighting console without an ArtNet interface (on DMXPen
we have a bidirectional conversion so we can select the DMX→ArtNet function,
connect the DMXPen Live to the console DMX output and obtain an ArtNet
output on the DMXpen's Ethernet port)
analyse a DMX line from a PC
Remember that the DMX→ArtNet conversion is synchronous: each time that DMXPen
Live receive a DMX frame, an ArtNet conversion is immediately performed and
transmitted on the ArtNet port.
ArtNet→DMX conversion can be configured as synchronous or asynchronous. In the first
case each time a DMXPen Live receive an ArtNet frame, a conversion to DMX is
immediately performed and transmitted on the DMX Port.
The DMXPen can alternatively be set to perform an ArtNet frame transmission only in
conjunction with a changing state event; in this case, the ArtNet → DMX conversion is
configured as synchronous.
This features has the advantage to optimize system resources and helps keep the
devices synchronized on the network, but can be recognised by a fixture as a loss of
DMX signal, that in some case can cause an automatic home positioning.
For this reason a asynchronous transmission function has been introduced that allows
the DMX signal to be transmitted at the desired fixed frame rate continuously, regardless
of ArtNet frame reception.
Figure 3: DMX transmission configuration from PenSuite
Recording
On the DMXPen device recording operation is made frame by frame. This means that
each frame received is compressed and stored for both DMX or ArtNet source stream.
Other than the frame content, the frame rate is also measured and stored, allowing an
accurate playback session.
Playback
The playback session, can be started in three different ways:
1.
Through the on board multifunction selector, moving the knob on the desired
position and pressing it. A second press on the knob, stops the playback.
2.
Through the MIDI port, starting the playback as in an instrument preset recall.
3.
From a PC connected through the Ethernet port using PenSuite or other
software able to generate the DMXPen remote control commands.
Once started, the playback will perform an automatic loop of the recorded session. This
means that when the DMXPen transmits the last frame, it will restart from the
beginning.
The playback request is also stored on the non-volatile device memory, so if the power
is lost the playback will restart from the last selected session when power returned.
Configuration
PenSuite is available for downloading at www.dmxpen.com on the PenSuite page , or it
can be found on the microSD card supplied with DMXPen. Using the supplied card
reader, you can plug in the microSD card to PC and use it like an external flash disk. On
the microSD card you can find the product manuals and the PenSuite software that you
can copy on your PC and launch directly.
PenSuite is available in 3 different versions: one Microsoft Windows ® version and two
Apple Macintosh versions, one for MAC OS 10.4 and one for MAC OS 10.5 ® .
Figure 4: microSD plug in on card
reader
Figure 5: card reader plug in on PC
As you can see is very easy to get and run the PenSuite tool, moreover you can use it
with different operating system and you don't need big installation files.
PenSuite is a single executable file, compressed to speed the download operation
through from the internet (.ZIP for Windows version and .DMG for MAC).
Figure 6: microSD browsing
Manual – US
11
DMXPen Live
At start up, PenSuite appear as you see in the picture above. With this software tool the
operator can Configure, Test or Analyse the device.
To allow device configuration, PenSuite has to learn how many device are connected to
the network and who they are.
Clicking on the “Find Node” button, will start the network scanning procedure asking
PenSuite to learn and list the ArtNet devices connected on the network. These devices
will be identified by MAC and IP Address.
Now by selecting the desired device from the node list it is possible to display that
device's configuration in the window on the right side of the screen and connect it with
PenSuite. This means that any configuration edit, action or diagnostic function will be
applied to the selected device.
Device configuration data:
–
Name: Name assigned from the user to the device
–
IP Address: Device IP Address
–
Subnet Mask: Device Subnet Mask that defines the device subnet network
–
Broadcast Address: Destination IP Address for all the subnet network devices
–
ArtNet Port: UDP port used from ArtNet protocol
–
ArtNet Subnet: A group of 16 consecutive universes is referred to as a subnet
and it's range value is 0 to 15.
–
ArtNet Universe: ArtNet protocol handle a maximum number of 256 universe
divided in 16 groups of 16 universe: the ArtNet Universe parameter is the universe
relative to the current group and it's range value is 0 to 15.
–
DMX TX: Allow to select the DMX signal transmission mode. There are 2
possible modes:
•
”DMX TX on ArtNet RX”: selecting this mode, the DMXPen transmits over the
DMX line a frame only when a ArtNet frame is received. In this way the frame
transmission over DMX Line is said to be synchronized with ArtNet transmission (this
mode is suggested to control fast response devices like LED fixtures).
Manual US
12
DMXPen Live
”DMX TX on Fixed Rate”: selecting this mode, the DMXPen transmits the last
received frame continuously at selected fixed rate over DMX line (this mode is suggested
when the host transmits over the ArtNet line only when a frame changes and we have
fixtures that detect the DMX line absence as standby or an error condition, going i.e. to
home position).
–
Data Direction: As indicated from the icon on the middle of PenSuite SetUp
window, the DMXPen can perform ArtNet→DMX conversion and DMX→ArtNet
conversion. The green arrow displays the active mode. By clicking on the icon is possible
to change the conversion data direction. The device multifunction LED displays the data
direction, lighting BLUE for ArtNet→DMX data direction conversion and SKY BLUE for
DMX→ArtNet data direction conversion.
•
Figure 7: ArtNet -> DMX data direction selection
Figure 8: DMX -> ArtNet data direction selection
Each time that a parameter is changed (except data direction changes), a star will
appear to the right side of the parameter data entry and the “Store” button will became
active. This is to remind you to store on the device the new value to activate the
modification.
To help beginning users to easily configure all of the parameters an “Auto Set” button is
provided. This procedure analyses the computer network configuration and calculates a
standard device set up. All that is necessary to activate the new set up is to click on the
“Store” button.
Figure 9: Parameter edit example
Regarding the device IP Address configuration, we can provide an example: imagine a
network composed by three devices: The first device is viewed as the server made up
by a PC running lighting software that generates ArtNet. The second and third devices
are two DMXPens Live. Each DMXPen is to receive the ArtNet signal that is then
converted to DMX512. The DMX output line of each DMXPen is connected to two groups
of fixtures.
IP Address are composed of four sets of numbers separated by a decimal point. For the
purpose of this discussion we will refer to each individual element of the address as A,
B, C, and D from left to right
To realize a network as outlined by the ArtNet specification the A number of the IP
Address has to be common on all devices. We can start by selecting the PC IP Address,
i.e. 2.0.0.100 and a Subnet Mask as 255.0.0.0. After that we know that DMXPen Live IP
Address need the same PC IP Address A number “2” and the same Subnet Mask address
of 255.0.0.0 it then follows that the Broadcast Address is 2.255.255.255. We don't need
any other particulars in the configuration, so we leave the ArtNet port unchanged.
The tables below outline the addressing requirements necessary to create a two
universe network with the PC and two DMXPens.
PC
First DMXPen Live
Second DMXPen Live
IP Address
2.0.0.100
IP Address
2.0.0.101
IP Address
2.0.0.102
Subnet Mask
255.0.0.0
Subnet Mask
255.0.0.0
Subnet Mask
255.0.0.0
ArtNet Port
6454
ArtNet Port
6454
Broadcast
Address
2.255.255.255
Broadcast
Address
2.255.255.255
Subnet Switch
0
Subnet Switch
0
Universe
0
Address Switch
Universe
1
Address Switch
Figure 10: IP Address distribution example
Once this configuration is saved the devices are ready to use.
Refer
to
www.plasa.org
website
for
more
DMX512
www.artisticlicence.com website for ArtNet protocol information.
information
and
Selector Switch DMX Recording Mode
The DMXPen Live is designed to read a DMX signal stream coming from a DMX line but
Manual – US
15
DMXPen Live
the provided XLR connector is a female type that is considered as a DMX output line in
the DMX standard. Because the DMXPen Live DMX port is a bidirectional port it can be
configured as input or output. To record we need to configure it as input and convert
the 5 pole XLR to a male input connector type so it can be connected to a device that
transmits DMX signal. To do this a 5 pole XLR male-male adapter has been provided.
Figure 11: DMX recording set up
After the DMXPen Live is powered up, any running playback can be stopped by pressing
the selector switch. Next it is necessary to ensure that DMX port is configured as an
input. The multifunction LED will display this information by lighting SKY BLUE, if the
light is BLUE, turn the selector switch to the change direction position, the two opposite
arrows, and press the selector switch to confirm. The multifunction LED will light SKY
BLUE indicating that the DMX port is configured as an input.
Figure 12: DMX port selection as input
Then rotate the selector to the show number that you want to assign to your recording
session and press and hold the selector switch for 3 seconds. The multifunction led will
light RED steady state and upon DMX signal presence will blink RED. This will start the
recording session. Pressing the selector again will stop the recording session. If a
recorded session is already present on the microSD card, it will be overwritten.
Manual US
16
DMXPen Live
Selector Switch ArtNet Recording Mode
ArtNet recording procedure is similar to the DMX recording process where the difference
is only in the data direction. In this case the data source is the ArtNet line and the
multifunction LED display in this configuration will light BLUE. Stop any running playback
by pressing once the selector switch. If the data direction configuration is incorrect, turn
the selector knob to the change direction position and press the switch. The
multifunction LED will light BLUE indicating ArtNet input source port selection and DMX
port Output .
Connect the Ethernet cable to the RJ45 connector, and the multifunction LED will light
RED and the Link LED will light RED. The GREEN Act LED will blink while receiving any
Ethernet packets and the multifunction LED will blink RED when an ArtNet frame is
directed to our device when the following conditions exist:
1.
The destination IP Address corresponds to the DMXPen Live IP Address or to the
Broadcast Address configured on the device. In all cases the subnet mask address has
to be the same.
2.
The destination subnet switch and universe number is the same as configured
on DMXPen Live.
If any of these conditions are not true, the multifunction LED will not blink.
As soon as you have confirmed the correct configuration, rotate the selector switch to
the show number that you want to assign to your recording session and press and hold
for 3 seconds. The multifunction LED will light RED in steady state and once an ArtNet
signal is detected it will blink RED starting the recording session.
Pressing the selector again will stop the recording session. If a recorded session is
already present on the microSD card, will be overwritten.
PenSuite Recording Mode
The same recording operation that is performed with the on board selector switch, can
be performed remotely through the Ethernet port using a proprietary protocol provided
by the PenSuite software..
After launching PenSuite and performing the “Find Node” operation we must then select
the data direction, telling the DMXPen Live the data source of the recording session.
Remember that in the ArtNet→DMX data direction, the device DMX port is configured as
output and each frame received from the Ethernet port will be transmitted to the DMX
port.
With the DMX→ArtNet data direction configuration, the device DMX port is configured as
input and each frame received from the DMX line transmitted to the Ethernet port to the
Broadcast Address using the ArtNet protocol.
After the data direction selection, you can use the DMX Show control panel, to set the
show number and to start and stop the recording operation .
Figure 13: Recording/Playback control panel
Selector Switch Playback Mode
The playback start operation is very easy: just rotate the
selector switch to the desired the show number position and
press it. Remember that during playback no need to worry
about data direction as data is sent on both the DMX and
ArtNet ports as outputs: Pressing the selector switch again
ends playback.
During playback, if the show file is present on the microSD
card, the multifunction LED will light GREEN. Otherwise if the
show file associated to the selector position is empty, the
multifunction LED will light RED for few second before
returning to s standby state.
Figure 16: Show playback start
Figure 14: Show selection
Figure 15: Show playback stop
MIDI Playback Mode
The MicroSD card recorded session can be
playback also through the MIDI port using a
normal MIDI device such as a guitar MIDI foot
switch, MIDI keyboard, or other MIDI device.
The DMXPen products are arranged to receive
Program Change MIDI command, used in most
cases from MIDI device to recall a Preset.
The command Preset 1 recall will start show
playback 1, Preset 2 recall will start show playback
2, and so on.
PenSuite Playback Mode
Playback can also be remote controlled through the Ethernet port using a proprietary
protocol provided by the PenSuite software.
Remember that during playback there is no need to worry about data direction as data
is sent on both the DMX and ArtNet ports as outputs: Pressing the “Stop” ends
playback.
During playback, if the show file is present on the microSD card, the multifunction LED
will light GREEN. Otherwise if the show file associated to the selector position is empty,
the multifunction LED will light RED for few second before returning to s standby state.
Figure 17: Recording/Playback control panel
Manual – US
19
DMXPen Live
Recording Session Handling
Recorded shows are stored in the DMXPen Live on board a microSD card as
SHOWxx.BIN named files. Using the USB microSD card reader provided it is possible to
copy, delete, backup, etc. all the recording session files as ordinary archive files.
Figure 19: USB microSD Card reader
provided
Figure18: microSD Card removal
Quick Manual
On the www.dmxpen.com website, you can find additional documentation showing
DMXPen Live operations. You can also find the complete user manual for the PenSuite
software that is briefly introduced in this manual.
Warranty
12 months
Maintenance and Cleaning
No special maintenance operations are required for DMXPEN Live.
Always remember to unplug the device from the power supply during maintenance and
cleaning operation.
It is strongly suggested that backup copies of the show files stored on the microSD card
are made using a PC.
Use only damp cleaning cloth is used to clean the DMXPen Live. Do not use cleaning
solvents or soaps.
Manual US
20
DMXPen Live
www.DMXPen.com
www.plasa.org
www.ArtisticLicence.com
Designed by and Copyright
Artistic Licence (UK) Ltd.


