1
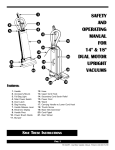
MD17E-MAS-AR
SAFETY, OPERATION
& MAINTENANCE
MANUAL
W/PARTS LIST
This unit is intended for commercial use.
Address: 777 South Street
P.O. Box 2310
Newburgh, NY 12550-0606
TEL:
(800) 835-7812 (845) 565-8850
FAX:
(800) 752-6883 (845) 565-9392
mastercraftusa.com
[email protected]
Read and Follow All Instructions,
Warnings & Cautions Before Using This Machine
This floor sander will afford you many
years of trouble-free operating satisfaction, provided it is given proper care.All
parts have passed rigid quality control
standards prior to being assembled to
produce the finished product. Prior to
packaging, the vacuum was again
inspected for assurance of flawless
assembly.
Your floor sander is protectively
packed to prevent damage in ship-
ping. We recommend that upon delivery, unpack the sander and inspect it
for any possible damage. Only a visual examination will reveal damage
that may have occurred.
If damage is discovered, immediately
notify the transportation company that
delivered your sander. As a shipper, we
are unable to report claims for concealed damage. You must originate
any claims within 5 days.
This manual is for your protection and
information. PLEASE READ CAREFULLY
since failure to follow precautions
could result in discomfort or injury.
Treat this floor sander as you would
any other high grade precision made
product. Dropping, unreasonable
bumping across thresholds and other
misuses may result in a damaged unit
which is not be covered by warranty.
SAVE THESE INSTRUCTIONS
Page 1
Part No 238066 - Printed in USA 06/16/08
IMPORTANT
SAFETY
INSTRUCTIONS
WARNING:
RISK OF EXPLOSION
FLOOR SANDING CAN RESULT IN AN EXPLOSIVE MIXTURE OF FINE DUST AND
AIR. USE FLOOR SANDER MACHINE ONLY IN A WELL VENTILATED AREA.
To reduce risk of fire, electric shock or injury;
Read all instructions before using this floor sander.
When using this electric floor sander, basic precautions should always be followed, including the following:
1) DO NOT leave this floor sander
plugged in when not in use. Unplug
from outlet when not in use and/or
before servicing.
2) Electric shock could occur if
exposed to rain. Store indoors.
3) This is NOT a toy. Close attention is
necessary when used around or near
children.
4) Use only as described in this manual. Use only manufacturer's recommended attachments.
5) DO NOT use with damaged cord
plug. If the floor sander is not working
as it should because it has been
dropped, damaged, left outdoors, or
dropped into water, contact the manufacturer or authorized service center.
6) DO NOT handle the plug or operate
with wet hands.
GROUNDING
INSTRUCTIONS
Electrical equipment must be grounded. If it should malfunction or breakdown, grounding provides a path of
least resistance for electrical current to
reduce the risk of electric shock. This
floor sander is equipped with a cord
9) DO NOT unplug by pulling on cord.
To unplug, grasp the plug, not the
power cord.
7) DO NOT pull or carry by cord, use
power cord as a handle, close a door
on cord, or pull cord around sharp
edges or corners. DO NOT run the floor
sander over the cord. Keep cord away
from heated surfaces.
8) DO NOT put any object into motor
openings.
10) Keep hair, loose clothing, fingers
and all parts of body away from moving parts.
11) DO NOT operate where oxygen or
anesthetics are used.
12) DO NOT use around flammable or
combustible liquids such as gasoline
or use in areas where they may be
present.
13) DO NOT use an extension cord
unless absolutely necessary. If an
extension cord is used, then wire size
must be #14 gauge or thicker and
should not exceed 50 feet in length.
Use only a three-wire grounded extension cord to ensure grounding protection.
14) Replace damaged or worn parts
immediately with genuine original
equipment parts to maintain safety
and to protect your limited warranty.
15) Floor sanding can result in an
explosive mixture of fine dust and air.
Use a floor sanding machine only in a
well ventilated area and with the vacuum cleaner hooked up and operating.
DANGER:
Improper use of the grounding plug can result in
a risk of electric shock.
having an equipment-grounding conductor and grounding plug. The plug
must be inserted into an appropriate
outlet that is properly installed and
grounded in accordance with all local
codes and ordinances.
If repair or replacement of the cord or
plug is necessary, DO NOT connect
the grounded wire to either flat blade
terminal. The wire with insulation having an outer surface that is green with
or without yellow stripes is the grounding wire.
WARNING:
Improper connection of the equipment-grounding conductor can result in a risk of electric shock.
Check with a qualified electrician or service person if you are in doubt as to whether
the outlet is properly grounded.
DO NOT modify the plug provided with the equipment. If it will not fit the outlet,
have a proper outlet installed by a qualified electrician.
Page 2
GROUNDING
METHODS
This electric equipment is for use on a
nominal 120 volt circuit, and has a
grounded plug that looks like the plug
illustrated in (Fig A).A temporary adaptor that looks like the adaptor illustrated in (Fig B & C) may be used to connect this plug to a 2-pole receptacle as
shown in (Fig B) if a properly grounded
outlet is not available.
The temporary adaptor should be
used only until a properly grounded
outlet (Fig A) can be installed by a
qualified electrician.The green color
rigid ear, lug or the like extending from
the adaptor must be connected to a
permanent ground such as a properly
grounded outlet box cover. Whenever
the adaptor is used, it must be held in
place by a metal screw.
Note: In Canada, the use of a temporary adaptor is not permitted by the Canadian Electrical Code.
OPERATION
INSTRUCTIONS
This floor sander is designed to move
from side to side. Raise handle slightly
to guide right.As handle is raised higher, the faster it will move to the right.
Lower the handle to guide left.
Likewise, the more you lower handle,
the faster it will move to the left.
Plug in the power cable. With pad driver in position, adjust handle and lock
into a comfortable operating position.
Place hands on handle grips and
squeeze trigger locks beneath grips.
This will activate the motor and start
pad driver operating.
Begin operating this floor sander at
the closet possible point to an electrical outlet and work away from the outlet. This will prevent running over the
electrical cord.
PAD DRIVER
INSTALLATION
1) Unplug power cable and LOCK
handle in upright position.
2) Tilt the floor sander back until the
handle is laying on the floor and
underside of the machine is fully
exposed.
3) Holding the pad driver in both
hands straddling the motor with your
back to the handle, bend over and fit
the three slots of the clutch plate over
the three lugs of the drive plate.
4) Turn the pad driver counterclockwise as far as it will go.It is now seated
and ready for operation.
To Remove:
Disengage the clutch plate slots from
drive plate lugs by turning clockwise.
CAUTION:
Disconnect wall plug before leaving floor sander unattended to prevent accidental startup.
DO NOT operate this sander without brush or pad driver and pad in place.Never attempt to lock
pad driver on floor sander by positioning (JUMPING) running floor sander on unattached pad driver.
DO NOT leave a plugged in floor sander unattended.
Page 3
CHASSIS
ASSEMBLY
DRAWING
Page 4
CHASSIS
ASSEMBLY
PARTS LIST
__________________________________________
Ref
No
Part Description
Qty
Part
No
__________________________________________
1
Motor Canopy w/Stud
1
353132
2
Canopy Bumper
1
441635
3
Capacitor Cover
1
215244
4
Strut Support
1
354570A
5
3 Idler Gear Box Only
1
415642
6
Canopy Bumper
1
468258
7
.37-16 Nylok Nut
2
480789
8
Handle Tee
1
234265
9
3
2
353221
10
1” X 5” Grey Wheel
2
357766
11
Spring Washer
2
353248
12
Metal Straight Pin
2
461776
13
.37-16 X 21/2 ” Hex Bolt
2
480290
14
Pop Rivet
3
318906
15
Hose Connector w/Rivets
1
310999
16
Circle Gasket
1
320986
17
E-Clip Retainer
4
368946
18
#6 - 32 X .75 Screw
2
482188
19
Flat Washer
2
369519
20
#6 - 32 Hex Nut
2
377171
/8 ” Flat Washer
21
Velcro w/Peel & Stick
1
468231
22
Velcro w/Brush Strip
1
491926
23
1
4
219290
24
.25 Lockwasher
4
342858
25
17” Apron
1
227587
26
Apron Handle
1
463302
27
.25-20 X 1/2 ” Screw
4
479861
28
1.5 HP Motor
1
415839
29
1.5 HP Motor & Gear Box
1
469580
/4 -20 X 3/4” Screw
__________________________________________
Page 5
HANDLE ASSEMBLY
DRAWING
Page 6
HANDLE ASSEMBLY
PARTS LIST
__________________________________
Ref
No
Part Description
Qty
1
Switch Box Cover
1
2
#12-24 Nut w/Lockwasher
3
3
Ribbed Handle Grip
2
4
Handle Bar
1
5
1
2
6
Roll Pin
4
7
Extension Spring
8
#8-32 X 3/8" Screw
9
Part
No
Ref
No
Part Description
376647
23
Strain Relief
1
352705
376744
24
#12-24 Hex Nut w/Lockwasher
3
376744
324744
25
Orange Electric Wire Connector
1
398985
376612
26
39” Handle Tube
1
353086
376701
27
0.31 - 18 X 12/3” Hex Screw
2
232408
383139
28
Coiled Spring
2
367184
2
376671
29
Wing Nut
1
380490
2
367389
30
3
1
353221
__________________________________
/4 X 11/4 " Trigger Pin
__________________________________
Qty
Part
No
__________________________________
/8 ” Flat Washer
#6-32 X 1" Switch Screw
2
335576
31
U-Clamp
1
376051
10
25 AMP Micro Switch
1
469629
32
11/2 ” Swivel Hose Connector
1
349445
11
Cord Clamp
1
342890
33
Plastic Grommet
1
477885
12
#6 Internal Tooth Washer
2
355224
34
Pop Rivet
8
318892
13
Leaf Spring
1
335584
35
50 Ft 14/3 Power Cord
1
376809
14
Trigger Lock Spring
2
383147
36
11/2 ” Swivel Hose Connector
1
349445
15
Plastic Trigger
2
385654
37
.37-16 X 3.37 Bolt
1
380504
16
Trigger Kit
2
386839
38
Clamping Lever
1
380520
17
Trigger Lock
2
390119
39
Lever Pin
1
382434
18
#6-32 X 1/4" Screw
4
349402
40
Metal Cap
1
380555
19
Reinforced Plate
2
387169
41
Sq Hole Flat Washer
1
382426
20
#12-24 X 17/16 " Screw
5
376760
42
.31 - 18 Hex Lock Nut
2
354791
21
Switch Box
1
376620
43
.319ID, .625 OD, .250L Spacer
2
232394
22
#12-24 X 1/2" Screw
2
312746
__________________________________
__________________________________
Page 7
HANDLE
ADJUSTMENT
The handle adjustment is controlled
by a lever in the rear of the machine at
the base of the handle.
WARNING:
To avoid damage to the equipment or personal injury:
NEVER turn sander ON with the handle in locked upright position.
NEVER make any handle adjustments unless the
motor/chassis base is sitting upright, flush to the floor.
To Adjust The Handle:
1) Pull up on the upper portion of the
lever to release handle.
2) Pull the handle back to the appropriate operating position.
3) Step down on the lever to lock the
handle into position.
When transporting or attaching the
pad driver the handle MUST be
LOCKED in the upright position.
CARE &
MAINTENANCE
Read this manual completely before
operating the floor sander. It is important to follow instructions in this manual to prevent the possibility of injury or
damage to the user and/or sander.
When using floor pads, to achieve the
best results use clean pads frequently,
changing them as they load up.
Always remove pad and driver assembly when storing the sander.
1) When not in use, power cord should
be wrapped around cord hooks for
storage.
3) After each use, wipe off all of the polished and painted areas with a clean
cloth.
A) Adjust by turning pad 1/3 turn, then
reinstall on sander.
2) With the floor sander unplugged,
check the power cord for any breaks in
the wire. Breaks will most likely occur
near the plug or switch. Any breaks
should be repaired or replaced immediately.
4) When sander is not in use, remove
pad driver, wrap power cord around
cord hooks and store in a dry area.
TROUBLE
SHOOTING GUIDE
If the machine wobbles or vibrates:
B) Inspect the pad driver for warpage
or out of round. Lay floor sander down
on handle with pad driver in place.
With sander running, observe if pad
driver appears to wobble or is out of
round. Replace if this problem occurs.
WARNING:
Always disconnect power cable from electrical outlet when
working on the floor sander
PROBLEM: Motor won’t run.
Possible Cause
Possible Solution
1. Blown fuse or tripped circuit breaker
2. Defective switch.
3. Defective power cord.
1. Replace fuse or reset circuit breaker.
2. Replace switch.
3. Replace power cord.
PROBLEM: Floor machine runs slow.
Possible Cause
Possible Solution
1. Low line voltage.
1. If voltage is under recommended minimum, check size of
wiring from main switch. If okay, contact power company.
PROBLEM: Noisy machine.
Possible Cause
Possible Solution
1. Defective motor or gear box.
1. Contact the manufacturer or authorized service center.
Page 8
Part No 238066 - Printed in USA 06/16/08