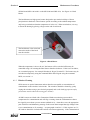
1
SWS-050 SWS-100 SWS-200 SWS-250 i PROPRIETARY NOTICE The information contained in this manual (including all illustrations, drawings, schematics and parts lists) is proprietary to BIRAL. It is provided for the sole purpose of aiding the buyer or user in operating and maintaining the instrument. This information is not to be used for the manufacture or sale of similar items without written permission. COPYRIGHT NOTICE No part of this manual may be reproduced without the express permission of BIRAL. © 2014 Bristol Industrial and Research Associates Limited (BIRAL) Biral – P O Box 2, Portishead, Bristol BS20 7JB, UK Tel: +44 (0)1275 847787 Fax:+44 (0)1275 847303 Email: [email protected] www.biral.com Manual Number : 105223 Revision : 06D i CONTENTS GENERAL INFORMATION Manual version ...........................................................................................................i Contents list .............................................................................................................. ii Figures and Tables................................................................................................... iii The sensors covered in this manual ..........................................................................iv Features of the SWS sensors ..................................................................................... v Customer satisfaction and After Sales Support ........................................................vi Contacting Biral .......................................................................................................vi Three year warranty................................................................................................ vii If you need to return the sensor .............................................................................. vii CE Certification – Safety........................................................................................ vii 1 SENSOR SET-UP .................................................................................................... 1 1.1 1.2 1.3 1.4 1.5 1.6 2 STANDARD OPERATING DATA ..................................................................... 31 2.1 2.2 2.3 2.4 2.5 3 Calibration Check ....................................................................................... 55 Sensor Re-calibration ................................................................................. 59 Precipitation Amount Calibration............................................................... 61 PRODUCT OVERVIEW...................................................................................... 62 6.1 6.2 6.3 6.4 6.5 6.6 6.7 6.8 6.9 6.10 ii General Checks ........................................................................................... 48 Self-Test Codes .......................................................................................... 50 User Confidence Checks ............................................................................ 51 CALIBRATION PROCEDURES ........................................................................ 55 5.1 5.2 5.3 6 Sensor Commands ...................................................................................... 43 Sensor Responses ....................................................................................... 47 MAINTENANCE PROCEDURES ...................................................................... 48 4.1 4.2 4.3 5 Standard Operating Data Message for the SWS-050 ................................. 32 Standard Operating Data Message for the SWS-100 ................................. 33 Standard Operating Data Message for the SWS-200 ................................. 35 Standard Operating Data Message for the SWS-250 ................................. 37 Data Message Variations For ALS-2 .......................................................... 42 COMMANDS AND RESPONSES....................................................................... 43 3.1 3.2 4 STEP 1 - Unpacking the Sensor ................................................................... 2 STEP 2 - Electrical Connections .................................................................. 3 STEP 3 - Equipment Test ........................................................................... 10 STEP 4 - Configuration Options ................................................................ 12 STEP 5 - Installation .................................................................................. 23 STEP 6 - Test and Commissioning............................................................. 28 SWS-050, SWS-100, SWS-200 and SWS-250 Present Weather Sensors .. 62 Sensor Features ........................................................................................... 65 Present Weather Measurements.................................................................. 66 Visibility Measurements ............................................................................. 66 Precipitation Measurements ....................................................................... 67 Sensor Specifications.................................................................................. 75 Instrument Characteristics .......................................................................... 76 Digital Communication Interface ............................................................... 78 Analog Outputs ........................................................................................... 79 Relay Outputs ............................................................................................. 79 6.11 6.12 7 Sensor Remote Self-Test Capabilities ........................................................ 80 SWS Sensors – external dimensions .......................................................... 81 INDEX .................................................................................................................... 82 LIST OF FIGURES Figure 1-1 SWS-200 in Packing ................................................................................ 2 Figure 1-2 Cable Glands............................................................................................ 3 Figure 1-3 Power and Signal Connections ................................................................ 4 Figure 1-4 Location of J7, RS232/422/485 select ..................................................... 6 Figure 1-5 Relay Connections. .................................................................................. 7 Figure 1-6 ALS-2 Connecting System ...................................................................... 9 Figure 1-7 SWS-050 and SWS-100 Orientation ..................................................... 25 Figure 1-8 SWS-200 and SWS-250 Orientation ..................................................... 25 Figure 1-9 U-Bolt Mounting Method ...................................................................... 26 Figure 4-1 Hood Heater ........................................................................................... 49 Figure 4-2 Transmitter Hood with White Card ....................................................... 52 Figure 5-1 Assembly of Calibration Reference Plaque ........................................... 56 Figure 6-1 SWS-050 and SWS-100 Capabilities .................................................... 62 Figure 6-2 SWS-200 and SWS-250 Capabilities .................................................... 63 Figure 6-3 Precipitation Recognition Matrix .......................................................... 74 Figure 6-4 External Dimensions of SWS Sensors (Dimensions in mm) ................ 81 List Of Tables Table 1-1 Pin connections for power supply ............................................................. 5 Table 1-2 Pin connections for operating in RS232 interface mode ........................... 6 Table 1-3 Pin connections for operating in RS422/RS485 interface mode ............... 6 Table 1-4 Connections for 0-10 V analogue output .................................................. 8 Table 1-5 Connections for 0/4-20mA analogue output ............................................. 8 Table 1-6 Options word (lower byte) ...................................................................... 12 Table 1-7 Relay configuration ................................................................................. 22 Table 1-8 Sensor height above ground .................................................................... 24 Table 1-9 Remote self-test and monitoring check fields ......................................... 29 Table 2-1 SWS-050 Operating data message format .............................................. 32 Table 2-2 SWS-100 Operating data message format .............................................. 34 Table 2-3 SWS-200 Operating data message format .............................................. 36 Table 2-4 SWS-250 Operating data message format .............................................. 39 Table 2-5 METAR codes......................................................................................... 41 Table 2-6 Message extension for ALS-2 ................................................................. 42 Table 3-1 Commands for SWS series of sensors .................................................... 45 Table 3-2 Command R? response............................................................................ 46 Table 3-3 Command T? response ............................................................................ 47 Table 3-4 Sensor responses ..................................................................................... 47 Table 6-1 Visibility measurement capabilities ........................................................ 67 Table 6-2 Precipitation measurement limits ............................................................ 68 Table 6-3 UK precipitation intensity definitions ..................................................... 69 Table 6-4 US precipitation intensity definitions...................................................... 69 Table 6-5 SWS-050 WMO codes ............................................................................ 70 Table 6-6 SWS-100 WMO codes ............................................................................ 70 Table 6-7 SWS-200 WMO codes ............................................................................ 71 Table 6-8 SWS-250 WMO and METAR codes ...................................................... 72 Table 6-9 Sensor specifications ............................................................................... 76 Table 6-10 Instrument characteristics ..................................................................... 78 Table 6-11 Digital communication interface specifications .................................... 78 Table 6-12 Analog output specification .................................................................. 79 Table 6-13 Relay specification ................................................................................ 79 iii General Information The sensors covered in this manual : Sensor Model Capability SWS-050 Visibility Obstruction to Vision SWS-100 Visibility Precipitation type identification 1 Fault relay switch 1 Relay for visibility 1 Relay for precipitation or visibility SWS-200 Visibility Precipitation type identification 1 Fault relay switch 1 Relay for visibility 1 Relay for precipitation or visibility This model has an extra backscatter receiver for: Rain rate Snowfall rate Precipitation accumulation SWS-250 Visibility Precipitation type identification Rain rate Snowfall rate Precipitation accumulation This model will additionally report: 39 weather codes (from WMO Code Table 4680), including Past weather Freezing Fog Ice Pellets iv PATENT COVERAGE The Present Weather Measurement Techniques are protected by the following Patents. U.S. Patent No. 4,613,938 Canadian Patent No. 1,229,240 German Patent No. 3,590,723 RoHS compliant Thank you for choosing Biral as your supplier of present weather sensors A great deal of time has been invested at Biral to offer the best combination of sensor performance and value and almost three decades of experience and knowledge have been incorporated into the SWS series. We are confident that they will provide you with many years of accurate operation. Features of the SWS Sensors: - full date/time stamp in data string provided by the real time on-board clock. - flexibility to connect to a wide range of data collection/processing units with a choice of serial, analogue and relay switching outputs. - easy installation due to its light weight and small footprint. - simple field calibration, automatic sequence can be initiated after fitting calibration plaque. - switching of external equipment based on both visibility and precipitation outputs (ie fog and rain, or fog and snow or 2 different fog thresholds). (SWS-100 and SWS 200). - reports WMO 4680 codes. - reports 35 METAR codes in addition to 39 WMO 4680 codes (SWS-250 only). There are currently four sensors in the SWS sensor range. These are the SWS-050, the SW100, the SW-200 and the SWS-250. Any of these can be supplied to be used with the Biral Ambient Light Sensor, model ALS-2. Throughout this manual the term SWS Sensor is used to refer to features common to all these sensors. v Customer Satisfaction At Biral we set our standards high and only your complete satisfaction is acceptable to us. If you believe your experience has not met these standards we would be grateful if you would contact us so we can rectify any issues you may have (equally, if you have any positive experiences you would like to share). After Sales Support Biral offers support by telephone and email for the lifetime of these sensors, even if there has been a change of ownership, so please get in touch if you require help. Similarly, if you have any questions about your new equipment we are only a mouse-click or telephone call away. Our contact details are given below. (NB For your convenience our contact details are also on the label fixed to your sensor) Contacting Biral If you would like technical assistance, advice or you have any queries regarding the operation of the sensor please do not hesitate to contact us. For enquiries and technical support: vi Contact us by telephone on : + 44 (0)1275 847787 Contact us by fax on : + 44 (0)1275 847303 Contact us by e-mail at : [email protected] Three year warranty The SWS Present Weather Sensors come with a three year limited warranty against defective materials and workmanship. If you have any questions about the warranty please contact Biral. In order to help us to assist you please be sure to include the following information: - Model of equipment - Serial number of equipment - Nature of defect - Your full name, address and contact details - Relevant application details and data output - Responses to R? command (see paragraph 3.1.2, page 46) If you need to return the sensor The SWS sensors should give you many years of trouble-free service but in the unlikely event that the equipment proves to be faulty and we have asked you to return the sensor to us please address the equipment to: BIRAL Unit 8 Harbour Road Trading Estate Portishead Bristol BS20 7BL UNITED KINGDOM The customer is responsible for the shipping costs. CE Certification - Safety All Biral’s SWS sensors comply with the requirements for CE marking. Once installed, it is the user’s responsibility to ensure that all connections made to the sensor comply with all Local and National safety requirements. vii Section 1 1 Sensor Set-up SENSOR SET-UP The format of this section is such that it logically follows these recommended procedural steps: Step 1 - Unpack equipment and ensure that all required parts are supplied and identified. Step 2 - Make electrical connection as required for testing and configuration. Step 3 - Power up and test equipment on bench. Step 4 - Configure equipment as required for site installation. Step 5 - Installation including siting considerations, height, orientation, mounting and electrical grounding. Step 6 - Carry out commissioning test procedure. NOTE: Many of the tests specified within this manual require the use of a PC or equivalent. To achieve the two-way serial communication required, Biral recommends the use of a PC running the Biral Sensor Interface Software. If this software is not available, use a terminal program for example Windows® Hyper Terminal™. The Biral Sensor Interface Software is available from our website (www.Biral.com), or contact Biral at: [email protected]. Sensor Set-up 1 Sensor Set-up Section 1 1.1 STEP 1 - Unpacking the Sensor The sensor is packed in a foam filled shipping container and is fully assembled ready for use. The sensor is delivered with: SWS sensor in foam-filled packaging (example shows SWS-200) - U-bolts for pole mounting - 2 off ferrites for cable EMC protection - Documentation - Other optional items you may have ordered Figure 1-1 SWS-200 in Packing Other optional components you may have ordered Calibration Kit The calibration kit in a protective carrying case, containing: a calibration screen, a mounting arm (referred to as the calibration reference plaque when assembled) and 3 grey foam plugs (see section 5, Calibration Procedures, for application). Transit Case A rigid re-usable transit case designed to provide full protection to the instrument for regular shipping. Please note if this is not ordered the sensor is shipped in the standard rugged foam filled box as shown above. Mains Adapter A mains adapter to operate the sensor using mains power. Power and Signal Cables Power and signal (data) cables if you are not supplying these yourself. The length must be specified at time of order. 2 STEP 1 – Unpacking the sensor Section 1 Sensor set-up 1.2 STEP 2 - Electrical Connections ALL ELECTRICAL CONNECTIONS SHOULD BE COMPLETED BEFORE APPLYING POWER TO THE SENSOR 1.2.1 Cables Unless purchased as an option the sensor is not supplied with power and data cables. For the power and data cables we recommend you use screened, twisted pair cables in a suitable outdoor EMC and UV resistant sheath (this is particularly important for the data cables). Screens should be earthed by the customers. 24 AWG stranded (7/32) or solid wire conductors, or equivalent are ideal for the low power requirements of the system, however, the connectors can accommodate wires from 20AWG down to 26AWG (0.5 to 0.13mm2), of solid or stranded construction. Note: For RS232 data configuration, cable lengths above 6m will not work reliably at high baud rates. It is strongly recommended that baud rates no higher than 4800 are used for cable lengths up to 25m. 1.2.2 Cable Glands There are two connecting areas within the instrument, one for the DC power and communications and one for the zero volts relay connections. These relay connections are separate to retain the necessary isolation required for the 230VAC switching capability. 2 small cable glands for cables between 3.5 to 7.00mm diameter 2 larger glands for cables between 4.5 to 10mm diameter Figure 1-2 Cable Glands STEP 2 – Electrical connections 3 Sensor Set-up Section 1 To assist in this four cable glands are provided (see Figure 1-2): - the 2 small cable glands are for cables between 3.5 to 7.00mm diameter - the 2 larger glands are for cable between 4.5 to 10mm diameter Any or all of these glands can be used. The DC power supply can be separated from the signal connection cable, or a single cable can be used for all required connections. If the fault or alarm relays are being used to switch mains voltages, it will be necessary to use cables approved for mains use for these connections which will, in general, require to be separated from the communications cable. Unused Glands Any glands not in use should be sealed with the supplied sealing plugs to retain the integrity of the weatherproof housing. 1.2.3 Connecting the power supply and signal cable The power and signal cables are connected to the instrument using the connector strip along the bottom edge of the main circuit board adjacent to the cable glands. J11 Connect the power cable here J12 Connect the signal cable here A F A L Figure 1-3 Power and Signal Connections This connecting strip is of a lever clamp design. The wire is released by pressing on the lever with a small screwdriver with a flat blade of no more than 2.5mm. 4 STEP 2 – Electrical connections Section 1 Sensor set-up For ease of assembly it is recommended that 24AWG stranded (7/32) or solid wires are used, or equivalent. These are ideal for the low power requirements of the system. However the connectors can accommodate wires from 20AWG down to 26AWG (0.5 to 0.13 mm2), of solid or stranded construction. They require a strip length of 11 mm. Connecting the power supply: All SWS sensors require an input voltage supply between 9 and 36V DC. This is typically 24V DC supply at 3.5W. This will rise to typically 6W if the no-dew window heaters are in use. See Figure 1-3 for the identification of the connector strip. This is split into two sections, a 6-way block labelled J11 and a 12-way block labelled J12. The individual connections are labelled A to F and A to L respectively from left to right. With the power removed from the supply cable, connect the +ve lead to J11/C and the negative lead to J11/D. The negative lead is the internal signal ground reference point. Care must be taken, particularly when long power leads are used, to ensure that this negative supply lead is at near ground potential. If it develops more than 10V DC with respect to ground, damage will be caused to the sensor. NOTE: If an ALS-2 ambient light sensor is being installed with the SWS sensor, these two power leads are to be taken to J1 on the SWS-ALS daughter board, see section 1.2.8. Connecting the hood heaters (optional on SWS-100 and SWS-200) The hood heaters, if fitted, may be used if required. They are wired independently and isolated from the instrument power. These should be powered from a 24V supply of either AC or DC. The SWS-050 and SWS-100 will draw 24W from this source, and the SWS200 and SWS 250 will draw 36W. A higher voltage should not be used as the power will increase above acceptable levels. If a lower voltage is used, the de-icing will be less efficient. The connections are J11/A for the heater supply (switched), and J11/B heater return. See Table 1-1 Pin connections for power supply for full details. Pin connections for power supply Pin Number J11/A J11/B J11/C J11/D J11/E & F Designation Hood Heater Supply (Option) 24VAC or DC Hood Heater Return (Option) 24VAC or DC Power +9 to +36V Supply Power 0V Supply Not Used Table 1-1 Pin connections for power supply STEP 2 – Electrical connections 5 Sensor Set-up Section 1 Pin Connections for RS232 or RS422/RS485 Signal Interfaces The sensors can be operated with RS232 OR RS422 OR RS485 communications. It is not possible to operate both the RS232 and the RS422/RS485 together. If there is to be a long distance between the sensor and its control computer (more than 40 metres), then the RS422 or RS485 configuration should be used and a RS422 communications port installed in the control computer. RS232 may be useable at low baud rates up to 100 m but reliable communications cannot be guaranteed for more than 40 m. See Table 1-2 and Table 1-3 for full connection details. Pin Number J12/A J12/B J12/C Designation RS232/422/485 common/0V RS232 Tx (signals FROM sensor) RS232 Rx (signals TO Sensor) Table 1-2 Pin connections for operating in RS232 interface mode Pin Number J12/A J12/D J12/E J12/F J12/G Designation RS232/422/485 common/0V RS422/RS485 Rx+ (TO sensor) RS422/RS485 Rx- (TO Sensor) RS422/RS485 Tx- (FROM sensor) RS422/RS485 Tx+ (FROM Sensor) Table 1-3 Pin connections for operating in RS422/RS485 interface mode Selection of RS232 or RS422/485 communications To select which output to use, place jumper J7 (see Figure 1-4) onto pins 1 and 2 for RS422/485 outputs and onto pins 2 and 3 to select RS232 outputs. Location of J7 ■■■ 123 Jumper on 1 & 2 – RS422/RS485 Jumper on 2 & 3 – RS232 (as in photograph) Figure 1-4 Location of J7, RS232/422/485 select 6 STEP 2 – Electrical connections Section 1 Sensor set-up 1.2.4 Connecting the relays The unique ability to switch equipment using a visibility (fog) relay and /or a precipitation (rain, snow) relay is a feature of the SWS-100 and SWS-200 sensors. For example you can set relays to automatically switch a speed reduction sign when visibility is below 100 m and then switch an additional ‘danger of aquaplaning’ alert when it rains. These connections are along the right hand side of the main circuit board at the gland end (see Figure 1-5). They are a two-part connector with pins in the circuit board and a removable plug for the connections. It is advised that the plug is removed from the pins to enable the connections to be made to the cable before re-connecting to the circuit board. The connections are of a screw clamp type. Contacts are defined here when relays are not energised RL2 NC RL2 COM RL2 NO RL1 NC RL1 COM RL1 NO FAULT NC FAULT COM FAULT NO NB The Fault relay operates in Failsafe mode - i.e. is energised when there is no fault. Figure 1-5 Relay Connections. Relay contacts are rated 2A, 250V AC. For ease of assembly it is recommended that 22AWG stranded (7/30) or solid wire conductors, or equivalent are used. These are ideal for the low power requirements of the system. However, each connector can accommodate wires from 16AWG down to 26AWG (1.5 to 0.2 mm2), of solid or stranded construction. They require a strip length of 5 mm. Care must be taken to ensure that the voltage rating of the cable is correct for the switching application requirement. If the relays are to be used with mains voltages, protective earth bonding of the sensor housing should be carried out to ensure compliance with all national and local safety requirements. STEP 2 – Electrical connections 7 Sensor Set-up Section 1 1.2.5 Pin connections for 0-10 V analogue output An analogue output representing Meteorological Optical Range (MOR) as a signal between 0 and 10 V is standard on the SWS-100 and SWS-200 sensors. The connections are as follows, Table 1-4. Pin Number Designation J12/H 0-10V Analogue Output (MOR) +ve J12/I 0-10V Analogue Output (MOR) -ve Table 1-4 Connections for 0-10 V analogue output 1.2.6 Pin connections for sensors ordered with the OPTIONAL 4 – 20mA or 0 – 20 mA analogue output current loop An additional analogue output representing MOR as a current between 4 and 20 mA or 0 and 20 mA is available as an option on the SWS-100 and SWS-200 sensors. The connections are as follows, Table 1-5. Pin Number Designation J12/J 0 / 4 – 20 mA Analogue Output (MOR) +ve J12/K 0 / 4 – 20 mA Analogue Output (MOR) -ve J12/L Not Used Table 1-5 Connections for 0/4-20mA analogue output This is a current sourced from the sensor. It is derived from a 10 V digital to analogue output and is not isolated. It should be terminated with a resistance not greater than 500 Ω to enable the maximum current of 20 mA to be available. 1.2.7 EMC Compliance In order to comply with the EMC requirements, in particular the susceptibility to conducted interference, some of the leads connected to the sensor should be fitted with ferrites. If this is not carried out, the sensor could be affected by external electromagnetic fields. The ferrites supplied with the unit should be clipped over the power and the signal leads, between the gland and the connector blocks. These are not required on the relay connections or on the hood heater supplies. 8 STEP 2 – Electrical connections Section 1 Sensor set-up 1.2.8 Optional ALS-2 Connections Any of the SWS sensors can be supplied with an ambient light sensor, model ALS-2. This sensor will be connected directly to the SWS sensor, drawing its power from the sensor supply. If required, the ALS-2 will be fitted with hood heaters which will operate when the sensor hood heaters operate. The output data is automatically integrated into the main SWS sensor data stream, see section 2 Standard Operating Data. The ALS-2 connections are taken to a daughter board which is mounted on the main SWS sensor processor board, in the position shown in Figure 1-6 ALS-2 Connecting System. SWS/ALS-2 daughter board Connection to SWS processer J9 ALS-2 Connector (J2) Wire Colour List SWS Sensor Power Connector (J1) Flying lead connection to enclosure lid (J3) Connection to SWS processor J8 Connection to SWS processor main terminal strip J11 Figure 1-6 ALS-2 Connecting System The SWS sensor power supply is now connected to J1 on this ALS-2 connection board, with the positive and negative leads as marked on the circuit board. The hood heater supply, if used, is still connected to the main processor terminal strip pins A and B and the data connections are not affected. See section 1.2.3 for details. The ALS-2 cable is connected to J2, with the wire colours as shown on the circuit board adjacent to J2. Note, both J1 and J2 have removable (reversible) connection plugs for ease of assembly. Check wire colours against list on board before applying power to the combined system. STEP 2 – Electrical connections 9 Sensor Set-up 1.3 Section 1 STEP 3 - Equipment Test Biral recommends that the equipment is powered and checked on the bench before site installation. This is to ensure that you are comfortable with the functionality of the sensor and to pre-empt any queries that arise before attempting site installation. Note: this procedure assumes a default configuration for the sensor - please check the Calibration Certificate supplied with your sensor for specific configuration details. NOTE: In this test, and in all subsequent sections of this manual, the following convention MUST be observed: ALL COMMANDS SHOULD BE TERMINATED WITH <CARRIAGE RETURN> AND <LINE FEED> (ASCII CHARACTERS 13 AND 10). In this manual this is normally abbreviated to <CRLF>. 1.3.1 Equipment Test Procedure 1. Connect the power pins on the input connector to a local power source (do not turn power source on). Connect sensor earth lug to earth (this may not be necessary but can help prevent communication errors with certain PCs). 2. Connect the signal cable to a PC running the Biral Sensor Interface Software. If this is not available, use a terminal program - for example Windows® Hyper Terminal™. (For RS422/485 sensors a RS422 to RS232 converter must be used). Note: Biral recommends testing to be done with RS232 or RS422 as applicable. When you are confident that the sensor is working it can then be set up for RS485 if required. 3. Configure the terminal program, either the Biral Sensor Interface Software or Hyper Terminal as follows: Default Interface Parameters Baud Rate ........................................................... 9600 Data Bits ............................................................. 8 Stop Bits ............................................................. 1 Parity .................................................................. None Flow Control ...................................................... None (If using Hyper Terminal the options 'Send line ends with line feeds' and 'Echo typed characters locally' in ASCII set up should be checked.) 10 STEP 3 – Equipment Test Section 1 Sensor set-up 1. Turn the local power source "ON". If communications are working the sensor will respond with “Biral Sensor Startup”. 2. Check Data Transmission To Sensor: Send the command R? from the PC terminal to the sensor: The sensor will respond with its Remote Self-Test & Monitoring Message. For example: 100,2.509,24.1,12.3,5.01,12.5,00.00,00.00,100,105,107,00,00,00,+021.0,4063 3. Check Data Transmission From Sensor: If the sensor is NOT in polled mode: Wait for the sensor to transmit a Data Message (approx. 80 seconds from power up). If the sensor is in polled mode: Send the command D? from the PC terminal to the sensor: A Data Message will be transmitted immediately. 4. MOR Calibration check: Carry out the calibration check procedure in section 5.1, page 55 to ensure that the MOR value changes (i.e. the sensor responds to changes in visibility). NOTE: as this calibration check is being carried out indoors the MOR value will NOT necessarily agree with that marked on your calibration reference plaque. NB The sensor is fully calibrated before it leaves Biral. THIS PROCEDURE CAN ONLY BE COMPLETED IF A SUITABLE SWS CALIBRATION KIT AND PC ARE AVAILABLE STEP 3 – Equipment Test 11 Sensor Set-up Section 1 1.4 STEP 4 - Configuration Options There are a number of configuration options available for the user to select. Three options (date and time enable, checksum enable and RS485 enable) are set using a configuration byte of the Options Word, detailed in sections 1.4.1 to 1.4.6. The remaining options are set using a configuration byte of the Operating State word. These are set directly using commands starting with “OS”. Each of these is detailed below in sections 1.4.7 to 1.4.9. 1.4.1 Options Word The options word consists of two bytes. Their current values can be determined by sending the “OP?” command. The reply will be as follows: aaaaaaaa,bbbbbbbb The upper byte, (aaaaaaaa) is used to set internal operating parameters and should not be changed. It will in general be ‘00000000’. For the lower byte, a value is entered as a binary number (1’s and 0’s). Leading 0’s in the value need not be entered. The value is stored in non-volatile memory and the operating configuration when power is applied is that set by the last entered options word. The definition of each bit of this byte is shown below (Table 1-6). Note: the first bit is bit 8, the last being bit 1. Each bit of the lower byte of the Options Word is defined as follows: bbbbbbbb Bit 1: 1 - Add Date and Time to the start of the data message 0 - No Date and Time at the start of the data message Bit 2: Not used Bit 3: 0 - Use temperature sensor value in PW determination This bit should not be changed. Bit 4: Not used Bit 5: Not used Bit 6: 1 - Add a checksum character to all sensor output messages 0 - Don't add checksum character to all sensor output messages Bit 7: 0 - Adjust MOR values in data messages for measured transmitter window contamination. This bit should not be changed Bit 8: 1 - Use RS485 addressable Communications protocol 0 - Do not use RS485 addressable Communications protocol Table 1-6 Options word (lower byte) 12 STEP 4 - Configuration Options Section 1 Sensor set-up To set this word, send command CO to enable changes and then command OPa0b0000c to set the Option Word as required. For example, send OP100000 to enable the checksum with no date and time stamp and not using RS485 (leading ‘0’s are not necessary in this command). Bit 1 (Date and Time enable), Bit6 (Checksum enable) and Bit 8 (RS485 enable) are the only bits which may be set to ‘1’by the user. All other bits MUST be left at ‘0’ for correct sensor operation. The functions controlled by this byte are detailed in sections 1.4.2 to 1.4.6. The Default setting = 00000000 1.4.2 Date and Time Stamp in data string By default the date and time stamp is not included at the start of the data string. This is controlled by the Options Word setting; see Table 1-6 Options word (lower byte). To enable Date and Time stamp The sensor can be configured to generate messages with the date and time string by setting the least significant bit in the options word: Step 1 - Send the command: CO. Step 2 - Send the command: OP1. (Note: to enable checksum and time/date-stamp send OP100001 in step 2). PLEASE BE EXTREMELY CAREFUL IN SETTING THE CORRECT BIT IN STEP 2 AS SETTING THE WRONG BIT WILL RESULT IN THE SENSOR FUNCTIONING INCORRECTLY To check the setting of the options word, send the command: OP? The sensor should respond: 00000000,00000001. To disable Date and Time stamp To disable the date and time stamp, send the command OP0 in step 2 above. To read the current Date and Time Send the command TR? STEP 4 - Configuration Options 13 Sensor Set-up Section 1 The sensor will respond with the date / time message e.g.: FRIDAY ,19\12\14,13:15:25,000 Note: the final ,’000’ is a time calibration figure, set during final test. To set the current Date and Time There are two commands required to set the current date and time: %SD sets the real time clock date. The format of the command is: %SDWDDMMYY where: W - is the day of the week (1..7) with Sunday being 7 DD - is the date (01..31) MM - is the month (01..12) YY - is the year (00..99) The sensor will respond with 'OK'. %ST sets the real time clock time. The format of the command is: %STHHMMSS where: HH - is the hours in 24 hour clock (00..23) MM - is the minutes(00..59) SS - is the seconds (00..59) The sensor will respond with 'OK'. 1.4.3 Checksum to verify message A checksum byte can be included with messages sent by the sensor to verify that noise in the communications link has not changed the message. Generally noise is not a problem and checksum verification is not required. This is controlled by the Options Word setting; see Table 1-6 Options word (lower byte) Note: if RS485 communications are selected then this checksum is not used. By default the sensor is configured at the factory with checksum DISABLED. 14 STEP 4 - Configuration Options Section 1 Sensor set-up To enable checksum The sensor can be configured to generate messages with a checksum byte by setting the sixth bit in the options word: Step 1 - Send the command: CO. Step 2 - Send the command: OP100000. (Note: to enable checksum and time/date-stamp send OP100001). PLEASE BE EXTREMELY CAREFUL IN SETTING THE CORRECT BIT IN STEP 2 AS SETTING THE WRONG BIT WILL RESULT IN THE SENSOR FUNCTIONING INCORRECTLY To check the setting of the options word, send the command: OP? The sensor should respond: 00000000,00100000M. (NB. M is the checksum character). To disable checksum To disable the checksum send the command OP0 in step 2 above. The checksum character is positioned after the message and before the end characters (<crlf>). The checksum value is between 0 and 127, and is the sum modulo 128 (the remainder after the sum is divided by 128) of all the ASCII values of the characters in the message except the end characters. The checksum value is replaced by its bit wise complement if it happens to be any of the following: ASCII 8 (backspace), ASCII 10 (linefeed), ASCII 13 (carriage return), ASCII 17 through ASCII 20 (DC1 through DC4), or ASCII 33 (exclamation point ‘!’). For Message: C1 ... Cm <cksum><crlf> The calculation is as follows: m cksum cn MOD128 n 1 STEP 4 - Configuration Options 15 Sensor Set-up Section 1 IF <cksum> = 8 THEN <cksum> = 119 IF <cksum> = 10 THEN <cksum> = 117 IF <cksum> = 13 THEN <cksum> = 114 IF <cksum> = 17 THEN <cksum> = 110 IF <cksum> = 18 THEN <cksum> = 109 IF <cksum> = 19 THEN <cksum> = 108 IF <cksum> = 20 THEN <cksum> = 107 IF <cksum> = 33 THEN <cksum> = 94 1.4.4 Communications Configuration The SWS sensor can use either RS232C or RS422/RS485 signal voltage levels. The configuration of the sensor is selected by connecting to the appropriate terminal connections and setting the right jumper position, see section 1.2.3 Connecting the power supply and signal cable. If the signal voltage levels for RS422/RS485 are selected, the configuration to select RS422 or RS485 should be set by the user. The following paragraphs provide the instructions for this adjustment and details for setting up the RS485 communication if required. 1.4.5 RS485 Configuration The SWS sensor can be set by the user for either RS422 or addressable RS485 communication protocols. The software needs to be configured to use this protocol. By default the sensor is configured at the factory for RS422 protocol unless specifically requested when ordering. RS485 Protocol Format The RS485 communication protocol is based on the Modbus ASCII Frame Format. Each data request and transfer is configured as follows: Start: ‘:’ (3A Hex). Sensor Address: 2 Character address field. Data: As standard SWS message format, see Section 2. LRC Checksum: 2 Characters - Longitudinal Redundancy Check. End: 2 Characters - Carriage return + Line Feed. Start The ‘:’ (colon) symbol is used as a start flag which is 3A hex. 16 STEP 4 - Configuration Options Section 1 Sensor set-up Sensor Address The 2 character sensor address is defined by the operator for the unit and programmed as specified in the set-up instructions (Section 1.4.6). It can be any numeric value between 00 and 99. It is used by the unit to define the recipient of the message and by the slave to define the source of the message. Data This is a variable length ASCII character string as defined in section 2 for each of the models in this range. The master has a defined range of commands available for the SWS sensor. The SWS sensor has a range of defined data messages. These messages can either be sent as a response to a request for data by the master unit, or sent without any request on a timed basis, according to the instrument user settable configuration. However, it is recommended that a polled system is used in a multi-sensor application as this can avoid most data contention issues through the design of a suitable system operating schedule. LRC Checksum This enables error checking, allowing the master to request a re-send if errors are detected. For RS485 a Longitudinal Redundancy Check (LRC) Checksum is generated on the data. NOTE: This checksum is different from the optional RS232/RS422 Checksum. The LRC is one byte, containing an 8–bit binary value. The LRC value is calculated by the transmitting device, which appends the LRC to the message. The receiving device calculates an LRC during receipt of the message, and compares the calculated value to the actual value it received in the LRC field. If the two values are not equal, an error is implied. The LRC is calculated by adding together successive 8–bit bytes of the message, discarding any carries, and then two’s complementing the result. It is performed on the ASCII message field contents excluding the ‘colon’ character that begins the message, and excluding the <crlf> pair at the end of the message. The LRC byte is converted to 2 ASCII characters and appended to the message. For example, the message: :42D? Checksum is calculated as : ASCII string 42D? BYTE Values (in HEX) 34+32+44+3F Sum is E9 One’s compliment (0xFF – 0xE9) = 0x16 Two’s compliment 0x16 + 1 = 0x17 Checksum is 0x17 (Hex) STEP 4 - Configuration Options 17 Sensor Set-up Section 1 Checksum ASCII characters are “17” Transmitted string will therefore be: :42D?17<CRLF> End All communications will end with the standard 2 characters, carriage return +. line feed <CRLF> pair (ASCII values of 0D & 0A hex). 1.4.6 Sensor Addressing – RS485 sensors only To use addressable RS485 communication each sensor must have a unique address in the range 0-99. By default the sensor address is set to 0. Querying the sensor address To query the sensor address, send the command: ADR? The sensor should respond with the address: e.g. 00. Changing the sensor address To change the sensor address, send the command: ADRxx where xx is a number between 00 and 99. e,g, ADR02 sets the sensor address to 02. The sensor should respond with: OK. Enabling the addressable RS485 Communications The sensor can be configured to use addressable RS485 communications by setting the eighth bit in the options word, see Table 1-6 Options word (lower byte). Step 1 - Send the command: CO. Step 2 - Send the command: OP10000000. (Note: to enable RS485 and time/date-stamp send OP10000001). PLEASE BE EXTREMELY CAREFUL IN SETTING THE CORRECT BIT IN STEP 2 AS SETTING THE WRONG BIT WILL RESULT IN THE SENSOR FUNCTIONING INCORRECTLY To check the setting of the options-word send the command: :00OP?FF. The sensor should respond: :0000000000,1000000073. (NB. :00 is the address and 73 is the LRC checksum character). 18 STEP 4 - Configuration Options Section 1 Sensor set-up To disable RS485 Communications To disable the RS485 communications (i.e. revert to RS422 protocol) send the command: :00OP0FF in step 2 above (or :00OP1FF to enable time/date-stamp). (NB. :00 is the address and FF is the LRC checksum override character, see below). Checksum Override When using addressable RS485 communications, the sensor will disregard any commands that do not have the sensor address or have an incorrect checksum. For a command to be valid, it must be prefixed by :XX (where XX is the address) and have the 2 character checksum on the end. If the checksum character is set to FF then the sensor will accept the message without checking the checksum. This is useful when using programs such as HyperTerminal for diagnostics. For example. A sensor with address 00 to request a data message: Send command: :00D?FF Recommendations When using the sensor on an RS485 network it is recommended that the sensor be set up in polled mode (Automatic message transmission disabled) rather than transmitting a data message automatically. See paragraph 1.4.7 for full instructions for setting this configuration. NOTE: When RS485 communications are enabled the sensor will not output the “Biral Sensor Startup” message on power up and reset. 1.4.7 Automatic message setting The sensor can be set to send a data message automatically after each data collection period, or to send a data message only when requested (polled sensor). The default setting is for automatic data transmission. To check which method is programmed send the message: OSAM? The sensor will send the reply: 00 = Automatic message transmission disabled 01 = Automatic message transmission enabled To set the sensor to the required automatic message setting, send the message: STEP 4 - Configuration Options 19 Sensor Set-up Section 1 OSAMx Where x is: 0 = Automatic message transmission disabled 1 = Automatic message transmission enabled The sensor will respond with “OK”. 1.4.8 Optional hood heater operating setting The sensor can be set to have the hood heaters disabled, or for them to work automatically. The default setting, for sensors with fitted hood heaters, is for automatic hood heater operation. To check which configuration is programmed send the message: OSHH? The sensor will send the reply: 00 = Hood heaters disabled 01 = Hood heaters on automatic To set the sensor to the required hood heater configuration, send the message: OSHHx Where x is: 0 = Hood heaters disabled 1 = Hood heaters on automatic The sensor will respond with “OK”. 1.4.9 Window heater operating setting The sensor can be set to have the window heaters disabled, permanently enabled, or for them to be controlled according to contamination levels. The default setting is for window heaters enabled and on. To check which configuration is programmed send the message: OSWH? The sensor will send the reply: 00 = Window heaters disabled 01 = Window heaters enabled and on 02 = Window heaters enabled and controlled according to contamination levels To set the sensor to the required window heater configuration, send the message: OSWHx Where x is: 0 = Window heaters disabled 1 = Window heaters enabled and on 2 = Window heaters enabled and controlled according to contamination levels The sensor will respond with “OK”. 20 STEP 4 – Configuration Options Section 1 Sensor set-up 1.4.10 Baud Rate Configuration Default communication parameters are 9600, 8 data bit, 1 stop bit, no parity, and no flow control. The baud rate may be changed if required as follows. Send %B(Number) Just typing %B will bring up the different baud rate options: SELECT REQUIRED BAUDRATE BY TYPING %B(NUMBER) 1....1200 BAUD 2....2400 BAUD 3....4800 BAUD 4....9600 BAUD 5....19K2 BAUD 6....38K4 BAUD 7....57K6 BAUD Select the baud rate to use, for example to select 4800 baud the user would type %B3<CRLF> The user then receives a prompt to send an "OK" to the sensor at the new baud rate setting. The new setting will only be accepted if the user manages to communicate with the sensor at the new baud rate within 60 seconds. Otherwise the sensor will reset and continue operation with the original baud rate settings. If an "OK" command is received at the new baud rate the sensor will update its settings and restart. STEP 4 – Configuration Options 21 Sensor Set-up Section 1 1.4.11 Configuring the Relays To get the current relay configuration send the command JRO? The sensor will respond with a number which corresponds to: Value Description 0 No Relays Configured. 1 Fault Relay, Relay 1 triggered on visibility and Relay 2 triggered on precipitation. 2 Fault Relay, Relay 1 triggered on visibility and Relay 2 triggered on visibility. 3 Fault Relay, Relay 1 triggered on visibility and Relay 2 triggered on snow. Table 1-7 Relay configuration The default value is set to 1. NOTE: A response of 225 means that no relays are configured (the same as ‘0’). To change the configuration To change the relay configuration send the command JROx where x is the value from the table above. e.g. JRO2 Configures Relay 2 to be a second visibility relay. To read the visibility Threshold levels To read the visibility threshold levels for Relay 1 and relay 2 send the following command: RLn? where n is the relay number (either 1 or 2). The sensor will respond with the visibility threshold in km. e.g. 10.00 km To change the visibility Threshold levels To change the visibility threshold levels for relay 1 or relay 2 send the following command: RLn,xx.xx where n is the relay number (either 1 or 2) and xx.xx is the threshold level in km. e.g. to set the threshold for relay 1 to 1km send the command: 22 STEP 4 – Configuration Options RL1,1.00. Section 1 Sensor set-up 1.5 STEP 5 - Installation Please consider the following factors when installing the sensor: (1) Siting considerations. (2) Height of the sensor above ground. (3) Orientation of the sensor. (4) Mounting the sensor. (5) Electrical grounding. Each of these factors is covered in more detail below: 1.5.1 Siting Considerations Pollutants – Care should be taken to ensure that the sensor is situated away from any possible sources of pollutants (for example car exhausts, air-conditioning outlets etc.). Particulates entering the sensor’s sample volume will cause errors in the reported visibility measurements. Reflected Light – Care should be taken to ensure that the sensor is situated away from any surfaces which could causes of reflections of the IR illumination from the transmitter (for example walls, trees and people etc.). Reflected IR illumination entering the sensor’s optics will cause errors in the reported visibility measurements. Air-flow – Care should be taken to ensure that the sensor is situated away from objects that disrupt the 'normal' flow of air to and through the sensor sampling volume (for example walls, trees and other equipment etc.). RFI Interference – In addition to the above mentioned natural effects that may influence the performance of the sensor, due regard should also be given to radiated electrical interference. Sources of potential interference include radio antennas and radiated transients from high-voltage plant located near to the sensor installation. STEP 5 – Installation 23 Sensor Set-up Section 1 1.5.2 Height Above Ground: The optimum height at which to mount the sensor depends on the application. The table below shows recommended heights. Application Typical height Comment Recommended height for the Highway fog-warning systems 1.5 to 2 meters (4.9 to 6.6 feet) sensor sample volume is the average distance of a vehicle driver's eyes above the roadway. This is the standard height for Airport applications 4.3 meters (14 feet) visibility sensors in the U.S. above the runway This height may differ in other countries. This is a suitable height unless General meteorological 1.8 meters (6 feet) the particular application dictates otherwise. Table 1-8 Sensor height above ground 1.5.3 Orientation of Sensor Head The orientation of the sensor heads should be such that the rising or setting sun does not appear in the field-of-view of the receiver lenses. It is desirable to avoid sunlight from flooding the receiver optics and to avoid sunlight induced noise spikes from creating false precipitation counts, although false-alarm algorithms in the sensors invariably eliminate such false counts. The recommended orientation is shown in the following two diagrams (Figure 1-7 SWS050 and SWS-100 Orientation, and Figure 1-8 SWS-200 and SWS-250 Orientation). For the SWS-050 and SWS-100 sensors, the optimum position is with the receiver head pointing directly due North. For the SWS-200 and SWS-250, the optimum position is with the forward scatter receiver and the back scatter receiver oriented equally either side of due North. This is with the backscatter head pointing 34˚ East of North. 24 STEP 5 – Installation Section 1 Sensor set-up For sensors located in the Southern hemisphere, 180˚ should be added to the above directions. That is, for the SWS-200 and SWS-250 point the backscatter head 34˚West of South, and for the SWS-050 and SWS-100, point the forward scatter receiver directly due South. Figure 1-7 SWS-050 and SWS-100 Orientation Figure 1-8 SWS-200 and SWS-250 Orientation STEP 5 – Installation 25 Sensor Set-up Section 1 1.5.4 Mounting the Sensor: On a pole Two stainless steel U-bolts and saddles are provided for securing the sensor to the top of a mast, see Figure 1-9 U-Bolt Mounting Method. The two V-block saddles oppose the Ubolt, thus providing a secure grip on the mast. The sensor can be mounted on a galvanised steel pipe or heavy walled aluminium tube with an outer diameter between 40 to 64 mm. For mast diameters outside this range the U-bolts provided will not be suitable. Note: pipe sizes often refer to their inside diameter; some 60 mm (ID) pipe may be too large for the U-bolts to fit around. The sensor head should be mounted near the very top so that the mast will not interfere more than necessary with the free flow of fog or precipitation through the sample volume. The flat stainless steel washers should be placed next to the powder coated surface of the mounting plate to prevent gouging by the lock washers as the nuts are tightened. Figure 1-9 U-Bolt Mounting Method 26 STEP 5 – Installation Section 1 Sensor set-up On a wall The sensor can be bolted directly to a flat surface using the four mounting holes provided. Every effort should be made to ensure that the mounting surface has minimal effect on the air flow and the precipitation flow through the sample volume. Even if mounted at the top of a wall, the airflow will be restricted, reducing the accuracy of the sensor in certain atmospheric conditions. 1.5.5 Electrical Grounding Possible instrument failure can result from the damaging effects of over-voltage transients induced on the power line and the signal distribution lines. Destruction of sensitive components can result from unprotected lines, or instrument failure may occur over a long period of time due to slow device degradation. Destructive over volt transients can occur in many ways; e.g., lightning induced transients, AC power line transients and EMI/RFI electromagnetic noise. The power/control subsystem of the sensor contains transient surge-arrestors on all power and signal lines as a standard feature. EMI filters are present on the power and data lines entering the power/control subsystem. It is essential to connect the sensor to earth ground for maximum protection of the instrument. In addition, if relays are in use and are required to switch mains voltages, protective earth bonding will be required to conform with national and local installation safety requirements. The following notes are intended to provide some guidance in the design and construction of an electrical grounding system. (1) Ground Rod: An eight-foot ground rod should be used to make contact with moist soil during even the driest periods. (2) Lead Lengths: No. 6 AWG solid copper wire should be used to connect the instrument (and thus the transient voltage suppressers) to the ground rod. Use the shortest and most direct paths to the ground. Simply connect the ground lead to the grounding screw provided on the front of the lower mounting flange of the instrument. (3) System Interconnections: Eliminate all isolated ground loops. The shield of the signal output cable, for example, should be attached only at one end of the cable and left floating at the other end. Preferably, it should be attached to ground at the sensor end of the signal cable. (4) Connections: Use tight-corrosion-proof bare metal connections throughout the grounding system. STEP 5 – Installation 27 Sensor Set-up Section 1 1.6 STEP 6 - Test and Commissioning The following steps contain a few basic checks to provide confidence that the unit is functioning correctly after installation. These checks are recommendations only and are neither essential nor exhaustive. 1.6.1 Checking Power Supply Before connecting the power cable to the sensor, the supply voltage being provided should be measured to ensure that the voltage present is compatible with the sensor power requirement. Use a multimeter to measure the supply voltage which should be between 9V and 36V DC. DANGER of electric shock! Exercise caution when performing this measurement. WARNING Only connect the power cable if it matches the voltage requirements of the sensor. Damage caused by improper voltage connection is not covered under warranty. 1.6.2 Checking Data link 1. Connect the power-input cable to a local power source (do not turn power source on). 2. Connect the signal wires to a PC running the Biral Sensor Interface Software. If this is not available, use a terminal program - for example Windows® Hyper Terminal™. For RS422/485 sensors a RS422 to RS232 converter must be used). Note: Biral recommends testing to be done with RS232 or RS422 as applicable. When you are confident that the sensor is working it can then be set up for RS485 if required. 3. Configure the terminal program as follows: Default Interface Parameters Baud Rate ........................................................... 9600 Data Bits ............................................................. 8 Stop Bits ............................................................. 1 Parity .................................................................. None Flow Control ...................................................... None 28 STEP 6 - Test and Commissioning Section 1 Sensor set-up 4. Turn the local power source "ON". If communications are working the sensor will respond with “Biral Sensor Startup”. 5. Check Data Transmission To Sensor: Send the command R? from the PC terminal to the sensor: The sensor will respond with its Remote Self-Test & Monitoring Message. For example: 100,2.509,24.1,12.3,5.01,12.5,00.00,00.00,100,105,107,00,00,00,+021.0,4063 6. Check Data Transmission From Sensor: If the sensor is NOT in polled mode: Wait for the sensor to transmit a Data Message (approx. 80 seconds from power up). If the sensor is in polled mode: Send the command D? from the PC terminal to the sensor: A Data Message will be transmitted immediately. 1.6.3 Remote Self-Test Check Check that the values in the Remote Self-Test & Monitoring Message from the previous ‘Data Transmission to Sensor’ check are within the ranges indicated below in Table 1-9 Remote self-test and monitoring check fields (response to R? command). Field 1: Space Field 2: 100 or 108 Field 3: 2.450 - 2.550 Field 4: 9.00 - 36.00 Field 5: 10.8 -13.2 Field 6: 4.5 - 5.5 Field 7: 10.8 -13.2 Field 8: 00.00 Field 9: 00.00 Field 10: 85 - 105 Field 11: 80 - 120 Field 12: 80 - 120 Field 13: 00 - 99 Field 14: 00 - 99 Field 15: 00 - 99 Field 16: Field 17 3300-4200 Message starts with a space. Heater state and error flags. Internal reference voltage. Supply voltage. Internal operating voltage. Internal operating voltage. Internal operating voltage. Not applicable in this check. Not applicable in this check. Transmitter power monitor. Forward receiver monitor (optional). Back receiver monitor (SWS-200 and SWS-250 only). Transmitter window contamination. Forward receiver window contamination (optional). Back receiver window contamination (optional). Temperature oC. ADC Interrupts per second. Table 1-9 Remote self-test and monitoring check fields STEP 6 - Test and Commissioning 29 Sensor Set-up Section 1 1.6.4 Calibration Check The sensor is fully calibrated before it leaves Biral. However, if you would like to carry out a user confidence calibration check please follow the calibration check procedure in section 5, page 55 to ensure that the MOR value changes ie the sensor responds to changes in visibility. THIS PROCEDURE CAN ONLY BE COMPLETED IF A SUITABLE SWS CALIBRATION KIT IS AVAILABLE CONGRATULATIONS YOUR SENSOR SHOULD NOW BE FULLY CONFIGURED, TESTED AND INSTALLED READY FOR USE THE REMAINDER OF THIS MANUAL COVERS: 30 - STANDARD DATA MESSAGES - COMMANDS AND RESPONSES - OPERATIONAL AND MAINTENANCE PROCEDURES - CALIBRATION CHECK AND RE-CALIBRATION PROCEDURE - SENSOR DETAILS AND SPECIFICATIONS STEP 6 - Test and Commissioning Section 2 2 Standard Operating Data STANDARD OPERATING DATA When in standard mode a data message will be output from the sensor every measurement period (default 60 seconds). When in polled mode the same message is output only in response to the D? command. The operating mode is checked by sending command “OSAM?”. The standard mode (default) is selected if the response is “01”. If the response is “00”, the polled mode is selected. Instructions for setting this configuration are provided in paragraph 1.4.7 page 19. Note: All responses from the sensor are appended with carriage return and line feed characters (<crlf>, see paragraph 1.3). There are four different standard messages, dependent on the model number. These are detailed below in Table 2-1 SWS-050 Operating data message format, Table 2-2 SWS-100 Operating data message format, Table 2-3 SWS-200 Operating data message format and Table 2-4 SWS-250 Operating data message format. Standard Operating Data 31 Standard Operating Data Section 2 2.1 Standard Operating Data Message for the SWS-050 The data message format for the SWS-050 is: <Date>,<Time>,SWS050,NNN,XXX,AA.AA KM,BB,CCC.CC,DDD, <cs><crlf> MESSAGE MEANING <Date> Optional Date string in the form DD/MM/YY. <Time> Optional Time string in the form HH:MM:SS. SWS050 SWS-050 message prefix. NNN Instrument identification number set by the user. XXX Averaging Time period in seconds. AA.AA KM Meteorological Optical Range (km). This is the averaged value. Obstruction to vision code. From WMO table 4680: XX 00 04 30 BB Not Ready (first 5 measurement periods from restart). No significant weather observed. Haze or Smoke. Fog. CCC.CC Total Forward Scatter Exco value. DDD Self-test and Monitoring (see section 4.2): DDD O = other self-test values OK. X = other self-test faults exist. O = windows not contaminated. X = window contamination warning – cleaning recommended. F = Window contamination fault – cleaning required. O = sensor not reset since last "R?” command. X = sensor reset since last "R?" command. <cs> If selected this will be the checksum character. The checksum is off by default. Table 2-1 SWS-050 Operating data message format A typical data message from an SWS-050 sensor is as follows: SWS050,001,060,00.14 KM,30,022.18,XOO 32 Standard Operating Data Message for the SWS-050 Section 2 Standard Operating Data 2.2 Standard Operating Data Message for the SWS-100 The data message format is: <Date>,<Time>,SWS100,NNN,XXX,AA.AA KM,BB.BBB,CC,DD.D C,EE.EE KM,FFF<cs><crlf> MESSAGE MEANING <Date> Optional Date string in the form DD/MM/YY. <Time> Optional Time string in the form HH:MM:SS. SWS100 SWS100 message prefix. NNN Instrument identification number set by the user. XXX Averaging Time period in seconds. AA.AA KM Meteorological Optical Range (km). This is the averaged value. BB.BBB Not used in the SWS100. Set to 99.999. CC Present weather codes. From WMO Table 4680 (Automatic Weather Station). XX 00 04 30 40 50 60 70 Not Ready (first 5 measurement periods from restart). No Significant weather observed. Haze or smoke. Fog. Indeterminate precipitation type. Drizzle. Rain. Snow. DD.D C Not used in the SWS100. Set to 99.9 C. EE.EE KM Meteorological Optical Range (km). This is the instantaneous value. Standard Operating Data Message for the SWS-100 33 Standard Operating Data Section 2 MESSAGE MEANING FFF Self-test and Monitoring (see section 4.2): FFF O = other self-test values OK. X = other self-test faults exist. O = windows not contaminated. X = window contamination warning – cleaning recommended. F = Window contamination fault – cleaning required. O = sensor not reset since last "R?” command. X = sensor reset since last "R?" command. <cs> If selected this will be the checksum character. The checksum is off by default. Table 2-2 SWS-100 Operating data message format A typical data message from an SWS-100 sensor is as follows: SWS100,001,060,00.14 KM,99.999,30,+99.9 C,00.14 KM,XOO 34 Standard Operating Data Message for the SWS-100 Section 2 Standard Operating Data 2.3 Standard Operating Data Message for the SWS-200 The data message format is: <Date>,<Time>,SWS200,NNN,XXX,AA.AA KM,BB.BBB,CC,DD.D C,EE.EE KM,FFF<cs><crlf> MESSAGE MEANING <Date> Optional Date string in the form DD/MM/YY. <Time> Optional Time string in the form HH:MM:SS. SWS200 SWS200 message prefix. NNN Instrument identification number set by the user. XXX Averaging Time period in seconds. AA.AA KM Meteorological Optical Range (km). This is the averaged value. BB.BBB Amount of water in precipitation in last measurement period (mm). CC Present weather codes. From WMO Table 4680 (Automatic Weather Station). XX 00 04 30 40 51 52 53 61 62 63 71 72 73 89 Not Ready (first 5 measurement periods from restart). No Significant weather observed. Haze or smoke Fog Indeterminate precipitation type Light Drizzle Moderate Drizzle Heavy Drizzle Light Rain Moderate Rain Heavy Rain Light Snow Moderate Snow Heavy Snow Hail DD.D C Temperature (C). EE.EE KM Meteorological Optical Range (km). This is the instantaneous value. Standard Operating Data Message for the SWS-200 35 Standard Operating Data Section 2 MESSAGE MEANING FFF Self-test and Monitoring (see section 4.2): FFF O = other self-test values OK. X = other self-test faults exist. O = windows not contaminated. X = window contamination warning – cleaning recommended. F = Window contamination fault – cleaning required. O = sensor not reset since last "R?” command. X = sensor reset since last "R?" command. <cs> If selected this will be the checksum character. The checksum is off by default. Table 2-3 SWS-200 Operating data message format A typical data message from an SWS-200 sensor is as follows: SWS200,001,060,00.13 KM,00.000,30,+24.5 C,00.13 KM,XOO 36 Standard Operating Data Message for the SWS-200 Section 2 Standard Operating Data 2.4 Standard Operating Data Message for the SWS-250 The data message format is: <Date>,<Time>,SWS250,NNN,XXXX,AA.AA KM,CC,W1,W2,,DD,EEEEE,FFF.FFF, GG.GG KM,HHH.HH, III.II,±JJJ.JJ,KKK.K C,±LLLLL,MMM,NNNN,OO.OOOO, PPP<cs><crlf> MESSAGE MEANING <Date> Optional Date string in the form DD/MM/YY. <Time> Optional Time string in the form HH:MM:SS. SWS250 SWS250 message prefix. NNN Instrument identification number set by the user. XXXX Averaging time period in seconds. AA.AA KM Meteorological Optical Range (km). This is the averaged value. CC Present weather codes. From WMO Table 4680 (Automatic Weather Station). XX 00 04 20 21 22 23 24 30 31 32 33 34 35 40 51 52 53 57 58 61 62 63 67 68 Not Ready (first 5 minutes from restart) No significant weather observed Haze or Smoke or Dust Fog in last hour but not at time of observation Precipitation in last hour but not at time of observation Drizzle in last hour but not at time of observation Rain in last hour but not at time of observation Snow in last hour but not at time of observation Fog Fog in patches Fog becoming thinner in last hour Fog no appreciable change in last hour Fog begun or becoming thicker in last hour Freezing Fog Indeterminate Precipitation Type Slight Drizzle Moderate Drizzle Heavy Drizzle Slight Drizzle and Rain Moderate or Heavy Drizzle and Rain Slight Rain Moderate Rain Heavy Rain Slight Rain and Snow Moderate or Heavy Rain and Snow Standard Operating Data Message for the SWS-250 37 Standard Operating Data MESSAGE Section 2 MEANING 71 72 73 74 75 76 77 78 81 82 83 85 86 87 89 W1 W2 38 Slight Snow Moderate Snow Heavy Snow Slight Ice Pellets Moderate Ice Pellets Heavy Ice Pellets Snow Grains Ice Crystals Slight Rain Showers Moderate Rain Showers Heavy Rain Showers Slight Snow Showers Moderate Snow Showers Heavy Snow Showers Hail or Small Hail (Graupel) Past Weather Type1 SYNOP Code: / No past weather code 4 Fog or Thick Haze 5 Drizzle 6 Rain 7 Snow or Mixed rain & snow 8 Showers Past Weather Type2 SYNOP Code: / No past weather code 4 Fog or Thick Haze 5 Drizzle 6 Rain 7 Snow or Mixed rain & snow 8 Showers DD Obstruction to Vision Message: (Blank) No obstruction HZ Haze FG Fog EEEEE METAR Reporting Code. See Section 2.4.1. FFF.FFF Precipitation Rate (mm/hr). GG.GG KM Meteorological Optical Range (km). This is the instantaneous value. HHH.HH Total Exco (km-1). This is the averaged value. III.II Transmissometer equivalent EXCO (km-1). ±JJJ.JJ Back Scatter Channel Exco (km-1). This is the averaged value. ±KKK.K C Temperature (C). Standard Operating Data Message for the SWS-250 Section 2 Standard Operating Data MESSAGE MEANING ±LLLLL ALS signal, 1 minute average value (cd/m2). Optional, if not fitted set to 99999. MMM Self-Test and Monitoring (See section 4.2): O = Other self-test values OK. X = Other self-test fault exists. F = Forward Scatter Receiver Flooded with Light. B = Back Scatter Receiver Flooded with Light. O = Windows not contaminated. X = Windows contaminated warning – cleaning recommended. F = Windows contaminated fault – cleaning required. O = Sensor not reset since last "R?" command. X = Sensor reset since last "R?" command. NNNN Number of precipitation particles detected in last minute. OO.OOOO Amount of water in precipitation in last minute (mm). PPP ALS Self-Test and Monitoring (if ALS not fitted set to OOO) (See 4.2): O = Other self-test values OK. X = Other self-test fault exists. O = Window not contaminated. X = Window contaminated warning – cleaning recommended. F = Window contaminated fault – cleaning required. S = Sensor input saturated. O = Sensor not reset since last "R?" command. X = Sensor reset since last "R?" command. <cs> If selected this will be the checksum character. The checksum is off by default. Table 2-4 SWS-250 Operating data message format A typical data message from an SWS-250 sensor is as follows: SWS250,001,0060,00.14 KM,30,/,/,FG,FG ,000.000,00.14 KM,021.19,021.40,+073.54, +022.0 C,+99999,XOO,0000,00.0000,OOO Standard Operating Data Message for the SWS-250 39 Standard Operating Data Section 2 2.4.1 METAR Codes CODE NUMBER METAR CODE MEANING XX X Not Ready (first 5 minutes from restart) 00 04 40 No significant weather observed HZ Haze, visibility greater than or equal to 1km 20 Fog in last hour but not at time of observation 21 Precipitation in last hour but not at time of observation 22 Drizzle in last hour but not at time of observation 23 Rain in last hour but not at time of observation 24 Snow in last hour but not at time of observation 30 FG Fog 31 BCFG Fog in patches 32 PRFG Fog becoming thinner in last hour 33 FG Fog no appreciable change in last hour 34 FG Fog begun or becoming thicker in last hour 35 FZFG Freezing Fog 40 UP Indeterminate precipitation type 51 -DZ Drizzle, not freezing, slight 52 DZ Drizzle, not freezing, moderate 53 +DZ Drizzle, not freezing, heavy 57 -RADZ Drizzle and Rain, slight 58 RADZ Drizzle and Rain, moderate 58 +RADZ Drizzle and Rain, heavy 61 -RA Rain, not freezing, slight 62 RA Rain, not freezing, moderate 63 +RA Rain, not freezing, heavy Standard Operating Data Message for the SWS-250 Section 2 Standard Operating Data CODE NUMBER METAR CODE MEANING 67 -RASN Rain (or Drizzle) and Snow, slight 68 RASN Rain (or Drizzle) and Snow, moderate 68 +RASN Rain (or Drizzle) and Snow, heavy 71 -SN Snow, slight 72 SN Snow, moderate 73 +SN Snow, heavy 74 -PL Ice Pellets, slight 75 PL Ice Pellets, moderate 76 +PL Ice Pellets, heavy 77 SG Snow Grains 78 IC Ice Crystals 81 -SHRA Rain Showers, slight 82 SHRA Rain Showers, moderate 83 +SHRA Rain Showers, heavy 85 -SHSN Snow Showers, slight 86 SHSN Snow Showers, moderate 87 +SHSN Snow Showers, heavy 89 GR Hail 89 GS Small Hail / Graupel Table 2-5 METAR codes 2.4.2 SWS-250 Present Weather Measurement Timing For the SWS-250 only, the present weather coding and the precipitation type and intensity are always calculated at one minute intervals. The measurement timing command TMx will set the timing interval for all visibility related measurements, but not the present weather coding or precipitation details. It is recommended that this visibility timing is set to 1 minute intervals (command TM60), the default value, for consistency with the precipitation measurements and coding. Standard Operating Data Message for the SWS-250 41 Standard Operating Data Section 2 2.5 Data Message Variations For ALS-2 For SWS sensors fitted with an Ambient Light Sensor, ALS-2, the data output strings are identical to the standard message with the following appended to the message, prior to the optional checksum<cs> and the carriage return and line feed <crlf>. NOTE: for the SWS250, the ALS-2 data is integrated into the standard data message format, see section 2.4, page 37. ,ALS,±AAAAA,BBB Message Meaning ALS ALS data message prefix. ±AAAAA ALS Signal, 1 minute averaged value (cd/m2). BBB ALS Self-Test and Monitoring (see section 4.2). O = Other self-test values OK. X = Other self-test fault exists. O = Window not contaminated. X = Window contaminated – cleaning recommended/required. F = Window contaminated – fault. S = Sensor input saturated. O = Sensor not reset since last "R?" command. X = Sensor reset since last "R?" command. Table 2-6 Message extension for ALS-2 A typical data message from an SWS-200 sensor with an ALS-2 is as follows: SWS200,001,060,00.13 KM,00.000,30,+24.5 C,00.13 KM,XOO,ALS,+00118,OOO 42 Data Message Variations for ALS-2 Section 3 3 Commands and Responses COMMANDS AND RESPONSES 3.1 Sensor Commands NOTE: All commands should be terminated with <Carriage Return> and <Line Feed> (<crlf>, see paragraph 1.3). Command Applicability SWS- Function Response A? Send accumulated precipitation message. (Accumulated precipitation in mm) ,(Accumulation time in minutes). xxx.xx (xxxx.x) ,xxxx √ √ AC Clear accumulated precipitation. OK √ √ ADR? Send RS485 address. See para. 1.4.6. xx √ √ √ √ ADRxx Set RS485 address. Range 00-99. See paragraph 1.4.6. OK √ √ √ √ BB? Send instantaneous value of backscatter EXCO. ±xxx.xx √ √ BL? Send instantaneous value of Total EXCO less precipitation particle component. ±xxx.xx √ √ BT? Send instantaneous value of Total EXCO . ±xxx.xx √ √ CA Perform precipitation amount calibration (Calibration must be enabled). See para. 5.3 CE Perform both forward scatter and backscatter (Not 050 or 100) EXCO calibration. (Calibration must be enabled). CO Enable calibration. CX See para. 5.2 050 √ 100 √ 200 250 √ √ √ √ √ √ OK √ √ √ √ Disable calibration. OK √ √ √ √ D? Send latest data message. See section 2 √ √ √ √ DHO Turn hood heaters on temporarily. If off at time of command, the heaters will turn off after 2 minutes (for maintenance only). OK √ √ √ √ DHX Turn hood heaters off temporarily. If on at time of command, the heaters will turn on after 2 minutes (for maintenance only). OK √ √ √ √ IDx Set instrument identification number displayed in data message. Range x = 1 to 999. (Default = 1). OK √ √ √ √ Sensor Commands 43 Commands and Responses Command Section 3 Applicability SWS- Function Response JRO? Check Current Relay Configuration X, See section 1.4.11 JROx Set Current Relay Configuration, , See section 1.4.11 M? Send precipitation matrix accumulated over last five measurement periods. This is a matrix of 16 rows with up to 21 readings. Zeros to right not displayed. Mnnn (,nnn,nnn……) See Para 3.1.1 OP? Check Option Word configuration. See para. 1.4.1 √ √ √ √ OPxxxxxxxx Set configuration options. See para. 1.4.1. OK √ √ √ √ OSAM? Check automatic message setting See para 1.4.7 √ √ √ √ OSAMx Set automatic message setting, para 1.4.7 OK √ √ √ √ OSHH? Check hood heater setting See para 1.4.8 √ √ √ √ OSHHx Set hood heater setting. See para 1.4.8 OK √ √ √ √ OSWH? Check window heater setting See para 1.4.9 √ √ √ √ OSWHx Set window heater setting. See para 1.4.9 OK √ √ √ √ PV? Send program version message. SI xxxx.yy √ √ √ √ R? Send remote self-test and monitoring message. See Para 3.1.2 √ √ √ √ RLn? Check relay ‘n’ visibility threshold setting. See section 1.4.11 XX.XX KM √* √* √* RLn,XX.XX Set relay ‘n’ visibility threshold in km.. See section 1.4.11 OK √* √* √* RST Restart instrument. OK √ √ √ √ SN? Send instrument serial number Jxxxx.xx √ √ √ √ T? Send instrument times message. See Para 3.1.3 √ √ √ √ TAx Set auxiliary measurement sample period. Range x= 2-20 (seconds). (Default = 5). OK √ √ √ √ TMx Set measurement interval. Range x = 10300 (seconds). (Default= 60). OK √ √ √ √ TR? Send current date and time. See paragraph 1.4.2. (The final ,000 is an internal fixed constant). FRIDAY , 23/03/12, 13:15:25,000 √ √ √ √ 44 Sensor Commands 050 100 200 √* √* √* √* √* √* 250 √ Section 3 Commands and Responses Command Function Response WT? Send current window contamination threshold for warning indication. Applicability SWS050 100 200 250 XX √ √ √ √ WTx Set window contamination threshold for a warning indication, % drop in transmission. Range: 0 to 30 (%) (Calibration must be enabled). (Default = 10). OK √ √ √ √ %Bx Set communication baud rate. Range 1-7. See para. 1.4.10 √ √ √ √ %SDWDDM MYY Set current date. See paragraph 1.4.2. OK √ √ √ √ %STHHMM SS Set current time. See paragraph 1.4.2. OK √ √ √ √ Table 3-1 Commands for SWS series of sensors √* indicates that these commands are only applicable if the relay option has been taken, which is only available on the following models: SWS-050T, SWS100 & SWS200. 3.1.1 Command M? – Send Precipitation message This command is only available in the SWS-250 sensor. The sensor responds by sending a precipitation matrix accumulated over the last five measurement periods. This is a matrix of 16 rows with up to 21 readings, each being the number of precipitation particles of that specific size and velocity. Zeros to right are not displayed. The meaning of the matrix is graphically presented in Paragraph 6.3.2, Figure 6-3 Precipitation Recognition Matrix, page 67. An example response, which was during a period of heavy rain, is provided below: M001 M001,001,002,001,001,000,000,000,001 M009,002,006,002,001,001 M009,019,020,020,010,002,000,000,001,001 M011,033,068,078,056,042,020,005,001,000,001 M003,031,048,041,047,033,038,027,014,009,008,003 M004,007,027,020,013,016,011,007,002,008,006,007,004 M000,005,006,005,007,003,000,002,003,001,000,000,000,001 M000,000,006,004,005,000,001,002,001,000,000,001 M000,001,007,000,005,002,001,000,001 M000,000,001,000,001 M000,000,000,001 M000,000,000,000,001 M000 M000 M000 Sensor Commands 45 Commands and Responses Section 3 This shows the greatest precipitation amount in rows 5 and 6, relatively slow hydrometeor velocity (~3.3m/sec) and in columns 2 to 8, relatively small hydrometeor size (~0.5mm). 3.1.2 Command R? - Send Remote Self-Test and Monitoring Message Example response: 100,2.509,24.1,12.3,5.01,12.5,00.00,00.00,100,105,107,00,00,00,+021.0,4063 The various fields in the response are as follows: Field 1: Space Field 2: ABC The message starts with a space. Heater state and error flags. A = 1 - Window heaters ON. A = 2 - Not used. A = 4 - A/D control signal error. B = 1 - EPROM checksum error. B = 2 - Non-volatile memory checksum error. B = 4 - RAM error. B = 8 - Register error. C = 2 - Ired commanded OFF. C = 4 - Receiver test in progress (Ired OFF). C = 8 - Sensor power reset since last R? Command. or any combination of these. Field 3: 2.450 - 2.550 Field 4: 9.00 - 36.00 Field 5: 11.5 - 14.0 Field 6: 4.5 - 5.5 Field 7: 11.5 - 14.0 Field 8: 0.00 - 6.00 Field 9: 0.00 - 6.00 Field 10: 85 - 105 Field 11: 80 - 120 Field 12: 80 - 120 Field 13: 00 - 99 Field 14: 00 - 99 Field 15: 00 - 99 Field 16: Field 17: 3300-4200 Internal reference voltage. Supply voltage. Internal operating voltage. Internal operating voltage. Internal operating voltage. Forward scatter background brightness. Backscatter background brightness (not SWS-050 or SWS-100). Transmitter power monitor. Forward receiver monitor (option for SWS-100 and SWS-200). Back receiver monitor (not SWS-050 or SWS-100). Transmitter window contamination. Forward receiver window contamination (option for SWS-100 and SWS-200). Back receiver window contamination (option for SWS-200). Temperature oC. ADC interrupts per second. Table 3-2 Command R? response 46 Sensor Commands Section 3 Commands and Responses 3.1.3 Command T? - Send Instrument Times Message Response: aaaa,bbbb,ccccc,dddd aaaa: bbbb: ccccc: dddd: Measurement interval for each operational data message (10 to 300 seconds) (default = 60). Auxiliary measurement sample period - time between measurement of peripheral signals during measurement interval. (2 to 20 seconds) (default = 5). Not used. Not used. Table 3-3 Command T? response 3.2 Sensor Responses RESPONSE MEANING BAD CMD The command was not understood by the sensor. Check the text of the command and re-send. COMM ERR An error was detected in a character in the command. Re-send the command. OK Command with no quantitative response was understood and executed. TIMEOUT Command was sent with more than 10 seconds between characters. Re-send the command. TOO LONG Command message was longer than 24 characters including end characters. Check the text of the command and re-send. Table 3-4 Sensor responses Sensor Responses 47 Maintenance Procedures Section 4 4 MAINTENANCE PROCEDURES The SWS series of sensors require very little maintenance. The following sections detail the checks that are advisable to ensure continued good operation of the sensor. The frequency of these checks depends upon the location and environmental conditions under which the sensor operates. It is suggested that a general check, plus window cleaning should take place typically at three monthly intervals. This period may be increased or decreased dependent on the contamination determined during these inspections. It is also recommended that a calibration check (See Paragraph 5.1) is carried out at six monthly intervals to verify that the instrument is still continuing to perform within the specification. Paragraph 4.2, Self-Test Codes, describes the meaning of the self-test codes provided in all the standard data messages. It specifies what actions, if any, are required to restore the sensor to full operational capability. 4.1 General Checks A general check of the physical condition of the sensor should be carried out at regular intervals. Particular attention should be paid to the condition of the cable(s) from the base of the unit. It is suggested that this is carried out at least every three months, in conjunction with window cleaning (see 4.1.3 below). 4.1.1 De-mister Heaters (fitted as standard to all sensors) The window de-misters are low powered heaters designed primarily to prevent condensation. They maintain the temperature of the windows at a few degrees above ambient temperature. The default setting is ON. See section 1.4.9 for details. The warmth may be detected with the finger on the window but is easier to detect using a thermometer with surface temperature probe. The windows should be between 5 and 10C above ambient temperature after at least 10 minutes operation. Ensure that windows are cleaned after coming into contact with the skin. 4.1.2 Hood Heaters (optional) Hood heaters are fitted as standard on the SWS-050 and SWS-250 sensors, and are an option for the other models. They are fitted to the inside of each of the hoods (2 on the 48 General Checks Section 4 Maintenance Procedures SWS-050 and SWS-100 with 3 on the SWS-200 and SWS-250). See Figure 4-1 Hood Heater. The hood heaters are high-power heaters designed to prevent the build-up of frozen precipitation in the hoods. These heaters operate according to the ambient temperature only being switched on when the temperature is below 2°C. When switched on, it is easy to detect the heating by placing a finger on the end of each hood. The hood heater is the raised red mat on the inside of the hood near the window Figure 4-1 Hood Heater When the temperature is above the 4°C the heaters will be switched off but may be controlled using a PC running the Biral Sensor Interface Software. If this is not available, use a terminal program - for example Windows® Hyper Terminal™. The heaters may be switched on temporarily using the command DHO and off again using the command DHX, see section 3.1. 4.1.3 Window Cleaning SWS sensors are optical instrument and are therefore susceptible to accumulation of contaminants on the windows in the hoods. The windows should be cleaned by gently wiping the windows using a pure alcohol (propanol) and a soft cloth (appropriate safety precautions must be taken when using pure alcohol). All SWS sensors are fitted with a Transmitter Window monitoring system which compensates for contamination and will flag a warning when the contamination reduces the signal by more than a pre-set amount (default 10%) - when this occurs, the appropriate part of Self-test and Monitoring message in the sensor Data Output Message changes from O (no contamination) to X (warning) – see paragraphs 2 and 4.2.2. If this registers an ‘X’, all windows should be cleaned at the earliest convenient opportunity. If the contamination General Checks 49 Maintenance Procedures Section 4 continues to increase above a pre-set limit of 30%, the accuracy of the instrument may begin to deteriorate. The self-test monitoring message will change to ‘F’, and the windows should be cleaned as a matter of urgency. The SWS-050 and SWS-250 sensors are additionally fitted with receiver window monitors. These monitor the forward scatter window and, if fitted, the back scatter window. This provides better accuracy if there is likely to be different contamination on each window. If any of the transmitter or receiver window contamination values go above the pre-set limit a warning message ‘X’ is generated. If any of these readings exceed 30%, this warning changes to a fault message ‘F’. Receiver window monitoring is an available option for the SWS-100 and SWS-200 models. 4.2 Self-Test Codes Self-Test and Monitoring information is provided in the standard Operating Data Message. This information consists of three alpha-numeric characters which have the following meanings. NOTE: The command “R?” provides a response with full diagnostic information. The extent of this information depends on the sensor configuration specified at time of purchase. This response is detailed in paragraph 3.1.2. 4.2.1 Most Significant Character (Sensor Reset Flag) This will be set to “X” on start-up. It will only be set to “O” following receipt of an “R?” command. If it subsequently is set to “X”, this is an indication that a fault, such as a power interruption, has caused the processor to reset. This is generally of no importance, but may assist in the diagnosis of any other problem which may have occurred previously. 4.2.2 Central Character (Window Contamination) All SWS sensors have monitoring of contamination on the transmitter window. The processor compensates the visibility reading to allow for this contamination and also checks the contamination figure against a value of either 10% (default value) or 30%. This Self-test code can be one of three characters, O, X or F dependent on the contamination reading received. These have the following meaning: “O”: Window contamination is less than 10% (Default value; can be adjusted by the user, see command WTxx, paragraph 3.1). No action required. 50 Self-test Codes Section 4 Maintenance Procedures “X”: Window contamination warning. The window contamination is between 10% and 30%. The visibility reading provided is corrected utilising this contamination figure, but it is recommended that the windows are cleaned at the earliest possible opportunity. “F”: Window contamination fault. The window contamination is above 30%. Although the visibility reading is still corrected using this contamination figure, the accuracy may deteriorate as the contamination increases. The windows require cleaning. NOTE: The ALS-2 has an additional code of “S”. This indicates that the sensor is saturated with a VERY bright light source (such as direct view of the sun). Although the reported light level will be in error, it can be implied that the true ambient light level is high. 4.2.3 Least Significant Character (Other Self-Test errors) A variety of operating parameters are regularly checked against normal operational figures as an early warning of possible sensor faults. This character indicates whether all parameters other than window contamination are normal. This Self-test code can be one of two characters, O, or X. These have the following meaning: “O”: No Fault. No action required. “X”: Internal error. Send command “R?” to list all internally monitored parameters. Check against paragraph 3.1.2 to determine the cause of this error. Send command “RST” to restart the sensor. If the fault persists, arrange for the sensor to be serviced at the earliest possible opportunity. 4.3 User Confidence Checks The following user confidence checks require bi-directional communications with a PC running the Biral Sensor Interface Software. If this is not available, use a terminal program - for example Windows Hyper Terminal. It is suggested that these should be carried out at least every year, to provide continuing confidence in the correct operation of the system. User Confidence Checks 51 Maintenance Procedures Section 4 4.3.1 Calibration Check If you wish to carry out a user confidence calibration check please follow the calibration check procedure in section 5, page 55 to ensure that the sensor calibration values are still within specified limits. THIS PROCEDURE CAN ONLY BE COMPLETED IF A SUITABLE SWS CALIBRATION KIT AND PC ARE AVAILABLE 4.3.2 Window Monitor Checks All SWS sensors monitor the transmitter window for contamination. The values measured are used to adjust the MOR value, and are also used to determine when the windows should be cleaned. The performance of the monitoring circuit can be checked by the following procedures: Transmitter Window Monitor Step 1. Clean the transmitter window. Step 2. Send the command: R? Step 3. Verify that the 'Transmitter Window Contamination’ field value is 00 to 02. Step 4. Insert a white card (or paper) in the transmitter hood that blocks and almost touches the window (see Figure 4-2 Transmitter Hood with White Card). white card Figure 4-2 Transmitter Hood with White Card Step 5. Send the command: R? 52 User Confidence Checks Section 4 Maintenance Procedures Step 6. Verify that the 'Transmitter Window Contamination' field value is much greater than 10 (eg 99). Step 7. Remove the white card. Receiver Window Monitor(s) This procedure is used for the forward scatter receivers on the SWS-050 sensor (optional on the SWS-100) and both the forward and back scatter receivers on the SWS-250 sensor (optional on the SWS-200). Carry out the following procedure for the forward scatter window, and then the back scatter window if applicable. Step 1. Clean the forward (or back) scatter receiver window. Step 2. Wait for operational data in message from the sensor. Step 3. Send the command: R? Step 4. Verify that the ‘Forward (or Back) Scatter Receiver Window Contamination’ field value is 00 to 02. Step 5. Insert a white card in the forward (or back) scatter receiver hood that blocks the window, and almost touches it (similar to Figure 4-2 Transmitter Hood with White Card). Step 6. Wait for operational data message from the sensor. Step 7. Send the command: R? Step 8. Verify that the 'Forward (or Back) Scatter Receiver Window Contamination' field value is much greater than 10 (i.e. 99). Step 9. Remove the white card. 4.3.3 Receiver Background Brightness Measurement Checks The receiver background brightness value measures the optical signal detected by the receiver caused by the ambient background. This value is used to set the threshold values for precipitation particle detection. The following procedure will check this function for the forward scatter receiver on all SWS sensors, and additionally the back scatter receiver on models SWS-200 and SWS-250. User Confidence Checks 53 Maintenance Procedures Section 4 Step 1. Insert grey foam plugs (‘Zero Plugs’, supplied in the calibration kit) into the forward scatter receiver hood (and back scatter hood if applicable), blocking all light from the window. Step 2. Send the command: R? Step 3. Verify that the value in the 'Forward (Back) Scatter Receiver Background Brightness' field is less than 00.06. (forward scatter is field 8, backscatter is field 9, see section 3.1.2). Step 4. Remove the zero plugs from the Sensor Head receiver hoods. Step 5. While shining a flashlight directly into the appropriate receiver window send the command: R? NOTE: This test requires the use of a filament bulb flashlight. There is insufficient IR radiation from a visible LED source to carry out this test successfully. Step 6. Verify that the value in the 'Forward (Back) Scatter Receiver Background Brightness' field is much greater than 00.06. 54 User Confidence Checks Section 5 5 Calibration Procedures CALIBRATION PROCEDURES This section explains how to CHECK the calibration of the sensor and ONLY IF NECESSARY how to recalibrate it. ALL THE PROCEDURES IN THIS SECTION REQUIRE A SWS CALIBRATION KIT The calibration of the forward scatter and the back scatter (SWS-200 and SWS-250 only) channels are checked using the procedure detailed below (section 5.1). The Calibration Reference Plaque used for the calibration check has been assigned a forward scatter calibration value and a back scatter calibration value. These values are shown on the label on the arm of the Calibration Reference Plaque. Each Calibration Reference Plaque also has a MOR equivalent value assigned to it. This value is shown on the surround of the Calibration Reference Plaque. All these calibration values are also provided on the Calibration Certificate sent with the Calibration Kit. Assembly of the Calibration Reference Plaque is shown in Figure 5-1 page 56. This shows it attached to a SWS-200, but the assembly is identical for all other models in this range. 5.1 Calibration Check The following instructions show how to check the calibration of a SWS series sensor. This procedure can only be completed with: 1. A SWS Calibration Kit 2. Connection to a PC running the Biral Sensor Interface Software, or, if this is not available, terminal emulation software (such as Windows ® Hyper Terminal™) using the serial connection. If you need help with this please do not hesitate to contact us (contact details on page vi). Calibration Check 55 Calibration Procedures Section 5 CALIBRATION CHECK NOTES PLEASE READ THESE NOTES BEFORE CONTINUING The MOR (Meteorological Optical Range or visibility) values depend heavily on the location and prevailing weather conditions and should only be carried out with the sensor: 1. MOUNTED OUTSIDE AND ON A CLEAR DAY (VISIBILITY>10KM) 2. POWERED FOR AT LEAST 1 HOUR 3. NOT LOCATED NEAR A WALL OR OTHER OBSTRUCTION 4. NOT RECEIVING OPTICAL REFLECTIONS (FROM SURFACES OR CLOTHING) ASSEMBLING THE CALIBRATION REFERENCE PLAQUE Step 1. Attach the arm to the round calibration screen. Step 2. Fix this assembled calibration reference plaque to the sensor as pictured to the left. Figure 5-1 Assembly of Calibration Reference Plaque (Example of plaque in-situ on SWS-200) 56 Calibration Check Section 5 Calibration Procedures Note: All commands should be terminated with <Carriage Return> and <Line Feed> <crlf>, (see Paragraph 1.3). STEP 1: Clean all windows on the sensor using pure alcohol (propanol) and soft cloth or tissue, preferably lens tissue. Check the cleanliness using a portable light if possible. (Step 1 may not be necessary if checking or commissioning a new sensor) STEP 2: Attach the calibration reference plaque to the sensor as shown in Figure 5-1 (power to the sensor need not be removed). Do not stand close to the sensor during calibration as reflections may cause errors in the reported values. Zero Check: STEP 3: Insert GREY FOAM PLUGS in the front of each window blocking out all light. (There are 3 foam plugs top left in the calibration case - you will only use 2 of these for the SWS-050 or SWS-100). STEP 4: Send the command “RST<crlf>”. Verify the response “OK”. STEP 5: If the sensor is operating in the polled mode, send the “D?” command at 60 seconds intervals. (If the sensor is set to automatically output data then the sensor will output data every 60 seconds.) STEP 6: Wait for the fifth (5th) data message from the sensor. Send the command “BT? <crlf>”. Verify that the response value is between 0.00 and 0.05. STEP 7: SWS-200 and SWS-250 ONLY: Send the command “BB? <crlf>”. Verify that the response value is between -1.0 and +1.0. STEP 8: Remove the foam plugs. Gain Check: STEP 9: Send the command “RST<crlf>” to restart the sensor. Verify the response is “OK”. STEP 10: If the sensor is operating in the polled mode, send “D?” command at 60 seconds intervals. (If the sensor is set to automatically output data then the sensor will output data every 60 seconds.) Calibration Check 57 Calibration Procedures Section 5 Wait for the fifth (5th) data message from the sensor. Send the command “BT? STEP 11: <crlf>”. Verify that the response value is within ±10% of the forward scatter calibration value assigned to the Calibration Reference Plaque.. STEP 12: SWS-200 and SWS-250 ONLY: Send the command “BB? <crlf>”. Verify that the response value is within ± 20% of the back scatter calibration value assigned to the Calibration Reference Plaque. STEP 13: Remove the calibration reference plaque from the sensor. If the results of the calibration check have agreed with the value on the label attached to the calibration reference plaque within the limits stated above, re-calibration is NOT required. A re-calibration is required ONLY if the MOR values are outside those on the calibration reference plaque AND the calibration check has been carried out ACCORDING TO THE CALIBRATION CHECK NOTES on page 56. 58 Calibration Check Section 5 Calibration Procedures 5.2 Sensor Re-calibration RE-CALIBRATING THE METEOROLOGICAL OPTICAL RANGE SHOULD ONLY BE CARRIED OUT IF THE SENSOR HAS FAILED A CORRECTLY PERFORMED USER CONFIDENCE CHECK WARNING ERRORS DURING THIS RE- CALIBRATION PROCEDURE WILL CAUSE THE SENSOR TO GIVE INCORRECT DATA BEFORE CONTINUING ENSURE THAT THE SENSOR: 1. IS MOUNTED OUTSIDE AND THAT VISIBILITY IS GREATER THAN 10KM. 2. HAS BEEN IN CONTINUOUS OPERATION FOR AT LEAST 1 HOUR. 3. WINDOWS ARE CLEAN 4. IS NOT LOCATED NEAR A WALL OR OTHER OBSTRUCTION 5. IS NOT RECEIVING OPTICAL REFLECTIONS (from surfaces or clothing) STEP 1. Set up the sensor with the calibration reference plaque in place - see section 5.1 (power to the sensor need not be removed). STEP 2. Send command CO. Sensor replies: OK. STEP 3. Send command: CE. Sensor replies: CLEAN WINDOWS, BLOCK FWD SCAT RCVR OPTICS, BLOCK TRANSMITTER OPTICS BLOCK BK SCAT RCVR OPTICS (not for the SWS-050 or SWS-100) INSTALL REF STD, ENTER FWD SCAT VALUE FORM: XXX.XX STEP 4. Fit the grey foam plugs (supplied with the calibration kit) against all three of the windows (only two needed for the SWS-050 and SWS-100). Sensor Re-calibration 59 Calibration Procedures Section 5 STEP 5. Enter the forward scatter calibration value from the calibration plaque. STEP 6. SWS-200 and SWS-250 Only Sensor replies: ENTER BACK SCAT VALUE FORM: XXX.XX Enter the back scatter calibration value from the calibration reference plaque. STEP 7. Sensor replies: CAL IN PROGRESS Wait for approximately 2 minutes. Sensor replies: REMOVE OPTICS BLOCKS, ENTER "OK" STEP 8. Remove grey foam plugs from all windows and send text: OK. Sensor replies: CAL CONTINUES STEP 9. Wait for approximately 2 minutes. Sensor replies: CAL COMPLETE REMOVE REF STD Note: Do not remove the calibration reference plaque at this point. STEP 10. Wait for the third data message to be received at the PC. STEP 11. Send the command BT? and note the response value. STEP 12. Send the command BB? and note the response value (SWS-200 and SWS-250 only). STEP 13. If the response to the BT? command is within ±3% of the forward scatter calibration value of the plaque, and the response to the BB? command is within ±5% of the back scatter calibration value of the plaque then the sensor is within its calibration limits. The sensor can be returned to its operational configuration with confidence. 60 Sensor Re-calibration Section 5 Calibration Procedures 5.3 Precipitation Amount Calibration Note: All commands should be terminated with <Carriage Return> and <Line Feed> <crlf>, (see Paragraph 1.3). This section is only applicable to models SWS-200 and SWS-250. This process provides for adjusting the calibration factor of the sensor precipitation measurement. The amount of adjustment to this factor is determined by making an independent measurement of the liquid accumulation over several rain episodes and comparing the accumulation reported by the sensor to this independently measured accumulation. The value to be entered to adjust the precipitation amount factor is calculated as follows: Value entered = Desired precipitation accumulation * 100 Sensor's reported precipitation accumulation EXAMPLE: Over several rainstorms, a reference sensor measures an accumulation of 225 millimetres. The SWS sensor reported an accumulation of 244 millimetres. To adjust the sensor's precipitation accumulation factor, the value to be entered is: 225 x 100 = 92.2 244 The suggested procedure to be used for precipitation amount calibration is as follows: STEP 1. Send the parameter command: “CO”. The sensor replies: OK. STEP 2. Send the precipitation amount calibration command: “CA”. Sensor replies: ENTER PRECIP AMT ADJ FACTOR IN PERCENT (30.0 TO 300.0) FORM: XXX.X STEP 3. Send the required adjustment factor: (e.g. 92.2). Sensor replies: CAL COMPLETE STEP 4. The precipitation amount calibration process is complete. Precipitation Amount Calibration 61 Product Overview 6 Section 6 PRODUCT OVERVIEW 6.1 SWS-050, SWS-100, SWS-200 and SWS-250 Present Weather Sensors There are four models in the SWS series of present weather sensors, the SWS-050, SWS100, SWS-200 and SWS-250. They all use the same basic opto-mechanical and electronic components and have an optical transmitter and forward scatter receiver. The SWS-200 and SWS-250 also have a backscatter receiver to aid in precipitation identification. All models have the same time-proven software for measuring visibility and precipitation type and performing remote self-test diagnostics. The measurement capabilities of the models are as follows: Sensor Model Capability SWS-050 Visibility Obstruction to Vision SWS-100 Visibility Precipitation type identification 1 Fault relay switch 1 Relay for visibility 1 Relay for precipitation or visibility Figure 6-1 SWS-050 and SWS-100 Capabilities 62 SWS-050, SWS-100, SWS-200 and SWS-250 Present Weather Sensors Section 6 Product Overview Sensor Model Capability SWS-200 Visibility Precipitation type identification 1 Fault relay switch 1 Relay for visibility 1 Relay for precipitation or visibility This model has an extra backscatter receiver for: Rain rate Snowfall rate Precipitation accumulation SWS-250 Visibility Precipitation type identification Rain rate Snowfall rate Precipitation accumulation This model will additionally report: 39 weather codes (from WMO Code Table 4680), including Past weather Freezing Fog Ice Pellets Figure 6-2 SWS-200 and SWS-250 Capabilities SWS-050, SWS-100, SWS-200 and SWS-250 Present Weather Sensors 63 Product Overview Section 6 6.1.1 Instrument Components Each sensor has been engineered and manufactured with high-reliability components to provide accurate measurements under all weather conditions. Its rugged aluminium powder-coated construction is intended to serve you in the severest of environmental conditions throughout the long life of the instrument. All models are shipped fully assembled. 6.1.2 Optional Items Hood Heaters (standard on the SWS-050 and SWS-250) Heaters for the transmitter and receiver hoods. These are to minimise any build-up of ice within the optical paths. They require 12W per hood, supplied from an independent customer supplied source of 24 V, either AC or DC (Not to be confused with window heaters which are included in all sensors). Analog Data Output (only applicable to SWS-100 and SWS-200) In addition to the standard 0 - 10 V MOR analog output, a 4 - 20 mA or 0 - 20 mA current loop output can be supplied. This must be requested by the customer when ordering the sensor. Window Contamination Monitoring All SWS sensors have continual monitoring of the transmitter window contamination, with automatic compensation of the visibility measurements. Additional monitoring of the receiver window(s) is provided as standard on the SWS-050 and SWS-250, but is optional on the SWS-100 and SWS-200. This provides additional warning of localised contamination build-up on all sensor windows. See “window monitoring” information in section 4.2 Self-Test Codes. 6.1.3 Accessories Calibration Kit The calibration kit, containing a reference standard calibration plaque in a protective carrying case, is employed only at those times that the instrument calibration is being checked, see section 5, page 55 for a full description of the calibration process. Transit Case A rigid re-usable transit case designed to provide full protection to the instrument for regular shipping is available. 64 SWS-050, SWS-100, SWS-200 and SWS-250 Present Weather Sensors Section 6 Product Overview Mains Adapter A mains adapter is available if required. Power and Signal Cables These may be ordered if required. The length must be specified at time of order. Ambient Light Sensor The Biral ALS-2 ambient light sensor can be readily integrated with any SWS sensor. This provides an accurate measure of the prevailing apparent light intensity in any specific direction. The intensity measurement over a very wide range (< 2 up to 40,000 cd m-2) is integrated into the standard sensor output data stream; see section 2.5 Data Message Variations For ALS-2. 6.2 Sensor Features The SWS sensors are both visibility sensors and present weather sensors. They have the necessary optimum configuration for accurate measurement of visibility in the densest of fogs to very clear air conditions. They can detect the onset of precipitation as readily as a human observer and can measure the size and velocity of precipitation particles. Unique patented techniques utilising precipitation size/velocity distributions and backscatter/forward scatter ratios provide essentially error-free identification of the type of precipitation. False alarms and false identifications are kept to a minimum by the application of empirically derived algorithms sensitive to the characteristic of electronic noise and insects. Also unique is the sensor’s capability for separating the contribution of extinction due to precipitation from the total atmospheric extinction coefficient, thus giving the sensor the capability to identify fog whenever it is simultaneously present during a precipitation episode. In addition to its optimal and unique measurement capabilities, the SWS sensor has a number of distinctive physical features: Compactness: The sensor is a single package, small in size and weight. It can be readily installed by one person and can be used in portable or fixed installations. Proven Software: The basic software incorporated into the sensor has evolved over a long period of time and has been tested and proven in hundreds of sensors. Sensor Features 65 Product Overview Section 6 Ease of Maintenance and Calibration: Routine maintenance, including a check on calibrations, is performed in a matter of a few minutes. A re-calibration, if required takes only slightly longer and is easily performed by one person. 6.3 Present Weather Measurements 6.3.1 Present Weather Definition The term "Present Weather" is generally employed to define a large class of atmospheric phenomena that includes tornado activity, thunderstorm activity, precipitation, obstructions to vision, and "other atmospheric phenomena" such as aurora. For purposes of Automated Present Weather Sensors, the term "present weather" is restricted to those atmospheric phenomena that are local to the sensor. These phenomena include: 1. All forms of liquid and frozen precipitation; e.g., rain, drizzle, snow, snow pellets, snow grains, ice pellets (formerly sleet) and hail, and 2. Those suspended particles that are classed as obstructions to vision; namely, mist, fog, haze, dust and smoke. 6.3.2 Automated Measurements The present weather sensor utilises microprocessor technology to perform automatic visibility, precipitation and temperature measurements. The standard version is DC power operated; however, a mains converter is also available. Patented techniques are employed to identify precipitation and to determine the presence of fog during episodes of precipitation. 6.4 Visibility Measurements 6.4.1 Visibility Measurement Capability The visibility measurement capabilities of the sensor are summarised in Table 6-1. Determination of visual range is based on measurements of the atmospheric extinction coefficient (EXCO). Note that EXCO includes the attenuating effects of both suspended particles and precipitating particles. Meteorological optical range (MOR) is determined by application of the standard relation, MOR = 3.00/EXCO Haze and fog are the two most common forms of obstructions to vision. In the absence of precipitation, the sensor determines the presence of haze or fog based on the MOR. If the 66 Present Weather Measurements/Visibility Measurements Section 6 Product Overview MOR is less than 1 km, then fog (30) is indicated in the output message. If the MOR is between 1 and 10 km, then haze (04) is indicated in the output message. If MOR is greater than 10 km, no obstruction to vision is indicated. Note: Definitions of haze and fog may change dependent on the country of use. These definitions can be adjusted at time of manufacture for SWS200 and SWS250 sensors, in conjunction with the precipitation intensity definitions, see section 6.5.2 for details. The above definitions for haze and fog are always used by the SWS050 and SWS100 sensors. In the presence of precipitation, the sensor software measures the fraction of the atmospheric extinction coefficient due to precipitation and subtracts it from the total extinction coefficient to obtain a quantity we have named EXCO-EVENTS. If the value of EXCO-EVENTS is greater than 3.00 (MOR less than 1km), then fog is declared to be present in addition to the precipitation as an obstruction to vision. Function Details SWS-050 – 10m to 40km SWS-050T, SWS-100 and SWS-200 - Selectable from the following options at time of order: 10m to 2km 10m to 10km 10m to 20km 10m to 32km 10m to 50km (40km for the SWS-050T) 10m to 75km (Not for the SWS-050T) Other ranges between 10m and 75km by special request. Meteorological Optical Range (MOR) SWS-250 – 10m to 75km Measurement Accuracy MOR ~ 10km MOR ~ 20km MOR ~ 30km Better than 10% Better than 15% Better than 20% Obstruction to vision (1) Identifies Fog or Haze (Precipitation Absent). (2) Identifies Fog in Presence of Precipitation. Table 6-1 Visibility measurement capabilities 6.5 Precipitation Measurements 6.5.1 Precipitation Measurement Sensitivity The sensor identifies a variety of forms of precipitation, dependent on the model selected. Detection of the onset of precipitation in all the sensors is extremely sensitive, being 0.00025 mm per minute for rain and approximately 0.000025 water equivalent mm per minute for frozen precipitation. The actual limits of measurements are given in Table 6-2. Precipitation Measurements 67 Product Overview Section 6 Function Details (a) Liquid Precipitation (minimum detection limit): 0.00025 mm/min (0.00001 in/min). 0.015 mm/hr (0.00060 in/hr). (b) Snow (H20 Equivalent) (minimum detection limit) 0.000025 mm/min (0.000001 in/min). 0.0015 mm/hr (0.000060 in/hr). Precipitation rate (maximum) Rain – Up to 500 mm/hr (20 in/hr). Snow – Rain Equivalent up to 500 mm/hr (20 in/hr). Table 6-2 Precipitation measurement limits 6.5.2 Precipitation Intensity Measurements In addition to the basic precipitation identification, carried out in the SWS-100, SWS-200 and SWS-250 sensors, the SWS-200 and SWS250 sensors are designed to measure the intensity of precipitation. The intensity for each type of precipitation is classified as slight, moderate of heavy. Intensity of precipitation may be defined differently from one country to another. In both the United Kingdom and the United States, the intensity of precipitation is defined differently for drizzle and rain than for snow. For drizzle and rain, the intensity (slight, moderate and heavy) is based on the rate of fall of precipitation. For snow the intensity is based on visual range. In classifying precipitation intensity, the sensor utilises the precise definitions given by the UK CAA CAP 746 document, or in the US, the Federal Meteorological Handbook. These definitions are given in the tables below (Table 6-3 and Table 6-4). Note: If a sensor is intended for installation in a country where the definitions of precipitation intensity differ from the U.K. definitions, it is possible for the sensor to be produced with the appropriate definitions installed. BIRAL must be informed of this requirement at the time of order. UK Precipitation Definitions Drizzle 68 Slight A trace to 0.26mm/hour. Moderate 0.26mm/hour to 1.0 mm/hour. Heavy More than 1.0 mm/hour. Precipitation Measurements Section 6 Product Overview Rain Slight A trace to 1.0 mm/hour. Moderate Greater than 1.0 mm/hour to 3.99 mm/hour. Heavy More than 3.99mm/hour. Snow Slight Visibility greater than 800m. Moderate Visibility between 400 and 800 meters. Heavy Visibility less than 400 meters. Table 6-3 UK precipitation intensity definitions (Based on CAA CAP 746 ‘Requirements for Meteorological Observations at Aerodromes’) US Precipitation Definitions Drizzle Slight A trace to 0.01 inches (0.3 mm)/hour. Moderate 0.01 inches (0.3mm) to 0.02 inches (0.5 mm)/hour. Heavy More than 0.02 inches (0.5 mm)/hour. Rain Slight A trace to 0.10 inches (2.5 mm)/hour. Moderate 0.10 to 0.30 inches (2.6 to 7.6 mm)/hour. Heavy More than 0.30 inches (7.6 mm)/hour. Snow Slight Visibility equal to or greater than 5/8 statute miles, 0.55 nautical miles, or 1,000 meters. Moderate Visibility between 1/4 and 5/8 statute miles, 0.2 to 0.55 nautical miles, or 400 to1000 meters. Heavy Visibility equal to or less than 1/4 statute miles, 0.2 nautical miles, or 400 meters. Table 6-4 US precipitation intensity definitions (Based on Federal Meteorological Handbook No. 1 Part B.1.) Precipitation Measurements 69 Product Overview Section 6 6.5.3 Precipitation Reporting Any precipitation identified is reported according to the present weather codes from the WMO table 4680 (Automatic Weather Station). Additionally, the SWS-250 reports METAR present weather codes, see Table 2-5 METAR codes, page 41. The WMO codes utilised by each SWS sensor model are listed below. Present Weather Codes – SWS-050 Code Description XX Not Ready (first 5 measurement periods from restart). 00 No Significant weather observed. 04 Haze or smoke. 30 Fog. Table 6-5 SWS-050 WMO codes Present Weather Codes – SWS-100 Code Description XX Not Ready (first 5 measurement periods from restart). 00 No Significant weather observed. 04 Haze or smoke. 30 Fog. 40 Indeterminate precipitation type. 50 Drizzle. 60 Rain. 70 Snow. Table 6-6 SWS-100 WMO codes Present Weather Codes – SWS-200 Code 70 Description XX Not Ready (first 5 measurement periods from restart). 00 No Significant weather observed. 04 Haze or smoke. Precipitation Measurements Section 6 Product Overview Code Description 30 Fog. 40 Indeterminate precipitation type. 51 Light Drizzle. 52 Moderate Drizzle. 53 Heavy Drizzle. 61 Light Rain. 62 Moderate Rain. 63 Heavy Rain. 71 Light Snow. 72 Moderate Snow. 73 Heavy Snow. 89 Hail. Table 6-7 SWS-200 WMO codes Present Weather Codes – SWS-250 Code METAR Description XX Not Ready (first 5 minutes from restart). 00 No significant weather observed. 04 HZ Haze, visibility greater than or equal to 1km. 20 Fog in last hour but not at time of observation. 21 Precipitation in last hour but not at time of observation. 22 Drizzle in last hour but not at time of observation. 23 Rain in last hour but not at time of observation. 24 Snow in last hour but not at time of observation. 30 FG Fog. 31 BCFG Fog in patches. 32 PRFG Fog becoming thinner in last hour. 33 FG Fog no appreciable change in last hour. 34 FG Fog begun or becoming thicker in last hour. 35 FZFG Freezing Fog. 40 UP Indeterminate precipitation type. Precipitation Measurements 71 Product Overview Code Section 6 METAR Description 51 -DZ Drizzle, not freezing, slight. 52 DZ Drizzle, not freezing, moderate. 53 +DZ Drizzle, not freezing, heavy. 57 -RADZ Drizzle and Rain, slight. 58 RADZ Drizzle and Rain, moderate. 58 +RADZ Drizzle and Rain, heavy. 61 -RA Rain, not freezing, slight. 62 RA Rain, not freezing, moderate. 63 +RA Rain, not freezing, heavy. 67 -RASN Rain (or Drizzle) and Snow, slight. 68 RASN Rain (or Drizzle) and Snow, moderate. 68 +RASN Rain (or Drizzle) and Snow, heavy. 71 -SN Snow, slight. 72 SN Snow, moderate. 73 +SN Snow, heavy. 74 -PL Ice Pellets, slight. 75 PL Ice Pellets, moderate. 76 +PL Ice Pellets, heavy. 77 SG Snow Grains . 78 IC Ice Crystals. 81 -SHRA Rain Showers, slight. 82 SHRA Rain Showers, moderate. 83 +SHRA Rain Showers, heavy . 85 -SHSN Snow Showers, slight. 86 SHSN Snow Showers, moderate. 87 +SHSN Snow Showers, heavy. 89 GR Hail. 89 GS Small Hail / Graupel. Table 6-8 SWS-250 WMO and METAR codes 72 Precipitation Measurements Section 6 Product Overview 6.5.4 Precipitation Recognition Matrix The SWS series of sensors measure the amplitude and duration of the light pulse created by each precipitation particle as it falls through the sample volume. From the amplitude and duration it then determines the particle size and velocity. The size and velocity information is collected in a data matrix by the microcomputer and is stored for a time interval (the measurement time period, usually one minute) adequate to provide a statistically significant and representative sample of particle sizes and velocities. The size and velocity distributions of particles in the matrix are available to determine the type of precipitation. Small numbers of particles with distributions not indicative of rain or snow are considered not to be precipitation and are rejected by false alarm algorithms. Once precipitation occurrence has been determined, the particle size distribution is used to measure the intensity. To measure the intensity, the number of particles in each size bin of the matrix are summed, and then multiplied by the equivalent volume of water and a calibration constant. If the precipitation is identified as snow, a density factor is applied to determine the equivalent water content. Because the size/velocity matrix is a convenient presentation for identifying various forms of precipitation we have termed it the "Precipitation Recognition Matrix". Types of precipitation are identified from their "Signature" in the Precipitation Recognition Matrix. The "Signature" is the particle size/velocity distribution that is characteristic of each type of precipitation phenomena. An example of a precipitation recognition matrix is shown in Figure 6-3 Precipitation Recognition Matrix. This figure portrays a 16 x 21-matrix array of particle sizes and velocities. Sizes are arranged in columns and velocities in rows. Precipitation Measurements 73 Product Overview Section 6 Figure 6-3 Precipitation Recognition Matrix General size/velocity characteristics of various types of precipitation displayed on the precipitation recognition matrix. 74 Precipitation Measurements Section 6 Product Overview 6.6 Sensor Specifications The specifications for all versions of the SWS sensor series are summarised in the following pages. Where certain specifications are only applicable to certain models within the range, this is stated within that table. Visibility Measurements (MOR) and Precipitation Measurements Function Details Measurement Range – MOR (Meteorological Optical Range) SWS-050 – 10m to 40km SWS-050T, SWS-100 and SWS-200 Selectable from the following options at time of order: 10m to 2km 10m to 10km 10m to 20km 10m to 32km 10m to 50km (40km for the SWS-050T) 10m to 75km (Not the SWS-050T) Other ranges between 10m and 75km by special request. SWS-250 – 10m to 75km Measures: Visibility (MOR – Meteorological Optical Range), reductions caused by: fog, haze, smoke, sand, drizzle, rain, snow and general precipitation. Measurement Accuracy MOR ~ 10km MOR ~ 20km MOR ~ 30km Measurement Time Constant 30 seconds Better than 10% Better than 15% Better than 20% Stability of MOR Zero Setting Function Details Ambient Temperature Effects ≤ 0.02/km Long Term Drift ≤ 0.02/km Sensor Specifications 75 Product Overview Section 6 Precipitation Measurements (Not SWS-050) Function Details Detection Threshold: Rain 0.015mm/hr (0.0006 in/hr.) Detection Threshold: Snow (H20 Equivalent) 0.0015mm/hr (0.00006 in/hr.) Rain Rate (Maximum) ~ 500mm/hr (20 in/hr.) Maintenance Function Details MTBF (Calculated) 52,500 hrs (6 years). Typical Calibration Check Interval 6 months. Typical Clean Windows Interval 3 months. Remote Self-Test Monitoring Included. Table 6-9 Sensor specifications 6.7 Instrument Characteristics Physical Function Details Scattering Angle 45 with ± 6 cone angle Sample Volume 400 cm3 Weight 3.8Kg (4.3Kg including pole mounting kit) 4.0Kg (4.5Kg including pole mounting kit SWS-050 and SWS-100 SWS-200 and SWS-250 Length 0.81 m Light Source 76 Function Details Type IRED Central Wavelength 0.85m Bandwidth 0.04m Lifetime >10 years Modulation Frequency 2000 Hz Instrument Characteristics Section 6 Product Overview Detector Function Details Type (Photovoltaic) Silicon Response Silicon Filter Bandwidth 0.08m at 0.85m Temperature Sensor Function Details Type Circuit mounted IC Range -60°C to 100°C Power Requirements Function Details Power Source Sensor (Voltage) 9V to 36V DC (24V typical) Power Source Sensor (Power) 3.5 W Power Source Hood Heaters (Voltage) 24V DC or AC Power Source Hood Heater (Power) SWS-050 and SWS-100 24W SWS-200 and SWS-250 36W Additional for ALS-2 option 12W Additional Power for: No-Dew Window Heaters SWS-050 and SWS-100 1.7W SWS-200 and SWS-250 2.5W Additional Power for ALS-2 Option 1.2 W no window heater 2.0 W with window heater Environmental Function Details Sensor Operating Temperature Range -40C to +60C Altitude 0 to 20,000 ft Precipitation All weather Humidity 0 to 100% Protection Rating IP66/67 CE Certified √ Instrument Characteristics 77 Product Overview Section 6 Function Details EMC Compliant EN61326-1997,1998.2001 RoHS and WEE Compliant √ Table 6-10 Instrument characteristics 6.8 Digital Communication Interface Communication Protocol Function Details Interface Type RS232C, (Full Duplex) User Selectable RS422/RS485 Communication Parameters: Function Details Baud Rates (User selectable) 1200 Baud to 57K6 Baud (Default 9600 Baud) Data Bits 8 Parity None Stop Bits 1 Flow Control None Message Termination <CR,LF> Message Checksum: Selectable (sum modulo 128) for RS232/422 LRC for RS485 Reporting Interval Programmable (Response to poll, or Automatic at programmable intervals: 10 seconds to 5 minutes; 1 minute typical) Message Content: • Instrument Identification Number (Programmable) • Reporting Interval (seconds) • Meteorological Optical Range (Kilometres) • Precipitation Type • Obstruction to Vision (Fog, Haze, None) • Precipitation Amount (One Minute Interval) • Temperature • Remote Self-Test & Monitoring Flags • Date and time tags Table 6-11 Digital communication interface specifications 78 Digital Communication Interface Section 6 Product Overview 6.9 Analog Outputs These are available only on models SWS-050T, SWS-100 and SWS-200. Function Details Voltage 0 to 10 Volts out. Equivalent to 0 to MORMAX. Current 4 to 20 mA. Equivalent to 0 to MORMAX (option) 0 to 20 mA. Equivalent to 0 to MORMAX (option) (NOT SWS-050T) Table 6-12 Analog output specification 6.10 Relay Outputs These are available only on models SWS-050T, SWS-100 and SWS-200. Each relay has a Common terminal and NC and NO terminals. Function Details Fault Normally energised. Releases on fault condition Relay # 1 Settable for visibility range 0.02 km to MORMAX. Relay # 2 Settable for visibility range 0.02 km to MORMAX OR Triggered by presence of Precipitation OR Triggered by presence of Snow Switching Voltage (Max) 220 Vdc, 250 Vac Switching Current (Max) 2A Switching Power (Max) 60 W, 125 VA Contact Type Silver alloy with gold alloy overlay Table 6-13 Relay specification Analog Outputs/Relay Outputs 79 Product Overview Section 6 6.11 Sensor Remote Self-Test Capabilities 80 Optical Source Power. Forward Scatter Receiver Sensitivity. Back Scatter Receiver Sensitivity (not SWS-050 or SWS-100). Transmitter Window Contamination. Forward Scatter Receiver Window Contamination (optional on SWS-100 and SWS200). Back Scatter Receiver Window Contamination (optional on SWS-200). Power Supply Voltages. Non-Volatile Memory Checksum Test. EPROM Check-Sum Test. Restart Occurrence. Sensor Sample Interrupt Verification. RAM Read/Write Verification. Register Read/Write Verification. A/D Control Signal Test. A/D Conversion Accuracy Check. Input Voltage Check. Forward Scatter Background Illumination Level. Back Scatter Background Illumination Level (SWS-200 and SWS-250 only). Sensor Remote Self-test Capabilities Section 6 Product Overview 6.12 SWS Sensors – external dimensions All SWS sensors have dimensions as shown below. The diagrams show the SWS-200 and SWS-250 versions. The SWS-050 and SWS100 versions do not have the back scatter hood and window. Backscatter receiver Figure 6-4 External Dimensions of SWS Sensors (Dimensions in mm) SWS Sensors- External Dimensions 81 Index 7 Section 7 INDEX A ACCESSORIES Ambient Light Sensor ................................................................................................................................ 65 Calibration Kit ........................................................................................................................................... 64 Mains Adapter ........................................................................................................................................... 65 Power and Signal Cables ........................................................................................................................... 65 Transit Case ............................................................................................................................................... 64 AFTER SALES SUPPORT .....................................................................................................................................VI AMBIENT LIGHT SENSOR .....................................................................................................................V, 9, 42, 65 Data Message Extension ............................................................................................................................ 42 ANALOG DATA OUTPUT ..........................................................................................................................8, 64, 79 Connections for Optional 0 / 4-20mA ......................................................................................................... 8 B BACKSCATTER RECEIVER ................................................................................................................ 53, 54, 62, 65 BAUD RATE ..........................................................................................................................................10, 21, 28 BIRAL SENSOR INTERFACE SOFTWARE ............................................................................................ 1, 10, 28, 49, 51 C CABLES .............................................................................................................................................................. 3 Cable Glands ............................................................................................................................................... 3 Power and Signal Cables ....................................................................................................................... 2, 65 Connecting ............................................................................................................................................. 4 CALIBRATION ............................................................................................................................................... 2, 55 Calibration Certificate............................................................................................................................... 10 Calibration Kit ....................................................................................................................................... 2, 64 Assembly .............................................................................................................................................. 55 Precipitation Amount ................................................................................................................................. 61 Re-calibration ............................................................................................................................................ 59 CE CERTIFICATION - SAFETY............................................................................................................................VII CHECKSUM ..................................................................................................................................... 32, 34, 36, 46 LRC (RS485 only) ................................................................................................................... 16, 17–18, 19 Normal (not RS485) ............................................................................................................................ 14–16 COMMANDS AND RESPONSES............................................................................................................................ 43 Sensor Responses ...................................................................................................................................... 47 COMMUNICATION SPECIFICATION ..................................................................................................................... 78 COMMUNICATIONS CONFIGURATION ................................................................................................................ 16 CONFIGURATION OPTIONS ................................................................................................................................ 12 Automatic Messages .................................................................................................................................. 19 Baudrate..................................................................................................................................................... 21 Checksum .................................................................................................................................................. 14 Date and Time Stamp ................................................................................................................................ 13 Hood Heaters ............................................................................................................................................. 20 Relays ........................................................................................................................................................ 22 RS485 ........................................................................................................................................................ 16 Window Heaters ........................................................................................................................................ 20 CONTACT DETAILS ............................................................................................................................................ VI D DATA MESSAGE ............................................................................................................................................... 31 Ambient Light Sensor ................................................................................................................................ 42 Check Data Transmission .......................................................................................................................... 11 Example of Data Message ............................................................................................................. 33, 35, 37 DATE AND TIME STAMP.................................................................................................................................... 13 DIMENSIONS OF SENSOR ................................................................................................................................... 81 82 Index Section 7 Index E ELECTRICAL CONNECTIONS ................................................................................................................................ 3 Ambient Light Sensor .................................................................................................................................. 9 Power and Signal Cables ............................................................................................................................. 4 EMC COMPLIANCE ............................................................................................................................................ 8 ENVIRONMENTAL SPECIFICATION .................................................................................................................. 77 EQUIPMENT TEST ............................................................................................................................................. 10 H HEATERS .......................................................................................................................................................... 48 Hood Heaters ....................................................................................................................................... 48, 64 Commands............................................................................................................................................ 43 Connecting Power Supply ...................................................................................................................... 5 Window heaters (de-misters) ..................................................................................................................... 48 I IDENTIFICATION NUMBER ................................................................................................................ 32, 33, 35, 43 INSTALLATION ................................................................................................................................................. 23 Electrical Grounding.................................................................................................................................. 27 Height Above Ground................................................................................................................................ 24 Mounting ............................................................................................................................................. 26–27 Orientation ........................................................................................................................................... 24–25 Siting Considerations ................................................................................................................................. 23 IP RATING ........................................................................................................................................................ 77 M MAINS ADAPTER ................................................................................................................................................ 2 MAINTENANCE ................................................................................................................................................. 48 General Checks .......................................................................................................................................... 48 Hood Heaters ........................................................................................................................................ 48 Window Cleaning ................................................................................................................................. 49 Self-Test Codes.......................................................................................................................................... 50 User Confidence Checks............................................................................................................................ 51 MOR Calibration Check ....................................................................................................................... 51 Receiver Background Brightness Check .............................................................................................. 53 Window Monitor Checks ..................................................................................................................... 52 MAINTENANCE SCHEDULE................................................................................................................................ 76 MEASUREMENT PRINCIPLES Precipitation Recognition Matrix............................................................................................................... 74 METAR CODES ....................................................................................................................................40, 41, 72 METEOROLOGICAL OPTICAL RANGE ........................................................................... 8, 32, 33, 35, 56, 59, 66, 75 Calibration Check ...................................................................................................................................... 55 Re-calibration ............................................................................................................................................ 59 MOUNTING .............................................................................................................................. SEE INSTALLATION O OPTIONAL ACCESSORIES .............................................................................................................................. 2, 64 Ambient Light Sensor .................................................................................................................................. 9 Calibration Kit ............................................................................................................................................. 2 Mains Adaptor ............................................................................................................................................. 2 Transit case .................................................................................................................................................. 2 ORIENTATION OF SENSOR ................................................................................................................................. 24 P PIN CONNECTIONS .............................................................................................................................................. 4 Index 83 Index Section 7 Connections for 0 / 4-20mA analogue output .............................................................................................. 8 Connections for Power Supply .................................................................................................................... 5 Connections for Relay ................................................................................................................................. 7 Connections for RS232 or RS422 ................................................................................................................ 5 POWER REQUIREMENTS .................................................................................................................................... 77 PRECIPITATION AMOUNT CALIBRATION ............................................................................................................ 61 PRECIPITATION MEASUREMENTS ...................................................................................................................... 67 PRECIPITATION RECOGNITION MATRIX ....................................................................................................... 73, 74 PRESENT WEATHER .......................................................................................................................................... 66 Present weather codes in SWS-100 data message ..................................................................................... 33 Present weather codes in SWS-200 data message ..................................................................................... 35 Present weather codes in SWS-250 data message ..................................................................................... 37 PRODUCT OVERVIEW........................................................................................................................................ 62 PROTECTIVE EARTH BONDING ........................................................................................................................... 7 R RELAYS Pin Connections ........................................................................................................................................... 7 Threshold levels......................................................................................................................................... 22 REMOTE SELF-TEST & MONITORING ................................................................................................................ 62 Capabilities ................................................................................................................................................ 80 Check ......................................................................................................................................................... 29 Data Message....................................................................................................................................... 11, 29 RESPONSES FROM SENSOR ................................................................................................................................ 47 To Command M? ....................................................................................................................................... 45 To Command R? ........................................................................................................................................ 46 To Command T? ........................................................................................................................................ 47 RS232 ....................................................................................................................................................6, 10, 28 RS422 .............................................................................................................................................. 6, 10, 16, 28 RS485 ........................................................................................................................................ 6, 10, 14, 28, 43 Configuration Settings ......................................................................................................................... 16–19 S SELF-TEST CODES ............................................................................................................................................ 50 SENSOR COMMANDS ........................................................................................................................................ 43 SENSOR DIMENSIONS........................................................................................................................................ 81 SENSOR ORIENTATION ...................................................................................................................................... 24 SENSOR RESPONSES ......................................................................................................................................... 47 SENSOR SPECIFICATIONS .................................................................................................................................. 75 T TEST AND COMMISSIONING .............................................................................................................................. 28 TIME STAMP..................................................................................................................................................... 13 TRANSIT CASE ................................................................................................................................................... 2 TROUBLESHOOTING .......................................................................................................................................... 28 Checking Data link .................................................................................................................................... 28 Checking Power Supply ............................................................................................................................ 28 Remote Self-Test Check ............................................................................................................................ 29 Self-Test Codes.......................................................................................................................................... 50 Sensor Responses ...................................................................................................................................... 47 Sensor Self-Test Capabilities ..................................................................................................................... 80 V VISIBILITY MEASUREMENTS ............................................................................................................................. 75 84 Index Section 7 Index W WARRANTY ............................................................................................................................................ II, VII, 28 WINDOW CLEANING ......................................................................................................................................... 49 WINDOW HEATERS........................................................................................................................................... 48 WMO TABLE 4680 ..................................................................................................................................... 32, 70 Index 85 Notes: 86