1
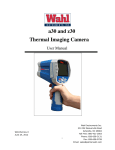
a50 and z50
Thermal Image Camera
User Manual
WD1055 Rev C
July 18, 2011
Wahl Instruments Inc.
234 Old Weaverville Road
Asheville, NC 28804
Tel: (828) 658-3131
Fax: (828) 658-0728
1
Email: [email protected]
! Warnings, Cautions and Notes
Definitions
!
WARNING Could cause bodily injury or death.
!
CAUTION Could cause damage to equipment or permanent loss of data.
!
NOTE provides useful information to the operator.
Important Information – Read before using the Instrument
!
WARNING – Laser Radiation is emitted from this device. Do Not stare
into Laser Beam. Class 2 Laser, 635 nm, 0.9mW
!
CAUTION - Never point the lens directly toward a strong radiation source
(ie. Sun, direct or reflected laser beam, etc ), with power on or power off, as
damage may result to the thermal detector used inside. Permanent
damage may result!
!
CAUTION - The original shipping carton should be kept for use for future
transportation. Do not drop, shake or impact the thermal imager
excessively, in use or during transportation.
!
CAUTION - Store the unit in its original case in a cool, dry, well-ventilated
area away from strong electromagnetic fields.
!
CAUTION - Protect the surface of the lens from being stained or damaged
by foreign objects such as sludge or chemicals. Please replace the lens cap
after use.
!
CAUTION - Please remember to backup image data regularly to avoid
losing important data.
!
NOTE - For maximum measurement accuracy, allow 3 to 5 minutes for
camera to stabilize after initial power up.
2
!
NOTE - Each camera is factory calibrated. It is recommended that
calibration be performed every 12 months.
!
CAUTION - Do not open case. Unit does not contain any user serviceable
parts. Repair should be performed by factory authorized technicians only.
WARRANTY & CALIBRATION
REGISTRATION at
www.palmerwahl.com/register
Registration is fast and easy. In about a minute you
can have your product automatically registered for
Warranty Protection and our Calibration Reminder
service. Let Palmer Wahl help you protect your
investment, and maintain product accuracy and
compliance with ISO and other quality standards.
Questions? Call Customer Service
at 1-800-421-2853 or 828-658-3131
Or email: [email protected]
3
Contents ! Warnings, Cautions and Notes.......................................................... 2 1
Introduction ................................................................................. 6
1.1 1.2 2 Camera overview ........................................................................ 10 2.1 2.2 3 Standard accessories ................................................................................................9 Optional accessories..................................................................................................9 Function keys .............................................................................................................10 Interface ......................................................................................................................14 Getting started ........................................................................... 15 3.1 Battery Installation and Replacement ..............................................................15 3.1.1 Inserting or removing battery .....................................................................15 3.1.2 Replacing battery..............................................................................................17 3.2 Battery safety and usage ......................................................................................17 3.3 Quick access...............................................................................................................18 3.3.1 Capture an image.............................................................................................18 3.3.2 Temperature measurement ..........................................................................19 3.3.3 Save image .........................................................................................................20 3.3.4 Viewing stored Images...................................................................................21 3.3.5 Export saved images.......................................................................................21 4 Operation guide .......................................................................... 21 4.1 Graphic interface description ...............................................................................21 4.1.1 Screen graphic interface................................................................................21 4.1.2 Main menu...........................................................................................................23 4.1.3 Dialog box ...........................................................................................................23 4.1.4 Prompt box interface.......................................................................................24 4.2 Measurement .............................................................................................................24 4.3 Level/Span ..................................................................................................................25 4.4 Setup menu ................................................................................................................26 4.4.1 Measuring Setup ...............................................................................................27 4.4.2 Adjustment..........................................................................................................28 4.4.3 Alarms...................................................................................................................29 4.4.4 Date/Time............................................................................................................30 4.4.5 System Setup.....................................................................................................31 4.4.6 System Info ........................................................................................................32 4.4.7 Factory Default ..................................................................................................33 4.5 File..................................................................................................................................34 4.5.1 Open ......................................................................................................................34 4.5.2 Save.......................................................................................................................35 4
4.5.3 4.5.4 4.5.5 4.5.6 5 Save Setting .......................................................................................................37 Auto Save ............................................................................................................38 Delete....................................................................................................................39 Format ..................................................................................................................39 Technical specifications .............................................................. 41 Troubleshooting ............................................................................... 42 Appendix A ....................................................................................... 44 Common material emissivity ...........................................................................................44 Appendix B ....................................................................................... 45 Factory default parameter setting table ......................................................................45 5
1 Introduction
Thank you for choosing the Wahl Instruments “a50” or “z50” hand-held infrared
thermal imager.
Model Identification
“a” prefix imagers operate with a 9 Hz sample rate
“z” prefix imagers operate at a 30 Hz sample rate.
“30” Series (Detectors) are entry level reduced feature imagers.
“50” Series (Inspectors) are full-featured imaging cameras
Features
30 Series Detectors include the following features:
User selectable Auto or manual level and span control
°C, °F or K measurement scale
4 user selectable color palettes
11 user selectable languages
Hot temperature spot measurement
Cold temperature spot measurement
2 User selectable spot measurements
High temperature Alarm setting
T Reflect - Reflected temperature compensation
2X digital zoom
Freeze screen for viewing current image
Video Output – NTSC or PAL
50 Series Inspectors include all the above 30 Series features plus:
7 additional color palettes for a total of 11
3 Area measurements
2 line measurements
Image storage via SD card
CMOS visible image and storage
Audio recording
Isotherm Alarm
T Correct – Measurement Offset correction
Built in Emissivity Table list of common materials
6
Upgrades and Options
30 Series Detectors are field upgradeable to 50 Series Inspectors.
30 and 50 Series models are field upgradeable for High temperature
measurements.
30 and 50 Series models are factory upgradeable for Wide Angle or Telephoto
Lenses.
All imagers use an uncooled focal plane infrared detector, and display the
thermal image as a multi-color image with user selectable color palette,
sensitivity and span. On Inspectors the image may be stored in the SD card
and subsequently transferred to a PC for analysis and report generation as
needed.
Applications:
Preventive maintenance
z
Power industry: Power line and power facility thermal state checking;
problem and defect diagnosis.
z
Electrical system: Identify potential circuit overloads.
z
Mechanical system: Reduce downtime and avoid catastrophic failure.
Construction science
z
Roof: Quick identification of water penetration problems.
z
Structure: Commercial and residential energy audits.
z
Moisture detection: Determine root cause of moisture and mildew.
z
Verification: Verify corrective actions are sufficient.
Others:
z
Iron and steel industry: Inspect steel refining and rolling processes;
diagnose hot-blast stove defects; detect the embryo temperature of armor
plate, etc.
z
Fire fighting: Forest fire prevention and detection of latent ignition
7
source. Preventive detection on specific materials of auto-ignition. Detection
of potential spark ignition sources.
z
Medical: Human body surface temperature detection and screening.
z
Petro/chemical: Oil pipeline status inspection; material surface
temperature detection; insulation inspection; power equipment status, etc.
8
1.1 Standard accessories
z
INSPECTOR infrared thermal image camera w/wrist strap
z
Carrying case
z
Video out cable
z
Lithium ion batteries (2)
z
Lithium battery charger
z
Lens cap
z
User manual
z
Infrared report and analysis software system CD
z
SD card
z
SD card reader
1.2 Optional accessories
z
External 0.5x wide-angle lens
z
External 2x telescopic lens
9
2 Camera overview
2.1 Function keys
7
2
1
4
3
5
6
10
[1] Power key
Press and hold the Power Key for > 3 seconds to power on/off the camera.
! Note: After powering off, please wait ten seconds before powering the
camera on again.
[2] Select/Auto key (Marked “A”)
The “A” or attribute button performs 2 functions.
a) The first function is modification of selected parameters. It is obtained
by a quick press and release (less than 2 seconds), that will select enabled
functions to modify their parameters. Subsequent presses will “scroll”
through the available parameters. The selected function will be highlighted
in yellow. The functions include:
•
Measurement cursors, areas, and lines
Cursors and lines - pressing the arrow keys will move their position.
Pressing the Menu key will pop up the attribute box. Pressing the C key will
delete the selected parameter.
Areas – Arrow keys adjust the attribute specified in the pop up attribute box.
Pressing the Menu key will pop up the attribute box. In this box, the user
can select to adjust either position or size of the area. After selection, the
arrows will then adjust the attribute.
•
Color Palette
Pressing the left or right arrows will scroll through the available color
palettes, displaying their name above the palette. The selected palette will
become active after about 3 seconds of selecting it and will be set as the
default power on palette.
•
Level/Span values
Pressing the left or right arrow will reduce or increase the Span and
pressing the up or down arrow will reduce or increase the Level. If the unit
11
is in Automatic mode, modifying any of these parameters will select Manual
mode.
b) The second function performed is to force an internal calibration cycle.
This is performed by pressing and holding the A key for 5 seconds or more.
The camera will make automatic correction to get the most accurate
thermal measurement.
[3] Cancel/Camera key (Marked “C”)
•
Pressing and releasing the C key cancels the present operation when in
Menu mode.
•
Pressing and releasing the C key when an image is frozen or being viewed
from memory, will return to real-time measurement status.
•
When not in menu mode or parameter editing, pressing and releasing the C
key will toggle between the thermal image and the visible CCD camera
image.
•
When a parameter is selected, such as a measurement cursor, pressing the
C key will delete the highlighted measurement.
[4] Freeze/Save key (Marked “S”)
Used for freezing or saving thermal image. Press the key once to freeze the
image. Press Confirm to save the image or Press C to return to real-time
measurement. If Voice recording is enabled, Voice comment dialog box will
display.
[5] Menu/Confirm key (bar)
Includes Up, Down, Left, Right and Menu/Confirm (center) keys.
Function varies with operation mode.
In Menu mode, it is used for menu selection. Up and Down keys are for
same level of menu operation. Left and Right keys are for different levels
12
menu operation. Confirm key (center) is to activate the menu and confirm the
choice.
In Image mode, press Up or Down key to activate X2 digital zoom. The
screen will display “X2” in the upper left corner. Press Up or Down key to
return to the original image.
In Spot Measurement editing mode (activated immediately after adding
a spot or by selecting via the A key), press the Menu key to pop up the
attribute box. Press four navigation keys to move the spot location.
In line temperature measurement editing mode (activated immediately
after adding a line or by selecting via the A key), press the Menu key to pop up
the attribute box. If measurement line is horizontal, press Up and Down keys
to move the line location; press Left and Right keys to move the reference line.
If measurement line is vertical, press Left and Right keys to move the line;
press Up and Down keys to move the reference line.
In area measurement editing mode (activated immediately after adding an
area or by selecting via the A key), press the Confirm key to pop up the
attribute box. Select in the attribute box the parameter to be edited, either size
or position. Press the four navigation keys to move the area location or change
the size of the area.
[6] Trigger/Shortcut key
The trigger key serves as a shortcut to access the following functions:
Laser – Pulling trigger activates laser sight and releasing deactivates it.
Spot or Area – Pulling and releasing trigger adds a spot or area. Pulling and
releasing trigger again removes the spot or area.
Save – Pulling trigger initiates a Save cycle.
IR/CCD - Pulling and releasing trigger toggles between the IR image and the
CCD image.
13
[7] Microphone
Used for recording a voice message with the Saved image. See Section
4.5.3 for details.
2.2 Interface
1
2
3
[1] Video port
Video interface is via the mini-USB plug and supplied video cable
[2] SD Card interface
Accepts standard size SD cards such as supplied 2GB capacity card.
[3] Power interface
External power input interface. Power source should be +12VDC.
Center pin is positive terminal.
14
3 Getting started
3.1 Battery Installation and Replacement
3.1.1 Inserting or removing battery
Battery compartment is located inside the handle. Turn the cover
counter-clockwise to remove. Remove battery for replacement.
Insert the battery (the battery contacts must face into the battery
compartment).
15
Replace cover and screw down in a clockwise direction.
! CAUTION: Use only original manufacturer replacement battery. Use of
incorrect battery may result in physical or electrical damage to the instrument
due to incorrect voltage or physical size difference.
16
3.1.2 Replacing battery
When battery has approximately 5% charge remaining, the warning will be
displayed and the instrument will turn off in approximately 3 seconds.
Powering off display
3.2 Battery safety and usage
¾
Batteries should be stored in an ambient temperature of -4°F (–20°C) to
67.9°F (+20°C). Lithium batteries will self-discharge during storage, so
they should be fully charged before storage. Self-discharge may affect
long term battery performance. Furthermore, it is recommended that the
battery should be charged in a set time, as below;
17
Ambient temperature of:
z
-4°F (–20°C) to 67.9°F (+20°C), once every 6 months
z
67.9°F (+20°C) to 113°F (+45°C), once every 3 months
z
113°F (+45°C) to 149°F (+60°C), once every month
Battery should have greater than 50% charge prior to recharge.
¾
The ambient temperature for charging should be 32°F (0°C) to 104°F
(+40°C). If under 32°F (0°C), the battery capacity will be diminished; if
over 104°F (+40°C), the battery may overheat, resulting in permanent
damage.
!
WARNING:
!
Never disassemble, incinerate or puncture battery
!
Never short circuit the battery
!
Keep battery dry
!
Keep out of reach of children
!
Always dispose of battery in accordance with local, state and federal
regulations
3.3 Quick access
3.3.1 Capture an image
z
After installing the battery, press and hold the power key (≥3 seconds)
until the display comes on. After approximately 50 seconds, the power
on routine will finish and the camera will start its measurements.
z
Remove the lens cap and aim at the target. Adjust the focus for the
clearest target thermal image. ! NOTE: Failure to properly focus the
camera will result in increased measurement error.
18
3.3.2 Temperature measurement
z
If no measurement cursors are on screen, add a measurement spot,
area or line by pressing MENU and selecting Measurement. Press
CONFIRM and scroll left or right to select the proper measurement
parameter. Aim the cursor indicator onto the target object on the
screen. The temperature will be displayed in the upper right corner of
the screen. For highest accuracy measurements, force a calibration
cycle by pressing the A key for 5 seconds until “Calibrating” appears in
upper left portion of display.
z
If you want to measure the current thermal image in detail, press S key
to freeze the image for on-screen analysis. Save the image if future
analysis is desired. For details, see Section 4.
z
If the target object’s temperature is lower or higher than the limits of
the camera, it will display <XXX° or >XXX° with XXX being the min or
max temperature of the selected range.
z
To modify the measurements attributes, select the measurement
parameter, and then press the Confirm key. The screen will display the
settings dialog box. The below figures are spot, line and area
measurement respectively.
Spot settings include emissivity and reference temperature. When Set
Ref is set as Yes, the displayed values of other measurements will be
their delta from this measurement. Setting a specific measurement
cursor as a reference will change the reference for all measurements.
19
Line settings only include the emissivity.
Area settings can modify the emissivity, area measurement type and
area move parameter. Measurement types are Min Temp, Max Temp or
Average Temp. Area Move parameter choices are Position or Size. The
selected parameter will be adjusted by the directional arrow keys.
When “Set Ref” is set as Yes, the displayed values of other
measurements will be their delta from this measurement. Setting a
specific measurement cursor as a reference will change the reference
for all measurements.
3.3.3 Save image
There are three ways to save the image:
z
Press S key to freeze the image and then select ”Save” to save the
image, or select “Cancel” to exit the operation.
z
Press Menu key to activate the main menu. Choose File->Save and
the system will initiate the save cycle.
z
With the “Trigger” parameter, located in Setup->Sys.
20
Setup->Trigger, set to “Save Key”, pulling and releasing the trigger
key will initiate the save cycle.
3.3.4 Viewing stored Images
z
Press Menu key to activate the main menu. Choose File->Open to
open the image.
z
When image is opened, choose Left or Right keys to select the
previous or next images respectively.
z
If the instrument is in IR mode, it will display all IR images of each saved
image, it will display “No Image” if there is no IR image for that saved
image.
z
If the instrument is in CCD mode, it will display all CCD images of each
saved image, it will display “No Image” if there is no CCD image for
that saved image.
z
If the trigger is configured to IR/CCD mode by Setup->Sys.
Setup->Trigger, when in image view, the trigger can switch between
IR and CCD images for each saved image. it will display “No Image” if
there is no IR or CCD image for that saved image.
z
Press C key to exit the Image view mode and return to the real-time
measurement mode.
3.3.5 Export saved images
Images cannot be downloaded via the USB port. To export saved images,
remove the SD card and insert into SD card reader, connect to USB port on PC
and export saved images.
4 Operation guide
4.1 Graphic interface description
4.1.1 Screen graphic interface
21
15
14
12
13
1
11
10
2
3
4
5
6
7
8
9
[1] Company logo: WAHL
[2] Operating status: displays the current operational status
[3] Spot temperature measurement: White crosshair
[4] Selected spot temperature: Yellow crosshair
[5] Emissivity: Indicates Imagers emissivity setting.
[6] Minimum temperature: Indicates minimum value of the palette.
[7] Palette: Palette bar. User can choose from 9 palettes.
[8] Maximum temperature: Indicates maximum value of the palette.
[9] Battery status: Indicates the current battery status.
[10] [11] Result: Indicates the value of the temperature of the target object.
Yellow denotes the value of the temperature of the
selected object for editing.
[12] Temperature unit: Three options: °C, °F or K.
[13] External lens symbol: Displays “0.5x” for wide-angle or “2x” for
telephoto lens.
[14] SD card symbol: Displays “SD” when SD card is installed.
[15] Digital zoom symbol: Displays “X2” when digital zoom is activated.
!
NOTE: Not all models have all functions, so the working status
screen may not show all features.
22
4.1.2 Main menu
1
2
[1] Main menu: Displays four options: Measurement, Level/Span, Setup, and
File.
[2] Low-level menu: The > indicates a low-level menu is available, accessed
by the right arrow key > (See Figure.4.1.2.1).
4.1.3 Dialog box
1
3
2
4
[1] Dialog box name: Displays the dialog box name, e.g. Measuring Setup.
[2] Item title: A dialog box may contain several items, such as Temp Range.
[3] Item content: Items show specified content. Black means valid or
changeable and white means invalid for this selection.
[4] Unit: Indicates the current selected temperature unit.
23
4.1.4 Prompt box interface
1
2
[1] Prompt box name: Display the prompt box name.
[2] Content: Display the content in the prompt box, e.g. Del Image File?
4.2 Measurement
Used for adding or deleting a measurement. Press Confirm key to
activate the main menu. Select Measurement and press Confirm key. It will
display the Measurement dialog box. Use the Left and Right arrows to scroll
through the available measurement options. Highlight the option you wish to
use and press Confirm key. Options are:
•
None – Deletes all measurements from the screen.
•
Add Hot Spot – adds a moving cursor that automatically displays the
hottest spot in the image. Designated by SH and
•
Add Cold Spot – adds a moving cursor that automatically displays the
coldest spot in the image. Designated by SC and
•
+H.
+c.
Add Spot – adds up to 2 fixed cursors, user adjustable by the cursor
editing mode. Designated by S1,
+1 and S2, +2.
24
•
Horizontal – Adds horizontal line measurement to display profile of
temperatures along the line. Designated by LH. Either Horizontal or
Vertical can be enabled at one time, but not both.
•
Vertical – Adds vertical line measurement to display profile of
temperature along the vertical line. Designated by LV. Either
Horizontal or Vertical can be enabled at one time, but not both.
•
Area – adds up to 3 area boxes, with min, max or average detection
within each box. Areas can be sized and moved by the user.
Designated by []1, []2 and []3.
!
NOTE: To delete a single object, press A key to select the object
and then press C key to delete.
4.3 Level/Span
There are two operational modes for assigning the color palette to the
thermal image. In Auto mode, the camera automatically determines the low
and high temperature levels to assign to the lower and upper ends of the
palette. These are determined based on the min and max temperatures being
25
measured by the camera. In Level/Span mode, the Operator may assign the
lower and upper end values to enhance the image quality by adjusting the
temperature to color relationship.
Press Confirm key to activate the main menu and select Level/Span.
The low-level menu will display the inactive mode followed by a “?”. Pressing
the > key followed by the Confirm key or pressing the Confirm key twice, will
switch to the displayed mode. Press A key to select palette and adjust the
image manually.
In Level/Span mode pressing the left or right arrow will reduce or
increase the Span and pressing the up or down arrow will reduce or
increase the Level. If the unit is in Auto mode, modifying any of these
parameters will select Level/Span mode.
4.4 Setup menu
26
4.4.1 Measuring Setup
Press Confirm key to activate the main menu. Select Setup->MeasureSet
and press Confirm key to pop up the Measuring Setup dialog box. User can
view or set temperature range, lens type, temperature unit, ambient
temperature, reference type and reference temperature. Press Up and Down
keys to choose different items, Left and Right keys to modify the item
contents.
z
Temp Range: Select Standard -4°/356°F (-20°/180°C) or High
212°/1112°F (100°/600°C) temperature range.
Requires High
Temperature option for High Temperature selection to appear.
z
Lens: Select Standard, Telephoto or Wide Angle. Requires
Telephoto and/or Wide Angle option for those options to appear.
z
Temperature unit: Select between °C, °F and K scales.
z
Ambient temperature: Camera will display internal ambient
temperature automatically. Used for automatic calibration and is not
user editable.
z
Reference type: When Ref Type is “On”, the temperature of the
measured object displayed by the cursor on the screen is the
difference from the selected reference or the reference temperature
set below.
27
z
Reference temperature: When Ref Type Ref Temp is enabled, this
item is editable. A fixed temperature may be entered as the reference
temperature.
4.4.2 Adjustment
Press Confirm key to activate the main menu. Select
Setup->Adjustment and press Confirm key to pop up the Adjustment dialog
box. User may set emissivity, temperature correct and temperature reflect.
Press Up and Down keys to choose different items, Left and Right keys to
modify the item contents.
z
Emissivity The emissivity of a given material will vary with temperature
and surface finish. If not set manually, system will use the default value.
Appendix A provides emissivities of common materials.
z
Customize: Select material from pre-defined list via left and right keys.
z
TCorrect: Sets offset correction temperature used for cursor
measurements but does not affect Image color palette temperatures.
Usable range is ± 9.9°C.
z
TReflect: When Set to On, allows user to enter value of reflected
temperatures that may be in viewed image.
28
4.4.3 Alarms
Press Confirm key to activate the main menu. Select Setup->Alarms and
press Confirm key to pop up the Analysis dialog box. User can set temperature
alarm, alarm temperature, alarm color, isotherm color, isotherm temperature
and isotherm width. Press Up and Down keys to choose menu items, Left and
Right keys to modify the item contents.
An alarm is triggered when a measurement cursor’s measurement meets or
exceeds the Set Alarm Temp setting. All pixels above this temperature will
change to the color as set in Alarm Color. When the Alarm Color is set to
None, only the audible alarm will sound. When using alarms with Area
measurements, the selected measurement mode, Min, Max or Average will
have to meet or exceed the set temperature in order to trigger the alarm.
z
Temp Alarm: Off disables alarm function, On enables alarm function
and allows setting of Set Alarm Temp and Alarm Color.
z
Alarming Temp: Sets the alarm detection temperature. Only enabled
when Temp Alarm is set to On.
z
Alarming Color: Selects the color in which the alarming pixels are
displayed. If set to None, no changes are made to the screen’s color.
Only enabled when Temp Alarm is set to On.
29
z
Isotherm Color: Activates the Isotherm display by displaying the
image in the set temperature range by the specified color. There are 9
colors to choose from. Setting to Off, disables the feature.
z
Isotherm Temp: Sets the center temperature of the isotherm.
z
Isotherm Width: Sets the width of the displayed Isotherm band. For
example, if Isotherm Temp is set to 122°F (50°C) and Isotherm
Width is set to 1°F or °C, the isotherm band will be from 121.5F
(49.5°C) to 122.5°F (50.5°C).
4.4.4 Date/Time
Allows the user to set the system date and time. After setting, the camera
will save the current setting.
Press Confirm key to activate the main menu. Select
Setup->Date/Time and press Confirm key to open the Date/Time dialog
box. User can set Year, Month, Day, Hour, Minute and Second. Press Up and
Down keys to choose menu items, Left and Right keys to modify the item
contents.
!
NOTE: If the imager is not used for a long period, the system clock
may need reset due to the internal battery being depleted.
30
4.4.5 System Setup
Press Confirm key to activate the main menu. Select Setup->Sys. Setup
and press Confirm key to open the System Setup dialog box. User can set
Language, Auto calibration interval, Brightness, Trigger assignment, Video
mode, Standby time and Auto off time. Press Up and Down keys to choose
menu items, Left and Right keys to modify the item contents.
z
Language: Select system language from 11: English, Spanish,
French, German, Italian, Portuguese, Korean, Japanese,
Russian, Simplified Chinese and Traditional Chinese.
z
Auto Calib: Sets the time interval for auto calibration to occur. Range
is 0, which is Off and 30 to 600 in 1 second increments. Auto
calibration is used to improve image quality and measurement
accuracy during use.
z
LCD Brightness: User can select the brightness of LCD display with
choices being 20, 40, 60 80 and 100%.
z
Trigger: User can define the trigger key function from Laser, Spot
Temp, Area Temp, Save key and IR/CCD.
¾ Laser: Allows user to Turn on and off the laser from the trigger
key with Laser on only when trigger is depressed.
¾ Spot Temp: Adds or deletes Spot Measurement.
31
¾ Area Temp: Adds or deletes Area Measurement.
¾ Save key: Initiates the save routine.
¾ IR/CCD: Switches between IR image and CCD image.
z
Video Mode: Allows selection of PAL or NTSC video output.
z
StandbyTime: Allows user to select None, 2, 5, 10 or 15 minutes. If
no button depressions are made during the set time, the camera will
turn off the screen automatically, to prolong battery life. Press any key
except power key to reactivate the screen. If set to None, the function
is disabled.
z
AutoOffTime: Allows user to select None, 2, 5, 10 or 15 minutes. If
no button depressions are made during the set time, the camera will
turn off the main power automatically to prolong battery life. If set to
None, the function is disabled.
4.4.6 System Info
Press Confirm key to activate the main menu. Select Setup->Sys. Info
and press Confirm key to open the System Information dialog box. It
displays the Model number, Serial number, Version number and Date of
Manufacture.
32
4.4.7 Factory Default
Used to reset factory defaults. Press Confirm key to activate the main
menu. Select Setup->Default and press Confirm key to open the Reset
dialog box. Press Confirm key to reset the factory default. Press C key to
cancel the reset operation. Appendix B indicates the detailed factory default
parameter table.
!
NOTE: Default Reset function will delete all parameters defined by
user.
!
NOTE: Restoring Default settings will NOT delete images stored on
the SD card.
33
4.5 File
4.5.1 Open
Press Confirm key to activate the main menu. Select File->Open, press
Confirm key to open the saved images. Press Left and Right keys to change
the images. Press C key to exit the opened image and return to measurement
status. The imager will open the last image displayed or the last image saved,
whichever occurred last.
1
2
3
[1] Current file name, created by Imager.
34
[2] Current displayed image file number
[3] Total number of images currently stored
4.5.2 Save
Used to save the image, performs the same functionality as the Save key.
Press Confirm key to activate the main menu. Select File->Save, press
Confirm key to save the current image into the SD card or highlight Cancel
and press Confirm key to cancel Save operation. Alternatively, the C key may
be pressed to cancel. Saving Data will display.
With Voice Save set in Save Settings menu, the Voice Comment dialog
box will display as below. Select Record and press Confirm key to start
recording.
35
If Voice Save was On, Recording will start. Speak clearly into the
microphone on the control panel. Record function allows up to 40 seconds of
recording time and may be stopped at any time by pressing the Confirm key.
If the SD card is not installed the display will prompt the user to install a SD
card.
36
The Display will acknowledge when the SD card is installed properly.
4.5.3 Save Setting
The Save Setting menu allows enable/disable of the CCD Camera and voice
recording. Press Confirm key to activate the main menu. Select File->Save
Setting, press Confirm key to display the Save Setting dialog box. Press Up
and Down keys to choose the option. Press Left and Right keys to set On or
Off.
Link Save - With Link Save On, the imager will always save an IR image
and a CCD image with every save operation. With Link Save off, the imager will
only save whichever image the camera is viewing at the time of the save.
!
NOTE: When Imager is in the visible camera mode, thermal
detector calibration does not occur and may result in lower accuracy
images when saved. Always save thermal images with thermal
camera active, when Link Save is ON.
Voice Save – With Voice Save On, the imager will start the voice record
cycle after confirmation of the save image. No recording will occur with Voice
Save set to Off. Voice save setting is ignored with the Auto Save function.
!
NOTE: To add voice comment to an already existing uncommented
image, enable Voice Save, open the image to be modified and
select File>Save. The imager will prompt you to record the
message and the new image will be assigned a new image number
37
while the old image will remain unchanged.
4.5.4 Auto Save
Auto Save allows the camera to automatically save images at a
user-specified interval. Voice annotation is inactive with Auto Save. With Auto
Save set to 0 the function is disabled. To enable, select 10 to 3600 seconds (1
hour), in 1-second increments. To set, press Confirm key to activate the main
menu. Select File->Auto Save, press Confirm key to display the Auto Save
dialog box. Press Left and Right keys to set the values. Press the Confirm
key to accept and recording timer will start, saving images at the selected
interval.
38
4.5.5 Delete
Used for deleting the image. When camera is in image replay mode, press
Confirm key to activate the main menu, select File->Delete, press Confirm
key to pop out the below prompt box. Press Confirm key to delete the current
opened image. If it has voice comment, it will be deleted together. Press C key
to cancel the deletion.
!
CAUTION: Before deleting, make sure the file is not needed or
already backed up. Files cannot be recovered after deletion.
4.5.6 Format
Format is used for formatting the SD card. Press Confirm key to activate
the main menu. Select File->Format and press Confirm key to pop up the
below dialog box. Press Confirm key to do format; press C key to cancel the
format.
39
!
CAUTION: Before formatting, make sure all files are not needed or
already backed up. Data cannot be recovered after formatting.
Use Caution when using this function as ALL IMAGES and FILES
on the SD card will be deleted. If formatting via PC, please use
FAT16 format.
40
5 Technical specifications
50 Series Inspector
Detector
performance
Image
performance
Lens
parameter
Type
Resolution
Spectral Range
Thermal sensitivity
Frame frequency
LCD Display
Digital camera
Digital Zoom
Field of view
Range of focus
Focus type
Spatial resolution
Measurement range
Measurement accuracy
Palette
Image
adjustment
Level and Span
Measurement calibration
Image
control
Measurement mode
Measurement
analysis
Number of measurement
spots
Number of measurement
areas
Measurement analysis
mode
Setup function
Emissivity range
T Reflect
T Correct
Image
storage
Medium type
Storage Type
Technical parameter
Uncooled focal plane array
160 × 120
8 to 14μm
0.08°C @ 30°C
a Series = 9Hz
z Series = 30Hz
High resolution 3.5” color LCD 640 x 480
1.3 Mega pixels CMOS sensor
2X
17.5°×13°
0.1m to ∞
Manual
1.9mrad
Lo= -4°F to 356°F (-20°C to 180°C)
Hi= 212°F to 1112°F (100°C to 600°C)
greater of ±2% of reading or ±2°C
! NOTE: Instrument is not calibrated
below -10°C
11
Auto/Manual Gain/Brightness
Auto/Manual
Spot temperature measurement and area
temperature measurement (Maximum,
minimum and mean value) and line
temperature, isotherms
1 Hot, 1 Cold, plus 2 adjustable
3
Isothermal temperature, Temperature
difference, Temperature alarm (audible,
visual)
Date/Time, Temperature unit °C/°F/K,
Language
Range: 0.01-1.0
Auto, based on the background
temperature
Auto
SD card
Manual/Auto single frame image save
41
Infrared image file format
JPEG, 14 bit data
File size
60K (typical value)
40s voice record together with image
(internal microphone)
Voice comment
Laser
indicator
Power system
Environmental
parameter
Physical
characteristics
Interface
Laser indicator
Class 2 <1mW/635nm Red
Battery type
Battery working time
Power save mode
External power supply
Ambient temperature
Humidity
Preventive class
Size
Weight (exclude battery)
Tripod size
Carry case
External power supply
Audio output
Video output
SD card interface
Rechargeable lithium ion battery
≥3 h
Yes
DC10 to 15V, optional
5°F to 122°F (-15°C to +50°C)
≤ 90% (Non-condensing)
IP54
4.5 x 5.9 x 9 in (115 × 150 × 230mm)
1.65 lbs (0.75Kg)
1/4″-20
Impact Resistant Plastic
Yes
No
PAL or NTSC
Yes
Specifications subject to change without notice
Troubleshooting
Please follow the table below to diagnose and correct the problem. If
problem still exists, please contact our service department.
Problem
Cause & Solution
z
The
camera
power on.
does
not
z
z
Battery not installed or installed
incorrectly
→Install battery or re-install battery
Battery is out of power.
→Change battery.
“Power off” protection is enabled
→Wait for 5 seconds and reboot.
Battery is out of power.
→Change battery
z AutoOffTime option is enabled
→Set as None.
z
The
camera
automatically.
powers
off
42
Environmental temperature is too low
Rechargeable battery is not charged
completely.
→Recharge the battery.
z Rechargeable battery is out of power
completely and can not be recharged.
→Change to new battery.
z
z
Battery depletion is too fast
Lens cover is not removed.
→Remove lens cover.
z In image freeze status
→Press C key to exit.
z
No thermal image
Thermal image is white-black.
z
White-black palette is selected
→Select normal palette.
43
Appendix A Common material emissivity
Material
Surface
Temperature°C
Emissivity(ε)
Non- oxidized
100
0.20
Oxidized
Burnished to Brown
100
20
0.55
0.40
Dull luster
Oxidized
Seriously Oxidized
38
100
20
0.22
0.61
0.78
Oxidized
100
0.74
Rusty
Oxidized
25
200
0.65
0.64
Non- Oxidized
Quarry-faced
100
25
0.21
0.94
Nickel
Polished
Oxidized
38
200
0.28
0.37
Stainless steel
Oxidized
60
0.85
Steel
Oxidized
200
0.79
Common brick
Surface
20
0.93
Concrete
Surface
20
0.92
Glass
Polished plate
20
0.94
White
100
0.92
Black
Smoke black
100
25
0.97
0.95
Oil paint
Candle soot
Rough lead surface
Value of 16 colors
20
20
100
0.95
0.98
0.94
Paper
White
20
0.93
Sand soil
Surface
20
0.90
Timber
Dressed
20
0.90
Water
Distilled water
20
0.96
Skin
Human
32
0.98
Ceramic
Thin
Thick
21
21
0.90
0.93
Aluminum
Brass
Copper
Iron
Cast iron
Wrought iron
Lacquer
Carbon
44
Appendix B
Factory default parameter setting table
Table.1 Measurement temperature setting table
Parameter
Value
Temperature Range
-20 to 180°C
Lens
Standard
Temp Unit
°C
Ref Type
Off
Ref Temp
30°C
Table.2 Measurement temperature correction table
Parameter
Value
Emissivity
0.96
TCorrect
0°C
TReflect
OFF
Table.3 Analysis setting table
Parameter
Value
Temp Alarm
OFF
Alarming Temp
50.0°C
Alarming Color
NONE
Isotherm Color
OFF
Isotherm Temp
50.0°C
Isotherm Width
1.0°C
Table.4 System setting table
Parameter
Value
Language
English
Brightness
60%
Auto Calib
60S
Video Mode
NTSC
Quick Access
Laser
StandbyTime
5 minutes
AutoOffTime
15 minutes
234 Old Weaverville Road, Asheville, NC 28804
800-421-2853 • 828-658-3131 • 828-658-0728
www.palmerwahl.com
[email protected]
45