1
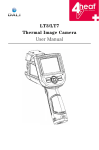
LT4/T8
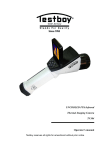
Thermal Image Camera
User Manual
LT4/T8 Thermal Image Camera User Manual
4heat
! Warnings, Cautions and Notes
Definitions
!
WARNING Could cause bodily injury or death.
!
CAUTION Could cause damage to equipment or permanent loss of data.
!
NOTE provides useful information to the operator.
Important Information – Read before using the Instrument
!
WARNING – Laser Radiation is emitted from this device. Do Not stare into Laser Beam.
Class 2 Laser, 635 nm, 0.9mW
!
CAUTION - Never point the lens directly toward a strong radiation source (ie. Sun,
direct or reflected laser beam, etc ), with power on or power off, as damage may result
to the thermal detector used inside. Permanent damage may result!
!
CAUTION - The original shipping carton should be kept for use for future transportation.
Do not drop, shake or impact the thermal imager excessively, in use or during
transportation.
!
CAUTION - Store the unit in its original case in a cool, dry, well-ventilated area away
from strong electromagnetic fields.
!
CAUTION - Protect the surface of the lens from being stained or damaged by foreign
objects such as sludge or chemicals. Please replace the lens cap after use.
!
CAUTION - Please remember to backup image data regularly to avoid losing important
data.
!
NOTE - For maximum measurement accuracy, allow 3 to 5 minutes for camera to
stabilize after initial power up.
!
NOTE - Each camera is factory calibrated.
It is recommended that calibration be
performed every 12 months.
!
CAUTION - Do not open case. Unit does not contain any user serviceable parts. Repair
should be performed by factory authorized technicians only.
2
LT4/T8 Thermal Image Camera User Manual
4heat
Contents
! Warnings, Cautions and Notes.......................................................... 2 1 Introduction ................................................................................. 5 1.1 1.2 2 Camera overview .......................................................................... 8 2.1 2.2 3 Standard accessories ................................................................................................ 7 Optional accessories .................................................................................................. 7 Function keys ............................................................................................................... 8 Interface .......................................................................................................................... 12 Basic operation ........................................................................... 13 3.1 Battery Installation and Replacement .............................................................. 13 3.1.1 Inserting or removing battery ..................................................................... 13 3.1.2 Replacing battery.............................................................................................. 14 3.2 Battery safety and usage ...................................................................................... 15 3.3 Quick access ............................................................................................................... 15 3.3.1 Capture an image ............................................................................................. 15 3.3.2 Temperature Measurement ...................................................................................... 16 3.3.3 Save Image .............................................................................................................. 18 3.3.4 Playback Image ....................................................................................................... 18 3.3.5 Download the Save Files ......................................................................................... 18 3.3.6 Screen Setting.......................................................................................................... 18 3.3.7 Manu Operation Introduction .................................................................................. 19 4 Operation guide .......................................................................... 19 4.1 Graphic interface description ............................................................................... 19 4.1.1 Screen graphic interface ................................................................................ 19 4.1.2 Floating Bar Interface ............................................................................................. 21 4.1.3 Main Manu .............................................................................................................. 21 4.1.4 Sub-manu interface ................................................................................................. 22 4.2 Measurement Object Adding........................................................................................... 22 4.3 Recording ........................................................................................................................ 23 4.4 Photo ............................................................................................................................... 23 4.5 Preview............................................................................................................................ 24 4.6 Setting ............................................................................................................................. 24 4.6.1 Measuring setting .................................................................................................... 28 4.6.2 Adjustment .............................................................................................................. 29 4.6.3 Image Setting .......................................................................................................... 30 4.6.4 Network setup ......................................................................................................... 33 4.6.5 TF Card Management ............................................................................................. 33 4.6.6 Photo Setting ........................................................................................................... 35 3
LT4/T8 Thermal Image Camera User Manual
4.6.7 4heat
System Setting......................................................................................................... 36 4.7 File Management............................................................................................................. 38 4.7.1 Playback .................................................................................................................. 38 4.7.2 Bluetooth Transmission ........................................................................................... 41 4.7.3 Delete ...................................................................................................................... 41 5 Configuration .............................................................................. 43 6 Troubleshooting .......................................................................... 45 Appendix A ....................................................................................... 46 Common material emissivity(FYI) ............................................................................. 46 Appendix B ....................................................................................... 47 Factory default parameter setting table ...................................................................... 47 4
LT4T8 Thermal Image Camera User Manual
4heat
1 Introduction
Thank you for choosing DALI Instruments “LT4” or “T8” hand-held
infrared thermal imager.
Model Identification
LT4 imagers use the detector with 25um 160*120, and measurement
range from -20°C~+350°C
T8 imagers use the detector with 25um 384*288, and measurement range
from -20°C~+600°C
Features
LT4\T8 include the following features:
11 user selectable color palettes
11 user selectable languages
2X ,4X digital zoom
5 removable spot measurements
5 Areas measurements
2 lines measurements
Custom shortcuts
Blue tooth
Power saving mode
LCD Brightness adjustment
Video Output – NTSC or PAL
Internet settings
Time and Date settings
Factory settings restore
TF card uninstall, formatting
TF card image storage, video storage
Text and Audio annotation via image storage
Consecutive image shot storage
Alarm image capture
Alarm video record
5
LT4/T8 Thermal Image Camera User Manual
4heat
Isotherm measurement function
Temperature measurement settings
Built in Emissivity Table list of common materials
CMOS visible image and storage
Infrared and visible image fusion
Merge set
Upgrades and Options
LT4&T8 Series models are factory upgradeable for Wide Angle or
Telephoto Lenses.
LT4&T8 Series models are factory upgradeable for high
temperature expansion lens to a wide temperature measurement range.
Applications:
Preventive maintenance
z
Power industry: Power line and power facility thermal state checking;
problem and defect diagnosis.
z
Electrical system: Identify potential circuit overloads.
z
Mechanical system: Reduce downtime and avoid catastrophic failure.
Construction science
z
Roof: Quick identification of water penetration problems.
z
Structure: Commercial and residential energy audits.
z
Moisture detection: Determine root cause of moisture and mildew.
z
Evaluation:Evaluate the resolution to ensure the area completely dry.
Others
z
Iron and steel industry: Inspect steel refining and rolling processes;
diagnose hot-blast stove defects; detect the embryo temperature of armor
plate, etc.
z
Fire fighting: Forest fire prevention and detection of latent ignition
source. Preventive detection on specific materials of auto-ignition. Detection
6
LT4/T8 Thermal Image Camera User Manual
4heat
of potential spark ignition sources.
z
Medical: Human body surface temperature detection and screening.
z
Petro/chemical: Oil pipeline status inspection; material surface
temperature detection; insulation inspection; power equipment status, etc.
1.1Standard accessories
z
Infrared thermal image camera (with wrist strap)
z
Carrying case
z
Video out cable
z
Lithium ion batteries(2)
z
User manual, Infrared report and analysis software system CD
z
Lithium battery charger
z
Lens cap
z
TF card
z
TF card reader
z
USB cable
1.2 Optional accessories
z
External 0.5x wide-angle lens
z
External 2x telescopic lens
z
Eye patch
z
Power adapter(with power cable and plug)
z
European standard plug
z
British standard plug
z
Australian standard plug
7
LT4/T8 Thermal Image Camera User Manual
4heat
2 Camera overview
2.1 Function keys
7
4
1
3
2
5
6
8
4heat
LT4/T8 Thermal Image Camera User Manual
[1] Power key
Press and hold the Power Key for > 3 seconds to power on/off the camera.
! Note: After powering off, please wait ten seconds before powering the
camera on again.
[2] Select/Auto key (Marked “A”)
The “A” or attribute button performs 2 functions.
a) The first function is modification of selected parameters. It is obtained
by a quick press and release (less than 2 seconds), with this functions to
modify their parameters.
Subsequent presses will “scroll” through the
available parameters. The selected function will be highlighted in yellow. The
functions include:
•
Measurement points, areas, and lines
Points, areas, lines – switching the added points, areas and lines in the
interface from Up to Down, press Menu to set properties, press C to delete the
selected measuring objects.
Color Palette
Pressing the left or right arrows will scroll through the available color
palettes, displaying their name above the palette. The selected palette will
become active after about 3 seconds of selecting it and will be set as the
default power on palette.
•
Level/Span values
Pressing the left or right arrow will reduce or increase the Span and
pressing the up or down arrow will reduce or increase the Level. If the unit is
in Automatic mode, modifying any of these parameters will select Manual
mode.
b)The second function performed is to force an internal calibration cycle.
This is performed by pressing and holding the A key for 5 seconds or more.
The camera will make automatic correction to get the most accurate thermal
measurement.
c) Image transmission via blue tooth. Open blue-tooth, select object image,
9
4heat
LT4/T8 Thermal Image Camera User Manual
short press A, it will display sending dialog.
[3] Cancel/Camera key (Marked “C”)
•
Pressing and releasing the C key cancels the present operation when in
Menu mode.
•
Pressing and releasing the C key when an image is frozen or being viewed
from memory, will return to real-time measurement status.
•
When not in menu mode or parameter editing, pressing and releasing the C
key will toggle between the thermal image and the visible CCD camera
image.
•
When a parameter is selected, such as a measurement cursor, pressing the
C key will delete the highlighted measurement.
[4] Freeze/Save key (Marked “S”)
Used for freezing or saving thermal image. Press the key once to freeze the
image. Press Confirm to save the image or Press C to return to real-time
measurement. If Audio recording is enabled, Audio comment dialog box will
display. In document management, press S to delete video or image.
[5] Menu/Confirm key (bar)
Includes Up, Down, Left, Right and Menu/Confirm (center) keys.
Function varies with operation mode.
In Menu mode, it is used for menu selection. Up and Down keys are for
same level of menu operation. Left and Right keys are for different levels
menu operation. Confirm key (center) is to activate the menu and confirm the
choice.
In Image mode, press Up or Down key to activate X2 digital zoom. The
screen will display “X2” in the upper left corner. Press Up or Down key to
return to the original image.
In Spot Measurement editing mode (activated immediately after adding
a spot or by selecting via the A key), press the Menu key to pop up the
10
4heat
LT4T8 Thermal Image Camera User Manual
attribute box. Press four navigation keys to move the spot location.
In line temperature measurement editing mode (activated immediately
after adding a line or by selecting via the A key), press the Menu key to pop up
the attribute box. If measurement line is horizontal, press Up and Down keys
to move the line location; press Left and Right keys to move the reference line.
If measurement line is vertical, press Left and Right keys to move the line;
press Up and Down keys to move the reference line.
In area measurement editing mode (activated immediately after adding an
area or by selecting via the A key), press the Confirm key to pop up the
attribute box. Select in the attribute box the parameter to be edited, either size
or position. Press the four navigation keys to move the area location or change
the size of the area.
[6] Trigger/Shortcut key
The trigger key serves as a shortcut to access the following functions:
Laser – Pulling trigger activates laser sight and releasing deactivates it.
Spot, Area– Pulling and releasing trigger adds a spot or area. Pulling and
releasing trigger again removes the spot or area.
Video and Image Save –pressing to initiate a Save cycle.
Zoom-pressing to zoom the infrared image
LCD brightness adjustment-pressing to activate
[7] Microphone
Used for recording a voice message with the Saved image
11
LT4T8 Thermal Image Camera User Manual
4heat
2.2 Interface
1
2
3
4
[1] USB to RJ45 output
Used for internet connecting.
[2] TF Card slot
Accepting standard size TF card such as supplied 2GB capacity card, for
device upgrade or image storage.
[3] Video port
It is a video output interface.
[4] Power interface
External power input interface. Power source should be +12VDC. Center
pin is positive terminal.
12
4heat
LT4/T8 Thermal Image Camera User Manual
3 Basic operation
3.1 Battery Installation and Replacement
3.1.1
Inserting or removing battery
Battery compartment is located inside the handle. Turn the cover
counter-clockwise to remove. Remove battery for replacement.
Insert the battery (the battery contacts must face into the battery
compartment).
13
4heat
LT4/T8 Thermal Image Camera User Manual
Replace the cover and screw down.
! CAUTION: Use only original manufacturer replacement battery.
Use of
incorrect battery may result in physical or electrical damage to the instrument
due to incorrect voltage or physical size difference.
3.1.2 Replacing battery
When battery displays empty and flashes for about 1 minute and 50
seconds, the instrument displays a low battery dialog and shut down
automatically after about 10 seconds.
It’s better to replace batteries now.
14
LT4/T8 Thermal Image Camera User Manual
4heat
3.2 Battery safety and usage
¾
Batteries should be stored in an ambient temperature of -4°F (–20°C) to
67.9°F (+20°C). Lithium batteries will self-discharge during storage, so
they should be fully charged before storage. Self-discharge may affect long
term battery performance. Furthermore, it is recommended that the battery
should be charged in a set time, as below;
Ambient temperature of:
z
-4°F (–20°C) to 67.9°F (+20°C), once every 6 months
z
67.9°F (+20°C) to 113°F (+45°C), once every 3 months
z
113°F (+45°C) to 149°F (+60°C), once every month
¾
Battery should have greater than 50% charge prior to recharge.
¾
The ambient temperature for charging should be 32°F (0°C) to 104°F
(+40°C). If under 32°F (0°C), the battery capacity will be diminished; if
over 104°F (+40°C), the battery may overheat, resulting in permanent
damage.
!
!
!
!
!
!
WARNING:
Never disassemble, incinerate or puncture battery
Never short circuit the battery
Keep battery dry
Keep out of reach of children
Always dispose of battery in accordance with local, state and federal
regulations
3.3Quick access
3.3.1
z
Capture an image
After installing the battery, press and hold the power key (≥3 seconds)
until the display comes on. After approximately 50 seconds, the power
on routine will finish and the camera will start its measurements.
z
Remove the lens cap and aim at the target. Adjust the focus for the
clearest target thermal image.
15
LT4/T8 Thermal Image Camera User Manual
4heat
! Note:Focus is not clear, and will lead to measurement error.
3.3.2
z
Temperature Measurement
To move the target object to the screen on the point of crossing temperature, the
upper-right corner of the screen shows "XX" is the temperature measurement point at the
target temperature. If you want to measure more accurately, keep press the "A" button for
3 seconds。
z
If wish to detailed analysis the thermal image of the current screen, you can press the "S"
key to frozen the image, then analysis. Sustainable pressing the "S" key for 3 seconds, the
thermal image stored, and then analyzed.
z
When the target temperature is greater than or less than the relevant thermal image' Max
or Min temperature, the temperature of the screen display> XXX ° C or <XXX ° C.
z
If you need to modify the properties of the temperature measurement object, you should
first check the temperature of the object, and then press the Enter key, the temperature of
the object's Properties dialog box pops up on the screen. The following figure is the
temperature measurement points, the temperature line, the temperature measurement area
of the Properties dialog box:
Point Measurement Properties Dialog Box
The attributes of the measurement points can be modified amplitude coefficient ratio,
the distance and the reference object, the left and right arrow keys to the left and right
selection, press the A key to switch up and down. Temperature value is displayed when
the "reference object" option changes to "open", and other measuring object with the
temperature difference of the temperature measurement points.
16
4heat
LT4/T8 Thermal Image Camera User Manual
Line Measurement Properties Dialog Box
Line temperature measurement properties can be modified amplitude coefficient
ratio, distance, maximum temperature, minimum temperature, average temperature,
maximum temperature difference, the crossing point temperature and the reference
object, the left and right arrow keys to the left and right selection, press the A key to
switch up and down. Temperature value is displayed when the "reference object" option
changes to "open", and other measuring object with the temperature difference of the
temperature measurement points.
Area Measurement Properties Dialog Box
Area temperature measurement properties can be modified amplitude coefficient
ratio, distance, maximum temperature, minimum temperature, average temperature, the
maximum temperature and the reference temperature properties can be modified, and the
17
4heat
LT4T8 Thermal Image Camera User Manual
left and right arrow keys to the left and right selection, press the A key to switch up and
down. Temperature value is displayed when the "reference object" option changes to
"open", and other measuring object with the result of the temperature difference between
the temperature measurement of the temperature measurement area
! Note:It can only set one reference target.
3.3.3 Save Image
Obtain the current image to store, you can choose one of the following four ways:
z
Press Ok button and will show panel menu, select the "photo" option in the menu, the
system will automatically save images
z
Press S key, the image will froze, and press the same key again and the image will be
saved.
z
Keep press S key for 3 second, the image will be automatically saved.
z
To set a shortcut key as Take Photo, then just need press this key to save image.
3.3.4 Playback Image
z
Two way to open the image file:
1、 Press the Ok key to activate the main menu, select "File Manager" menu , then select the
submenu (via the arrow keys to select)
2、 Click the "Preview" option in the floating panel to open the selected file (via the left and
right keys to switch selection)
z
After you open the image, you could use upper and lower sections of the playback control
panel keys to playback the current store images.
z
Press Cancel key to exit and return to the current state.
3.3.5 Download the Save Files
Can use card reader to download, delete, format the TF files.
! Note:Use the recommended form to format the TF card。
3.3.6 Screen Setting
There’s two ways to set up: 1) Via general setup menu of “LCD brightness adjustment” to
do screen brightness settings, so as to achieve the best effect. 2) by setting shortcut keys
for the “LCD brightness adjustment”, then use the shortcut key to adjust the LCD screen
brightness.
18
LT4/T8 Thermal Image Camera User Manual
4heat
3.3.7 Manu Operation Introduction
z
z
z
z
z
z
Keyboard operation: press the "OK" button to pop up the floating panel, use left and right
arrow keys on the floating panels to select the icon, click "OK" key to enter the relevant
interface.
Main menu interface: via "up and down" key to select the menu icon, click "OK" key to enter
the submenu.
Sub-menu interface: via "up and down" key to select, if there’s the ">" mark, using
right-click to enter the lower menu
Parameter interface: The "up and down" key is to modify, the “left and right” key is to choose
< > means modify the setting of the current manu.
Press the "OK" button to confirm the changes, save and return to the previous menu, press the
"C" key to cancel the changes and return to the previous menu.
z
Cancel and return to the previous menu button;
Save and return to the
previous menu button. (For touch screen)
z
Switch button, by the left and right keys to modify the switch settings
4 Operation guide
4.1 Graphic interface description
4.1.1 Screen graphic interface
20
19
18
17
16
15
14
13
1
12
2
3
11
4
10
9
8
5
7
6
19
LT4/T8 Thermal Image Camera User Manual
4heat
[1] Company logo: DALI
[2] Emissivity: the current emissivity setting
[3] Reference Temperature: Fixed reference temperature
[4] Result: Indicates the temperature value of the target object. Black and yellow denotes the
temperature value of the selected object.
[5] Spot temperature measurement:white crosshair
[6] System: the current system time
[7] Min temperature: indicate minimum value of the palette
[8] Auto Enhancement: select auto enhancement mode
[9] Manual Enhancement: select manual enhancement mode
[10] Palette: palette bar. User can choose different palettes
[11]Bluetooth:select Bluetooth function
[12] Max temperature: indicate the max value of the palette
[13] Battery status: indicate the current battery status
[14] TF card:indicate the TF card load status
[15] Freeze logo:indicate the current image is frozen
[16] Zoom:indicate the image is zoomed
[17] Recording:indicate the recording status
[18] Continuous snap-shot:indicate the continuous snap-shot status
[19] Voice recording:indicate the voice recording status
[20] Calibration:indicate the calibration status
! NOTE: Not all models have all functions, so the working status screen may not
show all features.
20
LT4/T8 Thermal Image Camera User Manual
4heat
4.1.2 Floating Bar Interface
Floating bar interface
Floating bar interface:From left to right is namely the temperature measurement, video,
photo, preview and settings manu.
4.1.3 Main Manu
Main Manu
The main menu items: display the main menu item, namely the document management,
temperature settings, image settings, camera settings, general settings, network
settings, TF card management and system setting.
21
4heat
LT4/T8 Thermal Image Camera User Manual
4.1.4 Sub-manu interface
1
2
4
3
Sub-manu interface
[1] Figure name: Displays the name of the dialog box. The name of the dialog box as shown in the
example is "temperature measurement setting.
[2] Item title: A dialog box may contain more than one item. As shown in the above figure
[3] Item Content: each item corresponds to the content of a project, the left and right keys to make
changes, ">" indicates the lower menu.
[4] Parameter options: press the left button to select a different parameter.
4.2 Measurement Object Adding
This feature is used to increase or clear the measuring object. The following dialog box pops
up, press the Enter key, floating menu pops up, select the temperature measurement target to add
and press the Enter key.
Temperature Measurement Object Adding Manu
22
4heat
LT4/T8 Thermal Image Camera User Manual
If select“
”,then press OK key,then the all the objects will be cleared.
! NOTE: When you delete a single temperature measurement object, direclty press “A” key and
choose the object, then press the "C" key to delete.
4.3 Recording
This function is used to save the video, save format to MP4. Pressing the Enter key, floating
menu pops up, select video and press the Enter key, as shown below.
Recording Figure
Press stop key to end the recording, and return to the current operation status
4.4 Photo
This item is for photo. And back up in the JPG format. Pop up the floating menu after
pressing confirming key. Then finish the photo. If turn up function of mark. Backup note
will pop up in the OSD as followed.
Voice record note for photo
Continuous photos mark will appears in the status column if set the continuous photo
23
4heat
LT4/T8 Thermal Image Camera User Manual
4.5 Preview
This item is for the preview files of backup. Press confirming key. Pop up the floating items ,
select preview and press confirming key will appears as followed .
Preview OSD
Switch to files by pressing key of left or right. Open it and it appears in the screen by pressing
confirming key. Press C key to quit
4.6 Setting
Main OSD
24
4heat
LT4/T8 Thermal Image Camera User Manual
Normal setting OSD
Press confirming key will pop up the panel and select the SETTING to open the main menu.
Select the Normal setting in the main menu. Normal setting OSD will pop up after pressing
confirming key. Users could set the time of auto calibration / definition of shortcut key
/Bluetooth/pattern of power saving/ brightness adjustment of LCD / unit of temperature / unit of
distance .totally 7 items. Switch to items by pressing key of up or down. Change the value by
pressing key of left or right. “>” means secondary -menu and enter the menu by pressing key of
right .
Time of Auto calibration:Set time interval of auto calibration to get better thermal image
and improve the precision. The unit is second
Auto calibration OSD
Shortcut key :Users could set the Functions of shortcut key. System offers record .screenshot.
Enlargement. Reduction. Enlarge brightness of LCD. Reduce brightness. of LCD Laser.
Lightness. Adding or removing spot 1 of testing temperature. Adding or removing area 1 of
25
4heat
LT4/T8 Thermal Image Camera User Manual
testing temperature and so on. When select shortcut key of laser. It will open the aimer of laser.
Then it closes. When select shortcut key of light. It will open the lighting. Then it closes. When
select shortcut key of spot 1. It will add or remove the spot 1. When select shortcut key of area
1. It will add or remove the area 1. When select shortcut key of record. It starts to record. When
select shortcut key of photo. It starts to save the photos you took.
Shortcut key setting
Bluetooth :Turn on the Bluetooth will enable status of scanning and searching below,Turn
off Bluetooth the status is not valid .Select scan and search key and start to scan the Bluetooth
device .the model and the name of devices will show in the OSD .Enable status of Bluetooth
the device will scan and search one time automatically
Bluetooth OSD
Power saving :Screen off and power off
Time of scree off :If without any operation ,thermal imaging camera will screen off to save
power。Press any key except the power key,thermal imaging camera will
26
4heat
LT4/T8 Thermal Image Camera User Manual
screen on 。This function is not valid when time is set to 00 minute.
Time of power off :If without any operation ,thermal imaging camera will power off to save
power。This function is not valid when time is set to 00 minute.
Power saving OSD
LCD brightness adjustment :It is valid when changing the brightness.
LCD brightness adjust OSD
27
LT4/T8 Thermal Image Camera User Manual
4heat
4.6.1 Measuring setting
Measuring setting Menu
Press OK button to call out the Setting Menu. Select “Measuring Setting”,then press “OK”
again to call out the setting interface. In this interface ,Level ,magnification,Environment
Temp,Ref Temp can be set. Use UP &Down button to select ,” >” means there is sub menu, press
Right Button to enter the sub menu.
Level: Seeting the Measuring Level of the thermal camera.
Magnification: Seeting the Magnification and the different Temp range.
Environment Temp: It will automaticly detect the Environment Temp after the
camera start-up.
Ref Temp: When it is enabled , the target temperature shown on the LCD is the
D-Value between the real temp and the Ref-Temp.
Ref Temp Menu
28
4heat
LT4/T8 Thermal Image Camera User Manual
4.6.2 Adjustment
Adjustment Menu
Press OK button to call out the “Adjustment” under menu “Measuring Setting”. In this menu ,
Emissivity, Tcorrect, Distance , Humidity ,TReflect can be set. Use UP &Down button to
select ,use LEFT & Right to set the value. ” >” means there is sub menu, press Right Button to
enter the sub menu.
Emissivity: Different target has different emissivity, so the user can set different emissivity
for different target. If it is not set , then will use default setting. Attached
Common emissivity table for reference.
Tcorrect: Correct the target Temperature.
Distance: Setting the distance between the camera and the target to make sure exact
measuring. Set the real distance if the distance is shorter than 10 meters. (unit
0.5m)
Humidity: Set the humidity of the using environment.
TReflect: It will only functioned after it is enabled. Can use fixed temp as
reference temperature.
29
LT4/T8 Thermal Image Camera User Manual
4heat
4.6.3 Image Setting
Image Setting Menu
Press OK button to call out the Image setting menu under “Setting” . in this menu ,
Manual/Auto-Enhance Mode, Alarm types, Alarm Tempe , IR transparency, Alarm color,
Alarmlink, Tiem Interval can be set. Use UP &Down button to select ,use LEFT & Right
to set the value. ” >” means there is sub menu, press Right Button to enter the sub menu.
Manual/Auto/Auto-Enhance Mode:Adjust the image quality for the user to get
better image for analysis purpose
When Auto-Enhance Mode is activated,can switch between manual and automatic. Press “A
“ button will enter manul mode,it can adjust the pallet with “UP, Down, LEFT, Right” buttons.
Press “C” will return into Auto Mode.
When Auto-Enhance Mode is deactivated,can switch between manual and automatic. Press
“A “ button will enter manul mode,it can adjust the pallet with “UP, Down, LEFT, Right” buttons.
Press “C” will return into Auto Mode.
The modes can be switched with the Auto-enhance mode Button.
If select auto mode, the camera will automatic adjust the sense of hierarchicy of the
image.
If select “Auto-Enhancement “ , both High temp target and low temp target can be viewed in
the image.
If Slect Manual mode, User can set the pallet value to adjust the image quality. Press “UP”
button to increase the level range , press Down to decrease the level range. Press Left button to
30
4heat
LT4/T8 Thermal Image Camera User Manual
reduce the upper limit, increase the bottom limit; Press RIGHT button to increase the
upper limit, decrease the bottom limit.
Alarm Setting
Alarm Types: It is only functioned when measurting. User cab set alarm OFF , High temp
alarm,Low temp alarm here. It will alarm when proper setting is selected. Alarm
color can be set in “Alarm Color”
Alarm Color: The color of the target area shown on the LCD will be changed into the alarm
color set when the temperature is over the alarm temp. 9 color types can be
selected. If “colorless”is selected, then the color will not change when alarm.
Alarm Temperature: Setting alarm Temperature. Only functioned when it is enabled。
Alarmlink: It will automatic saved when there is alarm including snapshots and video
record.
Time Intervel: Set the alarmlink time intervel.
Isotherm Setup Menu
31
4heat
LT4/T8 Thermal Image Camera User Manual
z
Isotherm: Activates the Isotherm display by displaying the image in the
set temperature range by the specified color.
z
Isotherm Color: 9 colors available for your choice,Setting to Off, disables the
feature.
z
Isotherm low value:Set the Isotherm low value。
z
Isotherm upper value:Set the Isotherm upper value。
IR Fusion High & Low temperature Menu
IR Fusion High & Low temperature:
It consists of three options--IR Fusion High Temp, IR fusion Low Temp, and OFF.
Set IR Fusion High Temp, when the actual temperature is higher than the
temperature of IR fusion set up, CCD image will be shown. Vice versa.
32
4heat
LT4/T8 Thermal Image Camera User Manual
4.6.4 Network setup
Network Setup Menu
Press the menu button to show up the floating panel and choose the “setup” option to active
the main menu. Select “Network function.
IP Address: This IP address must be the only one, can not be conflicted with the other IP address
of the same network segment.
Sub network mask: Divide the segment of the sub network.
Default network gateway: Set the gateway address to realize the communication among
different segment.
Link type: Default 10M/100M self-adapt, 10M、100M.
4.6.5 TF Card Management
TF Card Management Figure
33
LT4/T8 Thermal Image Camera User Manual
4heat
TF Unload
TF Card Format Figure
TF Card Format Successful
Press the Enter key to pop up floating panel, then select "Settings" option to activate the main
menu, select the "TF Card Management item in the setup menu.
Unload:Unload TF card.
Format:This function is used to format the TF card. Select the formatting options, pressing
the confirm key to format, press cancel or "C" key to cancel the formatting
34
LT4/T8 Thermal Image Camera User Manual
4heat
! Note: Verify that the file is no longer needed or have been backed up before formatting;
after formation, the saved thermal imaging pictures will be lost unrecoverable. If format by PC,
please select FAT16 to format the card.
4.6.6 Photo Setting
Photo Setting Manu
Pressing confirm key to pop up the floating panel, then select "Settings" option to activate the
main menu, selected the camera settings option
Associated Pictures: This function is to associate the infrared images with digital image, to
save the picture together.
Image annotation mode: This option has two kinds of annotations,audio annotations and
text annotations. Audio annotations is to add voice when you save the picture; text annotation is to
add text messages when save the image.
CS Shots:Set Continuous capture the number of sheets can be set for 1, 3, 5, 10 shot.
Continuous Capture Interval: can be 0.5s or 1s.
Record Time:can set 1、3、5、10 or 15 minutes to shut off the recording.
Manu Setting:
Manu Setting
35
4heat
LT4/T8 Thermal Image Camera User Manual
Set the path to save the file, directory type can be set by custom, by month, by date. In
preview mode, the playback file path set by directory type.
4.6.7 System Setting
System Setting Manu
Press the Enter key to pop up "Settings" option to activate the main menu, select "System
Settings" item in the setup menu. Users can customize the set system language, time / date formats,
time / date, restore the factory value items. Pressing the up/down key to switch the setting, use left
and right arrow keys to set the contents of the setting. The ">" indicates that there’s a lower-level
menu, use right-click to enter.
Language:Set the languages
Time / Date Format:
Time/Date Setting Manu
Change the format of the time/date
36
LT4/T8 Thermal Image Camera User Manual
4heat
Time Setting:
Time Setting Manu
Customer can via the Time Setting manu to set the thermal imaging camera’s time. After the
setting, the data the time will be saved.
Users can customize to set the year, month, day, hour, minute entries. Press the left and right
key to do the settings.
! Note: When left unused for a long time, due to the limited internal battery power, the thermal
imaging camera need to re-adjust the system time.
Restore the factory settings: This function is used to restore the factory settings. Pressing
the confirmation button, the setting manu will come up, continue to press the confirm key system
to restore the factory settings. When pressing the cancel button to exit, the restore the factory
settings will be cancelled. The details of the thermal imaging camera’ factory parameters listed
please see the Annex parameter table.
Recover Factory Setting
37
4heat
LT4/T8 Thermal Image Camera User Manual
! Note: Recover factory setting will cancel all user-defined parameters.
System Version Info:
System Version Figure
Display thermal imaging device model, device number, software version number and MAC
address
Import: New TF card the Create DCIM / Import directory on the TF card, import the fixed
file name as PicNote.cfg
File Name Form:
[Note]
Note1 =
Note2 =
Note3 =
Each line is not more than 20 words. After the import is complete, restart the instrument to
take effect.
Export: TF card, make sure the TF card is in the machine, then select the menu and then click
the Export button to export the contents stored in the TF card the DCIM / Export directory.
4.7 File Management
4.7.1 Playback
Two modes of playback:
38
LT4/T8 Thermal Image Camera User Manual
4heat
File Management Figure
1、 File management mode: press the Enter key to pop up floating panel select "Settings"
option to activate the main menu, select the file management menu in the setup menu,
press the confirm button to open the infrared image in the storage. The image
arrangement format has abalone grid , press the upper, lower, left, and right arrow keys
can switched the stored image. Pressing the "C" key to exit open image and return to the
measurement state.
Preview Mode Figure
2、 Preview mode: press the OK button to pop-up floating panel to select "Preview" option,
enter the preview mode. Through the left and right keys to switch selection, selected
press the OK button to enter the playback. Pressing the "C" key to exit open image and
return to the measurement state.
39
LT4/T8 Thermal Image Camera User Manual
4heat
Video Playback Interface
Video playback interface: Via the left and right key to select the play button on the status bar,
press the "confirm" key to take effect on the next key to show and hide the playback status bar
(press the "on" button is displayed, press the "next" button is hidden)
The icon buttons from left to right is as follow: play / pause, stop, rewind, fast-forward, the
former one, the next.
Image Playback Interface
The image playback interface: Via the left, right key to select the play button on the status bar,
press the "confirm" key to take effect on the next key to show and hide the playback status bar
(press the "on" button is displayed, press the "next" button is hidden)
The icon buttons from left to right is as follows: the former one (above), the next (paragraph),
sound recording, voice playback, text playback.
40
4heat
LT4/T8 Thermal Image Camera User Manual
4.7.2 Bluetooth Transmission
This function is used to transfer the stored images on TF card. First, turn on Bluetooth, then
open the file manager, and the arrow keys to select the files you want to transfer and Bluetooth
transmission prompt box pops up, press the "A" key, as shown below:
Bluetooth Transmission Figure
Press confirm key, will show the progress bar, as shown below:
Transmission Progress Bar
4.7.3 Delete
This function is used to delete data stored in files on the TF card. Open File Manager by the up
and down keys to select the file you want to delete, press the "S" key to bring up the prompt box,
delete the currently selected image files when the Enter key is pressed, the image voice or text
comments will also be deleted, then press the "C" key to undelete
41
4heat
LT4/T8 Thermal Image Camera User Manual
File Delete Figure
! Note: Before deletion, make sure that the file is no longer needed or have backup, the
deleted image can not be recovered
42
LT4/T8 Thermal Image Camera User Manual
4heat
5 Configuration
Item
Detect
or
Lens
Image
Image
Displa
y
Type
Array size
Pixel Pitch
Spectral range
Frame rate
Thermal sensitivity
FOV
Min
Focus
Distance
Focus
Option Lens
Interface Type
IFOV
Zoom
CCD
Frame Rare
Video Output
LCD display
Color Palette
Image adjustment
Image
Image Enhance
Range
Accuracy
Measurement
Correction
Measu
remen
t
Mode
Emissivity
correction
Background Tem
correction
Atmospheric
transmission
correction
Setting Option
Image
Storag
e
Card
Mode
Technical Specification
LT4
Un-cooled FPA micro-bolometer
160*120
384*288
25μm
8-14μm
50Hz
0.06℃@30℃
25°×19°
LT8
10cm
Manual
0.5x/2x
Screw Type
2.73mrad
1.37mrad
2×、4X
3 million pixel,CMOS module
50HZ/60HZ,
PAL / NTSC
3.6″TFT LCD,640*480,touch screen
11 color palette for option
Auto/manual to adjust brightness, contrast
Fast switch between infrared image and ccd image, with fusion
function.
Auto/manual enhance mode
-20℃~+600℃,(two range)
-20℃~+350℃
Extend to 1000℃
Extend to1200℃
± 2 °C or ± 2% of reading, Whichever is greater
Auto / Manual
Up to 5 movable spots. Up to 5 movable
areas(maximum, minimum and average temperatures).
Up to 2 movable lines. Line profile. Isotherms.
Temperature difference. Alarm(voice, color)
Variable from 0.01 to 1.0
Auto
Automatic correction according to user input object
distance, humidity and temperature
Time/Date, ℃/℉/K, language, brightness/contrast, LCD
brightness, IP address
2GB Micro TFcard,max 32GB
Auto/manual saving, single thermal images and ccd image
association, thermal video and ccd association, thermal and
ccd fusion function.
43
LT4/T8 Thermal Image Camera User Manual
Format
Power
source
Interfa
ce
other
Enviro
nment
Dimen
sion
CCD image format
Voice annotation
Text annotation
File Manu
Battery type
Battery
operating time
charging
Charging time
Power saving
SD card slot
Net
power
video
Auto/data
Mic
buzzer
Flash light
Laser point
Triple
Hand strap
Lens cover
Sky shade
Operation
temperature
Save temperature
Humidity
Encapsulation
Shock resistance
Vibration
resistance
Drop resistance
Dimension
weight
4heat
JPEG format
H.264 format
JPEG、H.264,include fusion
60s, saved together with the image
can upload
can upload
Li-Ion, rechargeable
3 hours continuous operation
Intelligent charge or power adaptor or 12v car power charge
1.5 hour to 50% full
auto sleep, auto shut down
Micro SD(TF)slot
Mini-USB
(DC12V)
yes
Bluetooth(earphone/RS232)
yes
yes
2 LED
red,1mw/635nm,two level,IEC60285
1/4″-20-UNC
Can install on two side
yes
yes
-15℃~+50℃
-40℃~+70℃
≤90%
IP54
25G,IEC68-2-29
2G,IEC68-2-6
2 meters
105x230x245mm
980g
44
LT4/T8 Thermal Image Camera User Manual
4heat
6 Troubleshooting
Please follow the table below to diagnose and correct the problem. If
problem still exists, please contact our service department (400-887-1897).
Problem
Cause & Solution
z
The
camera
power on.
does
not
z
z
Battery not installed or installed
incorrectly
→Install battery or re-install battery
Battery is out of power.
→Change battery.
“Power off” protection is enabled
→Wait for 5 seconds and reboot.
Battery is out of power.
→Change battery
z AutoOffTime option is enabled
→Set as None.
z
The
camera
automatically.
powers
off
Environmental temperature is too low
Rechargeable battery is not charged
completely.
→Recharge the battery.
z Rechargeable battery is out of power
completely and cannot be recharged.
→Change to new battery.
z
z
Battery depletion is too fast
Lens cover is not removed.
→Remove lens cover.
z In image freeze status
→Press C key to exit.
z
No thermal image
Thermal image is white-black.
z
White-black palette is selected
→Select normal palette.
45
LT4/T8 Thermal Image Camera User Manual
4heat
Appendix A
Common material emissivity(FYI)
Material
Surface
Temperature°C
Emissivity(ε)
Non- oxidized
100
0.20
Oxidized
Burnished to Brown
100
20
0.55
0.40
Dull luster
Oxidized
Seriously Oxidized
38
100
20
0.22
0.61
0.78
Oxidized
100
0.74
Rusty
Oxidized
25
200
0.65
0.64
Non- Oxidized
Quarry-faced
100
25
0.21
0.94
Nickel
Polished
Oxidized
38
200
0.28
0.37
Stainless steel
Oxidized
60
0.85
Steel
Oxidized
200
0.79
Common brick
Surface
20
0.93
Concrete
Surface
20
0.92
Glass
Polished plate
20
0.94
White
100
0.92
Black
Smoke black
100
25
0.97
0.95
Oil paint
Candle soot
Rough lead surface
Value of 16 colors
20
20
100
0.95
0.98
0.94
Paper
White
20
0.93
Sand soil
Surface
20
0.90
Timber
Dressed
20
0.90
Water
Distilled water
20
0.96
Skin
Human
32
0.98
Ceramic
Thin
Thick
21
21
0.90
0.93
Aluminum
Brass
Copper
Iron
Cast iron
Wrought iron
Lacquer
Carbon
46
4heat
LT4/T8 Thermal Image Camera User Manual
Appendix B
Factory default parameter setting table
Table.1 Measurement temperature setting table
Value
Parameter
LT4
-20 ~ 350°C
Temperature Range
Lens
Standard
°C
Temp Unit
Ref Type
Off
30°C
Ref Temp
Table.2 Measurement temperature correction table
Value
Parameter
0.96
Emissivity
0°C
TCorrect
Off
TAmbient Temp
Table.3 Analysis setting table
Value
Parameter
Off
Temp Alarm
50.0°C
Alarming Temp
None
Alarming Color
Off
Isotherm Color
50.0°C
Isotherm Temp
1.0°C
Isotherm Width
Table.4 System setting table
Value
Parameter
English
Language
60S
Brightness
60%
Auto Calib
Laser sight
Video Mode
NTSC
Quick Access
5 mins
StandbyTime
15 mins
AutoOffTime
4heat s.r.o., Ječná 1321/29a
621 00 Brno, Česká republika
tel.: +420 513 035 275
fax: +420 246 013 254
e-mail: [email protected]
Ing. Jan Novotný, tel.: +420 777 777 224
Výměníky a VZT jednotky
Michal Škvařil, tel.: +420 776 186 783
Výměníky, projekty na vytápění a VZT v ČR, SR a EU
www.4heat.cz
www.4heat.sk
LT8
-20 - 180°C
Lukáš Bohatec, tel.: +420 733 640 222
Vysočina, Zlínský, Jihomoravský a Jihočeský kraj
Jakub Kozlovský, tel.: +420 730 891 891
Praha, Středočeský, Plzeňský, Karlovarský,
Ústecký a Liberecký kraj
Tomáš Ondráček, tel.: +420 734 256 724
Královehradecký, Pardubický, Olomoucký,
Moravskoslezský kraj
Peter Tehlár, tel.: +421 948 506 833
Obchodní zastoupení pro Slovenskou republiku