1
Quick Installation Guide
For Bridge, Bridge Router & Access Point
A. Hardware Installation
1. Wired LAN connection: Connect an Ethernet
cable (i.e. UTP/STP Straight RJ45) from your
computer’s Ethernet (RJ45) port to one of the
LAN ports of this Bridge/Bridge Router/Access
Point.
2. Wireless LAN connection: Place the
Bridge/Bridge Router/Access Point in an open
environment to gain best signal strength.
3. Power on: Plug the power cord into the power
outlet and Bridge/Bridge Router/Access Point.
Note: For best results place this Bridge/Bridge
Router/ Access Point at least 5 meters from
another Bridge/Bridge Router/Access Point.
Subnet mask: 255.255.255.0
B. Configure the TCP/IP Settings of your
Computer
For Windows2000 and Windows XP:
1. Click Start > Settings > Control Panel and
double click on Network and Dial-Up
Connection. (In Windows XP click Start >
Control Panel. Select Classic View in the
upper left corner, and then double-click on the
Network Connections icon.)
2. Right click on the Local Area Connection
bound to your LAN Card and select
Properties. Select Internet Protocol (TCP/IP)
and click on the Properties button.
4. Click on the OK button to close to window,
and then click OK again in the Properties
window.
For Windows 95/98/ME:
1. Click Start > Settings > Control Panel and
double click on Network.
2. In the Configuration tab, select TCP/IP and
click on the Properties button.
3. In the IP Address tab, select Specify an IP
address and fill in the following:
IP address: 192.168.1.10
Subnet mask: 255.255.255.0
4. Click on the OK button to close the window,
and then click on the OK button again in the
Properties window.
Note: At this point you may be required to insert
the Windows Installation CD or restart your
computer.
C. Login/Configure the Bridge/Bridge Router
3. In the General tab, select Use the following
IP address, and fill in the following:
IP address: 192.168.1.10
Quick Installation Guide
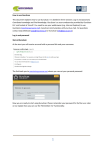
1. To access to the Bridge/Bridge Router using
the web-browser, enter the default IP address
(192.168.1.1) of the Bridge/Bridge Router into
the address bar of the web-browser, and
press Enter.
2. A login box will then appear. Enter “admin” for
Username and Password, and click on the OK
button.
Page 1 of 2
Quick Installation Guide
For Bridge, Bridge Router & Access Point
information about switching between Bridge,
Bridge Router and Access Point mode.
2. A login box will then appear. Enter “admin”
for Username and Password, and click on the
OK button.
3. The Status page of the Bridge/Bridge
Router will then appear. This page displays
the current status of the Bridge/Bridge
Router, which includes: the connection state,
SSID, channel, IP address and MAC
address.
3. The Status page of the Access Point will then
appear. This page displays the current status
of the Access Point, which includes the
Access Point name, MAC address, IP address,
SSID, channel, WEP and WPA settings.
4. Refer to the detailed User’s Manual in the
CD-ROM provided to configure the
Bridge/Bridge Router.
D. Login/Configure the Access Point
1. To access to the Access Point using the webbrowser, enter the default IP address
(192.168.1.2) of the Access Point into the
address bar of the web-browser, and press
Enter.
Note: By default, this device is configured in
Bridge mode. In order to login to the Access Point,
you must switch to Access Point mode using the
Operation link. Refer to the detailed User’s
Manual provided in the CD-ROM for more
Quick Installation Guide
4. Refer to the detailed User’s Manual in the CDROM provided to configure the Access Point.
Note: You must configure your wireless LAN card
based on the settings of your Bridge/Bridge
Router or Access Point. Refer to the User’s
Manual of your wireless LAN card for instructions.
P/N:6709A0233000
Page 2 of 2