1
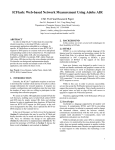
Monday, February 24, 2014 Stony Brook University: New Course Material Requisition System Faculty Guide Monday, February 24, 2014 Table of Contents Introduction: A New Course Material Requisition System ........................................................................ 2 Let’s get started: ......................................................................................................................................... 3 Step One: Select a Section .......................................................................................................................... 4 No Text Required ..................................................................................................................................... 4 Duplicate/Course Not Offered ................................................................................................................. 4 Step Two: Add Past Books .......................................................................................................................... 5 Step 3: Add New Books ............................................................................................................................... 6 Step 4: Add Supplies and Custom Coursepacks ......................................................................................... 7 Step 5: Set Requirements ........................................................................................................................... 8 Step 6: Submit Adoption ............................................................................................................................. 9 Desk Copy Policy ...................................................................................................................................... 9 Help and Troubleshooting ........................................................................................................................ 10 1 Monday, February 24, 2014 Introduction: A New Course Material Requisition System Welcome to Stony Brook University’s NEW Course Material Requisition system! Starting summer 2014, this new system will be effective across Stony Brook University Main Campus, Health Sciences, Manhattan as well as Southampton campuses. This user manual contains all essential information to help you make the transition to the new system as smoothly as possible. With step by step instructions this manual will help you get started with ease. With an aim of continuously improving your experience in submitting course material information, the new and improved system will house fresh features that allow you to pass along your adoptions from previous semesters, using a Google-‐like search-‐and-‐select tool to add new books and many more. A couple of clicks later, the adoption is in! Now, let’s get started… 2 Monday, February 24, 2014 Let’s get started: The new Course Material Requisition system is designed to make it easier than ever to select and submit your course materials. You will receive an email close to the due date that contains a link that is unique to your course profile. Clicking this link will take you to the front page of the new Course Material Requisition system, where you will find the list of courses you are responsible for. To get started just click the “Select and Submit Course Materials” button next to the course you would like to submit information for (Figure: 1a). Figure: 1a; 1b A tutorial video will be available to guide you along during this process. This video can be accessed from the front page (Figure: 1b), or during any step in the process by clicking the “Instructions” button located in upper right corner of the screen (Figure: 2). Figure: 2 3 Monday, February 24, 2014 Step One: Select a Section Step one is to select which sections of a course you would like to submit materials for. On the left hand side of the screen, check the box next to the section(s) you would like to edit (Figure: 3a). You are able to edit multiple sections at once so long as they use the same materials! Then click the "Go to Next Step" button on the right (Figure 3b). Figure: 3a; 3b; 3c No Text Required If your course does not require any course materials, begin by selecting the appropriate section(s), and proceed to click the “Mark As: No Text Required” button located to the right of the screen (Figure: 3c). This will bring you to the final step in the process where you will only need to click the “Submit Adoption” button to finalize the process. Duplicate/Course Not Offered If your course or course sections are listed more than once, or if the course assignment is wrong, click the “Mark As: Duplicate/Not Offered” button located to the right of the screen (Figure: 3c). This will bring you to a new screen where you can select the section or course to remove (Figure: 4a). Enter a brief reason for why the course/sections needs to be removed (Figure: 4b), and click the “Submit Adoption” button located to the right of the screen to finalize the process (Figure: 4c). Please note that once completed, you will no longer be able to make changes for that course or section. If you find that you are in this section by error, simply click the “Click Here to Start Over” button to the right of the screen (Figure: 4c) to return to step one of the process. 4 Monday, February 24, 2014 Figure: 4a; 4b; 4c Step Two: Add Past Books On the next screen you can add any books that have been adopted for the course in the past. Begin by selecting which semester’s history you would to examine (Figure: 5a). Next, scroll through the list of past titles and click the "Add" button to the left of any book(s) you would like to use for your upcoming course (Figure: 5b). Alternatively, if you'd like to re-‐use all books in a section, just click the "Re-‐Use All Past Books from This Section" button (Figure: 5c). When you're done, click “Go to Next Step” to move on (Figure: 5d). Note: Throughout the process, you'll see the "X items in current adoption" drop-‐down list, towards the top right of your screen, update with the book you have just added. You can check what has been added for a course at any time by clicking on the drop-‐down list and viewing its contents. 5 Monday, February 24, 2014 Figure: 5a; 5b; 5c; 5d Step 3: Add New Books The next step is to add any new books which have not been used in past semesters. If you know the book information already, you can simply type in the ISBN, or author and title and then click "Add" (Figure: 6a). You may also search for books by clicking on the "Search For Books" button and typing in your query (Figure: 6b). Books are searchable by ISBN, title and author. Once you've added all of the necessary books, click on the "Go To Next Step" button (Figure: 6c). You can add multiple books on the same page by clicking the “Add” button. 6 Monday, February 24, 2014 Figure: 6a; 6b; 6c Step 4: Add Supplies and Custom Coursepacks On the next screen you can add a coursepack or any supplies you may need for the course. To add a coursepack simply click the “Add” button located under the “Add Custom Coursepack” section. The Bookstore will know to expect it. Please note that you’ll need to create your coursepack and communicate it to the bookstore through the typical channels, or add a note at the end of the adoption. To add materials such as goggles or a lab coat, just tell us the item's description and then click the "Add" button under the “Add Supplies” sections (Figure: 7b). If you'd like to give additional information, tell us who supplies the product and where it can be found online (supplier and link are not mandatory fields). Figure: 7a; 7b; 7c 7 Monday, February 24, 2014 Once you have added all of the required materials for your course click on the "Go To Next Step" button (Figure: 7c). Step 5: Set Requirements The next step is to set the requirements for your course materials. Choose whether an item is required, recommended, a value option, or go to glass first by selecting the appropriate choice from the "Status" drop-‐down menu to the left of the item (Figure 8a). Once you have set the status of all your items click on the “Go To Next Step” button (figure 8b). Figure: 8a; 8b 8 Monday, February 24, 2014 Step 6: Submit Adoption On the last step, tell us about the course and submit the adoption. If known, be sure to indicate the “Estimated Enrollment” (Figure: 9a), and add any necessary notes or comments regarding multiple desk copies (Figure: 9b). Be sure to review all information carefully as you will need to request permission to be able to submit edits or additions to the course. At this stage, desk copies may be requested by faculty who submit their Course Material Requisition information by the designated due dates. In the “Add Note” area, please specify the titles and number of copies of desk copies you are requesting. (Figure 9b). Desk Copy Policy If you wish to request a desk copy for a title that will be used for your course, please be aware of the following guidelines: § § § § § § § § § Desk copies are complimentary copies publishers release to faculty members who have adopted a textbooks for their course and placed orders at the University Bookstore. Please be aware that desk copies cannot be obtained from the University Bookstore. This service is provided to you by the Provost's Liaison's Office. Desk copy requests will be honored only if your Course Material Requisition (CMR) is submitted by the designated due dates (October 12th for the Spring/Winter Semesters and April 5th for the Fall/Summer semesters). Please note that these dates never change. If you wish to add a title to your CMR after the designated due date, and your CMR was submitted prior to the designated due date, your desk copy request for that title will be honored. In order to be eligible for desk copies for the upcoming semester, all previously requested desk copies must be picked up prior to requesting new titles. Since all publisher policies are different, they may not send the requested amount of desk copies since the decision is purely of their discretion. If you wish to receive supplementary copies you must contact the publishers. We will provide you with their contact information if necessary. Publishers are often unlikely to send desk copies of the same titles in consecutive semesters. If you are distributing desk copies to your teaching assistants, collecting them at the end of the semester is the only way to ensure TA copies for a new semester. We are unable to order review copies or exam copies. Faculty wishing to obtain these versions of the books must contact publishers directly. If you need help making a decision regarding their course book materials should visit the Faculty Center Network at www.facultycenter.net, which will allow you to compare course books before requesting them for classes. Desk copies must be picked up from the Provost’s Liaison’s Office. We cannot ship books through inter-‐office mail, or through any other methods. Once you have double checked that all the right materials are included for your course, click on the "Submit Adoption" button (Figure: 9c) and you're done! 9 Monday, February 24, 2014 Figure: 9a; 9b; 9c Help and Troubleshooting If you are having difficulties understanding the new Course Material Requisition system, or if the program is not functioning properly please email the Provost’s Liaison’s Office at [email protected]. 10