1
www.irevo.com /
www.egateman.co.kr
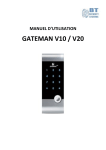
V Series
본 제품은 국내 판매용입니다.
대한민국 이외의 지역에서 본 제품이 판매 또는
사용되어질 경우 AS를 비롯한 제품의 정상적인
품질보증이 이루어지지 않을 수 있습니다.
Korean domestic market only.
Unauthorized over seas sales and use
cannot guar antee the quality and service.
ISL-1161-75 Rev.3
Printed in Korea
INTRO
Thank you for purchasing GATEMAN iRevo, Inc.
CONTENTS
TO BEGIN
As the leader of the world’s digital door lock market, we would like to welcome you to
entering No. 1 Pride GATEMAN’s world.
With the perfect combination between analog technology and digital technology,
experience the GATEMAN’s convenience and safeness.
This instruction manual has been created to for our customers to use GATEMAN more
conveniently and safely.
INSTRUCTION
Please read the instructions before using GATEMAN, and we hope for your happiness
and safeness while you use our product.
Cautions for Safety
4
Product’s Characteristics
5
Summary of Instructions
6
Instructions
8
Components Guide
Name of Parts (Inside)
Name of Parts (Outside)
To Use the Product
10
To use passcodes
How to Safety-key
How to lock the door
How to open the door from inside
Setting Up
14
Manual opening and closing device
sound control function
Volume control function
Forced lock function
Automatic / Manual lock function
Reassuring Feature
17
Alarm Function
3 Minute (LOCK) Function
Fake Numbering Function
Additional
Component
http://www.egateman.co.kr
You can find out about various information regarding GATEMAN’s products and
functionalities through our homepage.
Customer Service 1544-3232
You can use this when purchasing optional products or questions about using the product.
2
Additional parts
20
Homecare communication pack
Remote control
Customer Service
22
Emergency battery supply method during battery outage
Checklist before applying for customer service
Product specification
After Service (A/S) request during product malfunction
GATEMAN Safety Grade
3
Precautions for Safety
Product Characteristics
Absolutely Necessary!!!
This is for user’s safety, so please read carefully
Do not install outside where rain
can get in the product
Do not disassemble the product
by yourself.
In cases of deliberately
disassembling and reassembling,
the product may malfunction and
ause safety hazards.
Do not clean the device by
directly spraying water or using
chemical products like benzene,
thinner, or alcohol.
Smart Pad Feature
Patent
Pending
Every number on the keypad has been individually designed to have separate
lighting system, so all of the features that the user selected can be seen to check
its operation state for any problem.
Advanced HOOK Mechanism Applied
Patent
Pending
When the GATEMAN HOOK product locks, the main body and the latch inside
the door interlock to fight against strong invasion attempts like levers and such.
Smart Pad Feature
Patent
Pending
Every number on the keypad has been individually designed to have separate
lighting system, so all of the features that the user selected can be seen to check its
operation state for any problem.
Do not deliberately apply force /
pressure on the product with
tools.
Please keep in mindful of the
passcodes.
Always check to make sure that
the door is locked properly when
leaving.
Anti-Fire Technology (Only in Fireproof Models)
By adopting special materials and structures for preventing the spread of fire via fireproof
door's hole, fireproof technology that prevents spread of flames for at least an hour
at 1,000 degrees or higher is applied.
Special Material (FiberGlass) and Robust Body Structure
Exclusive
in Korea
By adopting the strong structure against shock from the product design, it can
withstand high temperature, and through utilizing both high-strength fiberglass and
durable die-casting, it is a product that viewed safety and robustness as the top priorities.
GATEMAN Networking System Built (Separate purchase)
Please be cautious to keep the
finger print recognition area clean
from debris and do not use the
device with wet fingers.
Please Be careful not to lose the
safe-key
Exclusive
in Korea
With added homecare communication pack, it can be used with a remote
control and by interworking with wireless safety system, network package, you can use
your phone to check your home’s security state or lock and unlock the GATEMAN.
Unlimited Fake Number Feature
By adopting fake number feature for preventing the passcode to be exposed easily to other
people, product's security was upgraded.
Electric Shock Neutralizing Effect (AntiShock) Feature
Because it uses circuits that have door-opening prevention through electrical tasers,
it is safe against illegal tasers or excessive electric shocks since its circuit blocks the
source of the currents.
Caution
4
If you don’t follow the cautions above, personal injury or property damage may occur.
5
Summary of Instructions
Registering the pass code
Press the
button (register)
Insert passcode
(4~12 numbers)
Press the
Sequentially touch
the safety key that
will be registered
to the safety key
touch area
Press the
button (register)
Registering the safety key
Press the
button (register)
How to use
button (register)
Usage instruction
Locking the door from outside
Opening the door from outside
8
Components Guide
Name of parts (inside)
①
In automatic lock setting, due to the
automatic lock sensor, the door locks
within 5 seconds after the door is closed.
②
In manual lock setting, the door locks
when you lightly touch the keypad from
the `outside.
① Insert the registered fingerprinted finger
in the fingerprint scan area.
② Lightly touch the outside keypad with
your palm and enter the registered
password and lightly touch the keypad
with your palm again, or press the to
terminate.
*
Name of parts (outside)
To Use the Product
10
To use pass codes
To use Safe-Key
How to lock the door
How to open the door from inside
Locking / Opening
the door from inside
Automatic / Manual
lock setting
① The deadbolt unlocks and
locks if you manually turn the
switch/lock.
OPEN/CLOSE
BUTTON
② The door unlocks if you
press the safe handle button
and lower the handle.
Manual opening
and closing device
Automatic setting
Volume control function
Forced lock function
Manual setting
Automatic/Manual lock function
Reassuring Feature
Alarm Function
3 Minute (LOCK) Function
Fake Numbering Function
6
14
Setting the alarm sound for manual switchgear device
Press the inside
automatic/manual lock setting
button, so that the button is
popped up.
Press the inside
automatic/manual lock setting
button, so that the button is
pressed down.
Setting Up
17
Usage Instruction
Usage Instruction
Components Guide
Outside
The product’s components may be changed to improve functions or product quality without notice.
》Basic Components
❶
V Series
❷
Inside (Main body)
Main Bracket
❹
Latch
❶
Keypad (smart pad)
❷
Deadbolt jammed lamp
❸
Emergency power supply terminal
❹
Battery change lamp
❺
Sequentially touch the safety key
❻
RESET Hole
❼
Emergency cover
❶
Battery cover
❷
Homecare communication pack
settling place
❸
Alkaline AA battery
❹
Volume control button
❺
Automatic/Manual lock
setting button
❻
Open/Close Button
❼
Manual Switchgear
❺
❸
❻
V Series HOOK
(Sold Separately)
❼
Inside
Outside (front body)
Inside (Main body)
Main Bracket
Latch
V Series
❶
❷
❸ ❹ ❺ ❻ ❼
❽
4 Batteries
4 Safe-key
❾
screw
product warranty
❿
alarm sticker
installation paper
diagram
User Manual
V Series HOOK
❶
❷
❸ ❹ ❺ ❼/❽
❻
❽
Inside forced lock switch
❾
Deadbolt
❿
Door status detecting sensor
button (register)
》Additional Components
button (menu)
❾
·
·
8
Homecare
Communication
Pack
Battery change lamp
❿
Remote Control
9
To Use the Product
To Use the Product
Registering safety key
To use passcode
Please enter pass codes from 4~12 numbers without
* or # symbol
》To register the pass code
Selection Order
》Setting the alarm tone for manual switchgear
Operation
Movement
Function Description
Open the interior battery cover and
Press the
button (register)
press the
(register) button once.
Follow the voice guide after pressing the 1 button and
Enter the passcode
enter the passcode in the keypad (4~12 numbers)
Press the
button (register)
Press the
button (register) in the inside again to
finalize the passcode registration.
》To open the door with passcode
Selection Order
Operation
Movement
Function Description
Lightly touch the keypad located outside.
Enter the passcode
Enter the registered pass code from outside.
10
Operation
Movement
Function Description
Open the interior battery cover and
Press the
button (register)
press the
(register) button once.
When registering the safety key,sequentially
touch them at the safety key touch area.
Entering safety key
Open the interior battery cover and
Press the
button (register)
press the
(register) button once.
Selection Order
Operation
Movement
Opening door
with safety key
Make sure
the door is open
Function Description
When the registered safety key is touched
to the safety key touch area outside the house,
locked status is disabled.
After passcode or safety key is registered,
please be sure to check that the registered
passcode or safety key opens the door well.
Lightly touch the keypad located outside or
press the
button.
Reference
•
Selection Order
》Opening door with safety key
Touch with your palm
Touch with your palm
When registering the safety key, sequentially touch them at the safety key touch area.
When you are first registering the pass code, the door may close by accident and lock,
so make sure to register it with the door open.
•
When you register a new pass code, the previously registered pass code will automatically be erased.
•
When you register the passcode on the keypad (smart pad), the entered number sequentially show
and disappear.
Reference
• In the case of losing safety key or not having the safety key, please be sure
to register the passcode.
• When the new safety key is registered, previously registered safety key is
deleted automatically.
• When registering safety key, number pad (smart pad) displays the number of
registered safety keys.
11
To Use the Product
To Use the Product
To lock the door
To open the door from the inside
》To open the door via open/close button
》To lock the door from outside
Selection Order
With automatic
door lock setting
Operation
Movement
5
seconds
V Series
Function Description
Due to the built-in automatic lock sensor,
the door automatically locks
within 5 seconds of the door shut.
Pressing the open/close
With manual
door lock setting
The door locks when you touch
button of the inside
the outside keypad lightly with your palm
disables the lock status
(Closed State)
V Series HOOK
》To lock the door from inside
Selection Order
With automatic
door lock setting
Operation
Movement
5
seconds
(Open State)
(Closed State)
(Open State)
Function Description
Due to a built-in automatic lock sensor,
the door automatically locks
》To open the door via manual switchgear during emergency
V Series
within 5 seconds of the door shut.
Under manual door lock setting, you can lock
the door by turning the manual lock device to the
With manual
door lock setting
direction of “locked” setting.
Turn the manual switchgear
Under manual door lock setting, you can press
in the open direction.
the open/close button to lock the door.
(Closed State)
V Series HOOK
(Closed State)
•
12
(Open State)
Reference
Reference
Even with the automatic door lock setting, make sure to double-check to see that the door
is locked properly.
(Open State)
•
In the case of emergency, please read and study how to operate the manual switchgear.
13
To Use the Product
Setting Up
Forced lock feature
Manual Switchgear Alarm Sound Features
》How to set the manual switchgear alarm sound
Selection Order
Operation
Movement
》Outside forced lock set up – Safety key
Selection Order
Function Description
Press the
After opening the interior battery cover
button (menu)
press the
Press the 0, 8 button
on the keypad
Press the 0, and then the 8 button
사
용
방
법
Operation
Movement
Press # button for 5 seconds
Press safety key
for 5 seconds.
button (menu)
Function Description
(There will be 3 beeping sounds.)
on the keypad sequentially.
Press the
Press the
button (menu)
button (menu) in the interior again.
》Outside forced lock set up – Passcode
Selection Order
Touch with palm
Volume Control Feature
Operation
Movement
Function Description
Lightly touch the key pad with a palm
This feature allows control over all of the sounds made by the product
》To control volume
Selection Order
To control volume switch
Operation
Movement
Enter the passcode
Enter the registered passcode
Press # button
for 5 seconds
Press # button for 5 seconds
Function Description
Based on the volume switch setting, the operation
volume is controlled.
( 2 : Loud operation volume / 1 : Low operation volume
/ 0 : Operation volume muted )
(There will be 3 beeping sounds.)
Reference
14
•
The product’s initial setting is to not produce an alarm sound from opening or closing the door via
manual switchgear, but depending on the user convenience, it can be set to play an alarm sound.
•
For each use, the alarm sound setting and disabling for the manual switchgear is repeated.
Reference
•
When the external forced lock is enabled, an intrusion alarm will sound when the door is open
from the inside by manual opening and closing device.
15
Setting Up
Reassuring Features
Forced lock feature
Alarm Function
Product alarm sound will last 30 minutes or till the alarm is off
》 Inside forced lock set up
》Intrusion, Breakage alarm sounds
V Series
While the door is closed, move the inside forced lock
switch to the
position so that the red
sticker can be seen.
Inside forced lock
switch setting/disabling
V Series HOOK
While the door is closed and manual switchgear device
pressed, switch to the
position.
Intrusion
An alarm will sound when there is an
intrusion by forcibly opening the locked
door through the crack.
Breakage
An alarm will sound when there is a
breakage of the external part by forcibly
separate or break it with a drill.
Turn off the Intrusion,
Breakage alarm
Method
❶ Enter the registered passcode
❷ Touch the registered safety key to the safety key touch area.
Method
❸ Press the OPEN/CLOSE button of the inside part for 5 seconds.
Method
Automatic / Manual Lock Setting
In automatic lock setting, the door locks within 5 seconds of the door being shut
》 Automatic/Manual Lock Setting
Selection Order
Operation
Movement
》High Temperature Alarm Sound
Function Description
•
Press the inside automatic/
Automatic lock
setting
Manual lock
setting
Press the inside automatic/
manual lock setting button
so that the button is pressed in.
inside temperature and automatically alarm
the sound and unlock the door.
manual lock setting button
so that the button is popped out.
In the case of fire, the device will detect the
•
It will automatically unlock if high temperature
alarm sounds even when the inside forced
lock mode is enabled.
To turn off the High
temperature Alarm
Method
❶ Enter the registered passcode
❷ Touch the registered safety key to the safety key touch area.
Method
❸ Press the OPEN/CLOSE button of the inside part for 5 seconds.
Method
Reference
Reference
•
•
16
When the inside forced lock is enabled, no fingerprint or passcode will work from the outside.
Even with the automatic door lock setting, make sure to double check to see that the door is locked properly.
•
•
•
•
An alarm will sound if the door is open when the automatic lock is not working properly.
An alarm will sound by the temperature sensor reaction if the internal part (the main body) is exposed
to direct sunlight for a long period of time.
It will automatically unlock if high temperature alarm sounds even when the inside forced lock mode is
enabled.
If alarm sounds by breakage, fire, or intrusion, the number on keypad will be lit in clockwise manner.
(It will be repeated for 30 minutes with alarm
17
Safety Feature
3 Minute Lock feature
In 3 Minute Lock mode, no other button except the buttons in the inside part will work
》3 Minute Lock Status Display
• If one inputs unregistered passcode or fingerprints
5 times repeatedly, the 3 minute lock mode will be
activated and it will be continued for 3 minutes.
❶ Press the open/close button.
❷ Press (register) / (menu) button.
1 Minute
Passed
2 Minutes
passed
To turn offthe 3 minute lock
3 Minute Lock
Begins
2 Minutes Left
1 Minute Left
Number
3 Lit
Number
2 Lit
Number
1 Lit
Open the door with fake numbers
It is effective when you are with other person and worry about exposing the passcode to him/her
》Open the door with fake numbers
Selection Order
Additional
Component
Additional parts
Operation
Movement
Function Description
20
Homecare communication pack
Remote control
Touch with a palm
Lightly touch the keypad of outside with a palm
Enter any number
(fake number)
Method
❶ Fake number
Method
❷ Passcode
Customer Service
22
Emergency battery supply method during battery outage
Enter the passcode.
Enter the fake number.
Checklist before applying for customer support
Product specification
After Service (A/S) request during product malfunction
GATEMAN Safety Grade
Touch with a palm
Lightly touch the keypad of outside with a palm
or press
button to finish.
*
Reference
18
•
Alarm feature will work normally while 3 minute lock feature is being activated, and it will be continuously
enabled after the power is reinstalled.
•
If 3 minute lock feature is activated, the fake numbering feature will not work until the normal access
(fingerprint access, normal passcode access, and opening from inside) is granted. So, please open the
door by using the normal passcode.
Additional Parts
Additional Parts
Homecare Communication Pack
Remote Control (Sold Separately)
Applied FSK system and wireless encryption algorithm
If you purchase and install the optional Homecare Communication Package, you can use it
in conjunction with the remote control.
》Register the Remote Control
Service Center (1544-3232)
Selection Order
Operation
Movement
Function Description
Press the
button (menu)
After opening the battery cover,
Enter the 0, 5 of
the keypad
Enter the 0 and then the 5 of the keypad
Press the SET
button on the
remote control
Press the SET button on the remote control with a pin.
(You can register up to 5 continuously. When you register
continuously, press SET button on the remote control with
the 10 seconds interval between each one)
Press the
button (menu)
Press the
press the
button (menu).
Homecare Communication Pack
》Installing the Homecare Communication Pack
Remove the battery
Open the battery cover
of the inside part
and remove
the batteries.
Installing the Homecare
Communication Pack
Install the Homecare
Communication Pack
to the Homecare
Communication Pack
sequentially
button (menu) of the inside part
on more time to finish.
connecting terminals.
》Deregister the remote control
Installing the Batteries
Install the batteries
after rechecking
terminals.
and
the
Confirming
Selection Order
If there is a melody, then
the Homecare
Communication Pack is
installed properly. Then
Press the
button (menu)
place the battery cover
back to the unit.
Enter the 7, 5 of
the keypad
Press the
button (menu)
Reference
•
20
The operation status of the Homecare Communication Package can only be checked by executing
the feature by a remote control or Homecare Pack (wireless security system).
Operation
Movement
Function Description
After opening the battery cover,
press the
button (menu).
Enter the 7 and then the 5 of the keypad
sequentially
Press the
button (menu) of the inside part
on more time to finish.
Reference
•
The wireless encryption algorithm uses the floating ID technology in which the wireless passcode
is changed whenever the remote control is used.
21
Customer Support
Customer Support
Things to check before you ask for the service
How to supply the emergency power in case of battery discharge
You can open the door by contacting the 9V battery
When you have a trouble while using the product, please check the following problems and solutions first
》How to supply the emergency power
Selection Order
Operation
Movement
Problem
Function Description
After open the emergency cover, contact
Contacting
the 9V battery
the 9V batter to the emergency power supply terminal
Touch the Safety key to the safety key touch area.
❶ Touch the Safety key
(You may stop contacting the 9V battery if the operation of
the motor is finished.)
Lightly touch the outside keypad with the palm Enter
the passcode Press button again
*
❷ Enter the passcode
(You may stop contacting the 9V battery if the operation of
the motor is finished.)
Standard
Operation
( The battery life can vary depending on temperature, humidity, the number of uses, and the quality of the battery.)
Battery life expectancy
The product uses 4 of 1.5V AA alkaline batteries,
and can use about 1 year if you use it 10 times a day
(Please use the authentic alkaline batteries)
Batteries should be replaced when battery
replacement lamp of outside part is lit, a red
light is on in the battery replacement lamp of
inside part, warning melody (real music part)
rings, or voice guide is sounded.
You should replace all 4 batteries at once.
22
It stops working right after it
starts to work.
- The batteries do not have enough power.
So, replace the batteries.
It is not possible to operate
the door via open/close
button on the inside.
(secondary key limited)
- Turning the manual switchgear on the inside
to open location will open the door.
- In the case of internal forced lock status,
disable the forced lock and then operate it.
- When the battery is discharged, the open/close
button may not work, so replace the battery.
- Check if there is any other lock device.
- There may be foreign objects between the door
and doorframe, so check between the door and
doorframe.
- If an error sound is played and door does not open
after authentication, this is likely due to jammed
lock latch, so shake the door and try again.
1.5V AA alkiline battery
Inside
Outside
Keypad
Cannot register the passcode.
Battery
replacement
lamp (red)
- The registration will be cancelled 7 seconds after
pressing
button. You should enter passcode
within 7 seconds while the keypad is lit.
- or # can't be used as passcode
- Passcode can be registered from 4 digits to 12 digits
only.
*
V Series HOOK
Battery
replacement
lamp (red)
- If safety key is not entered within 7 seconds
Safety key
•
•
Please check on
•
Once the battery life is done, replace all the batteries, and do not mix
and use the unused battery with the used or being used batteries.
and
- Check whether the batteries are installed correctly,
and (+) and (-) of the polarity is correctly put in.
- Check whether the batteries are
discharged or defect.
1:1 The actual size
V Series
Battery Replacement Notification Alarm
There is no power.
Registered safety key and
passcode are authenticated,
but the door doesn't open.
》How to replace the battery
Solution
terminal before you place the batteries.
Please be careful to place the battery with right position because if you
place in a reverse way, it will cause leakage or breakage.
Safety key is not able to be
registered.
after pressing the button for registration,
input is cancelled. Therefore, input the safety key
within 7 seconds of number pad displayed.
- It may be that some safety keys are not supported,
or some are faulty keys. Try to register with
the provided safety key.
23
Customer Support
Customer Support
Checklist before requesting for customer support
Product Specification
When there is a problem with the product, please check out the problems and actions that can be taken care of first
Problems
When using the product, the
product functions but does
not make any sounds.
Check List
- Please check to see if the interior volume control button
is on ‘0’ place.
(If you place it on 1 or 2, operation sound comes on.)
Components
Exterior (front body)
Interior
Alarm
Sound
When trying to use the pass
codes or fingerprint recognition
from outside to open the door,
the three beeping sounds or
“inside forced lock setting is in
process” is heard and does not
operate.
A song melody comes on
(about watching out for a bicycle)
Automatic lock does not work.
Automatic
Lock
Automatic lock works but then makes
“ddi ddo ddi ddo” error sound or
“the door is not locked” sound is
heard and cannot be locked.
- If you accidentally turned on the door status check
sensor, intruder alert alarm may turn on. Just like the
usual, use the pass code or finger print recognition,
or press the interior open/close button until the alarm
sound stops to disable the alarm.
- This song melody indicates battery change point.
Use 4 of brand new 1.5V batteries to exchange the
batteries.
Options
Rated Voltage:
DC 6V
Operating Temperature:
36(D)×85(W)×158(H) Reinforced Plastic
HOOK
35.5(D)×85(W)×158.5(H) Reinforced Plastic
V Series,
HOOK Model
Direct current, non-fireproof, temperature sensor style, non-key style,
main key door lock (D-NF-T-NK-S)
Fireproof
Direct current, fireproof, temperature sensor style, non-key style,
main key door lock (D-NF-T-NK-S)
-15~55˚C
Sensor Operating Temperature
(High-Temperature): 55˚C
1.5V 4 AA alkaline Battery
1 year life expectancy
(at 10 uses per day)
Remote control
wireless
optional
(separate purchase)
Homecare
communication
pack
wireless security syste
optional
(separate purchase)
Homecare
pack
wireless security syste
optional
(separate purchase)
Battery
While you are touching the
product, and all of a sudden
the ‘beep~beep~’ alarm sound
keeps on ringing.
24
- The door can be only opened if the inside forced lock
setting is disabled from inside the home.
Product
Type
19(D)×64.6(W )×160.2(H) zinc die casting
Remarks
V Series,
Fireproof
(main body)
- If the inside forced lock setting has been turned on from
inside the home, then the door cannot be opened from
outside using pass code or fingerprint recognition.
Product Details
※ Terms of use may slightly vary depending on the battery life.
- Check to see the inside automatic/ manual setting state.
The setting button that is popped out is the automatic
lock state.
- In the manual setting state, if you lightly touch the
keypad with your palm, the deadbolt locks.
- This could be due to a problem with the door,
so please get your door check out first.
25
Customer Support
Customer Support
After Service (A/S) Request Upon Product Malfunction
GATEMAN Safety Grade
When a problem occurs with the product, please contact the customer support at (1544-3232)
to request for after service (A/S).
During the warranty period, the after service (A/S) is at free of charge. However, consumer
negligence or operation misuse (non-defect cause) after service or past warranty period after
service will be charged.
Be sure to keep the product warranty statement since you may not receive
a proper after service without it.
■
Product Warranty is until
one year after the purchase
Consumer Damage Compensation Standards
Consumer Damage Type
Normal
Conditions
of Use
Consumer’s
intentional
or negligence
malfunction
Compensation Detail
During product warranty
After product warranty
Malfunction within 1 year of purchase
Free
Not Free
Same malfunction occurring 2 times
Free
Not Free
Same malfunction occurring 3 times
Product Exchange
Not Free
Absence of product parts for repair
Product Exchange
Product Exchange
(based on the standard
depreciation rate)
Battery exchange mistake,
inexperience in dealing with
the product, consumer’s mistak
Not Free
Not Free
Batteries or consumables exchange
Not Free
Not Free
Malfunction due to using
the product other than
its original intent
Not Free
Not Free
Intentional act or consumer’s faulty
assembling, disassembling, or repair
Not Free
Not Free
Damage due to missing pass code
Not Free
Not Free
Not Free
Not Free
Damage due to fire or natural disaster
※ “Not Free” amount only accounts for the cost of the parts. Travel expenses will be accounted on additionally.
Consumer Damage Compensation Standard follows the Ministry of Finance and Economy Notice’s
※ This
Consumer damage compensation regulations.
Customer Support
26
Internet Homepage
The No. 1 Pride Gateman, which is leading in the digital doorlock
technology, strives to build more stable and stronger doorlock by
utilizing the years of experiences and the highest technology as the
basis and selecting the top essential items for safety. This is the first
digital door lock safety rating that applied the international standard.
Based on safety and four other closely related sections, each
section is divided into sub-categories, and overall, 25 items are
used as standards for testing.
■ Testing Items
Testing Item
Safety Area
Authentication
Security
Enhanced
Security
Function
Safety check for security steps for authentication, duplication of key,
copying, and hacking
Double-safety/security feature support check for safety, alarm sounding
function, and double-lock feature
Electronic
Circuit
Security Capability
Safety check for electrical, electronic, and magnetic field in regards
to safety, electronic shocker, radio, static electricity, magnets, and others.
External Intrusion
Responsiveness
Safety check against external shocks (mechanical or physical) through drill,
crowbar, driver, and hammer
■ Safety Grade
Safety Grade
Grade Standard
Applied Technology
Grade 1
Grade 2 + Exam Passing
Standard Dual
Enhancement
Compared to Grade 2, external damage
responsiveness exam as standards, and
about two times greater enhancement
Grade 2
Grade 3 + Exam Passing
Standard Enhancement
Compared to Grade 3, 17 testing items
used as standards, and about two times
greater enhancement
Grade 3
Grade 3 + 14 Exam
Items Enhancement
ANSI, UL, and EN introduced
(based on global authority for keys)
Grade 4
KS & KPS Standard
Korean digital door lock standard rules
Grade 5
Below KS & KPS Standard
Product Description and Online Customer Support
27
MEMO
28
MEMO
추
가
구
성
29
MEMO
30
MEMO
추
가
구
성
31