1
Battlegrounds Gaming Engine
User Manual
Updated for BGE v1.0
(June 2011)
1
Table of Contents
Overview of Battlegrounds Gaming Engine...........................................................6
What It Is ......................................................................................................................................... 6
What It Isn’t ..................................................................................................................................... 7
Other Potential Uses....................................................................................................................... 7
Advantages ..................................................................................................................................... 7
What You Need...............................................................................................................................7
How It Works ................................................................................................................................... 8
Design Philosophy.................................................................................................8
Using Battlegrounds Can Save You Time and Money ..........................................9
System Requirements.........................................................................................10
Minimum ........................................................................................................................................ 10
Recommended..............................................................................................................................10
Installing BGE .....................................................................................................11
Windows OS.................................................................................................................................. 11
Mac OS X ...................................................................................................................................... 11
For Access to the User Manual from within BGE....................................................................... 12
Using BGE in a Face-to-Face Game Session .....................................................12
Learning to Use this Software .............................................................................13
Learning Mode ..............................................................................................................................13
Help Screen ........................................................................................................14
Terms and Abbreviations Used in this Manual....................................................16
Terminology Differences in BGE and BRPG .......................................................16
Launching BGE ...................................................................................................17
Hotkeys ...............................................................................................................18
Host and Player.............................................................................................................................18
Host Only ....................................................................................................................................... 19
The Battlegrounds Button....................................................................................20
The Commands Panel.........................................................................................21
The Game Table Window....................................................................................22
The Game Table Menu .......................................................................................22
Force Full Update .........................................................................................................................23
Create Multi-Token Component................................................................................................... 23
Create Deck .................................................................................................................................. 23
Changing the Game Board (host only)................................................................24
Server-based Game Boards ........................................................................................................ 24
Choose Game Board Color (host only) ...............................................................25
Board Settings (host only) ...................................................................................26
Scrolling the Game Table....................................................................................27
Zooming the Game Table In & Out......................................................................28
Placeholder Game Boards ..................................................................................29
Grid Overlay ........................................................................................................30
Snap-to-Grid........................................................................................................31
Views...................................................................................................................32
View Manager (host only)....................................................................................34
Unit Types: Minis and Components.....................................................................35
Minis............................................................................................................................................... 35
Components .................................................................................................................................. 35
Controlling Units..................................................................................................35
Placing a Mini on the Game Table ..............................................................................................35
Placing a Component on the Game Table.................................................................................. 39
2
Selecting and Deselecting a Unit................................................................................................. 42
Moving a Unit ................................................................................................................................43
Rotating a Unit ..............................................................................................................................44
Adjusting a Unit’s Offsets ............................................................................................................. 45
Deleting a Unit...............................................................................................................................46
Selecting Multiple Units ................................................................................................................ 46
Cloning an Existing Unit (host only).............................................................................................48
Select All (host only) ..................................................................................................................... 48
Cut (host only)...............................................................................................................................48
Contextual Popup Menus ....................................................................................49
Measure Range ............................................................................................................................51
Edit Notes ...................................................................................................................................... 52
Attack (available for minis only, and only if it is that mini’s turn to act)..................................... 53
Target (available for minis only, and only if it is not that mini’s turn to act) ..............................54
Label (available for minis only) .................................................................................................... 55
Status (available for both minis and components) ..................................................................... 56
Base Type (available for minis only) ...........................................................................................58
Sideboard (available to host only, for both minis and components) ......................................... 60
Hide................................................................................................................................................ 60
Token (available for both minis and components)...................................................................... 61
Portrait (available for both minis and components).................................................................... 63
Audio (available for both minis and components) ...................................................................... 65
Flip Image (available to host only, for both minis and components)......................................... 66
Arrange (available for both minis and components)................................................................... 67
Owner (available to host or unit owner only) .............................................................................. 67
Antialias (available for components only) ................................................................................... 68
Include in Turn Sequence (available for both minis and components)..................................... 68
Edit in Turn Sequencer (available for both minis and components) ......................................... 69
Lock (available to host only, for components only) .................................................................... 69
Tile (available to host only, for components only) ...................................................................... 69
Free-Floating (available to host only, for components only)...................................................... 70
Use as a Screen (available for components only)...................................................................... 71
Team (available for both minis and components) ...................................................................... 72
Edit Mini or Component................................................................................................................ 73
Delete (available to host only, for both minis and components)................................................ 73
Set Action Phases (available for both minis and components) ................................................. 74
Contextual Popup Menu for Multi-Unit Selections ...............................................75
Duplicate & Select.........................................................................................................................75
Toggle Antialias.............................................................................................................................75
Select ............................................................................................................................................. 76
Arrange .......................................................................................................................................... 76
Stack & Shuffle..............................................................................................................................76
Stack .............................................................................................................................................. 76
Stagger .......................................................................................................................................... 77
Adjusting the Stagger Offset ........................................................................................................ 77
Move to Top .................................................................................................................................. 78
Move to Bottom.............................................................................................................................78
Draw Card ..................................................................................................................................... 78
Discard Card ................................................................................................................................. 78
Anchor ........................................................................................................................................... 78
Group ............................................................................................................................................. 79
Connection Panel................................................................................................79
If you are the Host: ....................................................................................................................... 80
If you are a Player:........................................................................................................................ 81
Automatic Media Syncing with Connected Clients ..............................................82
Game Media Bundles..........................................................................................83
The Chat Window................................................................................................83
3
Issuing Commands from the Chat Window................................................................................. 86
Set the Zoom Level................................................................................................................ 86
Load a Server-based Game Board....................................................................................... 86
Launch a Web Page .............................................................................................................. 86
Rename Units.........................................................................................................................87
Resize Units ...........................................................................................................................87
Define the Stagger Offset...................................................................................................... 87
The Participants List ..................................................................................................................... 87
The Text Macro Panel.........................................................................................88
Dice Roller...........................................................................................................89
Dice Plug-in System ............................................................................................94
Creating and Using Dice Macros.........................................................................94
Reference Tables..........................................................................................................................96
Reference ...................................................................................................................................... 97
Browsing the Dice Roll History ............................................................................98
Alternate Die Rolling Method: “Game Table Dice”...............................................99
Turn Sequencer.................................................................................................101
The “Roll Initiative” Button.......................................................................................................... 103
The Turn Sequencer’s “Undo” Button .......................................................................................103
The “End My Turn” Button.................................................................................103
Examples of Turn Sequencer Configurations ........................................................................... 104
The Turn Sequencer Setup Wizard (host only) .................................................108
Unit Manager (host only) ...................................................................................109
Draw Tools (host only) ......................................................................................110
Text Labels .................................................................................................................................. 111
Sending Visual Aids (host only).........................................................................112
Library ...............................................................................................................113
Sending Audio (host only) .................................................................................114
Card Table ........................................................................................................116
Creating Custom Card Decks .................................................................................................... 120
Manipulating Cards and Card Decks in the Game Table Window.....................121
What Constitutes a Card? .......................................................................................................... 121
Draw Card ................................................................................................................................... 121
Discard Card ...............................................................................................................................121
Saving a Game File (host only) .........................................................................122
Loading an Game File (host only) .....................................................................122
Saving a Deployment (host only) ......................................................................123
Loading a Deployment (host only).....................................................................123
Export Game Media ..........................................................................................124
Import Game Media...........................................................................................125
Batch Import (host only) ....................................................................................126
Clear All Units (host only)..................................................................................126
Undo (host only)................................................................................................126
Hide/Show Text Labels .....................................................................................126
Screenshots ......................................................................................................127
Toggle Fullscreen Mode....................................................................................127
Lobby ................................................................................................................128
Preferences.......................................................................................................130
Purging Obsolete Media....................................................................................133
Purge/Refresh Artpacks ....................................................................................134
User Manual......................................................................................................134
4
Check for Updates.............................................................................................135
Purchase BGE ..................................................................................................135
Licensing BGE ..................................................................................................135
Quitting the Program .........................................................................................137
Customizing BGE..............................................................................................137
Expanding BGE.................................................................................................138
Adding Custom Artwork, Sound Effects, Reference Material, and Grids to BGE..................138
Using Third-Party Game Boards with BGE............................................................................... 139
Free and Commercial Digital Game Conversions for BGE................................141
Free and Commercial Artpacks for BGE ...........................................................141
How to Register a Commercial Artpack ....................................................................................142
Support for Flash Content .................................................................................143
Auto-naming......................................................................................................143
Public and Private Unit Names..........................................................................143
Updates.............................................................................................................144
Updating from an Older Version of BGE ...........................................................144
Using BGE with a Projector...............................................................................145
Using BGE with Real Minis ...............................................................................146
Running Non-Live Games .................................................................................146
Tips & Tricks .....................................................................................................147
Support..............................................................................................................148
Contact E-Mail Addresses.......................................................................................................... 148
Troubleshooting ................................................................................................148
Potential Conflicts with Third-Party Software ....................................................150
Known Issues and Limitations...........................................................................150
Free Use Promos ..............................................................................................151
How You Can Help Support Battlegrounds Games...........................................151
Credits...............................................................................................................152
PRODUCT CATALOG
Artpacks for BGE...............................................................................................153
Game Boxes and Game Conversions for BGE .................................................156
5
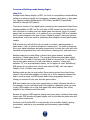
Overview of Battlegrounds Gaming Engine
What It Is
Battlegrounds Gaming Engine (or BGE, for short) is cross-platform virtual tabletop
software for playing virtually any boardgame, wargame, card game, or dice game
(our flagship product, Battlegrounds: RPG Edition, aka BRPG, is specifically
tailored for use with RPG games).
There are a number of free digital game conversions and commercial Game Boxes
already available for BGE, but the real value of BGE comes from the fact that it is
also a toolbox for creating your own digital game conversions, either of physical
games that you already own, or of games of your own design. BGE is an excellent
tool for game designers who wish to use a “digital prototype” during the game’s
development, and is also ideal for playtesting their designs and any game system
tweaks.
BGE provides you with all the tools you need to conduct a gaming session: a
game board – with an optional hexagonal or square grid – on which to place and
move your digital miniatures and game components, a virtual dice roller with both
standard and polyhedral dice, text chat functions, drawing tools, and much more.
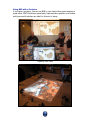
Battlegrounds can be used offline in face-to-face game sessions, essentially
serving as a “digital game board”. The program’s full-screen game table and its
“hidden-until-you-need-it” interface make it ideal for this purpose. To use BGE in
face-to-face game sessions, you will need either a projector, a large highdefinition TV, or a large secondary display, for the players to view. Alternatively,
BGE games can be played over a local area network (LAN), with each player
sitting in front of his/her own computer.
Battlegrounds can also be used online. Many gaming groups have found themselves in the unfortunate situation of losing one or more members because they
had to move far away, but BGE breaks down those geographical barriers by
letting you continue to play your favorite games online.
BGE also enables you to play more games than you might otherwise be able to.
For example, if your local friends aren't interested in a particular game you want
to play, BGE enables you to play that game with online buddies, even if they
happen to live halfway around the world.
Because it’s generic, BGE supports playing nearly any game, including those using
house rules. BGE provides the game engine, and you provide the game rules and
virtual game components.
We think you'll find that BGE is a user-friendly (and incredibly flexible) gaming
environment, and also a very accessible and empowering game-building
“toolbox”.
6
What It Isn’t
BGE is not a game itself, but rather a tool for playing a game that you already
own. It doesn't have any game-specific artificial intelligence to implement your
game's rules. In fact, one of BGE's greatest advantages is that it isn't gamespecific; it's generic enough to use with any game rules.
Other Potential Uses
You could also use BGE to generate stunning visuals for play-by-post or play-byemail games. With a little imagination, BGE could also be used for other types of
online collaboration.
Advantages
While online gaming is not a replacement for playing in person with your friends,
using BGE in your game sessions does offer some significant advantages over
traditional face-to-face gaming.
For starters, the visuals can be greatly enhanced. Even if the original game had
sub par game components, you can always create nicer-looking digital
components to spruce up the game, or even completely re-theme the game, if
you want. Audio clips (both music and special effects) can also be used to set the
tone, enhance the mood, or even provide the players subtle clues. Some game
mechanics, such as complex turn sequencing, can be automated and simplified
using BGE, leading to faster, more-streamlined gameplay. It may also be possible
to play large games that might require more than one copy of the physical game,
since digital game components are easily “cloned” to make as many copies as you
need.
What You Need
To play a game using BGE, you need your game’s rulebooks and any charts and
tables, just as you would in a face-to-face game session. You will also need digital
game components to represent the physical game components. These can come
from downloaded files, from your own scans, or from original artwork that you
create using a graphics program.
The more familiar you are with your game's rules, the better, but if needed, BGE’s
Library feature can provide you instant access to important reference materials,
like charts and tables (due to copyright limitations, you must scan these in
yourself).
If playing online, all participants also need an internet connection (broadband is
highly recommended, especially if you are the host of the game session).
7
How It Works
Whether playing on the internet or on a LAN, the process is the same: one person
hosts a game session. BGE’s peer-to-peer networking system effectively turns the
host’s computer into a game server. Other players then join the session by
logging into the host's game (using either a Gamer Client, or the free Demo). The
number of clients that can connect at one time is 16 (15 players plus the host).
However, note that large groups (over 8-10 players) can easily become unwieldy,
and depending on the game being played, some players may get bored waiting
for their turn to come around again.
Once everyone is logged in, the participants communicate with each other via text
chat, which is built into the application. Optionally, they can also communicate via
a voice chat (VOIP) application running in the background (see the Links &
Resources page on the Battlegrounds Games web site for various free third-party
VOIP software options). Generally speaking, games that use voice chat tend to
move a lot faster than games that do not. BGE allows a log of the entire text chat
to be saved, for those who like to keep a record of what happens in a game.
The participants move their virtual miniatures or other game components around
on the game board and/or on the virtual game table, in accordance with the
game’s rules. The host may move any item in the game, but each player may
only move the minis and/or other game components that have been assigned to
them.
Design Philosophy
BGE’s interface may seem a little unusual when compared to “standard”
programs. There’s no menu bar along the top, no ever-present toolbar, and some
functions differ from the “normal” way of doing things. This is because BGE is at
its heart a collaborative presentation tool. BGE’s interface is designed to remain
hidden and out of the way until you need it, in order to avoid distractions and to
promote immersion. Because of this, most of the program’s functionality is
controlled by hotkeys and popup menus.
Traditional user interface guidelines haven’t been eschewed just for the sake of
doing things differently. There’s a reason behind any changes from the norm. If
you keep that in mind, you will understand why certain features were designed
the way they were.
To cite just one example, in BGE, you close a visual aid by double-clicking on it.
Normally, you would expect a visual aid (a graphic) to appear in a traditional
window, and you would simply click the “Close” box on the window’s title bar
when you were done viewing the graphic. But a visual aid in BGE has no window,
by design, in order to allow for PNG transparency effects and a clean presentation
of the visual aid.
8
Using Battlegrounds Can Save You Time and Money
Battlegrounds can potentially offer significant cost savings compared to physical
gaming. It can save you time, as well (and for many people, free time is even
more precious than money).
Ask yourself these questions:
How much time and money will BGE save me on gasoline from not having to physically
commute to game sessions?
How much money do I save on print-and-play costs (printer ink, craft tools and materials,
etc.) if I use digital game components, instead? How much money and time will I save by
not having to paint physical miniatures, and/or from not having to print out large game
boards in full color?
How much money will I save on babysitters, if I can keep an eye on my kids myself while
I’m gaming from home?
9
System Requirements
Minimum
Windows 98/ME/2000/XP/NT/Vista/7:
• Pentium III or equivalent
Macintosh OS X:
• Power Macintosh G3 running OS 10.1.5 or better
• Rosetta must be installed on Intel-based Macs
All Platforms:
RAM: 256 MB
Hard drive space: 200 MB
Display: 24-bit color
Resolution: 1024 x 768 (note that most netbooks do not meet this requirement)
Recommended
Processor: 800 MHz or higher
RAM: 512 MB or better
Display: 32-bit color
Hard drive space: 500 MB or more (to store media for many digital game
conversions)
Mac Users: A mouse with a scroll wheel and a right button are strongly
recommended.
Note: The higher the display resolution, the better the graphics look, and the
more game board you can see at any one time. Higher resolutions greatly reduce
the amount of scrolling required in a typical game.
You should set your display’s resolution prior to launching BGE, but if you do
change it while BGE is running, you can manually resize the window to better
accommodate the new settings.
Note that BGE does not specifically support multiple monitors/displays at this
time, although it can be used with more than one display.
10
Installing BGE
Windows OS
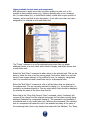
Right-click on the Zip file you downloaded and select “Extract All…”. Complete the
extraction Wizard to expand the program onto whichever hard drive you prefer.
There is no further installation procedure, and the software is ready to use.
Do not make the mistake of trying to run BGE directly from the Zip file without
extracting it first.
Mac OS X
If you downloaded the Zip version of BGE, simply double-click the zip file to
expand it. Move the expanded folder to wherever you want it on your hard drive.
The software is now ready to use.
If you downloaded the DMG version of BGE, mount the disk image by doubleclicking on it, then drag its contents to wherever you want on your hard drive.
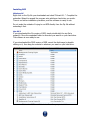
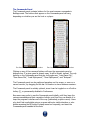
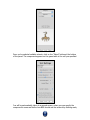
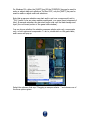
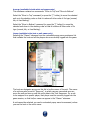
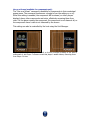
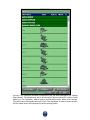
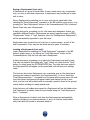
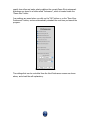
This is what BGE’s root folder looks like after a proper installation
11
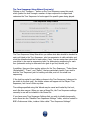
For access to the User Manual from within BGE
Microsoft Windows users must place an alias to their preferred PDF-viewing
program in the BGE folder, and name the alias “PDF Viewer”. Doing this will
enable accessing the User Manual from within BGE.
Mac OS X users do not need to do this.
Using BGE in a Face-to-Face Game Session
If you are using BGE in a face-to-face game, you can either use two computers
(one for the host, and one to drive the players’ view), or you can run two
instances of BGE on a single computer. You will either need the free Demo or
another Gamer Client in order to connect with the Gamer Client that is hosting.
To use a second instance of the program on a single computer, you will need to
duplicate the entire BGE folder, not just the executable. You also need to rename
one of the executables so that they don’t both have the same name and share
the same preference files.
Note that games with information that must be hidden from the other players
may only be playable in a LAN environment where each player has their own
computer.
12
Learning to Use this Software
Battlegrounds Gaming Engine is designed to be easy to use, and equally easy to
learn to use. There isn’t a steep learning curve, and there are no arcane,
indecipherable icons in the user interface. All controls are intuitive, consistent,
logically laid out, and clearly labeled. If you know how to push a button, use a
popup menu and press a hotkey, you can learn how to use this program, and can
probably be playing within an hour of installing the application. If you've ever
bought gaming software aids that were so hard to use that you never did use
them, you'll realize just how important this is.
The various panels in BGE use a fairly consistent interface. This was done to
make the program easy to learn and use.
Some users may prefer to dive right in and start experimenting (that’s OK, you
won’t break anything). Others might prefer to give this manual a quick read first,
in order to become familiar with the software.
We recommend a mix. Print out this manual for easy reference and use it as a
guided walk-through of the software, reading each section as you follow along on
your computer.
Remember that you don’t need to learn every single feature of the program at
once. Start with the basics, then teach yourself the more advanced features
gradually, as you need them.
There are also some tutorial videos available on the Battlegrounds Games forums,
and additional tutorial videos will eventually be posted there.
If you are brand new to this software, we recommend that you start small,
perhaps with just 2 to 4 players, until the host is comfortable enough with the
software to handle larger groups. A practice session is also recommended prior to
running a “real” game, in order to work out any technical issues, and to allow
users to learn the software’s basic features.
Learning Mode
BGE has a feature that lets users learn the software more easily, by keeping
advanced features hidden until the user feels ready for them, and by providing
occasional instructions the first time you use a given feature in a particular BGE
session.
By default, BGE has Learning Mode turned on. It can be turned off (or back on)
from the Preferences panel.
The following commands are not available when Learning Mode is enabled: Flip
Image, Free Floating, Screen, Antialias, and Cursor Mode.
13
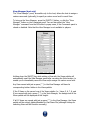
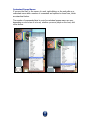
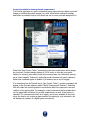
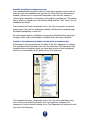
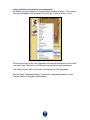
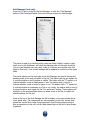
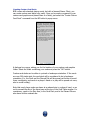
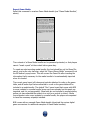
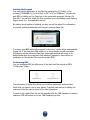
Help Screen
Press the [?] key to bring up the Help screen, or press the “Help” button on the
Commands panel. If the Commands panel is closed or has been disabled, you can
also select the “Help” command from the BG button’s popup menu.
The Help screen also comes up automatically the first time the program is
launched on any given computer.
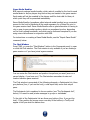
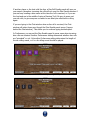
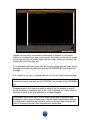
The Help screen gives some basic operating instructions and provides a handy
reference of most of the hotkeys used by both the host and the players. If you
need additional help, consult this User Manual or the BGE forums.
14
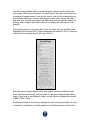
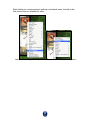
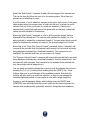
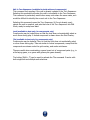
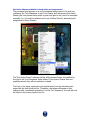
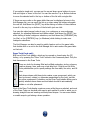
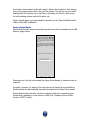
Click anywhere on the Help screen to advance to a second Help screen.
Click anywhere on the second Help screen to make it go away. Pressing the [?]
hotkey, or pressing the “Help” button on the Commands panel, are alternate ways
of viewing, navigating, and dismissing the Help screens.
15
Terms and Abbreviations Used in this Manual
BGE: Battlegrounds Gaming Engine.
BRPG: Battlegrounds: RPG Edition. A virtual tabletop program that is very similar
to BGE, but is specifically tailored for playing RPGs. BGE was derived from
BRPG, and is essentially a subset of BRPG’s features.
Cell: A generic term used to define a single grid square or hex on the game
board or game table.
Component: Any token used to represent a game component, such as a
meeple/pawn, card, coin, or a modular board tile.
Game File: BGE’s principal file format. A digital game conversion consists of one
or more Game Files; each “scenario” in a wargame will probably exist as a
separate Game File. A game that has a different setup according to how many
players are in the game will also probably have a Game File for each possible
number of players.
Host: The person hosting and moderating a BGE game session. Sometimes this
term is also used to signify the person creating a digital game conversion.
Hotkey: A keyboard-activated shortcut for issuing a command or toggling a
setting. Hotkeys only work in BGE if the Chat Window is closed or if the Chat
window does not have focus.
Mini: A “digital miniature”, or token, generally used to represent an individual
(soldier, tank, ship, or whatever).
Modifier key: A key that must be held down while performing another action.
Modifier keys include [SHIFT], [CONTROL], [OPTION] (Mac-only), [ALT]
(Windows-only), and [COMMAND] (Mac-only). On occasion, BGE will use the
Spacebar or the [CAPS LOCK] key as a modifier key.
Right-clicking: Pressing the right mouse button. On a Mac with a one-button
mouse, you must Control-click instead (hold down the [CONTROL] key while
clicking). BGE makes extensive use of right-clicking, so a multi-button mouse is
recommended (preferably one with a scroll wheel).
Unit: A generic term used to refer to any mini or component on the game table.
Terminology Differences in BGE and BRPG
Singe BRPG is primarily used for playing roleplaying games (aka RPGs), it uses
different terminology than BGE, but the functionality is identical.
“Components” in BGE are called “Objects” in BRPG.
“Minis” in BGE are called “Figures” in BRPG.
“Game Boards” in BGE are called “Maps” in BRPG.
The “Game Table” window in BGE is called the “Map” window in BRPG.
“Game Files” in BGE are called “Encounters” in BRPG.
The “Host” in BGE is called the “GM” in BRPG.
A “Game Media Bundle” in BGE is called a “Media Asset Bundle” in BRPG.
“Team” in BGE is called “Disposition to Party” in BRPG.
A “free Player Slot” in BGE is called a “Floating License” in BRPG.
16
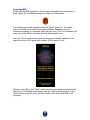
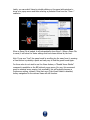
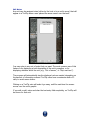
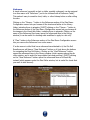
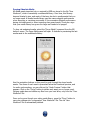
Launching BGE
Double-click the BGE application, which is easily identified by its custom icon, a
black capital “B” on a reddish-orange hex shape, as shown below.
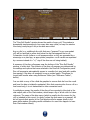
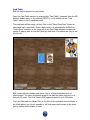
The default game board is displayed and the “About” panel (i.e., the splash
screen) is briefly shown while the program initializes. Depending on your
Preferences settings, a Commands panel may also open. The Turn Sequencer will
open very briefly while it initializes, and will automatically close.
Once the “About” window closes and the zoom level is briefly displayed in the
upper left corner of the game table window, BGE is ready for use.
Clicking on the URL in the “About” panel launches your default web browser and
takes you to the Battlegrounds Games web site. Clicking anywhere else on the
“About” panel closes the panel, but this should not be done while BGE is still
launching.
17
Hotkeys
Hotkeys are simple keyboard shortcuts for activating a command or changing a
game setting. Most hotkeys do not require holding down a modifier key when
pressing the hotkey.
The following is a list of most of the hotkeys in BGE.
Host and Player
Arrow Keys = Scroll the game table one cell
Control & Arrow Key = Scroll the game table one screen
Shift & Up Arrow = Zoom the game table in by 10%
Shift & Down Arrow = Zoom the game table out by 10%
Control, Shift & Up Arrow = Zoom the game table in by 50%
Control, Shift & Down Arrow = Zoom the game table out by 50%
Any Number = Go to a View
1-4, 6-9 = Move Selection (on square grid)
1, 3, 4, 6, 7, 9 = Move Selection (on hex grid)
+ = Rotate Selection Clockwise
- (minus sign) = Rotate Selection Counter-clockwise
< = Previous token (if a selected unit has multiple tokens assigned to it)
> = Next token (if a selected unit has multiple tokens assigned to it)
Shift & <= Previous portrait (if a selected unit has multiple portraits assigned to
it)
Shift & > = Next portrait (if a selected unit has multiple portraits assigned to it)
TAB = Open or close the Chat window (only works when hosting or logged in)
R = Dice Roller window
Control & R = Roll a selected die in the game table window
T = Turn Sequencer
L = Library panel
Shift & L = Lobby window
G = Toggle the Grid Overlay On/Off
C = Connection panel (also use to log off)
Shift & C = Card Table window
N = Notepad
X = Toggle Snap-to-Grid On/Off
\ = Toggle the Commands panel (unless it has been disabled in Preferences)
? = Help screen (press to show or hide it, or to advance to the next Help screen)
P = Preferences panel
Shift & | = Make the game table window fill the screen
RETURN = Stack or Stagger (if multiple units are selected)
Shift & RETURN = Step the Sequence (if you control the active unit)
Q = Quit BGE (confirmation required)
18
Host Only:
DELETE/BACKSPACE = Delete Selected Unit/s (confirmation required for minis)
H = Hide or Show the Selected Unit/s
S = Save Game File
E = Load Game File
U = Unit Manager
V = Send Visual Aid
A = Send Audio
D = Drawing Tools
Shift = Hold down while clicking a unit to add the unit to the current selection, or
to remove it from the current selection
Shift & V = View Manager
Note that in multiplayer games, hotkeys only work when the Chat Window is
closed, or if you first click on the game table window to ensure it has focus.
19
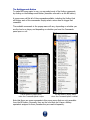
The Battlegrounds Button
To make BGE even easier to use, you can select most of the Hotkey commands
by clicking on the Battlegrounds button (hereafter referred to as the BG button).
A popup menu will list all of the commands available, including the Hotkey that
will trigger each of the commands. Simply select a menu item to trigger that
command.
The available commands in the popup menu will vary, depending on whether you
are the host or a player, and depending on whether you have the Commands
panel open or not.
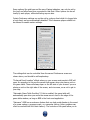
The BG button’s popup menu,
when the Commands panel is open
The BG button’s popup menu,
when the Commands panel is closed
Note that there are some commands in this popup menu that are only accessible
from the BG button. Generally, they are the ones that don’t have a Hotkey
equivalent assigned to them, because they are used infrequently.
20
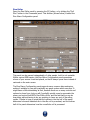
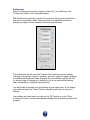
The Commands Panel
The Commands panel contains buttons for the most common commands in
Battlegrounds. The buttons that appear on the Commands panel will vary,
depending on whether you are the host or a player.
The Commands panel on a player’s client
The Commands panel on the host’s client
Clicking on any of the command buttons will open the appropriate panel or
dialogue box. If a given panel is already open, it will be closed, instead. The only
buttons on the Commands panel that are not toggles are: “Load Game File”,
“Save Game File”, “Load Deployment”, “Save Deployment”, and “Notepad”.
The Commands panel can be positioned anywhere on the screen, or even on a
second monitor, by dragging its title bar. Its location is stored between sessions.
The Commands panel is entirely optional, since it can be toggled on or off with a
hotkey [\], or permanently disabled in Preferences.
New users may prefer to use the Commands panel initially, until they learn the
various commands and their respective hotkeys, and then they can disable it to
keep the program’s interface out of the way (particularly projector users). Users
who don’t feel comfortable using a program without a visible interface, or who
dislike accessing the BG button’s popup menu too frequently, can leave the
Commands panel enabled all the time.
21
The Game Table Window
BGE’s primary window is the game table window. Most users will want to keep it
large, covering most of or the entire screen. Windows users can resize the game
table window by dragging on any of the window’s edges. Mac users can resize the
window by dragging the handle in the lower right corner.
Game boards in BGE can be up to 40 x 40 squares, or 40 x 46 hexes. The game
board graphic can measure up to 4000 pixels wide by 4000 pixels high. Each cell
on the game table is 122 pixels across (at 200% zoom).
The above limits are for a single large game board graphic, and for using the Grid
Overlay feature with the game board. However, the game table window itself is
boundless, so you can create very large layout using modular board sections
(component tiles), if you wish.
There is a “Roll Dice Macro…” button in the bottom left of the game table window
which allows you to auto-roll a dice macro (which you will choose from a popup
menu). If you hold down the [SHIFT] key before clicking on the button, the text
on the button will change to read “Load Dice Macro…”. This will allow you to load
(but not automatically roll) a dice macro in preparation for last-minute
adjustments to the roll.
The Game Table Menu
Double-click on the game board (or on the game table window’s black
background) to bring up the game table’s popup menu.
The game table menu on a player’s client
The game table menu on the host’s client
For a player, this menu will contain only a few commands, but for the host, it will
also list commands for placing minis, components, and Deployments on the game
table, for accessing the Board Settings panel, for copying and pasting units, and
for forcing the players to view the particular area of the game table that the host
is currently viewing. Most of these commands are self-explanatory, but a few are
detailed further, below.
22
Force Full Update
If the host has one or more players logged into his/her game session, the host
will have a "Force Full Update" command available in the game table menu. This
command, while not normally needed, can help troubleshoot any problems that
may arise with the player clients being out-of-sync with the host.
Create Multi-Token Component
The "Create Multi-Token Component" command is only available when a game
session is not currently being hosted (it is intended to be used during the game
creation process, not in actual play).
Selecting this command will bring up a media-browsing panel prompting you to
select a Category (either from a local folder or from an artpack). The "Create"
button at the bottom of the media-browsing panel will be dimmed until a
Category with more than one token is selected. Clicking on the "Create" button
when it is enabled will create a component on the game table and assign it every
token in the selected Category, at a default scale of 50%. Any media assets
needed will be automatically imported.
Create Deck
The "Create Deck" command is only available on a licensed Gamer Client, and
only if a game is not currently being hosted.
Activating this command will open the "Components" browser, prompting you to
choose the folder/directory that contains the custom card graphics that you wish
to use, and to specify which image will be used to represent the back of each
card. Once you have selected the “Card Back” image, clicking on the "Choose"
button on the bottom of the media browser panel will create a custom card deck
containing one card per graphic image located in the selected folder. The deck
will be automatically shuffled and selected when the operation is complete.
23
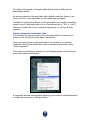
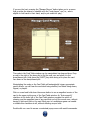
Changing the Game Board (host only)
Select the “Load Game Board” command from the BG button’s popup menu, or
click on the “Load Game Board” button on the Commands panel. Only the host
may change the current game board.
Select the game board you want to swap in, then click on the “Select” button.
In multiplayer games, if the host has selected a game board that has been used
before on the connected clients, the game board switch will be instantaneous on
the players’ screens. BGE does not support peer-to-peer transfers of game
boards.
Note that when swapping in a new game board, units on the game table retain
their relative positions. In most cases, the units will need to be repositioned on
the new game board.
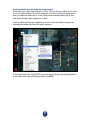
Server-based Game Boards
Assuming you have a working internet connection, BGE can load game boards
that reside on a server.
While downloading a server-based game board, the connected clients will see a
“Downloading Game Board…” placeholder graphic in lieu of an actual game
board, until the game board is fully downloaded. Units will not be drawn on the
game board while this is happening, nor will the Grid Overlay be shown.
24
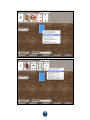
To load a server-based game board from an artpack, simply select it using the
game board browser panel, as shown above. Instructions for using server-based
game boards that are not from an artpack are covered later, under “Issuing
Commands from the Chat Window”.
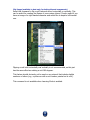
Choose Game Board Color (host only)
The host also has the option to set the “game board” to be any flat background
color (in other words, no actual game board, just a field of the chosen color). To
do so, double-click on the game table window and select the "Choose Game
Board Color..." command from the contextual popup menu that appears. A color
picker will appear in the center of your screen. Use it to specify the color you
would like to use in lieu of a game board. Note that the color you select is not
transmitted to connected clients until the color picker is closed, so you can
preview many colors before making your final selection. The selected game board
color is retained when a Game File is saved.
25
Board Settings (host only)
This panel appears automatically anytime a new game board is loaded after using
the “Load Game Board” command.
The host can also open this panel at any time by selecting the “Board Settings”
command from the game table’s popup menu, or by clicking on the “Board
Settings” button on the Commands panel.
Controls on this panel allow the host to specify the game board’s exact
dimensions so that it matches the grid overlay. This is particularly useful when
using a game board with a grid already “printed” on it. The Grid Overlay (see
below) is automatically cropped to the game board’s dimensions.
The “Maintain Aspect Ratio” checkbox can be enabled to maintain the game
board graphic's original aspect ratio, so that it is not stretched or squashed in
either dimension. This can greatly speed up the time it takes to resize a game
board.
Controls on this panel also allow the host to set Game Board Offsets, which
ensure that the snap-to-grid feature works well when a particular game board has
an embedded grid on it that does not begin exactly in the top left corner of the
game board. When adjusting horizontal or vertical offsets, the offset amount is
26
adjusted by 1 pixel per click, but you can hold down the [SHIFT] key while
clicking on the adjustment control in order to change the offset by 61 pixels (half
a cell) with a single click.
There are also controls on the Board Settings panel that allow the host to set the
game board's scale, which is used for measuring distances. Measurement units
are defined in an external text file (“Game Scale Units.txt”, located in BGE’s
Preferences folder), so users can easily add their own measurement units, if
needed. The scale settings for a given game board are saved in each Game File.
From the Board Settings panel, the host can also specify whether the Grid Overlay
and the snap-to-grid functions should be forced on, forced off, or be left up to the
discretion of each connected client. These settings are also saved in each Game
File.
Scrolling the Game Table
Use the arrow keys to scroll the game table by pressing the arrow key indicating
the direction that you would like to reveal. Each press of an arrow key scrolls the
game table by one cell. For quicker scrolling, holding down the [CONTROL] key
while pressing an arrow key will scroll the game table nearly one screen’s worth
per key press (similar to how the Page Up and Page Down keys work in other
programs).
Note that in multiplayer games, the arrow keys only work when the Chat Window
is closed, or if you first click on the game table window to ensure it has focus.
You can also scroll the game table by right-clicking anywhere on the game table
(i.e., not on a unit) and dragging in the direction you wish to slide the game
table. The cursor changes to a hand while dragging, until the right mouse button
is released. Mac OS X users with a single-button mouse will need to hold down
the [CONTROL] key to simulate a right-click in order to initiate the dragging
action. You can also scroll the game table by right-clicking on a component that
has been set to “Tile” or “Lock” and then dragging the mouse in the direction you
wish to slide the game table.
Lastly, if you enable the “Automatic Board Scrolling” option in Preferences, you
can scroll the game table by moving the mouse cursor to an edge of the game
table window. This even works if you are in the middle of dragging a unit to move
it. Scrolling the game table with the mouse cursor is disabled while certain panels
are open.
It is strongly advised that you run BGE in the highest screen resolution you are
comfortable with, so that you can see more of the game table at one time, and
therefore don’t need to scroll around as much.
27
Zooming the Game Table In & Out
You can zoom in or out on the game table window by pressing a hotkey [+] or
[–] (if no units are selected), or alternatively, [SHIFT – Up Arrow] or [SHIFT –
Down Arrow] (even if units are selected). Each press of the hotkey changes the
zoom level by 10%. For quicker zooming, holding down the [CONTROL] key while
pressing the corresponding hotkey to zoom will change the zoom level by 50%
per key press.
A zoom level indicator appears briefly beside the BG button whenever you change
the zoom level, letting you know your current setting. Possible zoom settings
range from 20% to 200%.
BGE allows you to select the desired zoom level and fine-tune it before the
zoomed game table re-renders. This makes zooming to a particular zoom level
faster.
You can also use the scroll wheel on your mouse to change the zoom level. Each
notch on the scrollwheel adjusts the zoom level by 10%. Hold down the
[CONTROL] key while turning the scrollwheel to adjust the zoom level by 50% for
each notch of the scrollwheel. For finer control of the zoom level, hold down the
[CONTROL] key and the [ALT] key ([OPTION] key on a Mac) while turning the
scrollwheel, and each notch on the scrollwheel will adjust the zoom level by 1%,
instead.
Double-clicking on the game table will also pop up a menu that allows you to set
the zoom level directly, without having to navigate through intermediate zoom
levels.
More precise zooming (in 1% and 5% increments) is also possible using the Zoom
command on the game table’s popup menu. Precise zooming is primarily intended
for projector users who are playing with real miniatures while projecting the game
board onto a table.
Lastly, the Zoom Level can be set via a command typed into the Chat window.
This will be covered later, under “Issuing Commands from the Chat Window”.
28
Placeholder Game Boards
When a Game File calls for a game board that cannot be found, a placeholder
game board will be shown instead. While a placeholder game board is showing,
units will not be drawn on the screen, and the Grid Overlay will be hidden.
If a server-based game board is called for by a Game File, a "Board Downloading"
placeholder is shown while the server-based game board is downloading.
29
Grid Overlay
A square grid or hex grid may be overlaid on top of the game board. The Grid
Overlay will be automatically cropped to fit the size of your current game board.
Anything placed on the game board goes on top of the Grid Overlay, except for
mini bases and tile components.
The grid may be shown or hidden at any time with the press of the [G] hotkey.
The Grid Overlay will fade out or fade in, as appropriate (exception: if the host
has specified that a particular Game File must be used without a grid, it will not
be possible to show the grid, and if the host has specified that a particular Game
File must only used with a grid, it will not be possible to hide the grid). The host
can dictate whether the Grid Overlay is available or not on a per-Game File basis
(see “Board Settings”, above).
Note that if the host has set the grid visibility for a Game File to “Client Chooses”,
grid visibility becomes strictly a local option that does not affect other connected
users. For example, the host may chose to show the grid on his screen, while
another player chooses to have it hidden on his.
Depending on the game being played, some people may prefer the added visual
realism achieved by keeping the grid hidden during play (at least until the need
arises to count the range to a target). Grid visibility has no effect on the snap-togrid feature, which is independent.
From the Preferences screen, the host can decide what type of grid to use
(square or hex), the color of the grid overlay (black, white, grey, yellow, red,
blue, green, cyan, magenta, or brown), and the opacity of the grid overlay (10100%, in 10% increments). The host’s choice of grid type (square or hex) is
forced on any connected players, but the players are free to set their own grid
color and grid opacity.
Users may also add their own custom Grid Overlays, in case they wish to add
more grid colors, or even additional grid information, such as centerpoints (for
Line of Sight calculations) or a grid-numbering system (see “Expanding BGE”,
below). Custom grids should be created at a resolution of 100 pixels per cell.
30
Snap-to-Grid
Snap-to-grid is on by default when you first launch BGE. Thereafter, it can be
toggled on or off with the [X] hotkey, or via the “Snap to Grid” command in the
game table’s popup menu. When snap-to-grid is on, a cell highlight graphic
“snaps” from cell to cell as you move your mouse cursor across the game table.
This happens even if the Grid Overlay is hidden. The highlighted cell marks where
a unit would be placed (see “Placing a Mini on the Game Table” and “Placing a
Component on the Game Table”, below).
The cell highlight graphic disappears when you select one or more units on the
game board, so if you can see the cell highlight graphic, it’s a visual cue that no
unit is currently selected.
If snap-to-grid is enabled, units will snap to the center of each cell as you drag
them, even if the Grid Overlay is hidden (exception: Free Floating components
never snap-to-grid). Units will only snap-to-grid if they are moved at least one
pixel in any direction. This makes it possible to select units that are not aligned
with the grid (e.g. doors) without having them snap-to-grid.
If snap-to-grid is disabled (from the game table’s popup menu, or with the [X]
hotkey), the cell highlight graphic does not appear, and units may be dragged
around freely on the game table without snapping to the center of each cell.
The host can dictate whether snap-to-grid is available or not on a per-Game File
basis (see “Board Settings”, above).
Snap-to-grid also affects the Draw Tools, and can be of great assistance in
drawing straight lines, rectangles, and other shapes that are aligned perfectly
with the Grid Overlay.
31
Views
Every Game File can have up to 10 host-defined “Views”. A View is like a
bookmark to a particular spot on the game table window, and it can (optionally)
have a pre-defined zoom level that it will be viewed at. The primary purpose of
Views is to let you quickly and easily jump around in the game table window to
points of interest that the host has defined (e.g., Character dossiers or vehicle
record sheets located "off-board").
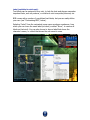
A Views palette appears at the bottom of the game table window when your
mouse cursor is in the lower portion of the game table window. The View palette
will not appear if the game table window has been resized so as to be too narrow
to display the entire palette (so as to avoid cropping the View palette). The Views
palette has a thin black frame around it, to help set it off from the background if a
white or light-colored game board is being used.
The host can define a View by holding down the [ALT] key (the [OPTION] key, on
Mac OS X) and clicking on a View button in the View palette. Alternatively, the
host can define a View by pressing a number key while holding down the
[CONTROL] and [SHIFT] keys; this method will also cause the View Manager (see
below) to open, ready for further input by the host. Players cannot set Views.
Navigate to a View by clicking on a View button in the View palette. Alternatively,
you can jump a View by pressing a number key while holding down the [ALT] key
([OPTION] key on Mac OS X). While the View palette is the primary way of
switching from one View to another, you may find that using hotkeys to switch
Views is significantly faster.
32
Lastly, you can switch Views by double-clicking on the game table window to
bring up a popup menu and then selecting a particular View from the "View..."
submenu.
When a Game File is loaded, it will automatically show View 0. When a Game File
is saved, it will store the Views settings that have been defined by the host.
Hint: If you ever "lose" the game board by scrolling too far away from it, pressing
a View button is probably a quick and easy way to find the game board again.
For those who do not wish to use the Views feature, a "Disable Views Palette"
command is available on the BG button's popup menu (for now, this command
must be selected every session, but eventually, this will probably become a
Preferences setting, instead). Note that even if the Views Palette is disabled,
hotkey navigation for the various Views will still function.
33
View Manager (host only)
The "View Manager" panel, accessible only to the host, allows the host to assign a
custom name and (optionally) to specify a custom zoom level for each View.
To bring up the View Manager, press the [SHIFT-V] hotkey, or click the “View
Manager” button on the Commands panel. You can also select the “View
Manager” command from the BG button’s popup menu, if the Commands panel is
closed or disabled. Note that the View Manager is not available to players.
Holding down the [SHIFT] key while setting a View with the Views palette will
automatically open the View Manager panel after recording the View location, to
enable you to immediately name the View and/or assign it a custom zoom level.
Any View named with just a space (" ") in the View Manager will have its
corresponding button hidden in the Views palette.
If the 5 Views on the second row of the Views palette (i.e., Views 5, 6, 7, 8, and
9) are named with just a space (" ") in the View Manager, the background of the
Views palette will be displayed at half height.
If all 10 Views are named with just a space (" ") in the View Manager, the Views
palette will be entirely hidden/disabled for that Game File (although hotkeys for
switching Views will still function normally).
34
Unit Types: Minis and Components
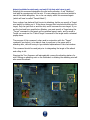
There are two main categories of things that can be deployed on the game table:
minis and components. These are collectively known as “units.” Only the host
may place units on the game table, and only the host may delete them.
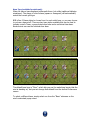
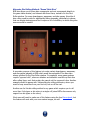
Minis
Minis are used to represent the characters, troops, animals, and monsters on the
game board (basically anything that can move, attack, and be killed). Minis differ
from Components because all minis have a base, and a color-coded Status halo
(unless these features have been manually turned off). Minis also have a
contextual popup menu (accessed by right-clicking on a Mini) that offers many
more options than the contextual popup menu does for Components.
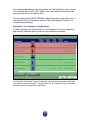
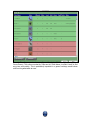
The mini whose turn it is to act (according to the Turn Sequencer) is highlighted
with a blue halo. This visual cue is useful for players to know when they are
expected to act. A currently-selected mini is highlighted with a white halo. The
white selection halo supercedes the blue “active mini” halo, as well as all the
Status halos.
Components
Components represent everything else, such as blocks, money tokens, game
cards, or moveable terrain features, like doors. Components do not have a base
or a halo associated with them. Components may have a Status designated, but
the Status is not depicted graphically in the game table window (only in the Turn
Sequencer).
Controlling Units
Placing a Mini on the Game Table
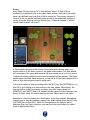
Move your mouse cursor on the game table to the spot where you want the mini
placed, then double-click to get a contextual popup menu. Select “Place Mini”.
Only the host may place a mini.
If the snap-to-grid feature is enabled, the cell highlight graphic will mark the cell
where the mini will appear.
35
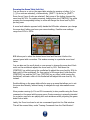
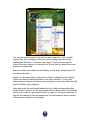
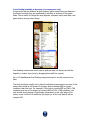
A Mini browser panel appears, allowing you to choose an illustration to depict the
character, animal, or monster on the game board.
Once you’ve selected suitable artwork, click on the “Select” button at the bottom
of the panel. The mini appears on the game table on the spot you specified. If
snap-to-grid was enabled, the unit will be automatically centered in the
corresponding cell.
36
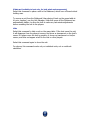
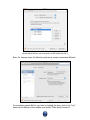
You will be automatically taken to a second screen, where you can specify the
mini’s name (although not required, it’s usually best if each mini and component
is assigned a unique name), its owner (the host or one of the connected players,
which allows that person to move and control his own mini), and its base type
and base size. You can also dictate how BGE should use the selected artwork by
defining scale, rotation, and offset values (for changing the centerpoint of the
graphic).
When placing minis on the game table, if the unit does not have a default Scale
Adjustment factor defined for it, Scale Adjustment will default to 50%, so that the
artwork will not pixelate even at full zoom (200%).
Note that you can apply different scale and rotation settings to different units
which use the same artwork, but the offsets for any given artwork must be the
same. If you need to use different offsets, you will have to duplicate the artwork
in BGE’s “Minis” folder.
A real-time preview of your chosen settings is shown on the game table. In order
to match the orientation of a mini’s graphic to the facing indicator on the mini’s
37
base, you should use the rotation slider on this screen to make the mini face due
right.
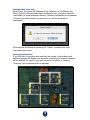
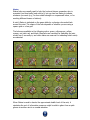
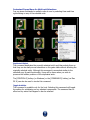
Specify whether your selected artwork displays the mini from above (default),
from the front, or whether it is portrait-style artwork. If you select “Portrait-style
token” or “Mini shown from front”, the artwork will not be rotated to match the
mini’s facing on the game board. If you select “Mini shown from front”, the mini
will be vertically offset for you to properly align it in a cell, although you may
further tweak the vertical and horizontal offsets to get the exact placement you
want.
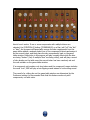
BGE supports top-down, front view, and portrait-style tokens
There are checkboxes at the bottom of the panel that allow the host to save the
current settings as the default for anytime that particular artwork is used again in
the future, and one for applying the current settings retroactively to units that are
already on the game table and use that same artwork.
BGE allows you to place many copies of a unit on the game table at once, all
using the exact same settings. Use the popup menu labeled “Number to Deploy:”
to select how many identical units to place on the game table.
When you are finished adjusting the settings, click the “OK” button at the bottom
of the panel.
Depending on your Preferences settings and whether or not you are currently
hosting a game session, you may notice that the mini on the game table is now
transparent. This is because by default, units are automatically hidden from the
players. This allows the host the opportunity to further tweak the mini, such as
adjust which way it is facing, or perhaps attach a text label or notes to it. When
it’s all ready, the host can choose to reveal the mini to the players by pressing the
38
[H] hotkey. Units placed on the game table while the host is offline are not
automatically hidden.
All minis are placed on the game table with a default orientation (facing to the
right), but once on the game table you can rotate them as needed.
In addition to placing minis directly on the game table, minis can also be initially
placed on top of other units (even on top of components set to “Tile” or “Lock”),
either via a double-click (as for a standard deployment), or via Copy & Paste
operation.
Placing a Component on the Game Table
The procedure for placing a component on the game table is the same as for
placing a mini. Only the host may place a component.
Move your mouse cursor on the game table to the cell where you want the
component placed, then double-click to get a contextual popup menu. Select
“Place Component”.
If the snap-to-grid feature is enabled, the cell highlight graphic will mark the cell
where the component will appear.
A component browser panel appears, allowing you to choose a suitable illustration
to depict the component on the game table.
39
Once you’ve selected suitable artwork, click on the “Select” button at the bottom
of the panel. The component appears on the game table in the cell you specified.
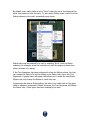
You will be automatically taken to a second screen, where you can specify the
component’s name and define how BGE should use the artwork by defining scale,
40
rotation, and alignment values. A real-time preview of your chosen settings is
shown on the game table.
When placing component on the game table, if the unit does not have a default
Scale Adjustment factor defined for it, Scale Adjustment will default to 50%, so
that the artwork will not pixelate even at full zoom (200%).
There are checkboxes at the bottom of the panel that allow the host to save the
current settings as the default for anytime that particular artwork is used again in
the future, and one for applying the current settings retroactively to units that are
already on the game table and use that same artwork.
Note that you can apply different scale and rotation settings to different units
which use the same artwork, but the offsets for any given artwork must be the
same. If you need to use different offsets, you will have to duplicate the artwork
in BGE’s “Components” folder.
BGE allows you to place many copies of a unit on the game table at once, all
using the exact same settings. Use the popup menu labeled “Number to Deploy:”
to select how many identical units to place on the game table.
When you are finished adjusting the settings, click the “OK” button at the bottom
of the panel.
Depending on your Preferences settings and whether or not you are currently
hosting a game session, you may notice that the component on the game table is
now transparent. This is because by default, units are automatically hidden from
the players. This allows the host the opportunity to further tweak the component,
such as rotating it, or perhaps attaching descriptive notes to it. When it’s all
ready, the host can choose to reveal the component to the players by pressing
the [H] hotkey. Units placed on the game table while the host is offline are not
automatically hidden.
All components are placed on the game table with a default orientation, but once
on the game table you can rotate them as needed.
In addition to placing components directly on the game table, components can
also be initially placed on top of other units (even on top of components set to
“Tile” or “Lock”), either via a double-click (as for a standard deployment), or via
Copy & Paste operation.
41
Selecting and Deselecting a Unit
Simply click on a unit to select it. By default, a Movement Guide is displayed
around a unit when a unit is selected, showing which number key to press to
move the unit in a particular direction (the number correlate to the layout of a
keyboard’s numberpad). The Movement Guide always appears above other units,
so that it is never obscured. The Movement Guide feature can be disabled in
Preferences.
If the unit is a mini, it will also be highlighted with a white halo when it is
selected.
To deselect a unit, simply click on any empty spot on the game table, or on a
component that is set to Tile or Lock.
The host may select any unit on the game table, but players may only select units
that have been assigned to them by the host, or units that have been set to be
owned by “Everyone” (see the Owner command, below).
42
Moving a Unit
Select a unit, then press one of the movement keys (preferably on the keypad) to
move the selected unit in the direction specified by the Movement Guide. The unit
will “glide” smoothly from its original location to its new location. Diagonal
movement is possible, if your game rules allow it.
If you are in the middle of moving and need to scroll the game table to see
further in that direction, you can do so with the arrow keys or with the mouse
without interrupting the movement.
The game table window is boundless, so it is possible to move a unit beyond the
edges of the game board. This should probably only be done with units that the
host wants to be temporarily out of play, or if the host has decided to expand the
playing area by placing modular board tiles beyond the game board edge.
Note that in a multiplayer game, the movement keys only function if the Chat
window is closed, or if you first click on the game table to ensure that it has
focus. If the keypad numbers are not moving units as expected, activate the Num
Lock function on your keyboard and try again.
Another way of moving units is to drag them with the mouse to where you want
them. If snap-to-grid is on, the unit will snap to each cell’s centerpoint as the
mouse is dragged. While someone is dragging a unit with the mouse, the unit's
position is updated in real time on connected clients' screens. Releasing the
mouse button will send the final unit position to connected clients. Remote
players will see the unit “glide” smoothly (animate) from point to point on the
game table. This is to prevent units seeming to teleport from one place to
another, and to make moves less jarring. If, on occasion, you actually want to
simulate a teleporting effect, simply hide the unit, then move it, then unhide the
unit.
Note that a player may only move a unit/s that he/she controls, while the host
can move any unit.
It is also possible to "nudge" units on the game table one pixel at a time. This is
primarily useful when laying out units that require precise alignment with each
other, such as elements on a form or record sheet. Simply select one or more
units, hold down the SPACEBAR, then press any arrow (aka cursor) key.
43
Rotating a Unit
Select a unit, then press the [+] (plus key) to rotate the selection 90 degrees
clockwise, or the [-] (minus key) to rotate the selection 90 degrees counterclockwise. If you are using a hex grid instead of a square grid, the selection is
rotated only 60 degrees. You will see the unit rotate gradually to its new facing.
Holding down the [SHIFT] key while pressing a rotation key rotates a selected
unit by only 15 degrees (regardless of the current grid type). Holding down the
[CONTROL] key while rotating a component (not a mini) rotates the component in
180 degree increments.
If you have a mouse with a scrollwheel, you can also rotate a unit with the
scrollwheel. Note that the scrollwheel will change the zoom level if no unit is
selected. If a unit is selected, it will rotate in 90 degree increments (60 degree
increments on a hex grid) if no modifier keys are held down. Holding down the
[CONTROL] key (the [COMMAND] key, on a Mac) will cause the scrollwheel to
rotate a unit in 15 degree increments, regardless of the current grid type. Holding
down the [CONTROL] and [ALT] keys (the [COMMAND] key and the [OPTION]
key on a Mac) while rotating a unit/s with the scrollwheel will rotate the unit in 5
degree increments.
The artwork for Portrait-style and Front View minis never rotates, only the facing
indicator on the mini’s base rotates.
44
Adjusting a Unit’s Offsets
Sometimes you don’t want units to be perfectly centered in a cell. An example of
this is a mini wielding a long pole weapon. You would want the body of the mini
centered in the cell, allowing the polearm to protrude into an adjacent cell/s.
You can use the controls on the Unit Settings panel to adjust the centerpoint
offsets.
Before adjusting the horizontal
and vertical offsets
After adjusting the horizontal
and vertical offsets
When adjusting horizontal or vertical offsets for a token, the offset amount is
adjusted by 1 pixel per click, but you can hold down the [SHIFT] key while
clicking on the adjustment control in order to change the offset by 61 pixels (half
a cell) with a single click.
Keep in mind that units are rotated based on the centerpoint that is established
with the horizontal and vertical offsets, so, for example, a door graphic should
have its offsets adjusted such that the door rotates on its hinges.
45
Deleting a Unit (host only)
Select a unit, then press the [Backspace] key (Windows) or the [Delete] key
(Mac). Only the host may delete units. If deleting a mini, you will be asked for
confirmation (to avoid accidental deletion). Deletion confirmation can be disabled
in Preferences. When deleting a component, you will not be asked for
confirmation.
Units may also be deleted by selecting the “Delete” command from their
contextual popup menu.
Selecting Multiple Units
If you left-click on the game table and drag the mouse, a red-bordered unit
selection marquee will appear, and any units touched by the selection marquee
will be selected. For players, only units owned by the player or owned by
“Everyone” can be selected with the marquee.
46
On Windows PCs, either the [SHIFT] key OR the [CONTROL] key can be used to
make or adjust multi-unit selections. On Mac OS X, only the [SHIFT] key can be
used to make or adjust multi-unit selections.
Note that a marquee selection can start and/or end over a component/s set to
“Tile” (useful if you are using modular mapboards, or a game board composed of
tiles). A marquee selection can also start and/or end over the black background
layer (the non-board portion of the game table window).
You can choose whether the selection marquee selects minis only, components
only, or both minis and components. To do so, double-click on the game table,
and a menu will pop up.
Select the submenu that says “Dragging a marquee selects…” and choose one of
the three options given.
47
Cloning an Existing Unit (host only)
Units on the game table can be duplicated easily using the standard Copy and
Paste commands (on Windows, [CONTROL-C] to Copy and [CONTROL-V] to
Paste; on Mac OS X, [COMMAND-C] to Copy and [COMMAND-V] to Paste). Simply
select one or more units, copy it/them to the clipboard (i.e., into RAM) using the
Copy command, then position the mouse cursor to the place on the game table
where you want the copied unit/s to appear and use the Paste command. If snapto-grid is enabled, the cloned unit/s will be centered in the cell you selected.
It is also possible to copy a unit using the “Copy Unit/s to Clipboard” command in
the unit’s contextual popup menu, and to paste units onto the game table using
the “Paste Unit/s from Clipboard” command on the game table’s popup menu.
The name of a cloned unit is based on the original unit’s name, not on the name
of the original unit’s token artwork.
The cloned unit will be visible or hidden from the players depending on the state
of the original/source units.
Select All (host only)
The "Select All" command will select all units that are not set to Locked, Tile, or
Free-Floating, and which are not in the Sideboard.
This command can be invoked with the [CONTROL-A] hotkey on Windows, or the
[COMMAND-A] hotkey on Mac OS X. Only the host can use this command.
Cut (host only)
The "Cut" feature, used in conjunction with the Paste feature and the Views
feature, allows the host to easily and quickly move units from one View to
another View. This command will only affect the currently-selected unit/s.
This command can be invoked with the [CONTROL + X] hotkey on Windows, or
the [COMMAND + X] hotkey on Mac OS X, or by selecting the “Cut Unit”
command in the unit’s contextual popup menu. Only the host can use this
command.
48
Contextual Popup Menus
If you are the host, or the owner of a unit, right-clicking on the unit pulls up a
contextual menu with a number of commands and options to chose from, which
are described below.
The number of commands listed in a mini’s contextual popup menu can vary,
depending on who’s turn it is to act, whether you are a player or the host, and
other factors.
Host’s Contextual Popup Menu Options
Player’s Contextual Popup Menu Options
49
Right-clicking on a component also pulls up a contextual menu, but with a few
less options than are available for minis.
Host’s Contextual Popup Menu Options
Player’s Contextual Popup Menu Options
50
Measure Range
Selecting this command will draw a thin blue line from the selected unit's
centerpoint to wherever you place the mouse cursor. The length of the line is
calculated and displayed alongside the cursor, according to the current game
board's scale settings (see “Board Settings”, above).
Measuring can be done with snap-to-grid on or off (snap-to-grid can even be
toggled during the measure operation), and there is a Preferences setting to
ensure that fractional results are rounded up to the nearest whole number (rather
than displayed as a floating point number), if that is what you prefer.
When you are done measuring, just click anywhere to get out of measuring
mode.
51
Edit Notes
Any unit may be assigned notes (either by the host or by a unit’s owner) that will
appear in a ToolTip when a user places the mouse cursor over that unit.
You may enter in any sort of notes that you want. The most common use of this
feature is for displaying a brief description of the unit in question, or for
displaying statistics about the unit (e.g., “Out of ammo”, or “Skip next turn”).
The program will automatically size the displayed note as needed, depending on
the amount of information entered. ToolTip notes have a maximum width of 3
cells, to avoid screen clutter.
Clicking on a ToolTip note will make it go away, until the next time the mouse
moves over the unit’s graphic.
If you edit a unit’s notes and clear the text entry field completely, no ToolTip will
be shown for that unit.
52
Attack (available for minis only, and only if it is that mini’s turn to act)
Selecting this command designates the mini as the attacker. A red “Attacking”
text label is superimposed on the mini. If a user changes his mind and wishes to
cancel the attack altogether, he or she can simply select this command again
(which will now be called “Cancel Attack”).
Once a player has declared that his mini is attacking, he/she can specify a Target
mini simply by clicking on it. If the player changes their mind about which mini to
target, they can just click on another mini, and it becomes the new target. If you
are the host and have specified an Attacker, you must specify a Target using the
“Target” command in the target unit’s contextual popup menu, and to cancel a
Target you must use the “Cancel Target” command in the target unit’s contextual
popup menu.
The purpose of this command, when used in conjunction with the “Target”
command (see below), is to make it clear to everyone in the game who is
attacking who, without having to type detailed explanations in the chat window.
This command should be used just prior to designating the target of the attack
and rolling to hit.
Stepping the Turn Sequence will automatically remove the attacking status of a
mini. Placing an attacking mini on the Sideboard or deleting the attacking mini will
also cancel the attack.
53
Target (available for minis only, and only if it is not that mini’s turn to act)
Selecting this command designates the mini as the target of an attack. A blue
“Target” text label is superimposed on the mini. If the attack is canceled for some
reason, the Target label automatically disappears.
The purpose of this command, when used in conjunction with the “Attack”
command, is to make it clear to everyone in the game who is attacking who,
without having to type detailed explanations in the chat window.
This command should be used just prior to the attacker rolling to hit.
If you are the host and you wish to cancel a Target you must use the “Cancel
Target” command in the target unit’s contextual popup menu.
Stepping the Turn Sequence will automatically remove the Attacker or Target
status of a mini.
54
Label (available for minis only)
Text labels can be assigned to any mini, to help the host and players remember
important facts, such as postures, or whether a mini is surprised, stunned, etc.
BGE comes with a number of pre-defined text labels, but you can easily define
your own (see “Customizing BGE”, below).
Selecting “Label” from the contextual popup menu produces a submenu, from
which you can chose the exact label you want (or select “None”, to remove all
labels on that mini). You can also choose to have a label that shows the
character’s name, or a label that shows the unit-owner’s name.
55
Status
Status halos are usually used to help the host and players remember who is
wounded (and how badly) and who isn’t, but you can use Status to indicate
whatever you want (e.g., to show shield strength on a spacecraft token, or for
marking different teams or factions).
A mini’s Status is indicated on the game table by a glowing color-coded halo
around the mini. The shape of the halo depends on whether you are using a
square grid or a hex grid.
The halos are available in the following colors: green, yellow-green, yellow,
orange, red, dark red, and black. Blue halos are reserved for indicating the mini
whose turn it currently is, and white halos are reserved for indicating which mini/s
are selected.
When Status is used to denote the approximate health level of the mini, it
simulates the sort of information someone might be able to glean from a quick
glance at another mini in a combat situation.
56
By default, every unit’s status is set to “None” when the unit is first deployed (for
minis, this means no halo is shown). To set a unit’s Status, select a color from the
Status submenu in the unit’s contextual popup menu.
Status halos may be disabled for a mini by selecting “None” from the Status
submenu (for example, when the host does not wish the players to know how
close a creature is to dying).
If the Turn Sequencer has been configured to show the Status column, the host
can change the Status of a unit by clicking on its Status color chip in the Turn
Sequencer. A popup menu will appear that allows you to select the new Status.
Players may only change the Status of a unit they own.
Components also have a Status setting, but there is no visible halo on the game
table to indicate a component’s Status. However, the Turn Sequencer will display
the Status color, if that option has been enabled by the host.
57
Base Type (available for minis only)
Minis can have a base displayed underneath them (not unlike traditional tabletop
miniatures). The shape of a mini’s base (square or hexagonal) will automatically
match the current grid type.
BGE offers 12 base styles to choose from for each mini’s base, or you may choose
to not use a base at all. There are two base styles available that can be used to
indicate a mini’s Team: a green-tinted clear base and a red-tinted clear base.
Neutral minis can use the untinted clear base.
The default base type is “Clear”, which lets you see the underlying terrain that the
mini is standing on, but you can change that default from the second Preferences
screen.
To select a different base, simply select one from the “Base” submenu on the
mini’s contextual popup menu.
58
You may also select the size of the base to use for each mini. This is usually
chosen when you first deploy a mini, but you can change the base size by
selecting the “Edit Mini…” command (see below). There are 6 base sizes to
choose from when playing on a hex grid, and 5 base sizes to choose from when
playing on a square grid.
Bases are drawn underneath the Grid Overlay, so that large, opaque bases will
not obscure the grid.
Nearly all of the bases have a yellow line on them to indicate the mini’s facing
(which can often be ambiguous based on the mini’s artwork). If your game
system does not require unit facings to be specified, you can use a mini base that
doesn’t include a facing indicator.
Users who prefer the most visual realism can opt to hide unit bases altogether
(select “None”), and turn off the Grid Overlay and the Status halos. If a particular
mini is hard to see on a given game board, try using one of the colored bases, to
help the mini stand out from the background. Colored bases can also be used to
indicate teams or factions, if necessary.
59
Sideboard (available to host only, for both minis and components)
Select this command to place a unit in the Sideboard, which is an off-board virtual
holding area.
To remove a unit from the Sideboard (thus placing it back on the game table at
it’s prior location), use the Unit Manager. Units that come off the Sideboard are
automatically hidden, to allow the host to make any last-minute adjustments
before revealing the unit to the players.
Hide
Select this command to hide a unit on the game table. If the host owns the unit,
it will disappear from the players’ screens, and show as transparent on the host’s
screen If a player owns the unit in question, it shows up transparent on his/her
screen, and does not appear at all for the host or other players.
Select this command again to show the unit.
For players, this command works only on individual units, not on multi-unit
selections.
60
Token (available for both minis and components)
BGE allows you to attach more than one token graphic to each unit, so it’s
possible to have multiple poses (e.g., fighting, standing idle, prone, mounted,
etc.) or token states (e.g., a chest that is closed, a chest that is open and full of
treasure, and a chest that is open but empty). A unit with more than one token
assigned to it is referred to as a multi-token unit.
The “Token” submenu in a unit’s contextual popup menu lets you attach
additional tokens to a unit, select which token to display, and delete tokens from
a multi-token unit.
Select the “Add Token” command to add a token to the selected unit. This can be
done by either the host or by the owning player. Each token added to a unit can
have its own unique settings, so it’s possible to have, for example, a large base
size for a mounted mini and a small base size for a dismounted mini.
Below the “Add Token” command is a list of all the tokens that are attached to
the selected unit. The one currently selected for display (i.e., the active token) is
marked by a checkmark beside it. You can select which token should be displayed
by selecting the name of the token from this list.
Below that is the “Keep Only Current Token” command, which, if selected, will
remove all the tokens from the selected unit except for the token currently being
displayed (indicated by a checkmark beside it). This command is not available if
the selected unit is not a multi-token unit. Selecting this command if the selected
unit is a component will cause the unit to be renamed according to the name of
the remaining token (this is very handy when used with Unit Palettes). The “Keep
61
Only Current Token” command will also be automatically invoked when you set a
multi-token component/s to “Tile”.
The “Remove Current Token” command will remove the token that is currently
being displayed (indicated by a checkmark beside it) from the selected unit, but
will retain all other tokens. This command is not available if the selected unit only
has a single token assigned to it.
“Secret Token” is a toggle setting, and is available only for multi-token units. The
“Secret Token” setting is enabled if there is a checkmark beside the command,
and disabled if there isn’t. When enabled, it allows only the unit’s owner to see
the token that is selected for display (i.e., the active token), and everyone else
(including the host, in the case of a player-owned unit) will see an alternate
token. The alternate token that will be shown is the second token listed for the
unit. The “Secret Token” feature is primarily intended for use in boardgames and
wargames to conceal the true nature of a unit (e.g., a letter tile in Scrabble, an
unplaced domino, a flipped counter in a wargame).
What the unit owner sees
What everyone else sees
With multi-token units, you can easily and quickly change the currently-displayed
token by selecting the unit and pressing the [<] or [>] hotkeys. These hotkeys
allow you to cycle through all the available token states. Note that the hotkeys
will also work on a multi-unit selection, so that you can change the currentlydisplayed token on many units with a single keystroke.
Pressing a token-swapping hotkey while holding down the [SHIFT] and
[CONTROL] keys will swap both the current token and the current portrait of a
selected unit simultaneously (potentially useful for things like were-creatures).
62
Portrait (available for both minis and components)
The Portrait submenu in a unit’s contextual popup menu lets you attach a portrait
image (or additional portrait images) to a unit, select which portrait to display,
and delete a portrait/s from a unit which has one or more portraits assigned to it.
Select the “Use Current Token” command to use the current/active token image
as a portrait. Portraits always display at 100% scale, so this can be a useful
feature for viewing units clearly even when zoomed way out (effectively serving
as an “auto-magnify” feature for units that would otherwise be hard to discern).
Select this command again to disable it (it functions as an on/off toggle).
If a component has its Portrait set to "Use Current Token", another command will
appear in the Portrait submenu called "Match Component's Rotation". Selecting
this will rotate the portrait graphic in accordance with the component's current
rotation on the game table. For example, a card component that is upside-down
on the game table will show it's portrait upside-down, as well, if this option is
selected. The command functions as a toggle, and is only available to the host
when the host is not hosting a game session (the setting is only intended to be
set during the creation of a digital game conversion).
63
Select the “Add Portrait” command to add a Portrait image to the selected unit.
This can be done by either the host or by the owning player. More than one
portrait can be attached to a unit.
A unit’s portrait, if one is attached, appears in the upper right corner of the game
table window when the mouse cursor is held over the unit, or when the unit is
selected (but not if the unit is part of a multi-unit selection). Clicking on a
selected unit’s portrait will auto-center the game table on that unit, unless that
option has been disabled in Preferences.
Below the “Add Portrait” command is a list of all the portrait images that are
attached to the selected unit. The one currently selected for display (i.e., the
active portrait) is marked by a checkmark beside it. You can select which portrait
should be displayed by selecting the name of the portrait image from this list.
Below that is the "Keep Only Current Portrait" command, which, if selected, will
remove all the portraits from the selected unit/s except for the portrait currently
being displayed (indicated by a checkmark beside it). This command is not
available if the selected unit does not more than one Portrait.
The “Remove Current Portrait” command will remove the portrait that is currently
being displayed (indicated by a checkmark beside it) from the selected unit, but
will retain all other portraits. This command is not available if the selected unit
only has a single portrait assigned to it.
You can easily and quickly change the current portrait by selecting the unit and
pressing the [<] or [>] hotkeys while holding down the [SHIFT] key. These
hotkeys allow you to cycle through all the available portraits. Note that the
hotkeys will also work on a multi-unit selection, so that you can change the
currently-displayed portrait on many units at once with a single keystroke.
Pressing a portrait-swapping hotkey while holding down the [SHIFT] and
[CONTROL] keys will swap both the current token and the current portrait of a
selected unit simultaneously (potentially useful for things like were-creatures).
64
Audio (available for both minis and components)
Units may have audio clips attached to them. This can be done either by the host
or by the owning player. The Audio submenu in a unit’s contextual popup menu
lets you attach an audio clip to a unit, select which attached audio clip to play,
and delete all audio clips attached to a unit.
Once an audio clip has been attached to a unit, it can thereafter be played by
selecting that audio clip from the Audio submenu.
If the host holds down the [SHIFT] key while triggering an audio clip attached to
a unit, that audio clip will play with looping enabled.
65
Flip Image (available to host only, for both minis and components)
Select this command to flip a unit’s artwork either horizontally or vertically. This
can be useful for creating the illusion of more unique tokens. It’s also useful if you
have an image of a right-handed character and would like to depict a left-handed
one.
Flipping a unit both horizontally and vertically is not recommended, as this just
has the same effect as rotating a unit 180 degrees.
This feature should obviously not be used on any artwork that includes legible
numbers or letters (e.g., a police car with a unit number painted on its roof).
This command is not available when Learning Mode is enabled.
66
Arrange (available for both minis and components)
This submenu contains two commands: “Move to Top” and “Move to Bottom”.
Select the “Move to Top” command (or press the "]" hotkey) to move the selected
unit up in the stacking order so that it is above all other units of it's type (normal,
tile, or free-floating).
Select the “Move to Bottom” command (or press the "[" hotkey) to move the
selected unit down in the stacking order so that it is below all other units of it's
type (normal, tile, or free-floating).
Owner (available to the host or unit owner only)
Selecting the “Owner” submenu from the contextual popup menu produces a list
that includes the host and all the players who are currently logged into the game.
The host can designate anyone on this list to be the owner of the unit. The owner
of a unit may also be set to “Everyone”, in which case any connected user can
move the unit and view or edit the unit’s data in the Turn Sequencer. For a unit
to be assigned to a specific player, that player must be currently logged into the
game session, so that his/her name can appear in the “Owner” submenu.
A unit cannot be selected, nor can its contextual popup menu be accessed, unless
you are the host or the unit’s owner.
67
Antialias (available for components only)
This command/setting should be used for units whose graphics contain text, to
make the text more readable when zoomed out. Note that when this setting is
enabled, rollovers will no longer take transparency into account; instead, a
rollover will be detected or not based on the graphic's bounding box. This setting
has no effect on rotated units. Text labels created with the "Text" Draw Tool are
antialiased by default.
This command will have a checkmark next to it in the component’s contextual
popup menu if the unit has antialiasing enabled. Selecting this command again
will disable antialiasing on that unit.
For performance reasons, antialiasing is temporarily disabled during panning of
the game table, and is automatically re-enabled when panning is complete.
Include in Turn Sequence (available for both minis and components)
Units placed on the game table are not listed in the Turn Sequencer by default.
You must select this command if you want the unit listed. This feature can help
streamline play in situations where you have large crowds of non-combatants,
since the non-combatants won’t clutter up the Turn Sequence.
This command will have a checkmark next to it in the unit’s contextual popup
menu if the unit is already included in the Turn Sequence. Selecting this
command if a unit is already included in the Turn Sequencer will remove the unit
from the Turn Sequencer.
68
Edit in Turn Sequencer (available for both minis and components)
This command only appears if the unit is already included in the Turn Sequencer.
Selecting this command will make the unit’s row editable in the Turn Sequencer.
This command is particularly useful when many units share the same name, as it
would be difficult to identify the correct unit in the Turn Sequencer.
Selecting this command opens the Turn Sequencer (if it's not already open),
selects the unit in question, and puts that row of the Turn Sequencer into Edit
Mode, ready to accept new data.
Lock (available to host only, for components only)
Components may be locked down so that the host does not accidentally select or
move them during play. A locked component is drawn above the Grid Overlay.
Tile (available to host only, for components only)
Components may be declared Tiles, so that the host does not accidentally select
or move them during play. Tiles are similar to locked components, except that tile
components are drawn under the grid overlay, and under mini bases.
Tiles are useful when constructing a game board out of component parts (e.g., in
a tile-laying game, or a game with geomorphic game boards).
The hotkey [Shift + T] can be used to activate the Tile command. It works with
both single-unit and multiple-unit selections.
69
Free-Floating (available to host only, for components only)
Components may be declared as free-floating, which means they are always on
the screen because they are unaffected by scrolling or zooming of the game
table. This is useful for things like map legends, compass roses, scale bars, and
game charts, among other things.
Free-floating components never snap-to-grid and may not be moved with the
keypad or number keys (only by dragging them with the mouse).
Up to 12 simultaneous free-floating components can be on the screen at one
time.
The host should be careful not to place free-floating components in an area of the
screen that would be off-screen for a player that is running BGE at a lower
resolution than the host. For example, if the host is running BGE at 1280 x 768
resolution and one of his players is running BGE at 1024 x 768 resolution, the
host should avoid placing a free-floating component on the right edge of his
screen, since it will not be visible by the player (or at the very least it will be
cropped off).
70
Use as a Screen (available for components only)
The "Use as a Screen" command is available for components in their contextual
popup menu. The command functions as a toggle to turn the setting on or off.
When this setting is enabled, the component will be drawn (on other players'
displays) above other components and minis, effectively screening them from
view. For the player owning the component, the component is not drawn at all, so
the component owner's view is not obscured by the screen.
This setting can also be controlled by the host using the Unit Manager.
Player 1 does not see his own Screen at all, so it does not affect his ability to see what is
underneath it, but Player 2’s Screen covers that player’s wealth tokens, obscuring them
from Player 1’s view.
71
Team (available for both minis and components)
By default, new units placed on the game table are Neutral (Grey). The host can
use the commands in this submenu to set the unit’s Team to Green or Red.
Units that are listed in the Turn Sequencer will have the background of the unit’s
row match their Team color, and Neutral units will have a grey background.
This setting has no effect if the unit is not listed in the Turn Sequencer.
See the “Base” command (above), if you wish to graphically indicate a unit’s
Team or faction in the game table window.
72
Edit Mini or Component
Selecting this command opens the Unit Settings panel. The panel’s appearance
will vary depending on whether you are editing a mini or a component, but in
both cases it is very similar to the layout of the Unit Settings panel when you are
first deploying a unit.
The Unit Settings panel for minis
The Unit Settings panel for components
Delete (available to host only, for both minis and components)
Selecting this command deletes the unit from the game table. This is an alternate
method of deleting a unit (particularly useful for Tablet PC users). The more
common method is to simply press the Backspace key (Windows) or the Delete
key (Mac).
73
Set Action Phases (available for both minis and components)
This command only appears on a unit’s contextual popup menu if the host has
configured the Turn Sequencer to use Turn Phases, and furthermore that Action
Phases (the turn phases during which a given unit gets to act) are to be managed
manually (i.e., the host has elected not to use a Phase Chart for automating the
assignment of Action Phases).
The “Set Action Phases” submenu will list all the Action Phases, as specified by
the host in the Turn Sequencer Setup Wizard. If the Action Phases were not
explicitly named, they will be numbered, instead.
The host or the player owning the unit should select from the submenu each
phase that the unit should act on. Thereafter, that phase will appear in this
submenu with a checkmark preceding it. In the Turn Sequencer, the unit will only
be listed on the phases it gets to act on.
74
Contextual Popup Menu for Multi-unit Selections
You can issue commands to multiple units at once by selecting them and then
right-clicking on any of the selected units.
Duplicate & Select
This command duplicates the currently-selected unit/s and then selects them so
that they can be easily moved elsewhere on the game table without affecting the
originally-selected unit/s. Although this command is somewhat similar to the
standard copy & paste functionality, there will be times when you wish to
preserve the relative positions of the duplicated units.
The [CONTROL-D] hotkey (on Windows) or the [COMMAND-D] hotkey (on Mac
OS X) can also be used to invoke this command.
Toggle Antialias
This command is available only for the host. Selecting this command will toggle
the setting for antialiasing on any selected components. The command has no
effect on any minis that happen to also be selected.
75
Select
The "Select" submenu lets you chose a particular unit from among all the units
selected. This command is useful for pulling a particular unit out of a stack (e.g.,
a certain card from a discard pile, or the bottom-most card in a deck of cards).
Units are listed in the "Select" submenu according to their stacking order (the
highest unit is listed first, and the lowest unit is listed last).
When you are finished using the "Select" command, you will no longer have
multiple units selected; you will have only a single unit selected. The very next
thing you will usually want to do after using the "Select" command is to press a
movement hotkey to separate the selected unit from a stack of (probably similar)
units, or perhaps utilize the “Move to Top” hotkey.
Arrange
The "Arrange" submenu contains the commands "Stack", "Stack & Shuffle",
"Stagger", and two submenus, "Move to Top" and "Move to Bottom". These
commands are explained below.
Stack & Shuffle
This command is only available for multi-unit selections. Selecting this command
will co-locate the selected units and shuffle their stacking order (aka z-order). A
card-shuffling sound effect is played when you use the "Stack & Shuffle"
command.
The primary purpose of this command is to allow card decks to be used in the
game table window. It is also useful for boardgames or wargames which use a
"chit-pull" mechanic (e.g. "pull a random counter from a cup"), in which case the
top-most unit after shuffling is to be considered the random unit pulled.
Shuffling a stack automatically discards any cards in the stack that were being
held by a player and "flips them over" (if needed) so that the back of the card is
showing. It will also reset any card’s rotation to 0 degrees. This makes it easy to
shuffle a discard pile back into a deck without first having to manually straighten
out any rotated cards and/or flip them over to be face-down.
The "Stack & Shuffle" command uses the lowest unit in the stacking order as the
location where the selected units will be stacked. The same is true for the "Stack"
and "Stagger" commands (see below).
The "Stack & Shuffle" command can be invoked by a hotkey, [SHIFT-S].
Stack
This command is similar to the "Stack & Shuffle" command, except that the
stacking order (z-order) of the selected units is not changed; the selected units
will simply be co-located. The "Stack" command is only available for multi-unit
selections.
76
The "Stack" command uses the lowest unit in the stacking order as the location
where the selected units will be stacked.
The [RETURN] hotkey can be used to invoke the "Stack" command on a multi-unit
selection that is not already stacked. The same hotkey will invoke the "Stagger"
command on the selected units if they are not already stacked (i.e., co-located).
In effect, this hotkey functions as a "Stack/Stagger" toggle. The hotkey has no
effect if multiple units are not selected.
Stagger
This command, which is only available for multi-unit selections, will spread the
selected units out by a user-specified distance.
The "Stagger" command uses the lowest unit in the stacking order as the location
where the selected units will be placed (i.e., the lowest unit will determine the
origin point of the staggered units).
The [RETURN] hotkey can be used to invoke the "Stagger" command on a multiunit selection that is already stacked. The same hotkey will invoke the "Stack"
command on the selected units if they are not already stacked (i.e., co-located).
In effect, this hotkey functions as a "Stack/Stagger" toggle. The hotkey has no
effect if multiple units are not selected.
This command should be useful for finding a particular unit in a stack (for
example, in a stack of counters in a wargame).
Adjusting the Stagger Offset
The default offset for the Stagger command is 5 pixels to the right and 5 pixels
down (of the lowest selected unit), but you can change the stagger offset to any
amount you want.
Press [CAPS LOCK - Right Arrow] to increase the horizontal stagger offset, and
press [CAPS LOCK - Left Arrow] to decrease the horizontal stagger offset (if you
go into the negative range, the stagger command will shift stacked units to the
left instead of to the right).
Press [CAPS LOCK - Down Arrow] to increase the vertical stagger offset, and
press [CAPS LOCK - Up Arrow] to decrease the vertical stagger offset (if you go
into the negative range, the stagger command will shift stacked units up instead
of down).
Whichever hotkey combo you press, in addition to changing the vertical or
horizontal offset, the Stagger command will automatically be invoked, so that you
can visually see the result of your new offset amount.
77
Hold down the [SHIFT] key while invoking one of the above-mentioned hotkeys to
change the offset amount by 10 pixels, instead of 1 pixel.
The host can also specify a specific stagger offset by issuing a command in the
Chat window (see “Issuing Commands from the Chat Window”).
Move to Top
This submenu allows you to choose a particular unit from among the units
selected. Doing so moves the chosen unit to the top of the stacking order.
Move to Bottom
This submenu allows you to choose a particular unit from among the units
selected. Doing so moves the chosen unit to the bottom of the stacking order.
Draw Card
The "Draw Card" command is also available for multi-unit selections, but it works
slightly differently than it does for single-unit selections, since it is intended for
multiple card draws. The “Draw Card” submenu allows you to choose how many
cards to draw (from 2 to 10). Selecting this command will draw the topmost x
cards from a selected card deck.
Discard Card
This command allows you to “Discard” all the selected units at once.
Anchor
Select this command to bind all the selected units to the selected unit that is
lowest in the stacking order. For example, if you select a group of characters and
the boat that they are traveling in, the characters will be anchored to the boat
(assuming the boat is the lowest unit selected).
Moving or rotating a unit that has other units anchored to it will also move the
anchored units, and keep them in the same relative positions; anchored units can
still be moved or rotated independently of the anchoring unit (in the above
example, the characters could move around on the boat).
To break this link, right-click on the anchor unit and select the "Clear anchored
units" command from the contextual popup menu.
Development note: this feature is still a work in progress, and as of v1.0 is not
currently working as intended in all situations.
78
Group
Select this command to bind all the selected units to each other. Moving or
rotating any unit that has been grouped with other units will also move or rotate
the other units in the group, and keep them in the same relative positions.
This feature should be particularly useful when moving or pivoting formations of
soldiers.
To ungroup one or more units, select a grouped unit/s and choose the "Remove
from Group" command from the contextual popup menu.
Development note: this feature is still a work in progress, and as of v1.0 is not
currently working as intended in all situations.
Connection Panel
Press the [C] hotkey to open the Connection panel, or click on the “Connection”
button on the Commands panel. If the Commands panel is hidden or disabled,
you can access the “Connection” panel from the BG button’s popup menu,
instead.
If you are the host and wish to host a game session, click on the “Host Game”
button. If you are a player and wish to join a game session, click on the “Join
Game” button. The “Disconnect” button will be dimmed (disabled) unless you are
hosting a game session or have joined a game session.
79
If you are the Host:
Type in your username. For port number, use 1626, unless your firewall, router,
and/or ISP requires you to use a different port to connect. Select your chat text
color from the list of 10 colors listed in the “Chat Color” pulldown menu.
Once a host attempt succeeds, the Connection panel automatically closes and the
Chat window opens. The BG button will appear to be glowing or lit from within, to
visually indicate your hosting status.
If your attempt to host a game session fails, see the “Troubleshooting” section,
below.
A message in the Chat window will tell the host his/her internal IP address,
(which, if not behind a router, is also the external IP address). If the host is
behind a router, he/she can press the “IP” button on the Chat window and his/her
external IP address will be shown in the chat output pane a few moments later.
The host must inform the players that will be joining the game session (via the
Battlegrounds Lobby, e-mail, a third-party chat client, by voice chat, or by
telephone) of his/her IP address, which they will need in order to join the game.
80
If you are a Player:
Type in your username and the IP address of the game’s host. Select your chat
text color from the list of 10 colors listed in the “Chat Color” pulldown menu.
When you successfully connect to a game session, the Connection panel
automatically closes and the Chat window opens. The BG button will appear to be
glowing or lit from within, to visually indicate your connected status.
If your attempt to join a game session fails, see the “Troubleshooting” section,
below.
Every player must have a unique username. If a player logs in with a username
that is already in use by another player, he or she will be automatically booted
from the game, or may not be able to join the game session at all.
A player will also be automatically booted if they log in using a different version of
BGE than the host is using. Version parity is required for multiplayer games.
If you are already logged into a game and wish to disconnect, open the
Connection panel and press the “Disconnect” button to log off. Logging off will
automatically close the chat window, if it is open (exception: if you are the host,
the Chat window will not close, so that you have a chance to save the Chat log).
81
If you have lost your connection to the host, disconnecting normally will not work,
and you will need to force a disconnect by holding down the [SHIFT] key while
clicking on the “Disconnect” button.
If the host logs off before the players, the players will be notified that the host
has logged off (exception: the players won’t be notified if the host force-quits
BGE, or if he has crashed out of the program).
Whenever you successfully host or join a game session, your login settings are
saved to your hard drive. The next time you want to join or host a game, those
settings will be pre-filled in for you.
Automatic Media Syncing with Connected Clients
The host’s client automatically sends media to connected clients when it detects
that the connected client does not already have the media locally. This media
syncing includes unit tokens, audio clips, portrait art, and visual aids, but does not
include game boards.
A placeholder game board will be displayed on connected clients’ screens if the
game board is not available locally (game boards are never transmitted by the
host). Unit tokens and portraits will be displayed with a placeholder graphic until
the necessary artwork is received.
This player has not yet received the token artwork
for this mini, so a placeholder graphic is displayed
Media over 2 MBs (in uncompressed size) will fail to transfer, due to a limitation in
BGE’s networking protocol. Token art, portrait art, visual aids, and audio clips are
sent without a progress bar.
Media that is over 2 MB in size (e.g., game boards, background music, large
visual aids, etc.) should be sent to the players using an external media bundle
(see “Game Media Bundles”, below).
82
Game Media Bundles
BGE supports external media bundles, which make it possible for the host to send
media assets to his/her players long before they are needed in the game session.
Such assets will not be revealed to the players until the host calls for them, at
which point they will be presented immediately.
Game Media Bundles (sometimes called external media bundles) are a convenient
means for the host to distribute all the media necessary for a Game File prior to
the game session itself. Game Media Bundles offer a great alternative to having to
rely on peer-to-peer media transfers, which can sometimes be slow, depending
on the host’s upload bandwidth, and which can be furthered hampered if you are
using voice chat software in conjunction with BGE.
For instructions on creating a Game Media Bundle, see the “Export Game Media”
command, below.
The Chat Window
Press [TAB], or press the “Chat Window” button in the Commands panel, to open
or close the Chat window. The Chat window is only available if you are hosting a
game session or if you have joined a game session.
You can resize the Chat window and position it anywhere you want (even on a
second display, if you have one). The Chat window remembers its size and
location between game sessions.
The Chat window is comprised of the following elements: a Participants List, three
grey buttons (four, if you are the host), a chat input field, and a chat output
pane.
The Participants List is explained in its own section (see “The Participants List”,
below). It is used to send private messages to groups or individuals.
To the right of the Participants List are three grey buttons (four, if you are the
host). If you position the mouse cursor over any of the buttons, a ToolTip will
appear to tell you what the button does.
83
The chat input field is where you type text messages to communicate with other
participants. After typing your text, press [RETURN/ENTER] to send the message.
You can use the standard Cut, Copy, Paste and Select All commands in the chat
input field. These work via the standard keyboard shortcuts for the platform. The
chat input field also accepts multi-line text snippets that are pasted into it, or
inserted via a chat macro.
The tilde key (right below the ESC key) is reserved for use with VOIP programs
like Ventrilo that have a push-to-talk feature. You can use the tilde key for this
purpose, even with the chat window open, and the tilde won't get typed into the
chat input field.
The chat output pane is where everyone’s sent messages appear. Each entry is
specially formatted and color-coded to make it easy to pick out the information
you’re looking for.
Many messages that appear in the chat output pane will also appear briefly in the
top-left corner of the game table window (where the Zoom Level Indicator is).
This should be useful for users who keep the Chat window closed (e.g., in faceto-face games, or during solo games).
Dialogue is presented with the speaker’s name preceding it, and in the chat color
chosen by the user when he/she logged into the game session.
Private chat messages are always shown in red, and in italics.
System-generated chat messages will appear in the chat output pane when
certain actions occur, such as a card being drawn, the dice being rolled, the Turn
Sequence being stepped, etc.
If you are the host, an “IP” button will appear in the Chat window. Press this
button to have BGE report your external IP address in the chat output pane. Your
external IP address is what the players will need in order to join the host’s game
session, if they are logging in from outside the host’s local network and the host’s
computer is behind a router.
The button labeled with a “…” is for Text Macros. The use of this button is
explained in its own section (see “Text Macros”, below).
The “Bell” button is for calling someone’s attention, particularly useful if it is that
person’s turn and they are not responding, and you suspect they may have “gone
AFK” (short for “away from keyboard”). The Bell can be used to ping everyone at
once, or you can use the Participants List to select a group or individual to ping.
Whoever is the target of a bell ping will hear a bell chime sound effect (and even
if their audio has been muted, they will see a message in the Chat window).
84
The “Roll Dice” button in the Chat window allows you to either load a dice macro
or to auto-roll it (by holding down the [SHIFT] key while clicking the button). The
first time the "Roll Dice" button on the Chat window is pressed in a game session,
it will simply open the Dice Roller window. After that, clicking on the "Roll Dice"
button in the Chat window will show a popup menu allowing you to load or autoroll any of your dice macros.
The Roll Dice button gives you quick and easy access to all of your dice macros.
The scrollwheel can be used to scroll the contents of the chat output pane up or
down when the mouse cursor is over that pane (if the mouse cursor is not
positioned over the chat output pane, the scrollwheel will instead perform its
standard action of zooming the game table in or out, or of rotating a unit/s,
depending on whether one or more units are selected).
The host can [SHIFT]-double-click on the chat output pane to make it editable.
[SHIFT]-double-clicking it again takes you out of edit mode. Note that all editing
done in this manner is not transmitted to other connected users.
Double-clicking on the chat output pane will copy the contents of the chat output
pane into the clipboard (i.e., into RAM), so that you can paste the content into a
word processing app like NotePad, TextEdit, or MS Word, in order to keep a Chat
Log of the game session.
85
Issuing Commands from the Chat Window
Commands can be issued from the Chat window to set the zoom level, to load a
server-based game board, to remotely launch a web page on the players’ screens,
to resize units, or to rename units. The specific commands and how they work are
discussed below.
Set the Zoom Level
Anyone can set the zoom level from the chat window by typing in a speciallyformatted command. For example, typing "zoom=43.7" (sans quotes) into the
chat input field and hitting [RETURN/ENTER] will set the zoom level to 43.7%.
This allows for a greater degree of control than other methods of setting the
zoom level. The valid range for the command is any numerical value between 20
and 200 (floating point numbers are allowed).
Note that this command only sets the zoom level on the local client, not on
remote clients.
Load a Server-Based Game Board
The host can load a server-based game board by typing in a specially-formatted
command. Typing “board=theURLtoTheGameBoard” (sans quotes) into the chat
input field and hitting [RETURN/ENTER] will cause every connected client,
including the host, to load the specified game board from a server.
The URL you provide could be to your own game board that you’ve uploaded to
your personal webspace, or it might be a game board you saw elsewhere on the
internet.
Launch a Web Page
The host can launch a web page on connected players' screens by typing in a
specially-formatted command in the chat window and pressing [RETURN/ENTER].
The format for this command is "url=" (sans quotes) followed by the complete
URL. The web page will load using the default web browser on each computer.
A sample "Web Links" file in the "Text Macros" folder is provided to help illustrate
the feature’s usefulness. Feel free to replace the file’s content with your own
favorite websites.
86
Rename Units
Hosts can rename the selected unit or units by issuing a command in the Chat
window. For example, typing "rename=Fate Card" (sans quotes) in the Chat
window and then hitting [RETURN/ENTER] will edit all of the selected units so
that they are called "Fate Card".
Resize Units
The host can resize the currently-displayed token on the selected unit or units by
issuing a command in the Chat window. For example, typing "resize=35" (sans
quotes) in the Chat window and the hitting [RETURN/ENTER] will edit all of the
selected units so that they currently-displayed token is scaled to 35%.
The host can also resize all the tokens at once on a selected multi-token unit or
units by issuing a command in the Chat window. For example, typing
"resizeall=35" (sans quotes) in the Chat window and then hitting
[RETURN/ENTER] will edit all of the tokens on all of the selected units so that
they are scaled to 35%.
Define the Stagger Offset
The host can also specify a specific stagger offset by issuing a command in the
Chat window. For example, typing "stagger=61,0" (sans quotes) in the chat
window and the hitting [RETURN/ENTER] will set the horizontal stagger amount
to 61 pixels (1 cell) and the vertical stagger amount to 0 (none).
The Participants List
The Participants List, located on the left side of the Chat window, lists all the
participants in the game session, and it also shows which of the two groups each
participant belongs to. The two possible groups are “Host” and “Players”.
The “Host” group can only ever contain one person, and it must be the host of
the game session. It is not possible to leave or to join this group.
In addition to managing groups, the Participants List is also used to send private
text messages. To send a private message to a particular person, simply click on
the person’s name in the Participants List. The name will be highlighted in red, to
indicate that they are the target of a private message. Type your message in the
Chat Input field and press [RETURN/ENTER] to send the message. Only the
intended recipient will receive the text message. Private messages always appear
in red in the Chat Output pane.
After sending a private message, the red highlight in the Participants List automatically disappears, and your next message will not be private. If you intend to
send more than one private message in a row to the same individual or group,
you can lock the chat target by holding down the [SHIFT] key when selecting
your chat target. To unlock the chat target and revert to public messaging, click
on a blank line in the Participants List.
87
The Text Macro Panel
Text macros are snippets of commonly-repeated dialogue or text. Press the “…”
button on the Chat window to pull up a menu listing all your available Text Macro
files. Choosing a Text Macro file opens the Text Macro panel and loads the text
macros contained in the file.
Double-clicking a text entry (a row) in this window will paste the text from the
right-hand column into the Chat Input field (where it may be tweaked or edited
prior to actually sending the message with the [RETURN/ENTER] key). Chat
Macros should be prepared prior to a game session and saved in a plain text file
using a tab-delimited format.
If you have some Text Macro files that you don’t wish to use in the current game
session but don’t want to throw them away, place them in the “Disabled Text
Macros” folder, which is located in BGE’s “Text Macros” folder. To re-enable those
Text Macros, simply move the files back into the “Text Macros” folder.
88
Dice Roller
Open the Dice Roller panel by pressing the [R] hotkey, or by clicking the “Roll
Dice” button in the Commands panel. This window (shown below) is called the
Dice Macro Configuration panel.
This panel can be opened independently of other panels, but it is not resizable.
Within a given BGE session, the Dice Macro Configuration panel remembers
where on your screen it was last placed, so that it always opens there instead of
centered on the main screen.
The Dice Macro Configuration panel supports many common dice mechanics,
making it suitable for use with practically any game system which uses dice. It
might seem a little intimidating at first, because there are so many controls and
options to chose from, but you will (hopefully) quickly come to appreciate the
power and control that BGE’s Dice Roller offers, and the fact that you can do
everything without having to do any scripting or learn any sort of die-rolling
syntax. It helps to keep in mind that the options in the top half of the panel
determine how each individual die in the dice roll is processed, and the bottom
half of the panel determines how the overall dice roll is processed.
89
The Dice Roller can be used for one-off die rolls, or it can be used to create Dice
Macros (pre-configured dice roll settings that you will use often). This section
deals with the general operation of the Dice Roller, but also see “Creating and
Using Dice Macros”, below.
There are a total of 11 dice colors available, including red, green, brown, yellow,
orange, turquoise, purple, magenta, grey, black, and white. Fudge dice are
available in 4 colors: red, blue, white, and black. A dX (x-sided die) is available
only in the blue dice set. Use the “Dice Set” menu to select the die color you wish
to use for your dice roll.
Clicking on a die icon at the top of the screen will pull up a menu from which you
can choose how many dice to roll. You can have up to two die types or die colors
in a single roll. Up to 30 dice may be rolled at once (exception: only 9 percentile
rolls at once). The die types included in BGE are d2, d3, d4, d6, dF (Fudge dice),
d8, d10, d12, d20, d100 (percentile), and dX (x-sided die). Note that not all the
dice are available in all colors. For example, the blue dice set is the only one with
a dX, and the Fudge dice are only available in blue, black, red, and white.
By checking the “Tally Successes” checkbox, each die in a dice roll can be
evaluated for success or failure, according to conditions you specify.
Clicking on the “Mod” (short for Modifier) button in the top right corner of the
panel will add a modifier to the overall dice roll. You can then specify whether it
should add to, subtract from, multiply, or divide the result of the dice roll, and by
how much. Up to two modifiers can be applied to a dice roll.
The “Apply Roll Result To:” checkbox and pulldown menu near the bottom of the
Dice Macro Configuration screen can be used to apply a dice roll result to any
custom value listed in the Turn Sequencer. The most common use of this feature
will be to roll for initiative at the start of every turn, but the feature could also be
used for other things, such as randomly determining a creature's Hit Points.
Clicking on the “Reset” button at the bottom of the panel will clear any settings
you have entered, in case you wish to start over in configuring your dice roll.
In multiplayer games, you can use the “Send To” popup menu to select who
should receive the die roll. You can choose to send it to everyone, to just the
host, or to a single player. If you wish to make a die roll without anyone else
seeing it, just send the die roll to yourself.
When more than one die type or color has been assigned to a dice roll, BGE can
track separate totals for the primary dice and the secondary dice. Just to the left
of the secondary die graphic is a grey button that you can click to specify whether
the secondary dice should be added to, subtracted from, or used to multiply or
divide the results of the primary die/dice. Each time you click on the button, the
90
arithmetic function changes. After the “Divide” button, there is a blank button.
This will allow you to keep the secondary dice results separate from the primary
dice results, and will cause the totals for each die type to be tracked separately.
You can use up to two different die types and/or die colors in a single roll.
Set your die rolling options as desired, then click on the “Roll” button. The Dice
Macro configuration screen will be replaced by the Dice Roll Results screen.
91
The “Dice Roll Results” window shows the results of every roll. This window is
dynamically sized according to how many dice were rolled, to keep the window
from being overly-large if only a few dice were rolled.
Any re-rolls (e.g., additional dice rolls that were “spawned” by an open-ended
roll) will be reported in yellow text below the die that spawned the re-roll.
Consecutive re-rolls (when a re-roll spawns another re-roll) are separated by a
minus sign or a plus sign, as appropriate (exception: re-roll results are separated
by a comma instead of a "+/-" sign if the dice are not being totaled).
A summary of the dice roll appears near the bottom of the “Dice Roll Results”
window, in white text. The contents of the dice roll summary are determined by
the settings and options that were selected in the Dice Roll Configuration panel.
Dice roll summaries automatically appear in a smaller font size (and with smaller
line spacing) if the dice roll summary is over a certain length. This allows for
longer table results when using Reference Tables (see “Reference Tables”,
below).
You can click on any of the rolled die graphics to remove that die from the result
and have the dice re-totaled/re-evaluated. Note that removing dice from a roll is a
local event only; it is not transmitted to other connected users.
In multiplayer games, the results of the dice roll are reported in blue text in the
chat output pane of the Chat window, which keeps a log of all die rolls for future
reference. The name of the dice macro (which is usually also the reason for the
roll) is included in this report, for clarity (unless the dice macro is un-named). All
die roll reports that appear in the Chat window will also appear briefly in the
game table window (providing useful notification for users who happen to have
their Chat window closed).
92
If another player or the host rolls the dice, a Dice Roll Results panel will open on
your screen (exception: incoming die rolls will not open the Dice Results window if
you are busy creating a dice macro at the time the roll is received, or if you are
the host and are in the middle of using a Drawing Tool). Be sure to space out
your die rolls, to give everyone a chance to see what you rolled before rolling
again.
If you are typing in the Chat window when a dice roll is received, the Chat
window will retain focus even though the Dice Results panel opens (it opens
behind the Chat window). This allows you to continue typing uninterrupted.
In Preferences, you can set the Dice Results panel to never open when incoming
dice rolls are received. Another Preferences setting determines whether dice rolls
are “animated” or not. Yet another Preferences setting determines the length of
the die rolling sound, or if no die rolling sound should be played.
BGE’s Dice Roller can evaluate individual dice (including re-rolls) for success or failure.
A dice macro can be configured to look up the results of the roll on a Reference Table.
93
If a dice roll has both the "Show total rolled" and "Show total modified roll"
options disabled on the Dice Macro Configuration panel, the actual die rolls will be
included in the Chat window's dice roll report. Otherwise, the roll total and/or the
modified roll total will be included in the dice roll report in the Chat window, but
not the actual die rolls (which often aren’t important).
Dice Plug-in System
Dice are handled as plug-ins in BGE. This allows you to disable any dice that you
don’t want to appear in the Dice Macro Configuration panel, so that they don’t
clutter up the interface (for example, if the game you are playing uses only d6s),
and/or to add additional dice beyond the ones that are included with BGE.
To disable a particular die type, just move the die file from BGE’s “Dice Sets”
folder into the “Disabled Dice Sets” folder. To re-enable a particular die, move the
die file back to its original location. The only dice that you should never disable
are the blue dice, because in the event that another player rolls using dice that
you have disabled, the dice will be re-mapped to be blue dice on your screen.
The d6s with digits are enabled by default when you first install BGE, but d6s with
pips are included with BGE if you prefer to use them instead. BGE comes with
four sets of d6s with pips (instead of digits) in white, blue, red, and black. To
enable the d6s with pips, first disable the d6s with digits, then move the d6s with
pips into the corresponding subfolders.
Additional custom dice (e.g., Bloodbowl block dice and HeroQuest dice) are
available for download from the Battlegrounds Games forums.
Creating and Using Dice Macros
Once you’ve configured a dice roll that you plan on using again in the future, you
can save it by clicking on the “Save Macro” button. A saved roll is called a dice
macro, and the name of the dice macro will be whatever text you entered in the
“Roll” description field at the top of the Dice Macro Configuration panel.
There are two types of dice macros in BGE: global dice macros and dice macros
that are attached to units. To create a global dice macro, simply open the Dice
Roller, configure your dice macro, and save it. To attach a dice macro to a unit,
you need to open the Dice Macro Configuration panel by using the “Add Dice
Macro” command, which is available from the “Dice Macros” submenu in a unit’s
contextual popup menu.
Existing global dice macros may be attached to a unit by first selecting the unit/s
that you want to attach the dice macro to, then loading the global dice macro you
want to attach to the unit/s. Hold down the [SHIFT] key in the Dice Macro
Configuration screen and the "Save macro" button’s text will change to say
"Attach macro". With the [SHIFT] key still pressed, click on the button and the
global dice macro will be attached to the selected unit/s.
94
The “Inspect Macro” button on the Dice Roll Results screen is used to return to
the Dice Macro configuration screen and automatically re-load the settings that
were used to perform a given dice roll. The “Inspect Macro” button is extremely
helpful when creating complex dice macros. We recommend that you perform
“test rolls” with your initial dice macro settings, then use the “Inspect Macro”
button to reload your last settings, make tweaks and adjustments to your dice
macro until you get the settings just right, and only then save the dice macro.
To load a global dice macro, access the “Dice Macros” submenu from the BG
button’s popup menu, then select the global dice macro you wish to load. To load
a dice macro that is attached to a unit, select “Dice Macros” from the unit’s
contextual popup menu.
You can load any dice macro (including those attached to units) by clicking on the
Roll Dice button in the Chat window and selecting the dice macro you want from
the menu that pops up.
The “Roll Dice Macro…” button in the bottom left of the game table window
allows you to either auto-roll a dice macro (which you will choose from a popup
menu) or to load it in preparation for last-minute adjustments to the roll (by
holding down the [SHIFT] key while clicking the button; the text on the button
will change to read “Load Dice Macro…”).
If the Dice Macro Configuration panel or the Dice Roll Results panel are already
open, you can click on the “Load Dice Macro…” button in the lower left of the
panel and a menu will pop up from which you can select any dice macro to load.
Holding down the [SHIFT] key while selecting a dice macro will automatically roll
that macro. This is useful for times when you know you don’t wish to make any
last-minute adjustments to the dice roll. Auto-rolling works whether the roll is
initiated from the “Roll Dice Macro” button on the Dice Roller window, or from the
“Roll Dice” button on the Chat window, or even when you select a dice macro
attached to a unit.
To store global dice macros that you don't want to be available in the current
game session, but which you don't want to throw away, place the dice macro file
in the “Disabled Dice Macros” folder, which is located in the “Dice Macros” folder.
To re-enable those dice macros, just move them back into the “Dice Macros”
folder.
95
Reference Tables
Reference tables can be used in a dice macro to essentially convert a dice roll into
a text entry. This is done by looking up the dice roll on a table and outputting the
text that corresponds to that dice roll result. This feature can be a huge timesaver when playing games that use a lot of charts & tables (e.g., Phoenix
Command).
Creating a reference table is very simple. You can use a program like Microsoft
Word or Excel, or even TextEdit or Notepad, to make a tab-delimited text file. You
can use the “Random Weather” reference table included with BGE as a guide. At
the beginning of each line of the text file, specify a number or range of numbers
(e.g., “1-3”), then press TAB, then type in the text that corresponds with that dice
roll result. Press [RETURN/ENTER] at the end of each line of text except after the
last line of your table. When you’re done inputting your table data, save your text
file and place it in "[BGE Folder]\Dice Macros\Reference Tables". It will be
available to select as a reference table the next time you open BGE’s Dice Macro
Configuration panel.
You can also make a reference table open-ended on either end of the scale. If
you end the range portion of a line with a "-" or a "<" symbol, it will accept openended results on the low end of the table's range, and if you end the range
portion of a line with a "+" or a ">" symbol, it will accept open-ended results on
the high end of the table's range. For example, if I want a result to come up on a
roll of 0 or less, I would type “0<” as the number range on the first line of the
table. If I want a result to come up on a roll of 10 or higher, I would type “10>”
as the number range on the last line of the table.
It’s worth noting that a reference table does not need to be distributed to the
other players (unless they need to create a dice macro of their own that
references that table).
96
Reference
A visual reference (generally a chart or table, possibly a diagram) can be assigned
to a dice macro as a "Reference" (not to be confused with a Reference Table).
This makes it easy to consult a chart, table, or other bitmap before or after rolling
the dice.
Clicking on the "Choose..." button in the Reference section of the Dice Macro
Configuration screen lets you browse all the charts and tables in the Library
folder, including those in artpacks. [SHIFT]-clicking on the "Choose..." button in
the Reference section of the Dice Macro Configuration screen lets you browse all
the images in the Visual Aids folder, including those in artpacks. Clicking on the
name of the Reference file chosen opens the referenced item in the Library
window (it can be useful for deciding what modifiers to apply to a die roll).
A "Clear" button in the Reference section of the Dice Macro Configuration screen
lets you remove the Reference from a dice macro.
If a dice macro is rolled that has a reference item attached to it, the Die Roll
Results screen will have a "View Reference" button on it (just above the buttons
for navigating the Dice Roll History. Clicking on the "View Reference" button
opens the referenced item in the Library window (which appears above the die
roller window, and is useful for large charts that need panning). [SHIFT]-clicking
on the "View Reference" button opens the referenced item as a Visual Aid,
instead (which appears under the Dice Roller window, but is useful for charts that
you want to stick around).
97
Browsing the Dice Roll History
BGE keeps track of every dice roll in a given game session. You can browse the
Dice Roll History by clicking the “Browse Roll History” button in the Commands
panel, or by selecting the “Browse Roll History” command, which is available from
the “Dice Macro” submenu of the BG button’s popup menu.
By default, the Dice Roll History always shows the last roll made. Navigation
buttons at the bottom of the “Dice Macro” window can be used to look up a
particular roll.
98
Alternate Die Rolling Method: “Game Table Dice”
BGE also allows you to place dice components and coin components directly in
the game table window, and interact with them there, instead of in the Dice
Roller window. For some boardgames, wargames, and dice games, this style of
dice rolling could provide for significantly faster gameplay, particularly in games
that use simple mechanics and don't require a lot of modifiers, in which using dice
macros would be overkill.
A secondary purpose of this feature is to make certain boardgames, wargames,
and dice games playable in BGE which would be unplayable if the dice were
always confined to the Dice Roller window. For example, some game systems
require "opposed rolls", where an attacker and defender must line up their dice
after rolling them, such that certain dice cancel out the opponent's dice. Another
example would be games with Yahtzee-like dice rolling mechanics, where you
want to keep some dice from your first roll, but re-roll the rest.
Another use for this die-rolling method is any game which requires you to roll
more than 2 die types or die colors in a single roll (since BGE's dice macros only
support two die types or die colors).
Most users will want to make use of this feature using the free Dice artpack, but
the feature will work with your own custom images, as well.
99
A sample of the dice images/components from the free Dice artpack
Here’s how it works: If one or more components with multiple tokens are
selected, the [CONTROL-R] hotkey ([COMMAND-R] on a Mac) will "roll" the "die"
or "dice"; the program will temporarily remove the dice component/s from the
game table window, randomly select one of the component's tokens and assign it
as the current token, and then place the dice component/s back on the game
table window. Rolling dice in this manner will play a sound effect while the dice
are being "shaken" (only if multiple "dice" are being rolled), and will play a sound
of dice landing on the table once the current token has been randomly set and
the unit redrawn on the game table window.
If a component unit contains only two tokens and the component's name includes
the word "coin", BGE will play a coin-flipping sound instead of a die-rolling sound.
The sound/s for rolling dice on the game table window are determined by the
Preference setting for dice sounds. Note that this feature works only with
components, not with minis.
100
Turn Sequencer
Open the Turn Sequencer window by pressing the [T] hotkey, or by clicking the
“Turn Sequencer” button in the Commands panel.
The Turn Sequencer is a highly-configurable, self-sorting, table-based list, which
can be opened independently of other panels. It supports both turn-based (e.g.,
Monopoly, Dominion) and phase-based (e.g., Car Wars) sequencing mechanics,
as well as systems that use a perpetually-increasing tick/impulse sequencing
mechanic (e.g., Phoenix Command).
The host can configure the Turn Sequencer to display the information he needs
for the game system being played (see “The Turn Sequencer Setup Wizard”,
below).
The Turn Sequencer can be resized, and the window remembers its size and
location between game sessions.
In the top left corner, the Turn Sequencer keeps track of the current game turn
(often called a Round).
The table-based portion of the Turn Sequencer automatically sorts the units in the
order in which they are to act each game turn, with the currently active unit
shown at the top of the list. On the game table, the active mini is highlighted with
a blue halo. The blue halo overrides the Status halo, if one is being used for the
mini.
The Turn Sequencer lists only the minis or components (e.g., vehicle tokens or
spaceship tokens) on the game table that you have explicitly specified that you
want listed by using the “Include in Turn Sequence” command. This allows for
non-combatant minis to be deployed on the game table without cluttering up the
Turn Sequencer.
Each row on the Turn Sequencer is color-coded according to the unit's Team
(green, red, or grey for Neutral units).
Sideboarded units are not listed in the Turn Sequencer, but hidden units are.
The host or the owner of a unit can easily edit the data/values for any unit by
double-clicking on the unit's row. This puts the row into edit mode. After making
any changes, click on the unit’s name (or click on another unit) to exit edit mode.
The updated data will be automatically transmitted to other connected users.
The scroll wheel on the mouse can be used to scroll the Turn Sequencer when
the mouse cursor is positioned over the Turn Sequencer list. Hold down a
modifier key (the [CONTROL] key on Windows, or the [COMMAND] key on Macs)
to scroll the Turn Sequencer horizontally instead of vertically.
101
By pressing the “Step” button (short for “Step the Sequence”) at the bottom right
of the Turn Sequencer, the host advances to the next mini on the list, making it
their turn to act. For players, the “Step” button on the Turn Sequencer is only
enabled/visible when the player controls the active unit.
The Chat window reports who's turn it is to act any time the active unit or the
Turn number has changed. This same information will also be shown briefly in the
top left of the game table window (where the Zoom Level Indicator is). If the
Turn Sequencer has been configured to use phases, the phase name or number
will also be shown briefly anytime the turn sequence is stepped.
After the last unit on the list has taken their turn, the Turn Counter at the top of
the panel increments by one, and the process begins all over again, until the
game ends.
The host can click on the “Turn:” label on the Turn Sequencer to reset the Turn
Counter to 1. In addition, the Turn Counter at the top is editable by the host.
Click on it to make it editable, type in the desired turn number, then click on it
again to make it non-editable and update all connected players with the new Turn
number.
Setting the Turn Number to zero takes the game out of “combat time”. The “End
My Turn” button (or “Step the Sequence” button, for the host) is not shown when
the Turn Number is set to zero.
With the Turn Sequencer open, players are able to see when their turn is coming
up, so that they can be ready to act. This should help games with many players
move a bit faster.
If the Turn Sequencer has been configured to show the Status column, the host
can change the status of a unit by clicking on its Status color chip in the Turn
Sequencer. A menu will appear that allows you to select the new Status. Players
may only change the Status of units they own.
The “Load Settings…” and the “Configure…” buttons do not appear on the
players’ view of the Turn Sequencer.
[CONTROL]-click on a unit in the Turn Sequencer to auto-center the game table
on that unit (exception: players cannot auto-center on hidden or host-controlled
units). Clicking on the portrait or token in the Turn Sequencer will also autocenter the game table on that unit. This auto-centering feature can be useful for
finding “lost” units on the game table.
102
The token names shown in the Turn Sequencer are governed by permissions, so
as not to reveal too much information. Enemy-controlled units will be listed
merely as “an enemy unit”, rather than with a name.
Other unit data shown on the Turn Sequencer can also be obfuscated for nonowners, depending on how the host has configured the Turn Sequencer Setup
Wizard.
The “Roll Initiative” Button
There is a "Roll Initiative" button on the Turn Sequencer, which only appears for
the host. Pressing this button will automatically roll initiative for all combatants
(i.e., every unit listed in the Turn Sequencer) by auto-rolling an attached Dice
Macro called "Initiative". If the dice macro has been properly configured, the
result of the roll will be automatically applied to the "Initiative" column on the
Turn Sequencer, and the units will be automatically re-sorted in their proper
acting order. Units that do not have an "Initiative" dice macro attached to them
will retain their prior initiative value (if any) on the Turn Sequencer.
Dice rolls for initiative that have been initiated from the Turn Sequencer are not
displayed in the traditional manner (i.e., they are not shown in the "Dice Roll
Results" screen or reported in the Chat window), although players will hear the
die rolls being made (unless they've opted not to hear die roll sound effects).
However, the initiative rolls are added to everyone's Dice Roll History, should they
wish to inspect the rolls.
The Turn Sequencer’s “Undo” Button
There is an “Undo” button on the Turn Sequencer (it has an icon on it that looks
like a circular arrow), which allows the host to go back one step in the sequence
(useful in case you stepped the sequence by accident, or if two users accidentally
stepped the sequence simultaneously). Note that loading a Game File will clear
the Turn Sequencer's Undo buffer.
The “End my Turn” Button
The “End My Turn” button appears centered along the bottom edge of the game
table window, and is a convenient way for players to step the sequence if they
don’t have the Turn Sequencer open. This button appears only if the game is in
“combat time” (i.e., Turn 1 or higher) and only if the player owns the currently
active unit (the top-most unit listed in the Turn Sequencer). On the host’s screen,
the button’s text reads “Step the Sequence”, rather than “End My Turn”.
You can also end your turn with a hotkey. Pressing [SHIFT-RETURN] while the
"End My Turn" or "Step the Sequence" button is showing will end your turn, as
long as the Chat window does not currently have focus.
103
It is recommended that you size and position the Chat window in such a way as
to not obscure the “End My Turn” button, since easy access to this button will
save you time when you need to use it.
The host may use the [SHIFT-RETURN] hotkey at any time, even if there are no
units listed in the Turn Sequencer and the “Step the Sequence” button is not
currently being displayed.
Examples of Turn Sequencer Configurations
To help understand the various ways the Turn Sequencer can be configured to
best support particular games, here are some illustrative examples.
Here the Turn Sequencer has been configured for playing “Asteroid Zero-Four” (by Task
Force Games). The “Notes” column is especially useful for tracking disparate data that
isn’t shared by all the unit types. This game uses the Turn Sequencer only for tracking
unit data, and not for actual turn sequencing.
104
Here the Turn Sequencer has been configured for playing “Valkenburg Castle” (by Task
Force Games). The units are sorted by Team and by Token Name, to make it easy to find
any given unit quickly. This is particularly important in a game involving several dozen
units on the game table at once.
105
Here the Turn Sequencer has been configured for playing Car Wars (by Steve Jackson
Games). The” Speed” value of the vehicles automatically determines which phase/s of
the game turn each vehicle gets to move on, by using a Phase Chart. Any ties in “Speed”
are resolved according to the “Reflexes” score of each driver, with the higher Reflexes
acting first. In the event of a tie in both “Speed” and “Reflexes”, the acting order would
be randomly determined at the beginning of each phase. This is a great example of how
BGE, with its built-in support for game turns with discrete phases, segments, impulses, or
ticks, can greatly speed up play. Every player can clearly see when their turn to act is
coming up, and be ready for it when it does.
106
Here the Turn Sequencer has been configured to play the Aliens Boardgame (by Leading
Edge Games). The Marines only get to act during the “Marines Move/Fire” phase of each
game turn. The “Sequence” value is used to set their acting order, which never changes.
The Aliens have intentionally been left off the Turn Sequencer in order to speed up play,
but the phase names still help keep the action moving quickly.
107
The Turn Sequencer Setup Wizard (host only)
Clicking on the “Configure…” button on the Turn Sequencer opens this panel,
which guides the host through a number of steps required to configure and
customize the Turn Sequencer to best support the specific game being played.
The Turn Sequencer Setup Wizard lets you define what data should be tracked for
each unit listed in the Turn Sequencer, who has permission to edit said data, and
what the defaults should be for each value, if any. You can assign two values that
you define to be used as sequencing traits, for determining sequencing for each
turn (automatic sorting to determine who gets to go first, second, etc.).
In addition, there are three sorting options for the Turn Sequencer, "Token Name
(Alphabetical)", "Team", and "Status", that are particularly useful if you wish to
use the Turn Sequencer just for tracking unit data, and not for actual turn
sequencing.
If the host has opted to use hidden columns in the Turn Sequencer (values set to
be visible to the host only), the hidden column will appear on the Players' Turn
Sequencer, but it won't show any data.
The settings specified using this Wizard may be saved and loaded by the host,
much like dice macros. When you save a Game File, the Turn Sequencer settings
currently in use will be included in the Game File.
If you have some Turn Sequencer Settings that you wish to disable temporarily,
move them into the “Disabled Turn Sequencer Settings” folder, which is located in
BGE’s Preferences folder, inside a folder called “Turn Sequencer Settings”.
108
Unit Manager (host only)
Press the [U] key to bring up the Unit Manager, or click the “Unit Manager”
button in the Commands panel. Only the host may access the Unit Manager.
This panel is used for controlling which units are visible, hidden, locked or tiled,
which are on the Sideboard, and what the stacking order of the units should be
(this is useful because you may want a unit to be shown over another unit, but
under a third unit). Your chosen settings will be updated in real time on the game
table.
The arrow buttons on the right side of the Unit Manager are used to change the
stacking order of the unit you select in the list. The button with an eye symbol on
it controls whether a unit is hidden or visible. The button with an “S” symbol on it
controls whether a unit is Sideboarded or not. The button with a Lock on it
controls whether a unit is locked in place or not. The button with a “T” symbol on
it controls whether a component is a Tile or not. Lastly, the button with an icon of
a screen functions as a toggle for the “Use as Screen” setting. These buttons will
highlight or dim as appropriate when you select a unit in the list, to reflect the
current settings for the unit.
Units at the top of the Unit Manager list will be drawn on the game table above
lower-listed units. Tile components are one exception to this rule, but are best
placed low on the list to keep things organized. Free-Floating components are
also an exception to this rule, but are best placed high on the list to keep things
organized.
109
If you select a single unit, you can use the up and down arrow buttons to move
that unit higher or lower on the list. You can also use the Top or Bottom buttons
to move the selected unit to the top or bottom of the list with a single click.
If there are more units on the game table than can be displayed at once in the
Unit Manager list, you can scroll the list up or down using the buttons alongside
the unit list. Hold down the [SHIFT] key while clicking on either of those buttons
to scroll to the very top or bottom of the list with just one click.
You may also select several units at once, in a contiguous or non-contiguous
selection, for adjusting Sideboard and Hidden status. Hold down the [SHIFT] key
while clicking to make contiguous selections, and hold down the [COMMAND] key
(on Mac) or the [CONTROL] key (on Windows) while clicking to make noncontiguous selections.
The Unit Manager can also be used to quickly locate a unit on the game table.
Just double-click on a unit in the Unit Manager list to auto-center the game table
on that unit.
Draw Tools (host only)
BGE has a Draw Tools palette, which can be opened or closed using the [D]
hotkey, or by pressing the “Draw Tools” button in the Commands panel. Only the
host has access to the Draw Tools.
There are tools for drawing filled and unfilled rectangles, circles, polygons,
freeform shapes, lines, and even a text label tool. Controls on the Draw
Tools palette allow you to specify settings like line width, line color, and fill
color.
Each shape drawn with these tools creates a new component, which can
then be moved, rotated, or otherwise manipulated by the host, just like
any other component. A checkbox on the Draw Tools palette allows you to
specify whether drawn items and text labels should be automatically
hidden or not after placement.
Most of the Draw Tools display a custom cursor while they are selected, and most
of the Draw Tools can be used with snap-to-grid enabled in order to assist you in
drawing straight lines and creating uniformly-sized shapes. You can even disable
or enable snap-to-grid during a draw operation.
110
By default, a Draw tool deselects itself after a draw operation. However, holding
down the [CONTROL] key while selecting a Draw tool will put that tool into “sticky
mode”, meaning it will remain selected after use so that you can perform
repeated draw operations with that tool. You can turn off this “sticky mode” by
clicking on that draw tool again.
Text Labels
Text labels created with the text label Draw tool can be edited at a later date by
selecting the “Edit label text…” command from the label’s contextual popup
menu.
Text labels store their settings (color, font, font size, etc.) when a Game File or
Deployment is saved, and the settings are transmitted to connected clients during
multiplayer games so that the text appears identically on all clients. The rendered
text image itself (i.e., the bitmap) is not transmitted to other clients.
When creating a new text label, the last-used text label settings (font, size,
alignment, etc.) are automatically applied to the new text label. This makes it
much faster to create a lot of text labels in the same style.
111
Sending Visual Aids (host only)
In multiplayer games, you can send your players visual aids. Visual aids are
anything that can be shown in a picture or diagram: a cheat-sheet/rules summary
card, a CRT, an image of the game’s box cover, etc.
Open the Send Visual Aid panel by pressing the [V] hotkey, or by clicking the
“Send Visual Aid” button in the Commands panel. Only the host may send visual
aids.
Use the controls on the panel to select the image that you would like to send. In
multiplayer games, you can use the “Send To” popup menu to select who should
receive the visual aid. You can choose to send it to everyone, to a single player,
or to a group of players. When you’ve made your selection, press the “Send”
button.
When the file is done transferring to the specified clients, the visual aid will
appear on the recipient’s screen, atop the game board and units. It can be
dragged with the mouse to reposition it, if necessary.
When a player is done looking at the visual aid, he/she can double-click anywhere
on the picture to make it go away.
112
Library
The Library feature provides you with quick and easy access to reference
materials for your game system. If you have access to a scanner, you can scan in
reference material from your game’s rulebooks (such as charts, tables, lists, and
other printed game aids). Due to copyright restrictions, we cannot provide these
for you.
If you don’t have a scanner but have the reference material in PDF format, you
can also extract the images you need from the PDF (with the proper PDF
software) or even with a simple screen capture.
These reference material scans can be accessed in BGE simply by placing them in
BGE’s “Library” folder. You can even organize these reference materials by putting
them into subfolders (only one level deep, or BGE won’t have access to them). Be
sure to save your scans in JPG or BMP format.
Note that nothing in the “Library” folder is transmitted to anyone, so you needn’t
worry about breaking copyright laws, as this is considered personal use and is
therefore perfectly legal. Just don’t share such scans with others.
Open the Library panel by pressing the [L] hotkey, or by clicking the “Library”
button in the Commands panel.
Once you’ve selected the reference material you want to consult, click on the
“Select” button.
113
The selected item will open in a new window atop the game table window. The
content of the Library window is draggable, to allow viewing of media that is
larger than the Library window. When you are done consulting the reference
material, double-click anywhere on it to make it go away, or click on the Close
box on the window’s title bar.
Sending Audio (host only)
In multiplayer games, you can send your players audio files. Audio files can be
music clips, voice recordings, or sound effects. They can be set to play once or to
loop continuously (useful for mood music or ambient sounds).
Open the Send Audio panel by pressing the [A] hotkey, or by clicking the “Send
Audio” button in the Commands panel. Only the host may send audio.
Use the tools on the panel to select the audio clip that you would like to send.
You can either listen to each file you select by clicking on the Preview icon, or set
sounds to auto-preview using the checkbox provided. You can also choose at
what volume the sound should be played (relative to the recipient’s system-wide
volume setting).
In multiplayer games, you can use the “Send To” popup menu to select who
should receive the audio. You can choose to send it to everyone, to a single
player, or to a group of players. When you’ve made your selection, press the
“Send” button.
114
The audio is played on the recipient’s speakers (or headphones). A player can
choose to mute their audio output (useful for when they don’t want to disturb
someone else in the room).
There are two sound channels in BGE. One is reserved for looping audio, and the
other for non-looping sound effects. This means you can play a non-looping
sound effect (e.g., a car crash) even while a looping sound effect (e.g.,
background music) is playing.
To stop a looping sound from playing, open the Send Audio panel and press the
“Cancel” button. Loading a new Game File will also stop any audio that is
currently playing, as will selecting the “Clear All Units” command from the BG
button’s menu.
115
Card Table
BGE has built-in support for card decks.
Open the Card Table window by selecting the “Card Table” command from the BG
button’s popup menu, or by pressing [SHIFT-C], or by clicking on the “Card
Table” button in the Commands panel.
The card table will be empty, at first. Click on the “Select Card Deck” button to
select and load a card deck. When a deck loads, it is automatically shuffled. An
“Invert Deck” checkbox in the lower left of the Card Table window provides the
option of playing with an inverted (face-up) card deck. This option can only be set
by the host.
BGE comes with two sample card decks. One is a 54-card standard deck of
playing cards. The other is identical except it has had the jokers removed, so it
has only 52 cards. The Card Table in BGE supports decks of up to 450 cards.
The Card Deck and the Discard Pile (to the left of the card deck) are not drawn in
an offset fashion, so it is not possible to tell how many cards remain in the stack
just by looking at the stacks of cards.
116
If you are the host, pressing the “Manage Players” button takes you to a screen
that provides the means to establish who the "card players" are (i.e., who is
eligible to hold cards in their hand, and/or put cards into play).
The cards in the Card Table window can be manipulated via drag-and-drop. Drop
a card to the right of the draw pile to flip the card over and place it in the
draw/discard pile. Hold down the [SHIFT] key while doing so to place the card
face down in the draw/discard pile.
Manipulating the cards on the Card Table will automatically trigger appropriate
sound effects: you will hear the card deck being shuffled, and cards being drawn,
flipped, or played.
Click on a card and hold down the mouse button to see a magnified version of the
card in the upper right corner of the Card Table window. An "Auto-magnify"
checkbox in the lower left of the Card Table window provides the option of
showing you the magnified view of any card that you roll the mouse over, without
having to click-and-hold on the card. Each user in a multiplayer game can enable
or disable this checkbox at will, without affecting anyone else.
Double-click on a card to access a contextual popup menu with useful commands.
117
118
The content of a card’s contextual popup menu varies, depending on whether the
card is in the deck, in the discard pile, in your hand, or in the play area. All of the
commands should be self-explanatory, but one of them is described in further
detail below.
Selecting “Draw Specific Card from Deck” from the Deck’s popup menu produces
a submenu listing all the cards remaining in the deck, in alphabetical order. If the
deck is very large (hundreds of cards), the individual cards will instead be listed in
two submenus.
Automatic system messages are displayed in the Chat window every time an
action is taken with the cards, to make it easier for everyone to follow along with
what's occurring during a card game, even for users who have closed the Card
Table window.
Pressing the “Save Game…” button allows the host to save the current state of
the cards, which can be loaded back in later by pressing the “Load Game” button.
Clicking on the "Load Game" button on the Card Table produces a popup menu
listing all the saved games, to make it quick and easy to load a saved game. This
should be particularly useful for games that use multiple card decks and you have
to frequently switch between them. Just be sure to save your current game prior
to switching to another card game file.
Note that the Card Table window is not modal. If it is open, you can still click on
the game table window or the Turn Sequencer to interact with units there. If the
Card Table window has been closed, pressing the [SHIFT-C] hotkey (or using any
of the other methods of opening the Card Table) will re-open it.
119
Creating Custom Card Decks
BGE comes with standard playing cards, but with a licensed Gamer Client, you
can create custom card decks very easily. Once you’ve made or scanned in your
custom card graphics and placed them in a folder, just select the “Create Custom
Card Deck” command from the BG button’s popup menu.
A dialogue box opens, asking you for the location of your custom card graphics
folder. Select the folder containing your cards and press the “OK” button.
Custom card decks can be either in portrait or landscape orientation. If the cards
are over 200 pixels wide, the card deck will be considered to be in landscape
orientation (i.e., the Deck and the Discard Pile will be spread out further to avoid
them overlapping, and cards in a player's Hand or in play will be spread out more,
also to avoid overlap).
Note that overly-large cards are drawn at a reduced size in a player's hand, so as
not to exceed the size of the Hand pane at the top of the Card Table window. For
consistency, cards in the Play Area, in the Card Deck, and in the Discard Pile are
also drawn at this reduced size.
120
Manipulating Cards and Card Decks in the Game Table Window
In addition to the Card Table feature, BGE also provides functionality which
should prove very useful for any game that requires using cards in the game table
window rather than in the Card Table window.
What Constitutes a Card?
A card is defined by BGE as any component (except a tile or a free-floating
component) in the game table window containing exactly two tokens and whose
Portrait is set to "Use Current Token".
Cards set to be owned by "Everyone" will not have the "Token" submenu show up
when the contextual popup menu is accessed, as this would allow anyone to
cheat by seeing what a card was without flipping it over.
Draw Card
This command is available on the contextual popup menu of any component on
the game table that might be a card (see above) which is owned by “Everyone”
and whose current token is set to the second token (the card back).
Selecting this command will play a card-flipping sound effect (remote clients will
also hear the sound effect), then shift the card one cell to the right, set the
Owner of the card to the current user's login name (or to "Host"), the current
token to the first token, and will enable the "Secret Token" state for the unit. The
end result is that the card's new owner sees the front of the card while others
continue to see the back of the card.
The hotkey for the "Draw Card" command, [SHIFT+D], can also be used to
activate the "Discard" command (see below), essentially functioning as a toggle
for drawing and discarding cards.
Discard Card
This command is available on the contextual popup menu of any component on
the game table that might be a card (see above) that is held (owned) by
someone (i.e., not “Everyone”).
Selecting this command will play a card-flipping sound effect (remote clients will
also hear the sound effect), then set the Owner of the card to "Everyone", and
will disable the "Secret Token" state for the unit. The end result is that everyone
can see the card side that is actually showing (i.e., the active token). By default,
the current/active token will be set to the first token (i.e., the discard is face-up),
but if the [SHIFT] key is held down while this command is selected, the discard
will be face-down (the current/active token will be set to the second token).
The hotkey for the "Discard Card" command, [SHIFT+D], can also be used to
activate the "Draw Card" command (see above), essentially functioning as a
toggle for drawing and discarding cards.
121
Saving a Game File (host only)
Save a Game File by pressing the [S] hotkey, or by clicking on the “Save Game
File” button in the Commands panel. If the Commands panel is closed or disabled,
the “Save Game File” command will instead be available from the BG button’s
popup menu. Only the host may save a Game File.
A dialog box opens, prompting you for a file name and destination. If a Game File
already has a name, it will be pre-filled in for you, so you can just press the
“Save” button file (or press the [RETURN/ENTER] key) to overwrite the preexisting Game File. If it is a new Game File, or if you wish to do a “Save As…”,
provide a unique name for the Game File first.
Unless you specified a different location, Game Files are saved, logically enough,
in BGE’s “Game Files” folder. A “.bge” extension (short for “Battlegrounds Gaming
Engine”) will be automatically appended to your file name (unless you type it
yourself).
Game Files may be saved by the host prior to a game session, as part of the
host’s preparation. They may also be saved during play, as a backup in case of a
computer crash or an ISP disconnect.
Loading a Game File (host only)
Load a Game File by pressing the [E] hotkey, or by clicking on the “Load Game
File” button in the Commands panel. If the Commands panel is closed or disabled,
the “Load Game File” command will instead be available from the BG button’s
popup menu. Only the host may load a Game File.
A dialog box opens, prompting you to select the Game File you wish to load. You
may only select a file ending with “.bge”. Select one, then click the “Open”
button, or simply press the [RETURN/ENTER] key. The Game File and all its
corresponding game-related settings will load. The Turn Sequencer settings that
were in use when the Game File was last saved will also load, if they are still
available. When a Game File is loaded, it will automatically show View 0.
In a multiplayer game, a lot happens when you load a Game File. The game
board and all unit graphics (including Sideboarded units) are sent to all the
players that don’t have those assets preloaded. Until those graphics are received,
the game board and units are displayed on the client screens using a placeholder
graphic/s. Hosts should wait until all the players report that they’ve received
everything (when there are no more placeholder graphics visible) before
proceeding with the game session.
If BGE finds a game media bundle in the “Game Media Bundles” folder that
corresponds to a Game File that was just loaded, all of the necessary media will
be automatically imported.
122
Saving a Deployment (host only)
A Deployment is a group of saved units. It may contain minis only, components
only, or a mix of minis and components. A deployment may contain just a single
unit or many.
Save a Deployment by selecting one or more units on the game table, then
selecting the “Save Deployment” command on the BG button’s popup menu, or by
pressing the “Save Deployment” button on the Commands panel. Only a licensed
Gamer Client may save a Deployment.
A dialog box opens, prompting you for a file name and destination. Unless you
specified a different location, Deployments are saved, logically enough, in BGE’s
“Deployments” folder. A “.bgd” extension (short for “Battlegrounds Deployment”)
will be automatically appended to your file name.
Deployments may be saved by the host prior to a game session, as part of the
host’s preparation. They may also be saved during a game, if necessary.
Loading a Deployment (host only)
Load a Deployment by selecting the “Load Deployment” command on the BG
button’s popup menu, or by clicking the “Load Deployment” button on the
Commands panel. Only the host may load a Deployment.
A dialog box opens, prompting you to select the Deployment you wish to load.
You may only select a file ending with “.bgd”. Select one, then click the “Open”
button, or simply press the [RETURN/ENTER] key. The units that were saved in
the Deployment file will appear on the game table, with all their prior settings
intact.
The host can also load a Deployment onto a particular spot on the game board
(ignoring the location/s specified in the Deployment file). To do so, select the
"Load Deployment here..." command from the game table's popup menu. All units
from the chosen Deployment will appear hidden and stacked on top of each
other, and the host will probably wish to manually reposition them in the general
vicinity before unhiding the newly-placed units.
Units that were not hidden when saved to a Deployment will not be hidden when
that Deployment is loaded, unless they are loaded using the "Load Deployment
Here..." command.
When a Deployment is loaded, units from the Deployment are automatically
selected (replacing your previous selection, if any), so that the newly-loaded
unit/s can easily be moved or otherwise acted on.
123
Export Game Media
Select this command to create a Game Media bundle (see “Game Media Bundles”,
above).
The contents of a Game Media bundle can be password-protected, so that players
cannot “sneak a peek” at the content before game day.
To create an auto-importing media bundle, the host should lay out his Game File,
save it, and as the very last step, select the “Export Game Media” command from
the BG button’s popup menu. This will re-save the Game File after inserting the
information that’s necessary for the media bundle to be automatically imported
when it is loaded.
The current game board, all tokens and portraits attached to units on the game
table, and all audio clips that are attached to a unit on the game table will be
included in a media bundle. The default “Dun” game board that comes with BGE
is never included in a media bundle (since every user already has this asset preimported, and it is not purge-able). Visual aids are not included in media bundles,
unless you have attached the artwork to a unit (as a portrait or token). Media
from artpacks is also never included in a media bundle; the players are expected
to have the necessary artpack/s installed.
BGE comes with an example Game Media bundle (download the various digital
game conversions for additional examples of Game Media bundles).
124
Hosts who create media bundles will need to deliver the bundle/s to their players
prior to the game session where they will be needed. This can be done via email
attachments, file transfers via a chat client, uploading the files to a web server,
via a file sharing solution such as Dropbox, etc.
Players should place any media bundles received into the “Game Media Bundles”
folder of their BGE installation.
Import Game Media
Game Media bundles may be manually imported using this command from the BG
button’s popup menu.
Depending on how the host created the Game Media bundle, a password may be
required.
Generally, however, it’s easier if the host sets up his Game File/s so that Game
Media bundles are automatically imported the moment the Game File is loaded.
Game Media bundles can also provide an effective method of preserving your
media when updating to a new version of BGE (see “Updating from an Older
Version of BGE”, below).
125
Batch Import (host only)
Hosts can use this submenu on the BG button's popup menu to import an entire
folder’s worth of media at once. The “Batch Import” submenu contains 6 entries:
"Minis", "Components", "Portraits", "Visual Aids", "Audio", and "Library".
Selecting an item from the “Batch Import” submenu will open the appropriate file
browser. Select a folder/category and press the "Import All" button to batchimport all the media present in that folder. A progress bar will provide visual
feedback while the operation is taking place.
This feature is only available on a licensed Gamer Client, and only if a game is not
currently being hosted.
Clear All Units (host only)
Select the “Clear All Units” command from the BG button’s menu to delete all the
units (including Sideboarded units). Only the game board will remain.
Issuing this command will also stop any audio that is currently playing (even
looping audio).
Undo (host only)
Press the Undo hotkey ([Control-Z] on Windows, [Command-Z] on Mac) to undo
the previous action. Press it again to Redo the undone action. You can even Undo
if you just loaded a new Game File, to revert to the previous Game File.
Note that there is only one level of Undo/Redo, and that some actions (such as
scrolling the game table or changing the zoom level) cannot be undone. Actions
that are strictly toggles (such as showing/hiding the grid or turning snap-to-grid
on/off) do not have an Undo.
Undo also works with actions performed on multi-unit selections (i.e., it will Undo
all the actions, not just the one on the last unit processed). For example, invoking
Undo immediately after a multi-unit deletion works as you would expect (by
restoring all the units deleted, not just the very last one).
Hide/Show Text Labels
Select the “Hide Text Labels” command from the BG button’s popup menu to hide
all the text labels on the minis. Even when labels are hidden, if you position the
mouse cursor over a mini that has text labels, the labels for that mini will appear.
If text labels are already hidden, select the “Show Text Labels” command to show
them again.
126
Screenshots
Select the “Screenshot” command from the BG button’s popup menu to save the
currently-showing portion of the game table window to a JPG file on your hard
drive. Screenshots are useful for posting game-state updates for a play-by-forum
game, or if you wish to capture a particular moment in the game for posterity.
Be sure to set the zoom level, grid visibility, and other settings that affect what is
shown in the game table window prior to invoking the screenshot command.
Screenshots containing highly-detailed game boards may take a short while to
encode into JPG format, but screenshots of simple game boards are pretty much
instantaneous.
Toggle Fullscreen Mode
Select this command from the BG button’s popup menu to enter Fullscreen Mode.
For best results, prior to launching BGE, you should edit BGE’s INI file
(“Battlegrounds Gaming Engine.INI”) in a word processor such as NotePad or
TextEdit. Edit the line which reads “FullScreen=0” to read “FullScreen=1”. This
manual tweaking is necessary due to a technical limitation of BGE’s authoring
environment.
Reverse the above edit to the INI file when you no longer wish to run BGE in
Fullscreen Mode.
127
Lobby
BGE has a Lobby (an online chat room), which can be accessed either by
selecting the “Lobby” command from the BG button's popup menu, or by pressing
the [SHIFT-L] hotkey, or by pressing the “Lobby” button on the Connection panel.
Once the Lobby window is open, type in your desired username and press the
“Connect” button.
The Lobby is still very rudimentary, as it only allows for basic chatting, but it
should prove useful for finding a game, gathering prior to a scheduled game
session, or getting a quick pick-up game or demo going with whoever happens to
be logged in at the time. It has also been used to provide live technical support,
on occasion.
BGE and BRPG share the same Lobby, so when looking for a game or opponent,
you should be sure to specify which program you plan to use.
128
Logging into the Lobby is completely independent of whether or not you are
hosting (or connected to) a peer-to-peer game. The Lobby window can be closed
at any time and you will remain logged onto the Lobby, unless you expressly exit
(disconnect from) the Lobby first.
To communicate with other users who are currently logged into the Lobby, type a
message in the chat input field and press the [RETURN/ENTER] key to send the
message.
It is possible to cut, copy, and paste text into or from the Lobby's text input field.
Note to Mac OS X users: I could not get the standard shortcuts for these
commands to work; you must use the [CONTROL] key instead of the [COMMAND]
key.
Messages typed in the Lobby are public by default, but it is possible to send a
private message to a particular user in the Lobby. Right-click on a user's name to
send the contents of the chat input field in a private message.
Development Note: While this is not the most intuitive way to handle private
messaging, it was a quick and easy way to get the feature implemented without
worrying about a graphical user interface, since the current Lobby interface will
likely be changed once the Lobby becomes more widely used.
129
Preferences
Open the Preferences panel by pressing a hotkey [P], or by clicking on the
“Preferences” button in the Commands panel.
BGE's Preferences panel lets you tailor the program’s functions and interface to
best suit your particular needs. There are many user-adjustable preference
settings, arranged on three separate Preference panel screens.
The first Preferences screen
The settings that can be controlled from the first Preferences screen include:
choosing your grid type (hexes or squares), grid color, and grid opacity; enabling
or disabling the Movement Guide; changing the sound effects used for die rolls
(or turning them off completely); whether or not to use sound effects during
chat; and enabling or disabling Learning Mode.
You will be able to preview your grid settings as you select them. If you change
your mind and press the “Cancel” button, everything will revert to your prior
settings.
Your settings are saved when you click on the “OK” button or on the “More
Preferences” button, and are automatically reloaded the next time you launch the
program.
130
Some options, like grid type and the use of facing indicators, can only be set by
the host, and affect everyone connected to that host. Other options can be set
locally by each player, without affecting anyone else.
Certain Preference settings can not be set by a player client while it is logged into
a host client, and are automatically disabled. This is because players should not
be allowed to enable certain settings.
The second Preferences screen
The settings that can be controlled from the second Preferences screen are
shown above, and should be self-explanatory.
“Preferred Panel Location” affects where on your screen most panels in BGE will
open. An exception to this are the panels that appear when you place a unit on
the game table. These will always open on the left side of your screen if you are
placing a unit on the right side of the screen, and vice-versa, so as not to get in
your way.
“Automatic Game Table Scrolling”: If this is enabled, the game table will
automatically pan when you move the mouse cursor close to the edge of the
game table window, as long as BGE is the front-most application.
“Autosave”: BGE has an autosave feature that can help avoid disaster in the event
of a power outage, a program crash, or a computer lock-up (other problems can
often be resolved with the Undo feature). The controls on this panel allow you to
131
specify how often and under what conditions the current Game File is autosaved.
Autosaves are stored in a folder called “Autosaves”, which is located inside the
“Game Files” folder.
Your settings are saved when you click on the “OK” button or on the “Even More
Preferences” button, and are automatically reloaded the next time you launch the
program.
The third Preferences screen
The settings that can be controlled from the third Preferences screen are shown
above, and should be self-explanatory.
132
Purging Obsolete Media
All media assets imported into or received by BGE are stored in the file “User
Media.cxt”, which is essentially a multimedia library. Over time, this file may
become bloated in size, and much of that may be due to media assets that you
no longer need. A bloated media library may also cause sluggish performance
when importing or receiving new media. If you encounter sluggish performance
during unit deployment or when importing new game boards, it may be a sign
that your media library has grown too large and needs to be purged.
To clear out undesired media, select the “Purge Media” command from the BG
button’s menu. The Purge Media panel will open. It defaults to previewing the last
media asset in the multimedia library.
Use the navigation buttons on this panel to cycle through the stored media
assets. The name of each asset is presented below the thumbnail preview, and
for audio cast members, you can click on the “Audio Preview” button that
appears. Click on the “Purge” button to delete each asset you no longer need.
Purging media does not delete any files from your hard drive, only from the “User
Media.cxt” file.
Once you’ve gone though your entire media library, press the “Done” button to
save your changes into a compacted “User Media.cxt” file. The old “User
Media.cxt” file is automatically deleted.
133
If you know you won’t be needing any of your old media anymore, press the
“Purge All” button, and then the “Done” button.
This command is not available to players during multiplayer games, to prevent
players from peeking at as-yet-unused media, and to prevent accidentally purging
media that may be in use (like Sideboarded units), so this command should be
used prior to logging into the game session.
It is worth noting that unit defaults (a graphic’s scaling and rotation info, etc.) are
retained even after the media it pertains to is deleted. If you should need to reimport that media at a later date, your default settings should still work.
It may also be necessary to purge a media asset if you have made changes to the
media, and want those changes brought into BGE. For example, if you’ve edited a
game board or token in a graphics application, those changes won’t appear in
BGE until you’ve purged the old media and re-imported the version with the
changes.
Purge/Refresh Artpacks
Artpacks can be enabled or disabled while BGE is running, but this command
must be activated after moving any artpack files into or out of the “Disabled
Artpacks” folder. Any units on the game table are redrawn after using this
command.
Select the "Purge/Refresh Artpacks" command from the BG button's popup menu
if, during launch, BGE asks you to locate an artpack that you've disabled.
User Manual
Selecting the “User Manual” command from the BG button’s popup menu will
launch your default PDF-viewing application and open the User Manual.
If this command doesn’t work as expected and you are running Windows OS, you
probably forgot to follow the instructions in the “Installing BGE” section, above.
134
Check for Updates
Selecting this command will inform you if there are any new official versions
and/or beta versions of BGE available for download. An internet connection is
required for this command to work.
Purchase BGE
Select this command to launch your default web browser and be taken to the
Store page of the Battlegrounds Games website.
This command only appears on an unlicensed BGE Demo.
Licensing BGE
The free Demo of BGE has two important limitations. The first is a 45-minute
timeout period (the application will automatically quit after 45 minutes of use).
The second is that the host is limited to a maximum of 12 units when saving or
loading Game Files. Aside from those limitations, the free Demo is nearly as fullfeatured as a licensed Gamer Client.
There are a couple of other minor limitations to be aware of:
• You cannot save a Deployment file without a Gamer Client license.
• You cannot export a Game Media Bundle without a Gamer Client license.
• You cannot create a custom card deck for the Card Table without a Gamer
Client license.
A white text label located above the BG button indicates when BGE is being run in
Demo Mode.
Purchasing and installing a Gamer Client license unlocks the software and
removes these limitations.
Another way to avoid the timeout limit if you are using just the free Demo is to
log into a game that is hosted by a Gamer Client with one or more player slots
available.
If you have purchased a license for BGE, open the License panel by selecting the
“License” command from the BG button’s popup menu.
135
The Challenge Code field will be pre-filled for you. E-mail your Challenge Code to
[email protected]. We will e-mail you back with a Response
Code that will allow you to install your BGE license on that computer.
Please do not submit the serial number shown in the screenshot above. That is
just there as an example.
Once you’ve received your Response Code via e-mail, launch BGE, open the
License panel, and paste your Response Code into the Response Code field in
BGE. Select the License Type (a “Gamer Client” with support for the correct
number of players) from the pulldown menu and click the “Unlock” button.
Your BGE software is now licensed and all of the Demo’s limitations have been
lifted.
136
Quitting the Program
You may exit the application at any time by pressing the [Q] hotkey, or by
pressing [COMMAND+Q] (on the Mac) or [ALT+F4] (on Windows). You can also
quit BGE by clicking on the Close box in the game table window’s title bar. On
Mac OS X, you can also select the Quit command from the Battlegrounds Gaming
Engine menu (i.e., the application menu).
No matter which method of quitting you use, you will be asked for confirmation,
to prevent quitting accidentally and losing an unsaved Game File.
If a player quits BGE while still connected to the host, he/she will be automatically
logged off. If the host quits BGE while one or more players are still connected,
the player/s will be informed, then their game table window will revert to its
default state when the program is first launched (exception: there will be no
notification to the players if the host force-quits BGE).
Customizing BGE
You can customize BGE by editing any of the plain text files stored in BGE’s
“Preferences” folder.
The information in these files allows you to define game scale units and text
labels that you want to use in your games. Complete instructions for editing the
contents of the files can be found in the files themselves.
Content in the Labels Menu file can be indented with the TAB character to make a
submenu. BGE will accept up to two TAB characters per line.
137
Expanding BGE
Adding new game boards, digital minis, and game components to BGE is very
easy. Just drag a JPG or PNG graphic into the appropriate folder. This can even
be done in the middle of a game, without re-launching the application. New
sounds can be added to the game in the same manner.
A wealth of free, quality artwork is available on the internet (see the Links &
Resources page on the Battlegrounds Games web site), and more is posted every
day. Of course, the graphically-inclined can make their own custom artwork using
any graphics application.
Adding Custom Artwork, Sound Effects, Reference Material, and Grids to BGE
Users wishing to add their own artwork or sound effects into the program may do
so by simply placing the asset file in its corresponding folder at the system level
(“Game Boards”, “Minis”, “Components”, “Audio”, “Visual Aids”, “Portraits”,
“Library”, or “Grids”).
The “Minis” folder and “Components” folder accept graphics in JPG, BMP, and
PNG format.
The “Game Boards” folder accepts graphics in JPG format only.
The “Visual Aids” folder, the “Portraits” folder, and the “Library” folder accept
graphics in JPG, BMP, and PNG format only.
The “Audio” folder accepts sound files in WAV, MP3, SWA, AU, and AIFF format.
The “Grid” folder accepts graphics in PNG format only.
For graphics without a transparency layer (alpha channel), JPG is the
recommended format, in order to keep file sizes down and hence speed up
transmission times in multiplayer games. For graphics with a transparency layer,
use PNG format.
For audio files, MP3 or compressed AIFF format is preferred, in order to keep file
sizes down and hence speed up transmission times in multiplayer games.
Custom grid graphics should ideally be named according to what color they are,
since the file name is what appears in the Preferences screen when you access
the “Color” pulldown menu.
Other than free space on your hard drive, there is no limit to the number of
custom assets that can be added to BGE, but make sure not to place more than
255 assets in a single folder.
You can organize your media assets by placing them in folders, but do not use
nested folders (folders within folders), or BGE will not be able to access them.
Frequently-accessed materials can be placed at the root (aka “Unfiled”) level, as
this will allow you quicker access to them within the program.
138
Using Third-Party Game Boards with BGE
BGE will accept game boards from any source that can create JPG output,
whether you’ve created them yourself from scratch in a graphics application, or
made them using any third-party mapping program.
Using the Board Settings panel, you can resize a game board within BGE so that it
is scaled and aligned properly with BGE’s grid overlay.
But if you follow these instructions and size your game board properly using a
graphics editing program beforehand, you won’t need to do any tweaking in BGE
at all.
If you don’t already own a graphics editing program, there are many free
applications (for both Macs and Windows PCs) available for download on the
internet that will allow you to do this.
To get your game boards properly sized, count the number of cells across that it
should be, then multiply that number by 122. That’s how many pixels wide your
game board needs to be for use in BGE (exception: neither the height nor the
width of the game board should exceed 4000 pixels). If your graphics software
allows you to maintain the aspect ratio, you don’t need to calculate the game
board height separately.
Here is a handy chart for figuring out what your game board’s dimensions need to
be:
Squares Across
5
6
7
8
9
10
11
12
13
14
15
16
17
18
19
20
21
22
Width in Pixels
610
732
854
976
1098
1220
1342
1464
1586
1708
1830
1952
2074
2196
2318
2440
2562
2684
Squares Across
23
24
25
26
27
28
29
30
31
32
33
34
35
36
37
38
39
40
Width in Pixels
2806
2928
3050
3172
3294
3416
3538
3660
3782
3904
4000
4000
4000
4000
4000
4000
4000
4000
Game boards made with Dundjinni (map creation software) are perfectly
compatible with BGE, although you must still resize them. If you are making a
139
game board in Dundjinni exclusively for use in BGE, it is recommended that you
output the Dundjinni map as a BMP at 122 pixels per inch, and then convert it to
JPG format.
When creating your game boards, be sure to leave off any elements that you
want to be moveable, and just insert them later in BGE. You should also export
your game board without a grid, since BGE gives you the option of showing or
hiding the grid as needed.
Game boards larger than 40 cells in either direction will need to be broken up
into several pieces and laid out as components set to “Tile”. (exception: game
boards that use a hex grid may be up to 46 cells high).
140
Free and Commercial Digital Game Conversions for BGE
As of this writing, there are close to 20 digital game conversions available for
download and/or purchase on the Battlegrounds Games website (and links to
them are available at the end of this User Manual). These game conversions
should provide an ideal way for a host and his/her players to learn how to use
the software together, and get a glimpse of what it is capable of. They should
also serve as examples for users wishing to create their own digital game
conversions.
Free and Commercial Artpacks for BGE
Artpacks are collections of media, generally based around a central theme.
Artpacks can contain any mixture of maps (for BRPG) or game boards (for BGE),
Fog of War Overlays (these are only used in BRPG), Mini tokens, Component
tokens, Visual Aids, Audio clips, and even reference material for use with the
Library feature.
There are both free and commercial artpacks available for BGE, and a list of all
the artpacks currently available is presented at the end of this User Manual.
For commercial artpacks, only the host needs to purchase the artpack. Players
can use artpacks for free. On the host's screen, if a unit attempts to display a
token or portrait art from a commercial artpack that is not registered, a
placeholder token will be shown instead.
Installing an artpack is as simple as downloading a Zip file from the
Battlegrounds Games website, unzipping the archive, placing the artpack file in
BGE’s “Artpacks” folder, and (if BGE is already running) selecting the
“Purge/Refresh Artpacks” command from the BG button’s popup menu.
141
How to Register a Commercial Artpack
Shortly after purchasing a commercial artpack, you will receive your artpack
registration code via email. You will need to input your registration code/s into
BGE in order to unlock the artpack/s.
Open the License panel in BGE and click on the “Register Artpack” button. The
Artpack Registration panel opens.
Follow the instructions on the screen to register your artpack. When you are
done registering all your artpacks (if you purchased more than one), click on the
“Done” button to close the panel.
The content of your artpack/s that you just registered will be available for use
the next time you launch BGE.
Free artpacks (e.g., the free adventure modules) don’t require registration in
order to work.
Regardless of whether an artpack is free or commercial in nature, if BGE was
already running when you installed the artpack, you must select the
“Purge/Refresh Artpacks” command from the BG button’s popup menu in order
to access the artpack’s content. You only need to select this command once,
even if you just installed many artpacks.
142
Support for Flash Content
Battlegrounds supports Adobe Flash content. Some examples of Flash content
are things like animated tokens, mini-apps such as calculators and 3D dice
rollers, and even third-party utilities that can add new features to Battlegrounds
or provide an alternate interface (e.g., a custom toolbar).
Flash developers wishing to create content for BGE should keep in mind that
interactive Flash content for BGE must use ActionScript 2, not AS3. Flash apps
may communicate with BGE, and some form of API will likely be published in the
not-too-distant future.
Because a Flash file is programmable and could potentially contain malicious
code, Battlegrounds users should only use Flash content from sources they trust.
Auto-Naming
Battlegrounds will automatically name units for you when you place several
identical units on the game table, either by mass-deploying a unit, cloning or
duplicating existing units, or loading additional copies of a unit by loading a
Deployment file.
For example, if you place a mini using a piece of artwork called “Meeple”, the
Character Name field will be automatically filled in with the text “Meeple”. You
can change the name to something else, if you want, but in many cases this
won’t be necessary. Suppose you now decide to clone this mini using the Copy
and Paste commands, so that you’ll have several identical meeple tokens on the
game table. The first token you placed will be renamed “Meeple 1”, and the
cloned copies will be automatically named “Meeple 2”, “Meeple 3”, etc.
Sequential auto-naming of units in BGE works for up to 162 similarly-named
units.
The host can temporarily disable unit auto-naming while loading a Deployment
by holding down the [SHIFT] key while he/she presses the "Load" button.
Public and Private Unit Names
Battlegrounds supports both public and private unit names. If the host puts part
of a unit’s name in square brackets (for example, “Goblin [4]”), the bracketed
portion of the name will not be seen by the players. This applies to the Character
Name text label on units in the game table window, to the “Token Name” column
of the Turn Sequencer, and to automatic turn sequence announcements made in
the chat window and game table window.
Players can also use private names for units they control. The host cannot see
the private name of any player-controlled units.
143
Updates
Updates to this User Manual and the BGE software will be periodically posted on
the Battlegrounds Games website, where you’ll be able to download them for
free. If you are registered on the forums, you will receive e-mail notification
every time a new official (i.e., non-beta) version of BGE becomes available
(unless you have opted-out of the Battlegrounds mailing list).
Updating from an Older Version of BGE
Game Files and Deployment files that were created in an older version of BGE
will be automatically updated to the latest format when you load the file.
Updating to a new version of BGE sometimes involves installing to a new
directory and then copying over any needed files from your old installation to the
respective folders of your new installation.
If the host has used the “Export Game Media” command to make Game Media
bundles for all of his/her Game Files, he/she can easily import all of that media
into the a new installation of BGE by using the “Import Game Media” command.
It may be worthwhile for the host to make a Game Media bundle containing all of
the media assets from his/her Deployments, as well.
Depending on what version of BGE you are updating from, it may be possible to
simply copy over your old “User Media.cxt” file and have instant access to all of
your prior media. Every new release of BGE will indicate whether or not the
“User Media.cxt” file has changed or not. If it hasn’t, you can safely copy over
your “User Media.cxt” file from an earlier installation.
144
Using BGE with a Projector
If you have a projector, you can use BGE in your face-to-face game sessions to
great effect. BGE’s full-screen game table, high-resolution graphics, and hiddenuntil-you-need-it interface are ideal for this sort of setup.
Projecting onto a wall
Projecting downward onto a table
145
Using BGE with Real Minis
Groups using BGE as a digital game board in face-to-face games can choose to
use real minis (rather than digital tokens) in their games, if they can project the
game table window onto a flat table surface.
Running Non-Live Games
Battlegrounds, like most virtual tabletop programs, is usually used for “live”
games, where the host and the players are all logged in at the same time.
However, some users may prefer to play “non-live” games, particularly if the
players live in widely-varying time zones.
Here’s how it works: the host hosts a game session, which he leaves running
continually. Players log in whenever they have a chance and take their move (if
it is their turn), then they log off. In this sense, it is like a play-by-post game on
a gaming forum, except that with Battlegrounds, you have the visual game board
that is constantly updating component and mini positions, and you have
convenient tools like the Dice Roller built right in. Of course, in non-live games,
some features won’t be used, such as audio (there’s probably no one around to
hear it at the moment it’s played).
For non-live games, be sure to enable automatic granting of player slots, if any
players will be connecting using just the free Demo.
146
Tips & Tricks
• Battlegrounds comes with an assortment of push pins and generic tokens.
Placing these on a game board and adding Notes to them is a handy method of
placing information on the game board that is accessed by placing the mouse
cursor over the unit.
• Place the audio token (included with BGE) on the game table, attach all the
sound effects and music tracks you want to it, then set it to be a free-floating
component in an unobtrusive corner of the game table window. This will provide
for a convenient audio library in your Game File. If the audio collection is generic
enough for use in many Game Files, save the audio token as a Deployment, so
that it can easily be added again to any Game File without having to recreate it
from scratch.
• Place a suitable token on the game table and attach a bunch of common
reference charts and tables to it using the Portrait feature. Set the unit to be a
free-floating component in a convenient corner of the game table window. Now
you can reference any given chart or table quickly and easily by selecting the
unit and choosing which “portrait” you wish displayed in the top-right corner.
Alternatively, rather than attach the charts and tables as portraits, attach them
as additional tokens, and use the token-swapping hotkeys to easily change the
chart to be displayed. This has the added benefit of connected players seeing
exactly what you’re seeing (since with the other method, they will only see the
portrait art if they select the unit or position the mouse cursor over it). With
either method, it may be useful to save this “Charts & Tables” token as a
Deployment, so that it can be easily added to any Game File.
• Consider using the game table window for other things besides game
components. Use the game table window as a virtual corkboard and put
whatever you want on it, taking advantage of the fact that you can move
individual components on it as needed. Want to hold a vote on what game to
play next? Use the text tool to write up multiple choices, and have the players
move their tokens onto the choice they prefer. There are many ways to use the
software’s existing features in ways other than their intended purpose. Your
imagination is the limit.
147
Support
If you have a question about BGE, would like to report a bug, or submit a feature
request, it is usually best to do so in the Battlegrounds Forums, so that others
can benefit from the answers posted or join in on the discussion. If possible, try
reading the content already posted to see if your issue has already been brought
up.
Technical support and customer service can either be handled via the forums or
via email, whichever you deem most appropriate for the issue at hand.
Contact E-Mail Addresses
For technical support and customer service: [email protected]
For all other issues: [email protected]
Troubleshooting
• Port-forwarding
If the host uses a router (and in some cases a cable modem), he/she will need
to set up port forwarding in order to allow players to connect to their game
session. The host should be able to successfully host a game session even if they
haven’t set up port forwarding, but if they haven’t set up port forwarding
correctly, players outside of their local network will not be able to connect.
Port forwarding should only affect whether other computers can connect to your
host or not. Players need not concern themselves with port forwarding.
If you can’t control port forwarding (e.g., if you are hosting from a hotel or a
college dorm), you can use Hamachi or other VPN (virtual private network)
software to get around port-forwarding.
• Firewalls
If you are hosting a game session and your operating system’s built-in firewall
(or third-party security software) warns you about Battlegrounds, you will need
to grant access, otherwise players outside of your local network will be unable to
connect.
• Hosting wirelessly on Mac OS X
If you cannot seem to host a game and instead see the “Connection Failed”
message, it is probably because BGE is attempting to host on the wrong network
interface. Disable any network protocols that you don’t need (e.g., Firewire
networking, dial-up modem, Bluetooth, etc.), and/or make sure that the wireless
protocol has priority.
148
Enabling only Airport and disabling other network protocols
should ensure that you can host games in BGE under Mac OS X.
Note: For Leopard users, the Network preferences screen is somewhat different.
For everything except AirPort, you have to highlight the item, click on the “cog”
button at the bottom of the window, and choose “Make Service Inactive”.
149
• “A serious error has occurred”
Clicking the splash screen during launch can cause this error to occur,
particularly on Windows PCs. Let the splash screen close automatically and allow
the program to fully finish launching prior to attempting to use it.
Potential Conflicts with Third-Party Software
• On some Windows systems, ZoneAlarm (from Zone Labs) can cause BGE to
crash or fail to connect when hosting or joining an online game. If this happens,
ZoneAlarm should be turned off for the duration of the game session.
• Windows’ Software Firewall may block access when hosting or joining an online
game, if not properly configured. On some systems, it may even have to be
disabled for the duration of the game session.
• On Mac OS X, Smith Micro’s StuffIt version 9 or less does not extract the BGE
zip file properly (although it may look like it did). Upgrade to StuffIt v10.0 or
better, or use Mac OS X’s default unzipping tool, “BOMArchiveHelper”, which is
accessed by [CONTROL]-clicking on the BGE zip file and selecting “Open With…”
from the contextual popup menu. On Mac OS X v10.5 (Leopard) or higher, the
unzipping utility is now called “Archive Utility”, not “BOMArchiveHelper”.
• On Mac OS X, right-clicking does not work with certain models or brands of
Bluetooth mouse. Use [CONTROL]-click instead to simulate a right-click.
• On Mac OS X, Unsanity’s Application Enhancer (APE) and/or WindowShade X
may be incompatible with BGE. If you experience problems, disable these
programs and try again.
Known Issues and Limitations
• BGE popup menus do not display correctly in Windows Vista while using the
"Windows Aero" or "Windows Vista Basic" appearance settings.
• Hosting over a wireless connection may not work on Mac OS X unless you
disable other network protocols (e.g., Ethernet, Firewire, Bluetooth, etc.). This
generally means disabling all network protocols except for Airport.
• At this time, a maximum of 12 simultaneous Free-Floating components are
supported. Using more than that will cause errors. This limit may be increased in
a future version.
• A Game File can hold up to 600 components if there are less than 20 minis
present. This reallocation of game sprites was implemented primarily to support
digital versions of boardgames and wargames that require a lot of components
(tokens, cards, etc.) but do not make extensive use of minis.
• Using a filename that is over 27 characters long when saving a Game File will
produce a blank/invalid Game File.
• Avoid using a filename that is over 27 characters long on any game board or
media asset.
150
• When moving the next-to-last item in the Unit Manager list down (making it the
last item on the list), it loses its highlight. This is purely a cosmetic issue.
• Media assets and saved Dice Macros should not contain parenthesis in their
filename, or they will be unselectable from the popup menus in BGE.
• The popup menus in BGE only support up to 255 entries, so be sure not to
throw more than 255 media assets into any single folder. Using different folders
to further categorize your media is a good idea anyway, since it will help you find
specific items faster.
• If you are using Ventrilo, dice rolls will not be received in BGE if Ventrilo's text
chat window is open (yes, that's a very weird bug).
• The unit selection marquee and the Draw tools do not provide proper visual
feedback when Fullscreen Mode is enabled.
• Selecting a dice macro from the "Roll Dice Macro" button on the Chat window
will fail to load the selected macro if the Dice Roller has never been opened
during that BGE session.
Free Use Promos
Occasionally, a “Free Use Promo” is held, during which period the BGE software
is free for anyone to use without a license. Be sure to take advantage of these
promo periods to introduce new players to the software, since they’ll be able to
experience the fully unlocked software as if they had a Gamer Client license. An
internet connection is required to take advantage of a Free Use Promo.
How You Can Help Support Battlegrounds Games
If you enjoy BGE, you can help by spreading the word. There are still many
people who have never tried or even considered the possibility of gaming online
via a virtual tabletop program, and many people have tried other virtual tabletop
programs but have not heard of BGE.
Another way you can help is to purchase one or more commercial artpacks or
Game Boxes for BGE. A complete list of these products is included at the end of
this User Manual, but you should visit the Battlegrounds Games website to keep
abreast of any new products that were released after this User Manual was
published.
151
Credits
Lead Developer & Programmer:
Hernan Ruiz Camauer (aka Heruca)
Webhosting & Server Support:
Daryl Hildebrand (aka Omnidon)
User Manual & Website:
Hernan Ruiz Camauer (aka Heruca)
Graphics Support:
Mark Manders (aka Kepli)
Dice scans
David Bellot (http://david.bellot.free.fr/svg-cards/)
Playing cards
Jason Sandeman (aka Kalmarjan)
Generic Tokens
Battlegrounds Gaming Engine is authored in Adobe Director MX 2004 (v10.1).
Special Thanks to:
• The Dundjinni user community and rpgmapshare.com, for creating such a wealth of
free, high-quality art that can significantly enhance our enjoyment of the Battlegrounds
software.
• To boardgamegeek.com, for helping to connect gamers and game designers, and for
providing a ready source of print-and-play games that are easily converted into digital
games in BGE.
• Everyone who provided feedback on the Battlegrounds Games forums, for helping to
improve our products, and to everyone who has supported Battlegrounds Games.
• You, for downloading Battlegrounds Gaming Engine and giving it a try.
152
Artpacks for BGE
The ever-growing collection of artpacks are a major strength of BRPG (and to a
lesser extent, of BGE), and can save GMs and game designers a lot of
preparation time while simultaneously providing them and their players with
visually rich and professional-looking content. In many cases, the content is
exclusively available for BRPG and BGE users.
The following list contains brief descriptions of each artpack. If one peaks your
interest, click on its name to see preview images, contact sheets, and/or to get
additional information about the product. Note that most of the artpacks
currently available are more suitable for use with BRPG than with BGE. The
artpacks that are most suitable for use with BGE (given the proper game
conversion) have been shaded in green, below.
Please check the BG Store for current pricing on any commercial products.
Dice Pack
Contains 128 dice objects that you can use to roll dice right in BGE's game table window.
FREE!
Base Map Pack 1
A collection of 35 maps, broken down into six categories (Grass; Forest Floors; Scrublands; Swamps &
Thickets; Earth, Sand & Mud; and Cavern).
Like the grass map that comes with BRPG, the maps contained in this artpack all use the same texture
throughout. The idea is that you will customize these generic maps with object overlays as needed to
suit your Encounters (e.g., by adding trees, boulders, roads, paths, ponds, etc), rather than use them
as ready-to-go maps (although some of these maps can certainly be used "as-is").
$11.00
Component Dungeon Pack 1
A set of modular room and hallway components that you place on the background of your choice to
create a dungeon layout. The artpack also contains doorway overlays, hallway bends & intersections,
stairways, pits, columns, caved-in hallway sections, and other goodies to flesh out your dungeons.
Even standalone floor and wall sections are included, so that you can lay out oddly-shaped rooms. The
artpack contains an astounding 234 pieces.
$11.00
This is a "must-have" set for both GM's who like to improvise on-the-fly and those who like to create
elaborate layouts well ahead of game-time.
Medieval Armies
Assorted troops (footsoldiers, cavalry units, leaders, corpses, etc.), all rendered in 5 unique
homogenous styles, allowing you to depict five different armies or warring factions. Contains 98
unique figures.
$10.00
Even when you don't need an army, many of these figures can be used to represent city guards, local
lords, or even PCs, so they should be useful in a number of games.
Elven Armies
Assorted troops (footsoldiers, cavalry units, leaders, corpses, etc.), all rendered in 4 unique
homogenous styles, allowing you to depict four different Elven armies or Elven subraces.
153
$10.00
Kepli's Tree Pack
Contains 154 trees in autumn/winter & spring/summer versions. Includes a PDF that
serves as a handy visual reference for all the trees in the artpack.
In addition to the incredibly-detailed tree graphics, this artpack also comes with 13 sound
effects, 10 of which are loopable. You can use these sound effects to help create a more
immersive environment. They include ambient sounds for both day and night encounters.
$11.00
This artpack is good for both GM's who like to improvise on-the-fly and those who like to
create elaborate layouts well ahead of game-time. The trees also happen to look great on
many of the maps in "Base Map Pack 1", if you happen to already own that artpack.
DevilDan's Monster Tokens
Contains 435 high-resolution figure tokens (including some which are color mods, for
additional variety). They are suitable for use with fantasy or horror games that use a scale
of 5 feet per square or 3 feet per hex.
$12.00
Component Sewer Pack
A set of modular components that you place on the background of your choice to create a
sewer system layout.
In addition to sewer tunnels in a variety of configurations, the artpack also contains standalone elements to further customize your layout, audio clips to set the mood (and creep
your players out!), and even figure tokens for commonly-encountered vermin (i.e., bats
and rats).
FREE!
The artpack contains 104 graphics and 19 audio clips (most of which can be set to loop
continuously).
This is a convenient set both for GM's who like to improvise on-the-fly and those who like
to create elaborate layouts well ahead of game-time.
Vry's PC & NPC Tokens
Contains 105 high-resolution figure tokens (100 original tokens plus 5 color mods for
additional variety). They are suitable for use with fantasy games that use a scale of 5 feet
per square or 3 feet per hex.
FREE!
An excellent "starter set" of PC & NPC tokens for BRPG.
Vry's Monster Tokens
Contains 102 high-resolution figure tokens (100 original tokens plus 2 color mods for
additional variety). They are suitable for use with fantasy or horror games that use a scale
of 5 feet per square or 3 feet per hex.
An excellent "starter set" of monster tokens for BRPG.
154
FREE!
Cyberdrake's Indoor Map Tiles Pack
Contains 99 unique indoor map tiles (8x8 squares each) for creating cave and dungeon
layouts.
FREE!
This is a convenient set both for GM's who like to improvise on-the-fly and those who like
to create elaborate layouts well ahead of game-time.
Cyberdrake's Outdoor Map Tiles Pack
Contains 86 unique outdoor map tiles (8x8 squares each) for creating layouts of villages,
forts, castles, towers, and the general outdoors.
FREE!
This is a convenient set both for GM's who like to improvise on-the-fly and those who like
to create elaborate layouts well ahead of game-time.
Mapping Tiles Pack 1
A set of 216 modular tiles and other graphics that you place on the background of your choice to
create a custom indoor or outdoor map layout.
SC's Mines Pack
A set of mine-themed graphics that you place on the background of your choice (or use one of the
three background textures provided) to create a custom mine layout.
$8.00
$9.00
Devin Night's Token Collection
An entire collection of themed artpacks (currently 12 packs with over 700 tokens) depicting guards &
nobles, dwarves, pirates, orcs & goblins, characters, townsfolk, etc.). All of the content is hand-drawn,
and many of the tokens have color mods for additional variety. The price of this collection will
gradually increase over time, as more artpacks are released throughout 2011.
Devin Night's Sci-Fi Tokens
Contains 160 high-resolution figure tokens for sci-fi games.
Roads & Vehicles
Contains 157 graphics suitable for depicting vehicular combat and/or car chases.
155
$18.00
FREE!
FREE!
Game Boxes and Game Conversions for BGE
The following list contains brief descriptions of each game currently available. If a
particular game listed below peaks your interest, click on its name to see preview
images and/or to get additional information about the game.
Please check the BG Store for current pricing on any commercial products.
"Valkenburg Castle" Game Box
A fantasy game of adventure and combat in the depths of an ancient dungeon. Players may use heroic
leaders, clever burglars, staunch dwarves, mysterious magic users, and squads of fighting men to
explore, and eventually to capture the castle from evil orcs, sorcerers, trolls, ogres, and other
monsters (including a dragon!). Two or more players maneuver their units on a game map which
depicts the five levels of the dungeon beneath the castle (the game is played in three dimensions).
$17.00
A solitaire scenario is included, and there's even a game variant which lets you assault the dungeon
with modern combat squads equipped with rifles, submachine-guns, hand grenades, and demolition
charges. The game features 5 scenarios and a campaign game.
"Asteroid Zero-Four" Game Box
A two-player science-fiction game portraying a nuclear war between two mining bases in the asteroid
belt of our solar system.
Each player commands an asteroid base equipped with laser turrets, command bunkers, ore
processing plants, landing pads, and defensive missile launchers. Each player also has spacecraft,
missiles, and an arsenal of nuclear ordinance at their disposal to attack the enemy asteroid base with.
$17.00
To win, you must destroy or disable the enemy mining operations in a fixed number of turns, while
trying to keep your opponent from doing the same to you.
"Search for the Emperor's Treasure"
In this charming, tongue-in-cheek fantasy boardgame (often considered a boardgame version of
"classic" Dungeons & Dragons), two to eight players take the role of a fighter, elf, cleric, or magician,
then wander around the board collecting arms, treasure, and resolving encounters (which can be
good or bad).
$8.00
The game ends when a certain number of Imperial Treasures has been found (depending on how
many players are playing) at which point the player with the most treasures wins. Gameplay is
competitive (half the fun is throwing nasty encounters on the other players).
"Close Assault" (Basic Game)
A game of man-to-man combat in WWII. Soldiers can be standing, crouching, or prone, and each
posture affects their vulnerability and lines of sight. "Random sequencing" mechanics (a "chit-pull"
system) simulate simultaneous movement, the fog of war, and combat friction without the bother of
written orders.
FREE!
"Close Assault" (Advanced Game)
A game of man-to-man combat in WWII. Soldiers can be standing, crouching, or prone, and each
posture affects their vulnerability and lines of sight. "Random sequencing" mechanics (a "chit-pull"
system) simulate simultaneous movement, the fog of war, and combat friction without the bother of
written orders. Each unit represents an individual soldier, weapon, vehicle, or piece of equipment.
Requires "Close Assault" (Basic Game), which is a free download.
$22.00
"Aliens" Boardgame
9 Colonial Marines with limited armament must fight their way through the alien-infested reactor
room to the APC that will evacuate them to safety.
Fans of the Aliens movie should find this game very enjoyable, and fans of the boardgame will be
pleasantly surprised by how much the gameplay and atmosphere are enhanced by the software.
156
FREE!
"Aliens" Boardgame Variant
A mini-expansion for the Aliens Boardgame conversion (required for play).
This variant adds a few new elements to the game, including:
1. An awesome new map by Joshua Oram
2. A mandatory search for cocooned colonists before you can exit the map
3. New unit type: Facehugger aliens
4. An on-screen Motion Tracker that lets you know when the aliens will begin arriving on the map
5. Exploding barrels
6. A turn counter that tracks how long you have until the nuclear reactor explodes
FREE!
"Aliens: This Time It’s War" Card Game
The Colonial Marines face off against the deadly alien xenomorphs in this asymmetrical card game
spanning five different battlefields. Can the Marines survive the Alien hordes long enough to nuke the
entire site from orbit?
FREE!
Fans of the Aliens movie should find this game very enjoyable.
"Zombie Plague" Boardgame
In this cooperative game of humans vs. zombies, the humans must race to barricade all the doors and
windows of a house, search the house for helpful items and weapons to defend themselves with, and
they must do all this while fighting off an ever-growing horde of shambling zombies.
The zombies, of course, just want to eat the humans. Zombies are slower than humans, but they
make up for that shortcoming through sheer numbers.
The humans can also try to escape using the car in the driveway (if they happen to find the car keys),
but they'll have to make it to the car. Or perhaps they can find the hidden cellar and take refuge in
there until help arrives...
FREE!
Zombie Plague is simple, fast, fun, easy to learn, and very strongly themed (it is very reminiscent of
the classic George Romero zombie movie, "Night of the Living Dead"). Every game of Zombie Plague
tells a story, almost as if you were in an interactive zombie movie. It's even fun if you get killed, since
you come back as a zombie and can continue playing, now intent on killing your former teammates.
"Zombie Plague" Expansion Pack
An expansion pack that takes the Zombie Plague game to a whole new level and greatly increases the
game's replayability.
FREE!
Includes three new maps/gameboards, five Rules Expansions PDFs, ten new tokens, an updated
Zombie Plague card deck, two new custom die types, seven sound effects (to liven up any Zombie
Plague game), and much more.
"Dead of Night" Boardgame
Two to six players must survive a zombie onslaught until dawn. The game can be played
cooperatively or competitively. Can also be played solo, using automatic zombie movement rules.
FREE!
Chunky Fighters Dice Game
A dice game where humorous characters fight it out in an all or nothing brawl. Each fighter is made of
four dice: a head, a body, some legs, and a weapon. Players choose their fighters and roll them to
determine hit points and weapons. Combat involves rolling damage and hit location dice. As fighters
take damage, their body parts are adjusted to show the remaining hit points, until they are finally
destroyed.
FREE!
D-Day Dice Game
Set against a backdrop of American troops landing in Normandy, the players are soldiers trying to
organize improvised units for an attack against a machine gun nest. Each player starts the game with
a unit of a few soldiers and nothing else. As the game progresses, he will collect resources and
advance on the beach, sector by sector, as his unit grows stronger and deadlier. He will succeed... or
die trying. Although built around dice rolling, this game is about resource management (soldiers,
specialists, items, and courage) and knowing when to move your unit.
157
FREE!
"Feudal Ops" Boardgame
"Feudal Ops" is a BGE digital boardgame conversion and complete re-theme of the "Nexus Ops"
boardgame. Players assume the role of medieval Lords that battle each other for control of the
region's wealth and compete with each other for the King's favor. By winning battles and fulfilling
Secret Missions, the players can obtain victory points. The first person to reach the required number
of victory points wins the game.
FREE!
"For Sale (Star Wars Edition)"
A complete re-theme of the original "For Sale" card game. "For Sale, Star Wars Edition" is a simple,
fast-playing auction/bidding game. The original "For Sale" is considered one of the finest
auction/bidding games around, and has a devoted following of fans. Players are continually forced to
make a multitude of difficult decisions during play. The auctions allow for tactics and bluffing, and
require careful assessment of your opponents.
"Pioneer in Peril" Boardgame
This fast-playing game of gunfights and brawls in the Old West is an introductory version of the full
“Outlaws: Adventures in the Old West” boardgame.
FREE!
FREE!
"The Dungeon of D" Card Game
A solitaire dungeon-crawling card game with no bookkeeping and no dice. Just you, the cards, a token
and a dungeon to explore! Your mission: Get out of the dungeon alive as rich as you can. And if you
are able to, find and bring back the Amulet of D’eugor!!
FREE!
"The Island of D 2" Card Game
A solitaire fantasy adventure card game with no bookkeeping and no dice. Just you, the cards, a token
and an adventure! Your mission: Save the Village of Dawn from an impending bandit invasion. Oh,
and by the way, you only have 8 days to do it!
FREE!
"Up Front"
In this card game, which is loosely based on Avalon Hill's Squad Leader series of wargames, each
player directs a squad of men in various World War II scenarios with cards driving the action (there is
no gameboard). Each card and counter represents an individual soldier, weapon, vehicle, or piece of
equipment. This digital conversion includes not only the basic Up Front game, but also the
components from the "Banzai" and "Desert War" expansions, so you will be able to play any of the
seven nationalities (Germans, Americans, Russians, Japanese, British, French, and Italians) covered in
these games.
FREE!
"Zombinion"
"Zombinion" is a complete re-theme of the "Dominion" boardgame. In this game of zombie-killing in a
post-apocalyptic world, each player starts with an identical, very small deck of cards. From then on,
the players construct their deck on the fly, striving for the most efficient path to the precious victory
points (zombie kills) by game end.
This digital conversion covers/supports not only the original "Zombinion" game, but also the followon expansions "Zombinion: Entrails" (the re-theme of "Dominion: Intrigue") and "Zombinion:
Genocide" (the re-theme of "Dominion: Seaside").
158
FREE!