1
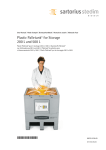
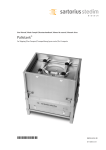
User Manual Installation and use of the Self-Deploying Accessory Flexsafe® 3D Bag for Storage from 100L to 1000L 85037-550-74 Vers. 09 | 2015 Table of Contents Self-Deploying Accessory . . . . . . . . . . . . . . . . . . . . . . . . . . . . . . . . . . . . . . . . . . . . . . . . . . . . . . . . . . . . . 4 1. Bag and Self-Deploying Accessory installation . . . . . . . . . . . . . . . . . . . . . . . . . . . . . . . . 5 2. Filling of 100L, 200L, 500L and 1000L . . . . . . . . . . . . . . . . . . . . . . . . . . . . . . . . . . . . . . . . . 7 3. Storage of the Self-Deploying Accessory . . . . . . . . . . . . . . . . . . . . . . . . . . . . . . . . . . . . . . . 8 4. Cleaning instructions . . . . . . . . . . . . . . . . . . . . . . . . . . . . . . . . . . . . . . . . . . . . . . . . . . . . . . . . . . . . 9 5. Precautions of Use . . . . . . . . . . . . . . . . . . . . . . . . . . . . . . . . . . . . . . . . . . . . . . . . . . . . . . . . . . . . . . . 9 6.Troubleshooting . . . . . . . . . . . . . . . . . . . . . . . . . . . . . . . . . . . . . . . . . . . . . . . . . . . . . . . . . . . . . . . . . . 9 7.Trademarks . . . . . . . . . . . . . . . . . . . . . . . . . . . . . . . . . . . . . . . . . . . . . . . . . . . . . . . . . . . . . . . . . . . . . . . 9 Table of Contents 3 Self-Deploying Accessory The Self-Deploying Accessory eases the installation and the filling of Flexsafe® 3D Bags for storage, saves operator time and eliminates risky bag manipulations post installation. As a bag fills, the Accessory removes all tension from the top of the bag by allowing the top tubing to gradually slide along the Self-Deploying Accessory for an effortless bag deployment to its appropriate position. The Accessory can be used with the Palletank® for Storage or In-Process Fluid Handling. These instructions for use describe the operations required to fill a 100L, 200L, 500L or 1000L Flexsafe® 3D Bag in its dedicated Palletank® for Storage or In-Process Fluid Handling, using the Self-Deploying Accessory. Self-Deploying Accessory components: The Self-Deploying Accessory consists of 3 components (See Fig. 1). 1. The support 2. The adjustment peg 3. The positioning bar 1 2 3 Fig. 1: Self-Deploying Accessory components 4 Self-Deploying Accessory 1. Bag and Self-Deploying Accessory installation 1000L 1. Refer to Flexsafe® 3D Bag Instructions for Use for directions on how to prepare the Palletank® prior to use, unpack the Flexsafe® 3D Bag and install the bag into the Palletank®. To fill the bag using the Self-Deploying Accessory, follow the instructions below. 2. Unfold the bag and drape the 4-port system and the top tubing over the top the Palletank® front wall. 500L 3. Position the mobile rod according to the volume of the Flexsafe® 3D Bag you are using as shown on Fig. 2. 100L | 200L Fig. 2: Three positions of the positioning bar based upon the Flexsafe® 3D Bag volume 4. Install the Self-Deploying Accessory in the middle of the Palletank® front wall and position the 4-port tubes onto the mobile rod as shown in Fig. 3. Fig. 3: Self-Deploying Accessory positioning onto the Palletank® Bag and Self-Deploying Accessory installation 5 5. Adjust the adjustment peg position according to the type and volume of the Palletank® you are using. Please refer to the below table: Part number Description Adjustment peg position FXC116216 STD Plastic Palletank Storage 500L No adjustment peg FXC116215 STD Plastic Palletank Storage 200L Position 1 FXC106230 STD Palletank in Process 200L Position 1 FXC106235 STD Palletank® in Process 500L Position 1 FXC110888 STD Palletank® Storage 200L Position 2 FXC110733 ® STD Palletank Storage 200L (Stackable) Position 2 FXC110889 STD Palletank Storage 500L Position 2 FXC110734 STD Palletank Storage 500L (Stackable) Position 2 FXC106223 STD Palletank in Process 1000L Position 2 ® ® ® ® ® ® The Accessory is not intended to be used with the Palletank® for Shipping. No peg Position 1 Position 2 Fig. 4: Three positions of the adjustment peg according to Palletank® type and volume If the Accessory is not in an upright position (see Fig. 5), check the positioning again according to the above table. Fig. 5: Incorrect positioning of the adjustment peg 6 Bag and Self-Deploying Accessory installation 2. Filling of 100L, 200L, 500L and 1000L The Self-Deploying Accessory is qualified for Bag filling through the top lines. Take into account the weight of the Self-Deploying Accessory when controlling the volume by weight. 1. If you are using a Palletank® for In-Process Fluid Handling close the front doors. Failure to follow this instruction may result in product loss. 2. Check that all the clamps are closed and that they are positioned close to the 4-port system. 3. Connect the bag to the supply line in accordance with the aseptic procedures used on your site. 4. Open the clamp(s) on the filling line. 5. Start to fill the Flexsafe® 3D Bag – Sartorius Stedim Biotech recommends the use of a peristaltic pump for filling and dispensing from the bag. When using a Plastic Palletank® and during the filling of the first liters of fluid, ensure the bag bottom port remains into the Palletank® bottom gate. As the bag fills, the tubes will gradually slide on the Self-Deploying Accessory positioning bar allowing for a perfect and effortless bag deploying to its appropriate position in the Palletank® (see Fig. 6). There is no need for the user to manipulate the Bag during the filling. Fig. 6: Self-Deploying of the Flexsafe® 3D Bag without manipulation Filling of 100L, 200L, 500L and 1000L 7 6. If needed, the Self-Deploying Accessory can be removed for further use on other Palletank® once the bag completely covers the bottom of the Palletank® and the 4-port system is inside the Palletank® (see Fig. 7). Fig. 7 7. Fill the bag to its nominal capacity. 8. Close all clamps and disconnect the filling lines in accordance with the aseptic procedure used on your site. Refer to Flexsafe® 3D Bag Instructions for Use for instructions on emptying the F lexsafe® 3D Bag. 3. Storage of the Self-Deploying Accessory When not in use, the Self-Deploying Accessory can be stored with minimum space on a side or back wall of the Palletank® by hanging it on a side panel of the Palletank® (Fig. 8). Fig. 8: Storage of the Self-Deploying Accessory when not in use 8 Filling of 100L, 200L, 500L and 1000L | Storage of the Self-Deploying Accessory 4. Cleaning instructions 1. Clean the surfaces first with a moist, lint-free cloth to remove coarse contamination. 2. You can clean the Self-Deploying Accessory parts with the help of mild detergents or alcohol. Ensure that cleaning materials are non-abrasive to avoid scratching the surfaces of the Self-Deploying Accessory. 5. Precautions of Use 1. The Self-Deploying Accessory is not intended to be used with the Palletank® for Shipping. 2. Close the doors of the Palletank® for In-Process Fluid Handling prior to the filling of the Flexsafe® 3D Bag. Failure to follow this instruction may result in product loss. 3. Take into account the weight of the Self-Deploying Accessory when controlling the volume by weight. 4. Install the Self-Deploying Accessory in the middle of the Palletank® front wall. 6. Troubleshooting The 4-port system is not supported by the positioning bar. yyCheck that the rod is correctly positioned according the bag volume. Refer to section 1 (3.). The Self-deploying Accessory is not in upright position when installed on the Palletank® front wall. yyCheck the position of the adjustment peg according to the type and volume of the Palletank® you are using. Refer to section 1 (5.). 7. Trademarks Flexsafe® and Palletank® are registered trademarks of Sartorius Stedim Biotech. Cleaning instructions | Precautions of Use | Troubleshooting | Trademarks 9 Sartorius Stedim Biotech GmbH August-Spindler-Strasse 11 37079 Goettingen, Germany Tel.: +49.551.308.0 Fax: +49.551.308.3289 www.sartorius-stedim.com Copyright by Sartorius, Goettingen, Germany. No part of this publication may be reprinted or translated in any form or by any means without prior written permission from Sartorius. All rights reserved by Sartorius in accordance with copyright law. The information and figures contained in these instructions correspond to the version date specified below. Sartorius reserves the right to make changes to the technology, features, specifications and design of the equipment without notice. Last updated: 09 | 2015 Sartorius Stedim Biotech GmbH, Goettingen, Germany Printed in the EU on paper bleached without chlorine. | W Publication No.: SPT6010-e150901