1
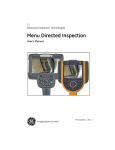
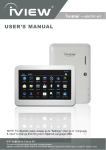
GE
Inspection Technologies
Remote Visual Inspection
iVIEW Remote PTZ
™
Operating Manual
www.ge.com/inspectiontechnologies
iVIEW Remote PTZ Table of Contents
Introduction . ...................................................................................2
What You Have Received . ....................................................................2
Requirements.......................................................................................3
Setup . .......................................................................................4
Hardware Installations......................................................................4
Software Installations.......................................................................5
Software Configuration.....................................................................6
Video and Audio Setup......................................................................7
Snapshot Capture Setup...................................................................8
Playback Setup.................................................................................8
Ca-Zoom PTZ Operation........................................................................9
Video Capture, Snapshot Capture and Playback .................................10
Video Capture.................................................................................10
Snapshot Capture using Twain Channel..........................................10
Snapshot Capture using Video Device Channel................................10
Video Playback...............................................................................11
Advanced Users Menu........................................................................12
Troubleshooting .................................................................................14
Environmental Compliance ................................................................15
Service Contact Information . .............................................................16
www.ge.com/inspectiontechnologies
iVIEW Remote PTZ
Introduction
The iVIEW™ Remote software was designed to allow you to control the functions of the
Ca-Zoom® PTZ system from a remote location using a computer. It allows for video
capture and snapshots to be taken directly to a computer.
What You Have Received
• USB Audio/Video (A/V) Capture Device
• Belkin USB VideoBus II (1) OR GrabBee USB A/V Grabber (1)
• 4 m (12 ft.) S-video Cable (1)
• iVIEW Remote PTZ Version 4.1 Software CD-ROM (1)
• 3 m (10 ft.) RS-232 Cable (1)
• Keyspan USB Serial Adapter (1)
• iVIEW Remote PTZ User’s Manual Part No. PTZ-REMOTE-MAN Rev. B (1)
10 ft. RS-232
Cable
Keyspan USB
Serial Adapter
12 ft. S-video
Cable
GrabBee USB
A/V Grabber
Belkin USB
VideoBus II
iVIEW Remote Software CD-ROM
www.ge.com/inspectiontechnologies
iVIEW Remote PTZ Requirements
Minimum Computer System Requirements
• PC Laptop or Workstation must be 300 MHz or faster
(for video capture, a 900 MHz or faster processor is recommended)
• RS-232 port and a USB port or two USB ports
• Windows® 2000 or XP
• DirectX 9.0 or higher (included on iVIEW Remote software CD-ROM)
www.ge.com/inspectiontechnologies
iVIEW Remote PTZ
Setup
Step 1 - Hardware Installation
• Connect one end of the included RS-232 cable to the RS-232 port on the back of the Ca-Zoom PTZ system Camera Control Unit (CCU) (Figure 3) and the other end to the RS-232 port on your computer (Figure 1).
Note: If your computer does not have an RS-232 port, connect the Keyspan USB serial adapter to one of the USB ports on your computer. This will function as a RS-232 interface (Figure 2).
• Connect the USB A/V Capture Device to a USB port on your computer (Figure 1). Hardware wizard will then guide you through the hardware installation process. The hard-
ware drivers for the USB A/V Capture Device are available on the iVIEW Remote Software CD-ROM.
• Connect one end of the provided S-Video cable to the S-VIDEO OUT plug on your Ca-Zoom PTZ system CCU (Figure 4) and the other end to the USB A/V Capture Device.
USB VideoBus II
Figure 1
RS-232
Adapter
RS-232
USB VideoBus II
Figure 2
RS-232
S-Video
POWER
CAMERA
PENDANT
Figure 3
KEYBOARD
PENDANT
Figure 4
www.ge.com/inspectiontechnologies
VIDEO
OUT
S-VIDEO
OUT
VIDEO
IN
S-VIDEO
IN
(Back of computer)
RS-232
iVIEW Remote PTZ Step 2 - Software Installation
• Insert the iVIEW Remote software CD-ROM into your PC’s CD/DVD-ROM drive. The installation
will automatically start. Follow the onscreen instructions to install iVIEW Remote (Figure 5).
• To start iVIEW Remote, either click on the iVIEW Remote icon located on your desktop or in the Start Menu Programs Everest VIT.
Note: If a previous version of iVIEW Remote was installed on your computer, you must manu-
ally delete it before installing this version.
Note: During installation a prompt will ask if you would like to install the drivers for the Keyspan USB to Serial Converter. Click OK to install the drivers, or Cancel to skip, if you’ve previously installed them.
Note: The driver files for both the GrabBee USB A/V Grabber and the Belkin USB VideoBus II adapters will automatically install to your computer’s hard drive.
Note: The MPEG-4 encoder/decoder will install automatically.
Figure 5
www.ge.com/inspectiontechnologies
iVIEW Remote PTZ
Step 3 - Software Configuration
• Select Video Capture Options from the Settings dropdown menu on the iVIEW Remote
software interface (Figure 6). A settings control window will appear (Figure 7).
Figure 6
NOTE: The user can choose between a traditional graphical user interface (Figure 6) or a skinstyle interface. When using the skin-style interface, right-click the mouse button on the graphical
user interface to access the menu features normally found on the menu across the top.
www.ge.com/inspectiontechnologies
iVIEW Remote PTZ Step 4 - Video and Audio Capture Setup
• Using your mouse, click the arrow to the right of the Video Device selection box (Figure 7). Select either USB VideoBus II, Video (for Belkin USB VideoBus II) OR USB Live! Pro Video Capture (for GrabBee USB A/V Grabber) from the resulting drop-down list. Use the same procedure to select USB VideoBus II, Audio OR USB Live! Pro Audio Capture for the audio device.
• Click the Connectors... button and select Video: S-Video In as your Input, click OK to accept changes. When you close the connectors screen and the Settings window there should be video.
• Using your mouse, click the arrow to the right of the Use Twain Channel and select either USB VideoBus II, Video (for Belkin USB VideoBus II) OR USB Live! Pro Video Capture (for GrabBee USB A/V Grabber).
Note: The iVIEW Remote program properties must be changed to accommodate a PAL Ca-Zoom PTZ system. To do this, access the Properties button in the Settings window (Figure 7), use the drop down menu to select PAL. Please restart the software after
switching between NTSC and PAL video standards.
Figure 7
www.ge.com/inspectiontechnologies
iVIEW Remote PTZ
Step 5 - Snapshot Capture Setup
• If “Use Video Device Channel” is selected the resulting images captured will be of the same resolution as the video stream. With the USB A/V Capture Device this creates a
quarter-VGA image (320 x 240).
• If “Use Twain Channel” is selected the software will break the video stream to provide a full-VGA image (640 x 480) (see table for memory information). USB VideoBus II, Video (for Belkin USB VideoBus II) OR USB Live! Pro Video Capture (for GrabBee USB A/V Grabber) must be selected from the dropdown menu to use the TWAIN Channel for image capture.
Capture Method
Snapshots
Using Video Channel
using USB A/V Capture Device Using TWAIN Channel
Capture Resolution Approximate Memory Used
1/4 VGA
Bitmap 240KB
JPEG 16KB
Bitmap 900KB
JPEG 900KBMB
VGA
Step 6 - Playback Setup
• Select the Files… button on the Settings window (Figure 7) and select the file that you would like to playback. Alternatively you can select the Always Play the Last Clip Captured option.
www.ge.com/inspectiontechnologies
iVIEW Remote PTZ Ca-Zoom PTZ Operation
Note: Please refer to your Ca-Zoom PTZ operating manual for assistance on any of the features
of the Ca-Zoom PTZ system controlled remotely.
The onscreen graphical user interface (Figure 5) mimics the controls of the Ca-Zoom PTZ system.
The following tips might allow you to use the interface more efficiently.
Pan-and-Tilt
Pan-and-Tilt can be accomplished in several ways:
• Click and drag the joystick in the desired direction.
• Use the arrow keys on your computer’s keyboard.
• Use the arrow keys on the iVIEW Remote software interface.
Menu Navigation
Menu Navigation can become somewhat cumbersome if controlled with the joysticks. This
function can, therefore, also be performed using the directional buttons on either your keyboard
or onscreen.
www.ge.com/inspectiontechnologies
10 iVIEW Remote PTZ
Video Capture, Snapshot Capture and Playback
Video Capture
• Select File Location
• Click the Files... button on the video capture portion of the Settings window.
• Enter a desired name and select location for new file.
• Start Capture by selecting on the Capture button (Figure 8).
Note: A green progress bar will appear onscreen to report the status of your available
memory. The entire bar represents the amount of memory you have available to capture video in the selected drive.
• Select the Stop Capture button to close the new file.
Snapshot Capture using Twain Channel
• Click Snapshot on the graphical user interface.
• Click Capture Still Image on the image capture window.
Snapshot Capture using Video Device Channel
• Click Snapshot on the graphical user interface.
Note: Snapshots taken with iVIEW Remote software are taken directly from the video stream. As a result, there is no tip data within the image data. Therefore, snapshots taken with the iVIEW Remote software cannot be re-measured. This problem can be circumvented if you use iVIEW Remote software to access the Ca-Zoom PTZ system’s internal iVIEW software and save measurement images to the floppy drive or internal memory of the
Ca-Zoom PTZ system Camera Control Unit.
Figure 8
www.ge.com/inspectiontechnologies
iVIEW Remote PTZ 11
Video Playback
To start a video playback, either select the playback button (Figure 6) or Open Video from the
File dropdown menu. Figure 9 represents the video playback window. From this window you can
pause the video, advance or retreat the video one frame at a time, and even capture snapshots.
The progress bar allow the bottom allow the user to quickly jump anywhere in the video file.
Figure 9
www.ge.com/inspectiontechnologies
12 iVIEW Remote PTZ
Advanced Users Menu
The Advanced Settings window allows the user to customize iVIEW Remote to best fit the user’s
needs. To access the Advanced Video Settings, press the Advance button in the Settings window (Figure 7).
Figure 10
www.ge.com/inspectiontechnologies
iVIEW Remote PTZ 13
Use Serial Connection allows the user to toggle ON/OFF the remote control portion of the
software. This is useful if the software is being used only for video capture. It slightly improves
recording quality because it does not allocate any computer resources to Remote Control. When
the box is checked the serial connection is enabled.
The Video & Audio Capture section allows the user to make adjustments to video capture
properties.
Full Screen Viewing:
By selecting “Don’t dock the live video option”, it is possible to use iView Remote as a full screen
viewing option. After selecting the check-box, return to the user interface screen (Figure 6) and
start a video capture. When the video capture is stopped, the video will remain in its streaming
video box. This window can then be maximized to achieve full screen video. The software must
be restarted to return to original video format.
The user can select from any Codec available in their computer. iVIEW Remote is not compatible
with all Codecs and only guarantees operation with the default codec, “Microsoft MPEG-4 Codec
V2”. The user can also select the Motion Video Quality. A value of 10 provides the maximum
video quality, a value of 1 uses the least disk space. Not all codecs allow the utilization of Motion
Video Quality setting. The advantage of using a codec, like MPEG-4 is that, it greatly reduces you
capture file size. The chart below shows the extent to which file sizes are reduced.
Video Capture
Capture Method
USB A/V Capture Device
Capture Resolution 1/4 VGA
Approximate Memory Used
AVI 3.4 MB/sec
MPEG .2 MB/sec
The Snapshot capture section allows the user to select JPEG capture quality. A value of 10
provides the best quality, a value of 1 uses the least disk space.
Bitmap Pixel Size and Clipping Area allow for aspect ratio correction. This is important when
using DV. DV is 720 x 480 (rather than the standard 640 x 480), because of this, images can
appear stretched. Setting the Bitmap Pixel size to 640 x 480 corrects for this stretching. The
Bitmap clipping area allows the user to adjust the size of the images captured.
Playback Window:
There are several playback settings that can be adjusted. The playback window width and
height can be adjusted to correct for the aspect ratio problems associated with using the DV
video format. The playback speed can be important when viewing compressed video (i.e. Some
compressors drop frames to achieve smaller file sizes. When frames are dropped, the resulting
playback appears to accelerate. By decreasing the playback speed, the user can compensate for
this lost of frames). The playback rate is defaulted to 1 (original capture speed). Adjusted rate is
set relative to the original capture speed (i.e. an adjustment rate of .5 is half the original speed,
a rate of 2 doubles the playback rate).
www.ge.com/inspectiontechnologies
14 iVIEW Remote PTZ
Troubleshooting
• My computer is unable to communicate with the Ca-Zoom PTZ system.
- Many Pocket PCs monopolize the COM ports with their docking stations. To circumvent this problem re-configure the Pocket PC software so that it does not continually search for a Pocket PC to sync with. This process should be described in your Pocket PC literature.
- The Ca-Zoom PTZ system’s power must be turned ON before starting the iVIEW Remote Software.
• Why is there no video on the iVIEW Remote graphical interface screen?
- Make sure your settings are configured correctly, as indicated in Figure 7.
• Why is the video in the view-screen distorted or black-and-white?
- Make sure that you have selected the correct video format - NTSC or PAL. The software defaults to NTSC. Click on Properties button from the Settings window to change it
(see Page 7).
• Why does the video stream in the view-screen appear choppy?
-
The frame rate is number of frames or images that is projected or displayed per second. The higher the frame rate, the smoother the video stream or playback. Conversely lower frame rates will result in choppy video stream or playback. To correct this
problem, adjust the frame rate to a higher value. Click on the Resolution button from the Settings window (Figure 7). Change frame rate value by clicking the arrow-up button.
Note: The maximum frame rate for NTSC Ca-Zoom PTZ is 30, and 25 for PAL.
• Why does the iVIEW Remote graphical interface screen appear disjointed?
-
Windows is operating in a greater than 100% (96 dpi) font environment. To correct this problem, right-click on your desktop. Click on the Settings tab and click on the Advanced... button. From the General Tab, change font size to Small fonts (Normal size [96dpi]).
• Why can’t I properly control the Ca-Zoom PTZ system using iVIEW Remote when a GVD is connected?
- There may be a communications conflict. Using iVIEW Remote and a GVD simultaneously is not recommended.
www.ge.com/inspectiontechnologies
iVIEW Remote PTZ 15
Environmental Compliance
The equipment that you bought has required the extraction and use of natural resources for its
production. It may contain hazardous substances that could impact health and the environment.
In order to avoid the dissemination of those substances in our environment and to diminish the
pressure on the natural resources, we encourage you to use the appropriate take-back systems.
Those systems will reuse or recycle most of the materials of your end life equipment in a sound
way.
The crossed-out wheeled bin symbol invites you to use those systems.
If you need more information on the collection, reuse and recycling systems, please contact your
local or regional waste administration.
Visit www.ge.com/inspectiontechnologies for take-back instructions and more information about
this initiative.
www.ge.com/inspectiontechnologies
16 iVIEW Remote PTZ
Service Contact Information
USA
GE Inspection Technologies Product Service Dept.
4619 Jordan Road North Dock
Skaneateles Falls, NY 13153
Germany
GE Inspection Technologies
Lotzenäcker 4
72379 Hechigen
Hong Kong
GE Inspection Technologies
Unit 1602, 16/F Sing Pao Building
101 King's Road
North Point, Hong Kong
Tel: 315-685-4142
Fax: 315-685-2920
Email: [email protected]
Tel: +49-7471-9882 20
Fax: +49 7471-9882 30
Email: [email protected]
Tel: +852-2877-0801
Fax: +852-2877-0868
Email: [email protected]
www.ge.com/inspectiontechnologies
Customer Support Centers
North/South America
4619 Jordan Road
Skaneateles Falls, NY 13153
Tel:
888-332-3848
315-685-4142
Email: [email protected]
Europe
Lotzenäcker 4
72379 Hechingen
Germany
Tel: +49 (0) 7471 9882 0
Email: [email protected]
Asia/Pacific
Unit 1602, 16/F Sing Pao Building
101 King’s Road
North Point
Hong Kong
Tel: +852 2877 0801
Email: [email protected]
www.ge.com/inspectiontechnologies
©2007 General Electric Company.
Ca-Zoom is a registered trademark of General Electric Company.
iVIEW is a trademark of General Electric Company.
Windows and Microsoft are registered trademarks of Microsoft Corporation.
Manufactured in USA by GE Inspection Technologies
PTZ-REMOTE-MAN Rev. D
Printed in USA