1
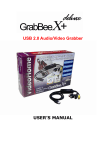
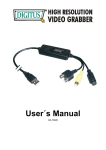
GrabBee-AV
USB 2.0 Audio/Video Grabber
User's Manual
FEDERAL COMMUNICATIONS COMMISSION
This device complies with Part 15 of the FCC Rules Operation is subject to the following two conditions:
this device may not cause harmful interference, and (2) this device must accept any interference received,
including interference that may cause undesired operation.
This equipment has been tested and found to comply with the limits for a Class B Digital Device, pursuant
to part 15 of the FCC Rules. These limits are designed to provide reasonable protection against harmful
interference in a residential installation. This equipment generates, uses and can radiated radio
frequency energy and, if not installed and used in accordance with the instruction, may cause harmful
interference to radio communication. However, there is no grantee that interference will not occur in a
particular installation. If this equipment does cause harmful interference to radio or television reception,
which can be determined by tuning the equipment off and on, the user is encouraged to try to correct the
interference by one or more of the following measures:
- Reorient or relocate the receiving antenna.
- Increase the separation between the equipment and receiver.
- Connect the equipment into an outlet on a circuit different from that to which the receiver is connected.
- Consult the dealer or an experienced radio/TV technician for help.
Notice: Changes or modifications not expressly approved by the party responsible for compliance could
void the user’s authority to operate the equipment.
CE DECLARATION
This device complies with CE . These limits are designed to provide reasonable protection against
harmful interface in a residential installation.
Printed in TAIWAN R.O.C No. 07202011
All contents are subject to change without notice.
All trademarks are the property of their respective owner.
TABLE OF CONTENTS
CHAPTER 1. OVERVIEW..............................................................................................................
1.1 Introduction..............................................................................................................................
1.2 Features...................................................................................................................................
1
1
1
1.3 Specifications...........................................................................................................................
1.4 System Requirements..............................................................................................................
1.5 Package Contents....................................................................................................................
1
2
2
CHAPTER 2. INSTALLATION........................................................................................................
2.1 Hardware device description....................................................................................................
2.2 Driver Installation......................................................................................................................
2.3 Application Software Installation...............................................................................................
3
3
3
4
2.4 Hardware Device Installation....................................................................................................
4
CHAPTER 3. OPERATION………………......................................................................................
3.1 Starting.....................................................................................................................................
5
5
3.2 File...........................................................................................................................................
3.3 Record......................................................................................................................................
3.3.1 Video Device..................................................................................................................
5
6
6
3.3.2 Set Video Device............................................................................................................
3.3.3 Video Type......................................................................................................................
3.3.4 Image Filter.....................................................................................................................
3.3.5 Recording Format...........................................................................................................
6
6
6
6
3.3.6 Recording Video Type.....................................................................................................
3.3.7 Quality.............................................................................................................................
3.3.8 Split Size.........................................................................................................................
3.3.9 Maximum Recording Time..............................................................................................
3.3.10 Recording duration time................................................................................................
3.3.11 Commercial Cutting.......................................................................................................
6
6
6
7
3.3.12 Output Folder................................................................................................................
3.3.13 Recording and Burning.................................................................................................
3.3.14 Start button....................................................................................................................
3.3.15 Stop button....................................................................................................................
3.3.16 Current Status...............................................................................................................
3.4 Edit...........................................................................................................................................
3.4.1 Player control tools.........................................................................................................
7
7
7
7
7
7
7
8
3.5 Burning......................................................................................................................................
8
9
9
11
15
CHAPTER 4. TROUBLESHOOTING..............................................................................................
17
3.4.2 Editing in Storyboard......................................................................................................
3.4.3 Transition........................................................................................................................
3.4.4 Preview and Save Button...............................................................................................
CHAPTER 1. OVERVIEW |
1
1.1 Introduction
GrabBee - AV - New Generation USB2.0 Audio/Video grabber is the best ideal companion for your
portable audio/video application. Now with Real-time DVD recording, you have a powerful video
application on your hand.
It is the bridge between your computer and analog camera, VCR, camcorder or any other video
source.
GrabBee-AV is small enough to fit in the palm of your hand and it is ideal for both notebook and
desktop computers.
1.2 Features
• Small physical Wonder--Dimensions are (L)81mm x (W)30mm x (H)15mm
• Audio and video go though USB 2.0 bus for Audio/Video synchronization and superior performance
• High speed USB 2.0 data transfer rate for superior audio/video recording
• VCD/SVCD/DVD direct burning support, no need burning software
• Encoding VCD/SVCD/DVD/LDVD format directly, Ideal formats for video application
• Up to 25 fps motion capture capability at 720x576(PAL) & 30 fps at 720x480(NTSC)
• Composite, S-Video analog input, NTSC, PAL and SECAM multi system support
• Recording period and Commercial cutting setup
• Support Brightness, Contrast, Hue, Saturation, Sharpness control
• Powerful video editing function include Motion Video Special Effects/ Title Effects/ Picture-in-Picture
Effects/ Slow & Fast Motion Video Effects/ background music/ color background/ Transitional
Effects
• Simple and Easy Direct burning function for Video to DVD making
• Plug & Play
• Low power consumption. Ideal for portable computer too
1.3 Specifications
• Video input : One RCA composite, One S-Video.
• Video system : NTSC, PAL and SECAM multi system support.
• Audio input : Go through USB
• Motion capture :
DVD/LDVD format up to 720x480@NTSC, and 720x576@PAL
SVCD format 480x480@NTSC, and 480x576@PAL
VCD format 352x240@NTSC, and 352x288@PAL
• Performance : Up to 25 fps at 720x576 for PAL, 30fps at 720x480 for NTSC.
• Power Source : 5VDC,230mA(max) through USB port.
CHAPTER 1. OVERVIEW |
1.4 System Requirements
• USB 2.0 equipped computer
• Pentium4 or above
• 256MB of RAM
• WinXP/Vista/7
• Sound card
• CD ROM drive(For software installation)
• DVD Writer (if you want make DVD Burning application)
1.5 Package Contents
• GrabBee-AV USB 2.0 Audio/Video Grabber
• VHS to DVD software CD
• Quick Installation Guide
2
CHAPTER 2. INSTALLATION |
※ Do not connect GrabBee - AV to computer USB port before driver installation
Steps :
(1) Install Driver
(2) Install “VHS to DVD” Capture/Edit/Burning software
(3) Plug in GrabBee - AV hardware
2.1 Hardware device description
1.
2.
USB 2.0 connector : Connect to USB 2.0 port of your computer
Composite video input : Composite video input from external A/V Device (e.g. VCR)
3.
4.
Audio L/R input : Audio input from external A/V device
S-Video input : S-Video input from external A/V device (e.g. VCR)
2.2 Driver Installation
2.2.1 Please insert CD-ROM into your CD-ROM drive; please go to “My Computer”, click CD-ROM
drive)
2.2.2 Select “GrabBee - AV” product.
2.2.3 Select “Device Driver”
2.2.4 Setup wizard is running.
2.2.5 Complete Setup Wizard, Click "Finish"
3
CHAPTER 2. INSTALLATION |
4
2.3 Application Software ( VHS to DVD Capture/Edit/Burning ) Installation
2.3.1 Please insert CD-ROM into your CD-ROM drive; please go to “My Computer”, click CD-ROM
drive)
2.3.2 Select “GrabBee - AV” product.
2.3.3 Select “Application”
2.3.4 Setup wizard is running.
2.3.5 Select the language you will use. Click "Next"
2.3.6 Welcome to the InstallShield wizard. Click "Next"
2.3.7 Accept the terms of the license agreement. Click "Next"
2.3.8 Choose destination location. Click “Next”
2.3.9 Select program folder, Click “Next”
2.3.10 Click “Install” to begin the installation. Click “Install”
2.3.11 InstallShield Wizard Complete; Click "Finish"
2.4 Hardware Device Installation
2.4.1 After Driver and Application Software install completed, please plug the GrabBee - AV into the
computer’s USB 2.0 port; System will now detect the new device and install completely.
2.4.2 Please check the Device Manager, the GrabBee - AV driver was installed successfully in
your computer
CHAPTER 3. OPERATION |
3.1 Starting
After AP software install, you can find “honestech VHS to DVD” short cut on desktop.
Please click the “honestech VHS to DVD” icon.
3.1.1 The first time starting application software,
Please Enter the product key, the license
key on CD envelop
After starting application, you can see video window as below.
3.2 File:
Manage current tasks in project units.
1. New Project: Create a new project.
2. Open Project: Open an existing project.
3. Save Project: Save the work that has been done up to now.
5
CHAPTER 3. OPERATION |
3.3 Record
3.3.1 Video Device:
Using the drop down menu shown above, you can select the input source for your video.
this auto-detects video input devices and list them here. All your attached capture device
will be list here.
3.3.2 Set Video Device:
Change Input source, Control setting of the
device selected.
When the input source is specified as Tape
source, the VCR Input checkbox needs to
be checked.
3.3.3 Video Type:
Select the type of input file.
3.3.4 Image Filter
3.3.6.1 Clean noise: This is a filter which is clean noise in the screen.
3.6.6.2 Adjustment: To control of color value that is input video.
3.3.5 Recording Format:
Select the output file format from drop down menu.
3.3.6 Recording Video Type:
Select the type of output file.
3.3.7 Quality:
Adjust the quality of the output file. (Best/Good/Normal/Average)
3.3.8 Split Size:
Split size takes the guess work out by automatically splitting the file size of capture video
according to the format and disc capacity you will be using to burn your movie. The output
files are partitioned according to the capacity of the disk to be burned (CD/DVD).
6
CHAPTER 3. OPERATION |
7
3.3.9 Maximum Recording Time:
The maximum recording time will be determined depending on the output format and amount
of hard drive space you have available. Files cannot be created which exceed this time. This is
ideal if you want to monitor and record activities at home while you are away for short time.
(Few hours are ideal)
3.3.10 Recording duration time:
Set the recording duration time you want. This is very handy when you know the duration
of the movie you are capturing. You don't have to monitor the capture process, just set the
recording duration and will HT Video to DVD will stop once this time expires. It is always
good idea to set record duration time. If not set, recording will continue up to the maximum
recording time.
3.3.11 Commercial Cutting:
This function is cutting a scene which not be want to included at the recording file like
to a commercial scene, that is only work at recording status. At the first, start recording
and click
when come out the CM and click
after end CM and then the
cut time data be add to a combo list. Do again when you want to cut like this, and after stop
recording it should be changed to Edit and add the list of cut time date in the storybook.
If you want to detail cut of the cut clip, you double click the clip that you can see the time
range at the play panel and control a seek bar and click
then be applied, At the last,
click
it should be output a file. (CM: Commercial Message)
3.3.12 Output Folder:
Specify the location where the capture video will be saved.
3.3.13 Recording and Burning:
If checked, starts burning process right after recording for the designated time.
This is ideal when you are copying your home videotapes into DVD disc. Makes
the whole process automatic.
3.3.14 Start button:
After all the configurations are set you can simply click on this button
to start
The capture process.
3.3.15 Stop button:
Click on this button
when you are not using the record time duration.
Also when you want to stop the record process. Everything recorded prior to
pressing this button will be saved into a file.
3.3.16 Current Status:
Displays the status of the recording depending on your recording durations time,
or the maximum record time.
CHAPTER 3. OPERATION |
8
3.4 Edit
Once all your video is captured, you can move onto the edit
phase of the honestech VHS to DVD 2.5 Editing video clips
are very easy with drag-and-drop feature. Your clips can be
reviewed by dragging the clips in your file pool in to player
panel. Editing is done within this player panel.
During the edit phase, you can trim out scene from your
recorded video. You can also cut your movies into multiple
scenes and add them into storybook transition effects
between each scene. When you have multiple scenes
captured, you can combine them into one continuous clip
with transitions effects. In order for you trim or cut part of the
scene from the captured clips, you will need to create two
separate clips, one before the part of the clip to be trimmed
and another for the scenes after the part of the clip to be
trimmed. You can even combine two separate clips into one
scene using the storyboard.
3.4.1 Player control tools
1.
2.
3.
4.
This scroll bar can be moved from left right to
change the Mark In and Mark Out locations for
the video clips to be trimmed or Zoom In to.
To specify the beginning of the clip you want to keep.
To specify the end of the clip you want to keep.
This scroll bar can be used to easily move within
the video clip to quick preview. You can also use
the play scroll bar to assign the Mark In and Mark
Out point of the movie clip.
5.
6.
7.
8.
9.
10.
11.
12.
13.
To remove Mark In or Mark Out specified.
To Zoom into Mark In and Mark Out location for more precise trimming.
Play the movie clip from where the play scroll bar is located.
Stop the movie clip.
Go to beginning of the movie clip.
Move single frame forward in the movie clip.
Move single frame backward in the movie clip.
Go to the end of the movie clip.
After you are satisfied with Mark In and Mark Out location, you can use Cut tool to
add the clip within the Mark In and Mark Out into the Storyboard as shown below.
CHAPTER 3. OPERATION |
3.4.2 Editing in Storyboard:
You can combine video clips and transitions.
A: To Change the Transition Section:
1. Select the Transition icon.
2. In the Transition Properties window (3.4.3.3), change the transition section.
B: For Video Clips: To Change the Size of a Clip:
1. Select a video clip.
2. In the Player panel, use the
buttons to change the size of the clip.
3.4.3 Transition:
Transition allows you to add a video transition between the two clips,
like a fade-in-fade-out effect.
3.4.3.1 To Add a Transition
1. Drag and drop the type of transition that you want to apply onto Storyboard.
2. Once the transition has been added, the Transition Properties window will
open to the right of the screen.
9
CHAPTER 3. OPERATION |
3.4.3.2 Setting Up Transitions
When you click the Transition icon from
Storyboard, the Transition Properties window
opens as shown below.
[Transition Properties window]
1. Preview Window :
Provides immediate playback of video edits.
2. Direction: Set the direction of the transition.
3. Section Setup:
You can adjust the section where the two clips overlap.
3.4.3.3 Transition Effect Group
The registered transition effects will
be displayed on the Transition List
screen.
Five types of transition are available:
3D, Wipe, Slide, Stretch, and Etc.
transitions.
10
CHAPTER 3. OPERATION |
11
3.4.4 Preview and Save Button
3.4.4.1: Preview Button
You can preview the registered frame before saving it.
3.4.4.2: Save Button
This saves the contents edited in Storyboard into a file.
A: Saving in MPEG format
(1) Rendering Method
(1)-1 Fast MPEG merge
- To use the Fast Method, all video segments being rendered must have
identical MPEG formats. This makes inserting and deleting frames
simple and fast.
- The output video format will match the original MPEG format.
- Customizing of video and audio settings is not possible; function
property settings are made inactive.
CHAPTER 3. OPERATION |
12
(1)-2 Smart Rendering
- Smart Rendering encodes a part or the whole video.
- Only the edited title, audio and special effect segments of the original
streaming video will be encoded while the remainder of the original
video will be saved as is.
- If edits are applied to the entire movie clip, the whole movie will be
re-rendered.
- When movie clips with different video formats are combined, the format
of the output file will be set to match the format of the "base streaming
video file". Movie clips with formats that don't match the "base
streaming video file" will be re-rendered.
- Select the "base streaming
video file" using the button.
- Although the video settings cannot be changed, the audio settings can
be adjusted.
(1)-3 Full Rendering
- Flexible
Renders movie clips together that are formatted with different video
and audio settings.
- Customizable
The output video and audio settings can be manually selected.
- Time consuming
The Full Method requires that the entire video be encoded, not just the
edited part(s).
(2) Type
- Fast MPEG merge: Displays MPEG format of file to be rendered.
- Smart Rendering: Displays MPEG type.
- Full Rendering: Select MPEG type
(Support MPEG-1, VCD, MPEG-2, SVCD and DVD.
Both NTSC and PAL standards are supported.)
CHAPTER 3. OPERATION |
13
(3) Video
- Resolution: Displays video resolution (screen size).
- Frame Rate: Displays Frames Per Second (fps).
- Bit Rate: Displays Bits Per Second (bps).
- Advanced
Interlace encoding mode:
Interlace Encoding Mode encodes one image page in field units by
separating it into even/odd number line fields. You can improve screen
quality using this option when horizontal lines appear in the input source
screen. When the Interlace Encoding Mode is set, an MPEG file whose
frame type is interlaced is created. This option is available only in MPEG2.
De-interlace:
This option is to remove the horizontal lines on the screen entered in the
frame unit before encoding. If you select the Interlace Encoding Mode
above, you do not have to use this option. In addition, if you select
De-interface, you can obtain a good quality MPEG file without selecting the
Interlace Encoding Mode.
Interlace Encoding Mode and De-Interlace are effective in converting
DV-AVI files made by Camcorders into MPEG files.
(4) Audio
- Sampling Rate
Displays Sampling Frequency (KHz).
- Bit Rate
Displays Bits Per Second (bps).
CHAPTER 3. OPERATION |
B: Saving in DV-AVI format
(1) DV-AVI Type
(1)-1 Type 1: Video file in Digital Video format.
- This is native format of video in digital camcorder.
- Video and audio are in the same stream.
- So it requires splitter that divides video and audio.
(1)-2 Type 2: Video file in general AVI format.
- Video is compressed in DV format.
- Video and audio are in the separate stream.
- It needs to be converted into type 1 to be transferred to a
digital camcorder.
(2) Video format : Select NTSC or PAL.
- NTSC: 720 x 480 resolution
- PAL: 720x 576 resolution
(3) Audio sample rate : Select audio frequency.
14
CHAPTER 3. OPERATION |
3.5 Burning
*Sequence for using the burn function
A: Select output video format
(VCD, SVCD, Mini-DVD, DVD).
B: Option
Allows for custom settings.
(1) Select CD/DVD writing device
(2) Input video type:
Select video standard.
Note (page18)
(3) Make UDI File:
Check this box to keep the UDI file that was created during burning.
Otherwise the file will be deleted after the burning is completed.
(4) Record to media
If you select this menu, video is saved on CD or DVD.
(5) Disk Name
Create custom title for
CD/DVD media.
(6) Temp Path
: Click on this icon to browse and select the directory to be used as a Temp folder.
(7) OK/Exit
: Saves setting changes and closes Option Dialog window.
: Cancels setting changes and closes Option Dialog window.
15
CHAPTER 3. OPERATION |
16
C: Prepare the media to be burned.
: Eject CD/DVD drive.
: Close CD/DVD drive.
: Erase rewriteable disk.
: Disk Information.
D: Select the file to be burned using the Drag & Drop function.
Attention: VCD,SVCD, Data CD, Data DVD is not supported by "Create Menu " function
E:
: Select among background images for each page
: Select the color and style of the page navigation arrow
: Select the Number of clips per Page
F: Chapter
To add chapter points, move your mouse cursor on top of the thumbnail, then double-click your
mouse. Or select a video in the list, then click the chapter button. The following window should
appear:
Move the seek bar on the point that you want to add,
then click "Add chapter" button. After adding chapter
points, click "OK" button.
G: Text:
To edit the Top Menu or Clip title, move your mouse cursor
on top of the title text, then double-click your mouse.
The following window should appear:
Set the font, font size, font style and font color as well as
edit the title text.
H:
Press the Start Button to start burning.
CHAPTER 4. TROUBLESHOOTING |
17
Q1: Why doesn't the GrabBee–AV properly work?
A1 : If you are having a problem with GrabBee - AV does not working, you should connect GrabBee–AV
to USB 2.0 port of your computer and check Device Manager first.
This will often solve many issues you may be having with the product.
1. Open the Device Manager by going to Start -> Settings -> Control Panel and double click on
the System Icon. This will bring up the System Properties window.
2. Click on the Device Manager tab to see the Device Manager.
(A) If you do not see device name in the “Sound, video and game controllers” list then that means
Windows system does not recognize it. You may see a yellow question mark or exclamation
point next to the device in the “other device” list..
1. Please disconnect the GrabBee – AV device.
2. Re-install the GrabBee – AV driver.
3. Then try to connect the GrabBee – AV device again.
(B) You may also have a problem with driver install or conflict with another device, Windows
system may show a yellow question mark or exclamation point next to the device name in the
“Sound, video and game controllers” list..
1. Please UNINSTALL and remove the driver from your system.
2. After uninstall, disconnect the GrabBee – AV device and restart your computer.
3. Re-install the GrabBee – AV driver.
4. Then try to connect the GrabBee – AV device again.
If the driver is installed correctly in your computer, the GrabBee – AV device will work properly.
Q2 : Why can’t my system detect the GrabBee-AV?
A2 : (a) Check to see you’ve enabled USB 2.0 in the motherboard BIOS setup.
(b) Please make sure that your system has the latest USB 2.0 host driver.
For Win XP, please upgrade to Service Pack 2 or above.
Q3 : Why can’t I see video display?
A3 : (a) Perhaps your video system setup is incorrect; please check your hardware connection and
choose the correct Video Format
(b) Please make sure your system has the latest USB 2.0 host driver.
For Win XP, please upgrade to Service Pack 2 or above.
CHAPTER 4. TROUBLESHOOTING |
18
Q4 : Why does the system show “High Speed device plug into Full speed USB port…”
A4 : (a) Please make sure your system support USB 2.0 hardware port.
(b) Please make sure that you’ve installed USB 2.0 Host driver already.
Q5 : How can I get minimum number of dropped frames during video capture?
A5 : The best recording performance depends on your computer system performance, but you can also
take some steps described below to improve your performance.
(a) Try lowering the resolution format you record.
(b) Enable hard disk drive DMA ; Go to My Computer->Control Panel -> System -> Hardware
->Device Manager->Disk drives to setup.
(c) Try and keep more available free space in the hard disk.
(d) Use a hard disk drive with speed of more than 7200 rotation per minute
(e) Disable Power Management in BIOS.
(f) Disable Power Saving mode of monitor.
(g) Close unnecessary/unused programs in your system.
(h) Defrag your hard disk.
(i) Try not to run other program(s) during recording.
Q6 : I can preview video but when recording, the system crashed/hanged.
A6 : (a) Please make sure you’ve install DirectX 9.0 or above.
(b) Your VGA card driver may be incompatible with DirectDraw, please update your VGA driver.
(c) Too many programs might have occupied available memory.
(d) Please lower your hardware acceleration; you can go to
My Computer->Control Panel->Display->Settings->Advanced to adjust it.
CHAPTER 4. TROUBLESHOOTING |
Note: NTSC is used in USA and Japan; PAL is used in Europe
Digital Versatile Disk / Video CD / Super VCD Spec
Digital Versatile Disk(DVD) Spec
- NTSC:
Size: MPEG2 720 X 480 pixels
Video bit rate: Up to 9.8 Mbit/sec
Frame rate: 29.97 frames/sec
Audio: LPCM, MPEG-1 Layer2
- PAL:
Size: MPEG2 720 X 576 pixels
Video bit rate: Up to 9.8 Mbit/sec
Frame rate: 25.00 frames/sec
Audio: LPCM, MPEG-1 Layer2
Video CD(VCD) Spec
- MPEG1 352 X 240 NTSC:
Size: MPEG1 352 X 240 pixels
Video bit rate: 1150 kbit/sec
Frame rate: 29.97 frames/sec
Audio: 224 kbit/sec MPEG-1 Layer2
- MPEG1 352 X 288 PAL:
Size: MPEG2 352 X 288 pixels
Video bit rate: 1150 kbit/sec
Frame rate: 25.00 frames/sec
Audio: 224 kbit/sec MPEG-1 Layer2
19
CHAPTER 4. TROUBLESHOOTING |
Super VCD(SVCD) Spec
- NTSC:
Size: MPEG2 480 X 480 pixels
Video bit rate: max 2524 kbit/sec MPEG-2 (if the audio is in 224 kbit/s),
audio + video bitrate max bitrate is 2748 kbit/s.
Frame rate : 25.00 frames/sec
Audio : from 32 - 384 kbit/sec MPEG-1 Layer2
- PAL:
Size : MPEG2 480 x 576 pixels
Video bit rate : max 2524 kbit/sec MPEG-2 (if the audio is in 224 kbit/s),
audio + video bitrate max bitrate is 2748 kbit/s.
Frame rate : 25.00 frames/sec
Audio : from 32 - 384 kbit/sec MPEG-1 Layer2
Long DVD
- NTSC :
Size : MPEG2 720 X 480 pixels
Video bit rate : Up to 2.5 Mbit/sec
Frame rate : 29.97 frames/sec
Audio : LPCM, MPEG-1 Layer2
- PAL
Size : MPEG2 720 X 576 pixels
Video bit rate : Up to 2.5 Mbit/sec
Frame rate : 25.00 frames/sec
Audio : LPCM, MPEG-1 Layer2
20