1
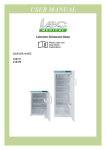
PE 357 PE 907 PG 907 Operating Instructions refrigerators GB/IE The refrigerator was developed taking the different storage requirements of Pharmacy products into consideration. Some must be stored cold - others require a little higher temperature. A few must be stored separately. To ensure that you get the best out of your new refrigerator, it is important that you become familiar with the refrigerator functions and know how to use the accessories. Please read the instructions for use carefully before setting up and using your refrigerator. As these instructions apply to several refrigerator models, the equipment may vary from model to model. Before using the refrigerator On receipt, check to ensure that the refrigerator has not become damaged during transportation. Any transport damage should be reported to our Customer Services department immediately. Before filling the refrigerator with contents / products, the refrigerator interior should be cleaned with lukewarm water containing a mild detergent. Use a soft cloth. If the refrigerator has been stored in cold surroundings (colder than +5°C), it must be allowed to stabilise for at least 2 hours before being switched on. Read more about setting up, building in, and installation on pages 10 and 11. 2 GB/IE Contents Important information Transporting and moving the refrigerator If the refrigerator is to remain unused for a time Old refrigerators Disposal 4 4 4 4 Product description 5 Using the refrigerator User interface First start up Deleting recorded exceedance (MIN / MAX) ALARM CONDITION / REMOTE ALARM Alarms Using the refrigerator and accessories Shelves Defrosting and cleaning Automatic defrosting Manual defrosting Cleaning Setting up and installation Where to place the refrigerator Electrical connection Maintenance and Service Changing the door hinging Spare parts 3 6 6 7 7 7 8 8 8 8 10 11 12 14 15 Important information GB/IE The refrigerator contains the environment-friendly, non-ozone-depleting refrigerant R600a. As R600 is a flammable gas, it is important to avoid damage to the refrigeration circuit during transport and installation. If the refrigeration circuit is damaged, avoid using naked flame in the vicinity of the refrigerator and connecting power to the refrigerator. Also make sure that there is good ventilation in the room. If you are in doubt, please contact your supplier. Transporting and moving the refrigerator The refrigerator must always be moved in the vertical position. The cabinet must not be tilted more than approx. 40°. If the refrigerator has been tilted more than 40°, the power supply must not be connected until the appliance has stood upright for at least two hours. If the refrigerator is not to be used for some time If the refrigerator is to remain unused for a period of time, switch it off by pressing button ‘ I ’ (1). Then disconnect the power supply to the refrigerator and preferably pull the plug out of the wall socket. Empty, defrost and clean the refrigerator. Leave the refrigerator door slightly ajar. This will prevent bad smells in the refrigerator. Warning This appliance is not intended for use by persons (including children) with reduced physical, sensory or mental capabilities, or lack of experience and knowledge, unless they have been given supervision or instruction concerning use of the appliance by a person responsible for their safety. Children should be supervised to ensure that they do not play with the appliance. Old refrigerators and freezers are often fitted with complicated latches that can only be opened from the outside. If you have an old unit like this stored away somewhere, or if you scrap it, remember to destroy the latch to prevent children from being exposed to danger by getting locked inside the unit.Note! Please also observe the environmental rules on disposal. Disposal If a refrigerator is to be disposed of, this must be done in an environmentally correct way, in accordance with current rules on disposal. Please observe the environmental rules on disposal. There might be special requirements/conditions to be observed. Information on disposal can be obtained from: - Your supplier - Authorities (the local council, Ministry of the Environment, etc.) 4 GB/IE Product description The refrigerator is intended for use in a Pharmacy. It is designed to safely store products and contents between 2 and 8 degrees C. Please find on the product nameplate the interval of ambient temperature for which this product is designed to have the best performances Class Symbol Extended Temperate SN Ambient Temperature Range °C Temperate N + 160C to + 320C Subtropical ST +180C to + 380C + 100C to + 320C 5 Using the refrigerator GB/IE 1. User interface Button (1) ‘ I ’ (ON /OFF) – pressed for about 2-3sec – switches on and switches off whole product's controlling, Button (2) ‘light’ – turns on and off the lighting, if it is not turned off, it turns off automatically after 3 minutes. Green LED diode (3) – indicates lighting turned on, Button (4) ‘lock’ – pressed for about 2-3sec – blocks the keypad – does not refer to button (1) driver switch off, Green LED diode (5) – indicates active blockade function, ‘-‘ minus diode (6) – indication of temperatures below zero, LED display (7) –temperatures, service parameters and alarm symbols display, Button (8) ‘▼’ - minimum temperature preview or parameter value decrease, Button (9) ‘▲’ – maximum temperature preview or parameter value increase, Button (10) AUX – functional button, Green LED diode (11) – indication of temperature programming mode – manual switch of AUX output, 2. First start up After switching on, the driver activates the auto-test procedure. During the first second, it displays dots, program version during next second, dots during the third second and then switches to normal work mode. During normal work mode, the display shows cooler temperature. In case of an alarm, it displays E with alarm number. If the driver is switched off, LED diodes are turned off and the display shows two horizontal lines. The display indicates temperature of the cooler-freezer within the range of –30oC to +30oC 6 GB/IE 3. Deleting recorded exceedance (MIN / MAX): - pressing buttons (8)‘▼’ and (9)‘▲’ for about 2-3sec results in deleting saved min/ max temperatures and saving current temperature in the driver’s memory 4. ALARM CONDITION / REMOTE ALARM On PE 357, PE 907, PG 907 models the jack plugs are in a box at the rear of the cabinet in the compressor cavity. Note! The power source for this circuit must be external to the cabinet and MUST NOT EXCEED 50 V AC/DC. This must be installed by a competent electrician. In normal conditions (no alarm) the AUX relay OPENS the contact for the remote alarm facility. When there is alarm condition (Hi/Lo temperature, E1, E2, probe failure), the AUX relay CLOSES the contact. In alarm condition (excluding power failure), pressing any button for 1 second causes the alarm display to be cancelled, the buzzer to be muted and the AUX relay to open the contact. After the alarm has been silenced, if the alarm ends , all indications are erased. 5. Alarms A displayed alarm should be saved even if the reason of the alarm does not exist anymore Alarms are not saved after switch off (lack) of energy. E1 – cooler sensor malfunction – if the error persist for a long time please call the Customer service E2 – evaporator sensor malfunction – if the error persist for a long time please call the Customer service Hi – maximum set temperature of the product exceeded – please be sure that the door is properly closed, the compartment is not over loaded, air circulation to the sensor is blocked - if the error persist for a long time please call the Customer service Lo – minimum set temperature of the product exceeded – - if the error persist for a long time please call the Customer service By pressing any button the sound alarm will be off as well Hi and Lo indications. E1 and E2 can be erased if the malfunction is fixed and the electronic control board is reset (unplug the appliance). 7 GB/IE Using the refrigerator and accessories Shelves Extract the shelf by lifting up the left shelf side (12). Start by removing the top shelf when you want to clean the refrigerator or rearrange the shelves. 12 Defrosting and cleaning Automatic defrosting The refrigerator features automatic defrosting. In some periods, however, frost may form on the rear wall of the refrigerator. This normally happens when the compartment is very full or when many new items of are stored in the refrigerator. In situations such as these the compressor must run for long periods of time. As automatic defrosting takes place while the compressor is at a standstill, the refrigerator may not defrost completely before the compressor restarts. In these instances, manual defrosting is required. Manual defrosting Stop the compressor by pressing button ‘ I ’ (1) and disconnect the power supply to the refrigerator. Any loose frost on the evaporator can be removed using a plastic or wooden scraper. Never use a knife or a sharp object as these can damage the evaporator. Warning It is dangerous to use electrical apparatus, knives or sharp objects to speed up the defrosting process. Cleaning Stop the compressor by pressing button ‘ I ’ (1) and disconnect the power supply to the refrigerator The refrigerator is best cleaned using a weak soap solution and a soft cloth. Do not use cleaning agents that scour. Clean the sealing strip around the door regularly to prolong its life. Use only clean water for cleaning the sealing strip. The plastic parts of the cabinet cannot withstand boiling water (max. 85°C). It is important to prevent water from getting into the control panel Clean the melt water drain in the refrigerator compartment using the cleaning pin supplied (13). 8 GB/IE Remove dust and threads from the compressor compartment at the back of the refrigerator with a vacuum cleaner. Cleaning of doors in stainless steel or aluminium 13 Cleaning of doors in stainless steel or aluminium Stainless steel or aluminium doors on Lec products can, with advantage, be cleaned with a spray and a soft cloth. There are a number of different spraying agents for this purpose on the market. 9 Setting up and installation Where to place the refrigerator GB/IE For safety reasons the refrigerator must not be installed outdoors; it must be placed in a dry room. Never place the appliance close to sources of heat such as radiators, and avoid placing it in direct sunlight. The surface on which the appliance is placed must be flat. Do not use a frame or similar. The small wheels mounted at the rear of the refrigerator make it easy to place it in the required position. The refrigerator can be set up free-standing against a wall. It is important that the appliance stands completely level and that there is good air circulation over, under and around it. The refrigerator can be adjusted by turning the four adjusting screws on the plinth. After adjustment, the feet and the two rear wheels must be in contact with the surface on which the appliance stands. 10 GB/IE Electrical connection The appliance is intended for connection to alternating current. The connection values for voltage (V) and frequency (Hz) are given on the nameplate in the cabinet. Power must be connected via a wall socket with switch. The wall socket should be easily accessible. All earthing requirements stipulated by the local electricity authority must be observed. The cabinet plug and wall socket should then give correct earthing. If in doubt, contact your local supplier or an authorised electrician. WARNING – This appliance must be earthed The flexible cord (mains lead) fitted to this appliance has three cores for use with a 3-pin 13-amp plug. If a BS 1363 (13-amp) fused plug is used, it should be fitted with a 13-amp fuse. IMPORTANT The cores in this mains lead are coloured in accordance with the following code: GREEN-AND-YELLOW: EARTH BLUE: NEUTRAL BROWN: LIVE These colours might not correspond with the colour markings identifying the terminals in your plug. Note: First connection to the mains. The appliance provides information about the higher temperature (Hi alarm ) till the moment of cooling. The alarm is signalised by a sound signal and “Hi” caption on the display. To cancel the alarm, press any push button. Until the moment of cooling, the alarm is repeated every 15 minutes. Such an operating mode is normal until the required temperature settings are reached. 11 Maintenance and Service GB/IE Problem Reason Solution The appliance does not work A gap in the elect ric system circuit - make sure the plug is properly inserted into the socket, - make sure there is electricity in the socket by plugging in another electric device, such as a night lamp, - make sure the power supply cord is not damaged, The compressor hardly ever activates - make sure the ambient temperature is not below +16°C, The door does not shut tight or is open ed too often - rearrange the products so as they do not hamper the door, - shorten the time the door is opened, The ambient temperatu re is above +32°C - the appliance is designed for operation in temperatures from +16°C to +32°C, Air circulation at the back of the appliance hampered - move the appliance a bit away from the wall, The appliance is placed in a sunny place or near a heat source - move the appliance to a different place, The contents touch the back wall of the refrigerator chamber - move the food or containers away from the back wall, The drain opening is clogged - take the cleaning plug and unclog the condensate opening, The appliance is not level - level the appliance, The appliance is touching a piece of furni ture or other objects - place the appliance detached, so as it is not touching any objects. The temperature inside the chambers is not low enough (the compressor ope rates continuously) Water collects at the bottom part of the refrigerator chamber The appliance makes too much noise 12 GB/IE The sounds that can be heard during normal operation: • clicks - heard when the control activates or deactivates the compressor • buzz - the sound of the compressor intensely working shortly after its activation • crackles and clatter - coming from the cooling system, caused by expansion and shrinking of parts due to temperature differences before and after compressor activation • rustle, gurgle, whistle - coming from the cooling system piping, caused by the coolant flowing inside. ● Expanding and shrinking of parts caused by temperature changes causes crackling sounds that may be heard Easily corrigible sources of noise: ● noise caused by the appliance positioned not level - adjust the position with the adjustable turn-in front feet. ● rubbing the adjacent piece of furniture - move the refrigerator a bit. ● creaking of the drawers and shelves - take out and put back the drawer or shelf. 13 Changing the door hinging GB/IE See figures 16-19 for instructions on how to change the door hinging. The fridge must be off and empty. - tilt the appliance by 45 degrees backward. Thereby, the lower hinge becomes accessible. - use cross screw driver to unscrew the three lower hinge bolts (2 bolts from the top, and one from the front) (see fig. 16). - remove the door and set aside. Make sure the door cannot fall. - use screw driver to remove the pin below the control panel at the right side of the fridge. Screw it fully into the hole at the left side (see fig. 17). - unscrew the two lower bolts. Remove the plug from the lower hinge socket with a screw driver (see fig. 18). - fit the fridge door back, insert the top pin into the door slat. - insert the hinge pin into the lower slat. Screw the hinge fully with a cross screw driver. - unscrew the door handle (see fig. 19). - fit the handle to the opposite side of the door. - start the appliance according to the relevant instructions. 17 16 18 19 14 GB/IE Exchanging the bulb * S w i t c h o ff t h e r e f r i g e r a t o r b y pressing button ‘ I ’ (1) and unplug the appliance. * Unscrew the bulb cover with a crosshead screwdriver and take the cover off (Phot.20). * Exchange the bulb with a new one ob serving the parameters: 220 - 240 V, max. 15 W, E14 thread, maximum bulb dimensions: diameter - 26 mm, length - 55 mm. * Put the cover back and tighten it with the screws (Phot.21). 20 21 Service Spare parts Glen Dimplex Professional Appliances (A division of GDHA) Stoney Lane Prescot Merseyside L35 2DX Customer service Telephone number: 0870 458 4386 Fax : 0870 458 4192 15 IOAL-730 (11.2007/1)