1
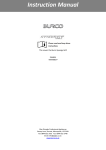
P
l
e
a
s
e
r
e
i
i
n
T
h
i
s
c
o
v
e
C
1
r
0
S
s
T
t
h
H
e
1
0
L
,
2
0
L
&
3
4
4
4
4
8
L
B
u
r
c
o
e
s
l
t
e
r
c
u
t
c
r
d
n
d
k
e
e
p
t
h
e
s
e
o
t
i
a
n
c
c
s
a
t
e
0
S
r
i
n
u
g
r
n
s
F
C
4
0
a
5
2
2
0
S
T
H
F
C
3
T
H
F
8
4
4
4
4
4
8
5
2
9
4
4
4
4
4
8
5
3
0
Getting the best from your urn
•
Remove any plastic film from the urn before use.
•
Any water in the urn is due to testing and is normal.
•
The urn must be used on a flat level surface.
•
Boil and discard the water twice before general use.
Important safeguards
•
To avoid being scalded when the urn is operating or has just been switched off keep
hands away from any steam from the lid. Be particularly careful not to touch hot surfaces when
opening the lid or filling.
•
Do not use the appliance if it has malfunctioned or has been damaged in any way.
1
•
Do not dismantle any part of the urn. Responsibility cannot be accepted if this
instruction is ignored.
•
Do not place the urn on or near hot surfaces.
•
Do not use accessories or attachments which are not recommended or sold by Burco
Appliances as they can cause hazards.
•
This appliance must only be used for heating water.
•
Always switch off and disconnect the urn from the mains supply when not in use or
when cleaning.
•
To prevent any risk of electrocution do not immerse the urn in water or any other liquid
when cleaning and do not allow any water or liquid to come into contact with any of the
electrical connections or controls.
•
Do not allow the cord to hang over the edge of the work surface, to touch wet or hot
surfaces or become twisted.
•
The urn should not be lifted whilst connected to the mains.
•
The urn should not be carried whilst it contains water.
•
Maintenance other than cleaning should be performed by the manufacturer while this
product is within guarantee (contact our service help line) or otherwise by a qualified service
engineer.
•
This appliance is not suitable for installations in an area where a water jet could be
used.
•
This appliance is not to be intended for use by persons (including children) with reduced
physical, sensory or mental capabilities or lack of experience and knowledge unless they have
been given supervision or instruction concerning use of the appliance by a person responsible
for their safety. Children should be supervised to ensure that they do not play with the
appliance
•
This appliance must not be cleaned by a water jet.
•
This appliance is only to be installed in locations where its use and maintenance is
restricted to trained personnel.
•
For correct operation this appliance should be operated in an ambient temperature
between 22-28 °C.
Installation
Preparation
•
Remove any plastic film from the urn and wipe over all surfaces with a damp cloth.
2
•
Check that the voltage shown on the rating plate is suitable for your supply.
•
Before general use it is recommended that the urn is used on the maximum setting
twice discarding the water each time.
Fitting a plug
The mains lead of this urn will already be fitted with a BS1363 13A plug. In the event of
replacing a fuse, a 13 amp fuse approved by ASTA or BSI must be used. If the plug is not
suitable for your socket then the plug must be cut off and disposed of safely. An appropriate
plug should be fitted as follows:
IMPORTANT: The wires in the mains lead are coloured in accordance with the
following code:
Green-and-Yellow – Earth
Blue – Neutral
Brown – Live
The wire which is coloured green-and-yellow must be connected to the terminal in the plug
which is marked with the letter E or the earth symbol
or coloured green or green-andyellow.
The wire which is coloured blue must be connected to the terminal which is marked with the
letter N or coloured black or blue.
The wire which is coloured brown must be connected to the terminal which is marked with the
letter L or coloured red or brown.
Make sure that the connections are tight and that there are no loose strands of wire and no
insulation trapped under the terminals. Tighten the clamp in the plug making sure that it grips
the outer covering of the cord. In a 13A (BS 1363) fused plug, fit a 13A fuse. Tighten the plug
cover securely.
If you are in any doubt, consult a qualified electrician.
IMPORTANT: If the supply cord is damaged, it must be replaced by the
manufacturer, service agent or similar qualified person in order to avoid a
hazard. The supply cord may become warm when the appliance is in use.
WARNING: This appliance must be earthed.
Location
•
More than 100mm from any combustible surface.
•
On a flat level surface.
•
This appliance is for indoor use only.
3
Using
IMPORTANT: Always put water in the urn before switching on.
•
Lift the lid and fill the urn with the desired amount of water.
•
Do not fill above the ‘MAX’ capacity mark.
WARNING: If the urn is over filled there is a risk that hot or boiling water
may be ejected.
•
Under filling will cause the boil dry cut-out to operate (and may shorten the life of the
element).
•
The urn is not suitable for boiling liquids other than water or for boiling water containing
small solid particles.
•
If the water is being boiled for tea making, it is best to make the tea in another
container. However, if it is necessary to make the tea in the urn it should be suspended
clear of the urn bottom and heating elements in a muslin bag.
•
If it is intended to boil large items such as puddings or hams in the urn, they should be
suspended clear of the urn bottom and heating element
Thermostat control
•
The green light will glow to show power is connected to the urn.
•
Turn the control knob to 6.
•
When the water reaches temperature, turn the control knob to approximately setting 5
to keep it simmering. An exact setting will be found by experience.
•
To maintain the water at any other temperature, set the control knob to approximately
one of the following positions:
Approx temp
Knob setting
37°C (99°F)
1
55°C (131°F)
2
68°C (155°F)
3
82°C (180°F)
4
Up to 100°C (212°F) 5/6
If it is necessary to keep the water at an exact temperature, use a thermometer to check this.
Stir the water before taking the temperature and when the desired temperature has been
4
reached, turn the control knob slowly to the left until a click from the thermostat is heard. The
thermostat will cycle on and off to maintain the temperature.
Serving
•
The safety tap is locked or unlocked by twisting it so that the closed or opened padlock
symbol is lined up with the white dot on the tap body.
•
There are two open positions, one self- holding so that the tap remains open, and the
other self-closing so that the tap closes as soon as the lever is released. To change the
tap position, turn the tap lever through 180°.
•
Open the tap by depressing the tap lever into the horizontal position.
•
Close the tap by returning the lever to a vertical position.
After use
•
Switch off to 0 and disconnect from the mains supply.
•
Water may be left in the urn when it is not in use for short periods, but to maintain a
supply of fresh water, it should be emptied periodically and cleaned out.
•
WARNING: Only move when disconnected and empty.
Protective cut-out
The heating element is fitted with a thermal cut-out which protects the urn from damage if it is
allowed to boil dry or is switched on without water. If this happens, allow the urn to cool down
then press the reset button situated under the base. If this happens, allow the urn to cool,
drain the water then press the reset button, situated on the base.
In order to ensure correct operation of this cut-out it is essential to keep the heating element
free from scale. Failure to do this will result in the cut-out operating before the water has
boiled.
Cleaning
WARNING Disconnect from the mains supply before cleaning and allow the
urn to cool.
IMPORTANT Do not immerse the urn in water or any other liquids and take
care to keep water away from the mains lead and connections.
IMPORTANT Do not use any abrasive cleaning fluids or materials.
•
Wash out the urn. Use clean water and a soft cloth.
•
Brush any scale or sediment from the element.
•
Rinse thoroughly and buff with a dry cloth.
5
•
Do not clean with a water jet.
Descaling
In hard water areas scale will form on the element and walls. This will adversely affect the
operation of the urn if allowed to accumulate. Descaling can be simply achieved by using a
proprietary descaler. Choose one recommended for stainless steel kettles. It is important to
follow the instructions given on the descaling solution carton.
Scale build-up can also cause the tap to drip even when in its closed position. If this should
occur disconnect from the mains supply, empty the urn, allow it to cool and unscrew the top of
the tap from the body of the tap. Wipe, scrape and break the scale away from the rubber
flexible seal and also from the sealing surface inside the plastic body of the tap.
IMPORTANT Failure to de-scale will invalidate your guarantee.
Guarantee
This appliance is guaranteed against defective materials or faulty workmanship. For length of
guarantee please contact your supplier.
This guarantee is given subject to the urn being used in accordance with the instructions on the
supply voltage marked on it and to the usual fair wear and tear conditions.
The guarantee does not cover consequential damage arising out of any failure acceptable under
guarantee, nor does it cover damage resulting from misuse, accident or unauthorised
alterations to the urn.
In any communication with the supplier or manufacturer, it is essential to quote the catalogue
number marked on the urn.
Proof of purchase will be required.
In any communication with the service department, it is essential to quote the model and serial
number marked on the rating label.
This guarantee, in no way diminishes the buyer’s statutory rights.
Burco products are intended for commercial use as detailed in these instructions.
Burco has a policy of continuous improvement in product quality and design. The
Company, therefore, reserves the right to change the specification of its models at
any time.
6
Model
C10STHF
C20STHF
C30STHF
444448528
444448529
444448530
H
380
380
480
W
300
390
390
D
335
430
440
Weight in Kg
3.0 (empty)
4.0 (empty)
4.4 (empty)
Power rating
3kW (@240V)
3kW (@240V)
3kW (@240V)
SKU Number
Dimensions in mm
7
Customer helpline
For spares and after-sales service please contact
Burco on:
T: 0844 815 3737
F: 0844 248 4123
E: [email protected]
Glen Dimplex Professional Appliances,
A Division of Glen Dimplex Home Appliances
Stoney Lane,
Prescot,
Merseyside L35 2XW
www.burco.co.uk
8