1
USER MANUAL
CONTINUOUS INTERMITTENT
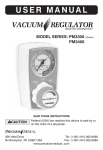
MODEL SERIES:PM3300 (shown)
PM3400
SAVE THESE INSTRUCTIONS
CAUTION
Federal (USA) law restricts this device to sale by or
on the order of a physician.
300 Held Drive
Northampton, PA 18067 USA
ISO 13485 Certified Tel: (+001) 610-262-6090
Fax: (+001) 610-262-6080
www.precisionmedical.com
CONTENTS
RECEIVING / INSPECTION........................................................... 2
INTENDED USE............................................................................. 2
READ ALL INSTRUCTIONS BEFORE USING.............................. 2
EXPLANATION OF ABBREVIATIONS .......................................... 2
SAFETY INFORMATION - WARNINGS AND CAUTIONS............. 2
SPECIFICATIONS.......................................................................... 3
OPERATING INSTRUCTIONS....................................................... 4
PARTS DESCRIPTION.................................................................. 5
PARTS LIST................................................................................... 5
REPAIR KITS................................................................................. 6
DISASSEMBLY INSTRUCTIONS.................................................. 6
ASSEMBLY INSTRUCTIONS........................................................ 6
VACUUM REGULATOR CLEANING ILLUSTRATION................... 7
CLEANING / DECONTAMINATION............................................... 8
MAINTENANCE............................................................................. 8
RETURNS...................................................................................... 8
DISPOSAL INSTRUCTIONS.......................................................... 9
TROUBLESHOOTING................................................................... 9
LIMITED WARRANTY ................................................................. 10
DECLARATION OF CONFORMITY............................................. 11
CONTINUOUS INTERMITTENT
1
RECEIVING / INSPECTION
Remove the Precision Medical, Inc. Vacuum Regulator from the packaging
and inspect for damage. If there is any damage, DO NOT USE and contact
your Provider.
INTENDED USE
The devices are intended to control and show the amount of vacuum from
a central vacuum system used in various medical suctioning procedures.
READ ALL INSTRUCTIONS BEFORE USING
This manual instructs a Professional to install and operate the Vacuum
Regulator. This is provided for your safety and to prevent damage to the
Vacuum Regulator. If you do not understand this manual, DO NOT USE
the Vacuum Regulator and contact your Provider.
EXPLANATION OF ABBREVIATIONS
l/min
mmHg
inHg
kPa
Liters Per Minute
Millimeters of Mercury
Inches of Mercury
Kilopascal
SAFETY INFORMATION - WARNINGS AND CAUTIONS
a potentially hazardous situation which, if
WARNING Indicates
not avoided, could result in death or serious injury.
CAUTION
CAUTION
Indicates a potentially hazardous situation which, if
not avoided, may result in minor or moderate injury.
Used without the safety alert symbol indicates
a potentially hazardous situation which, if not
avoided, may result in property damage.
CONSULT ACCOMPANYING DOCUMENTS
There are no components in this product made
with natural rubber latex.
WARNING
• DO NOT use this Vacuum Regulator for anything other than its
Intended Use. Personal injury and/or damage to Regulator may
result from misuse.
• Only personnel instructed and trained in its use should operate
this Vacuum Regulator.
2
CONTINUOUS INTERMITTENT
SPECIFICATIONS
GAUGE RANGE:
PM3300:
0 - 200 mmHg - Full Vacuum
*PM3300E:
*PM3300EHV:
0 - 200 mmHg (0 - 26 kPa)
0 - 300 mmHg (0 - 40 kPa)
PM3300HV:
0 - 300 mmHg - Max Vacuum
PM3400:
0 - 150 mmHg
*PM3400E:
0 - 150 mmHg (0 - 20 kPa)
*Counterclockwise direction
GAUGE ACCURACY:
Analog:
± 5% of MAX
Digital/Analog, Dual Gauge:
Digital Display:
± 1% of Full Scale
Analog Gauge:
± 5% of MAX within ref. Indicator
VACUUM PORTS: 1/8 NPT Female
MODES:
REG. - (Regulated) provides an adjustable,
continuous vacuum level
OFF - No Vacuum
INT. - (Intermittent) provides an adjustable vacuum
level that cycles between ON and OFF
FLOW: Models
Mode
PM3300:
Max Flow
51 l/min
REG
PM3400:
50 l/min
MAXIMUM FLOW IS OBTAINED WITH A VACUUM SOURCE OF 21” Hg (71.1 kPa)
MAXIMUM VACUUM:
PM3300:
PM3300HV:
PM3400:
REG. Mode @ Full Vac-396 mmHg (53 kPa)
REG. Mode @ Max Vac-396 mmHg (53 kPa)
Restricted to 170 mmHg ± 10 mmHg (1.3 kPa)
INTERMITTENT CYCLE TIME:
Operating Environmental Limits:
Factory set at sixteen (16) seconds ON
and eight (8) seconds OFF ( Reference only)
0°F to 122°F (-18°C to 50°C)
Recommended Environmental Operating Limits: 55°F to 85°F (13°C to 29°C)
Storage Environmental Limits:
Temperature Range:
Humidity:
Battery:
3 Volt Lithium,
-4°F to 140°F (-20°C to 60°C)
Max 95% Noncondensing
AA (Digital Vacuum Gauge Models ONLY)
Specifications are subject to change without prior notice.
CONTINUOUS INTERMITTENT
3
OPERATING INSTRUCTIONS
CAUTION
Inspect the Vacuum Regulator for visual damage before use,
DO NOT USE if damaged.
NOTE:• Overflow protection should be used with the Vacuum Regulator.
(i.e. Filter, Vac Trap, Canister equipped with float shutoff).
• Gauges operate independently; if the digital gauge fails, the
analog gauge will still function.
1. Turn the Selector Knob to the “OFF” position.
2. Attach the Vacuum Regulator to the vacuum source.
A. REG MODE (Regulated Mode) ALL MODELS
1. Turn the Selector Knob to the “REG.” position.
2. Block the bottom port of the Regulator.
3. Using the Regulator Knob, set the desired vacuum.
To INCREASE vacuum - Turn Knob CLOCKWISE
To DECREASE vacuum - Turn Knob COUNTERCLOCKWISE
B. INT. MODE (Vacuum cycles ON and OFF.)
1. Turn the Selector Knob to the “REG.” position, to select
desired vacuum level.
2. Turn the Selector Knob to the “INT.” position.
NOTE: Intermittent cycles starts in the OFF phase, therefore a
delay occurs before the intermittent cycle begins.
3. Turn the Selector Knob to the “OFF” position to turn the Regulator off.
WARNING
• ALWAYS confirm vacuum setting prior to performing procedure.
• When turning the Vacuum Regulator to “REG.” or “INT.” from any
position, the vacuum level will return to its previously regulated setting.
• Full Line Vacuum is present between settings.
• Vacuum levels will remain the same when switching from one
mode to the other.
CAUTION
DO NOT operate the Vacuum Regulator when the collection
canister is “full”. This may cause loss of vacuum and damage to
the Vacuum Regulator. This will void the warranty.
4
CONTINUOUS INTERMITTENT
PARTS DESCRIPTION
CAUTION
Missing or illegible labels must be replaced, contact Precision Medical, Inc.
3-Analog
2
3-Digital
PM3400/
PM3400E
ONLY
QUANTITY 6 PLACES
4
14
13
1
5
6
7 8
PARTS LIST
No. Description
1
Housing Assembly
2
Screw
3
Analog Gauge Assembly
Analog Gauge Assembly (Export E)
Analog Gauge Assembly (HV)
Digital Assembly
Digital Assembly (HV)
Digital Assembly (Export E)
Digital Assembly Export E (HV)
PM3300
10
9
502102
12
Selector
Knob
Regulator
Knob
11
PM3400
503956
503694
503923
504309
505244 (0-200 mmHg)
505392 (0-300 mmHg)
506036
506038
503826
504225
505391 (0-150 mmHg)
4
Snubber
5
O-ring
6
Selector Assembly
7
Index Ring
8
Wave Spring Washer
9
Case Assembly
10
Regulator Module Assembly
11
Set Screw
12
Control Knob Assembly
502100
13
Timing Module
502103
14
Rear Case
506034
1396
502231
1805
502685
1614
1827
1567 (*505962)
1567
1391
1831
* HV MODELS ONLY (PM3300HV)
CONTINUOUS INTERMITTENT
5
REPAIR KITS
Analog Part#
Digital Part#
PM3300 / PM3300D Vac Reg
RK6300
RK6300D
PM3300HV / PM3300DHV Vac Reg
RK6300HV
RK6300DHV
PM3300E / PM3300DE Vac Reg
RK6300E
RK6300DE
PM3300EHV / PM3300DEHV Vac Reg
RK6300EHV
RK6300DEHV
PM3400 / PM3400D Vac Reg
RK6400
RK6400D
PM3400E / PM3400DE Vac Reg
RK6400E
RK6400DE
DISASSEMBLY INSTRUCTIONS
(Reference “PARTS DESCRIPTION”)
1. Loosen the Set Screw (Item # 11) in Selector Knob.
2. Pull the Control Knob Assembly (Item # 12) away from case. (The Regulator
Module (Item # 10) is threaded onto the Control Knob Assembly.)
3. Remove the screws (Item # 2) from the back of the product.
4. Remove the Rear Case (Item # 14) by pulling away from product.
5. Remove screws (Item# 2) from the top of the Timing Module.
6. Remove the Timing Module (Item# 13) by pulling away from the
Housing Assembly (Item# 1).
7. Separate the Case Assembly (Item# 9) by pulling it away from the
Housing Assembly (Item# 1).
8. Remove the Selector Assembly (Item# 6) by pulling it away from the
Housing Assembly (Item# 1).
9. Remove the Gauge Assembly (Item# 3).
ASSEMBLY INSTRUCTIONS
1. To assemble, perform the “DISASSEMBLY INSTRUCTIONS” in
reverse order.
NOTE:• Ensure the Selector Assembly is inserted with the groove in
the 12 o’clock position.
• Ensure tabs and slots on various components are properly
aligned and engaged when reassembling.
2. Lubricate all O-rings and cavities with Vacuum grease (part# 1775)
supplied in the Vacuum Regulator Repair Kit.
3. Repeat steps 1 through 3 of “OPERATING INSTRUCTIONS”.
4. Prior to returning Vacuum Regulator to service verify accuracy of gauge.
6
CONTINUOUS INTERMITTENT
VACUUM REGULATOR CLEANING ILLUSTRATION
(Cleaning/Decontamination Instructions on page 8)
Working
Vacuum
Regulator
Vacuum Regulator
To Be Cleaned
Suction
Tubing
Suction
Tubing
Patient
Port
Vacuum
Port
Suction
Collection
Canister
Cold
Disinfection/
Sterilization
Solution
CAUTION
• DO NOT autoclave or immerse in liquid.
This will cause damage to the Vacuum Regulator and will void
the warranty.
• If Vacuum Regulator becomes internally contaminated, warranty
is voided, DO NOT send back to Precision Medical, Inc. for repair.
Follow your facilities contaminated equipment protocol.
• This Vacuum Regulator contains magnetic, ferrous material that
may affect the results of an MRI.
• Be sure all connections are tight and leak free.
CONTINUOUS INTERMITTENT
7
CLEANING / DECONTAMINATION (As needed)
1. Attach a working Vacuum Regulator with a continuous regulated
mode to a minimum vacuum source of 15 inHg.
2. Mix cold disinfection / sterilization solution according to its
manufacturer’s directions.
3. Connect tubing as shown in Cleaning Illustration on previous page.
4. Turn the working Vacuum Regulator on to a continuous regulated mode.
5. Adjust the vacuum to a minimum of 120 mmHg.
6. Set the Vacuum Regulator to be cleaned to the “REG .” mode, and
set at 100 mmHg.
7. Allow cold disinfection / sterilization solution to pass through and collect
in Suction Canister. Procedure should continue for time recommended
by the manufacturer of the cold disinfection / sterilization solution for the
desired level of disinfection or sterilization.
8. Set working Vacuum Regulator to its maximum vacuum setting.
9. Thoroughly dry the internal components by drawing maximum vacuum through the Regulator to be cleaned for at least 30 seconds
in “REG.” mode.
NOTE: If it is not possible to pass cold disinfection / sterilization
solution through the Regulator, then the passageways are
totally blocked and disassembly of the Regulator is required.
Be sure to follow your facilities’ Biohazard protocol.
MAINTENANCE
Before each use; visually inspect Vacuum Regulator for any sign of
damage, DO NOT USE if damaged.
RETURNS
Returned products require a Returned Goods Authorization (RGA) number,
contact Precision Medical, Inc. All returns must be packaged in sealed
containers to prevent damage. Precision Medical, Inc. will not be responsible
for goods damaged in transit. Refer to Precision Medical, Inc. Return Policy
available on the Internet, www.precisionmedical.com.
Manuals available on our Website; www.precisionmedical.com
8
CONTINUOUS INTERMITTENT
DISPOSAL INSTRUCTIONS
Dispose of the Vacuum Regulator in accordance with the local regulations.
Please Recycle
WARNING
Product should be cleaned before being disposed of. Potential for Biohazard.
TROUBLESHOOTING
If the Vacuum Regulator fails to function, consult the Troubleshooting
Table below. If problem cannot be solved, consult your Provider.
Problem
Probable Cause
Remedy
No vacuum at
bottom port (gauge
at zero)
1. Regulator turned “OFF”
4. Clogged vacuum Port
1. a. Turn selector knob
1. b. Adjust Regulator
knob
2. Tighten connection
3. Connect to a known
working vacuum source
4. Disassemble & clean
No vacuum at
bottom port (gauge
showing vacuum)
Clogged Regulator
Disassemble & clean
Vacuum at bottom
port (No reading on
gauge when port is
blocked)
Gauge will not return
to zero
Defective Gauge
Replace Gauge
1. Clogged Snubber
2. Damaged Regulator
Module
3. Defective Gauge
1. Replace Snubber
2. Replace Regulator
Module
3. Replace Gauge
Vacuum Regulator
erratic
1. Dirty Regulator Module
Stiff movement of
Selector Knob
1. Dirty Regulator Module
and/or Selector Module
1. Disassemble & clean,
Lubricate O-rings
No Intermittent (INT.)
cycle
1. Improper mode selected
2. Defective Timing Module
1. Turn Selector Knob to
“INT.” mode
2. Replace Timing Module
No digital display
Dead Battery
Replace Battery
2. Loose connection
3. No vacuum to Regulator
1. Disassemble & clean,
Lubricate O-ring
2. Defective Regulator Module 2. Replace Module
CONTINUOUS INTERMITTENT
9
LIMITED WARRANTY
AND
LIMITATION OF LIABILITY
Precision Medical, Inc. warrants that the Medical Vacuum
Regulator (the Product) will be free of defects in workmanship
and/or material for the following period:
Ten (10) years from date of shipment.
Should any failure to conform to this warranty appear within the
applicable period, Precision Medical, Inc. shall, upon written
notification thereof and substantiation that the goods have been
stored, installed, maintained and operated in accordance with
Precision Medical, Inc.’s instructions and standard industry
practice, and that no modifications, substitutions, or alterations
have been made to the goods, correct such defect by suitable
repair or replacement at its own expense.
ORAL STATEMENTS DO NOT CONSTITUTE WARRANTIES.
The representative of Precision Medical, Inc. or any retailers are
not authorized to make oral warranties about the merchandise
described in this contract, and any such statements shall not be
relied upon and are not part of the contract for sale. Thus, this
writing is a final, complete and exclusive statement of the terms
of that contract.
THIS WARRANTY IS EXCLUSIVE AND IS IN LIEU OF ANY
WARRANTY OF MERCHANTABILITY, FITNESS FOR A
PARTICULAR PURPOSE OR OTHER WARRANTY OF QUALITY,
WHETHER EXPRESS OR IMPLIED.
Precision Medical, Inc. shall not under any circumstances be liable
for special, incidental or consequential damages including but not
limited to lost profits, lost sales, or injury to person or property.
Correction of non-conformities as provided above shall constitute
fulfillment of all liabilities of Precision Medical, Inc. whether based
on contract, negligence, strict tort or otherwise. Precision Medical,
Inc. reserves the right to discontinue manufacture of any product or
change product materials, designs, or specifications without notice.
Precision Medical, Inc. reserves the right to correct clerical or
typographical errors without penalty.
10
CONTINUOUS INTERMITTENT
DECLARATION OF CONFORMITY
Precision Meidcal, Inc
300 Held Drive
Northampton PA 18067
Emergo Europe (European Office)
Motenstraat 15
2513 BH, The Hague
The Netherlands
Phone: +31 (0) 70.345.8570
Fax: +31 (0) 70.346.7299
Vacuum Regulators:
PM3300E, PM3300E-P, PM3300EHV, PM3300DE,
PM3300DE-G, PM3300DE-MG, PM3300DE-Y,
PM3300DEHV, PM3300DEHV-MG, PM3400E, PM3400DE
Classification:IIa
Classification criteria: Clause 3.2 Rule 11 of Annex IX of MDD
We hereby declare that an examination of the under mentioned production quality
assurance system has been carried out following the requirements of the UK national
legislation to which the undersigned is subjected, transposing Annex II, 3 of the
Directive 93/42/EEC and Directive 2007/47/EC on medical devices.
We certify that the production quality system conforms to the relevant provisions of
the aforementioned legislation, and the result entitles the organization to use the
CE 0473 marking on those products listed above.
Applied Standards: BS EN 1041, EN ISO 10079-3, EN ISO 14971, ISO 15223-1
Notified Body:
Address:
AMTAC Certification Services Limited
0473
Davy Avenue Knowlhill Milton Keynes MK5 8NL, UK
Certification Registration No’s: 1126 CE
Date of Expiry: 03 August 2017
Devices already manufactured: S/N traceability Device History Records
Validity of DOC:
04 August 2012 to Date of Expiry
Manufacture Representative: Quality Manager
Position:
Quality Systems/ISO Representative
Date of Issue:
04 August 2012
Tell us how we are doing!
Visit us at www.precisionmedical.com
1949 Rev19 12/14 (10M) Printed in USA