1
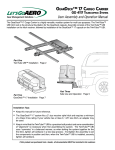
TWINTuBE™ U-BUILD-IT (UBITM)
t:[~~~i!Y
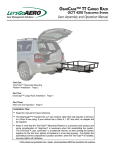
----------------------~~----~---------------4000 TELESCOPING HITCH RACK SYSTEM
User Assembly and Operation Manual
TT
Congratulations on your purchase of Twin'Iube" UBI. Whether you are using UBITM with one of LGA's carriers or
building your own platform, the TwinTube ™ UBI system is the best receiver hitch load carrying structure available.
The Twin'Iube" UBI system features separate components that extend and
enhance the load carrying capabilities of a receiver style hitch.
•
The Spine assembly, which provides UBI's structural strength and
telescope support.
•
The Frame assembly which provides UBI's carrier, platform or box
mounting interface and telescoping function.
•
Safety Cable Quick Links allow the Frame and Spine system
components to be separated, thereby dividing the UBI's weight in
half. This provides ease-of-use when installing or removing and
storing the system.
Installation Tips:
•
Keep this manual for future reference.
• The Twin'Iube" UBI system fits a 2" size receiver style hitch and requires a minimum
of a Class II tow rating. If your vehicle has a Class II, 1.25" size hitch, an adapter may
be used. This may be purchased locally, or contact LGA at 877-464-2376 regarding
our Silent Flip Flop Shank accessory option.
•
Keep in mind that the TwinFube" is a precision built product and some consideration
of "alignment" is necessary when first assembling the system. The Twin'Iube" uses
"symmetry" in a balanced manner, so when bolting the system together for the first
time, tighten all hardware in a two step process - first tighten the assembly to set the
components in position and then, when the Twin'Iube" is installed, securely tighten
all hardware.
If this product was purchased from a dealer, all documentation MUST be furnished to the customer.
·
TWINTuBpM U-BUILD-IT (UBITM)
PARTS
IDENTIFICATION
Parts List
Quantity
Item Description
A
B
C
D
E
F
G
H.
J
K
L
M
N
P
Q
R
S
T
U
V
W
X
Shank
V-Plates
Top Plate
Telescope Tubes
Fixed Tubes
Wings (44" C Channel)
Top Hat Brackets
1/4-20 U-Bolts
Hexhead Silent Hitch Pin" Assembly
Hand Tighten Silent Hitch Pin ™ Assembly
Safety Cable with 2 Quicklink Connectors
End Caps
End Cap & Reflector Assembly
1/2" Shoulder Bolts
1/2" Washers
1/2" Locking Nuts
1/4" Washers
1/4" Locking Nuts'
Safety Cable Retainer
Center Plate
1/4-20 x 3/4" Bolts
Slide Bumpers
Paraffin Starter Wax
1
2
1
2
2
2
4
4
1
1
1
2
2
6
12
6
16
12
1
Tools Needed
3/4" Wrench
3/4" Socket
1/4" Wrench or Socket
7/16" Wrench
1
4
2
1
If you are missing any items, contact your sales agent if the product was assembled by them.
If not, or if purchased from Let's Go Aero, please contact us at 1-877-GO-4-AERO (464-2376).
Spine Assembly
Frame Assembly
-------------------------------2--------------!~~~
SILENT
HITCH.PIN™
INSTALLATION
Two Silent Hitch Pins are included with TwinTube ™ UBI
to prevent the inherent rattle that occurs when placing an
accessory device (in this case, Twin'Iube ' UBI) into the
receiver hitch. The installation process is the same for
both Silent Hitch Pins, the Hexhead Silent Hitch Pin" (J)
secures the TwinFube" Assembly to the receiver hitch
and the Hand Tighten Silent Hitch Pin ™ (K) secures the
Frame Assembly to the Spine Assembly.
WARNING
SPINE ASSEMBLY
The Silent Hitch Pins" must be firmly tightened to work
properly. Make sure you use the Hexhead Silent Hitch
Pin" (J) to attach the Shank to the receiver hitch and
use a wrench to securely tighten it.
3. The V-Plate
(B) with the Safety Cable hole goes on
the passenger side of the Shank (A). Orient both
V-Plates (B) so that they angle up and away from
the Shank (A) and the lower holes in the plates line
up with the 1/2" holes in the Shank. Install a 1/2"
Shoulder Bolt (P), two 1/2" Washers (Q) and a 1/2"
Locking Nut (R) in each hole. Use a 3/4" Wrench and
a 3/4" Socket to position tighten the bolts.
1. Orient the Shank
(A) with the two 5/8" holes toward
the receiver hitch on the vehicle. Insert the spring nut
from the Hexhead Silent Hitch Pin" Assembly (J) into
the Shank and line it up with the second hole from the
end of the Shank (A).
V-Plates (B)
Safety Cable Hole
Spring Nut
Use Second Hole
unless more clearance is required
Receiver
Hitch
~
Note: Use the bolt hole in the Shank that places the
TwinIube"
as close to your vehicle as possible. If
more clearance is needed use the last hole in the
Shank.
2.
__
--'""1/2" Shoulder
Bolts (P)
Note: V-Plates MUST be attached angled AWAY from the
vehicle for product to install properly.
Slide the Shank with the spring nut installed into the
vehicle hitch and line up the Shank's bolt holes with
the hole in the hitch.
Make sure the washer is on the Hexhead Silent Hitch
Pin
(J) and thread it into the threaded spring nut.
Use a wrench to securely tighten the Hexhead Silent
Hitch Pin™ (J) to 30 ft. Ibs - 60 ft. Ibs. of torque
(equi alent to tightening a lug nut on a car wheel).
Install the pin clip from the assembly.
4.
Place the Center Plate (V) between the V-Plates.
Install a 1/4-20 x 3/4" Bolt, two (2) 1/4" Washers and a
1/4" Locking Nut in each hole. Then tighten the bolts
on the Center Plate.
1/4-20 x
,_
3/4" Bolts
1/4"
Washers
1/4-20 x
_
,
Receiver
_______________
S_ha_n_k_(A_)
tm
1/4" Locking
Nuts
4'
J~
-'
_~3/4"
Bolts
--
J
,
-
~
~3~--------------------~~~~~~~~
<
TWINTuBETM U-BUILD-IT
5.
(UBITM)
Place the Fixed Tubes (E) between the top of the VPlates (B) and place the Top Plate (C) on top. Install
a 1/2" Shoulder Bolt (P), two 1/2" Washers (Q) and a
1/2" Locking Nut (R) in each hole (2 per Tube). Use a
3/4" Wrench and a 3/4" Socket to position tighten the
bolts.
Top Plate
9. Securely
tighten the bolts that attach the Fixed Tubes
(E) to the V-Plates (A). Make sure that the bolts are
so tight that it is difficult to tighten them further using
hand tools.
A
Caution
Periodically check that the bolts are tight to ensure
TwinTube" performs as designed.
6. Securely
tighten the bolts that attach the V-Plates (B)
to the Shank (A). Make sure that the bolts are so tight
that it is difficult to tighten them further using hand
tools. Then snug tighten the bolts on the Center Plate
to 12 ft. Ibs.
7. Place a Slide
10.
Rub the top, sides and corners of the Spine's
Fixed Tubes (E) with the enclosed bar of Paraffin
Wax. This reduces friction, provides telescope
smoothness, and protects the powder coated paint
from wear. You will find that TwinTube's Paraffin Wax
is a great solution to clean, hassle-free operation.
Once applied, it stays put and stays clean.
Bumper (X) over each Fixed Tube and
slide them back against the Top Plate.
Fixed Tubes (E)
FRAME
ASSEMBLY
11. Locate the Telescope
B.
Insert the spring nut from Hand Tighten Silent Hitch
Pin Assembly (K) into the Telescope-Safety pin hole
on one of the Fixed Tubes (E). Line up spring nut hole
with the Telescope-Safety Pin hole.
Tubes (0) and orient them to
the Spine Assembly with the weld seam down and
with the hole away from the Spine. The hole in each
Telescope Tube (0) must line up with the hole in the
Fixed Tube (E).
Note: It does not matter which Fixed Tube is used.
Either Rxed Tube
may be used
~
""
. H
Telescope Safety Pin
ole
Spring Nut tram Hand
Tighten Silent Hitch Pin
-----------------------4~----------
Holes must align
~
LETSGoAERDGear Management Solutions ~
TWINTuBETM U-BUILD-IT
12.
(UBITM)
The two 44" Wings (F) form the mounting surface of
the TwinTube UBITM. The Wings are adjustable for
different platform widths, but they must be at least
12" apart to support a load properly.
The first Wing (F) should be mounted as close
to the Top Plate (C) of the Spine Assembly as
possible, depending on spare tires or ladders on
the vehicle.
.
To mount this Wing, place two 1/4x20 U-Bolts (H)
in the pre-drilled mounting holes in the bottom of
the Wing channel and position the Wing on the
Telescope slide tubes. Place the Safety Cable
Retainer (U) on the passenger side and a Top-Hat
Bracket (G) over the U-Bolt threads. Secure the
Brackets with a 1/4" Washer (S) and a 1/4" Locking
Nut (T) on each leg of each Bracket.
14.
WARNING
The 44" Wings must be at least 12" apart to support a
.Ioad properly.
44" Wing (F)
Top Plate (C)
o
~~T,p-Hat
After installing your platform of choice to the Wings,
the last step is to firmly tighten all the 1/4x20
Nuts securing the Top-Hat Brackets to the Wings.
Tighten these in a balanced fashion until securely
snug. Between uses, periodically re-check these
fasteners for proper tightness.
44" Wing (F)
Bracket IGI
1/4x20
U-Bolts (H)
Safety Cable
Retainer (U)
1 4" Washers (S)
1/4" Locking
Nuts (T)
13.
Note:
Repeat Steps 9 and 10 with the rear Wing (F).
Leave the If-Bolts (H) and Locking Nuts (T) loose
enough so the Wing can move forward or back as
needed to fit the bolt hole pattern of the platform
you intend to mount on UBI. You may adjust
both Wings along the Frame tube as needed to
accommodate your platform of choice, as well as
for additional clearance to accommodate spare
tires, etc. on the back of your vehicle.
Check that the Telescope Tubes (D) are as
far toward the vehicle as possible and that the.
Telescope Pin holes in the rear of the Spine and
Telescope Tubes (D) are aligned. When everything
is aligned, tighten the 1/4x20 Locking Nuts (T) on
the U-Bolts (H). Tighten the 1/4x20 Locking Nuts
alternating from side to side so each side of the
Top-Hat Bracket is equally compressed around the
Telescope Tube (D). Use a 7/16" wrench to snug
tighten the nuts to 12 ft. Ibs.
Top-Hat
Bracket (G)
1/4" Washers (S)
and 1/4" Locking
Nuts (T)
~'
Top-Hat Bracket (G)
1/4" Washers (S) and
1/4" Locking Nuts (T)
Slide the Frame back and forth on the Spine to
check the alignment. If any binding is observed,
check to be sure that the Telescope Tubes (D) both
co e to rest against the Top Plate on the Spine and
that the Wing is mounted "squarely". If not, loosen
the Top Hat Bracket fasteners and reposition the
Wi g (F).
Caution
The Wings must fit squarely on the Telescope Tubes
for the U-Bolts to tighten correctly and for the telescope
feature to operate freely. Tighten the Top Hat Brackets so
that the ears deflect into a slight bend.
~
~~~~~~~~~~~~~~~~~~~~~_~5L-_-------------------~~~~~~~~
TWINTuBETMU-BUILD-IT (UBITM)
15.
Attach the Safety Cable (L) to the passenger side
V-Plate (B) and the Safety Cable Retainer (U) on
the Frame using the Quick-Links attached-to the
cable. This will ensure that the Frame cannot slide
off the Spine inadvertently. To remove the Frame
and carrier from the Spine, simply undo one Quick
Link. This allows TwinFube" to be separated into
its two component parts to ease the installation,
removal and storage of the system.
17.
V-Plate (8) Passenger Side
Safety Cable
Retainer (U)
16.
lnstall the End Caps (M) without reflectors into the
ends of the Fixed Tubes (D) closest to the vehicle
and the End Cap and Reflector Assemblies (N)
into the ends of the Telescope Tubes at the rear
of TwinTube ™ (farthest from vehicle for view from
behind).
End Cap and Re ector
Assemblies
The Hand Tighten Silent Hitch Pin ™ (K) with the
handle is for securing TwinTube's Frame to the
Spine during use. When this pin is engaged, it
helps prevent carrier movement or wobble. When in
transit, it prevents the Frame from sliding rearward
on the Spine. Be sure to use the 1/4" x 5/8" nylon
bushing on the Silent Hitch Pin" assembly to
prevent any scratching or marring of the powder
coated finish on the Telescope Tube (D). To install,
thread the Hand Tighten Silent Hitch Pin" (K) into
the spring nut that was installed in Step 6. Install
the pin clip from the assembly.
Hand Tighten Silent
Hitch Pin (K)
A
WARNING
The Hand Tighten Silent Hitch Pin MUST be firmly secured
in Telescope-Safety pin hole location before transit. Failure
to do so may result in potential hazards from improper
operation, including property damage and bodily injury.
A
WARNING
Never move your vehicle with the Twin'Iube" UBI extended in the telescoped position. It must always be properly secured before transit. Failure to do so may result
in potential hazards from improper operation, including
property damage and bodily injury.
------------------------------~6--------------~~
TWINTuBETM U-BUILD-IT
SAFE USE
&
(UBITM)
OPERATION
This information is pertinent to TwinTube ™ UBI and any platform it supports including carriers
by Let's Go Aero. Be sure to follow these guidelines to prevent possible hazards from misuse.
Vehicle and Hitch Receiver Compliance
This TwinTube ™ UBI hitch rack fits 2" size hitch receivers and is rated for a Class II tow capability or higher (Class II, III
and up). When operating a tow accessory (any item inserted into the hitch receiver), you must comply with the vehicle and
hitch receiver's towing parameters. Consult your vehicle and hitch receiver owner manual(s) for details on your tow and
tongue weight parameters. Be sure that they are compatible with Twin Iube" UBI and your platform of choice's weight
specifications.
Tongue Weight Compliance
TwinTube ™ UBI and any platform installed on this support structure creates a combined weight that creates direct downward pressure on the hitch receiver's tongue. This downward pressure is the tongue weight. Tongue weight is one of the
two critical weight rating factors of your tow rating's classification (Class I, II, III, IV, V). Never exceed your vehicle and
hitch receiver's tongue weight specification.
Twin Tube
TM
UBI Weight and Load Parameters
Twln'Iube"
UBI weighs 48 Ibs unloaded. To determine your available load weight in accordance with your vehicle and
hitch receiver's tongue weight rating, subtract TwinTube's 48 Ibs from your identified tongue weight rating. The difference
represents your vehicle and hitch receiver's available load weight.
Twin'Iube" UBI is rated for up to 300 Ibs of carrying capacity. This weight includes any platform installed on TwinFube"
,UBI as well as the cargo itself.
When transporting cargo, place heavy loads in the center and lighter cargo to the outside. The 44" Wings must be at least
12" apart to support a load properly.
The rearward load length should not exceed the overall surface space provided by the Twin'Iube" UBI structure. The
Wings are adjustable; however, always keep the load as close to the vehicle as possible. Keep in mind that the further
your load is from the hitch receiver, the greater your downward pressure (tongue weight). For each one foot rearward,
approximately twenty percent of your hitch receiver's tongue weight is diminished
Telescoping Twin Tube ™ UBI
To telescope the Twin Iube"
UBI, remove the Hand Tighten Silent Hitch Pin" from the Telescope Safety pin hole. Verify
that the Safety Cable is secured and then slide the frame to the rear.
WARN'INGS
Failure 0 adhere to these recommendations
ing property damage and bodily injury.
.
may result in potential hazards from improper operation, includ-
• Engage Silent Hitch Pins"
Both pins MUST be securely engaged before transit. A wrench MUST be used to tighten the Hexhead
Silent Hitch Pin" at the hitch receiver location.
• Secure the TwinTube TM UBI as close to vehicle as possible
ways secure Twln lube" UBI as close to your vehicle as possible, minimizing the distance of this
s cture and its load from your vehicle. There are two bolt hole settings (5 3/4" and 8" positions) from
ich to choose. You may also adjust the Wings for up to 10" of rear installed clearance from your
ehicle as needed. See Step 10 of this User Manual for Wing adjustment.
• Verify that the Safety cable is Secured
e Safety Cable prevents the Frame from sliding off the Spine when telescoping the TwinTubet'", It
should always be engaged for this reason, and to prevent the cable from dragging on the ground while
. transit.
• Never move your vehicle with the Twin'Iube"
UBI extended in the telescoped position.
e Twin'Iube" UBI must always be properly secured before transit.
We warrant ls roduct to the first consumer 0 be free from defect in material and workmanship for one year (Please retain your sales slip for your records).
Any produc
oart thereof found to be de'ective within that period will be replaced without charge provided that: (1) the product was not misused; (2) no
alterations 0
ifications were made; 3 . s failure resulted from a defect in material or workmanship and not from normal wear expected in the use of
the produc. ) e product or part is de .•ered, freight prepaid, to Let's Go Aero. Please contact Let's Go Aero, toll free, at 877-464-2376 to get a return
authorization umber prior to return. an acturers only Obligation shall be to replace such products or parts proved to be defective.
U.S. And InternationalPatentNumbers:6.409,203; 6,609,725; 6,945,550;6,910,609;
PatentsPending
~
--------------------------------------------7---------------------~~~~~~~~·