1
AA
Drainpipe
and drain hose installation
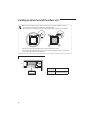
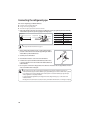
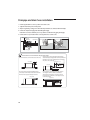
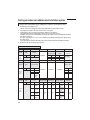
1 Push the supplied drain hose as far as possible over the drain socket.
2 Tighten the metal clamp as shown in the picture.
3 Wrap the supplied large sealing pad over the metal clamp and drain hose to insulate and fix it with clamps.
4 Insulate the complete drain piping inside the building (field supply).
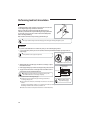
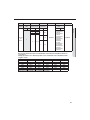
If the drain hose cannot be sufficiently set on a slope, fit the hose with drain raising piping (field supply).
5 Push the drain hose up to insulation when connecting the drain hose to drain socket.
Metal clamp
Drain socket
Drain hose
Drain piping
5JHIUFOUIFQSPWJEFENFUBMDMBNQUP
make sure that fifteen holes are able to
be seen at least.
A-A’
Large sealing pad
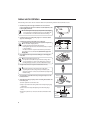
"JSWFOUJMBUJPO
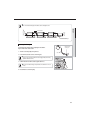
11.8inch(300mm) or less
0.79inch(20mm)
or more
1/100 or more
#BOEKPJOU
Ceiling
%POPUHJWFUIFIPTFBOEVQXBSEHSBEJFOUBGUFSUIF
DPOOFDUJPOQPSU5IJTXJMMDBVTFXBUFSUPøPXCBDLXBSET
when the unit is stopped, resulting in water leaks.
Under gradient
Drain hose
Ceiling
Do not apply force to the piping on the unit side when
connecting the drain hose. The hose should not be
allowed to hang loose from its connection to the unit.
Fasten the hose to a wall, frame or other support as close
to the unit as possible.
Support pieces
3.28~4.92ft(1~1.5m)
1/100 or more
Ceiling
14
21.7inch(550mm) or less
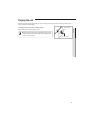
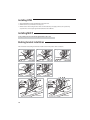
Check that the indoor unit is level with the ceiling by using the leveler.
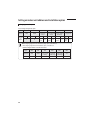
If it is necessary to increase the height of the drainpipe,
*OTUBMMBJSWFOUJMBUJPOUPESBJODPOEFOTBUFXBUFSTNPPUIMZ
install the drainpipe straightly within 11.8inch(300 mm) from
the drain hose port. If it is raised higher than 21.7inch(550
mm), there can be water leaks.
Ceiling