1
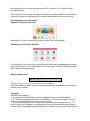
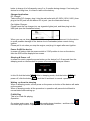
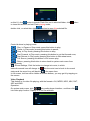
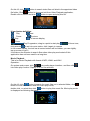
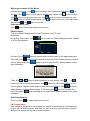
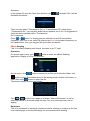
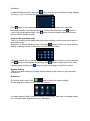
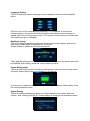
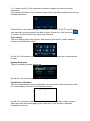
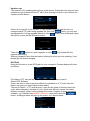
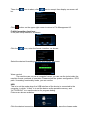
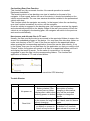
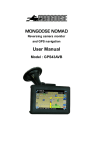
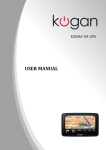
With GPS the world between your hands User Manual YMCA شارع-بيت ساحور 888952020:تلفاكس 8520252255:جوال www.palgps.com [email protected] Please read this manual before you start using this device Thanks for purchasing our product. Please read this manual carefully before starting to use this device. When you use this device, you are supposed to learn well of this product. The information in this manual has been verified for its accuracy. But no liability will be applied for the correctness of mapping data of navigation, technical and/or editorial interpretation or illustration, or the printing and translation of this manual, nor liable for any consequence or incidental damages caused by using this manual. This device is a complicated technical product consisting of OS and third party software. The manufacturer has paid sufficient attention to and fulfill its duty in its hardware manufacture processing and in development and/or application of the software so as to ensure the device work properly. If there is any malfunction or defective of the device, the manufacturer will provide a warranty for the congenital quality problem, but not covering for any loss or damage of property, or any consequence caused by or related to using this device. The navigation software and mapping data is provided by a third party. Its copyright is protected by laws. A User can only use on this device, any copying or application of the software for other purpose is not allowed. No explicit and/or implicit guarantee or assurance will be applicable for the validity, integrity, correctness, accuracy of mapping data for navigation used on this device, nor liability for any loss, damage, and/or any consequence caused by or related to defective mapping data or software used on this device. The copyright of this manual is owned by the company and protected by laws. Any copy or translation of whole or part of its content, including words, figures, signs, phonetic index, etc., is only allowed for the individual customer's reference, but not for public circulation, or other legal and/or commercial purpose. The company reserves the right for final interpretation of this manual. General tips for GPS application The following content is tips for GPS device application and operation. Please read it before starting use of the GPS device, so that you may make a better use of the GPS device. While the GPS device is working, it receives signal from satellites for positioning. The signal from satellite may not be received, or be weakened in room, nearby some big buildings, or under overhead bridges. When the GPS device is receiving satellite signals, you will get signals from different satellites when you are in different places, this is called "Satellite Path", a "Satellite Path" only covers a range of 300 KM. If a "Satellite Path" is defined at place A, then turn off the device and move to another place beyond 300 KM away from A, the device is under another "Satellite Path", At this moment, the device needs to search for satellite signal again. To track the new "Satellite Path", this will take quite a long time. To save time for this searching, you may click "GPS Reset" button in menu of "GPS Testing" to clear the previous “Satellite Path". It will be difficult and taking more time to catch positioning signal from satellite during high speed driving. It is suggested to search the positioning signal by stopping your car for a better and safer effect. While charging the device, please only use the travel charger or car charger equipped by the manufacturer in its original package. Other chargers may cause damage to this device, and this damage is not covered by our warranty. Features: Professional portable navigation system, UI design for mobile application, convenient operation Most popular Windows OS, World class CPU TF card of extensible capacity for mapping data, MP4 video, MP3 music, Photo, and personal files Map for major large and medium scale cities, detailed mapping data, real voice guidance, and automatic smooth switching Built-in high sensitive GPS receiving module and antenna, Faster GPS signal receiving and more accurate positioning Prompt and accurate positioning applicable for GPS data collection, e.g. Area measuring Prompt response for both cold and warm start; Re-capture of GPS signal just in 1 second on average, Accuracy of positioning: no more than 10 meters; Accuracy of timing: no more than 1 microsecond Embedded Organizer/Calendar, personalized friendly touch panel handwriting control, record and plan personal schedule Multimedia entertainment: Flash display, MP3 music, MP4 video, Photo viewing Scientific calculation: embedded calculator, a good business assistant Personalized function setting: Language selection, Backlight brightness adjustment; Power management, Coordination calibration. A user friendly feature is GPS "hold on". With this feature, you may use the device for other applications, like music, e-Book, except for Flash, by pressing Return button on the device to switch GPS application to background and keep it running without exiting from GPS application during the same time. Warnings: Please install the device in a right way to avoid driver's sight and airbag to be hindered. Any loss or damage of product, passengers, or other property caused by mistakes of mounting or installing of the device will be not covered within the warranty and not be the responsibility of the manufacturer. Please not put on earphone and operate the device when you drive or ride a bike to ensure your safety. Please consult with airline crew for application of the device if you want to use it during flight. Please keep the device far away from strong magnetic field which may cause damage or malfunction to the device. Please protect the device from being dropped, shocked or scratched on or by hard objects to avoid possible damages (scratches on the device face, loose contact of the battery, data loss or other hardware part broken) to the device. Please not use earphone with a continuous and large volume for long time, set the volume at a moderate loudness and use it not for a long time to avoid possible damage to your ear audibility. Please not use chemical solution or cleaner to clean the device to avoid possible damage to the paint and polish of its surface. When the device is used as a mobile storage device, please follow right procedures of file management operation to copy or transfer files. The warranty does not cover any mistake, or damage, or loss of files It will be better for you to make a backup copy of your personal files in the device into your PC or laptop in time It is prohibited to use higher voltage power supply, to bent or squeeze the power cord with big force so as to avoid possible damage and overheat resulting in fire Never use wet hands to pull out or plug in the power plug to avoid possible electric shock Not use the device in an environment over 60℃, or below -10℃, and with high humidity as well. The content of this manual is subject to definition, or interpretation, or modification from time to time for improvement on features and function without prior notice. Illustrations on screen display: System UI (Projector Screen) Under this UI, click icon down the screen to enter the function page. Secondary UI (Projector Screen) In this interface, click the icons on the screen to enter the corresponding functions; and click the arrow on the right bottom to turn the page. There will be an animation effect when turning the page. Battery Status Icon: Full==============================>Drained When the battery is at low power level, please charge it immediately to ensure the device work normally. Charging: Warnings for charging: 1. A new battery may be empty and not charged before you get the device. 2. To achieve the best performance of the battery, it is better to charge it up to 8 hours in the first three times, but not over 16 hours. 3. In normal charging with DC charger, please make sure to charge it for 2 – 2.5 hours to get it fully charged. A new battery will reach its best performance after a number cycle of charging and discharging. If the device is not used for long time, it is better to charge it to full capacity every 2 or 3 months during storage. If not using the device for a long time, it is wise to take out the battery. Charger Application: DC Charger: Take out the DC charger, plug it into the wall outlet with AC 220V (100V~240V), then plug in the DC jack into the device DC-in jack. (see the illustration below). Car Lighter Charger: Please insert the car charger into car cigarette lighter jack, and then plug into the USB jack (see the illustration below). When you use car charger, please start car engine first, then connect it to the device to avoid possible damage to the device due to overloaded pulse current during ignition. Please pull it out when you stop the engine, and plug it in again after next ignition. Power On/Off the device In power off status, slide the power switch to "ON" position to turn on the device, then the OSD will be displayed on screen. Sleeping & Power –off In power-on mode, press the power button on the device for 3-5 seconds then the sleeping mode or confirmation for power-off screen will display as follows: In this UI click the button power off, click the button will be in sleeping mode, click the button will to exit the UI and back to normal. operation. Waking -up from the sleeping When in sleeping mode, a short press on the power-on button of the device will wake up the system. When in sleeping mode, all the procedure in operation will pause but will back to normal status after waking up. FLASH Play This is for Flash file playing. Operation: On system main menu, click into media player Interface,and then click into video play function. Display of UI for file selection: on this UI, click button to search Flash files not in selected folder; click to close this window and exit Flash playing mode; double click, or select then click button button to open this selected file. Control buttons in playing mode: : Play, in Pause or Stop mode, press this button to play; : Pause, in Play mode, pressing this button to pause; : Stop, in Play mode, pressing this button to stop; : Fast Forward, in Play mode, pressing this button to get fast forward once; : Fast Retreat, in Play mode, pressing this button to fast retreat once; : Full Screen, pressing this button for full screen play; : Return, pressing this button to return back to system main menu from playing mode; : Sound Settings, Click the button to change into mute, in which status the sound icon will change to click the mute icon to back to its normal status and the sound icon will back to at the same time. In full screen, tool bar will be hidden at screen bottom; you may get it by tapping on the screen. Video Playback This feature is for video file playing, with the formats: AVI, MPEG, MPG, ASX, DAT, ASF and WMV. Operation: On system main menu, click into media player Interface,and then click into video play function. Display of UI for file selection: On this UI, click button to search video files not listed in the appointed video file folder; Click button to close and exit from Video Playback application; Double click or select and click button to open and play this file. UI and button definition: Play Next Pause Previous Stop Full screen display Close Play Progression, drag to a point to start play Volume tune, click anterior to set into mute status, click it again to resume In full screen display, the tool bar at screen bottom will be hidden; you can slightly tap on screen to get it. It will take a few minutes to search files when video play mode starts if this application has not been used for a long time. Music Playback This is for Music Playback with format of MP3, WMA, and WAV. Operation: On system main menu, click into media player Interface,and then click into video play function. Display of UI for file selection: On this UI, click button to search for music files not in selected folder; click button to close this window and exit music play mode; double click, or select then click button to play this music file. Music play mode is displayed as following diagrams: Button and control in Play Mode: In music play mode, click this time click click click button to pause, then it becomes Play Button button, music play mode will return again; click button to jump to the next one, click ; At button to stop; button to jump to the previous one; button to switch Repeat mode; click button to set mute, then this button will become , click again to recover. Exit from Music play Click button at the upper right corner to exit. Photo Display This is for Photo Display with format JPG stored in an TF card. Operation: On system main menu, click of UI for file selection: On this UI, click file folder; click button to search photo files not listed in the appointed photo button to close current UI and exit Photo Display function; double click or select then click right illustration: Then, click icon to enter into Photo Display function. Display or button to open or play this file. Display shown as the button to select previous or next photos; click button to zoom in or zoom out photo; click button for full screen display. In full screen display, tap the screen again to exit full screen display; click select display of different percentage. Click the button Ctrl-R the photo. of display. or button to you can Ctrl-Shift-R or is for selecting to set automatic or manual mode to turn page Exit Photo Display Click the button on upper right corner to exit. FM Transmission This feature is designed for transmitting the sound of this device at a set frequency to your car FM radio receiver, and then you can hear from your car stereo system, and get it at volume set by the car stereo system. Operation: In the system UI open the Tools then find the icon illustrated like below: to activate FM. It will be Then you may select "Transmission On" or "Transmission Off", when select "Transmission On", you may also select device speaker on or off. It is suggested to close the device speaker when "Transmission On" is selected. Press or button, or directly drag the slide bar to set FM transmission frequency, then turn on car radio FM receiver and turn it to the same frequency as the transmission, then you may get the sound from the device. EBook Reading This is for eBook Reading with format .txt stored in an TF card. Operation: On system main menu, click button to enter into eBook Reading application. Display of UI for file selection: On this menu, click button to search for txt files not in selected folder; click button to close this window and exit file reading mode; double click button, or select then click button to open this file. The screen display is shown as follows: Click or button to turn page up or down; “Manual/Automatic” is set for selecting Manual or Automatic page turning; Font is for selecting letter size of display. Bookmark This is for bookmark in reading a voluminous article, marking or jumping to the last time marked page, a humanized design for convenience while reading. Operation: In eBook Reading mode, click right button to enter into bookmark setting, display of dialogue block is shown as in the illustration below: Click button to set a bookmark for the current page. Directly click selected bookmark stored in the dialogue block to remove this bookmark; click button to jump to the bookmarked page. Click button to exit bookmark setting and return back to eBook Reading mode. Jump to the appointed page This is for jumping to the appointed page when reading a voluminous article and no bookmark is set. Operation: In eBook Reading mode, click right button to enter into Jump function, display of dialogue block is shown as in the illustration below: Click the number key on screen to input the page number to jump to, when inputting, click button to backspace for deleting; click button to clear input block, after inputting page number click button to jump to the page of selected number. System Setting This is for system setting to change default setting of the system to your personal preference. Operation: On system main menu, click icon to enter into system setting. Screen display is shown as the illustration below: In system setting, there 9 items for setting, click directly each item to change setting for it. Details will be described one by one below. Language Setting This is for setting of system language; screen display is shown as the illustration below: Click the icons of the corresponding language in this interface or choose the interface project, the system will save the setup automatically when the setup is closed, and return to the previous menu. (The system will be required to restart after the interface project is changed.) Backlight setting This is for changing backlight brightness of the device screen display, and time to start screen saver when no operation on the device. Screen display is shown as the illustration below: Then, drag the slide block to set. Select No Screen Saver, then the screen saver will be disabled. After setting, close the current window to save. Power Management This is for setting auto power off and/or power saving mode, and time to start power off and/or power saving when no operation on the device. In drag menu to select time, select “No” for disabling this feature. After setting, close the current window to save. Sound Setting This is for setting of beeping of power on, button operation on screen, and total volume. After entering into this UI, screen display is shown as the illustration below: click “Screen sound” in this interface to enable or disable the sound of screen operations, In the present interface, click "customize Sound" then its dialog window will show up, illustrated as below: "Nand Flash" is the inside memory of the device, "SDMMC" is the TF card. So the start-up music can be selected from both of them. Select one, click the button to confirm, and then back to the upper-level interface. Time Setting This is for setting time of the system. After entering into this UI, screen display is shown as the illustration below: On this UI, click button on the screen to set. After setting, close the current window to save. System Resources This is for checking system resources: On this UI, click directly at the item on the right to check. Coordinates Calibration This is for calibrating the stylus coordinates on touch screen. After entering into this UI, screen display is shown as the illustration below: On this UI, use stylus to tap at the center of the cross, then tap on other crosses which will move after each tapping until finish and “Touch Screen Calibration Completed” is shown. Update Logo The function is for updating start-up logo of the device. Please be sure that you have stored the Logo pictures into the TF card. After entering into this UI you will see the interface shown below : If there is no logo file in the current TF card, please copy the logo file into it or change another TF card having upgrade file, then click button, you may see this upgrade file. During upgrade operation, click button, then a dialogue frame will pop up, shown as the illustration below: Then click button to cancel upgrade, or click to proceed with the upgrade processing. Warning: please be sure that the battery is being full when you are updating. If not, please get the device charged. GPS Path Using this function is to set GPS path for your navigation. Screen display will show as follows: File folders of TF card will be listed on screen. Click a folder to open it. Select GPS Software If there are two or more maps from different companies on a TF card, then this feature can help you select each of them easily. The way to Select: In TF card directory, open the file folder to find the map to be used, select navigation software of .exe, (which has different names from each different company, please refer to details from each company of these navigation software. e.g. Careland has WINCE_GPS.exe), then select and click button, a dialogue frame will pop up on screen, as it shown below: Then click be: Click icon to abort; click icon to accept, then display on screen will button on the upper right corner to return to File Management UI. FLASH formatting functions: In the path setup interface, as shown: Click the icon, enter the format: interface, as shown: Select the desired formatting and click icon format, as shown: Warm remind The machine can not use a computer format, you can use the tools inside the machine format, methods of operation: Please select the system configuration / GPS path / formatting functionality mode, you can confirm USB This is to set the mode when the USB interface of the device is connected to the computer, in which “U disk” is to set the device as the portable memory, and “ACTIVESYNC” is to use the device for program debug. Pictures are shown as below: Click the desired connection mode and close the window to save the chosen mode. Car-backing Rear View Function This function is a fully automatic function. No manual operation is needed. Equipment Installation: The receiving device of car-backing rear view is installed on the seat of the navigator. In that regard, before the use of the device, it should be installed on the vehicle mount bracket. The rear view camera should be installed in the professional vehicle refit shop. This function needs the navigator as monitor. In that regard, when the car-backing rear view function is enabled, do not turn off the navigator. Once the vehicle is engaged in the backing gear, the navigator receives the signals, and automatically switches to the display image of the rear view camera. When the vehicle is not engaged in the backing gear, the navigator will switch to the previous work mode automatically. How to save and allocate files in TF card: Usually, the files used by the device are saved in the appointed folders to ensure the access for embedded program of the device. You may save files into other folders or under root directory of the TF card. If the files are saved in the appointed folders, when opening the corresponding application, these files can be seen directly; If not in the folders, then you can not see them for the application, so that you need to click “Search” button, the system will search in all files in un-appointed folders until find it and display the result of search. For the sake of convenience, it is strongly suggested to save the files into the corresponding folders. The function and application of folders in TF card is listed below: Attention: Navigation software must be saved into GPS directory! Trouble Shooter No. Fault 1 No power on 2 Dead Unit Possible Cause Solutions Please refer to the Battery drained (The description of battery screen has no further charging in this manual, display after a blink when only use the enclosed pressing power on button.) charger to charge the device. The start interface stays Take out the battery, then on the screen for long time put it back, start the device without changing. again. No display of the screen, Press and hold the power or display on screen is on button for 5 seconds, frozen as any button is then release it to power on. pressed. 3 4 5 Dead or frozen during upgrade, display on the Error in upgrade screen is frozen and no button works. Take out the battery, then put it back, start the device again. This fault can only be fixed by the manufacturer. Please return for repair. If the charger is connected properly and powered. Charger is damaged. During charging, the green Battery is damaged or full LED indicator of the Impossible to charged. device has no light or no recharge It is normal when the green charging sign displayed on LED is lit on but the the screen. charging sign is not on the screen at the same time during charging. Power off and then press The click position is not the power button for 6-9 Coordinates match with the reaction seconds, select Calibration failure position after starting up Coordinates Calibration to the device。 operate。