1
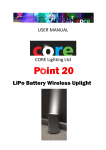
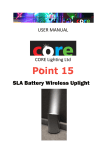
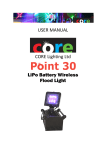
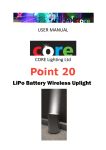
USER MANUAL Mk2 Battery Wireless Uplighter © 2015 ABC Production Services Ltd. (www.abcgb.com), all rights reserved 2 Contents Product Modification .............................................................................................................................. 5 Safety Information .................................................................................................................................. 5 Before You Begin ..................................................................................................................................... 5 Product Overview ................................................................................................................................... 6 Features .............................................................................................................................................. 6 Supplied with Hire ............................................................................................................................... 6 Safety .................................................................................................................................................. 6 Getting Started ........................................................................................................................................ 7 Power .................................................................................................................................................. 8 Ventilation and Mounting ................................................................................................................... 8 Operation ................................................................................................................................................ 8 Power .................................................................................................................................................. 8 Reset ................................................................................................................................................... 8 Charging .............................................................................................................................................. 8 Control Panel........................................................................................................................................... 9 External Power .................................................................................................................................... 9 Function Modes .................................................................................................................................... 10 Cust Col ............................................................................................................................................. 10 Static Operation ................................................................................................................................ 11 DMX Operation ................................................................................................................................. 12 DMX Master Operation ................................................................................................................. 12 DMX Slave Operation .................................................................................................................... 12 DMX Mode .................................................................................................................................... 12 DMX Start Address ........................................................................................................................ 13 Built‐In Effects ................................................................................................................................... 13 W‐DMX Pairing and Unpairing .............................................................................................................. 13 W‐DMX Link LED ............................................................................................................................... 13 © 2015 ABC Production Services Ltd. (www.abcgb.com), all rights reserved 3 Unpairing from all W‐DMX Transmitter units ................................................................................... 14 Pairing with a W‐DMX Transmitter unit or ColourPoint Master unit ............................................... 14 Pairing with a CORE Point15, Point20 or Point30 Master unit ......................................................... 14 Additional Settings ................................................................................................................................ 15 Power Mode ...................................................................................................................................... 15 Brightness Control............................................................................................................................. 15 PWM Frequency Control ................................................................................................................... 15 Keypad Lock ...................................................................................................................................... 15 Mechanical ............................................................................................................................................ 16 Dimensions ........................................................................................................................................ 16 Antenna ............................................................................................................................................. 16 Locking .............................................................................................................................................. 16 Copyright notice This document and its content is copyright of ABC Production Services Ltd. ‐ © ABC Production Services Ltd, 2015. All rights reserved. This manual maybe freely distributed in its entirety only on the express condition that all references to ABC Production Services not be omitted, hidden, concealed, faded or edited out in any way whatsoever. You may not copy, extract or rebrand this manual or any part of it as it remains the copyright of ABC Production Services Ltd., a UK registered company. You may not, except with our express written permission, distribute or commercially exploit the content. Disclaimer ABC Production Services Ltd believes that the information in this manual is accurate and complete and assumes no responsibility for any error or omissions within this document or any other documentation accompanying the product. We reserve the right to revise this document at any time. Please see http://goo.gl/7jpa4Q to download the latest version of this document. © 2015 ABC Production Services Ltd. (www.abcgb.com), all rights reserved 4 Product Modification This CORE Lighting product has been designed and manufactured to meet the strict requirements of UK, EU and International safety regulations. Any unauthorised modifications to the product including replacement of parts with non‐standard parts could compromise safety and result in the product being non‐compliant with relevant standards. If the hirer modifies the unit in any way without consent from ABC Production Services, they will be liable for a repair charge and additional hire charges while the unit is out of use. There are no user serviceable parts within this product. Safety Information Important safety information is contained within this manual. Please read all instructions fully prior to installation and use of the equipment. Internationally recognised symbols are used within the document to highlight important messages as follows: Critical installation or usage information. Failure to comply with this information may cause damage to the product, third party equipment or cause harm or injury. Important installation or usage information. Failure to comply with this information may cause the product to operate incorrectly. Note: Restrictions apply to transporting this equipment on aircraft due to the lithium polymer batteries having capacity greater than 100Wh. Please consult IATA Packing Instructions for further information. Before You Begin The CORE ColourPoint fixture is a battery‐powered wireless up‐lighter capable of providing portable and instant architectural and feature lighting anywhere. With high‐powered red, green, blue and white LEDs the fixture is capable of producing any colour or shade of white using combinations of those LEDs. Ideal for illuminating buildings in colour, both indoors and outdoors, the fixture is powerful enough to light buildings of 3 or 4 storeys. Lighting effects may be created by connecting to effects generators such as lighting desks or other CORE Master units using the in‐built Wireless DMX receiver. Simply connect wirelessly to the transmitter of the generator. The product is designed and manufactured in the UK. © 2015 ABC Production Services Ltd. (www.abcgb.com), all rights reserved 5 Product Overview Features High powered 2,000 lumen RGBW LEDs equivalent to 5300 Lux @ 2m 4 x Cree high‐powered RGBW LED arrays Lithium Ion Battery reducing unit weight to just 4.0Kg LEE Filter Colour Library, separate RGBW control and built‐in colour programs. Wireless DMX wireless master and slave control (2.4GHz W‐DMX) Cable DMX output of full universe– unit acts as Wireless DMX receiver to cable DMX converter 4 or 5 Channel DMX operation Variable PWM frequency for TV work Intuitive LCD menu Designed and Manufactured in the UK Operating temperature range ‐20°C to +45°C or ‐4°F to +113°F Supplied with Hire When hiring these units, the following will be supplied. Please contact ABC Production Services Ltd. immediately if there are any signs of product damage or parts missing. Charging Case of Six Units: Single Unit: 6x ColourPoint wireless LED fixture 1x ColourPoint wireless LED fixture 6x Stainless steel shroud 1x Stainless steel shroud 1x Manual 1x Manual 1x Flightcase 1x 13A Powercon power cable Safety AVOID direct eye exposure to the light source when illuminated DO NOT submerge this product in water or expose to excessive water spray DO NOT hang this product other than by the means indicated in this manual DO NOT leave any flammable material near product whilst operating or charging ALWAYS use the supplied charger or charging case ALWAYS ensure the charger is connected to the specified voltage ALWAYS ensure the charging case lid is open whilst plugged into mains supply NEVER connect this product or charger to a dimmer pack DO NOT operate thi s fixture if it appears damaged in any way DO NOT operate this fixture where the ambient temperature exceeds 45ºC In the unlikely event that your product develops a fault, please contact ABC Production Services Ltd. Do not attempt to repair yourself unless specifically instructed by ABC Production Services Ltd. © 2015 ABC Production Services Ltd. (www.abcgb.com), all rights reserved 6 Getting Started Handle LED Emitters Chrome Shroud Control panel Charging, power and DMX out port W‐DMX button W‐DMX Indicator LED Display Charging status LED Power button Function button Down button Enter button Up button © 2015 ABC Production Services Ltd. (www.abcgb.com), all rights reserved 7 Power The battery charger may be included as an accessory for individually hired fixtures or built into the flight case for the charging of multiple fixtures. In either case the supply has an input voltage range of 100‐240 VAC at 50/60Hz. Ensure the product is used only with correct voltage and frequency of mains supply. Never connect the charger or charging case to a dimmer circuit, even when a dimmer has been configured for ‘non‐dim’ or ‘switched operation. Ventilation and Mounting Always use the product in a safe position and ensure there is enough room around it for ventilation. Never close the lid during charging; this allows escape of heat. Operation Power Push and hold this power button for >1 second to switch the unit ON or OFF. The display will show “Core Lighting” and software version for a few seconds before starting. The display backlight will extinguish after a short time to reduce power use Reset To reset the unit, hold down the up and down buttons then press the power button. When the unit starts up, release the buttons an the unit will start up as usual and followed by the message “MASTER RESET” to confirm the unit has reset. Charging Turn the unit OFF before connecting to the charger Only use the supplied charger or charging case For case chargers the unit should be inserted into the case. External chargers should be plugged into the 5‐pin connector on the front of the unit. For best results recharge battery fully before storage When charging the battery in the charging case, ensure the case remains open. Switch off the charger unit and unplug once fully charged Whilst charging the LED indicator will illuminate in AMBER Once fully charged the LED indicator will show GREEN Charging Charged DO NOT use any charger other than the unit supplied with the ColourPoint. When using a charging flight case, ensure the unit is pushed fully down on the charging connector and the protruding screws are located in their positioning holes. The charge light on top of the unit should illuminate to signify this has been done. © 2015 ABC Production Services Ltd. (www.abcgb.com), all rights reserved 8 Control Panel Enables changes to FUNCTION or SETTINGS menus Exits from the current option or menu Navigates backwards through the menu list or decrements a numeric value or navigates back through available values Navigates forward through the menu list or increments a numeric value or navigates forward through available values Enters the currently displayed menu option or saves the currently displayed value Wireless key to enable linking to a W‐DMX transmitter in “Slave” mode or in “Master” mode it adds new slaves Power button turns the unit on and off ExternalPower A separately available power supply is available as an accessory to drive the ColourPoint from mains voltage 100‐250VAC 50/60Hz. Connect this to the charging/power port in the front of the unit. The device supplies 24VDC to the ColourPoint which replaces battery power. Battery is disconnected whilst the Power Supply is plugged in so will not be charged or discharged. © 2015 ABC Production Services Ltd. (www.abcgb.com), all rights reserved 9 Function Modes There are three modes of Operation, accessed through the FUNCTION menu; Cust Col This mode allows the fixture to output a static Red, Green, Blue or White colour, or any combination thereof; each colour may be set to any value 0 to 255. Any W‐DMX signal, if present, is ignored. Static In this mode the fixture outputs a static LEE or preset ‘cc’ colour as selected. The selection is remembered if the unit is switched off then back on or put into another mode. Any W‐DMX signal, if present, is ignored. DMX In this mode the fixture is under control of Wireless DMX so may be controlled by a W‐DMX compatible device or DMX compatible device with a W‐DMX transmitter attached. The options available within DMX mode are described in more detail below. To change Function press . Use the & keys to select “CHANGE Function” and press to accept. Then use the & keys to select the required function as above and press . The three modes of operation are discussed in more detail below. All of these adjust the brightness settings for each colour. Information for more technical users: the brightness is set using Pulse Width Modulation (PWM). The PWM frequency is 610Hz. Cust Col When in Custom Colour mode the display indicates the current selected colour. Simply press to step through the colours or accept a colour value. Use the & keys to change the value. FUNCTION Cust Col Set Col. Red: 255 Value range is from 000 to 255, 000 turning that particular colour off and 255 being full brightness Set Col. Tip: Mix red & blue for purple/pink Grn: 000 Tip: Mix red & green with White for warm shades of white Set Col. Tip: Mix red & green for orange/yellow Blu: 128 Set Col. Wht: 050 © 2015 ABC Production Services Ltd. (www.abcgb.com), all rights reserved 10 StaticOperation When in STATIC mode the display indicates the current selected colour. To change the current selected colour press STATIC . Lee345 The last character of the currently selected colour is underlined Use the & keys to select a colour from the built‐in library of 70 pre‐programmed colours, including 60 popular LEE Filter Colours The colour changes when cycling through the available options. The selected colour is only saved when pressed. If is not pressed, the colour reverts to the previously selected colour after 8 seconds. is Available Colours: cc001 White Lee075 Evening Blue Lee157 Pink cc002 Half Flesh Tone Lee089 Moss Green Lee159 No Colour Straw cc003 Full Flesh Tone Lee100 Spring Yellow Lee162 Bastard Amber cc004 Half Mint Green Lee101 Yellow Lee170 Deep Lavender cc005 Mint Green Lee102 Light Amber Lee174 Dark Steel Blue cc006 Half Ice Blue Lee103 Straw Lee181 Congo Blue cc007 Full Ice Blue Lee104 Deep Amber Lee192 Flesh Pink cc008 Soft Red Lee106 Primary Red Lee199 Regal Blue cc009 Soft Green Lee107 Light Rose Lee323 Jade cc010 Soft Blue Lee108 English Rose Lee341 Plum Lee113 Magenta Lee345 Fuchsia Lee002 Rose Pink Lee115 Peacock Blue Lee353 Lighter Blue Lee009 Pale Amber Gold Lee117 Steel Blue Lee652 Urban Sodium Lee010 Medium Yellow Lee118 Light Blue Lee722 Bray Blue Lee013 Straw Tint Lee119 Dark Blue Lee724 Ocean Blue Lee015 Deep Straw Lee121 Lee Green Lee738 Jazz Green Lee017 Surprise Peach Lee126 Mauve Lee765 Lee Yellow Lee019 Fire Lee127 Smoky Pink Lee776 Nectarine Lee020 Medium Amber Lee135 Deep Amber Gold Lee777 Rust Lee024 Scarlet Lee136 Pale Lavender Lee779 Bastard Pink Lee026 Bright Red Lee138 Pale Green Lee789 Blood Red Lee046 Dark Magenta Lee139 Primary Green Lee793 Vanity Fair Lee058 Lavender Lee147 Apricot Lee795 Magical Magenta Lee068 Sky Blue Lee153 Pale Salmon © 2015 ABC Production Services Ltd. (www.abcgb.com), all rights reserved 11 DMX Operation CORE ColourPoint is equipped with a Wireless Solution W‐DMX wireless radio transmitter and receiver. This allows the fixture colour to be set up by or synchronized with sequences Function produced by a DMX lighting controller or other ColourPoint unit when in Receive, or SLAVE DMX mode. Alternatively when in MASTER mode the unit can be linked to many Slave units which will then duplicate everything output from the Master. If you are not using a ColourPoint as a Master unit then a compatible W‐DMX transmitter attached to a DMX controller is necessary. This could be a lighting desk, a specific controller, or a CORE Point 15, 20 or 30 Master unit. When the ‘Function DMX’ screen is shown, after a few seconds the screen automatically DMX Type reverts to the last mode used, either Master or Slave. By pressing the key the ‘DMX Type’ screen is shown, which allows the user to select the opposite mode using or Master key. DMX Master Operation Once Master mode is set, the Master may be linked to any number of unlinked slaves by pressing the Wireless key momentarily. The adjacent link light will flash for a few seconds whilst it links to the unlinked slave units DMX Master then go solid. DMX Slave Operation When in DMX Slave mode the display will show the current active DMX Start Address so Set DMX the unit can be controlled from elsewhere. The number of channels occupied is depends on the “DMX MODE” setting (4 or 5 channels Addr: 001 may be used by the fixture). In this mode the entire universe is output on a side connector pin, for which a connector cable is available to hire from ABC Production Services for connection to other non‐wireless fixtures. DMX Mode The ColourPoint has 2 modes of operation. From the “CHANGE Settings” menu select the “5th DMX CHANNEL” option as follows: Mode Chan Function 1 Red 2 Green 3 Blue 4 White 1 Red 2 Green 3 Blue 4 White 5 Dimmer (0‐100%) th 5 CHAN Off 5th CHAN M. Fader Notes This mode disables master dimmer and strobe functions. Each of the colour values may be set from 0 to 255. This mode enables the fixture’s overall colour, set on channels 1 to 4, to be dimmed. Values are 0 to 255, where 255 represents 100% output. © 2015 ABC Production Services Ltd. (www.abcgb.com), all rights reserved 12 DMX Start Address To set the DMX start address press the key when the display shows the current address. Use the select the new start address then the key to confirm. or keys to Built‐InEffects The ColourPoint is equipped to generate a number of special effects as a stand‐alone unit when DMX is placed in Slave Mode or will output these to a number of connected slave units when DMX is in Master Mode. By pressing the key the last used effect type is brought up, which can then be keys. changed using the and By pressing the key to confirm the effect type, the speed can be adjusted from a range 1 to 10 using the and keys. When confirmed with the key the screen reverts to show the effect and speed. Function Effect Type: R’bow 1 EFFECT R’bow 10 W‐DMX Pairing and Unpairing ColourPoint units need to be manually paired with the lighting control unit equipped with a W‐DMX transmitter. This could be a lighting desk with DMX Output, or a CORE Point15/20/30 Master unit with a W‐DMX transmitter inside. This allows a group of ColourPoint fixtures to be controlled from the lighting desk or Point15/20/30 Master using the built‐in colour cycles (Inside Point15/20/30). Or set up individually selected colours across many units at once from just one Master unit. W‐DMX Link LED The W‐DMX link status is shown by the LINK LED, this provides information on the W‐DMX link. This follows the same status indication as all Wireless Solution W‐DMX products. Description for operation in Slave mode: OFF If the LED is OFF the ColourPoint is not paired with a W‐DMX transmitter FLASHING If the LED is FLASHING the ColourPoint is paired with a W‐DMX transmitter, but the transmitter is switched off. STEADY ON If the LED is STEADILY ILLUMINATED the ColourPoint is paired with, and ready to receive data from a W‐DMX transmitter. This is a fully paired and fully functioning system. UNEVEN FLASHING If the LED is FLASHING unevenly, the ColourPoint could be paired with a W‐DMX transmitter, the transmitter is switched on, but no DMX Input to the transmitter. © 2015 ABC Production Services Ltd. (www.abcgb.com), all rights reserved 13 Unpairing from all W‐DMX Transmitter units Switch on the ColourPoint. Press and hold the key until the W‐DMX LINK LED is turned OFF. ColourPoint is now unpaired from the W‐DMX transmitter. Pairing with a W‐DMX Transmitter unit or ColourPoint Master unit Switch on the ColourPoint. Ensure the ColourPoint is unpaired from any other transmitter (the LINK LED is OFF) – above. Ensure the transmitter is within range and switched on. Press its ‘FUNCTION’ button for more than 1s. On a ColourPoint Master unit simply hold down the key momentarily. The transmitter will scan for all unlinked receivers for around 10 seconds; the LED will flash. If pairing is successful the LINK LED on the ColourPoint will illuminate. ALL Unlinked ColourPoint units (and other Unlinked W‐DMX units too) may be linked at the same time. No apparent limit to the number being paired. For receiver units not to be paired with this transmitter, simply switch off those unwanted receivers before this pairing process. They may be paired with a different transmitter after switching on again and repeating the pairing process with the new transmitter. PairingwithaCOREPoint15,Point20orPoint30Masterunit Switch on the ColourPoint. Ensure the ColourPoint is unpaired from any other transmitter (the LINK LED is OFF) – above. Ensure the Master unit is within range and switched on. Select MODE MSTR → MSTR DMX → Add Unit → ‘+’ to select ‘YES’ → to confirm. The transmitter will scan for all unlinked receivers for around 10 seconds; the LINK LEDs flash. If pairing is successful the LINK LED on the ColourPoint will illuminate. ALL Unlinked ColourPoint units (and other Unlinked W‐DMX units too) may be linked at the same time. No apparent limit to the number being paired. For receiver units not to be paired with this transmitter, simply switch off those unwanted receivers before this pairing process. They may be paired with a different transmitter after switching on again and repeating the pairing process with the new transmitter. For successful linking the receiver must fulfill the following conditions: Distance to transmitter (in free air) Less than 200m for Micro model transmitter Less than 500m for BlackBox or WhiteBox transmitter Position above obstacles (e.g. crowds and tress) Minimum 1m Pairing to a transmitter is remembered after power off or the battery is depleted. This allows the system pairing to be set up in a warehouse and the whole system simply switched on at the site, which makes deployment very simple. © 2015 ABC Production Services Ltd. (www.abcgb.com), all rights reserved 14 Additional Settings A number of additional settings may be accessed within the menu system: Power Mode Under the “CHANGE Settings” menu ColourPoint has two power modes that can be selected: Power LongLife 50% Power Power Normal Full Power The “Normal” option provides maximum light output at the cost of reduced battery life. “LongLife” reduces the LED output by 50%, therefore enables 2 x running period for ALL FUNCTIONS, whether stand‐ alone or DMX. To change the power mode press the key and use the and keys to select “CHANGE Settings” then press keys to select “POWER MODE” and press to select. the key . Use the and keys to toggle between “Norm” and “LongLife” then press to save changes. This setting Use the and affects all Static, Cust Colr and DMX modes so that the battery life of each unit can be individually set, irrespective of what’s controlling it. Brightness Control Under the “CHANGE Settings” menu ColourPoint has a separate brightness control that can control the output of the unit in stand‐alone mode: The value may be changed from 0 to 100% in five steps: 0%, 20%, 40%, 60%, 80%, 100%. Press the key and use the and keys to select “CHANGE Settings” then press . to accept. Use the and keys to select “BRIGHTNS CONTROL” and press to select. Use the and keys to toggle between “0%” and “100%” then press to save changes. This setting adjusts Static and Cust Col modes only. DMX mode remains unchanged as the unit remains under external control. PWMFrequencyControl For HD TV work ColourPoint is equipped with an option to adjust the PWM frequency of the LEDs to prevent ‘beating’ with the TV scan frequency. To enable soft dimming press and use the and keys to select “CHANGE Settings” then press to select. Then use the and keys to select “PWM Freq” and press to select from value 488Hz to 3.9kHz. Press to save changes and the screen will revert to showing the ‘Function’ mode. Beware that when using the higher frequencies the resolution of the colour intensity steps is reduced, so the effect of colour changing can become less smooth and more ‘steppy’. KeypadLock The keypad may be locked to prevent tampering or inadvertent adjustment of the unit. To Lock: Hold down the key whilst switching ON the unit to Lock. To Unlock: First switch OFF the unit. Hold down the key whilst switching ON the unit to Unlock. © 2015 ABC Production Services Ltd. (www.abcgb.com), all rights reserved 15 Mechanical Dimensions Antenna The antenna is a high‐gain type similar in performance to the Wireless Solutions W‐DMX 2dB standard antenna according to testing. This antenna is now fitted to all CORE POINT units. Locking The unit may be locked to a nearby object by passing a locking wire or padlock through the locking holes in the top or bottom plates. A Kensington Lock point is also provided on the bridle assembly holding the head in place. © 2015 ABC Production Services Ltd. (www.abcgb.com), all rights reserved 16