1
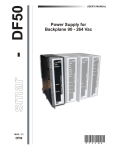
Section 25 ADDING REDUNDANCY TO THE DFI302 HSE CONTROLLERS Introduction To meet the requirements for fault tolerance, system availability and safety of the industrial process, the following DFI302 HSE controllers support redundancy: DF62, DF63, DF73, DF75, DF89, DF95 and DF97. The Hot Standby redundancy strategy is used when the Primary controller executes all tasks, and the Secondary controller is the one that, continuously synchronized with the Primary, keeps ready to assume the process in case the Primary controller fails. This event, where the Secondary assumes the process by changing its function to Primary, is also called switch over, and occurs in a bumpless and autonomous way. In those controllers the redundancy is Device D-3 type, in compliance with the specification “High Speed Ethernet (HSE) Redundancy Specification FF-593” of Fieldbus Foundation. By this capacity (Device D-3), during the entire operation time, the controller pair is seen as a single device by the configurator. Thus, actions as commissioning, decommissioning, configuration download, and parameterizations affect both controllers (Primary and Secondary). The different failures types, such as failures in the communication ports, are indicated even if occur in the Secondary, this allows proactive maintenance and thus ensure the redundancy availability. This new generation of Hot Standby redundancy of the DFI302 HSE controllers brings better diagnostic and failure detection capacities, autonomy during startup and transparency for the configuration tools. IMPORTANT The characteristics described in this section are valid for DF62, DF63, DF73, DF75, DF89, DF95, TM and DF97 controllers, except the information related to the FOUNDATION fieldbus H1 channels which are only applied to the DF62 and DF63 controllers. It is assumed that the user is familiar with Studio302 and Syscon. For further information, refer to the respective manuals. Hot Standby Redundancy With the Hot Standby redundancy full redundancy is achieved, heavily improving the fault tolerance, plant availability and safety. All the controller functionalities and databases have redundancy: 1. Device redundancy (Hardware redundancy); 2. Network redundancy (or LAN redundancy, for controllers with two Ethernet ports – DF63, DF73, DF75, DF89, DF95, and DF97); 3. Ethernet Gateway ↔ 4 FOUNDATION fieldbus H1 ports; 4. Link Active Scheduler (LAS) in the FOUNDATION fieldbus H1 channels; 5. Controller (running function blocks, including FFB/ Ladder logic); 6. Supervision; 7. Modbus Gateway ↔ 4 FOUNDATION fieldbus H1 ports; 8. Synchronism channel redundancy. The procedures for configuration and maintenance are as simple as for a non-redundant system, saving time to get the system running. Only one configuration download is necessary to configure the redundant pair. And in case of replacement of a failed controller none configuration download or user intervention is necessary. The new module inserted is automatically recognized, receiving the whole configuration from the controller in operation. 25.1 DFI302 – User’s Manual – AUG/14 - L Preparing a Redundant System In order to have a true redundant system, not just all the devices must be redundant but also the entire system architecture must be designed as redundant. The more elements with redundancy ability the system have, better reliability and availability can be achieved. A typical redundant architecture based on DFI302 controllers can be seen in the next figure. Ethernet network architectures In the following topics are presented the Ethernet network architectures required for the controllers with two Ethernet ports (DF63, DF73, DF75, DF89, DF95, and DF97), and also for the DF62 which have one Ethernet port and requires a different network architecture. In both cases the IP address of the controllers and network cards must follow the Class C (subnet mask 255.255.255.0), which means that all IP addresses on the same subnet must have the first three bytes equal. For reference purpose, in each pair of controllers, we designate one of them as A and another one as B. It may be associated with the controllers’ position in the panel. For example, the controllers on the left side are “A”, and the controllers on the right side are “B”. This designation (A and B) is an important reference for some of the procedures in this section, as well as for documentation of the controllers IP list. This is a static identification, different from the controllers function (Primary / Secondary) which is a dynamic state of the pair and can take any sequence depending on the failures that may cause a switch over. IMPORTANT It is highly recommended that the automation Ethernet networks are physically separated from other networks such as the corporate network, of common use. This is necessary to guarantee the safety and good operation of the automation Ethernet network. Network architecture for controllers with two Ethernet ports Figure 25. 1 – Network architecture for controllers with two Ethernet ports 25.2 Adding redundancy to the DFI302 HSE controllers In the Figure 25.1 are presented the network requirements, detailed as follows: • For controllers with two Ethernet ports, the networks’ nodes have to be equal (the last byte of IP addresses must be equals). For the ETH1 port must be used one subnet, and for the ETH2 port must be used another subnet. Example: the first DF63 port (ETH1) = 192.168.164.34, the second DF63 port (ETH2) = 192.168.165.34. This way, there will be two subnets: 192.168.164.X (red network) and 192.168.165.X (blue network), the first serves all ETH1 ports, and the second serves all ETH2 ports of all the controllers. These two subnets must be designed to be physically separated, using different network elements. • The workstations must have two network cards (NIC1 and NIC2) and each one must have the IP configured in one of the subnets as explained previously. Example: NIC1 = 192.168.164.250 and NIC2 = 192.168.165.250. This way, for controllers with two Ethernet ports, using the network architecture described the network redundancy is obtained. Thus, a failure that affects one of the network segments will be covered by the network redundancy, adopting the other network path which was not affected by the failure. Network architecture for the DF62 controller Figure 25. 2 – Network architecture for the DF62 controller In the Figure 25.2 are presented the network requirements when using the DF62, detailed as follows: • Just one subnet must be used (in the figure above the red network represents only one subnet). Example: all IP addresses in the range 192.168.164.X (only the last byte changes). But two switches and two network cards must be used (NIC1 and NIC2), because this way we still have redundancy on the network segments between workstations and switches. 25.3 DFI302 – User’s Manual – AUG/14 - L • The network cards may have any IP addresses, but necessarily in the same subnet. E.g.: NIC1 = 192.168.164.250 and NIC2 = 192.168.164.251. • The controllers A must be connected to the switch 1 and the controllers B must be connected to the switch 2 (see Figure 25.2). That is, for each controller pair, one of the DF62 will be connected to a switch and the other DF62 of the same pair will be connected to the other switch. IMPORTANT It is mandatory that the switches are connected by two paths. This is necessary to guarantee that a single failure in the interconnection cable between the switches does not affect the HSE control links which may exist between different pairs of controllers. Necessarily the switches must support RSTP (Rapid Spanning Tree Protocol) and have this feature enabled. Preferably the switches should have ports auto sensing type to avoid preoccupations with types of cable and ports that will be used for these interconnections. To increase the project safety, the interconnections should be performed with the analysis of a network administrator or IT professional. Using switches with no RSTP support may cause an interruption on the Ethernet network. This way, for a system with pairs of DF62 controllers, using the previous network architecture, the network redundancy is achieved between the workstations and switches. A failure that occurs on a segment between the workstations and switches will be covered by the network redundancy adopting the other network path which was not affected by the failure. For a failure that occurs in a segment between switches and controllers, and affects the current Primary controller, it will be covered by the controllers’ redundancy through the switch over of them. In the tables 25.1 and 25.2 is presented an example of the IPs’ configuration for the two architectures described in this section, both for the workstations and the controllers involved. Controllers with Controllers with two Ethernet ports one Ethernet port NIC1 192.168.164.250 192.168.164.250 Station 1 NIC2 192.168.164.251 192.168.165.250 NIC1 Station 2 192.168.164.252 192.168.164.251 NIC2 192.168.164.253 192.168.165.251 Table 25.1 – Example of the IPs’ addresses list for the workstations, considering the two types of network architecture Controllers with Controllers with two Ethernet ports one Ethernet port Pairs Controllers ETH port IPs ETH1 port IPs ETH2 port IPs DF A 192.168.164.10 192.168.164.10 192.168.165.10 PAIR 1 DF B 192.168.164.11 192.168.164.11 192.168.165.11 DF A 192.168.164.12 192.168.164.12 192.168.165.12 PAIR 2 DF B 192.168.164.13 192.168.164.13 192.168.165.13 DF A 192.168.164.14 192.168.164.14 192.168.165.14 PAIR 3 DF B 192.168.164.15 192.168.164.15 192.168.165.15 Table 25.2 – Example of the IPs’ addresses list for the controllers, considering the two types of network architecture 25.4 Adding redundancy to the DFI302 HSE controllers Configuring the Server Manager and Syscon At the Studio302 toolbar, click the button and the Server Manager dialog box will open. Figure 25. 3 – Server Manager Click the Network option and the next window will open. Figure 25. 4 – Server Manager: General tab At the General tab type the number of NICs (network cards) used in the machine, in this case is 2 (redundant system). Select the IP address of the NICs used by the Server Manager. At the HSE Redundancy tab, configure the fields as in the following figure. 25.5 DFI302 – User’s Manual – AUG/14 - L Figure 25. 5 – Server Manager: HSE Redundancy tab Select ON for Device Redundancy. If there are two network cards the network will be redundant. In this way select ON for LAN Redundancy (even using the DF62 controller). At the Device Index text box, type a value between 1 and 9 for each machine, and every machine must have a unique number. In the HSE network, the Device Index represents the network address for each device for routing purposes, because of this it needs to be unique. At the Syscon, the only care to be taken in the control strategy configuration related to redundancy is: - Right-click each controller which will be redundant and choose Attributes option; - Configure the item “Is Redundant (HSE Only)” as enabled. Synchronism channel A RS232 serial port is dedicated to synchronism between the Primary and Secondary controllers using the DF82 (0.5 m) or DF83 (1.8 m) cables. See the next figures. Figure 25. 6 - Label to identify the serial synchronism port (Left) and the serial synchronism port in the bottom part of the module (Right) 25.6 Adding redundancy to the DFI302 HSE controllers Thus, the distance between controllers is limited to 1.8 m. Therefore they have to be installed preferentially in the same panel, but with different power supplies and independent no-breaks. DIFFERENTIAL The DFI302 HSE controllers have redundancy of synchronism channel as a differential, with up to three possible paths: between ETH1 ports, between ETH2 ports and through serial port. Thus is ensured a greater availability of the own device’s redundancy. IMPORTANT • • • The synchronism between the controllers is done through the serial port mainly during the startup. After controllers’ startup, the synchronism is done through the Ethernet ports, ensuring a greater transfer rate for synchronism. If there is a communication failure in an Ethernet port, the synchronism is reestablished by another one. If there is a communication failure in both Ethernet ports, the synchronism will be done through the serial synchronism port. Exception: If a ladder application is used the synchronism has to be done through the Ethernet ports because demands a greater transfer rate. If there is a communication failure in both Ethernet ports, the controller pair will lost the synchronism of the ladder application, thus, the redundancy is not fully available, because the Secondary will not be updated to assume if the Primary fails. It is important that failures are repaired in order to have the redundancy available again. It is mandatory that the synchronism serial cable (DF82/DF83) remain connected all the time. This peer-to-peer connection is what determines the formation of a redundant controller pair during the plant startup, and also during restart up, after scheduled stops. FOUNDATION fieldbus H1 channels FOUNDATION fieldbus H1 redundant segments: For each FOUNDATION fieldbus H1 channel, from a common point in the panel, a segment can be ramified up to the Primary controller, and another one up to the Secondary controller offering failure tolerance in these segments. Accessing the I/O bus To allow the access to the I/O modules in a redundant way, a proper hardware topology must be used. Thus, it is necessary to use the DF78 or DF92 rack, where in the first two slots (Power Supply 1 and Power Supply 2) the power supplies DF50 (AC/DC) or DF56 (DC/DC) must be inserted, thus the power supply redundancy is provided. The controllers must be installed side by side in the CPU 1 and CPU 2 slots. The next two figures demonstrate the use of DF78 rack. DF78 and DF92 racks allow direct access to the I/O modules in a safe and transparent way when redundant controllers are used. Also is possible hot swap (insertion/extraction) of the controllers for maintenance purposes. Figure 25. 7 –DF78 Rack 25.7 DFI302 – User’s Manual – AUG/14 - L Figure 25. 8 – Example of modules arrangement in the DF78 rack (DF50-DF50-CPU1-CPU2) Hot Standby Redundancy Working Starting up the redundancy The controller which starts up first becomes the Primary. In case of both controllers which form a pair are started up at the same time, both will assume the same role that they were operating previously (nonvolatile information). In the absence of nonvolatile information (startup immediately after firmware updating or Factory Init mode) and in case of both controllers are started up at the same time, the controller which has a bigger serial number will be elected as Primary, and its partner will be the Secondary. IMPORTANT The controllers have conditions to define their role (Primary or Secondary) autonomously during the startup and no user action is necessary. Besides the information above mentioned, during the entire operating time of the controller pair and in conditions free of failures, we have the following: − − There is not physical difference between Primary and Secondary controllers; There is not preference for a controller rather than another, or for a rack position rather than another, to determine which controller will be the Primary. Operational Transparency In Syscon and LogicView for FFB the redundancy is seen in a transparent manner to the user, i.e., the redundant pair is seen as a single device. This concept is known as “operational transparency of redundancy”. In practice, the configurator will always be connected to the controller that is the current Primary. Thus, all download or configuration actions performed in the configurator will be destined to the current Primary. The synchronism implemented in the controllers’ firmware is responsible for updating constantly the Secondary. If there is a switch over, the new Primary is automatically recognized by the configurator, so that at no time the user has to take extra care due to redundancy in the actions of the operation or maintenance of the plant. 25.8 Adding redundancy to the DFI302 HSE controllers Switch over conditions The different failures that may occur in such system, lead it to a switch over, when the Secondary becomes Primary, and vice-versa in a bumpless way. The possible reasons for a switch over, divided in two types, are as follows: General Failures When the whole controller fails, this comprises: • Hardware failure; • Power off; • Removal of the controller from the rack. Bad Condition Failures When one of the Primary controller’s ports fails: − Failure in all Ethernet cables directly connected to the Primary; − Failure in an H1 channel (hardware or cables) of the Primary; − Failure in the Modbus communication (hardware or cables; in case of operating as master). The system is capable of checking which controller has the best conditions, electing it as the Primary. It is assured the recovery of one failure at a time. That is, once a failure has occurred, a second failure will be recovered by redundancy only if the first failure has been fixed. While the failure is not fixed, the system has the redundancy not fully available (in case of Bad Condition Failures) or even not available (in case of General Failures). For the case of General Failures, as soon as the failed controller recovers a healthy state or is replaced, the controllers automatically become a redundant pair again. That is, the system automatically recognizes a new inserted controller. After a failure, the maximum switch over time may alter depending on the specific failure, but typically takes 2 seconds or less. In order to monitoring the redundancy state, some parameters available in the Redundancy Transducer function block (TRDRED) should be used. See the following table. For further details see the Function Blocks manual. 25.9 DFI302 – User’s Manual – AUG/14 - L Valid Range/ Options Parameter Description Indicates the Serial Number of the RED_PRIMARY_SN 0 ~ 65535 RED_SECONDARY_SN 0 ~ 65535 Primary controller. Indicates the Serial Number of the Secondary controller. Indicates the Synchronism status of the controller pair. 0: Default value just after start up. 1: Stand alone operation (no 0: Not defined 1: Stand Alone 2: Synchronizing 3: Updating Secondary 4: Synchronized RED_SYNC_STATUS 5: WARNING: Role Conflict 6: WARNING: Sync Cable Fail 7: WARNING: Updating Secondary Fail redundancy). 2: Checking configuration for synchronization. 3: Primary transferring configuration to the Secondary. 4: The Primary continuously updates the Secondary dynamic databases. 5: It was not possible to solve autonomously the Role. (Primary / Secondary). 6: Fail on all the synchronism channels (redundancy unavailable). 7: Primary fails before synchronism is completed (redundancy unavailable). Bit 0: Modbus RED_PRIMARY_BAD_CONDITIONS 1: H1-1 2: H1-2 3: H1-3 4: H1-4 5: LiveList Bad conditions for the Primary / Secondary controllers. 6: ETH1 7: Reserved RED_SECONDARY_BAD_CONDITIONS 8: ETH2 9: Serial Sync Cable 10: Unable to Sync Table 25.3 – Description of main parameters of Redundancy Transducer function block 25.10 Adding redundancy to the DFI302 HSE controllers Bit Variable 0 Modbus 1 2 3 4 H1-1 H1-2 H1-3 H1-4 5 LiveList 6 7 8 9 10 ETH1 Reserved ETH2 Serial Sync Cable Unable to Sync Description When working as master and if no Modbus slave device answers, it means that Modbus communication is in bad conditions. Failures on the communication path or even a failure on the slave can cause it. Failure on an H1 channel, specifying each channel had the failure. H1 Live List was not completed on Secondary controller. Synchronism failure on ETH1 port. Synchronism failure on ETH2 port. Failure on serial synchronism cable. Firmware versions with incompatible synchronism. Table 25.4 – Description of RED_PRIMARY_BAD_CONDITIONS and RED_SECONDARY_BAD_CONDITIONS parameters bits IMPORTANT To know how to proceed when warnings appear in RED_SYNC_STATUS parameter and the indications of BAD_CONDITIONS parameters refer to Troubleshooting topic. Standby LED Behavior The available blinking patterns for the Standby LED are summarized below. The next figure shows a graphic representation for these patterns. a) PRIMARY IN STAND ALONE: Standby LED turned off all the time. It indicates that there is no partner connected. b) SECONDARY SYNCHRONIZED: Standby LED turned on all the time. It indicates that the Secondary controller is totally synchronized with the Primary controller and the redundancy is available. c) PRIMARY WITH PARTNER: Each three seconds, Primary’s Standby LED blinks briefly. It indicates that the Primary controller has a partner. d) SECONDARY SYNCHRONIZING: Standby LED blinking slowly turned off about one second and turned on about one second. It indicates that the configuration synchronism is on progress. e) ROLE CONFLICT: Standby LED blinking fast. It indicates the controller did not define its role during the startup. The Primary will pause for two seconds the blinking each ten times. The Secondary will blink permanently. f) PRIMARY - CABLE FAILURE: Standby LED blinking twice in the Primary, quickly at each two seconds. It indicates failure in the synchronism serial cable. g) SECONDARY – CABLE FAILURE: Standby LED blinking four times in the Secondary, quickly, at each two seconds. It indicates failure in the synchronism serial cable. h) PRIMARY FAILS DURING SECONDARY UPDATING: Standby LED blinking three times in the Secondary, quickly, at each two seconds. It indicates that there has been a general failure on Primary before reaching the Synchronized status. 25.11 DFI302 – User’s Manual – AUG/14 - L (a) (b) (c) (d) (e) (f) (g) (h) Figure 25. 9 – LED Standby behavior Procedures for Hot Standby Redundancy The next steps are for configuration and maintenance when using the Hot Standby redundancy. It is recommended that the steps be all read and understood before they are executed. IMPORTANT Before executing any of the following procedures, make sure you have followed the guidelines of the topic Preparing a redundant system. At this section, the following expressions and their respective definitions are used: - Hold Mode: stops the firmware execution in the controller as well as all tasks in the process. - Run Mode: executes the firmware again. - Factory Init Mode: restores the factory configuration, erasing the user’s configuration. For further information about those expressions and how to update the firmware refer to sections Setting Up or Troubleshooting in this manual. Configuring for the first time a redundant system This is the procedure to configure the system with Hot Standby redundancy for the first time, at the plant startup. 1 – With the rack not powered, connect the synchronism serial cable to each controller. 2 –Connect both controllers through the H1 channels (1 to 4), in case of DF62/DF63. Connect the Ethernet cables to the corresponding controllers’ ports. 3 – Power the rack where the controllers are installed. The controllers will decide autonomously which one will be Primary and Secondary. Wait until the Standby LED of one controller turns on permanently, what means the roles have been defined and the controller pair is synchronized. 4 - At the Studio302 click Areas and then click On-line Mode option , choose the desired configuration. It will be open at Syscon, . Execute the commissioning of controllers and field devices. Download the configuration right-clicking Fieldbus Networks . For further information refer to Syscon manual, specially the section Creating a FOUNDATION fieldbus configuration. 25.12 Adding redundancy to the DFI302 HSE controllers 5 – The controller pair will synchronize the configuration (Standby LED will blink). When the controller pair is synchronized (Standby LED turned on permanently in Secondary), the Primary will constantly update the Secondary with the process dynamic variables. As soon the controller pair get the Synchronized status and <none> in the BAD_CONDITIONS parameters, the redundancy will be fully available and failure simulations can be performed. Changing the configuration Download the new configuration to the device commissioned in the Syscon. The controller pair will re-synchronize automatically. Replacing a controller with failure To ensure a high safety process when replacing a controller, make sure of following the steps below: 1 – With the new controller disconnected from the rack, turn off the battery switch, at least, for 30 seconds. Set the BATTERY position to OFF, wait for 30 seconds and return to the ON position. 2 – You must connect the synchronism cable (DF82/DF83) just before inserting the new controller. This will avoid role conflict between controllers. 3 - If possible, connect all cables: besides the synchronism cable, H1 channels (1 to 4) in case of DF62/DF63 and the Ethernet ports. 4 – Insert the new controller in the rack. 5 – In case all cables have been connected before the insertion of new controller, the synchronism will automatically start (the Standby LED should blink in the new controller). When the system is synchronized (Standby LED turned on permanently), the Primary controller will constantly update the Secondary with the process dynamic variables. 6 – In case only the synchronism cable have been connected before the insertion, a hot insertion of the H1 cables (in DF62/DF63) may be necessary. In this case, set the new controller to Hold (none executing), connect the H1 cables, and also the Ethernet cables. Then, return the controller to Run mode (execution). 7 - As soon the system get the Synchronized status and <none> in the BAD _CONDITIONS parameters, the redundancy will be fully available and failure simulations can be performed. 8 – For any situation different from Synchronized status, refer to section Standby LED Behavior to make a better diagnosis. Adding redundant controllers in a non-redundant system Even a non-redundant controller supports redundant operation, working as Primary in Stand Alone state. Thus, a non-redundant system, in operation, may have redundant controllers added later without process interruption. Only is necessary that the non-redundant system has foreseen some cares according to the section Preparing a Redundant System. The procedure is the same of the previous section (Replacing a controller with failure). Firmware update without process interruption It is possible updating the controllers’ firmware to new versions, which have new features or improvements, without process interruption. For reference purpose in the following procedure, we designate one of the controllers as A and another as B. Suppose the controller A is the one which was Primary at the beginning of the procedure execution. That is, the references A and B are static, and the user can even associate the controller A as the one in the rack’s left side and controller B as the one in the rack’s right side. 25.13 DFI302 – User’s Manual – AUG/14 - L Follow the steps below: 1. Be sure the system is in the Synchronized status and it has <none> in the BAD _CONDITIONS parameters. So, using FBTools update the firmware of the controller A (current Primary). At this moment, the other controller (B) will take over becoming the current Primary. 2. After finishing the firmware’s update of controller A, the controller pair will synchronize with the current Primary (B) transferring the entire configuration to the other one (A). Wait for the system get the Synchronized status and it has <none> in the BAD _CONDITIONS parameters. 3. Using FBTools update the firmware of the current Primary controller (B). At this moment, the other controller (A) will take over becoming the current Primary. 4. After finishing the firmware’s update, the controller pair will synchronize with the current Primary (A) transferring the entire configuration to the other one (B). As soon the system get the Synchronized status and it has <none> in the BAD_CONDITIONS parameters, the redundancy is fully available again and failure simulations can be performed. After finishing this procedure both controllers will have updated firmware and the original configuration will be preserved without need of process interruption. Troubleshooting Role Conflict This exceptional situation occurs when some procedure was not followed. It is signaled by the RED_SYNC_STATUS parameter (value 5: WARNING: Role Conflict) and by the Standby LED (see Standby LED behavior topic). There is a chance to occur role conflict only when a controller has already had a partner operating in redundancy when one of the controllers is exchanged without doing a Factory Init in the new controller inserted. In such situation the redundancy does not define the function of the new controller because of security reasons. The user is responsible to decide which controller has the right configuration. Solution: the user has to do a Factory Init in the controller which will be the Secondary (the entire configuration of this controller will be erased and it will receive the configuration from another controller). Correction of synchronism cables failure Once there is a failure in some of the synchronism media (Serial, ETH1, ETH2) it is signaled by the BAD_CONDITIONS parameters, respectively with: Serial Sync Cable, ETH1 and ETH2 (see Table 25.4). Even the synchronism channel is redundant (with up to three paths); it is recommended that as soon as a failure is signaled in some of the paths, it has to be fixed. Indications of bad condition on ETH1 and ETH2 will be signaled on both the Primary controller and the Secondary controller. This indication advises that the controllers are unable to perform synchronization for a given path (ETH1/ETH2). The individual diagnosis for each of the Ethernet ports can be accomplished through ethLinkStatus parameters available via SNMP. Typical example of failure scenario The indication of zero in ethLinkStatus for both ports indicates that the Ethernet cables are connected (Media presence). This condition of LinkStatus is also signaled via ETH1 LNK and ETH2 LNK LEDs in the controllers’ frontal. If in this condition the indication of bad condition for both ports (ETH1 and ETH2) appears, it may be an indication that in some of the controllers the cables were inversely connected (ETH1 cable on ETH2 port, and ETH2 cable on ETH1 port). Solution: - Check if the connectors are properly fitted; - Check the synchronism cables with failure indication as well as the network elements in case of a failure in the Ethernet ports. - Check if the ports are connected to their networks (ETH1 port to network 1, ETH2 port to the network 2). 25.14 Adding redundancy to the DFI302 HSE controllers Primary fails before completing the synchronism. This exceptional situation occurs when some procedure was not followed. It is signaled by the RED_SYNC_STATUS parameter (value 7: WARNING: Updating Secondary Fail) and by the Standby LED (see Standby LED behavior topic). There is a chance to occur this failure only when a redundant pair is not yet with Synchronized in the RED_SYNC_STATUS parameter and then the current Primary is turned off. In such situation, when the redundancy is not available yet, the Secondary does not have conditions to take over the plant in a safe way. In this situation the Secondary keeps the same function and indicates this state as a safety condition. Solution: - In case the user knows that the Primary, which was turned off recently, has the complete configuration, set the Secondary to Hold, and then, turn on the Primary. Some seconds after that, remove the Secondary from Hold. The controller pair will synchronize, and only after they get Synchronized status and <none> in the BAD CONDITIONS parameters, failure simulations can be performed. - In case the user does not trust the Primary configuration, follow the same procedure above mentioned, however download the configuration again. Correction of an H1 cable failure Cables failures in H1 segments which affect only one controller (Primary or Secondary) are signaled in the BAD CONDITIONS parameters allowing an immediate maintenance. In case the failure occurs in an H1 cable segment which affects only the Primary controller, the redundancy will cover this failure, performing a switch over. In case the failure affects only the Secondary, it will not affect the process but even so it will be signaled by the RED_SECONDARY_BAD_CONDITIONS parameter allowing proactive maintenance. During the maintenance, in case the H1 cable is reconnected at once, the noise inserted in the line will cause communication problems for some time, what is undesirable. To avoid this, the next procedure has to be followed. 1 – Set the controller, which was affected by the H1 cable failure, to Hold mode. 2 – Fix the H1 cable connection. 3 – Remove the controller from Hold mode. The controller will be automatically recognized by the Primary controller. As soon as the controller pair has Synchronized status and <none> in the BAD_CONDITIONS parameters, the redundancy will be fully available again. Correction of bad conditions – Modbus Check: - If there are any cables failures in the paths related to the Modbus communication topology. - The parameterization of the Modbus function blocks. - If the converters/devices used in the Modbus communication topology are working properly. - If the Modbus slave device is correctly configured and working. Correction of bad conditions – Live List Check: - If the H1 cables have some connection problem or noise; - Problems with line terminators (BT302): bad contact, missing or excess of BT302; - Poor grounding; - Water in the junction boxes or inside the devices; - Transmitters with poor isolation; - Transmitter digital card with some problem; In case a deeper investigation is necessary, it is recommended to use the FBView software which is integral part of SYSTEM302. The FBView manual, in the Signal Quality and Live List topics, brings the necessary procedures. 25.15 DFI302 – User’s Manual – AUG/14 - L Correction of bad conditions – Synchronism incompatibility When executing the procedure Firmware update without process interruption in general will occur momentarily a situation where a controller has a firmware version and the other controller has another one. The following momentary situations may happen: a) Secondary has a newer firmware version than the Primary (Upgrade): the synchronism is compatible and the controller pair synchronizes normally. That is, this scenario is perfectly supported. An exception may happen if the firmware versions are not compatible where the controller pair does not synchronize indicating this situation as “Unable to Sync” in the BAD_CONDITIONS parameters. DF62/DF63/DF73/DF75: firmware version 1.x is not compatible with 2.x. b) Secondary with an older firmware version than the Primary (Downgrade): the synchronism is not compatible and the controller pair does not synchronize indicating this situation as “Unable to Sync” in the BAD_CONDITIONS parameters. That is, this scenario is not supported in the redundancy context. Solution for case b: This scenario (downgrade) must be avoided. Once a plant is operating with a firmware version in the controllers, and for some reason the user desires to operate the plant with a previous firmware version the option is: with the plant stopped, change the firmware of all controllers (Primaries and Secondaries), and then follow the procedure of the Configuring for the first time a redundant system topic. 25.16 Section 26 ADDING REDUNDANCY WITH REDUNDANT I/O MODULES Introduction To meet the requirements for fault tolerance, system availability and safety in the industrial process, the DFI302 controllers work with a Hot Standby redundancy strategy, where all the levels, including conventional Input and Outputs signals, may be configured and installed in a redundant manner. In this strategy, the Primary and the Secondary controllers are connected to a set of redundant I/O scanners, which are dedicated to read and write the redundant I/O cards. The complete path from sensor until operation station is totally redundant. In case of one fault, an event will alarm the user, and the availability will be granted in a bumpless way. IMPORTANT The characteristics described in this section are supported by the DF62, DF63, DF73, DF75, DF89, DF95, and DF97 controllers at this time. Ask to check availability to other DFI302 controllers. R-Series Ordering Codes The following components are necessary to built R-Series I/O Redundancy in DFI302. RACKS AND ACCESSORIES DF106 Master Rack - 6 slots for I/O redundancy DF110 -1 Slave Rack - 10 slots for I/O redundancy - Terminal blocks DF110 -2 Slave Rack - 10 slots for I/O redundancy – Interface cabling DF109 Thin stub cable (0,40m) DF119 Thick cable (1,0m) for DF106-DF109 or DF106-DF110 SCANNERS DF107 Master Scanner for I/O Redundancy DF108 Slave Scanner for I/O Redundancy DF111 1 Group of 16 Redundant Digital Inputs 24 Vdc - Source DF112 1 Group of 16 Redundant Digital Outputs 24 Vdc - Sink DF113 1 Group of 8 Redundant Current Analog Inputs DF114 1 Group of 8 Redundant Current Analog Outputs I/O MODULES The following components may complement R-Series IO Redundancy in DFI302. CODE DESCRIPTION DF87 Power Supply for Backplane 20-30VDC (5A, Advanced Diagnostic) DF0-R Box Used In Empty Slots ITF-CR-10 ITF-CR-15 ITF-CR-20 ITF-CR-25 ITF-CR-30 ITF-CR-35 ITF-CR-40 ITF-CR-45 ITF-CR-50 Interface cabling ( 1 m to 5 m) 26.1 DFI302 – User’s Manual – AUG/14 - L ITF-DIG Passive Interface Panel for 16 Digital Input and/or Output Module - DC Obs. The active components must be external connected ITF-AN-IOR Interface Panel for 8 Analog Input and/or Output Module Obs. Exclusive for R-Series R-Series IO Redundant System Overview In order to have a true Conventional I/O redundant system, all the parts and paths must be redundant. The hardware topology for Input and Output Redundant segments based on DFI302 controllers can be seen in the following figure. The system supports up to 16 pairs of R-Series I/O modules. This means 128 analog or 256 discrete I/O values, or a mix of them. Figure 26. 1 - Conventional I/O Redundant Overview The SYSTEM302 software logic tool, LogicView for FFB, select the IO redundancy option during hardware configuration phase, and after that, no extra configuration is need once the I/O redundancy is totally transparent to the control logic perspective. 26.2 Adding Redundancy with Redundant I/O Modules Figure 26. 2 - Configuring redundant I/O modules on LogicView for FFB IMPORTANT The R-Series modules cannot be configured through the HCT function block on Syscon. The configuration of modules parameters must be done through the LogicView for FFB. For further information refer to its manual. Each pair of redundant I/O modules checks the health of each other, working in an independent manner ahead of the main controller scan and grants the switchover in less than 100 microseconds. In case of a fault in the primary I/O module, the secondary I/O module takes the control ensuring that the digital field instruments remain powered and that the process is undisturbed. No single point of failure exists on this architecture, which means that any hardware failure is covered by a second hardware working in a hot standby way. During operation, each I/O module makes use of an internal high precise reference which is used for analog I/O cards to self diagnostic. The output I/O card also makes use of a digital feedback circuitry to make sure its output matches the main controller request. Scanners continually measure the health of each I/O modules to update the main controllers. The main controllers may use the status of the I/O modules in the control logic as safety interlock and provide the same rich information to HMI Stations. The diagnostic status for the whole system is available, as OPC and Simple Network Management Protocol (SNMP) parameters, available to HMI stations through its respective servers. When maintenance is needed, the system permits hot swap of the modules, including power supplies, controllers, scanners and I/O modules. The racks were built to avoid any kind of maintenance. No active component is mounted in this rack. For further information about technical characteristics of R-Series modules, racks and scanners refer to the Digital and Analog Input/Output Modules of DFI302 manual. Adding the R-Series I/O modules to a redundant system The information of this section are only complementary, it does not intend to explain how the function blocks are instantiated, neither how the controllers and devices are configured. For further 26.3 DFI302 – User’s Manual – AUG/14 - L information on configuring control strategies refer to the user manual of Syscon. On developing logics for discrete control and configuration of redundant I/O modules refer to the LogicView for FFB manual. Starting the Area It is possible to create, or edit, an area from the Studio302. In the Studio302 interface select Areas. A window will appear listing all areas of database. To create a new area from the Studio302, left-click inside the Areas window, then choose New Area. Figure 26. 3 - Creating a new area on Studio302 Another way to create a new area is from Syscon. Click the icon in the Studio302 toolbar. To create a new area on Syscon, choose File New, or through the toolbar, choose New button . The dialog box shows the Area options. Select Predefined Area as shown in next figure: Figure 26. 4 - Options to create Syscon areas 26.4 Adding Redundancy with Redundant I/O Modules After choosing the area name, a window will appear and the user has to choose the template type that will be used. In this case, the DF75 controller with FFB function block was chosen. Figure 26. 5 – Template options on Syscon Type the name for the area in the Area Name box, and click Ok. For this example, it chooses PROJ_RSERIES. Figure 26. 6 – New area name A new window will appear. This window has: Application – Logical Plant. To insert control strategies into this part. Fieldbus Networks – Physical Plant. To add devices and function blocks to the area into this part. The area shall be as follows: 26.5 DFI302 – User’s Manual – AUG/14 - L Figure 26. 7 – PROJ_RSERIES area created on Syscon Creating a logic from the FFB function block Right-click the DF75-FFB2-1 block and choose Edit Logic option. Figure 26. 8 – Edit Logic option The LogicView for FFB shall be as follows: 26.6 Adding Redundancy with Redundant I/O Modules Figure 26. 9 – Editing the configuration on LogicView for FFB Configuring the hardware on LogicView for FFB In the Hierarchy window right-click Hardware and choose Hardware Configuration option. Figure 26. 10 – Configuring the hardware on LogicView for FFB The following window will appear: 26.7 DFI302 – User’s Manual – AUG/14 - L Figure 26. 11 – Selecting the I/O platform Choose the R-Series (I/O Redundancy) option and click Ok. The following window will appear to choose the modules that form the system. Figure 26. 12 – Configuring the hardware The controller and the power supply are preconfigured. To choose the redundant I/O modules click the desired rack and the pairs can be defined. See the next figure: 26.8 Adding Redundancy with Redundant I/O Modules Figure 26. 13 – Choosing the redundant pairs After choosing the redundant pairs click OK. The next step is to configure the logic in the ladder drawing area of LogicView for FFB. Configuring the HMI to access the available diagnostics in OPC The diagnostic information of the redundant I/O system is available through the Smar SNMP OPC Server for DFI302. After connecting the OPC Client to the server mentioned, an address space with the diagnostic information will be presented as in the following table. Consider that the system is composed by up to 4 racks (rack 0, 1, 2 and 3), 4 pairs of I/O modules per rack (pairs 0, 1, 2 and 3), modules A (left) and B (right) per pair, up to 16 points per module (points 0, 1, 2 … up to 15). The table below has the list of specified diagnostic items available in SNMP: ITEM iored.msStatus iored.ss0Status iored.ss1Status iored.ss2Status DESCRIPTION Detailed Status for MS module. (MS is the Master Scanner – DF107). When this value is provided by module A, only the controller A will have access. The same is valid for module B and controller B. Detailed Status for SS0 module. (SS is the Slave Scanner – DF108). SS0 means the DF108 module of rack 0. When this value is provided by module A, only the controller A will have access. The same is valid for module B and controller B. Detailed Status for SS1 module. (SS is the Slave Scanner – DF108). SS1 means the DF108 module of rack 1. When this value is provided by module A, only the controller A will have access. The same is valid for module B and controller B. Detailed Status for SS2 module. (SS is the Slave Scanner – DF108). SS2 means the DF108 module of rack 2. When this value is provided by module A, only the controller A will have access. SNMP SYNTAX INTEGER (Table 2) ACCESS read-only INTEGER (Table 3) read-only INTEGER (Table 3) read-only INTEGER (Table 3) read-only 26.9 DFI302 – User’s Manual – AUG/14 - L ITEM iored.ss3Status iored.module00Astatus … iored.module33Bstatus iored.pair00.point000 … iored.pair00.point0015 …. Same rule up to the last pair: iored.pair33.point330 … iored.pair33.point3315 DESCRIPTION The same is valid for module B and controller B. Detailed Status for SS3 module. (SS is the Slave Scanner – DF108). SS3 means the DF108 module of rack 3. When this value is provided by module A, only the controller A will have access. The same is valid for module B and controller B. Detailed Status for IO module 00A. (I/O 00A is the input or output module in the rack 0 pair 0 module A). Unlike the scanners status, in this case, any controller (A or B) can get the status of the modules A or B simultaneously. SNMP SYNTAX ACCESS INTEGER (Table 3) read-only INTEGER (Table 4) read-only Detailed Status for IO module 33B. (I/O 33B is the input or output module in the rack 3 pair 3 module B). Unlike the scanners status, in this case, any controller (A or B) can get the status of the modules A or B simultaneously. Detailed Status for point0 – pair 00. (point 0 of pair 0 of rack 0) INTEGER (Table 4) read-only INTEGER (Table 5) read-only Detailed Status for point15 – pair 00. (point15 of pair 0 of rack 0) “ read-only Detailed Status for point0 – pair 33. (point 0 of pair 3 of rack 3) INTEGER (Table 5) read-only Detailed Status for point15 – pair 33. (point15 of pair 3 of rack 3) Table 1 - SNMP_IOR “ read-only MS Status (Master Scanner - DF107) iored.msStatus BIT 0 0: Bad - 1: Good 1 Current in PWR2 (current of power supply 2) 0: Bad - 1: Good 2 Voltage 1 (voltage of power supply 1) 0: Bad - 1: Good 3 Voltage 2 (voltage of power supply 2) 0: Bad - 1: Good 4 Partner MS (communication with partner master scanner) 5 Controller MS (communication with controller) 6 reserved 0: Bad - 1: Good 7 Module (module general status) 0: Bad - 1: Good Table 2 – MS Status 26.10 Value Current in PWR1 (current of power supply 1) 0: Bad - 1: Good Adding Redundancy with Redundant I/O Modules SS Status (Slave Scanner – DF108) iored.ssXStatus BIT Value 0 Current in PWR1 (current of power supply 1) 0: Bad - 1: Good 1 Current in PWR2 (current of power supply 2) 0: Bad - 1: Good 2 Voltage 1 (voltage of power supply 1) 0: Bad - 1: Good 3 Voltage 2 (voltage of power supply 2) 0: Bad - 1: Good 4 Partner SS (communication with partner slave scanner) 5 reserved 6 reserved 0: Bad - 1: Good 7 Module (module general status) 0: Bad - 1: Good 0: Bad - 1: Good Table 3 – SS Status I/O Module Status iored.moduleXXYstatus BIT Value 0 HS_PWR_0_5V (internal voltage of HS board) 0: Bad - 1: Good 1 HS_PWR_1_5V (internal voltage of HS board) 0: Bad - 1: Good 2 LS_INT_VCC (internal voltage of LS board) 0: Bad - 1: Good 3 LS_EXT_VCC (external voltage of LS board) 0: Bad - 1: Good 4 LS_ACTIVE_IDLE_FAIL_Status_b0 (internal status of LS board) 5 LS_ACTIVE_IDLE_FAIL_Status_b1 (internal status of LS board) 00: FAIL 01: ACT 10: IDLE 11: FAIL 6 IO_STATUS 0: Bad - 1: Good 7 Module_Status (module general status) 0: Bad - 1: Good Table 4 – Module Status Value 255 Point Status iored.pairXX.pointYY GOOD Valid for all modules (point status indicates good conditions) 1 Error Max Positive (maximum positive error) Valid for Analog modules 2 Error Max Negative (maximum negative error) Valid for Analog modules 3 Error (status of point with error) Valid for Digital modules Table 5 – Point Status 26.11 DFI302 – User’s Manual – AUG/14 - L For the tables 2, 3 and 4, the value greater than 127 indicates that the module is in good conditions. If you want to consider details, each bit can be interpreted. 26.12