1
Hosted PBX User Manual
For More Information Visit
www.usdigitalphone.com
02/14/2015
1
Work Area ............................................................................................................................................ 4
Language Selection Menu ................................................................................................................ 4
PBX Selection Menu ........................................................................................................................ 4
Menu Display Toggle Button ........................................................................................................... 5
Mobile version ................................................................................................................................. 5
Multiple select .................................................................................................................................. 5
Configuration Section .......................................................................................................................... 6
Extensions ........................................................................................................................................ 6
New SIP Extension/Define SIP Extension ................................................................................... 6
Recording ................................................................................................................................. 8
Security .................................................................................................................................... 8
Web User Panel ........................................................................................................................ 9
Outbound Calls ...................................................................................................................... 10
Find me/Follow me Configuration ......................................................................................... 11
Additional Destinations.......................................................................................................... 11
Bulk extension creation .............................................................................................................. 12
Delete of Extension .................................................................................................................... 12
Multiple Delete of Extensions.................................................................................................... 12
How dialing works ..................................................................................................................... 13
DIDs ............................................................................................................................................... 14
New/Define DID ........................................................................................................................ 15
Bulk DIDs creation .................................................................................................................... 17
Use DIDs storage ....................................................................................................................... 18
Media Files ..................................................................................................................................... 18
Conditions ...................................................................................................................................... 20
IVR ................................................................................................................................................. 22
Hunt List ........................................................................................................................................ 23
Conference Rooms ......................................................................................................................... 23
Call Queue...................................................................................................................................... 24
Paging and Intercom ...................................................................................................................... 25
Flow ............................................................................................................................................... 26
Custom Destinations ...................................................................................................................... 26
DISA .............................................................................................................................................. 27
Feature Codes ................................................................................................................................. 27
Short Numbers ............................................................................................................................... 30
CallerID Black List ........................................................................................................................ 31
Settings ........................................................................................................................................... 31
2
Provisioning ................................................................................................................................... 33
Phones ........................................................................................................................................ 33
New Phone ................................................................................................................................. 33
Autoprovision Values ................................................................................................................. 34
Status .................................................................................................................................................. 35
Call History .................................................................................................................................... 35
Queue History ................................................................................................................................ 37
Peers ............................................................................................................................................... 38
Conferences .................................................................................................................................... 39
Faxes .............................................................................................................................................. 39
Voicemail Messages ....................................................................................................................... 40
Stats ................................................................................................................................................ 40
............................................................................................................................................................ 42
Provisioning ................................................................................................................................... 42
Phone Models ............................................................................................................................. 42
SIP TAPI integration .......................................................................................................................... 43
Setup Guides ...................................................................................................................................... 46
How can I setup and use the Emergency Caller ID? ...................................................................... 46
How can I build a more user friendly feature code? ...................................................................... 47
Ask and set unconditional destination for a DID ....................................................................... 47
Condition override ......................................................................................................................... 50
Configuration examples ................................................................................................................. 53
Dial a number with different Caller ID ...................................................................................... 53
3
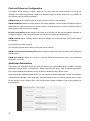
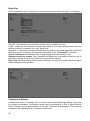
Work Area
In the top right corner you can identify in order the Language Selection Menu, the PBX Selection Menu,
the Exit Button and the Menu Display Toggle Button.
On the left there are the Configuration, Status and Admin Sections to configure, check and manage
your system. The menu available can be configured to show only the one interested for the user, by
customizing the user profile in the Admin/User Profiles menu.
Language Selection Menu
Using this menu you can choose the language used by the interface. Please note only the English
language is provided. If you want to use another language, you need to provide the translation by
yourself using the Admin/Translations menu. More language hooks can be provided. If you don't want to
display all the current language hooks available, you can disable them in the Admin/Settings. The
language, if available, is automatically chosen based on the language accepted by the browser.
PBX Selection Menu
Using this drop down box, the PBX you choose to work on can be chosen. Please take in mind only the
authorized PBXs are shown. Even if you are an admin, you can see only the PBXs enabled on your
4
account. If you want, admin users can automatically see all the PBXs by enabling the “Admins see all
PBXs” checkbox in the Admin/Settings menu.
Menu Display Toggle Button
The website is responsive, so it will resize based on the actual screen size. If you need more space you
can toggle the left menu display.
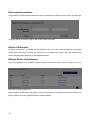
Mobile version
The website can be comfortably used also from mobile devices with limited screen size.
Multiple select
In almost every place of the interface, when a select box is shown, multiple options can be picked up,
ordered or deleted. There is no limit about the number of options to be selected.
5
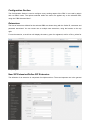
Configuration Section
The Configuration Section is used to configure every working aspect of the PBX. It can used by admin
and non-admin users. The options selected within this menu are applied only to the selected PBX,
using the “PBX Selection Menu”.
Extensions
The lists of extensions defined for the selected PBX are shown along with the Caller ID, username and
password associated. You can create one or multiple new extensions, using the buttons on the top
right.
For each extension, a small icon will display the status; green for registered, red for off line, yellow for
not yet registered.
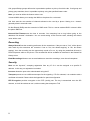
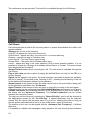
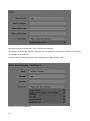
New SIP Extension/Define SIP Extension
The definition of an extension is comprised of multiple sections. The most important one is the general
6
one, where you can define the internal number for the extension and the password.
The password is automatically generated – please DO NOT change this to an “easy” password, as the
user will never need to know it – it is automatically placed into the configuration for the IP Phone.
The username is automatically generated based on the extension number and the code assigned to the
PBX. Extension number and SIP accounts are tied together. The username format <extension>-<PBX
code> is mandatory (see later for exceptions) and cannot be changed.
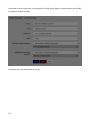
The name provided will be used as Caller ID for internal calls. This means the Caller ID on the phone
will be overwritten with the one specified here. If you don't want to have the Caller ID associated to the
one configured, but you would rather use the Caller ID coming from the phone (for example because
the extension is not assigned to a single phone, but because it is assigned to another PBX with multiple
extensions) you can set the “Trunk” checkbox. The trunk setting will also affect incoming calls to the
phone (or PBX). If the “Trunk” checkbox is set, the SIP INVITE sent to the account will include the
number dialed.
Username is automatically generated by adding the PBX code to the number provided. The format
used by default is the “-” sign. But some phones have been found to not accept the minus (“-“) sign. The
joining character can be changed by pressing on the double arrows. Take in mind the usage of “_” sign
is discouraged and needs to be used only when really needed.
Password can be auto generated by clicking on the “Generate” button. A new password is generated
every time using the random number generated. It is highly advisable to use long and completely
random passwords.
Codecs: Every extension can have a broad range of codecs allowed. Please remember that if you use
the G.729/723.1 codecs, even if they are listed in the system, you may have to pay royalty fees to the
G.729/723.1 patent holders for using their algorithm.
DTMF Mode is selectable between auto, info, inband and RFC 2833. Please check the phone
configuration and the provider support for choosing the right DTMF setting. The most widely accepted
format is RFC 2833.
Progress inband forces the system to generate ringing tones.
NAT setting is important when the phone is behind a NAT. Use force_rport, comedia in almost all the
cases. If you experience one way audio, then check the NAT setting.
The Can reinvite feature, allows two endpoints, like two phones, or the phone and the provider, to
exchange the RTP data directly, without routing through the PBX. Usually if one party is behind NAT,
you may experience one way audio. Usually set to No.
Qualify, allows the PBX to contact the phone periodically to check if it is still online. This has the benefit
of “open” connection tracking on the firewall that would be between the phones and the Internet.
Connections are made every second. If you have slow phones, you can increase the time so that it may
have time to wait for an answer.
7
Call groups/Pickup groups define who is permitted to perform a pick-up for which calls. If call group and
pickup group matches, then it is possible to pickup, using the specified feature code.
Note: you need to define the feature code to use.
Voicemail MWI allows you to assign the MWI on the phone for a voicemail.
Call Limit sets the max number of channels allowed to be used by a phone. Setting it to 1 doesn't
generally allow it to transfer calls.
Do Not Disturb (DND) sets the extension in DND mode. This is a server assisted DND. It doesn't affect
the phone DND set.
Inbound Dial Timeout sets the time in seconds. One extension has to ring before going to the
additional “No Answer” destination. You can avoid setting a Dial Timeout value, allowing the default
value will be used.
Recording
Always Record Sets the recording preference for the extensions. If they are set to “Yes”, all the phone
calls made by the extensions are recorded. If set to “Yes, but allows stopping” or “No, but allows
starting”, then the recording can be respectively turned off or on, by using the predefined #0 and #1
DTMF sequence while on the phone. The recorded file will be available for download in the Status/Call
History menu.
Email Recordings Allows to set an email address to send the recordings, once the call completes.
Security
Host can be “dynamic”, accepting registration from any IP. Or it can be assigned to a specific IP
address. In this way, no registration is needed.
Insecure allows the peer to be authenticated using the IP.
Transport permits to use a different transport for the signaling. If TLS is selected, it is needed to add a
certificate to Asterisk. Please check the Appendix for special configuration.
RTP Encryption provides encryption to the RTP (audio) part. The key is transmitted over the SIP
channel, so it will be useless to use it, without setting the transport to TLS
8
Outbound Destinations permits restriction of numbers the extension can dial. In other words, certain
call types can be restricted from designated phones. For example, the phone placed in the kitchen of
the office, can be restricted to place international calls.
The Outbound destination can be:
All Allowed: Allowing every number
All Prohibited: The phone cannot place outbound calls
Allowed if matches: The call is allowed if the number dialed matches the Regex associated
Prohibited if matches: The call is prohibited if the number dialed matches the Regex associated
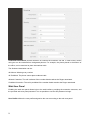
Web User Panel
Enabling the web user panel allows login to the web interface, providing the extension username, and
the provided web user panel password. It is not possible to use the SIP password to login.
User Profile defines the user profile assigned to the user connecting to the web user panel.
9
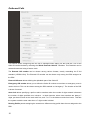
Outbound Calls
This section allows configuring how the call is managed when dialing out the local pbx. Use of the
Caller ID can be blocked by selecting the “Block External Caller ID” checkbox. This checkbox can be
selected/unselected using a feature code.
The External CID number can be chosen among various formats, usually resembling the E.164
standard (15552011234). The External CID number can be chosen only among the DIDs assigned to
the PBX.
External CID name allows defining the alphabetic part of the Caller ID.
Emergency CID number allows you to define the Caller ID number to use when an emergency route is
used to dial out. This can be chosen among the DIDs marked as “emergency”. The location of the DID
is shown if entered.
Area Code allows specifying a prefix to add to numbers when the number of digits entered is between
the number of digits specified next, inclusive. In North America, where local numbers are always 7
digits, put the area code in the “area code” box, and “7 to 7” in the add area code from boxes. This tells
the system to add the area code when a 7 digit number is dialed.
Routing Profile permits assigning the extension a different routing profile than the one assigned to the
PBX.
10
Find me/Follow me Configuration
This feature allows defining a simple “next hop” for calls, when the dialed number is busy, or not
available. The FMFM configuration needs to be enabled using the relative check box. It is possible to
use a feature code to enable or disable it.
FMFM Number is the number to dial when the extension is busy or not available.
FMFM Dial Method Allows a choice between two dialing methods; “normal” when the FMFM number is
dialed after the “Inbound dial timeout” for the extension, and “simultaneous” when the FMFM number is
dialed together with the extension number.
Request Confirmation allows asking to the callee to accept the call, playing the standard message or
a custom message. If the callee refuses the call, the call is managed as he was BUSY.
FMFM Caller ID allows choosing which Caller ID to display to the called number. Two special options
are available:
Use Original will use the Caller ID
Use Incoming DID will use the DID receiving the call as Caller ID
FMFM Caller ID Num and Name prefix defines a prefix to add to the Caller ID chosen when dialing the
FMFM number
FMFM Dial Timeout defines the second to dial the FMFM number before going to the Additional
Destination, if defined
Additional Destinations
They specify the destination of the call when the extension is not answered, Busy, or Offline. A special
destination feature called, “Unconditional”, allows redirecting the phone calls to another destination.
Every kind of Additional Destination can be enabled or disabled using Feature Codes.
When defining the Additional Destinations, you may choose a special destination, usually not available,
“Voicemail Same Number”. This destination will automatically create a voicemail with the same number
as the extension, and a random PIN. If the voicemail was already available, it will be just assigned to
the destination-
11
Bulk extension creation
It is possible to create multiple extensions at once by pressing the “Bulk SIP peer” button. The definition
web page will be the same except for the number range requested.
Delete of Extension
To delete an extension, just press the delete button at the end of the extension definition. A message
will request confirmation. Deleting the extension will unregister and clean it from the asterisk peer
cache, denying further operation for the deleted extension.
Multiple Delete of Extensions
From the extensions list is possible to delete multiple extensions at once. On the top right corner you
can locate a small garbage icon.
When pressed, a new column will appear on the left, allowing for selecting the extensions to delete, Do
this by pressing the newly appeared button “Delete Selected”.
12
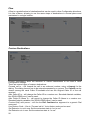
How dialing works
Dialing an extension follows a series of steps based on the extension status and its configuration.
Here are some examples:
13
Online Extension without any FMFM number defined and without any additional destination defined:
Extension is called. Nobody answers. After the “Inbound Ring Timeout” the call drops.
Offline Extension without any FMFM defined and without any additional destination defined:
Extension is called. Call drops immediately
Online Extension with an FMFM number defined and without any additional destination defined:
Extension is called. Nobody answers. After the “Inbound Ring Timeout” the FMFM number is
dialed for the FMFM Dial Timeout
Online Extension without FMFM number defined and with an additional destination to Voicemail for the
No Answer:
Extension is called. Nobody answers. After the “Inbound Ring Timeout”, voicemail answers
Online Extension with FMFM number defined and with an additional destination to Voicemail for the No
Answer:
Extension is called. Nobody answers. After the “Inbound Ring Timeout”, FMFM number is
called. Nobody answers. After the “FMFM Dial Timeout”, voicemail answers
DIDs
Every PBX can be assigned a group of DIDs, numbers to be dialed from the outside. Each DID can be
configured to reach a certain extension or Queue, or Hunt Group, or IVR ,or any combination of the
elements defined for the PBX.
14
New/Define DID
A DID can be configured to accept voice fax, or try to guess the calling party (if voice of fax). Auto
detection relies on signaling at the start of the call and cannot be always reliable. The time to detect the
fax tone can be set in the Admin/Settings page.
Comment is just a comment and is only used for you to “name” the DID in the displays.
15
Unconditional Forward is a destination that can be set on the DID to send the call to a particular
destination. It is enabled/disabled by the checkbox. That checkbox can be easily controlled by a feature
code. This is not the destination to be set for common usage; you need to use the one in the Voice
section.
Max channels allows you to set the maximal number of channels available on the DID. Any additional
call received will be refused with a busy signal.
Use CNAM service allows you to assign the Caller ID Name based on this popular service offered in
most countries. You can configure the service in the Admin/Settings page.
Use as Emergency Caller ID permits you to mark this DID as one of the available to be used when an
emergency call is dialed. Due to the fact that emergency numbers are not standard in all countries, it is
your duty to assign the “emergency flag” to the dialing rules for emergency numbers. When a call is
dialed and it is using a dialing rule marked as “emergency”, the Caller ID number used for the extension
is the one defined as “Emergency”, among the ones with this flag set.
Inbound Call Rate allows you to define a call rate for inbound calls.
Voice section allows defining how to route the call when a voice call is received.
Always record forces the recording of the call and future calls. Recordings will be available through the
Call History menu.
Email recordings to defines if and to who the recordings need to be sent once the call is over. Multiple
destinations email can be entered with any delimiter, like space, comm and point and comma.
Using the Prefix CallerIDNum is possible to define a string to be added to any Caller ID number
received to identify. For example, the DID the call is coming from. The same can be achieved by
defining a Custom Destination.
Prefix CallerID Name is the same as above, but for the Caller ID Name.
Destination multiple drop down allows defining the list and the order of the objects receiving the call.
16
Fax section defines what to do with the call if a fax is received on the number defined. Receiving Fax
over the Internet has often a low success rate, even if T.38 protocol is used.
Receive fax can be used to select if autodetect, force or disallow the reception of a Fax over the
current DID. NOTE: Autodetect makes the PBX listen for one full ring cycle in order to determine if this
is a fax or voice call. For dedicated fax numbers, always choose “force”.
Fax Station ID and Fax Header allows you to customize your virtual fax.
Fax Protocol can be selected among T.38 (the preferred way to receive faxes), T.38 with fallback to
G.711 or only G.711.
Email destinations box permits to enter one or multiple comma delimited email address to forward the
received fax. Received faxes are sent in PDF format. Partially received faxes are sent in the same way.
It is possible to store the fax received for later reviewing using the Store Fax Received control.
Bulk DIDs creation
17
It is possible to create multiple DIDs at once with the Bulk DIDs creation button. In this way, a range of
numbers are requested. All the numbers generated are configured in the same way.
Use DIDs storage
In the Admin/Settings page it is possible to choose to use the DIDs storage. To do this, the DIDs need
to be entered by the Admin/DIDs List menu and can be later chosen using a drop down box from the
Define DID page. DIDs cannot be deleted, but they are just not assigned to any PBX.
Media Files
Media files are used for music on hold, welcome messages and for every kind of message
played to the user.
18
Each media file is internally addressed by its MD5 sum and a local copy is stored on each
node to reduce the load on the database server. A name can be assigned to the media file
to easy identify in the system. To reduce the asterisk load when playing, it can be
automatically converted into slin format (16 bit Signed Linear PCM).
To create a new media file:
Enter a name for the recording – something like “Holiday message”
Either:
Have the system call you at an extension (It will walk you through recording,
confirm/rerecord/save the message).
Have the system call you at an external number (It will walk you through recording,
confirm/rerecord/save the message)
Upload an existing WAV file.
One additional option is to add a feature code pointing to feature “Record a message”.
Example: You select configuration->feature codes, click new feature code and add *1234
pointing to feature “record a message”.
When any user dials *1234 the system will ask them to record a message.
This new recording will be in the media files list with name “Message recorded at …”
You
can
now
rename
this
media
file
and
use
it.
To re-record an existing media file you may:
Either:
Have the system call you at an extension (It will walk you through recording,
confirm/rerecord/save the message).
Have the system call you at an external number (It will walk you through recording,
19
confirm/rerecord/save the message)
Upload an existing WAV file.
Or add another feature code pointing to feature “re-record media file…”. When a
user dials this feature code, it will walk them through re-recording this specific
message
Conditions
Conditions allow managing the call flow, playing for example, a different messages or rou
based on hours, days, or calling party.
Several type of Condition can be configured:
20
Weektime a complete week planner allows to easily identify in which day/hour to trigger
the destination.
Caller ID the routing decision is made using the Caller ID of the call. For example,
allowing coworkers calling the main number to directly reach the support staff
without waiting in the Queue.
Weekday allows routing calls based on the day of the week
Date
routes the calls based on specified dates. A date, like Christmas, can be made
“recurring”, so it will trigger every day, regardless the year.
Extension Status the routing decision is made based on the status of an extension. This
condition is really powerful when connected to the custom setting of extension
status.
AGI Script execs an AGI script and check the variable AGIRESULT. If set to true, the
condition is matched, otherwise the “not match” condition is followed.
21
IVR
IVR defines Interactive Voice Response to manage voice menus.
Welcome Message is the media file to play to the calling user while waiting for the user
choice
Menu selection timeout is the time in seconds to wait for the user choice before going to
the “On timeout” destination.
Digit timeout is used when the “Allow Dialing Extensions” or the “Allow Dialing Features
Code” is selected. This determines the amount of seconds to wait before considering the
number entered as “complete”
Loop on timeout allows the continuation of playing the welcome message, and the wait for
the selection every time the Menu selection timeout expires.
Loop on wrong key press allows the restart of playing the welcome message and the wait
for the selection, if the user chooses an unsupported key.
Allow Dialing Extensions permits the calling user to dial directly to an extension instead of
picking one of the digits.
Allow Dialing Feature Codes, like above, but for feature codes.
22
Hunt List
Hunt List defines a list of extensions or external numbers to dial at all once or in sequence.
The Type of the Hunt List can be:
Ring All – All extensions and external numbers can be dialed all at once
Cycle – Extension and external numbers are dialed in the order specified and once the
bottom of the list is reached, the “hunt” starts over.
Sequence – Extensions and external numbers are dialed in the order specified. When the
bottom of the list is reached, the destination specified in the “On timeout” is followed
Check if exten are in use allows user to skip dialing extension already in use
Request confirm to answer if set, requests the dialed user to accept or reject the call. If
the call is rejected, the hunt list continues trying to locate a phone
Ring Time allows specifying the time each extension or external number has to be dialed
before skipping to the next item.
Conference Rooms
A conference room or meeting room is a virtual place where all phones dialing, are joined
in a single conversation. Conference rooms can be protected by a PIN. A special Admin
PIN is reserved to the administrator, so he can mute/unmute participants. The maximal
number of users allowed in the conference can be set.
23
The conference can be recorded. The audio file is available through the Call History.
Call Queue
Call queue permits to hold all the incoming calls in a queue and distribute the calls to the
agents available.
Strategy can be one of the following:
Ring All – All agents are rang at the same time
Round Robin – agents are rang, one at the time, in a round robin way
Random – agents are rang in a random order
Least Recent – The least recent agent is rang
Fewest Calls – The agent with the fewest calls is rang
Linear – agents are rang in the order specified. Due to some asterisk limitation, it is not
possible to change the Strategy of an already defined Queue to “Linear”. The queue needs
to be destroyed and recreated.
Always Record always allows recording the call. The call record is available through the
Call History.
Play to the caller permits to define if playing the defined Music on Hold for the PBX or a
generic Ringing
Agents list the agents in the queue. For each extension, two kinds of agents are available,
the first is normal. The second is the “following to A.D.”; allowing the forwarding of the call
to the Additional Destination defined for the extension.
Queue timeout is the amount of time the caller can be hold in the queue before being sent
to the destination specified in the “On timeout”
Agent Timeout is the amount of time an agent is rung before moving on the next agent.
A special action can be configured when No Available Members are present in the queue.
Periodic Announce section allows definition of the announcment to play to the callers in
the queue with the Announce Frequency. The Periodic Announce can be chosen
between the media file loaded.
The user can exit the Queue by pressing the “Queue Exit Key” and he will be directed to
the destinations chosen by the “On Exit Key”. A special destination can be selected,
named “Exit the Queue and call back when it is your turn” allowing the caller to hang up
the call and be called back when he is in front of the queue, ready to be served.
The position of the user can be played with the “Announce Pos. Frequency”, if different
than zero.
It is possible to redefine the messages usually played to the user choosing them between
24
the media file uploaded
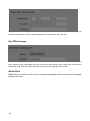
Paging and Intercom
Almost all SIP phones allow paging by using them as an intercom; the ability to establish a
mono directional or bidirectional communication without making them ring.
The number defined can be called directly by all extensions and it can be chosen to make
a bidirectional call (intercom) or just use the service as paging device.
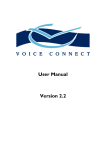
Some phones require adjustment to the configuration to allow them to auto answer. For
example, the Polycom VVX 300 requires the following setup:
25
Flow
A flow is a predefined set of destinations that can be used in other Configuration directives.
It is like a Macro, allowing to use the same steps of destinations in several places and
maintained in a single location.
Custom Destinations
Custom Destinations allow the definition of custom destinations to be used in other
Configuration settings.
There are several types of custom destinations:
Forward call to – will forward the call to an outbound number, using a timeout for the
dialing. The dialing timeout has to be entered separated by a comma. The CallerID can be
chosen among the usual Caller ID available and use the Original Caller ID of the call
received.
Alter Caller ID to – will change the Caller ID to a custom one. Standard Asterisk variables,
like ${CALLERID(num)} can be used.
Alter Caller ID Name to – will permit to change the Caller ID Name to a custom one.
Standard Asterisk variables, like ${CALLERID(name)} can be used.
Custom Dial() with param – will use the Dial Command as argument to a generic Dial
command
Use Feature Code – Like to “Forward call to”, but a feature code can be used
Set Extension to not in use: Set the extension state to “not in use”
Set Extensions to in use: Set the extension state to “in use”
26
Toggle Extension state: Change the extension state from “in use” to “not in use” or vice
versa.
DISA
DISA stands for Direct Inward System Access and is a way to let inbound callers reach any
internal extension. Once answered, the system will play a message inviting the caller to
enter the extension number to be connected to. The system also allows dialing outbound
numbers, usually protected by a PIN code.
The Welcome message is played to the calling party, usually asking to enter the
extension to dial. If present, the PIN is requested to access this feature. It is highly
advisable to set a PIN when outbound calls are allowed.
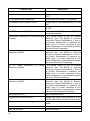
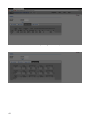
Feature Codes
Feature Codes are the key to access any aspect of the PBX, trigger special features or
just performs tricky operations. Feature codes can start with the * (star) or with the #
(sharp) and can be associated to a number of action from the following list. When
requested, the special string [NUM] and [EXT] can be used in the feature code. The [NUM]
will be replaced with the number dialed. For example, if a feature code is set to *62[NUM]
for “Mask the Caller ID on calling [NUM]” then if the number *625558764 is dialed, and
then the [NUM] is assigned to the number 5558764. The [EXT] instead will be replaced
with an extension number. If a feature code is set to *8[EXT] to Pickup Extension [EXT]
and you have defined extension 100, then dialing *8100, the extension 100 will be picked
up.
Feature code *1 is reserved (due to asterisk limitation) to enable/disable recordings.
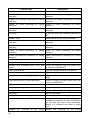
List standard feature codes:
Feature Code
Description
Answer the call
Usually not needed, it just answer the call
Barge with extension [EXT]
Barge with extension [EXT]
Dial by name directory
Access to Dial by name directory menu
Dial by name using the [NUM] dialed
Use the dialed [NUM] to call using dial by
name
27
Feature Code
Description
Disable FMFM extension
Disable FMFM for the calling extension
Disable on busy forwarding for calling Disable on busy forwarding for calling
extension
extension
Disable on no answer forwarding for calling Disable on no answer forwarding for calling
extension
extension
Disable on offline forwarding for calling Disable on offline forwarding for calling
extension
extension
Disable unconditional forwarding for calling Disable unconditional forwarding for calling
extension
extension
Echo test
Perform an echo test, repeating all what is
said
Enable FMFM
Enable FMFM for the calling extension
Enable on busy forwarding for calling Enable on busy forwarding for calling
extension
extension
Enable on no answer forwarding for calling Enable on no answer forwarding for calling
extension
extension
Enable on offline forwarding for calling Enable on offline forwarding for calling
extension
extension
Enable unconditional forwarding for calling Enable unconditional forwarding for calling
extension
extension
Force Recording of the call
Activate the recording for the call
Hangup the call
Hangup the call
Intercom with extension [EXT] (two way Perform an intercom (two way audio) with
audio)
the extension dialed [EXT]
Login to all Queues
Login the calling extension to all queue
Logout from all Queues
Logout the calling extension to all queue
Mask the callerID on calling [NUM]
Activate the Privacy Mode while calling the
[NUM]
Page extension [EXT] (one way audio)
Perform a page (on way audio) with the
extension dialed [EXT]
Park the call
Park the call
Pickup Extension [EXT]
Pickup extension dialed [EXT]
Pickup Group
Pickup a call from the current group
Play Beep
Play a simple beep
Play the callerid of the calling party
Play the callerid of the calling party
Record a Message
Record a message. The message is
recorded and added to the list of media files
with the date and time of the recordings.
Usually it is renamed and used in some
menu
Retrieve
28
the
voicemail
of
the
calling Retrieve
the
voicemail
of
the
calling
Feature Code
Description
extension
extension
Retrieve the voicemail of the [EXT] dialed
Retrieve the voicemail of the extension
[EXT]
Say the parked calls extensions
List the parking lot used by calls parked
Set Extension [EXT] state to in use
Set the state of the extension [EXT] to “IN
USE”
Set Extension [EXT] state to not in use
Set the state of the extension [EXT] to “NOT
IN USE”
Set FMFM number to [NUM] and enable it
Set the number [NUM] dialed as FMFM for
the calling extension.
Set on busy forwarding for calling extension If the [NUM] dialed is not an internal
to [NUM]
extension, then the [NUM] is checked
among the Custom Destinations. If one of
the Custom Destinations is matching the
[NUM], then it is used, otherwise a new
Custom Destination is automatically created
and set as Busy Forwarding.
Set on no answer forwarding for calling If the [NUM] dialed is not an internal
extension to [NUM]
extension, then the [NUM] is checked
among the Custom Destinations. If one of
the Custom Destinations is matching the
[NUM], then it is used, otherwise a new
Custom Destination is automatically created
and set as No Answer Forwarding.
Set on offline forwarding
extension to [NUM]
for
calling If the [NUM] dialed is not an internal
extension, then the [NUM] is checked
among the Custom Destinations. If one of
the Custom Destinations is matching the
[NUM], then it is used, otherwise a new
Custom Destination is automatically created
and set as Offline Forwarding.
Set unconditional forwarding for calling If the [NUM] dialed is not an internal
extension to [NUM]
extension, then the [NUM] is checked
among the Custom Destinations. If one of
the Custom Destinations is matching the
[NUM], then it is used, otherwise a new
Custom Destination is automatically created
and set as Unconditional Forwarding.
Spy extension [EXT]
Spy on extension [EXT]
Toggle state of extension [EXT]
Change the state of the Extension [EXT]
from IN USE to NOT IN USE and vice versa
Unmask the callerID on calling [NUM]
Remove the Privacy Mode while calling the
[NUM]
Voicemail for Extension [EXT]
Retrieve the voicemail for extension [EXT]
Wait five seconds
Wait five seconds
29
Feature Code
Description
Wait one second
Wait one second
Wakeup Alarm - Disable the time set
List all wake up alarms set for the calling
extension and allow to delete one of them
Wakeup Alarm - Play the time set
List all wake up alarms set for the calling
extension
Wakeup Alarm - Set the time from DTMF Set a wake up alarm by requesting to enter
HHMM
the hour in the HHMM format
New Feature Codes are automatically created when any of the objects are created, as
follows:
Object
Feature Code
Extensions
Allowing to dial the extension listed
Custom Destinations
Allowing to dial the destination defined
Media Files
Rerecord, Playback and Background the
media file
Conditions
Check condition
IVRs
Execute IVR
Hunt Lists
Execute hunt lists
Conference Rooms
Access conference room
Queues
Access queue
Flows
Execute flows
DISA
Access DISA
Voicemails
Send the call to the voicemail
Whisper to extension [EXT]
Whisper to extension [EXT]
Short Numbers
Short numbers are a way to assign shortcut for dialing numbers.
30
CallerID Black List
It is possible to avoid receiving calls from a list of caller IDs by entering them in this list.
Calls from those numbers will be hang up directly.
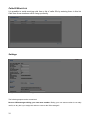
Settings
Every PBX can have its own settings.
The following aspect can be customized:
Recover VM messages dialing your own same number. Dialing your own same number is not really
useful, so why don't you assign this action to recover the VM messages?
31
Dial timeout identify the standard time the dialing command will ring an extension or an external
number before reporting as “no answer”. Remember the dialing time can be adjusted for each
extension.
Max call duration sets the maximal time, in second, a call can last connected.
Dialout digit allows you to define a digit to use for dialing out. If not set, all not local numbers are dialed
outbound
Voicemail Message Language let's you specify the default language to use in the Voicemail. This
value can be set for each voicemail.
Parking log timeout specifies how long in seconds a call can stay parked before returning to the
parking extension.
Save pcap every call let's you capture the pcap of every call received by the PBX for debug purpose.
Call logs are saved in the database for easy recovery. The tool used for capturing the traffic is
Voipmonitor
Voicemail autodelete after days let's you decide how many days of Voicemail to keep online. Deleted
messages cannot be recovered.
Default CallerID for autocreated custom destinations. This is the Caller ID to use when the system
needs to generate a Custom Destination, for example, when an unconditional transfer is set using a
feature code.
Recording format. The recording format for monitoring calls can be chosen between
Uncompressed 16-bit PCM Audio in Wav container and MS GSM audio, still in Wav container.
API Key. The API Key is used for the proxyapi.php API script.
Music On Hold allows user to choose the files to use as Music On Hold for the given PBX. If no files
are chosen, the standard asterisk Music On Hold files are used. The files need to be in wav or slin
format. Alternatively, a binary source of music can be selected, like a public streaming service entering
the URL in the “Streaming Service” field, like http://s9.voscast.com:7136/
Web calls are calls generated using an HTTP request. A simple proof of concept is supplied with the
webcall.php script. The generation of calls can be restricted using a password or by IP. The webcall.php
script can be run either from the command line or by invoking using GET or POST method.
When run in CLI mode, the arguments are in order: source number, destination number, PBX code and
secret key.
When run in GET/POST mode, the following variables needs to be assigned: source, dest, PBX, secret.
For example, getting the URL:
https://demo.plphonepbx.com/plphonepbx/webcall.php?source=104&dest=102&PBX=DEVEL&secret=
H63JpSdPEWequMpr
Will make extension 104 to ring, once answered, extension 102 is dialed.
32
Provisioning
Provisioning is the action of configuring a phone automatically, by providing only basic
information. Plphone PBX supports a wide range of phone provisioning with a general file
format. New phones brand and model can be added using the Admin/Provisioning menu.
Phones
Files used for provisioning are usually text or XML file containing information like the user
and password and the IP address or hostname of the SIP server. Information contained in
the provisioning files need to keep confidential and the leakage of this information can lead
to unauthorized usage of voice traffic. To avoid any snooping on provisioning content,
usage of HTTPS is recommended. Be aware some phones require a valid SSL certificate
to provision using HTTPS. The correct provisioning file is requested based on the MAC
address of the phones. To avoid any brute forcing of the MAC address, a special password
is needed in the URL to recover the file. Based on the model of the phone, a special string
needs to be append to the end of the provisioning URL, like {mac}.cfg for Panasonic
phones or {MA}.xml on Cisco phones. Check your phone manual for the right way to
identify the MAC address in the provisioning URL.
New Phone
Each phone can be named. The phone name is just used as reference and is not used anywhere else.
Model permits to select the provisioning template to use. Provisioning templates can be created using
the Admin/Provisioning menu.
Mac Address is the key identifying the phone needing to be provisioned.
33
Password is normally set to your PBX CODE. This is NOT the authentication password of
the extension, or a user password. It is a password added to the MAC address in order to
prevent brute force attacks.
Based on the definition of the phone model, one or multiple lines can be present, allowing
selecting one or multiple accounts from the Extensions defined for the PBX.
One or multiple button layouts can be defined and assigned to the phone.
Autoprovision Values
When configuring the provision for a phone, you make a connection between the
extensions in the pbx and the lines in the phone. Unfortunately it is not enough. The phone
requests additional configuration you can enter by using the Autoprovision Values
button.
Two kinds of autoprovision values can be needed:
The general one can be configured by clicking on the name and MAC address of the
phone on the right and will be used to configure values defined in the template file applying
on the whole phone.
The line related one can be configured by clicking on the Line desired and usually are
already prefilled with values read from the extension configuration. Other values, like the
server name and SIP port needs to be manually filled. Please refer to the
Admin/Provisioning section on how to define predefined values and build custom
templates.
34
Status
Using the Status menu, a complete overview of the status of the system can be obtained.
As other parts of the system, status is realtime. The info reported by the Status menu are
related to the selected PBX and are available to the not-admin profile.
Call History
The info for every call, internal or external, inbound or outbound, is saved in the Call
History along with basic information regarding the source and the destination.
For every call the info regarding the start time, the caller ID, the extension source of the
call (if call is originated by the internal network), destination, duration, answered duration
(billsec), disposition, cost and if any recording is available for the call.
Call History is retained for the amount of days configured in the Admin/Settings menu.
The disposition of the call is a link to access additional information gathered by the
VoIPMonitor system.
35
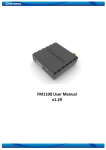
Info like the progress time, who hang up, the codec used in the call, the IP of the caller and
the called are easily shown a few seconds after the call has ended. A basic MOS
calculator is included.
The packet jitter and the latency can be easily shown in the graphs following the raw data
above.
36
A basic decoding of the call SIP message is available under the graphs.
Using the floppy disk link is possible to download the complete pcap of the call or just
check a detailed pcap dump.
Queue History
The info reported in the Call History are not enough when the call is processed using a
Queue. More info for each call using the queue system can be found in the Queue History
and the Caller ID, a detailed disposition of the call is shown with the agent who gets the
call, the hold time of the caller and the call time. The original position of the caller, when
the queue is accessed is also reported.
More detail of the call can be seen following the DETAIL link.
37
Peers
Info on all the connected peers are shown along with all the info gathered during the
registration process, like the brand and firmware version of the phone and even the
internal IP address.
Using the big red cross is possible to unregister a phone. Unregistering a phone is needed
every time there is a configuration for the phone; like its password or the codec are
changed. Some phone models, like Tiptel and Yealink, allow remote reboots the phone
using the circled red arrow.
38
Conferences
Using this menu, the status of all the conference rooms taking place on the server, for the
selected PBX can be shown.
Faxes
All faxes received by the system for the selected PBX can be viewed here if the fax has
been configured for storage
39
Voicemail Messages
Voicemail messages received by the PBX can be viewed here if they are configured for
storage
Stats
Several statistics are available in the system for inbound, outbound and queue/agents
calls. Clicking on the values will show the calls counted.
Stats are available for User Activity showing Outbound Calls Answered, Busy, No
Answered and Failed, Inbound Answered, Busy, No Answered and Failed.
Stats are available for DID Activity showing Inbound Calls Answered, Busy, No Answered
and Failed for each DID.
Stats are available also for Queue Activity and Agent Activity, showing the calls entered in
the queue and how the call ended, if answered, transferred, abandoned or time out, along
with the holding time.
40
The same values can be read divided by each agent and each queue:
41
Provisioning
Provisioning of phones is phone independent by providing the framework to create a
template and use some variable. Variables are predefined in the system, but more can be
added easily.
Phone Models
Several phone models can be defined. For each phone model the number of lines needs
to be defined, usually with the starting and ending line number.
The MAC request contains the text file that needs to be delivered to the phone for the
provisioning. Please inquire for your phone model to receive the correct template.
42
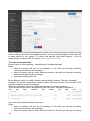
SIP TAPI integration
SIP TAPI integration is made using the freely available SIPTAPI application:
http://sourceforge.net/projects/siptapi/
*** IMPORTANT ***
The SIP TAPI integration is made by dialing your own extension and then connecting to
the destination. It is important the “Recover VM messages dialing your own same number”
is set to No.
The following example has been made using version 0.2.13.
Download and uncompress the zip package
On 32bit Windows
=================
1. Copy siptapi.tsp from 32bit folder into your Windows system32 directory (usually
C:\Windows\System32)
2. Install and configure SIPTAPI using the telephony options from control panel
On 64bit Windows
=================
1. Copy siptapi.tsp from 64bit folder into your Windows system32 directory (usually
C:\Windows\System32). This gives you full TAPI support with 64 and 32bit TAPI
applications
43
2. If you want to configure SIPTAPI not only from the telephony control panel and from
64bit applications, but also from 32bit applications, copy the 32bit siptapi.tsp from 32bit
folder into your WoW64 directory (usually C:\Windows\SysWow64)
3. Install and configure SIPTAPI using the telephony options from control panel
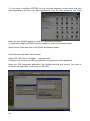
Open Control Panel and click on the Phone and Modem Option
In the Advanced tab add a new Provider
Select “SIP TAPI Service Provider...” and press Add.
Configure it by entering the PBX host address, the extension and the password
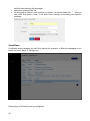
Open you TAPI compatible application, like Outlook and dial any contact. You need to
configure the application to dial using the SIPTAPI.
44
45
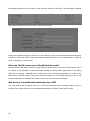
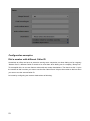
Setup Guides
How can I setup and use the Emergency Caller ID?
To be able to use Emergency Caller ID, you need to follow the following steps:
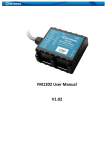
Create a routing rule using Admin/Routing Profiles for all the “emergency numbers” you like to use
with the Emergency Caller ID. So for example you need to create a specific rule for 112, 113, 911, 999
or whichever number is used in your country. It
can be good to add also a normal number to
check if the Emergency Caller ID usage has
been configured correctly.
Please don't forget if multiple routing rules
match your dialed digits, they are evaluated by
Order and Priority. It can be a good idea to
assign common rules to order 2 and emergency
routing rules to order 1.
To match only and exactly 911 for example, you
need to use the ^911$ regex.
Assign the “Emergency Route” flag to the
extension. It will be shown as a little medical kit
icon on the routing rules page.
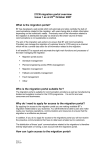
Select the DIDs you want to use as Emergency Caller ID using the Configuration/DIDs page. Before
to be able to use a DID as “Emergency Caller ID”, the flag “Use as Emergency CallerID”. A box will be
46
automatically shown to let you insert a note about the location of this DID. The “Emergency Enabled
DID” will be marked in the DIDs list with a little medical kit icon.
Assign the specified Emergency Caller ID to the extensions using the Configuration/Extensions page.
Locate the ”Outbound Calls” section and assign the desired DID to be used as Emergency Caller ID
when an emergency route is used.
How can I build a more user friendly feature code?
Some clients find the feature codes too rough and they prefer to have more user friendly feature even if
it is slower to use. Normally, a feature code asks nothing, but accept all the parameters on the dialing
itself, like for example *72[NUM] can be configured to set unconditional destination for a DID to the
NUM dialed. However, feature codes and custom destination are the building blocks you can use to
create something more complex and maybe user friendly. Let's see some examples:
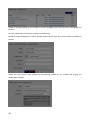
Ask and set unconditional destination for a DID
Our client likes to dial a feature code, like *72 and be prompted with a message asking to enter a
number. That number will be set as unconditional destination for a DID. These are the steps:
47
Create a recording asking for the number to use for forwarding your DID and load in the Media File
sections.
You can create also a recording to confirm the configuration.
Create a custom destination to read a number entered by the user and use the above recording as
prompt.
Create the “raw” feature code setting the unconditional forward for the number and playing the
confirmation message.
48
Create a custom destination to use the above feature code with the variable entered.
Create a feature code asking for the number and using that number to execute the above feature code.
49
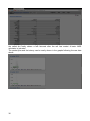
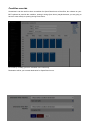
Condition override
Sometimes it can be useful to have a condition for Open/Close hours of the office, but a button on your
BLF keyboard to override the condition, closing it during Open hours (maybe because you are going to
have an extra coffee) or opening during Close hours.
Let's start by creating your time condition in the usual way:
Destination will be your normal destination for Open/Close hours:
50
In your DID, you have assigned the Condition in the usual way:
Now we are going to create a BLF key to override this condition.
We need to create the BLF number, using a Flow. Just assign for example the number 150 to the key,
so this client will monitor 150.
It can be useful to start creating the custom destination to toggle the BLF state:
And use it in the Flow definition:
51
Remember to set the initial state, just assign NOT IN USE (green light) to normal condition and IN USE
(red light) to condition override.
Now we need a condition to test for the BLF state and invert/override the condition.
Assembling all in the DID destination, we get:
52
Configuration examples
Dial a number with different Caller ID
Sometimes an office can have an extension serving more companies, so when dialing out for company
“Kartoon Cars” a different Caller ID needs to be used than when dialing out for company “Sleep Flex”.
To accomplish this, we use two feature codes with two custom destinations. The idea is to dial *11 plus
the number to dial out when you want to use the first Caller ID and *22 plus the number to dial out when
you want to use the second Caller ID.
Let's start by configuring two custom destinations as following:
53
And in a similar way, but for the other Caller ID number.
Once configured, you need to create a feature code using each one of the custom destinations created.
54