1
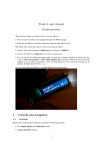
User Manual
Last update May 10th 2015
Watch the walkthrough video here!
Thanks!
Thank-you for adopting Acid8!
index:
1- Connectivity & Power
2- Operation Overview
3- Step Mode
4 Pattern Mode
5 Chain Mode
6 Global functions
7 External Control
8 Firmware Updates
9 Software Editor
1- Connectivity & Power
Acid8 features 1/4” audio output, MIDI input/output,
1/8” gate/sync input/output and a power socket.
Acid8 is equipped with a bridge rectifier so can be powered by any AC or
DC voltage source of between 7v and 15v, 1200mA.
2- Operation Overview
Acid8 enables you to edit patterns and songs under three main layers:
Step Mode
At this lowest level you create and modify patterns, step by step.
A pattern consists of 16 steps, but up to 15 of these steps can be skipped to
form shorter patterns.
Pattern Mode
In pattern mode you can select the pattern that is being played, you can also
copy/paste patterns and add them to a chain
Chain Mode
When chain mode is active, Acid8 will automatically sequence patterns of your
choice to form a song. 5 chains of up to 8 patterns are available.
3- Step Mode
Activate step mode by pressing down the rotary encoder (all black knob) until
the word Step is lit. At any time you can toggle between Step and Pattern
modes by clicking the encoder again.
Now roll the encoder to cycle through the 16 steps of your pattern and modify to
your liking. The selected step is indicated on the top row of illuminated dots. All
parameter changes are automatically stored.
3-1 Notes & Octaves
Each Step has a note, displayed on the 13 button keyboard.
You can also transpose each step across a 3 octave range using the
&
buttons. Acid8 can automatically advance to the next step when a note is
entered. To toggle this feature on and off, hold shift, then press the encoder.
3-2 Rest, Accent & Slide
Set rest, accent or slide on or off using the respective buttons.
The illuminated dot above the button indicates their status.
Rest mutes a step.
Accent boosts the filter envelope. The amount of boost is set by the accent
knob.
When slide is active the pitch will slide up or down to the next pattern.
3-3 Waveform selection
ACID8 features 16 waveforms arranged in 4 categories:
1 - Rectangle: Prophet, Distorted, SID and Perfect Rectangle*
2 - Triangle: NES, Prophet, SID and 3-BIT Triangle*
3 - Saw: Prophet, TB-303, SID and 3-BIT Saw
4 - Sine: Pure, Overtone Sine, Acoustic Guitar and Piano*
To Select a waveform, hold SHIFT then press one of the first 4 white keys.
Tap same button to cycle through the 4 versions of that shape
The variation of each shape is indicated above white keys 5-8.
By default ACID8 will store the current waveform within the pattern memory.
This also means that if you change patterns, the waveforms will change
accordingly. If you wish to deactivate waveform storage and loading per pattern,
hold any waveform button for 3 seconds. The row of dots will flash to indicate
change of mode. Repeat the same procedure to reactivate storing/loading of
waveforms.
* The last waveform of each category can be redrawn!
See section 9-3 for details
3-4 Bit Flipping
the bits function enables you to manipulate the audio signal by inverting the bits
of the 8bit data stream. This can result in some interesting harmonics.
Hold shift, then press bits (white key #5) to enter bits mode.
While keeping shift held you can now toggle the 8 bits on and off by pressing
the white keys that represent bits 0 to 7 from left to right.
Flipped bits are represented by the illuminated dots above the white keys.
Note: bit flipping sounds more pronounced on rounder waveforms like triangle
or sine. The right-most aka most significant bits have the most effect on the
signal,
3-5 Env Mod -> Pitch
When env mod > pitch is active, the modulation envelope affects the oscillators
pitch resulting in sweeping percussive sounds often heard in NES tunes.
Hold shift, then press *pitch (white key #6) to activate.
3-6 Swing
Each pattern can have 8 levels of swing, automatically stored within the pattern.
Hold shift, then press swing (white key #7) to enter swing mode.
While keeping shift held you can now select the level of swing by pressing any
of the white keys.
3-7 Skip
Up to 15 steps can be skipped per pattern.
To enable or disable skip for the selected step, hold shift whilst pressing skip
(white key #8)
Whenever you hold shift in step mode, the steps that are set to skip are lit on the
top row of illuminated dots. The illuminated dot above the skip button is also lit if
the selected step is set to skip.
If you hold shift+skip then roll the encoder you can skip/unskip multiple steps.
Counter-clockwise enables skip, clockwise disables it.
3-8 Transpose Pattern by Octave
You can transpose the entire pattern up or down one octave at a time (within the
3 octave range) simply by holding shift whilst pressing buttons &
3-9 Clear and Randomize Pattern
You can clear the entire pattern by holding shift whilst pressing rest. Press rest
again without releasing shift to randomize the pattern (this can be repeated).
3-10 Fx
The fx knob can control up to 5 effects at once:
To toggle an effect on or off, hold shift whilst pressing any of the black keys
Scrub: When scrub is active, sequencer is locked to a step defined by the fx
knob.
Accent Oscillator: When accent oscillator is active, the accent is automatically
toggled on and off at a rate defined by the fx knob for wobble, delay or gater
effects.
Crush: When crush effect is active, the fx knob has two functions - Sample Rate
& Bit Depth reduction: at twelve o clock, the fx knob has no effect. Turning
clockwise from twelve reduces sample rate, counter-clockwise reduces bit
depth resulting in distorted signal, particularly effective on rounder shapes like
triangle and sine.
Pulse Width: When the pw effect is active, the fx knob controls the pulse width
of the oscillators waveform.
Arpeggiator: The arp effect inserts in-between notes. The number of in-between
notes is defined by the fx knob.
The modulation wheel (CC#1) overrides the fx knob to control the amount of fx
via midi.
4 Pattern Mode
Pattern mode is like a pattern jukebox where you can switch patterns on the fly.
You can also copy/paste patterns and store/recall favorites.
Acid8 can store 128 patterns arranged in 8 banks of 16.
4-1 Select a Pattern
Roll the encoder to cycle through the 16 patterns of a bank. Switch banks
by pressing any of the white keys.
4-2 Copy/Paste a Pattern
To copy the current pattern hold shift, then press
To paste a pattern hold shift, then press
Warning: Pasting a pattern will overwrite the selected pattern
4-3 Favorites
You can assign 5 favorite patterns to the white keys for quick access.
To load a favorite pattern, simply press any white key
To set a favorite hold shift, then press any white key so set it to the respective
slot.
4-4 Real-Time Rest, Accent & Slide
You can force rest, accent or slide at any time simply by holding their respective
buttons.
Note: This is a performance feature that has no effect on the actual pattern
4-5 Transpose
You can transpose the playback up or down by pressing
or
.
The transpose amount (in semitones) is briefly indicated on the top row of
illuminated dots.
The large center illuminated dot (#9) is 0 or no transposition
Note: This has no effect on the actual pattern and is reset on machine reboot.
5 Chain Mode
You can create 5 songs by chaining up to 8 patterns per song.
5-1 Activate/Deactivate Chain Mode
To toggle chain mode on and off, simply press the chain button. The illuminated
dot above the chain button indicates chain mode status.
Note: This function applies to both step and pattern modes
5-2 Select a Chain/Song
To change the current chain/song hold down chain, then press any black key.
Note: This function applies to both step and pattern modes
5-3 Activate/Deactivate Chain Step
You can define the chains length (up to 8 patterns) by toggling on and off its
steps.
Hold down chain, then press any white key to toggle the respective chain step
on or off (indicated by the illuminated dot above the step)
Note: This function applies to both step and pattern modes
5-4 Assign Current Pattern to a Chain Step
Hold down both shift & chain, then press any white key to assign the current
pattern to a chain step.
Note: This function applies to both step and pattern modes
6 Global functions
These functions apply to both pattern and step modes:
6-1 Play Modes
4 Play modes are available:
Forward, Reverse, Pendulum and Random.
To cycle through the play modes in the above order, hold shift, then press run X
amount of times.
6-2 Tempo
Their are two ways to change the tempo:
Tap tempo: press the tempo button multiple times.
Dial tempo up/down: Hold shift and roll en encoder to speed up or down the
tempo.
7 External Control
Acid8 interacts with external devices in the following ways:
7-1 Incoming Midi Notes
Acid8 responds to midi notes on the channel of your choice (1 by default) and
can therefore be played like a traditional midi synth (within its pitch range).
To change the midi channel, hold
while powering the unit, then roll the
encoder to select a channel (indicated on the 15 dot row). Click the encoder to
confirm.
Note: Channel 16 is reserved for the editor and can not be used for notes.
7-2 Outgoing Midi Notes
Acid8 transmits notes so you can use the step sequencer to control other midi
compatible synths. Normal notes are sent velocity=64, accent notes=127.
To change the midi output channel, hold
while powering the unit, then roll the
encoder to select a channel (indicated on the 15 dot row). Click the encoder to
confirm.
Note: Channel 16 is reserved for the editor and can not be used for notes.
7-3 Incoming Midi Clock
Acid8 locks to incoming midi clock. When midi clock is received, the tempo
functions are overridden until a stop message is received or run is pressed
7-4 Outgoing Midi Clock
Acid8 transmits midi clock enabling you slave external devices (like drum
machines) to Acid8‘s clock via Midi.
Note: Acid8 also forwards incoming midi time to its output
7-5 Incoming Midi Control Change
The modulation wheel (CC#1) overrides the fx knob to control the amount of fx
7-6 Incoming Midi Program Change
Use Program Change messages 1-128 to change pattern at any time
7-7 Gate/Sync In
Acid8 triggers and advances a step when a 5v pulse is detected on its sync
input.
7-8 Gate/Sync Out
Acid8 transmits 5v clock pulses a 1/4 beat resolution.
8 Firmware Updates
The Acid8 firmware can be updated via midi sysex.
To enter update mode, hold the shift button before powering the unit and keep it
held for approx. 2 seconds. All leds should be lit indicating that ACID8 is ready
to receive new firmware.
During the transfer, all leds will flash on and off. When transfer is complete ACID
will boot normally.
8-1 Pc:
For a windows pc, we recommend MIDI-OX. It is a free and very useful app!
1.
Launch MIDI-OX
2.
In the Sysex window, choose Command > Window > Load File and
navigate the location where you stored the file.
3.
Choose Command Window > Send Sysex
4.
Once the upload is complete (approx. 30 seconds), Acid will reboot
8-2 Mac:
For a mac, we recommend SysEx Librarian. It is also free!
1. Launch SysEx Librarian.
2. Select your MIDI interface in the drop-down menu at the top (if it's not already
selected)
3. Drag the MIDI SysEx file from the Finder into the frame of SysEx Librarian (if
it's not already in there).
4. Select it with the mouse.
5. Click Play.
6. Once the upload is complete (approx. 30 seconds), Acid8 will reboot
9 Software Editor
You can optionally edit patterns and waveforms within ACID8’s memory with the
free editor.
Download the latest version here: http://twisted-electrons.com/acid8
The editor sends data to ACID8 via midi but it also needs data from ACID8 to
function properly.
9-1 Setup:
When launching the app, you will first have to define the midi ports, then click
OK to begin.
Note: INPUT is the port receiving data from Acid8. OUTPUT is the port to Acid8.
9-2 Patterns:
When launching the app, you will first have to define the midi ports, then click
OK to begin.
Now you can browse ACID8’s patterns and edit them on the fly.
9-3 Waveforms:
To edit a waveform, click the WAVEFORM button at the top left of the screen
Now you can visualize and redraw the 4th waveform of each shape in real time
with your mouse. These changes are automatically saved to ACID8s memory.
Use the reset button to restore the factory waveform.
Note: Acid8 automatically switches to the waveform you are drawing so that you
can hear the changes as they are being made.