1
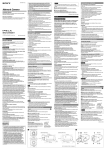
iPulse® Installation and User Guide IP1-STD Hardware Version 3.0 © 2007 VideogeniX Inc. iPulse® STD Manual P/N: 040-00002-001 iPulse® Installation and User Guide Owner’s Record The model and serial numbers are located on the bottom of the iPulse unit. Record the serial number in the space provided below. Refer to these numbers whenever you call upon your VideogeniX dealer regarding this product. Model No. ______________________ Serial No. ______________________ WARNING To prevent fire or shock hazard, do not expose the unit to rain or moisture. To avoid electrical shock, do not open the unit. Refer servicing to qualified personnel only. WARNING This installation should be made by qualified service person and should conform to all local codes. WARNING A readily accessible disconnect device shall be incorporated in the building installation wiring. Power Supply Caution for U.S.A and Canada The iPulse device operates on 5V to 24V AC/DC. Use a class 2 power supply which is UL Listed (in the U.S.A.) or CSAcertified (in Canada) For customers in the U.S.A. This equipment has been tested and found to comply with the limits for a Class B digital device, pursuant to Part 15 of the FCC Rules. These limits are designed to provide reasonable protection against harmful interference in a residential installation 12/6/2012 2 iPulse® Installation and User Guide NOTICE TO USERS © 2007 VideogeniX Corporation. All rights reserved. This manual or the software described herein, in whole or in part, may not be reproduced, translated or reduced to any machine readable form without prior written approval from VideogeniX. VIDEOGENIX CORPORATION PROVIDES NO WARRANTY WITH REGARD TO THIS MANUAL. THE SOFTWARE OR OTHER INFORMATION CONTAINED HEREIN AND HEREBY EXPRESSLY DISCLAIMS ANY IMPLIED WARRANTIES OF MERCHANTABILITY OR FITNESS FOR ANY PARTICULAR PURPOSE WITH REGARD TO THIS MANUAL, THE SOFTWARE OR SUCH OTHER INFORMATION. IN NO EVENT SHALL VIDEOGENIX CORPORATION BE LIABLE FOR ANY INCIDENTAL, CONSEQUENTAIL OR SPECIAL DAMAGES, WHETHER BASED ON TORT, CONTRACT, OR OTHERWISE, ARISING OUT OF SOFTWARE OR OTHER INFORMATION CONTAINED HEREIN OR THE USE THEREOF. VideogeniX Corporation reserves the right to make any modification to this manual or the information contained herein at any time without notice. The software described herein may also be governed by the terms of a separate user license agreement. “iPulse” and “VideogeniX” are registered trademarks of VideogeniX Corp in the United States and/or other countries Microsoft Windows, Internet Explorer and MS_DOS are registered trademarks of Microsoft Corporation in the United States and/or other countries Adobe, Acrobat and Adobe Reader are trademarks of Adobe Systems Incorporated in the United States and/or other countries All other company and product names are trademarks or registered trademarks of the respective companies or their respective makers. 12/6/2012 3 iPulse® Installation and User Guide 1. About iPulse® IP1-STD ......................................................................................... 5 Operating Modes .................................................................................................... 5 Intelligent Reset Mode ....................................................................................... 5 Timed Reset Mode .............................................................................................. 5 Relay Types ............................................................................................................. 5 2. Package Contents .................................................................................................. 7 3. Installation Steps.................................................................................................... 8 4. Hardware Installation............................................................................................. 9 4.A. iPulse® Timed Reset Mode Installation (IP1-STD) ................................... 9 4.B. iPulse® Intelligent Reset Mode Installation - (IP1-STD)........................ 11 4.C. iPulse Wired to relay to switch an isolated external power supply (Recommended OMRON LY1F) ......................................................................... 13 5. iPulse® LED Operation - (IP1-STD)................................................................... 14 LED Operation ....................................................................................................... 14 Green LED – Device Power Indicator............................................................ 14 Yellow LED – Communication/Signal Status .............................................. 14 Red LED – Operation Mode Indicator ........................................................... 14 6. Appendix ................................................................................................................ 15 Appendix A – Output Relay Configuration and Connections ...................... 16 Dry Contact ........................................................................................................ 16 Passive Solid-State........................................................................................... 17 Active Solid-State ............................................................................................. 17 Appendix B – Product Specifications (IP1-STD) ............................................ 18 Appendix C – iPulse Quick Start Guide ........................................................... 19 12/6/2012 4 iPulse® Installation and User Guide 1. About iPulse® IP1-STD The iPulse® provides an automatic external means to reset an electronic device that has malfunctioned due to various internal or external events. This document details installation, basic operation, device connection and LED indicators of the VideogeniX iPulse® IP1-STD device. iPulse® Model Model IP1-STD Operating Modes Intelligent Mode or Timed 12 Hour Power Connector 5-24VDC/VAC Note: The IP1-STD supports devices with a dry contact, passive or active solid-state output relay. ! Caution: iPulse is not weatherproof. When connected to an outdoor camera Please make sure it is protected inside weatherproof enclosure. Do not open iPulse® or all warranties will be voided. ! WARNING: To prevent fire or shock hazard, do not expose the unit to rain or moisture. To avoid electrical shock, do not open the unit. Refer servicing to qualified personnel only. Operating Modes The iPulse®-STD operates in one of two modes, Intelligent Reset Mode and Timed Reset Mode. iPulse® automatically detects the operating mode by monitoring the I/O Detect input. If iPulse® detects a change in the I/O Detect input, it will enter the Intelligent Reset mode. Otherwise, iPulse® will remain in Timed Reset mode. You can choose to use Timed Mode by twisting the I/O Detect wires together and securing them with the included wire nut. Intelligent Reset Mode The Intelligent Reset Mode monitors an output on the device being protected or on another device that can signal lockup. The output signal on the device is commanded by the iPulse Manager Software or other network software designed to support iPulse. When iPulse detects the loss of acceptable communication, after a pre-determined detection period, it power cycles the protected device and enters fault mode (Red LED Flashes). Generally, power cycling a device restores it to normal operation. After three (3) consecutive failed power cycles to restart the device, iPulse® goes into STANDOFF fault mode and only attempts to restart the the protected device after a four 4 hour STANDOFF period (RED and GREEN LED flash). At any time within STANDOFF mode, if the device starts operating correctly, iPulse immediately returns to normal (non-fault) mode (LEDs stop flashing). Timed Reset Mode The Timed Reset Mode, simply cycles power on the protected device once every 12 hours. When used in Timed Reset mode, iPulse connects directly inline with the device’s power, does not use the I/O Detect Cable (black and brown leads) and does not require any remote commanding software (in this case the toggle wires should be twisted together using the included wire nut). Note: If Timed Reset Mode is used on a PTZ camera, the camera will typically reset to its home position upon reset. For this reason, we recommend using Intelligent Reset Mode whenever possible for PTZ cameras. Relay Types 12/6/2012 5 iPulse® Installation and User Guide When operating in Intelligent Reset Mode, the iPulse monitors an output from your camera or other communication device. These outputs come in various forms. The iPulse has been developed to support Dry Contact, Passive Solid-State and Active Solid State relay types and standard line driven serial communication types such as rs232 and 485. Please refer to device compatibility document (040-000005-001) to ensure the I/O Detect Cable is connected correctly for your device’s relay type. Please refer to Appendix A if your camera is not listed or if you need more information regarding the various output relay types, When connecting to the Tx pin of a line driven serial output make sure that the appropriate communication protocol is set up. (If hardware controls are not in use make sure they are disabled on the serial output device so serial output will not be prevented due to lack of control signal) 12/6/2012 6 iPulse® Installation and User Guide 2. Package Contents The IP1-STD contains the following components: IPulse IP1-STD Components (095-00002-001) Item Qty Description 1 1 iPulse® IP1-STD 2 1 Wire nut 3 1 Quick Start Guide 1 2 3 Figure 1. iPulse IP1-STD Package Contents. Note: If any parts are missing, please contact VideogeniX for replacement. 12/6/2012 7 Part Number 084-00001-001 029-00001-001 040-00005-001 iPulse® Installation and User Guide 3. Installation Steps 1. Check the package contents against the chart above, 2. Select Operation Mode 3. Install Hardware Timed Reset Mode Intelligent Reset Mode 4. Download software and manuals from VideogeniX Web Site 5. Read LED Operation instructions 6. Install Software – see iPulse Manager Software Manual 12/6/2012 8 iPulse® Installation and User Guide 4. Hardware Installation The hardware installation depends upon the desired operating mode. If the Timed Reset Mode is desired, follow the steps in section 4.A. If the Intelligent Reset Mode is desired, follow the steps in section 4.B. 4. A. iPulse® Timed Reset Mode Installation (IP1-STD) The Timed Reset Mode connections are shown in Figure 2. Figure 2: iPulse® IP1-STD – Timed Mode Installation 1. If your device’s power input jack does not match the adapter plug supplied with the iPulse proceed to step 5. 2. Connect the power from the transformer to the power input in the iPulse. 3. Connect the output power plug from the iPulse to input power jack of your device. 4. Proceed to step 10. 5. Disconnect the adapter plug attached to the iPulse output power by unscrewing the two pin terminal connectors. 6. Plug the disconnected adapter into the power input jack of the iPulse. 12/6/2012 9 iPulse® Installation and User Guide 7. Leaving at least six inches of slack, cut the power plug adapter from your device’s transformer. 8. Connect the wires coming from the transformer to the two pin terminal strip that is now plugged into the iPulse (If you don’t know the polarity of the wires check the voltage from the transformer on the transformer’s wires with a voltmeter) 9. Connect the power plug that came from your transformer to the output power wires (using the provided wire nuts) of the iPulse (the red/black cable is positive and the orange/black is negative and should be wired back to the jack keeping the positive connection positive and the negative connection negative). 10. Do not connect the black and brown I/O Detect wires. Instead, twist wires together with provided wire nut. 11. No iPulse Manager Software installation is necessary. 12. The Yellow LED should flash about once per second and the Green LED will be on indicating the iPulse has Power. The RED led should remain off. Your iPulse STD is now connected in Timed Mode. Your protected device should be operating and power reset once every 12 hours. Figure 2.b: iPulse Wire Color Diagram 12/6/2012 10 iPulse® Installation and User Guide 4. B. iPulse® Intelligent Reset Mode Installation - (IP1-STD) Operating the iPulse® Intelligent Reset Mode requires an output connection to the protected device via the I/O Detect cable. Figure 3 illustrates the typical connections for Intelligent Reset Mode ! Warning- If Intelligent Reset Mode connection is incorrect and iPulse® does not detect I/O communication, iPulse will remain in Timed Reset Mode and re-start your device once every 12 hours (yellow LED flashes once/second). Figure 3: Connection for iPulse® STD in Intelligent Reset Mode 1. If your device’s power input jack does not match the adapter plug supplied with the iPulse proceed to step 5. 2. Connect the power from the transformer to the power input in the iPulse. 3. Connect the output power plug from the iPulse to input power jack of your device. 4. Proceed to step 10. 5. Disconnect the adapter plug attached to the iPulse output power by unscrewing the two pin terminal connectors. 6. Plug the disconnected adapter into the power input jack of the iPulse. 7. Leaving at least six inches of slack, cut the power plug adapter from your device’s transformer. 8. Connect the wires coming from the transformer to the two pin terminal strip that is now plugged into the iPulse (If you don’t know the polarity of the wires check the voltage from the transformer on the transformer’s wires with a voltmeter) 12/6/2012 11 iPulse® Installation and User Guide 9. Connect the power plug that came from your transformer to the output power wires (using the provided wire nuts) of the iPulse (the red/black cable is positive and the orange/black is negative and should be wired back to the jack keeping the positive connection positive and the negative connection negative). 10. Locate your device in the device compatibility document (040-000005-001). For the latest Camera/Device Chart visit www.videogenix.com. If your device is not listed, please refer to Appendix A for proper I/O Detect connection. 11. Connect the Solid Brown (+) Detect wire to the I/O terminal specified for your device. 12. Connect the Solid Black (-) I/O Detect wire to the I/O terminal specified for your device. 13. Connect the power output pin from the iPulse to the Power input on your device. Use the supplied plug adapter that matches the power input to your device. Make sure plug adapter’s positive (“+”) marking is aligned with sockets “TIP” marking (see figure 2 above) 14. Connect the power from the transformer to the power input in the iPulse. If the power input pin does not match use the Universal input connector provided. 15. Add your device’s configuration to the iPulse Manager Software or Network video recording (NVR) software (See iPulse Manager Software installation in CD-ROM). Note 1: Connection polarity MUST be observed for all devices. Figure 3.b: iPulse Wire Color Diagram 12/6/2012 12 iPulse® Installation and User Guide 4.C. iPulse Wired to relay to switch an isolated external power supply (Recommended OMRON LY1F) The Omron LY1F is an example of a readily available relay that can be used to enable the iPulse to cycle power on higher/multiple isolated voltages so that the iPulse software and hardware can watchdog devices beyond the scope of its low power design. The watchdog shown is a single pole double throw (SPDT) device (you may choose a multiple throw device such as the LY2f if you want to support more than 1 isolated power supply). A variety of models of the LY1F relay are available to support a variety of input power options (12VDC, 24VDC, 24VAC). The following 2 steps describe the wiring configuration for an isolated power supply implementation. Whenever you implement a design with a relay you should select a relay with very low energization specs. 1. As shown above, Pins 7 and 8 should be wired to the switched output voltage from the iPulse. Pin 7 should be wired to the orange cable with black stripe (-Vout) and Pin 8 of the LY1f should be wired to the red cable with black stripe (+Vout). Whenever the iPulse energizes its output power, it will energize the relay and the relay will connect pins 3&4 (Normally open) to pins 5&6. 2. You can then place the positive or hot lead of the isolated power source that you want the iPulse hardware to cycle across pins 5&6 and Pins 3&4 of the relay. When the iPulse energizes the relay pins 5&6 will be shorted to pins 3&4. When iPulse drops its output voltage the LY1F (or other such relay) will open the circuit across pins 5&6 and pins 3&4 thus de-energizing the power source. 12/6/2012 13 iPulse® Installation and User Guide 5. iPulse® LED Operation - (IP1-STD) LED Operation The iPulse® IP1-STD has three LEDs that define its state of operation. The picture and descriptions below detail LED operation. Figure 4: iPulse® STD – LED Operation LED Operation Green LED – Device Power Indicator ON : iPulse Output Power On to Device OFF : iPulse Output Power Off to Device (On device reboot for 5 secs) Flashing : Four Hour Standoff Mode, (after 3 consecutive reboots failures) Yellow LED – Communication/Signal Status Timed Mode : Flashes once per second Intelligent Mode : YELLOW LED will track command signal output Red LED – Operation Mode Indicator ON : Intelligent Mode, device operating as expected OFF : Timed Mode Flashing : Intelligent Mode, iPulse in fault mode 12/6/2012 14 iPulse® Installation and User Guide Timer Mode LED Operations RED ON OFF OFF YELLOW ON Flashing Flashing GREEN OFF ON OFF MODE Ipulse Power on cycle Normal Operation 5 Second Power Down Power Output OFF ON OFF MODE iPulse Power on cycle Normal Operation Fault Detection Phase 5 Second Power Down 4 Hour Fault Mode Power Output OFF ON ON OFF ON Intelligent Mode LED Operations RED ON ON FLASHING FLASHING FLASHING 12/6/2012 YELLOW ON ON/OFF/FLASHING ON/OFF ON/OFF ON/OFF GREEN OFF ON ON OFF FLASHING 15 iPulse® Installation and User Guide 6. Appendix Appendix A – Output Relay Configuration and Connections (intelligent mode only) Output Relay Configuration The relay output configurations vary based on the manufactures design. Because of these variations, the iPulse® I/O Detect input needs to operate in one of three ways. Refer to your device user manual for more information regarding the output relay configuration to your device. The following diagrams show proper connection to a device that is being run in iPulse intelligent mode and should be referenced in instances where the included device chart does not specify the output pins or terminals to be used when connecting to iPulse. Dry Contact The first and most common method requires the iPulse to supply current to the dry contacts of a relay. This configuration is shown in Figure 5. brown Camera Dry Contact black I/O Detect Cable Figure 5: Dry Contact Relay I/O Detect Connection 12/6/2012 16 iPulse® Installation and User Guide Passive Solid-State The second method is similar, requiring the iPulse to supply current to an open collector output transistor. This configuration is shown in Figure 6. brown Camera Open Collector Relay black I/O Detect Cable Figure 6. Passive Solid-State Relay I/O Detect Connection Active Solid-State The third and least common method is the emitter follower where the device output supplies the current used for detection. This configuration is shown in Figure 7. brown + + Volts Camera Solid State Sourcing Relay black - I/O Detect Cable Figure 7: Active Solid-State Relay I/O Detect Connection 12/6/2012 17 iPulse® Installation and User Guide Appendix B – Product Specifications (IP1-STD) Power Cable Options Transformed Y cable Power Requirements Input Voltage Operating Current : : 5 to 24 VDC : 5 to 24 VAC : 12 ma Switch Ratings Max Switching Current : 5 Amps Continuous Current : 2 Amps I/O Detect Input Input Voltage Threshold : -25VDC to +25VDC : +1.9 VDC Timer Mode Reset Cycle : 12 Hours Power reset period : 5 Seconds Environmental Temperature Humidity : 0 to 158 Degrees F : 5 to 95 % non-condensing Enclosure Dimensions : 1.97” x 1.38” x 0.79” : 50mm x 40mm x 20mm 12/6/2012 18 iPulse® Installation and User Guide Appendix C – iPulse Quick Start Guide 12/6/2012 19