1
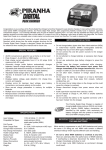
Page 1 Content General Guidelines & Precautions……………………………………………………………………….…..……6 1. Outlook………………………………………………………………………………………..……………9 2. Key Features of 550HD+WiFi………………………………………………………………………..…………....9 3. What’s in the Kit?..............................................................................................................9 4. The Remote Control………………………………………………………………………………….………….…...11 5. The Set Top Box……………………………………………………………………….………………………………….12 6. Initial Connections………………………………………………………………………………………………….…...12 7. Connecting to Power…………………………………………………………………………………….……………..13 8. Initial Boot……………………………………………………………………………………………………………….….13 9. The Setup Wizard Visual Guide………………………………………………………………..……………….…13 Step 1 – setup language……………………………………………………………………….………………….….13 Step 2 – Video Standard………………………………………………………………………………………………14 Step 3 – Video Connector…………………………………………………………………………………….……..14 Step 3.1 - Connecting to HDMI input…………………….………………………………………….…..14 Step 3.4 - Connecting to Composite (also known as RCA) input………..…………..………16 Step 3.5 - Connecting Audio Inputs to the 550HD+WiFi ………………..…………….……..16 Step 4 - Display Mode…….……………………………………………………………………………….………….16 Step 5 - Scan Mode………………………………………………………………………………………..…………..17 Step 6 - Aspect Ratio………………………………………………………………………………………………..…17 Step 7/8 – Video Settings Test………………………………………………………………………..………….18 Step 9 – Network Connection………………………………………………………………………….………….18 Step 9.1 - LAN - Wired Home Network…………………….………….……………………………..…19 Step 9.2 - Wi-Fi - Wireless Home Network…………………..……….………………………….……19 Step 9.3 - PPPoE - Point-to-Point Protocol over Ethernet….….……………………….……..19 Step 10 – Network Name (Wi-Fi Network)…………………………………………………..…………….20 Step 11 - Network Name (Wi-Fi Network name, manual insertion)………….………….…….20 Step 12 - Network Security (Wi-Fi Network)………………………………………………………….……21 Step 13 - Network Security Key (Wi-Fi Network)………………………………………………….…….21 Step 14 - PPPoE User name & Password…………………………………………………………………….21 Step 15 - Network Test………………………..…………………………………………………………………….22 Step 16 - Network Test Fail……………………..…………………………………………………………………22 Step 17 - Setup Completed…………………………………………………………………………………………23 10. Advanced Setup – Network Settings…………………………………………………………………….……23 Step 1 - Defining Network Type………………………………………………………………………………….23 Step 2 - Defining Wireless Network……………………………………………………………………..…….24 Step 3 - Defining Wi-Fi Security Mode………………………………………………………..……….……..25 Step 4 - Video Configuration - Defining Video Outputs……………………………………………….26 Step 5 - Audio Configuration - Defining Audio Inputs………………………………………………….27 Step 6 - Saving Setup Information – Exit Mode…………………………………………………………..27 11. Inputs / Outputs………………………………………………………………………………………………………….28 12. Specifications………………………………………………………………………………………………………….….29 Page 2 General Guidelines & Precautions This symbol is intended to alert the user to the presence of uninsulated dangerous voltage within the product’s enclosure that may be of sufficient magnitude to constitute risk of fire or electrical shock This symbol is also intended to alert the user to the presence of important operating and maintenance instructions in the literature accompanying this product. Important Safeguards Please read all of these instructions regarding your IP STB and retain this guide for future use. Observe and comply with all warnings, cautions and instructions placed on the product, or described in the operating instructions. Page 3 General Guidelines & Precautions WARNING To reduce the risk of fire or shock hazard, do not expose the product to rain or moisture. To guard against injury, the following basic safety precautions should be observed in the installation, use, and servicing of the product. Power Sources This product should be operated only from the type of power source indicated on the marking label. If you are not sure of the type of electrical power supplied to your home, consult your dealer or local power company. Overloading Do not overload wall outlets, extension cords or convenience receptacles beyond their capacity, since this can result in fire or electrical shock. Object and Liquid Entry Never push objects of any kind into the product through the slots as they may touch dangerous voltage points or short out parts that could result a fire or electrical shock. Never spill liquid of any kind on the product. Attachments Do not use attachments not recommended by the manufacturer, as they may cause hazards. Cleaning Unplug this product from the wall outlet before cleaning. Do not use liquid cleaners or aerosol cleaners. Use a cloth dampened with water for cleaning. Water and Moisture Do not use this product near water—for example, near a bathtub, washbowl, kitchen sink, or laundry tub, in a wet basement, or near a swimming pool, etc. Accessories Do not place this product on a unstable cart, stand, tripod, bracket, or table. The product may fall, causing serious injury to a child or adult and serious damage to the product. An appliance and cart combination should be moved with care. Quick stops, excessive force, and uneven surfaces may cause the appliance and cart combination to overturn. Ventilation Slots and opening in the cabinet are provided for ventilation and to ensure reliable operation of the product to protect it from overheating. These openings must not be blocked or covered. The openings should never be blocked by placing the product on a bed, sofa, rug, or other similar surface. This product should not be placed in a built-in installation such as a bookcase or rack unless proper ventilation is provided or the manufacturer’s instructions have been adhered to. Page 4 Power-Cord Protection Do not allow anything to rest on or roll over the power cord, and do not place the product where the power cord is subject to wear or abuse. Servicing Do not attempt to service this product yourself as opening or removing covers may expose you to dangerous voltage or other hazards. Refer all servicing to qualified service personnel only. Damage Requiring Service Unplug the product from the wall outlet and refer servicing to qualified service personnel under the following conditions: •When the power cord or plug is damaged or frayed. •Liquid spilt into the product. •Exposure to rain or water. •Subjection to excessive shock by being dropped, or the cabinet has been damaged. •If the product does not operate normally when following the operating instructions, then adjust only those controls that are covered by the operating instructions. An improper adjustment of other controls may result in damage and will often require extensive work by a qualified technician to restore the product to its normal operation. •When the product exhibits a distinct change in performance -- this indicates a need for service. Replacement Parts When replacement parts are required, be sure the service technician certifies in writing that he has used replacement parts specified by the manufacturer that have the same characteristics as the original parts. Unauthorized substitutions may result in fire, electric shock, or other hazards. Heat The product should be situated away from heat sources such as radiators, heat registers, stoves, or other products (including amplifiers) that produce heat as well as direct sunlight. If the product experiences sudden changes in temperature, moisture may form inside the product. Customer Care Please refer to your IPTV subscription provider for customer care information, hours of operation, and technical support. Page 5 1. 550HD+WiFi Outlook Peer TV‘s 550HD+WiFi is an advanced Internet TV STB supporting a range of streaming protocols and codec formats , allowing close replication of the broadcast experience over the Internet at the highest quality possible. The 550HD+WiFi STB is designed to run a wide range of Internet TV applications, developed either through use of its optional SDK, or provided by Peer TV (the MX Internet TV Client-Server software solution). For more instructions on either the SDK or the MX applications, please refer to the appropriate manual. The following manual covers all necessary procedure to connect start-up and configure the 550HD+WiFi STB. For further support on these steps, you may use the address and communication guidelines provided in section ___ Service provider details. 2. Key Features of 550HD+WiFi Can be configured to decode MPEG-1/2, H.264, WMV9 and MPEG4 (DivX) in D1 and HD resolutions, up to 1080p. Extensive support for WMV, MMS and RTSP streaming and for H.264 streaming via HTTP and RTSP (ISMA 2.0) streamers. HDMI 1.2 and Component ports for true HD out, Composite, S-Video for SD (all comply with PAL /NTSC). Stereo RCA Audio, Digital Audio via optical S/PDIF. Ethernet LAN port Optional external Wi-Fi 802.11b/g/n for high performance home networking (availability of the wireless interface depends on the option ordered). Please read the following instructions regarding your IP STB and retain this guide for future use. Observe and comply with all warnings, cautions and instructions placed on the product, or described in the operating instructions. 3. What’s in the Kit? 550HD+WiFi Set Top Box WiFi Antenna (Optional, depends on the option ordered) Ethernet Cable RJ45 cat. 5 Power Adapter A/V Cable Remote Control + 2 AAA Batteries CD with electronic copy of the Quick Installation Guide, User Manual, and additional technical documentation you may find necessary. Page 6 Page 7 4. The Remote Control (Note that some keys usage is application dependent. Please refer to the application user manual for further instructions) 01 Power On / Off 02 STB set-up 03 Subtitles (currently not in use) 04 Zoom 05 Display (Aspect Ratio) 06 Play Mode 07 Visualization 08 Channel Up / Dow 09 Volume Up / Down 10 Mute 11 Main 12 Compass Rose (Main navigation) 13 Back 14 Color Keys: Blue - Menu Green – Full Screen Yellow - Options / Smart Buffering 15 Page Up / Down (Scroll) 16 Information 17 Numeric / Text Input 18 Back Space (Delete) Page 8 5. The Set Top Box The following images illustrate the main parts of the 550HD+WiFi STB (front view and back panel view). Front Panel back-panel connectors Rear panel 6. Initial Connections Initial Connection of the STB to the TV Initially you should use the yellow (Composite) connector of the bundled A/V cable to connect the STB to the TV, Please follow the following image to identify the proper connector. Connect the other side of the yellow connector of the AV cable to the matching Video inputs on your TV set (Matching Composite input). You may connect the white and red audio connectors as well between the STB and the TV (or audio system). However it is not necessary at this stage (and may replaced by SPDIF connection later on – see later section) Page 9 7. Connecting to Power Please turn on the TV, before powering up the 550HD+WiFi, and switch to the Composite video channel. Plug one end of the power adapter into the +12v socket at the rear of the device and the other end into the electrical socket. On your TV you should see splash screen illustrated next: →SPALSH SCREEN In about 5-7 seconds, the Splash screen changes to the system start-up screen, indicated through a progress bar, illustrated next: →BOOT Sequence 8. Initial Boot After completing the TV & power connections the system is ready for initial setup. You will be guided on screen through a series of simple states, to complete the setup procedure. Please follow the printed guide (next section) as well, for more visual assistance. 9. The Setup Wizard Visual Guide Please follow the numbers on the bottom right of the screen to go through the Setup wizard steps. (This setup is required only on first time power up of 550HD+WiFi). Page 10 1 Step – setup language Please select the preferred setup language. To navigate through options, use the right/left arrows on the remote control and click OK to select. Step 2 – Quick Start Guide Manual 3 Step – Video Standard Most current TVs can play both types NTSC (US) or PAL (Europe), Please check your TV vendor‘s specifications to find out the video standard it supports. To navigate through options use the right/left arrows on the remote control and click OK to select. Page 11 4 Step – Video Connector Please check your TV vendor‘s specifications to find out the available video inputs. The preferred choice should be HDMI (best quality), then (next preference) Component, S-Video and then Composite. To navigate through options use the right/left arrows on the remote control and click OK to select. Page 12 Step 4.1 - Connecting to HDMI input Connect the HDMI cable to the HDMI connector at the rear of the device. HDMI Connector Connect the other side of the cable to the matching HDMI input on your TV set. Step 4.2 - Connecting to Composite (also known as RCA) input Connect the Yellow, plug in the AV cable to the matching sockets at the rear of the device. Connect the other side of the AV cable to the matching Video input on your TV set (Matching Yellow input). Composite connectors Page 13 Step 4.3 - Connecting Audio Inputs to the 550HD+WiFi – 550HD+WiFi offers three options to connect audio to 550HD+WiFi: HDMI: includes audio connection, so no need to connect additional cables (unless your intend to use audio system not part of your TV, for which you should use the following options) RCA Stereo: White and Red cables connecting stereo out of the 550HD+WiFi to the Stereo in of your audio system SPDIF Digital Audio: (Optical or Coax, depending on 550HD+WiFi Model): use special cable needed for such connection to link the 550HD+WiFi Audio Out to your audio system 5 Step - Display Mode Please check your TV vendor‘s specifications to find out the available display modes. To navigate through options use the right/left arrows on the remote control and click OK to select. The following display modes are available: (Starting from Best quality) Full HD - Full High Definition – (1080p / 1080i) HD Ready – High Definition – (720p) SD - Standard Definition – (480p / 480i) Step 6 - Scan Mode (Non-Available) 7 Step - Aspect Ratio Please check your TV vendor‘s specifications to find out the available aspect ratio modes. To navigate through options use the right/left arrows on the remote control and click OK to select. The following Aspect Ratio modes are available: Wide 16:9 – Wide Screen Standard 4:3 – Normal Screen Page 14 8 Step – Video Settings Test In this step the selected video settings will be tested. Click OK when ready for the test. Use your TV remote control to select the chosen input to your TV set. If you see the wizard‘s countdown after switching to the chosen input click OK to finish the test, if nothing displays on screen switch back to the previous TV input and wait till the countdown is finished then click Back ,check the settings and connections and run the test again. Page 15 9 Step – Video Settings Test Press OK to continue. 10 Step – Network Connection To navigate through options use the right/left arrows on the remote control and click OK to select. Step 10.1 - LAN - Wired Home Network Connect the local network cable (supplied in the package) to the Data socket at the rear of the device, and plug the other end to a free network LAN port. Page 16 Step 10.2 - Wi-Fi - Wireless Home Network Plug the Wi-Fi dongle to one available USB port on the left side of the device. Step 10.3 - PPPoE - Point-to-Point Protocol over Ethernet In case of direct connection of 550HD+WiFi to the ADSL router, PPPoE mode is needed. Connect the local network cable (supplied in the package) to the Data socket at the rear of the device, and plug the other end to a free network PPPoE port. Page 17 Next: 11 Step – Select Your Network (Wi-Fi Network) To navigate through available networks use the right/left arrows on the remote control and click OK when you find your network (check your router‘s network settings to find out the name). If not found (can happen when network is in hidden mode) use the right arrow till ―manual‖ appears and click OK. 12/13 Step - Network Security (Wi-Fi Network) Click YES if your network is secured, click NO if not secured. (check your router‘s network security settings). Page 18 14 Step - Network Security Key (Wi-Fi Network) Use the remote control‘s keypad to insert your Network Security Name (check your router‘s network settings to find out the key).click OK when finished. →You will now be transferred to step 15 (network test) 14 Step - PPPoE User name & Password Use the remote control‘s keypad to insert your User Name (check your router‘s network settings to find out the user name).click OK when finished. Page 19 Use the remote control‘s keypad to insert your Password (check your router‘s network settings to find out the password).click OK when finished. 15 Step - Network Test In this step the selected network settings will be tested. Click OK when ready for the test, the test will provide you with Pass or fail result. 16 Step - Network Test fail If one of the tests fails please click NO, check the settings and connections and run the test again. If you choose to continue you will have to change the settings later in order to get the service. Page 20 17 Step - Setup Completed The setup up is completed, when choosing YES the settings will be saved. If NO is chosen the settings will not be saved and in the next reboot the 550HD+WiFi will be running with the previous settings. Page 21