1
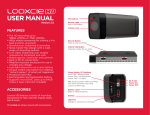
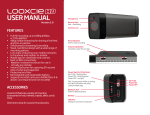
User Manual for Android
Model: LX1
Thank You for Purchasing Looxcie
Please read this user manual carefully before using Looxcie
Register Your Looxcie
To get important product updates, be sure to register your Looxcie at www.looxcie.com/support.
Customer Support
Visit www.looxcie.com/support or call 1-855-LOOXCIE if you need more help.
2
Contents
Looxcie Controls Overview
5
Creating Clips
21
6
Instantly Sharing Clips While Recording 24
Getting Started
7
Previewing Clips
25
Charging Looxcie
7
Sharing Clips
26
Downloading the Looxcie App for Android
8
Editing the Clip Title
27
Pairing Looxcie to Your Smartphone
9
Deleting Clips
27
Transferring Clips to Computer
28
Deleting All Clips
28
Viewing Video
29
Deleting Video
29
Basic Looxcie Controls
Adjusting the Fit
11
Why Fit Matters
11
Personalizing the Fit of Looxcie
12
Pointing Looxcie Where You Look
13
Recording Level Video
13
Let’s Start Recording with LooxcieCam
14
Recording Video with LooxcieCam
15
Previewing Your Clips
16
Saving Clips to Your Phone
17
Deleting Clips from Looxcie
17
Let’s Start Recording with LooxcieMoments
Recording Video with LooxcieMoments
18
19
Changing Settings and Configuring
Instant Share Updating Firmware with LooxcieDesktop
30
32
What Is LooxcieDesktop?
32
Upgrading Firmware with LooxcieDesktop
33
Saving Clips and Video to Your Computer from Looxcie
33
Take or Make a Call
34
Looxcie Specifications
35
3
At a Glance
Learn about your Looxcie camcorder
Package Contents and Accessories
Looxcie Camcorder
USB Power Adapter
USB Cable
Earbuds (small, medium, and large)
Record and share life’s
Plug into the wall to charge the
Either plug into the power
Try out the medium earbud that’s
unexpected moments.
camcorder.
adapter or a computer to charge
already on Looxcie. If it doesn’t feel
the camcorder.
snug or secure, choose another
Tip: Looxcie charges more quickly
via the USB Power Adapter and
size.
when Looxcie is turned off.
4
Looxcie Controls Overview
Bendable Earloop
Record Button
Camcorder Boom
Camcorder Lens
Record Light (Red)
Volume Button
Micro USB Connector
Rotating Earpiece
Instant Clip Button
Power/Call Control Button
Indicator Light (Green)
5
Basic Looxcie Controls
Record button
Press to start recording.
Power/Call Control button
Press and hold for five seconds to turn on Looxcie.
Press and hold for five seconds to turn off Looxcie.
Press to answer an incoming call.
Press to end a call.
Instant Clip button
Instant Clip: press to save the last 30 seconds of video.
Instant Clip & Share: press and hold for two seconds to save and
instantly send the last 30 seconds of video to a favorite.
Go to Settings in the LooxcieMoments App to set up your Instant
Share favorites. See Sharing Shortcuts on page 30 for more
information.
Volume button
Raise the volume with a single touch. Once the
volume reaches its highest level, it starts again at the
lowest level.
6
Getting Started
Using your new Looxcie
Charging Looxcie
It’s best if you charge Looxcie for two hours before using it the first
time. Please don’t wear Looxcie while it’s charging. You’ll know Looxcie
is fully charged when the Indicator light on the underside of the boom
stops flashing and turns off.
Tip: For faster charging, keep Looxcie turned off while charging.
Using Power Adapter
Plug one end of the USB Cable into the Micro USB Connector on
Looxcie and the other end into the USB Power Adapter. Then plug the
Indicator light (green)
Flashes green while charging.
Stays green when almost
fully charged and turns off
when fully charged and
plugged in.
Pulses green when Looxcie
is on.
USB Power Adapter into a power outlet. The fastest way to charge
Looxcie is to turn it off and use the Power Adapter.
Using Your Computer
Plug one end of the USB Cable into the Micro USB Connector on
Looxcie and the other into the USB Socket on your computer.
Record light (red)
Glows red while recording.
7
Downloading the LooxcieCam and
LooxcieMoments Apps for Android
To view, edit, and share Looxcie videos, you’ll need to download the LooxcieCam
or LooxcieMoments App to your Android phone. Turn on your smartphone, launch
your smartphone web browser, and download the app from www.looxcie.com/m.
Download the LooxcieCam and/or
LooxcieMoments App to your smartphone
8
Pairing Looxcie to Your Smartphone
Like all Bluetooth®-enabled devices, you must pair Looxcie to your phone so they
can communicate. We recommend pairing Looxcie with your phone after you have
fully charged Looxcie and downloaded the LooxcieCam or LooxcieMoments App.
Indicator light (green)
Record light (red)
Pairing Looxcie for the First Time
Enter pairing mode
Press the Power/Call Control button for 5 seconds to turn on Looxcie.
Power/Call Control button
If it’s the first time you’ve turned Looxcie on, it will enter pairing mode
automatically (the green Indicator light and red Record light will flash).
Volume button
If Looxcie doesn’t go into pairing mode, hold and press the Volume and
Power/Call Control buttons at the same time until the Indicator light (green)
and Record light (red) start flashing.
Turn on Bluetooth (on your phone)
On most phones, you turn on Bluetooth in Settings. You’ll likely find the
Bluetooth feature in one of the following places, though it varies by phone:
Settings>General>Bluetooth
Settings>Tools>Bluetooth
Settings>Wireless & Networks>Bluetooth Settings>Scan for Devices
If you need more help, try looking in your phone’s user manual.
Turn on Bluetooth (on your phone)
9
Choose Looxcie when your phone shows search results
Your phone should show which Bluetooth-enabled devices are already paired with
it as well as any other close-by Bluetooth-enabled devices, including your Looxcie.
Select Looxcie to pair it with your phone. If you need a PIN or passkey, enter
“0000”.
When your Looxcie and phone are successfully paired, the Record light (red) will
turn off and the Indicator light (green) on your Looxcie will pulse every three
seconds. Your phone will also list Looxcie under Bluetooth devices and note that it’s
paired and connected.
Manually Pair Looxcie (if it has been previously
paired)
Displaying search results
Make sure Looxcie is turned on. Enter the pairing mode manually by pressing and holding
the Volume and Power/Call Control buttons at the same time until the Indicator light
(green) and Record light (red) start flashing.
Follow the same steps as above: turn on Bluetooth on your phone and then choose
Looxcie from the phone’s search results. If you need a PIN or passkey, enter “0000”.
PIN/Passkey:
0000
Tip: Check your phone’s user manual for more information on pairing devices with your
phone.
10
Adjusting the Fit
Personalize the fit of your Looxcie so that it’s stable, comfortable, and records video that’s level
Camcorder Boom
Gently rotate to make video level.
Why Fit Matters
Every head and ear is different – so you’ll need to
Rotating Earpiece
Looxcie can be worn on either ear by
rotating the earpiece. Be sure to rotate
the earpiece toward the front and be
careful not to over rotate.
personalize Looxcie’s fit to make it just right for you. If
you fit it correctly, it’ll be snug in your ear and record
video that’s level.
Bendable Earloop
Twist, turn, and shape to fit Looxcie
securely and comfortably on your ear
and to point it where you look.
11
Personalizing the Fit of Looxcie
Here are some tips to get you started.
Take the time to personalize Looxcie.
Fit is everything with Looxcie. It may take
a few minutes to personalize your Looxcie.
When personalized, Looxcie will be stable,
comfortable, and ready to record everything you
see.
Decide whether you’ll wear Looxcie on
your left or right ear. Then turn the Rotating
Earpiece to fit the ear you want.
Choose the correct earbud. Make sure the
earbud is snug and secure. If it isn’t, try a smaller
or larger earbud.
Slide Looxcie over your ear. Starting with
You can move Looxcie around with different twists, bends, and turns to fit it
the bottom of the earloop, slide Looxcie gently
comfortably and securely on your ear. When Looxcie fits correctly, it won’t move when
around your ear.
you shake your head. You may need to take Looxcie off your ear, adjust it, and then put
it back on a few times before it fits perfectly.
Bend the earloop. If you have a small ear, try
bending the earloop down for a snug fit.
For more help, see our Adjust the Fit Video at:
www.looxcie.com/how-looxcie-works.html.
12
Pointing Looxcie Where You Look
• If Looxcie is pointing up, hold the back of the earloop and push the Camcorder Boom
When you’re done personalizing your Looxcie fit,
it may look something like this:
down.
• If Looxcie is pointing down, hold the back of the earloop and push the Camcorder
Boom up.
• If Looxcie is pointing to the side, hold the back of the earloop and push the
Camcorder Boom until it lightly touches your cheek.
Recording Level Video
Start the LooxcieCam or LooxcieMoments App and record some video. Use the
Viewfinder on your smartphone to make sure the video is level. If it’s not level, you can
simply turn the boom until the video is level.
Roll adjustment on Camcorder Boom
To get more help on getting your Looxcie to fit
just right, view the Adjust the Fit video.
13
Let’s Start Recording with LooxcieCam
Take full-motion 480p video to preserve your memories
LooxcieCam Viewfinder
With LooxcieCam you can:
Use LooxcieCam with your
Looxcie camcorder to:
•• Record one hour of 30 fps video in full 480p
•• Use your phone as a viewfinder
See what you’re
recording
Preview your
clips
Change your
settings
•• Transfer and save recorded video to your
phone or computer
14
Recording Video with LooxcieCam
It’s easy to start recording with the LooxcieCam App.
• Launch LooxcieCam on your phone.
• Press and release the Record button on Looxcie or tap the
button on the App’s Viewfinder.
You’ll know you’re recording when you see:
• Solid red
button.
• Flashing red “Rec” light on the upper left of the Viewfinder.
To stop recording, press and release the Record button on Looxcie or tap the
on the App’s Viewfinder. Looxcie automatically saves your
recording as a clip. Preview recorded clips by tapping Clips.
You may want to check that your video is level and aimed correctly using the Viewfinder. If it’s not, simply adjust Looxcie until the video is level and
aimed correctly.
Tip: The timer in the upper right corner of your Viewfinder shows how many more minutes of video you may record.
Looxcie automatically adjusts for different light levels. It’s easy to adjust the light mode manually. Just press the Light Mode indicator on the bottom
left of the App Viewfinder.
Sun
Night
Backlight Fluorescent
Incandescent
15
Previewing Your Clips
To preview a clip:
• Tap Clips in the LooxcieCam App.
• Tap the clip you want to preview, then tap the
button.
When you preview clips on your phone, the playback will be choppy due to limited
Bluetooth bandwidth between Looxcie and your phone. Save the clips to your
phone or connect and save to your computer for high-quality playback.
Note: Clips created via LooxcieMoments will also appear on your Clips list. The
LooxcieCam clips are easy to spot — you’ll see “480p” on the thumbnails of
LooxcieCam clips.
Clips list
16
Saving Clips to Your Phone
It’s easy to transfer and save clips to your phone.
• Tap Clips in the LooxcieCam App.
• Tap the clip you want to save.
• Tap Save.
Note: Because LooxcieCam creates video clips in 480p that may be large, it may
take awhile to transfer and save them to your phone.
Deleting Clips from Looxcie
Clips list
• Go to Clips.
• Tap the clip you want to delete.
• Tap the trashcan.
• Tap Delete to confirm that you want to delete the clip.
Delete clip
17
Let’s Start Recording with LooxcieMoments
Record and share unexpected moments with the LooxcieMoments App for Android
Looxcie Viewfinder
With LooxcieMoments you can:
With LooxcieMoments you can:
•• Record up to five hours of video
•• Create 30-second instant clips
•• Instantly share clips with your favorites when
See what you’re
recording
Scroll through
and preview
clips you’ve
created
See all your
video and create
new clips
Control settings,
including setting
up Instant Share
favorites
LooxcieMoments is running
18
Recording Video with
LooxcieMoments
Loop Looxcie around your ear and turn it on with the Power/Call Control
button. Launch LooxcieMoments on your Android phone to see the Viewfinder
screen. Press the Record button on Looxcie or tap the
Record button
button on the
LooxcieMoments Viewfinder to start and stop recording.
Check that video is level
You can adjust Looxcie until the image is level in the Viewfinder. You can view
video in landscape or portrait mode.
Power/Call Control
button
Check light mode
Looxcie automatically adjusts for light levels as your environment changes. If you
want to manually change the light mode, press the Menu button on your Android
phone and then choose a different light mode.
Tip: Use the Back button on your smartphone to return to a previous screen in
LooxcieMoments.
Sun
Night
Backlight Fluorescent
Incandescent
19
Join the action!
Once you like what you see on the Viewfinder, you can put your smartphone to
sleep to save your battery. LooxcieMoments will keep running in the background.
Battery Indicator
Looxcie will record up to five hours of video before it loops back and records new
video over your oldest video.
Battery full
Tones you might hear while recording
Battery 75%
Power On
4 rising tones
Power Off
4 falling tones
Low Battery
2 low tones
Out of Range
Slow error tone
Bluetooth Connected
3 rising tones
Bluetooth Disconnected
3 falling tones
Answer Call
2 rising tones
End Call
2 falling tones
Instant Clip
Multiple tones
Instant Clip and Share
Multiple tones in long sequence
Start Recording
2 slow rising tones
Stop Recording
2 slow notes
Battery 50%
Battery 25%
Battery <10%
Battery empty
Charging
20
Creating Clips
You can create clips in two ways:
•• For instant clips of the last 30 seconds you recorded, use the Instant Clip button on Looxcie.
•• For clips up to 30 minutes in length from all your recorded video, simply use LooxcieMoments on your
phone.
Creating instant clips from Looxcie
To create an instant clip, press and release the Instant Clip button on the underside of the Camcorder Boom.
When your clip is saved, you’ll hear a rapid tone. LooxcieMoments will also show that you’ve made a clip.
Note: When you play clips in preview mode, they might be choppy. Don’t worry. When you email or post the
clips, they’ll be much higher quality.
Instant Clip button
Press and release to create
a clip from the last 30
seconds of video
Press and hold to create a
clip and instantly share it
with favorites
21
Creating clips from your Android phone
If you recorded video but didn’t save it as an instant clip, you can still make new clips up to 30 minutes in length from all your recorded video. There
are two ways to create clips from your phone: Quick Clips and Custom Clips.
Quick Clips: 30-second clips
Tap Video to see all the video you’ve recorded. Drag the pointer
to the place on the video
scrollbar where you want your clip.
Tap Quick Clip to create a 30-second clip around the place you’ve chosen. The clip will include 15
seconds before and 15 seconds after the location you’ve selected.
A text box will appear that says: “Make a 30-second clip around this point?” Tap Yes to create and
save the clip. Tap No to return to the video scrollbar.
To preview the clip, click the Back button on your phone and then tap the Play button.
22
Custom Clips: Clips up to 30 minutes
Set beginning of your new clip
To create a clip longer than 30 seconds, tap Custom Clip.
Tap the place on the video scrollbar where you want to start the clip. You can also use the video
controls (play, fast forward, and rewind) to find the place you want to start your clip.
Tap Set Start. The Start Clip icon
indicates the beginning of your new video clip.
Set end of your new clip
Drag the pointer with your finger or use the video controls to find the end point for your clip. Tap
Set End. The End Clip icon
marks the end of your new video clip.
Save and title your clip
Tap Save.
The Edit Title screen will appear.
Type a new title and tap Save or just tap Save to create a default title (time and date video
created). You can edit the title of a clip later by tapping on the Clip Details screen.
Tap View Clip to preview your new clip.
Tap Back to Video to return to the video screen.
23
Instantly Sharing Clips While
Recording
Press and hold the Instant Clip button on Looxcie until you hear a series of
tones. This signals that your 30-second clip is being created.
Next, the Share Clip screen will appear in LooxcieMoments, giving you
options for sharing the clip.
Instant Clip button
Choose a contact from the Share Clip screen or do nothing to send the clip to
your Instant Share favorite.
Go to page 30 to learn how to set up Instant Share and Sharing Shortcuts in
Settings.
Tip: You must have LooxcieMoments running on your Android phone and
connected to Looxcie to use the Instant Share feature. LooxcieMoments can
be running in the background.
Sharing clips
24
Previewing Clips
Tap Clips on LooxcieMoments. Clips are listed in
chronological order, with the most recent clip first.
Scroll with your finger to find the clip you want to
preview. Touch and hold its thumbnail or title to go to
the Clip Details screen.
To play the clip, simply tap
pointer
. You can drag the
along the scrollbar to play the clip from a
new place. When the clip finishes playing, you’ll return
to the Clip Details screen.
Clip details
When you preview clips, they might be choppy. When
you email or post the clips, they’ll be much higher
quality.
Clip list
25
Sharing Clips
Tap Clips on LooxcieMoments. Clips are listed in chronological
order, with the most recent clip first. Scroll with your finger to
find the clip you want to share. Touch its thumbnail or title to go
to the Clip Details screen. Tap the Share icon on the Clip Details
screen.
The Share Clip screen will show options for sharing your clip.
Select the sharing option you want to use to share your clip.
Depending on clip size, it may take 30 seconds to several minutes
for your smartphone to download the clip from Looxcie. During
this time, you will not see the live Viewfinder or be able to
navigate LooxcieMoments. You can, however, continue to record.
Clips waiting to be shared
If your smartphone does not have a network connection,
LooxcieMoments will queue the clip and send it later, when you
do have a connection.
Tap Share on
the Clip Details
screen
Clip too large
If your clip is too large to share, LooxcieMoments will let you
know. To share a large clip, connect Looxcie to your computer,
copy the clip to your computer via the provided USB Cable, and
then share it from there. See page 28 for help transferring clips
to your computer.
26
Editing the Clip Title
•• Tap Clips on LooxcieMoments. Clips are listed in
chronological order, with the most recent clip first.
•• Scroll with your finger to find the clip you want to edit.
•• Touch and hold its thumbnail or title to go to the Clip Details
screen.
•• Tap Edit on the Clip Details screen.
Deleting Clips
Tap Edit on the Clip
Details screen
•• Tap Clips on LooxcieMoments.
•• Scroll with your finger to find the clip you want to delete.
•• Touch its thumbnail or title to go to the Clip Details screen.
•• Tap Delete on the Clip Details screen.
Tap Delete on the
Clip Details screen
27
Transferring Clips to Computer
Plug one end of the USB Cable into the Micro USB Connector on Looxcie and
the other into the USB Socket on your computer. Your computer will see
Looxcie as a mass storage device (like a USB drive or a camera). Copy the clips
to your computer.
Deleting All Clips
•• Tap Clips on LooxcieMoments.
•• Press the Menu button on your Android phone.
•• Tap Delete All Clips from the menu that appears.
•• Click the box that says “OK to delete all clips.”
•• Tap Delete.
Delete all clips
28
Viewing Video
There are two ways to view video using LooxcieMoments: you can preview clips using the Clips tab or preview all your captured video using the Video
menu tab.
To preview all video, tap Video on LooxcieMoments. The date and time stamp shows when video was taken. If the date and time stamp says “Now,”
you are viewing live video. The controls at the bottom of the screen let you rewind, fast forward, pause, or play the video. You can also drag
along
the video scrollbar to skip to any point in the video.
To show or hide video controls, simply tap the screen.
Tip: Because all video you record is stored on Looxcie, Looxcie must be connected to your phone to view video. Looxcie stores up to five hours of
video before it begins recording over the oldest video.
Deleting Video
Tap Video on LooxcieMoments to view your video. Press the Menu button on your Android phone and tap Delete All Video to delete all video from
Looxcie. Rest assured, it won’t delete the clips you’ve made.
29
Changing Settings and Configuring
Instant Share
Tap the Settings menu item on LooxcieMoments to change your settings.
Your email account
Enter the email address and password for the account you want to use to send Looxcie clips and tap Save.
Sharing Shortcuts
You can add shortcuts to share clips using Facebook, YouTube, or Twitter video services. To set up these
shortcuts, tap Sharing Shortcuts, and then tap Add a Sharing Shortcut. When you’re ready to share a
clip, you can choose your option from the shortcuts you’ve set up.
Important note: You’ll need to enter your personal upload email address for each social media service to
set up Facebook, YouTube, and Twitter as Sharing Shortcuts.
Sharing setup
Instant Share
Pick a contact to be your Instant Share favorite. If you want your Instant Share favorite to be a site like Twitter or Facebook, be sure to first set it up in
Sharing Shortcuts.
30
How to find your personal upload email addresses
using your computer
If you want to create shortcuts to Facebook, YouTube, or Twitter video services,
you’ll need a personal video upload email address for each site.
YouTube
Go to www.youtube.com/account#mobile and sign in. Choose Mobile
Setup from the menu. Your personal video upload email address is in the
blue box.
Facebook
Go to www.facebook.com/video/?upload and sign in. Choose Mobile
Video from the menu. Your personal video upload email address is in the
blue box.
Twitvid
Go to www.twitvid.com/index.php?area=upload and sign in. You can use
your Twitter account username and password. Your personal video upload
email address is in the blue box that says “Email or MMS your video to:”.
31
Updating Firmware with LooxcieDesktop
Get the most out of your Looxcie
What Is LooxcieDesktop?
LooxcieDesktop is a utility application that installs on your Windows or Mac computer and extends your Looxcie experience. LooxcieDesktop
upgrades your Looxcie with new features and capabilities as they are available, and it helps you manage and archive your video for easy editing and
backup. LooxcieDesktop lets you:
• Upgrade the firmware on your Looxcie.
• Transfer and save all your clips to your computer.
• Easily transfer and archive video recorded with LooxcieMoments to
your computer in 30-minute segments.
Upgrading Firmware with
LooxcieDesktop
• Download and install the LooxcieDesktop application from
www.looxcie.com to your computer.
• Connect your Looxcie to your computer using the USB cable.
• Launch LooxcieDesktop on your computer.
• Check for updates and follow the easy instructions.
Welcome
32
Saving Clips and Video to Your Computer from Looxcie
To save clips and video from your Looxcie to your computer, connect Looxcie to your computer and launch LooxcieDesktop. From the Save Options
screen, you may choose from three options:
• Save clips to your computer. Choose this option to save all the clips
created via LooxcieMoments and/or LooxcieCam to your computer.
• Archive video from LooxcieMoments in 30-minute segments.
Choose this option to archive 30-minute segments of all the video
you’ve recorded in LooxcieMoments. Once the video is on your
computer, you can view and edit it with your favorite media player and
film editor.
• Delete clips from Looxcie. Choose this option to delete all files in the
Clips folders. Don’t worry: this won’t delete the video you’ve captured
in LooxcieMoments.
Save Options
33
Take or Make a Call
To use Looxcie as a Bluetooth headset, it needs to be paired with your Android phone and turned on
Power/Call Control Button
Volume Button
Smartphone
Answer a Call
Send a Call to Voicemail
Make a Call
Press the Power/Call Control button
on Looxcie or answer using your
phone. Looxcie will beep twice when
the call begins.
Press and hold the Volume button on
Looxcie or reject the call using your
phone.
Enter a phone number on your Android
phone and press Send; the call will
transfer to Looxcie.
End a Call
Redial
Answer Call Waiting
Press and hold the Volume button to
redial the last number you called.
Accept a second call using your
phone or ignore it to send the caller
to voicemail. Looxcie will beep twice
to notify you that there is a second
incoming call.
Press the Power/Call Control button
on Looxcie or end the call using your
phone. Looxcie will beep twice when
the call ends.
Transfer Audio to Smartphone
Press the Power/Call Control button
twice while you are on a call to
transfer audio back to your phone.
Change the Volume
Press the Volume button until it’s at
the volume you want. The volume will
rise until it reaches its loudest level and
then start over at the lowest level.
34
Looxcie Specifications
Wearable
Weighs less than 28g (1 oz.)
Video
HVGA video resolution
4 GB on-board storage
5+ hours of LooxcieMoments video storage
4+ hours of LooxcieMoments clip storage
1+ hours of LooxcieCam clip storage
f 2.8 lens
Auto high color and light correction
MP4 video files
Battery
Fast-charging 365mAh lithium polymer battery
UL/CSA-approved power supply
4+ hours record time*
10+ hours talk time*
Headset
Bluetooth® Class 2
Bluetooth® V2.1 + EDR
Hands Free Profile (HFP 1.5)
Audio
Range to 33 feet
Dual silicon MEMS microphones
DSP-based noise cancellation
USB
Micro USB Connector
USB 2.0 mass storage compatibility
* Varies based on how you use Looxcie.
35
Copyright © 2010 Looxcie, Inc.
All rights reserved. Looxcie is a registered trademark of Looxcie, Inc. All other trademarks are the property of their respective owners.
For more information, visit www.looxcie.com.
Looxcie Model: LX1
36