1
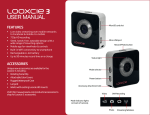
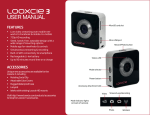
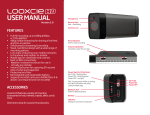
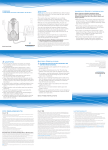
2
User Manual for Android
Model: LX2
Thank You for Purchasing Looxcie
Please read this user manual carefully before using your Looxcie
Customer Support
Visit www.looxcie.com/support or call 1-855-LOOXCIE (566-9243) if you need technical support.
Register Your Looxcie
To receive important product updates, register your Looxcie at www.looxcie.com/support.
Join the Looxcie Community
•• Become a Looxcie Facebook fan at facebook.com/looxcie.
•• Follow @LooxcieCam on Twitter at twitter.com/looxciecam.
•• Subscribe to the Looxcie YouTube channel at youtube.com/looxcie.
2
Contents
Looxcie Controls Overview
Basic Looxcie Controls
Getting Started
5
Creating Clips
21
6
Instantly Sharing Clips While Recording 23
7
Previewing Clips
24
Sharing Clips
25
Saving Clips to Your Mobile Device
26
Editing Clip Titles
26
Deleting Clips
26
Transferring Clips to Your Computer
27
Deleting All Clips
27
Previewing Captured Video
28
Deleting Captured Video
28
Sharing Settings
29
Charging Your Looxcie
7
Downloading the Looxcie Companion Apps
8
Pairing Looxcie to Your Mobile Device
9
Adjusting Your Looxcie Fit
11
Why Fit Matters
11
Personalizing Your Looxcie Fit
11
Recording with the LooxcieCam App
12
Recording Video with LooxcieCam
13
Previewing Your Clips
15
Saving Clips to Your Mobile Device
16
Editing Clip Titles
16
Deleting Clips
16
Recording with the LooxcieMoments App
17
Recording Video with LooxcieMoments
18
Recording Quality
20
Using Looxcie as a Standalone Video Cam
31
Using the LooxcieDesktop Utility
32
Upgrading Your Looxcie Firmware
32
Saving Clips to Your Computer
33
Changing Device Mode and Recording Quality
34
Using Looxcie as a Bluetooth Headset
35
Looxcie Specifications
36
Table of Contents
3
What’s Inside the Box
Package Contents
Looxcie 2
Record and share life’s
special moments.
Earbuds
Select the best size
earbud for your ear. Try
various fit combinations
with the earloops.
USB Cable
Plug into a computer
or power adapter (not
included in box) to charge
Looxcie. Power off Looxcie
prior to charging.
Earloops
Select the best size
earloop for your ear.
Insert the end of the
earloop into the earloop
base to wear on your ear.
Inside the Box
4
Looxcie Controls Overview
Boom
Status Light (Green)
USB Port
Earloop
Record Button
Instant Clip button
Call Button
Power switch
Loop of Earbud
Record Light (Red)
Earloop Base
Earbud
Looxcie Controls
5
Basic Looxcie Controls
Power switch
Slide to power on/off.
(Shows green when switched on.)
Record button
Press to start/stop recording.
Instant Clip button
•• Press and release to create an Instant Clip.
•• Press and hold for approximately 2 seconds to create and
send an Instant Clip to your instant share favorite.
Go to Settings in the LooxcieMoments app to set up instant sharing.
Call button
•• Press to answer/end a phone call.
•• Double press to voice dial (if supported by your mobile phone).
•• Press and hold for approximately 3 seconds (listen for
tone) to adjust volume.
Looxcie Controls
6
Getting Started
Using your new Looxcie 2
Charging Your Looxcie
Charge your Looxcie for 2 hours before using it the first time.
Using a Computer or Power Adapter
•• Power off Looxcie prior to charging.
•• Plug one end of the USB Cable into the USB Port on Looxcie, and
the other end into a computer USB Port or a power adapter.
Note: Average charging time is around 3 -4 hours.
USB Port
Status light (green)
•• Flashes green while charging.
•• Stays green once the battery
is fully charged.
•• Blinks green when Looxcie is
powered on.
Power adapter sold separately on www.looxcie.com.
Record light (red)
Glows red while recording.
Getting Started
7
Downloading the Looxcie
Companion Apps
Use the Looxcie companion apps to preview, edit, and share your video clips.
Download the LooxcieCam and LooxcieMoments apps from the Android Market
onto your mobile device.
Download apps from Android Market
LooxcieCam
LooxcieMoments
Getting Started
8
Pairing Looxcie to Your Mobile Device
Before pairing, make sure Looxcie is fully charged. Pairing Looxcie to your mobile
device connects the companion apps with your Looxcie.
Turn on Bluetooth (on your mobile device)
Status light (green)
Record light (red)
Power switch
Call button
•• Turn on your mobile device’s Bluetooth (under your mobile device’s Settings).
Activate pairing mode (on your Looxcie)
•• Power on Looxcie by sliding the Power switch on. (The green Status light
turns on.)
•• If the green Status light and red Record light are both flashing, pairing mode
is active. (Go to step 3 on next page.)
•• If the green Status light and red Record light are not both flashing, activate
pairing mode manually: Slide the Power switch off. Then press and hold the
Call button as you slide the Power switch on. (Both lights will flash.)
Turn on Bluetooth
Getting Started
9
Select Looxcie from the Bluetooth device list
•• Select Looxcie from the Bluetooth device list.
When paired successfully, Looxcie appears in your mobile device’s Bluetooth device list as
Connected. (The red Record light will turn off and the green Status light will blink.)
Tip: Check your mobile device’s user manual for more information on pairing Bluetooth
devices.
Help Me Pair
When the LooxcieMoments and LooxcieCam apps are launched, the Help Me Pair screen
will appear if Looxcie is not paired to your mobile device. If you want help pairing:
Bluetooth device list
•• Tap Help Me Pair.
•• Follow the three steps on the next two screens to pair Looxcie to your mobile device.
•• Tap Done to exit the screen.
Help Me Pair screen
Getting Started
10
Adjusting Your Looxcie Fit
Personalize the fit of your Looxcie so that it is stable and level on your ear
Personalizing Your Looxcie Fit
Find the correct fit for your ear
•• Select the best earbud and earloop size for
your ear (try various combinations).
Why Fit Matters
Every ear is different in shape and size – when Looxcie fits
•• Insert the end of the earloop into the
earloop base to fit on left/right ear.
correctly, it should should point in the direction of where
Place Looxcie on your ear
For more help adjusting your Looxcie fit, see the
•• Rotate the earloop away from the earbud
and toward your face to slip over your ear.
Fit Video online at: www.looxcie.com.
you’re looking.
•• Make sure the loop of the earbud is angled
upward slightly.
•• Fit the earbud in your ear with the loop of
the earbud resting on your outer ear.
Note: Looxcie will auto rotate the video image to
the correct position for recording on either ear.
Secure the fit and level the video image
Hold and slide the Boom along the earloop to
secure the fit on your ear and level the video
image.
Tip: Use the LooxcieCam or LooxcieMoments
viewfinder screen to help level and rotate the
boom to level the video image.
Looxcie Fit
11
Recording with the LooxcieCam App
LooxcieCam turns your Looxcie into a basic camcorder that records full motion 480p video
LooxcieCam Camcorder screen
Use LooxcieCam with your
Looxcie to:
•• Record 1 hour of 30 fps video in full 480p
LooxcieCam app menu
•• Use your mobile device as a viewfinder
•• Transfer and save recorded video to your
mobile device or computer by connecting
Looxcie via USB
See what you’re
recording
Preview clips
you’ve created
View current
Looxcie settings
Note: Looxcie must be connected to your mobile
device to use the LooxcieCam app functions.
LooxcieCam App
12
Recording Video with LooxcieCam
To start recording:
• Launch the LooxcieCam app on your mobile device.
• Press and release either the physical Record button on Looxcie
or tap the
button on the Camcorder screen.
Note: When Looxcie starts recording, you will see the solid red
button
and a flashing red “Rec” symbol appear on the Camcorder screen.
Record button
To stop recording:
• Press and release either the physical Record button on Looxcie
or tap the
button on the Camcorder screen.
Note: When Looxcie stops recording, it automatically saves your video as a clip.
Tip: The timer on the Camcorder screen shows the number of recordable
minutes left.
Level the video image
Go to page 11 to learn how to level the video image.
Tip: Rotate the Camcorder screen to view the video image in either landscape or
Camcorder screen
portrait format.
LooxcieCam App
13
Changing the light mode
Looxcie automatically adjusts for different light levels.
To adjust the light mode manually:
• Tap the
Bright Sun
Low Light/Night
Backlit Fluorescent
Incandescent
button on the Camcorder screen.
• Tap on the light mode you want to record with.
Note: When you power off Looxcie, the light mode will default back to Auto.
Tones you might hear while recording
Power On
4 rising tones
Power Off
4 falling tones
Low Battery
2 low tones
Out of Range
3 falling tones
Bluetooth Connected
3 rising tones
Bluetooth Disconnected
3 falling tones
Answer Call
2 rising tones
End Call
2 falling tones
Instant Clip
Multiple tones
Instant Clip and Share
Multiple tones in long sequence
Start Recording
2 slow rising tones
Stop Recording
2 slow falling tones
Battery Indicator
Battery full
Battery 75%
Battery 50%
Battery 25%
Battery <10%
Battery empty
Charging
LooxcieCam App
14
Previewing Your Clips
Clips created in LooxcieMoments will also appear on
the Clips screen. Clips are listed in chronological order
with the most recent clip listed first.
Note: The
symbol appears on clips created in
LooxcieCam or LooxcieMoments (Highest Quality).
To preview clips:
• Tap Clips on the LooxcieCam app menu.
• Tap the clip you want to preview.
• Tap the
Clips screen
button on the Clip Details screen to
play the clip.
Note: When you preview clips on your mobile device,
the playback will be choppy due to limited Bluetooth
speed between Looxcie and your mobile device.
Tip: Save the clips to your mobile device, or connect
and save to your computer for high-quality playback.
Clips Details screen
LooxcieCam App
15
Saving Clips to Your Mobile Device
• Tap Clips on the LooxcieCam app menu.
• Tap the clip you want to save.
• Tap Save on the Clip Details screen.
Note: Depending on the clip size, saving may take several minutes to hours, due to
the limited Bluetooth speed between Looxcie and your mobile device. If your clip is
too large to save, transfer the clip to your computer by connecting Looxcie via USB to
your computer.
Editing Clip Titles
Clips screen
• Tap Clips on the LooxcieCam app menu.
• Tap the clip you want to edit.
• Tap Edit on the Clip Details screen.
• Tap Save.
Deleting Clips
• Tap Clips on the LooxcieCam app menu.
• Tap the clip you want to delete.
• Tap Delete on the Clip Details screen.
Clip Details screen
• Tap Delete to confirm you want to delete the clip.
LooxcieCam App
16
Recording with the LooxcieMoments App
LooxcieMoments turns your Looxcie into an “always on” video cam ready to instantly share
LooxcieMoments
Viewfinder screen
Use LooxcieMoments with your
Looxcie to:
•• Capture up to 5 or up to 10 hours* of continuous
looping video
LooxcieMoments app menu
•• Create 30-second Instant Clips or custom length
New Clips from captured video
•• Save hundreds of clips
•• Instantly share clips to social networks
See what you’re
recording
Preview clips
you’ve created
View captured
Settings for
video and create Recording Quality
New Clips
and Sharing
Note: Looxcie must be connected to your mobile
device to use the LooxcieMoments app functions.
*Varies based on Looxcie model
LooxcieMoments App
17
Recording Video with LooxcieMoments
To start recording:
• Launch the LooxcieMoments app on your mobile device.
• Press and release either the physical Record button on Looxcie
or tap the
button on the Viewfinder screen.
Note: When Looxcie starts recording, you will see the solid red
button
on the Viewfinder screen.
Record button
To stop recording:
• Press and release either the physical Record button on Looxcie
or tap the
button on the Viewfinder screen.
Note: When Looxcie stops recording, it automatically saves the captured video
on your Looxcie.
Leveling the video image
Go to page 11 to learn how to level the video image.
Tip: Rotate the Viewfinder screen to view the video image in either landscape
or portrait format.
Viewfinder screen
LooxcieMoments App
18
Changing the light mode
Looxcie automatically adjusts for different light levels.
To adjust the light mode manually:
• Tap the
Bright Sun
Low Light/Night
Backlit Fluorescent
Incandescent
button on the Viewfinder screen.
• Tap on the light mode you want to record with.
Note: When you power off Looxcie, the light mode will default back to Auto.
Tones you might hear while recording
Power On
4 rising tones
Power Off
4 falling tones
Low Battery
2 low tones
Out of Range
3 falling tones
Bluetooth Connected
3 rising tones
Bluetooth Disconnected
3 falling tones
Answer Call
2 rising tones
End Call
2 falling tones
Instant Clip
Multiple tones
Instant Clip and Share
Multiple tones in long sequence
Start Recording
2 slow rising tones
Stop Recording
2 slow falling tones
Battery Indicator
Battery full
Battery 75%
Battery 50%
Battery 25%
Battery <10%
Battery empty
Charging
LooxcieMoments App
19
Recording Quality
Record with LooxcieMoments in either Mobile Sharing (320p) or Highest Quality (480p).
• Use Mobile Sharing (320p) for faster uploading to social networks.
• Use Highest Quality (480p) for higher resolution recording.
Mobile Sharing (320p)
Highest Quality (480p)
• Record up to 5 or up to 10 hours* of
continuous looping capture in 320p
• Record up to 1.5 or up to 3 hours* of
continuous looping capture in 480p
• Save 500+ clips from captured video
• Save 100+ clips from captured video
• Instantly share clips via mobile
device with social networks
• Share clips via computer with
social networks
Recording Quality screen
*Varies based on Looxcie model
Changing recording quality
• Tap Settings on the LooxcieMoments app menu.
• Tap Recording Quality.
• Tap the recording quality you want to record with.
Tip: When you’re ready to record, quit the app and place your mobile device in screen
saver mode to conserve it’s battery. Looxcie will continue to record looping video
without the app connected to it.
LooxcieMoments App
20
Creating Clips
Create clips in two ways:
•• Press and release the Instant Clip button on Looxcie to create 30 second Instant Clips.
•• Tap Video on the app menu to create custom length New Clips.
Creating Instant Clips from your Looxcie
To create an Instant Clip of the last 30 seconds of captured video:
•• Press and release the Instant Clip button. (You will hear multiple tones.)
Note: The “Clip created” message will appear on the app screen.
Instant Clip button
Press and release to create a clip
of the last 30 seconds of video
Tip: Press and hold the Instant Clip button for approximately 2 seconds to create and send
an Instant Clip to your instant share favorite. Go to page 23 to learn more.
Creating New Clips from your mobile device
To create a custom length New Clip of up to 30 minutes from the captured video:
•• Tap Video on the LooxcieMoments app menu.
•• Tap New Clip.
Video screen
LooxcieMoments App
21
Set the start of your clip
•• Drag the pointer along the video scrollbar or use the video controls to set the start of the clip.
•• Tap Set Start. The Start Clip icon
marks the start of your new video clip.
Set the end of your clip
•• Drag the pointer along the video scrollbar or use the video controls to set the end of the clip.
•• Tap Set End. The End Clip icon
marks the end of your new video clip.
Save and title your clip
•• Tap Save. The Edit Title screen will appear.
•• Type a new title and tap Save or just tap Save to create a default title (time and date video
created).
•• Tap View Clip to preview your new clip or tap Back to Video to return to the video screen.
Note: Edit the title of a clip by tapping Edit on the Clip Details screen.
LooxcieMoments App
22
Instantly Sharing Clips
While Recording
To instantly share clips, first set up your instant share favorite under
Settings. Go to page 29 to learn how.
To share an Instant Clip to your instant share favorite:
•• Press and hold the Instant Clip button for approximately 2 seconds.
Instant Clip button
(You will hear multiple tones in a long sequence.)
Note: The “Sharing clip” message will appear on the app screen while the
clip downloads from Looxcie and sends to your instant share favorite.
Sharing Settings screen
LooxcieMoments App
23
Previewing Clips
Clips created in LooxcieCam will also appear on the
Clips screen. Clips are listed in chronological order
with the most recent clip listed first.
Note: The
symbol appears on clips created
in LooxcieCam or LooxcieMoments (Highest Quality).
To preview clips:
• Tap Clips on the LooxcieMoments app menu.
• Tap the clip you want to preview.
• Tap the
Clips screen
button on the Clip Details screen to
play the clip.
Note: When you preview clips on your mobile device,
the playback will be choppy due to limited Bluetooth
speed between Looxcie and your mobile device.
Tip: Save the clips to your mobile device or connect
and save to your computer for high quality playback.
Clips Details screen
LooxcieMoments App
24
Sharing Clips
To share clips, first set up your sharing favorites under Settings.
Go to page 29 to learn how.
•• Tap Clips on the LooxcieMoments app menu.
•• Tap the clip you want to share.
•• Tap Share on the Clip Details screen.
•• Tap on the sharing favorite to which you want to send the clip.
Note: The “Sharing clip” message will appear on the app screen
Sharing Settings screen
while the clip downloads from Looxcie and sends to the sharing
favorite you selected. Depending on the clip size, sharing may
take awhile and limit your use of the app. Recording will not be
interrupted.
Clips waiting to be shared
If your mobile device loses its network connection, the app will
queue clips marked for sharing and send them later, when your
network connection is restored.
Clip too large
If your clip is too large to share, transfer the clips to your
Clip Details screen
computer by connecting Looxcie via USB to your computer.
Go to page 27 to learn how to transfer clips to your computer.
LooxcieMoments App
25
Saving Clips to Your Mobile Device
• Tap Clips on the LooxcieMoments app menu.
• Tap the clip you want to save.
• Tap Save on the Clip Details screen.
Note: Depending on the clip size, saving may take several minutes to hours, due to
the limited Bluetooth speed between Looxcie and your mobile device. If your clip is
too large to save, transfer the clip to your computer by connecting Looxcie via USB to
your computer.
Editing Clip Titles
Clips screen
• Tap Clips on the LooxcieMoments app menu.
• Tap the clip you want to edit.
• Tap Edit on the Clip Details screen.
• Tap Save.
Deleting Clips
• Tap Clips on the LooxcieMoments app menu.
• Tap the clip you want to delete.
• Tap Delete on the Clip Details screen.
Clip Details screen
• Tap Delete to confirm you want to delete the clip.
LooxcieMoments App
26
Transferring Clips to Your
Computer
Plug one end of the USB Cable into the USB Port on Looxcie and the
other into the USB Port on your computer.
Save clips to your computer in two ways:
•• Use the LooxcieDesktop utility to save clips to your computer.
Go to page 32 to learn how.
•• Use Looxcie as a storage drive to drag-and-drop your saved clips
onto your computer.
Clips screen
Deleting All Clips
•• Tap Clips on the LooxcieMoments app menu.
•• Press the Menu button on your mobile device.
•• Tap Delete All Clips.
•• Tap Delete to confirm you want to delete all clips.
Delete All Clips
LooxcieMoments App
27
Previewing Captured Video
•• Tap Video on the LooxcieMoments app menu.
•• Drag the pointer along the video scrollbar or use the video controls to
rewind, fast forward, pause, or play the video.
•• To show or hide the video controls, simply tap the screen.
The date and time stamp shows when the video was taken.
Video screen
Note: When you preview captured video on your mobile device, the playback
will be choppy due to limited Bluetooth speed between Looxcie and your mobile
device.
Tip: Connect Looxcie to your computer via USB to transfer and save your
captured video into 30-minute sized clips for high quality playback.
Deleting Captured Video
Delete All Video
•• Tap Video on the LooxcieMoments app menu.
•• Press the Menu button on your mobile device.
•• Tap Delete All Video.
•• Tap Delete to confirm you want to delete all video.
Note: When you delete all video, the clips you have created will not be deleted.
LooxcieMoments App
28
Sharing Settings
Set up your email account
Enter the email address and password for the account you want to send
Looxcie clips from. Emailed clips will indicate this email account as the clip sender.
•• Tap Settings on the LooxcieMoments app menu.
•• Tap “Your email account”.
•• Enter your email address and password.
•• Tap Save.
Set up your sharing favorites
Add social sites, like Facebook, Twitter, or YouTube, to your sharing favorites.
Sharing Settings screen
•• Tap Settings on the LooxcieMoments app menu. Tap Sharing.
•• Tap Add a favorite.
•• Enter your personal upload email address. Tap Save.
Note: Go to page 30 to learn how to find your personal upload email address for each social site.
Set up your instant share favorite
Tap the
button next to the sharing favorite you want to set up as your instant share favorite.
Note: Instant Clips will be sent to this sharing favorite when you press and hold the Instant Clip button.
LooxcieMoments App
29
Adding social sites to your sharing favorites
To add Facebook, Twitter, or YouTube to your sharing favorites, visit each site to
find your personal video upload email address.
Facebook
•• Go to www.facebook.com/video/?upload and sign in.
•• Choose Mobile Video from the menu.
•• Find your personal upload email address in the blue box.
Twitvid(for Twitter or Facebook)
•• Go to www.twitvid.com/index.php?area=upload and sign in.
•• Find your personal upload email address in the “Email or MMS your video to” box.
YouTube
•• Go to www.youtube.com/account#mobile and sign in.
•• Choose Mobile Setup from the menu.
•• Find your personal upload email address in the blue box.
LooxcieMoments App
30
Using Looxcie as a Standalone Video Cam
Recording with Looxcie as a
“standalone” video cam
• Fit Looxcie on your ear, and adjust the boom along the earloop to level
the video image. (Use a mirror for help.)
• Power on Looxcie by sliding the Power switch on.
Adjust boom along earloop
(The green Status light turns on.)
• Press and release the Record button on Looxcie to start/stop recording.
• Connect Looxcie to your computer via USB to transfer and archive clips and video.
Note: Use the LooxcieDesktop* utility to change the device mode & recording quality
on your Looxcie.
Power switch
Tip: In LooxcieMoments mode, you can create Instant Clips by pressing and releasing
the Instant Clip button.
*LooxcieDesktop does not perform the same functions as, nor is it a desktop version
of the LooxcieCam or LooxcieMoments mobile apps.
Record button
Looxcie Standalone
31
Using the LooxcieDesktop Utility
Get the most out of your Looxcie experience
LooxcieDesktop is a utility that installs on your Windows or Mac computer and extends your Looxcie experience.
Use the LooxcieDesktop Utility with your Looxcie to:
• Update your Looxcie firmware with new features when available.
• Transfer and archive clips for easy editing and backup.
• Switch between LooxcieCam and LooxcieMoments mode on your Looxcie.
Note: LooxcieDesktop does not perform the same functions as, nor is it a
desktop version of the LooxcieCam or LooxcieMoments mobile apps.
Updating Your Looxcie Firmware
• Visit www.looxcie.com to install LooxcieDesktop on your computer.
• Connect your Looxcie to your computer using the USB cable.
• Launch the LooxcieDesktop utility on your computer.
• Check for updates and follow the easy instructions on the
LooxcieDesktop screen.
LooxcieDesktop screen
LooxcieDesktop Utility
32
Saving Clips to Your Computer
• Launch the LooxcieDesktop utility on your computer.
• Click Save on the LooxcieDesktop screen.
• Select from the following two options:
Copy existing clips from your Looxcie: Choose this option to save all clips created from the Looxcie companion apps to your computer.
Copy captured video from your Looxcie into 30-minute sized clips: Choose this option to archive 30-minute sized clips of all the
captured video recorded in LooxcieMoments.
Note: Use the Looxcie companion apps to delete clips and video on your Looxcie.
Tip: You can view/edit saved clips with any MP4 media player/video editor.
Save screen
LooxcieDesktop Utility
33
Changing Device Mode & Recording Quality on Your Looxcie
• Launch the LooxcieDesktop utility on your computer.
• Click Settings on the LooxcieDesktop screen.
• Select from the following three options:
LooxcieCam Highest Quality (480p):
Choose this option to turn your Looxcie into a
basic camcorder that records full motion 480p
video.
LooxcieMoments Sharing (320p):
Choose this option to turn your Looxcie into
an “always on” video cam that records looping
video optimized for faster uploading to social
networks.
LooxcieMoments Highest Quality (480p):
Choose this option to turn your Looxcie into
an “always on” video cam that records looping
video optimized for higher resolution recording.
Settings screen
LooxcieDesktop Utility
34
Using Looxcie as a Bluetooth Headset
Pair Looxcie to your mobile device to use Looxcie as a Bluetooth headset
Go to page 9 to learn how to pair Looxcie to your mobile device.
Call Button
Answer/End Calls
Press the Call button on Looxcie or use your mobile device to
answer/end a call (listen for 2 tones).
Call button
Make Calls
Dial the number on your mobile device and press Send
(call transfers to Looxcie).
Voice Dial
Double press the Call button and begin speaking
(if supported by your mobile device).
Adjust Volume
Press and hold the Call button for approximately 3 seconds
(listen for tone). Repeat until you reach desired volume level
or adjust the volume on your mobile device.
Bluetooth Headset
35
Looxcie Specifications
Wearable
Weighs 22g (less than 1 oz.)
Video
With the LooxcieCam app or as a standalone device
VGA, 30fps, 4000kbps bitrate
1 hour of record time
2 hours of battery life
With the LooxcieMoments app in 320p
HVGA, 15fps, 800kbps bitrate
5 or 10 hours* continuous, looping video capture (clip storage)
4 hours of battery life (record time)
With the LooxcieMoments app in 480p
VGA, 30fps, 4000kbps bitrate
1.5 or 3 hours* continuous, looping video capture (clip storage)
2 hours of battery life (record time)
f 2.8 lens
62 degree field of view (FOV)
Auto high color and light correction
Codec: MPEG-4 video, AAC audio
*Varies based on Looxcie model
Battery
Fast-charging 365mAh lithium polymer battery
UL/CSA-approved power supply
Up to 4 hours of record time*
Up to 10 hours talk time*
*Varies based on how you use your Looxcie
Headset
Bluetooth® Class 2
Bluetooth® V2.1 + EDR
Range to 33 feet
Audio
DSP-based noise reduction
USB
Micro USB Connector
USB 2.0 mass storage compatibility
36
Copyright © 2011 Looxcie, Inc.
All rights reserved. Looxcie and the Looxcie logo are trademarks or registered trademarks of Looxcie, Inc. US and international patents pending.
For more information, visit www.looxcie.com.
Looxcie Model: LX2
37