Transcript
User Manual
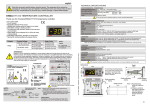
l. Specifications:
Worki
n
g tem peratu re : -20-6-0C
zv,]z+v
Supply voltage: oc[sv,[r
Product size: L62xW35xH23mm
Net weight: 809
Output: Three CMOSdrain- open output
Connecting Mode: common anode
Max load current:2 Aeach color
ll. Gontrol Method:
Brightness
(Sinall )
Static red
Static orange
Static dark yellow
Static yellow
Static straw yellow
Brightness
(Sinall)
Static gre
Static rrea qree
Static cyan
St tic light blu
Static sky blue
Increase
red
I
De
red
Dccrease
(Speed adjustable)
Increase
bl
gre
Decrease
trl
DIY key5
DIY key4
3 color jumpy change
Static blueS
Static dark blue
Static brown
Static pink
Static purple
gree
DIY key2
DIY keyl
:olor jumpy change
Speed adjustable)
On / Off
Pause / Ru
S
ic milk
S
ic white pink
whi
green-whi
Static
blue white
Static
Speed up
Speed-dow
Automatic
change
(Speed adjustable)
DIY key3
Flash on andoff
DIY key6
3 color fade
(Speed adju
tatic whit
( Speed adiustable)
o
ble)
7 color fadechang
(Speed adjustable
Complement explanation: About DIY key, when itis pressed firsttime, will enterthe DIY
color mode, youcan adjust thecolor per theG keys atabove to increaseor decrease the
R/G/B color byyourself freely (if other keyis pressed thistime, will jump outfrom DIY
color mode) . Andyou can savethe colorwhichyou have adjustedby pressing theDlY
key once again.When next timethis key ispressed, it willshow the coloryou saved last
time. There are 6 DlYkeys, so you can save Gcolor you like. They are alllndependent,
have no effect each other. For example: if you press DIY keyl f irst, and then press DIY key2,
DIY keyl will be invalid, until DIY key2 is pressed once again, current color will be saved.
III. Panel specification
DC Power lnput
and connecting drawing as follows:
M
nn
@
Lql H
HH
lV. Warn ing:
.
the input voltage of this controllershould follow the specifications, other high voltage
would most probablydestroy it
4 wirescoming out of the controller can'tbe incorrectly interconnectedOr short
circuit could occur
3. connecting the wires of the controllerand LED fittings as per instruction
1
2. the
