1
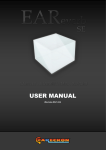
User
Manual
v. 1.1, July 2015
Copyright 2015, All Rights Reserved
V-Note, Bremig LLC
Contents
Overview Diagram
4
Chapter 1: Getting Started
5
An Overview of V-Note
Importing Videos into V-Note
Playing and Navigating a Video
Removing a Video from V-Note
Overlay Settings
Adjusting the Size of the Windows
Adjusting Playback Speed
Chapter 2: Timelines and Labels
10
What is a Timeline?
Creating, Changing, and Deleting Labels
Labeling Instances of Video
Changing, Editing, and Deleting Labeled Instances
Adjusting the Function of Making Labeled Instances
Chapter 3: Working With Projects
13
What is a Project?
Saving and Opening a Project Locally
Publishing a Project Online
Accessing Online Projects
Sharing a Project with Others
Viewing Data From Other Users
Saving and Publishing Projects Locally and Online
Chapter 4: Movie Builder
19
What is Movie Builder?
Navigating Tabs
Custom Movie Builder Tabs
Playing in Movie Builder
Exporting Videos
2
V-Note User Manual
Chapter 5: The Multi-Project Workshop
21
What is Multi-Project Workshop?
Adding Clips to the Multi-Project Workshop
Exporting a Video from the Multi-Project Workshop
Playing Two Clips at One Time
Chapter 6: Transcribing
24
Turning On Transcription
Transcribing
Using Looping
Changing Loop Duration and Advance
Manually Adjusting Start and Stop Times of Utterances
Reordering Utterances on a Transcript
Importing Transcripts from Other Sources
Exporting Transcripts
Chapter 7: Raw Data Export
28
Exporting Raw Data
Selecting an Interval for Your Data
Toggling On and Off Transcripts in Raw Data
Chapter 8: Synchronizing Secondary Audio
31
Adding Secondary Audio Tracks
Automatically Synchronizing Secondary Audio Tracks
Manually Synchronizing Secondary Audio Tracks
Chapter 9: Drawing on Your Videos
36
Using Drawing Controls
Adding Drawings to Your Videos
Sharing and Toggling Drawings
The Drawing Timeline
Chapter 10: Conversation Analysis
38
Turning On and Off Conversation Analysis Features
Changing Column Width
Sound Waveforms: Toggling On and Off
3
V-Note User Manual
Overview Diagram
Project
Details
Close
Project
Volume
Play Speed
Transcript
Window
Video Play
Window
Play/Pause
Button
Progress Bar
Labels
Labeled Instances
Hot Keys
Timelines
Movie Builder
Export Video
Button
Movie Builder
Tab
Scale/Zoom
Chapter 1: Getting Started
An Overview of V-Note
V-Note is designed for those of us who work with videos. Using multiple timelines,
hot keys, online sharing, transcripts, drawing, raw data output, and numerous other
features, V-Note can offer a video analysis experience like no other.
Importing Videos into V-Note
The first thing you may want to do is bring a video into your V-Note project (VNote’s main file format which maintains
and associates all of your media,
transcripts, timeline data, etc). You can
do this by opening a folder on your
desktop and dragging in a media file in
the following formats: .mp4, WebM
(VP8), H.264, .mov, *.wmv, or .mp3.
Alternatively, you can double click the
video play window (black space) to
browse to a video file.
*.wmv files are only supported in a Windows
environment
Playing and Navigating a Video
Videos imported into V-Note begin playing automatically. To start or stop play,
simply click on the video play window or the triangle “play” button just below the
video play window.
The bar below the video play
window will provide a preview
thumbnail of the video when
you drag over it. This can help
you to rapidly locate parts of a
video.
To change the play head position
you can single-click on the
timeline you can click anywhere
on the blue bar below the video
or double-click on the timelines.
Removing a Video from V-Note
To remove a video or audio file from your V-Note project you can click on the File
menu on top. Next, select “Remove Audio
or Video.”
Note: you cannot remove a video from a
file that has already been saved or
downloaded from the cloud. Instead,
start a new project.
If you want to locate the video file from
the earlier-saved project, you can browse
to it by clicking: File Menu > Project
Details > Video […]. This will browse to
the file.
If a project has been saved from a shared project on our cloud-based streaming
services, the related video will be saved only as a temp file. You should contact the
original owner to obtain the original.
Custom Settings
V-Note allows users to change function-key assignments (e.g., save project, advance
looping, etc.), languages and default font used by the program.
This functionality is accessed differently depending on platform.
On a Mac:
Choose: “V-Note” top menu > Preferences
In Windows:
Choose: “Edit” top menu > Preferences
Windows
Mac OS
Changing V-Note’s Language
To change the language in which VNote is displayed, choose “Language
Settings,” and then select your
preferred language. V-Note can be
displayed in: English (US), German,
French, Spanish, Italian, and Serbian.
6
V-Note User Manual
Changing Function Keys
You can change the keys used to control certain functions in V-Note. When viewing
“Preferences,” accessed as described above, select “Keyboard Settings.”
For example, Saving
a project (CTRL + S;
⌘+ S in MacOS),
Beginning and
ending an utterance
when transcribing
(CTRL + Shift +
Enter; ⌘+ Shift +
Enter in MacOS) can
all be given new key
combinations. Note
however, that single
alpha-numeric keys
should be avoided,
as these may be used when typing words in transcriptions, for example.
To change key settings, simply select a function with the mouse from the list, place
the cursor in the typing space below the list, and press the key combination of your
choice – pressing keys all at once.
Changing Function Keys: An Example
If you wanted to change “View - Full Screen” (the first one in the list), from
unassigned (as is default) to CTRL + F (⌘+ F on Mac OS), then select “View - Full
Screen” with the mouse
so that it becomes
highlighted. Next, type
the key combination of
your choice into the
text bar below the list
next to the word
“Shortcut.” Finally, click
on the “Set” button.
Once the change is
made, CTRL + F (⌘+ F
on Mac OS), when
pressed, will toggle full
screen on and off.
7
V-Note User Manual
Overlay Settings – Adjusting Subtitles
Overlay settings allow you to select a font, a font color, and font size for your
subtitles, which display over top of the video.
Adjusting the Size of the Windows
You can adjust the size of your video play window, the transcription window, and
the timeline window but simply placing your mouse’s cursor between any two
windows, clicking, and dragging in the direction you choose. The Movie Builder
window and top blue bar are not able to be reduced in size.
This allows you to emphasize the function of your choice at any given time. For
example, you can make the video play window or transcript window nearly full
screen if you desire.
You an even make the transcription and timeline windows disappear by continuing
to drag the video window’s edge all the way through the other windows. You can
still continue to use hotkeys even if the timeline window is shrunk from view, for
example. These can be useful when using an audio-only project for example.
Example screen setups are shown below.
Nearly Full Screen Video
Transcripts and Timelines Only
8
Half-Screen Video, No Timelines
Timelines Only
V-Note User Manual
Adjusting Playback Speed
Playback speed can be adjusted to be
made faster or slower. Simply, click on
the 1.00 button in the lower right of the
video play window and adjust the slider
up for faster play or down for slower
play. 1.0, in the middle, is normal play
speed.
9
V-Note User Manual
Chapter 2: Timelines and Labels
What are Timelines, Labels?
When V-Note first opens, there are
four timelines with four labels that
are open by default. The default
labels, shown in the image to the
right, are “Label 1,” “Label 2,” “Label
3,” and “Label 4.” These are just to the
left of their corresponding timelines,
which are white and punctuated by
times above on the black bar (i.e.,
00:03:20.000).
If you want to bring the play head to 3
minutes and 20 seconds, a double
click at this point on the timelines
(anywhere outside of a labeled
instance) will bring the play head to this position.
Creating, Changing, and Deleting Labels
Labels, including the default ones, can be changed, deleted or
added. To modify a default label (or any other), simply click
on the text to edit and type in a new label, as shown to the
left. This could be anything you might wish to mark in the
video (e.g., a name of a person, questions, interesting points,
etc.).
You can also assign or change a hot key – the key that is
pressed to begin and end coding (i.e., marking a labeled
instance) on the video – by clicking on the hot key (e.g., A, B,
C, etc.). Similarly, clicking on the color square allows you to
change the color of the label.
To add a new label, click on the “Add Label” button.
New labels
will appear below existing labels. These can be changed in label, color, hot key, in
the same way shown above.
To delete a label (including the default ones), a
right click over the label (or Control + Click on a
Mac) provides the option to Delete Label.
10
V-Note User Manual
Labeling Instances of Video
To label an instance of video – for example, parts
of the video where Judy is talking – first create a
label for Judy with the hot key “J,” for example.
Next, watch the video. Whenever Judy speaks, simply press the “J” key to start and
stop the label on the time line for Judy. The resulting labeled instances on the
timeline will look something like this:
Changing, Editing, and Deleting Labeled Instances
Labeled instances can be changed, edited, or deleted. Also notes can be made on
them.
A right click over a labeled instance bar allows a user
to delete a labeled instance as shown to the left.
Holding the mouse over center of the labeled instance,
makes the mouse cursor into a +. This allows you to
move the labeled instance left and right.
Holding the mouse cursor over the left and right edges allows you to stretch or
compress the labeled instance from that side by dragging the edge left or right.
To make notes on the labeled instance,
double-click it. You will see this window:
The note will appear in the labeled instance
as shown:
Any notes extending beyond the labeled instance box will be elided.
Adjusting the Function of Making Labeled Instances
Directly below the timelines is the option to change how labeled instances are made.
There are two general choices: Double Press Mode and Single Press Mode. When
watching and coding a video, if you would like to start and stop the labeling of the
11
V-Note User Manual
instances with two
presses of the
hotkey (i.e., one to
start and the other
to finish), then
choose “Double Press Mode.” If, however, your instances are all about the same time,
you can choose “Single Press Mode” and preselect a time for all labeled instances.
You will then only need to press the key once to create (i.e., start and stop) a labeled
instance on your timeline.
The lead-time of labeled instances can be set for both. When watching and coding a
video you may need a few seconds, for example, to recognize that a goal was indeed
scored. By setting the lead-time open to 2.0 seconds, for example, when a hotkey is
pressed, the beginning of the labeled instance is placed 2 seconds before you hit the
hotkey. Similarly, the close lead-time (only on “Double press mode”) can place the
end the labeled instance before the time at which you pressed the hot key.
12
V-Note User Manual
Chapter 3: Working With Projects
What is a Project?
A project in V-Note links together your video and all related parts into one file.
When a project is opened in V-Note, it opens: your video, any transcripts made
previously, any labels and labeled instances on timelines made previously.
Saving and Opening a Project Locally
If you have opened a
video in V-Note and
added some labels and
labeled instances as
described previously, you
can create a project by
clicking the “File” menu
and “Save Project As…”
This will prompt a
browse window where
you can select a title and
folder for saving.
a
The icon of the saved
project will appear as
below. The extension on V-Note project files is .vpnr. When this project is opened
in the future, it will immediately open your video and any parts
added to the project such as transcripts or labeled instances.
Publishing a Project Online
Once a project has been saved locally, it can be saved, or published, online for
sharing with others or for easy access from multiple devices.
To save a project to V-Note’s online servers you must have a V-Note storage and
streaming account with open time remaining. If you would like to create a storage
and streaming account with V-Note, you can do so here:
http://v-note.org/create_account
13
V-Note User Manual
Once your account has been created and
you have logged in, you can click the
“Online” menu on top and “Publish Project.”
Depending on the size of the video file and
the speed of your Internet connection the
upload may take from several minutes to
several hours. Progress of the upload can
be seen in the upper right part of the screen by clicking the cloud with the up arrow.
When they show as “Done” and turn green,
the uploads have completed successfully.
Note: uploaded videos will be converted to
.mp4 file types of about 400 kbps for better
streaming performance. Audio will be
converted to mono 64 kbps (equivalent
sound quality to the common standard of
128kbps stereo).
Your videos and projects are stored securely on our server, to be accessed only with
your password behind an SSL certificate that provides encryption and secure
transmission to your device and only your device. Note that your locally stored (on
your computer’s hard drive) videos and projects are viewable without a password.
To protect your local videos and projects you should restrict access to your device
or encrypt and password protect your hard drive. Furthermore, when you share
access to others working on the same project, they will have access to the video also.
Sharing a Project with Others
There are two ways to share projects with others. The first is to create a code that
others can use to access your projects and provide input. The second way is to add
a user or users directly to your project manually with their user name.
To create a code for sharing your project,
first make sure your video has been
uploaded to V-Note’s online storage and
streaming service. You can set up a free
account or purchase space at v-note.org.
Next, choose the “Online” top menu, then
“Passcode Manager.”
A dialog opens. Select “Generate
Passcode.” You will have two choices for the new user’s permission level. The first
choice, “Full Access: User can see everything,” allows the user to see everything in
the project including: pre-existing labeled instances, labels and hot keys, transcripts.
14
V-Note User Manual
The second choice, “Blind: User cannot see timelines made by others,” allows a user
to see everything except any pre-existing labeled instances (i.e., codes) others may
have made. This allows for a truly independent video coding experience in which
one user is not affected by other users’ codes. A user joining with this setting will
still see the labels and hot keys that are pre-existing and be able to add codes to
these same timelines (although these are differentiated; more on this later).
An expiration date for using the code to join the project is also able to be set. The
default time is 1 week from the time the code is made, but this can be changed. This
is the time before which the code must be used to join the project. After this the
code is no longer valid. A
new code can be made at
any time. Note: a user will
not automatically be
removed from the project
when the passcode expires
if s/he has joined. However,
the passcode will cease to
function for new users.
Multiple codes having
different permission levels
and different expiration
dates can be made for the
same project.
To add or remove users
manually, select the “Online” top menu and then “Edit Project’s Users.” The dialog to
the right appears, which allows for the selection, addition and removal of users.
To remove a user, select his or her name and then “Remove.” This will also remove
all data contributed by that user, including: labels, labeled instances, and transcript
utterances.
15
V-Note User Manual
To add a user type his or her user name into the white bar marked “Username.”
Note that a username is specific to V-Note and may be different that his or her actual
name or email. Verify the username with the person before adding him or her.
To change the permissions of a user, the user must be deleted and then re-added
with the new permissions. User data will be lost in this process.
Accessing Online Projects
To access a project for the first
time that has been shared with
you by another V-Note user,
log on to V-Note, then choose
from the “Online” top menu
“Join Project Using Passcode.”
You will be prompted to enter
or paste the code in.
Once entered, click “Continue,” and you will
open the project and be ready to begin
working. You will never need to enter the
code again. Rather, the project will appear
in your list of online projects accessed in the
manner described below.
To access all your online projects including those shared with you (whether
manually shared
or shared and
previously joined
by passcode) and
those you own,
simply click
“Browse Online
Projects” from the
screen displayed
when V-Note first
opens. A list of
projects will
appear. Double
click on a project to select and open it.
16
V-Note User Manual
Viewing Data from Other Users
Once other users have contributed labeled instances (i.e., codes) or transcripts to
the video, these will appear in the projects of any user that has full permissions to
see them. This can be useful to look for clusters of similar/different interpretations
or interest from among video coders at particular times on the video.
By default, all users’ labeled instances are visible. For a given label and timeline, for
example, Interesting (I), each user’s labeled instances will appear in the same
timeline and in approximately the same color. Colors get a bit lighter as one goes
down screen to aid in differentiating users’ data. Holding the mouse cursor over any
labeled instance for a second or so will reveal its author.
Right clicking over the timelines
and selecting “Authors” will
provide a list of all users and allow
one or more users’ data to be
toggled on and off of view. A
checkmark indicates that a user’s
data is displayed.
Similarly, transcripts added by
other users can be toggled off of
view with a similar checklist of users. This can be accessed by right-clicking over
the transcripts anywhere. Users’ transcripts are visible if his or her name is
checked.
17
V-Note User Manual
Saving and Publishing Projects Locally and Online
To save your projects in V-Note there are more options than in most programs. For
example, you can save locally or online. You can use the shortcut buttons on the top
blue bar or the File and Online Menus.
To save locally (e.g., to your hard-drive or local media), you can click on the disk
icon in the blue bar. Alternatively, you can go through the menus as follows: File >
Save Project (As). Either way, if you have not yet provided a title, you will be asked
to input one and select a folder to save in.
If you would like to publish a project online for storage or for sharing, you can the
“cloud / up-arrow” button or go through menus: Online > Publish Project. If your
project already published to V-Notes Cloud services and you want to push your
recent changes to the online file, the same blue button will work, or you can use
menus: Online > Save Changes to Online Project.
If others make updates and push them online while you are working, these will not
appear automatically in order that you not be distracted. Rather, V-Note will display
a notification in the blue bar, which will not interrupt your work. Whenever you
would like to update your local project with changes others have made, you can click
the double curved arrow icon on the blue bar or click the file menu item “Refresh
Online Project.”
18
V-Note User Manual
Chapter 4: Movie Builder
What is Movie Builder?
Movie Builder, at the bottom of the V-Note screen, is the place where labeled
instances become
clips. For example,
if “symbiosis” were
given a label (and
timeline), and
every time
symbiosis
occurred in the
video, the instance
were labeled, all
these labeled
instances would be
aggregated
automatically at
the bottom on the
“symbiosis” tab. To hit the play button would play only instances labeled as
symbiosis; no other parts of the video would play.
Navigating Tabs
Other tabs work similarly. All tabs bear the same names as the labels above to the
left of the timelines. When a tab is clicked it reveals all the labeled instances – now
clips to be played – placed side by side without the parts of video between them.
Custom Movie Builder Tabs
The “Custom 1” tab (and subsequent custom tabs) work a bit differently. These are
blank by default, but they can accept labeled instances to be dragged in from any
timeline. These can then be reordered once dragged in.
Playing Videos in Movie Builder
The Movie Builder allows you to rapidly play, scan, and compare clips from a given
category or label. It also allows you to make and export new videos from these clips.
19
V-Note User Manual
The Play button (triangle) to the left of the Movie Builder can start and stop the play
of clips on a given tab. A double click at any point over the labeled instances in the
Movie Builder can bring the play head immediately to that point.
During Movie-Builder play, other functions, such as labeling, using the timelines
above, and transcription are disabled until Movie Builder play is stopped.
Any given instance playing in the movie builder is also highlighted above in the
timelines so it can be identified in its original context.
Exporting Videos
To export a video, select the tab you
want or arrange a custom tab as you
would like, then click the “Export
Video” to the left of the tabs.
Browse to a folder where you would
like to save the new video and give
the video a title.
This is processor intensive and can
take some time. The processing
time is on the order of the total time
of the video clips. In other words, if the total time of the clips is 5 minutes, you can
expect that the time to output the file will be about 5 minutes. This may vary
depending on your processor speed and other processes your computer is
performing. You can use V-Note while this process is occurring in the background,
or you can use your computer for other things, although this may increase time
required to export the video.
The output video format is .webm (also called .vp8). This is a commonly supported
format and should play without problem on a current web browser as well as on
other media players. Due to licensing restrictions we were unable to offer output to
other formats.
Should you desire a video in another format, numerous products exist, many of
them free, that can convert .webm to other video formats such as .mp4, for example.
20
V-Note User Manual
Chapter 5: The Multi-Project Workshop
What is Multi-Project Workshop?
The Multi-Project Workshop is similar to the Movie Builder in some ways but it is
also very different. Unlike the Movie-Builder, the Multi-Project Workshop allows for
the creation of videos with clips from numerous V-Note projects, not just from one.
For example, even over a whole season of games (each with its own V-Note project),
every instance in which J. Smith gains possession of the ball can be put into one
video for export using the Multi-Project Workshop. Also, the Multi-Project
Workshop allows two video clips to be played at the same time.
Adding Clips to the Multi-Project Workshop
To use the Multi-Project
Workshop, open a project with
some labeled instances and right
click on one that you would like to
add to the Multi-Project
Workshop. Then, choose “Add to
Multi-Project Workshop.” The clip
will be placed in the Multi-Project
Workshop Window at the top
right of the screen. A red number
will appear representing the number of clips (i.e., labeled instances) that have been
placed into the Multi-Project Workshop. This can be seen in the image below.
The contents
of the MultiProject
Workshop
can be
viewed by
clicking on
its icon (a
box with a
downward
arrow). The
clips are
listed, with
their respective original project’s title, the time location in original video, and
original label applied. No thumbnails are available.
21
V-Note User Manual
Exporting a Video from the Multi-Project Workshop
The clips can be dragged up
and down to the desired
order. Once in order, they
can be exported in similar
fashion to the clips in the
Movie-Builder described
earlier in this chapter. One
difference is that, given the
varied origins of the clips,
their original project’s
name and the time at which
the clip was taken can be
displayed at the beginning
of each respective clip. This
option can be toggled on or
off with the check box at “Show information about each clip as overlay when clip
starts.” Overlay duration can also be modified. Default display is for 2 seconds.
Note that in order to export a video, the media on which all included clips’ original
media is stored must be connected (e.g., external drive, internet (if online project),
etc.). These projects will need to be accessed to provide the clips.
Playing Two Clips at One Time
22
V-Note User Manual
Playing two clips simultaneously, even at different speeds and at different volumes
(or muted) can also be done in the Multi-Project Workshop by dragging the clip text
into the video play window in which you would like it to play. The size of the MultiProject Workshop can also be increased or decreased by dragging the bottom left
corner.
Note that in order to play multiple clips, the media on which both included clips’
original media is stored must be connected (e.g., external drive, internet (if online
project), etc.). These projects will need to be accessed by the program to provide
the clips.
23
V-Note User Manual
Chapter 6: Transcribing
If you would like to add transcripts and captions to your video, V-Note is well
equipped. One of our most important goals with V-Note was to make transcribing
easier. V-Note allows you to use looping, a constant replay of usually about 5
seconds (you can adjust this) while advancing through the video by shifting it to the
right about 2 seconds (also adjustable). V-Note also helps you to create organized,
timeline related, transcripts and assigning utterances to speakers.
Turning On Transcription
To turn on transcribing click the check boxes called “Enable Transcription” found in
the transcription windows in the upper right of the screen.
Transcribing
To transcribe, find a place you would like to transcribe in the video. Anywhere is
fine (you can do earlier or later sections at any time and they will be put in the
correct order and associated with the video timeline as well).
Once you find the first utterance you would like to transcribe, click “Enable
Looping.” Wait until the red line (i.e., playhead) comes to just before your utterance,
then, press CTRL + Shift + Enter (on a Mac command replaces CTRL). The utterance
time will be marked by the position/time the playhead is at when you press CTRL +
Shift + Enter. You can now begin typing the name of the speaker (blue below) and
what you hear to make your first utterance on the transcript (red below).
Using Looping
Looping will repeat-play a short section of video outlined in yellow – by default
about 6 seconds – over and over again. This is to give you time to type what you
24
V-Note User Manual
hear, as speaking speed usually exceeds typing
speed. As you complete typing the speech
contained within your 6
seconds and wish to continue
you can advance the loop and
continue transcribing by hitting the CTRL +
Shift + > keys all at the same time (note: on a
Mac the CTRL key is replaced by the
“command” key). In fact, you can also back up the loop on the timeline by hitting
CTRL + Shift + < (again, the “command” key replacing CTRL on a Mac).
Once you come to the end of your utterance (either by advancing or not), press
CTRL + Shift + Enter once again to end the utterance. The utterance end time will
be marked by the position of the red line (playhead) when pressed.
Advance the loop (CTRL + Shift + >) if necessary to find the beginning of your next
utterance and repeat the steps outlined above.
Changing Loop Duration and Advance
You can change the length of the audio loop from 6
seconds to a value of your choice in the “Loop Duration”
setting at the top of the transcription window.
Similarly, the “Advance By” setting changes the time of
loop-advance (the same time also applies to the backing up).
Manually Adjusting Start and Stop Times of Utterances
To adjust the start time of an utterance after you have made
it, simply click in the box indicating it’s time (see left)
where you can use the arrows to adjust the time or simply
type in a new time.
Reordering Utterances on a Transcript
You cannot drag an utterance up and down to reorder, as their order is determined
automatically by their start times. If you would like to reorder utterances that are in
close succession, you must adjust their times manually in this fashion. New
utterances, even if between existing utterances, will also be placed in their proper
order based on start time.
25
V-Note User Manual
Importing Transcripts from Other Sources
V-Note allows for the importing of transcripts from most other sources. These files
must be in one of the following formats: CSV (comma separated variables), XLS
(Microsoft ® Excel ®) or SRT (a commonly used subtitle format). If you do not have
your transcripts in these formats, you can usually make a suitable CSV or XLS file
type for import in a program such as Microsoft ® Excel ® or similar spreadsheets.
Once you have your file with your transcripts, V-Note can import the file and will
automatically associate the time with the video. If the times do not agree (for
example, if you removed the first 20 minutes of video), you will need to modify your
transcripts in a spreadsheet program. For example, subtract a time (20 minutes in
the example from each utterance’s start time and end time so that it aligns properly
with the video in V-Note, for analysis and subtitle display purposes. Fortunately,
spreadsheet programs such as Excel ® can make this easy and automatic by
allowing you to apply a formula to the whole column. Consult the respective user
manual for more information.
In order to begin the importing of the transcripts, click the
button labeled “Import Transcript” in the transcription
window near the top of the screen. This will allow you to
browse for the file. Once you find it, double click it and it
will prompt the Import Transcript Dialog as shown below. V-Note attempts to assign
the columns correctly and provide a sample rendering called a “preview” which is
shown at bottom of the window.
26
V-Note User Manual
In the event that V-Note does not produce the “Preview” you desire, you can assign
the columns manually (upper right of window). “Refresh Preview” will allow you to
see how your data, as chosen, will look in V-Note once imported.
If you are still unable to import your transcript, you may need to reduce the quantity
of extraneous (non-transcript) content in your files and/or verify continuous
columns and rows of data.
Exporting Transcripts
V-Note can also export transcripts. There are two ways to accomplish this: alone or
with timeline labeled data (i.e., codes). Exporting transcripts alone will be discussed
in this section. Exporting them with data will be discussed in the next section.
In order to export transcripts, simply click on the “Export Transcript” button near
the top of the screen. Select the format you wish to save it in. Browse to a folder
where you would like to save the file. Create a title. Finally click “Save.” The file will
be saved as a CSV, SRT, or XLS file, per your choice.
XLS and CSF can be easily opened by Excel ® or other spreadsheet programs or
imported by V-Note again; whereas, SRT-type files can be opened by traditional
video players such as VLC. All of these formats can also be imported back into VNote.
27
V-Note User Manual
Chapter 7: Raw Data Export
Exporting Raw Data
Raw data including: labeled instances,
notes, and transcripts can be exported
from V-Note for use in other programs
(e.g., spreadsheets, word processors,
email, etc.).
To export raw data from V-Note,
choose: File > Export Raw Data. You
will have three options including:
1. Interval for data rendering (from
1 second – 60 seconds)
2. To include transcripts
3. To include description notes (typed into labeled instances)
Once you have navigated to the folder where you will save and created a title, click
“Save.” Your file will be output as a CSV, which can be opened in spreadsheet
programs such as Excel ®.
Selecting an Interval for Your Data
Selecting an interval for rendering your
data, will be like selecting a finer or coarser
resolution. A 1-hour video rendered at 1
second intervals, for example, will have
3600 lines of data (60 seconds x 60 minutes
= 3600 seconds) and will take many pages
to print; whereas, that same 1-hour video,
rendered at 60 second intervals, would
have only 60 lines of data.
28
V-Note User Manual
A sample set of the data rendered at 5-second intervals.
That same data rendered at 20 second intervals
Note a few differences. Although it is the same data, the 20-second interval
rendering takes up much less vertical space. Note, however, that no labeled
instances are omitted. If a labeled instance is present, even for a fraction of a second
during an interval, it will be shown on any output data, even at intervals of a minute.
At 1-minute intervals, though, you will be not be able to determine its duration
other than somewhere between 0 seconds and 1 minute. A smaller interval allows
for better determining of durations of labeled instances.
Similarly, all transcripts are displayed regardless of interval. If, in a 1-minute
interval rendering, multiple utterances appear during that minute, they will be
stacked left to right; whereas they would be vertical in a smaller interval rendering
such as 1-second.
You will need to balance the concerns of a high vs. low interval resolution for your
data based upon your needs.
29
V-Note User Manual
Toggling On and Off Transcripts in Raw Data
The transcripts, shown to the right of
the spreadsheet’s raw data, can be
toggled off by the check box “Include
Transcription.” Viewing transcripts and
labeled instances side by side in a
spreadsheet can be helpful in
visualizing how they relate to one
another.
Similarly, the description notes (i.e., what is typed in a labeled instance bar),
appearing, immediately to the right of their respective speaker’s labeled instance
column, can also be toggled off. No description notes are present in the samples
above.
30
V-Note User Manual
Chapter 8: Synchronizing Secondary Audio
You may sometimes need to add a secondary audio track to a video. This may be in
case of a camera location that is far from a speaker and does not have adequate
sound quality. Fortunately, V-Note makes adding a secondary sound track easier,
and in many cases, automatic.
Once added, these tracks can be played at the same time with video playback, or one
or the other, or at different volumes with both being audible but one being
dominant.
For best results, the tracks should be similar. The computer will look for similarities
in sounds and match them up according to time. They must have been recorded at
the same event and have similar start and stop times. Note: for automatic
synchronization to work best these may only differ by about 10% on either end.
V-Note can even correct for drift, which can occur when devices (i.e., camera and
external audio recorder) record at slightly different rates. This normally results in
audio that is synchronized early on in the video but becomes out of sync as the video
plays.
Adding Secondary Audio Tracks
In order to add a secondary audio,
first, add the video to the play
window as described in Chapter 1 of
this manual. Next, simply drag the
audio track you wish to synchronize to the video play window where the video is
displaying. Alternatively, you can click on the “Tools” top menu and select “Add
Audio Track.”
Automatically Synchronizing Secondary Audio Tracks
Once you have added your audio track to your video, you may have to wait a few
minutes while the data in the audio files is decoded. When decoding is finished, you
will see a new window pop up like that on the next page. Displayed on the top white
bar is the wave form for the video (i.e., the original audio track in the same file as the
video). This is a representation of the audio track made by graphing volume across
time. In the middle white bar is the wave form for the secondary audio track, or the
one recorded by an external recorder. This is the new audio track (from, for
example, a voice recorder or external microphone) that is to be associated with the
video track and synchronized to its audio.
31
V-Note User Manual
If your tracks have been recorded at approximately the same time at the same event,
you can try to automatically synchronize them, by hitting the “Auto Sync” button at
the top right. This will cause the computer to look for similarities between the two
tracks and shift the secondary track left and right as needed to align the two. Once
done, the third white space (the
bottom one) will display a
waveform also. This space will
display the secondary track (the
same one as in middle white
space), but it will be aligned to the
video. You can play them both at
the same time by clicking either
play button (top or bottom), and
both will play at the same time. A
double-click over the bottom track
will bring the play head to the
same respective position in both
and begin play in both the top and bottom.
32
V-Note User Manual
Once you have verified your tracks have been synchronized, simply press the
“Apply” button at the bottom of the window. Your secondary audio track will then
be added to the video file and the V-Note project. A copy of your original video will
be saved for backup in the backup folder that will be displayed at the end of the
process. You can also access any backups made at any time by selecting under
“Tools” > “Open Backup Folder.”
If your tracks are sufficiently dissimilar (e.g., overlaid commentary, an announcer
calling a game, an audio recorder that was too far away, etc.) pressing the “Auto
Sync” button will prompt no action, and the tracks will remain unchanged. The
computer cannot find (enough) instances that are the same in order to line up the
tracks.
You can still synchronize them; however, this will be a manual process, as described
in the next section.
Manually Synchronizing Secondary Audio Tracks
If you are not able to automatically synchronize your tracks, you can synchronize
them using V-Note’s manual synchronizing features.
33
V-Note User Manual
As with the automatic synchronization option, add your audio track to the project by
dragging and dropping or by file menu (Tools > Add Audio Track). Once added, the
same window appears. This time, however, you will need to select “Add Markers.”
Once this is done, two red lines (both labeled A) will appear over each waveform (as
shown). These are the “A” markers. These can be played with their respective
buttons. Through listening to both tracks and by looking at the waveforms (you can
also zoom in with the slider bar), you should try to find a common point on the
soundtrack (e.g., a clap, a cough, a hit, a run, a score, etc.). Once this is done, you can
drag both “A” markers to the common points on each’s soundtrack. Do not worry
that this be perfect.
You can fine tune it using the “Fine Tune” feature, which lets you loop (play again
and again) the 5 seconds around the point you chose and nudge (offset) the tracks
left and right while listening to both to ensure a good sync. Also, the correlation of
the tracks will increase as they are nearer to being in sync.
Once the tracks sound in sync to you, hit the “Apply” button and the markers will be
fixed. Next, exit the “Fine Tune” dialogue. Finally, click the “Align Markers” button
and the tracks will be brought into synchronization at the point of the markers.
After “Align Markers” is pressed, the second track is added to the bottom row and
shifted such that the two “A” markers now align. Playing the bottom one will also
34
V-Note User Manual
play the top one at the same time. If done well, the two tracks will play in
synchrony.
It is important to verify synchronicity at several spots during the video, however, as
devices can record at slightly different rates resulting in a track that is in sync early
become out of sync later in the track.
To fix drift, in the event there is some, you can add another marker (or many, in the
event of very irregular recording speeds) to a new space in the secondary audio
track (middle waveform) and repeat the steps outlined above. This will slightly
stretch or compress the secondary waveform between the markers to ensure
synchronicity with the primary audio track.
35
V-Note User Manual
Chapter 9: Drawing on Your Videos
Drawing on your videos can be a good way to record and share information about
them. V-Note allows you to draw in real time on a playing video and then play that
drawing back as it was made. The drawing is remade as the video is played again.
You can also share these drawings with others via our storage and streaming
services. They are automatically uploaded when you publish your project online
and can be shared with others in the same manner as transcripts and timeline data.
Using Drawing Controls
To turn on drawing controls press the pen icon in the blue bar above the video play
window. The tools will appear as shown below. You can choose the pen size and
the color on the left side of the toolbar. On the right, the square button allows you to
clear the current drawing from the current frame going forward, and the red x
allows you to clear all drawings you have made. (Those of others, if present, will be
unaffected.)
The squiggly line allows you to check which user’s drawings are displayed. Only one
user’s drawings can be displayed at a time.
36
V-Note User Manual
Adding Drawings to Your Videos
In order to draw on your video, select a pen size and a color. Move the mouse
cursor over the video to the spot where you would like to begin drawing. Hold
down the right mouse button and begin to move the mouse. You are now drawing.
When you release the mouse button, you can move to another spot without drawing.
You can begin drawing over the video at any time.
The video can be playing or paused when you draw. If the video is paused, your
drawing will appear in its entirety on that frame when the video is replayed.
If, however, you draw on your video while the video is playing, it will reappear that
way; that is: it will be redrawn as the video is played for all future plays.
In order to erase the screen going forward, while still keeping your
drawings in the past, you can click the square icon in the drawing
tool bar. If you would like to erase all your drawings, click the red X
icon.
Sharing and Toggling Drawings
To share your drawings with others, simply upload the project as any other. The
drawings will be contained within the project.
To toggle on your drawings or those that others have made, click on the
squiggle and select the name of the user whose drawings you would like
to see. Only one user’s drawings can be displayed at any one time.
Drawing Timeline
As you draw, a drawing timeline will automatically be created which displays at
which points on the video the drawings appear. This feature can be turned on and
off (i.e., displayed or not) on the top menu View > Drawings Label.
Note: no description notes can be typed into labeled instances on the drawings
timeline.
37
V-Note User Manual
Chapter 10: Conversation Analysis
Conversation Analysis (CA) employs: Jeffersonian Notation (a formalized system of
notation including arrows and other characters), sound waveforms, and a Courier
font, which can be exported as it appears on screen for uniformity of text
positioning. This can be used for linguistic analysis and that of other fields.
CA features can be toggled on or off per user preferences.
Turning On Conversation Analysis Features
Conversation Analysis features can be
turned on or off by clicking: File > Project
Details (or also by clicking the title of the
project in the upper blue bar of the
project).
Once clicked the dialogue below appears.
Near the top, under “Project Type,” you can
select “Regular Project” or “Conversation
Analysis Project.”
Changing Column Width
Turing on CA will allow you to
craft the look of your output (or
printed) transcript as well (for
example, if you need to fit your
text into a single column of a
journal article). In this same
dialogue box, near the bottom,
you can select “Max Text Width,”
to choose how many characters
wide the text of your transcripts
will be.
You can experiment with the
width, as it can be changed at
any time later. 40 characters
may be a good starting point.
38
V-Note User Manual
Sound Waveforms: Toggling On and Off
Waveforms (i.e., representations of volume along the sound track) can be toggled on
or off regardless of whether or not CA features are being used. In the image below
the waveform is the black squiggly line between the video/transcript on top and the
timelines on bottom. These can help you to identify activities in the video and
measure periods of silence or talk. On the other hand, you may wish to turn it off in
order to use the space for a larger video window or more timelines.
To toggle the waveform on or off, click:
View (top menu) > Waveforms.
When the checkmark appear, the waveform
will be displayed.
39
V-Note User Manual