1
Users Manual
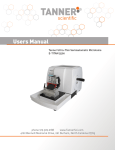
Tanner Manual Rotary Microtome
TITAN 5000
phone 919.309.0188
www.TannerSci.com
4122 Bennett Memorial Drive, 201 Durham, North Carolina 27705
Contents
Section
Page
1 Overview 1
2 Handwheel operation
1
3 Technical parameters
3
4 Brief introduction
3
4.1 Sketch of the Titan microtome
3
4.2 Description
4
5 Unpacking and installation
4
5.1 Unpacking
4
5.2 Requirements for handling
4
6 Installation
5
6.1 Installation of specimen clamp 6
6.2 Installation of accessories
6
6.3 Installation of Blade Holder and its Base
6
6.4 Installation of Waste Tray
6
7 Operation
7
7.1Section Thickness
7
7.2 Handwheel
7
7.3 Trimming
7
7.4 Sectioning
8
7.5 Retraction
8
8 Regular Operation 8
9 Error Checking and Solutions 9
10 Cleaning
9
11 Maintenance
10
12 Appendix
11
Titan 5000 • Manual Microtome User Manual
1. Overview
The serial number and date of production are attached
on the nameplate at the back of the instrument.
2. Handwheel Operation
Safety Devices
Attention: Always Lock the Handwheel before cleaning!
Quick locking lever for Handwheel
Attention: Remember to lock the handwheel and cover the blade with the protective fitting
before changing the blade or specimen block.
The handwheel can be locked at any position with the locking
lever (1) located at the right side of the microtome pedestal.
The two positions (Up=lock; Down=loosen) of the locking handle
are marked on the pedestal.
Operation:
• Pull the locking lever (1) “Up” to mechanically lock the handwheel,
the handwheel can then not be turned.
• Pull the locking lever (1) to “Down” to loosen the handwheel, and the
handwheel can then rotate.
Titan 5000 • Manual Microtome User Manual
1
Blade-protecting lever on the blade holder
Attention: Remember to lock the handwheel and cover the blade with the protection lever
before operating the blade or changing the blade and at any time when not operating the
microtome.
There is a protecting lever on each blade holder, with which the blade edge can be
fully covered.
Transportation and Installation
• Pay careful attention to the “Technical Parameters” in Chapter 4.
• The instrument can only be placed upright in the course of transportation.
• Avoid grasping the handles of the handwheel, or the knob used for adjusting
the section thickness in the course of moving the instrument.
• Do not remove or change the protecting devices equipped on the instrument
and its component parts.
Operation
• Be very careful when using blades or disposable blades.
The sharp edges may cause serious injury.
• No blade or blade-holder with blade inside should be randomly placed.
The blades should always be kept in blade cases except when in use.
• The blade is should never be placed with its edge upward.
• Never try to catch a blade if dropped!
• Firmly clamp the specimen before installing the blade.
• Remember to lock the handwheel and cover the blade with the protection fitting
before operating the microtome or when changing the specimen, and also at any
time that the unit is not being used.
• Be careful when using any liquids around the instrument, any spilling of liquid on
the instrument will cause serious damage and void the warranty.
Cleaning
• Always lock the handwheel before cleaning the instrument.
• Do not clean the instrument with detergent containing acetone and benzene.
• Make sure that no cleaning fluids flow into the instrument, this will cause
serious damage and void the warranty.
• Please follow any cleaning regulations and rules stipulated by the manufacturer
and any laboratory rules concerning safety.
Maintenance
• Opening the instrument cover should not be necessary except by authorized
technicians of our company in the course of maintenance.
2
Titan 5000 • Manual Microtome User Manual
3. Technical Specifications
• Section thickness setting range: 0-60µm
• Setting values : 0µm-20µm
in 1µm increments
20µm-60µm in 5µm increments
• Precision Error: ±5%
• Trim Setting Mode: 15µm or 35µm
• Specimen Retraction Range: 90µm, this function can be shut off
• Object Feed: 30mm
• Vertical Stoke: 70mm
• Specimen orientation System: 8°X/Y, moving Range of Holder Base:
• Front / Back: 65mm
• Left / Right: 40mm
• Dimension: 500 x 570 x 300(L x W x H)
• Height of Blade edge: 105mm
• Net Weight: 33kgs
4. Brief
4.1 Sketch of the Titan 5000 Microtome
Standard Specimen Clamp Thickness Knob Handwheel Small Handwheel e Blade pressure Blade Holder Enclosure
Enclosur
Lever for Trimming Display Window Lock lever Titan 5000 • Manual Microtome User Manual
3
4.2 Description
Model Titan 5000 is a manually operated microtome powered by the turning handwheel.
The guide-lines for the vertical and horizontal movement of the specimen are seamless
and maintenance free. The specimen advances by the turning of the handwheel. All of
the important the parts of the instrument are covered by a sturdy enclosure. The
handwheel should turn smoothly during cutting. Selection of the section thickness
can be adjusted by the thickness adjustment knob.
5. Unpacking and Installation
5.1 Unpacking
• Unpack the wood crate to take out all components and the instruction sheets.
IMPORTANT – The Titan microtome is packed in a safe crate designed to limit any
movement of the unit during shipping.
WARNING- A hex screw is used to secure the unit to
the base of the wooden crate. Care must be taken to
remove the hex head screw from the base before
attempting to remove the unit from the crate.
Hold the base of instrument and take it out.
DO NOT try lifting the unit by any part of the
enclosure at any time.
Attention
Avoid grasping the handle of the handwheel, the wheel itself,
or any part of the section adjustment knob in the course of
moving of the instrument.
Instrument setting
• The instrument should be set up on a very stable platform in the lab.
5.2 Requirements for Handling
• The unit should always be stable and not allowed to
rock on the surface.
• There should be no vibration coming from the floor.
• Leave enough room for the convenient operation of the
handwheel and the wheel’s rotation
4
Titan 5000 • Manual Microtome User Manual
6. Installation
6.1 Installation of Specimen clamp
The adjustment mechanism of the specimen
clamp has been installed onto the mainframe,
and as ordered, the component setting hasn’t
been pre adjusted, The mechanism requires
installation and adjustment at the time of unit setup.
Standard specimen clamp
• Lock the handwheel
• There is a coattail holder on the standard
specimen clamp (1)
• loosen the clamp handle (4)
• Insert the coattail holder-leading into the
coattail slot (3) when completed
• Lock “up” the handle (4).
• Turn the locking handle downward to loosen (7)
• The position of the specimen clamp can be
adjusted by the large screw (5) and (6).
4 5 6 7 3 2 1 Attention
The screw (5) and (6) should be adjusted simultaneously
within their range of movement.
• The screw (5) for Up/Down, and screw (6) for Right/Left.
In the course of adjustment, the locking handle (7) should be loosened.
• Once the position of the specimen clamp is fixed, turn the
locking handle upward (7) to lock it down.
•Changing the specimen clamp: Loosen the locking handle (4) to take
out the specimen clamp from the coattail slot and install new one by
reversing the procedure.
Universal Cassette Clamp
• Lock the handwheel
• Installation and adjustment is the
same as the standard clamp above.
• The general specimen be positioned
horizontally or vertically as shown above.
• Pull the locking lever 2 toward you to
loosen mechanism.
• Horizontally or vertically put in the specimen cassette.
• Allow spring to retract back to lock cassette in place.
Titan 5000 • Manual Microtome User Manual
2 1 5
6.2 Installation of Accessories
Attention: please don’t insert the
disposable blade before the blade
holder is securely and properly installed
on the Microtome! The disposable blade
should be taken out before dismantling the
blade holder for any reason.
2 1 3 4 5 6 6.3 Installation of Blade Holder and its Base
• Loosen Lever (9), move the blade holder
base (5) backward to V block on the pedestal,
then lock lever (9)
• Loosen the screw (7), install part (8) onto part (5),
adjust the angle of part (8). The appropriate angle is 8°
• The screw (7) should be loosened before adjusting the cutting angle
• Loosen the locking lever (4) and mover part (6) to left or right to adjust blade position.
The blade holder can be used for both low and high profile disposable blades.
• Turn and loosen the locking lever (1), and insert the blade into the groove edgeways,
and lock the locking lever (4) after putting the blade into place.
7 The protection lever on disposable blade holder consists of a red adjustable handle (2) and pin
(3). Cover the blade with the protection lever at any time when not operating the microtome.
When changing the blade. Loosen lever (1), press pin (3) to take out the blade.
Attention
Remember to lock the handwheel and cover the blade with the protection fitting before
changing the specimen and during times when microtome is not operating.
6.4 Installation of Waste Tray
Push waste tray parallel to bottom of base of machine until the tray stops against
the base of the microtome.
6
Titan 5000 • Manual Microtome User Manual
8 7. Operation
7.1 Section Thickness
Section thickness range can be accomplished by
adjusting the knob located on the right upside of
the front part of the microtome. Each grade
of the
selection of the slice thickness can be easily be
positioned by knob (1)
• Section Thickness Range: 0—60μm
• Setting value:
0—20μm increment 1μm
20—60μm Increment 5μm
• Display Window (2) shows section
thickness range
2 1 7.2 Small Handwheel
The small handwheel on the left is used to move the specimen clamp forward
or backward quickly.
Turn the handwheel clockwise to make the specimen move toward blade. Handwheel is
designed to move the specimen horizontally and quickly move the block toward or away
from the blade. When the handwheel moves to the forward and backward utmost position,
it will become harder to rotate.
Attention
Be careful enough to ensure the specimen is mounted securely on the specimen clamp.
Damage will be done to the blade if the blade meets the metal specimen clamp.
7.3 Trimming
• Trimming lever (3) located at left side of the machine.
Pressed to the middle position,trimming thickness is 15μm.
Press it to bottom, trimming thickness is 30μm.
• First move the blade holder & base close to specimen, but
don’t touch or allow them to touch. Then, fasten the blade holder
to begin the trimming and sectioning process.
• You can also Press lever (1) to the largest range, for example(50μm)
to make trimming.
• When specimen is at upper position, press trimming lever
to accomplish
trimming or until the surface of the specimen is in a suitable position to start sectioning.
Titan 5000 • Manual Microtome User Manual
3 7
7.4 Sectioning
Attention
Be sure to turn the handwheel evenly, the speed of handwheel rotation
should match the rigidity of the specimen. The harder the specimen, the slower
Section thickness value can be accomplished by adjusting section knob at right
upright of the machine.
• Choose best cutting angle, from the small to big scale. Once the specimen is too hard to cut,
Cutting angle should be increased until ultimate desired ribbon is achieved.
• The Scale Value at right side of the blade holder is
used to adjust cutting angle
ON • Rotate Section Handwheel smoothly and
evenly to get ideal, good sample
��
7.5 Retraction
• Button for the retraction function is located
on the back of the Machine. “ON” for retraction.
• Use “Single” Screwdriver to turn the button to
“ON”, it means retraction function is activated,
If turned to “OFF”, it means retraction function is shut off.
8. Regular Operations
���
OFF
0F
F Instructions for paraffin Sectioning
Attention
Be sure to lock the handwheel and cover the edge of the blade with the blade protection fitting
in the course of operating the blade and specimen or before changing the specimen.
• Lock the handwheel
Attention: Firmly clamp the specimen before installing the blade.
• Put the pre-frozen paraffin onto the specimen clamp.
Attention: Be sure to be careful to avoid the edge of the blade, it is very sharp.
• Turn the handwheel to move the specimen to the backward utmost position.
• Insert the blade into the blade holder and firmly clamp it.
• Adjust the cutting angle (try first from 0°to 3°)
• Try to move the blade holder approaching the specimen.
• Adjust the surface position of the specimen to make it parallel to the edge of the blade.
• Loosen the handwheel.
Attention: Be sure to turn the handwheel evenly in the course of cutting.
• Turn the handwheel to start trimming for the ideal surface of the specimen.
• Select the ideal thickness of the slice or take the former ones as reference.
• Evenly turn the handwheel clockwise to cut slice.
• Change the specimen or stop the operation.
Attention: Be sure to lock the handwheel and cover the edge of the blade with the blade
protecting fitting in the course of operating of the blade and specimen or before changing
the specimen or during the break.
8
Titan 5000 • Manual Microtome User Manual
• Lock the handwheel.
• Cover the edge of the blade with the blade protecting fitting.
• Take out the specimen from the specimen-clamp for another operation. End the operation.
• Lock the handwheel.
• Take out the blade from the holder and put it into the blade-case.
• Take out the specimen from the specimen-clamp.
• Brush away the waste and clean up the instrument.
9. Problems and Solutions
Problems
Causes
Solutions
Uneven slices produced and 1. Inappropriate angle of the
sometimes no slice
blade, the angle of cutting is
can be cut
too small
2. Specimen not firmly locked
in the specimen clamp or/and
the blade holder.
3. Blunt blade
1.Adjust the angle of cutting until the
appropriate angle is acquired.
2. Check and firmly lock the screw of the
specimen lock and the blade holder.
3. Use another section of the blade or change
for a new one.
Slices are compressed or
corrugated or extruded
1. Blunt blade.
2. The specimen is too hot.
3. The angle of cutting is too
big.
4. The cutting is too fast.
1. Use another section of the blade or change
to a new one.
2. Freeze the specimen on the freezing platform.
3. Adjust the cutting angle.
4. Turn the handwheel slowly.
When cutting hard specimens, the blade holder;
nicks or chatter marks are
left on the slice
1. The cutting is too fast.
2. The angle of cutting is too
big.
3. Specimen holder or clamp
not locked tightly
1. Turn the handwheel slowly.
2. Adjust the cutting angle.
3. Check and firmly lock the screw of the
specimen locking device and blade holder
or tigheten the locking handle.
10. Cleaning
Attention: Be sure to lock the handwheel before cleaning
Brush off the slice residue with a dry brush.
Take off the blade base and the blade holder for cleaning.
Attention: Only cleanser for domestic use or gentle lye can be used for
cleaning the instrument.
ATTENTION! Acetone and benzene will damage the paint on the surface of the instrument.
• No leakage of cleaning liquid should be allowed into the instrument.
• A moist cloth should be used for cleaning.
Titan 5000 • Manual Microtome User Manual
9
11. Maintenance
Generally the microtome can work normally for a long time without any maintenance. But
preventive maintenance is also needed to ensure that the instrument can work normally for
a longer period. The regular maintenance should follow the advice listed below:
• Have a technician authorized by our company check the instrument at least once a year.
• After the free service period a successive maintenance contract should be made to ensure
the service continues. The detail can be obtained by contacting the Tanner service department.
• Clean the microtome daily.
• Monthly lubricate the following parts with special Tanner lubricating oil which we offer
(one or two drops is enough):
• The “V” block on the base of the instrument.
• The guiding rod on each disposable blade holder block
• The maintenance should be done by the authorized technicians.
Self-repair will void the warranty and can cause extra expense later
12. Appendix
Improvement of the instrument
Our company has the right to change any technical parameters of any Model for improving
the function of the instruments. Do not assume the parameters are the same for all models
produced.
Quality Guarantee
Every instrument we sell has been strictly examined and tested to ensure that every
instrument is qualified and matches its technical standards.
Warranty service terms are only provided for those who regularly use the instrument
and operate the instrument according to the Instructions.
We will not be responsible for the damage and other results caused by abuse and
mis-operation of the instrument.
Discarding and disposition
Discarded microtomes and fittings should be disposed according to the current laws or
regulations of the state and county of operation.
For the sake of environmental protection, we are willing to give you some advice on discarding
the Titan 5000 microtome.
10
Titan 5000 • Manual Microtome User Manual
Service information for customers
If you need any service or fittings of the instrument in the warranty period, please consult our
company or the sellers. You should provide them the specification, model, the serial number
and the time of contact.
Attention:
If you mail the instrument or its fittings back to Tanner, please make sure the following
procedures are followed:
• If the instrument or its fittings are free of any substance containing virus and bacteria or contacted with radiation resources, please disinfect them or eliminate the radioactivity
before mailing back. Our technicians will examine and verify.
• If you are sure that the instrument or its fittings, that you want to send back to our
company, is safe from any virus, bacteria or radiation, please tell our technician the
possible ways you will disinfect or eliminate the radioactivity and possible
contamination. Any possible infection of dangerous bacteria and virus or radiation
will lead to us immediately sending back the instrument or its fittings without any
maintenance or technical service, please inform us:
Model # _____________________________________
Serial # _____________________________________
The place where the instrument is located and the contact person.
Contact Name _________________________________
Address ______________________________________
____________________________________________
Contact Phone/E-mail ___________________________
____________________________________________
Reason for service ______________________________
______________________________________________
Titan 5000 • Manual Microtome User Manual
11