1
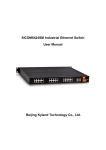
KIEN1005G User’s Manual 201106 KIEN1005G Industrial Ethernet Switch Hardware Installation Manual Kyland Technology Co., LTD. Publication Date: June 2011 Version: V1.0 Customer Service Hotline: (+8610) 88796676 FAX: (+8610) 88796678 Website: http://www.kyland.cn E‐mail: [email protected] No.: 1.12.02.1027‐0 1 KIEN1005G User’s Manual 201106 KIEN1005G Industrial Ethernet Switch Hardware Installation Manual Disclaimer: Kyland Technology Co., Ltd. tries to keep the content in this manual as accurate and as uptodate as possible. This document is not guaranteed to be errorfree, and we reserve the right to amend it without notice to users. Copyright © 2011 KYLAND Technology CO., LTD. All rights reserved. No part of this documentation may be excerpted, reproduced, translated, annotated or duplicated, in any form or by any means without the prior written permission of KYLAND Corporation. 2 KIEN1005G User’s Manual 201106 Notice for Safety Operation This product performs reliably as long as it is used according to the guidance. Artificial damage or destruction of the equipment should be avoided. z Read this manual carefully and keep it for future reference; z Do not place the equipment near water sources or damp areas; z Do not place anything on power cable and put the cable in unreachable places; z Do not tie or wrap the cable to prevent fire. z Power connectors and other equipment connectors should be firmly interconnected and checked frequently. z Do not repair the equipment by yourself, unless it is clearly specified in the manual. z Please keep the equipment clean; if necessary, wipe the equipment with soft cotton cloth. In the following cases, please immediately cut off the power supply and contact our company: ¾ Water gets into the equipment; ¾ Equipment damage or shell breakage; ¾ Abnormal operation of equipment or its performances have completely changed; ¾ The equipment emits odor, smoke or abnormal noise. 3 KIEN1005G User’s Manual 201106 Contents 1. Packing List ........................................................................................................................................................................... 5 2. Product Overview............................................................................................................................................................... 5 3. Structure and Interface .................................................................................................................................................... 5 4. Mounting ................................................................................................................................................................................ 6 5. Cable Connection .............................................................................................................................................................. 10 6. LED Indicators ................................................................................................................................................................... 14 7. Product Models.................................................................................................................................................................. 14 8. Basic Features and Specifications .............................................................................................................................. 15 4 KIEN1005G User’s Manual 201106 1. Packing List KIEN1005G Industrial Ethernet Switch 1 Hardware Installation Manual 1 Certificate of Quality (including Warranty Card) 1 Note: After unpacking, please check the accessories and the appearance of the equipment. If anything is missing or damaged, please contact us. 2. Product Overview KIEN1005G is a series of green low power consumption DIN‐Rail industrial Ethernet switch that can be applied extensively in wind power, distribution network automation, and subway PIS, power SCADA, wastewater treatment, metallurgy, intelligent transportation, rail transit and many other industries. KIEN1005G industrial Ethernet switch supports DIN‐Rail and wall mounting. It provides five 10/100/1000Base‐TX RJ45 ports in the front panel. 3. Structure and Interface Front Panel 1: PWR1 ‐‐ Power 1 LED 2: PWR2 ‐‐ Power 2 LED 3: G1‐G5 ‐‐ 10/100/1000Base‐T(X) RJ45 ports 5 KIEN1005G User’s Manual 201106 Top Panel 1: Terminal block for power input 2: Screw hole for grounding 4. Mounting Dimension Drawing for DINRail Mounting (Unit: mm) Dimension Drawing for Wall Mounting (Unit: mm) 6 KIEN1005G User’s Manual 201106 Note: The switch housing is a part of the heat dissipation system, which becomes hot during operation. Please avoid contact. Mounting Steps z KIEN1005G DINRail Mounting The specific steps are as follows: Step 1: Select the mounting position for KIEN1005G and ensure that there is enough space. Step 2: Insert the top of the DIN‐Rail into the spring‐supported slot of the DIN‐Rail connecting seat in the rear panel of KIEN1005G as seen below; move the device in the direction of arrow 2 to put the whole Din‐Rail into the seat; check whether KIEN1005G is firmly mounted on the DIN‐Rail, as shown below. 7 KIEN1005G User’s Manual 201106 z Remove KIEN1005G from DINRail The specific steps are as follows: Step 1: Plug the screwdriver into the hole at the bottom of spring locking plate; press the plate down to loosen the connection of DIN‐Rail and switch, as shown in arrow 1 Step 2: Take up KIEN1005G in the direction of arrow 2; meanwhile remove the device from the DIN‐Rail along the direction of arrow 3. z KIEN1005G Wall Mounting The specific steps are as follows: Step 1: Select the mounting position for KIEN1005G on the wall or in cabinet; ensure that there is enough space for the switch. 8 KIEN1005G User’s Manual 201106 Step 2: Drill 4 holes on the selected position according to the wall mounting dimension drawings; use a cross‐screwdriver to screw 4 cross‐slot screws (M3×10) into holes. Don’t tighten up the screws completely; leave about 5mm of space between. Step 3: Aim 4 mounting holes on KIEN1005G mounting plate at 4 fixed screws; pass the screws through 4 holes with the diameter of 6.5mm (Ф6.5); then slide down KIEN1005G as seen below; finally screw 4 screws tightly. Now the KIEN1005G should be firmly fixed to the wall or cabinet. z Remove KIEN1005G from wall or cabinet The specific steps are as follows: Step 1: Use a screwdriver to loosen 4 screws; move the device up to let screws into 4 holes with the diameter of 6.5mm (Ф6.5). Step 2: Unscrew the screws from wall or cabinet; remove the device from wall or cabinet 9 KIEN1005G User’s Manual 201106 5. Cable Connection RJ45 Port z RJ45 port cable types and requirements 10/100/1000Base‐TX Ethernet RJ45 port can be connected to terminal equipment and network devices with straight‐through cables or cross‐over cables. RJ45 connectors must be equipped at both ends of cable. RJ45 connector and pin number: 8 7 6 5 4 3 2 1 z Pin distribution of 10/100/1000BaseTX Pin MDI/MDI‐X signal name 1 Output/Receiving data(TRD0+) 2 Output/Receiving data(TRD0‐) 3 Output/Receiving data(TRD1+) 4 Output/Receiving data(TRD2+) 5 Output/Receiving data(TRD2‐) 6 Output/Receiving data(TRD1‐) 7 Output/Receiving data(TRD3+) 8 Output/Receiving data(TRD3‐) Note: “+” “‐“ means cable polarity. 10 KIEN1005G User’s Manual 201106 z 1000M straightthrough cable wiring z 1000M crossover cable wiring Power According to the power input requirements, use a 5.08mm‐spacing terminal block to connect power cable. Note: The cross section area of power cable is required to be greater than 0.75mm2 and less than 2.5mm2. The grounding resistance requirement: <5Ω. 11 KIEN1005G User’s Manual 201106 5 pin 5.08mm power terminal block: Contact definition Contact number DC wiring definition AC wiring definition 1 PWR1: + PWR1: L 2 PWR1: ‐ PWR1: N 3 Protection Ground Protection Ground 4 PWR2: ‐ PWR2: N 5 PWR2: + PWR2: L z Wiring and mounting Step 1: Take the power terminal block off KIEN1005G Step 2: Insert the power cable into the terminal block and fix the power cable Step 3: Put the terminal block back to KIEN1005G with the connected cable Grounding z Chassis grounding and power terminal grounding 12 KIEN1005G User’s Manual 201106 There is a grounding screw on the top panel of the KIEN1005G, which is for chassis grounding. One end of the chassis grounding cable is connected with the grounding screw and the other end of the cable is reliably earthed. (The cross section area of chassis grounding cable should be more than 2.5mm2. The grounding resistance requirement: <5Ω) The grounding part in the 5.08mm power terminal block is called surge grounding. It is required to connect the chassis grounding part with the surge grounding part by an 18#AWG yellow‐green line as seen below z 18#AWG yellowgreen line (Unit: mm) 13 KIEN1005G User’s Manual 201106 Note: If KEIN1005G needs to do a dielectric voltage withstand test, in order to avoid the failure of test, please disconnect the 18#AWG yellow‐green line to disable surge protection circuit that connects to surge grounding. 6. LED Indicators KIEN1005G LED indicators LED State Description Power LEDs PWR1 ON OFF Power 1 connects and operates normally. Power 1 disconnects or operates abnormally. PWR2 ON OFF Power 2 connects and operates normally. Power 2 disconnects or operates abnormally. Speed (Yellow) Link/Act (Green) ON Ethernet RJ45 port LEDs 1000M working state (i.e. 1000Base‐T) ON 10/100M working state (i.e. 10/100Base‐TX) or no connection Effective network connection in the port Blinking OFF Network activities in the port No effective network connection in the port OFF 7. Product Models The specific configuration models of KIEN1005G are shown in below table: KIEN1005G Configuration Table 14 KIEN1005G User’s Manual 201106 Model KIEN1005G‐5GE Description Power 5 10/100/1000Base‐TX RJ45 12VDC, 24VDC/AC, dual Ports redundant power inputs 8. Basic Features and Specifications Standard IEEE 802.3i, IEEE 802.3u, IEEE 802.3ab, IEEE802.3z Industrial Standard EMI: FCC CFR47 Part 15, EN55022/CISPR22, Class A EMS: IEC61000‐4‐2(ESD): ±8KV (contact), ±15KV (air) IEC61000‐4‐3(RS): 10V/m (80MHz‐2GHz) IEC61000‐4‐4(EFT): Power Port: ±4KV; Data Port: ±2KV IEC61000‐4‐5(Surge) Power Port: ±2kV/DM, ±4kV/CM; Data Port: ±2kV IEC61000‐4‐6(CS):3V (10kHz‐150kHz); 10V (150kHz‐80MHz) IEC61000‐4‐16 (common mode conduction): 30V (cont.), 300V (1s) Machinery: Vibration: IEC68‐2‐6, vibration amplitude:7mm, acceleration:20‐15, frequency range: 2‐9HZ 9‐200HZ 200‐500HZ Shock: IEC68‐2‐27, duration of the half‐sine pulse: 11ms, peak acceleration: 300m/s2 Free Fall: IEC68‐2‐32, Mass<20Kg: 0.25m Industry: IEC61000‐6‐2 Railway: EN50155, EN50121‐4 Cable Twisted Pair: 100m (Standard CAT5, CAT5e network cable) Power Requirements 15 KIEN1005G User’s Manual 201106 Power input: 12VDC (9~36VDC), 24VDC/AC (18~72VDC, 13~50VAC) Power terminal: 5‐pin 5.08mm‐spacing plug‐in terminal block Power consumption: full load: 3.4W; standby: 0.99W Physical Charactreristics Installation: DIN‐Rail or wall mounting Dimensions (W×H×D): 30mm×115mm×91.5mm Weight: 0.76Kg Environment Limits Operating Temperature: ‐40℃ to 85℃ (‐40 to 185℉) Storage Temperature: ‐40℃ to 85℃ (‐40 to 185℉) Ambient Relative Humidity: 5% to 95% (non‐condensing) MTBF: 357000h Warranty: 5 years For more information about KYLAND products, please visit our website: http://www.kyland.cn/ 16