1
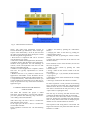
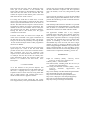
Fig. 6. .NET Platform Architecture
library. The .NET Class Framework consists of
several thousand type definitions, where each type
exposes some functionality. All in all, the CLR and
the .NET Class Framework allow developers to build
the following kinds of applications:
• Web Services. Components that can be accessed
over the Internet very easily.
• Web Forms. HTML based applications (Web Sites).
• Windows Forms. Rich Windows GUI applications.
Windows form applications can take advantage of
controls, mouse and keyboard events and can talk
directly to the underlying OS.
• Windows Console Applications. Compilers, utilities
and tools are typically implemented as console
applications.
• Windows Services. It is possible to build service
applications controllable via the Windows Service
Control Manager (SCM) using the .NET Framework.
• Component Library. .NET Framework allows you
to build stand-alone components (types) that may be
easily incorporated into any of the above mentioned
application types.
5. COMPLET REPORT OF THE PROJECT USER’S GUIDE
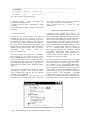
The folder that contains this project is called
Nettviewer. For being able to view the main interface
you must purchase the following steps: Netviewer>bin->debug->NetviewerInterface.
After those steps, the user is able to visualise the
main interface of the project.
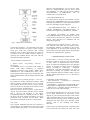
In the upper part the user is able to visualise the
current table with data.
In the right-down corner the user has the following
options:
• adding a new table by pushing the “Add Table”
button;
• changing the name of the table by pushing the
“Change Name” button;
• deleting the table by pushing the “Remove Table”
button;
• entering the name of the table in the text-box with
the label “Name”;
In the left-down corner of the interface, the user has
also a list of options:
• adding a new column by pushing the “Add
Column” button;
• writing a name for the current column in the text
box “Name”;
• choosing the type : byte, boolean, decimal from the
“Type” option;
• changing the name of the column from the “Change
Name” button;
• removing a column from the “Remove Column”.
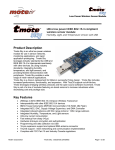
For data acquisition it must purchase the following
steps: Operations->Take Data The code behind this
interface allows the user to download data from the
mote that is connected in the usb port of our pc. The
“Open” button is opening the mote.
The next step is receiving the data from the mote,
visualising the data and saving them in xml format.
First the user must choose the number of columns
and rows, because the programme will take from the
mote as many data as the result of multiplying the
number of rows with the number of columns.
The acquisition and saving data in xml format will
begin at the time the user pushes the button “Receive
and Save as *.XML”.