1
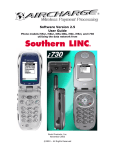
iPhone & iPad Wireless Point-of-Sale Solution Doc Version 3.0 for AirCharge for iOS v4.7 and above User Manual and Reference Guide AIRCHARGE • 4400 North Point Pkwy, Alpharetta GA 30022 • (866) 718-2800 www.aircharge.com User Manual Turn your cell phone into a “sell” phone! Perform real-time credit card transactions at the point of sale, wherever that sale occurs. This manual will show you how simple it is to use your AirCharge iOS App and hardware. Please note: AirCharge prides itself on excellent customer service. If at anytime you have a question, our knowledge customer service agents are available for all active AirCharge customers. Simply call 866-718-2800 and press 2 for support. Main Menu Swipe Card – Performs real time swiped credit card transactions. (AirSwipe or AirBlue required) Manual Entry – Performs manual entry credit card transactions Cash Receipt – Prints or emails cash receipts, replacing the need for handwritten forms. Information is not stored. Setup – Configuration and customer specific setting information. Add in custom text for print/emailed receipts. About – Contact information; email or call for support and activation assistance. Device Status – Displays the current status of an AirCharge Swipe Device. Setting Up Your AirCharge App Follow the steps below to activate your AirCharge App. 1. Hardware – The AirSwipe unit is ready to go right out of the box. For an AirBlue Mini, once you receive your hardware it is important that you remove it from the box and charge the unit prior to its first use. If you In order for the AirBlue Mini to charge properly please remove the tab between the battery and unit to allow for charging to occur – see last page for hardware information. 1 www.aircharge.com 866-718-2800 2. Software Download – Go to the Apple App Store on your iOS device or iTunes and search for “aircharge”. The application is free to download. To complete the activation process you must call AirCharge during normal business hours to activate your system. Call 866-718-2800 and press 4 for activations. 3. Activation – Contact an AirCharge agent to complete your activation. The agent will assist you with your activation and provide basic training of the AirCharge product. To assist the agent with your activation, please have your Gateway ID available. (Information sent to you via email) You will be required to provide the agent with your unique activation ID. Your activation ID can be found on the About screen under the main menu. Aircharge Activation ID Current Settings Customer Setup and Configuration Information. Software Configuration Options When contacting AirCharge for App setup, you will be asked about configuration options for the type of business you run. These options include: 4 Digit Verify – Verify the last 4 digits of a card swipe to protect against fraud. Work Order / Invoice Entry – Assign a work order / invoice number to the transaction. Tip – Enter a tip or preprint a receipt with tip lines for customers to sign. Other Amount – Break out additional costs on the receipt. Disable Refund – Protect against unauthorized credits by employees or others by disabling refunds. Choose the options that are right for your business type. 2 www.aircharge.com 866-718-2800 How to Run a Transaction There are two ways to obtain a customer’s credit card information: by swiping the credit card, or by manually entering the card number into the AirCharge App. When a card is swiped, the transaction is faster and more secure, plus your processing fees are lower. SWIPE Transaction (Hardware Required) From the Main Menu press the Swipe Card button. The next screen that appears will ask you to swipe the credit card. If you have an AirSwipe, you must press the button before you can swipe. If you have difficulties swiping the card or receive an error message, press the “Retry” key and swipe the card again. If the credit card is not readable, your options are to ask for a different credit card or to perform a manual transaction. If you have both an AirBlue Mini paired via Bluetooth and an AirSwipe device plugged in the audio jack, the AirCharge app will use the AirSwipe for swipe. If you wish to use the AirBlue Mini for the swipe, simply unplug the AirSwipe device before pressing the Swipe Card button on the main menu. MANUAL Transaction (Hardware not required) From the Main Menu press the “Manual Entry” button. You will be prompted to enter the customer credit card information Make sure to complete all information. Card Number Expiration Date CVV2 – 3 Digits on back or 4 digits on front (AMEX) Zip Code of the card holder Address # - Street number of the card holder (i.e. 123 Main St – only enter 123) If 4 Digit Verify function is enabled, a field requesting the last 4 digits of the card will appear after a swipe transaction. If the number does not match the number on the magnetic stripe of the card, the transaction cannot continue. 3 www.aircharge.com 866-718-2800 Enter Amount - Enter the amount for the transaction and press Continue. If Work Order / Invoice function is enabled, a field requesting this information will be available for entry. This also applies for the Other Amount function. If the Tip option is enabled, you will be presented an option enter a tip amount that will add to the total. If you have an AirBlue Mini, you have the option to preprint the merchant receipt. This preprint receipt will allow for the customer to enter the tip, total the receipts and sign the merchant’s copy of receipt. Enter the tip amount in the box and press Continue. If you have an AirSwipe with Signature Capture active, the tip screen will be available on the signature page. 4 www.aircharge.com 866-718-2800 The Transaction Summary screen provides a detailed summary of the transaction prior to processing. Be sure to confirm the cardholder name and the last 4 digits of the credit card for security. If you have an AirSwipe with Signature Capture active, a Signature Capture button will appear. Press this to load the signature capture page for the customer to sign. Press Charge Without Signature to submit the transaction for processing. Press Pre-Auth to get a pre-authorization of the transaction. Note: this button will not appear unless the pre-auth function is enabled during setup. Press Refund to submit a refund transaction for processing. Note: this function must be requested during activation. This function will appear if not initially set up. Pressing any one of these keys will process the transaction. The screen will change to let you know that the transaction is being processed and offer one of these responses: Approved Declined – Ask for another form of payment Cannot Connect to Server – Data service is not working Invalid Card Type – You are not set up to accept this card type Duplicate – DUPL – In the event of poor cellular service, this response confirms that original transaction went through and customer is not being charged again. The Signature Capture screen will present a customer-facing view of the transaction and prompt them to sign on the phone screen using their finger or a stylus. Options to clear the signature screen, add a tip (if enabled), or cancel the transaction are available. Once they sign, they press Complete Purchase to run the transaction 5 www.aircharge.com 866-718-2800 Approved Transaction – Once a transaction is authorized by the processor, the AirCharge application present options for receipts If you have an AirBlue Mini printer, options to print the Merchant Receipt and the Customer Receipt will appear. Press the Print Merchant Receipt button. Tear off this receipt for the customer to sign, and keep it in your records as your proof of the transaction. Once the merchant receipt has been printed you may now print the Customer Receipt. After pressing the Print Customer Receipt button, hand the printed receipt to your customer for their record of the transaction. In the event the receipt does not print correctly or the printer runs out of runs out of paper, press the Print Customer Receipt button again. You may also send an email receipt to the customer. Press Email Receipt and enter their email address. The receipt will be sent to them from [email protected] and will contain all of the information found on the paper receipt, including the custom text set in the Setup page. You may send to multiple addresses by inserting a comma after each one. If you have an AirSwipe with Signature Capture active, the print options will be gone and a No Thank You button will be visible. Even if the customer opts not to receive an email, the merchant will still receive one for their own records with the signature on it. Press the Done button when finished with the transaction. 6 www.aircharge.com 866-718-2800 Cash Receipt The cash receipt function allows you to generate a printed or emailed receipt for cash instead of writing a handwritten one. Please note that the receipt that looks very similar to a credit card transaction receipt, but information is not logged on any system. Cash receipts can be identified by the Auth: showing Cash Receipt. Custom Receipt Text & Signature Capture On the Current Settings page, there are two sections to insert custom text on to your printed or emailed receipts. Use it for disclaimers or offers to customers to protect and enhance the sale. The Custom Receipt Text will appear on the Email Receipt, Customer Receipt, and Cash Receipt ONLY. This text will appear between the transaction total and the signature line on printed receipts. The Custom Receipt Footer will appear on all receipts at the bottom (email receipts have an additional disclaimer below it). There is a 500 character limit on each section. You can force line breaks into the receipt by typing “\n”. The Signature Capture switch is for AirSwipe users to capture signatures for merchant records. AirCharge will be sending a copy of the transaction and signature to the merchant for every transaction. If the switch is on, a valid email where the receipt copies will be sent. 7 www.aircharge.com 866-718-2800 AirBlue Mini The AirBlue Mini printer connects to your iOS device via Bluetooth. To connect, first power on the printer and remove the paper roll. Beneath the paper roll is a label that identifies the Bluetooth name of the printer (starts with “P25_”) and the PIN code for the printer. On your iOS device, go to Settings -> Bluetooth. Ensure that Bluetooth is on. A list of available Bluetooth devices will appear on this screen. Choose the one that matches the name on the AirBlue Mini label. Once you press that device button, it will prompt you to enter the PIN code. Enter the PIN code from the label and press Pair. Replace the paper roll and shut the lid of the printer. When successfully paired, the light on the front of the device should turn solid blue. Loading the Paper LED STATUS CODES 8 www.aircharge.com 866-718-2800 LED ERROR CODES