1
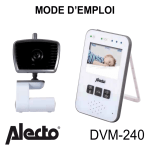
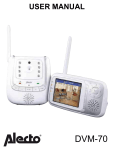
USER MANUAL
DVM-240
2
INDEX
1
INTRODUCTION ............................................................................................................................ 4
2
2.1
2.2
2.3
OVERVIEW OF FUNCTIONS ........................................................................................................ 4
BABY-UNIT ..................................................................................................................................... 4
PARENT-UNIT ................................................................................................................................ 5
DISPLAYED ON SCREEN OF THE PARENT UNIT ....................................................................... 5
3
3.1
3.2
HOW TO INSTALL ......................................................................................................................... 6
BABY-UNIT ..................................................................................................................................... 6
MONITOR UNIT.............................................................................................................................. 7
4
4.1
4.2
4.3
4.4
HOW TO USE ................................................................................................................................. 8
ON/OFF .......................................................................................................................................... 8
PARENT-UNIT ................................................................................................................................ 8
CONTROLLED FUNCTIONS & SETTINGS MENU ....................................................................... 9
AUTOMATIC NIGHT VISION.......................................................................................................... 10
5
5.1
5.2
5.3
5.4
5.5
5.6
5.7
5.8
5.9
5.10
5.11
TIPS AND WARNINGS .................................................................................................................. 11
GENERAL....................................................................................................................................... 11
INSTALLATION ............................................................................................................................... 11
RECEPTION INDICATION /OUT OF RANGE REPORT ................................................................ 11
DELAYS IN VIDEO AND AUDIO .................................................................................................... 12
POWER SUPPLY ........................................................................................................................... 12
FREE FROM INTERFERENCE...................................................................................................... 12
RANGE ........................................................................................................................................... 13
EAVESDROPPING/INTERCEPTION ............................................................................................. 13
MAINTENANCE.............................................................................................................................. 13
ENVIRONMENT AND DISPOSAL .................................................................................................. 13
IN CASE OF NO PICTURE AND NO SOUND ............................................................................... 13
6
DECLARATION OF CONFORMITY ............................................................................................... 14
7
SPECIFICATIONS .......................................................................................................................... 14
8
WARRANTY ................................................................................................................................... 15
3
1
INTRODUCTION
The Alecto DVM-240 is a wireless audio/video monitoring system suitable for indoor use.
You can watch and listen to your baby continuously or set the baby monitor to automatically turn on
when your baby starts to cry.
2
OVERVIEW OF FUNCTIONS
2.1
BABY-UNIT:
4.
1. Antenna
2. Light sensor, activates the infrared 5.
6.
night lighting in dark.
3. Infrared LED’s (for night vision). 7.
1
Camera Lens
Built-in microphone
On/off switch and light
Built-in loudspeaker
8. Power adapter socket
9. Button ‘pairing’ (signals
the camera to re-connect
with the parent unit).
2
9
7
3
4
6
5
4
8
2.2
PARENT-UNIT:
1
2
3
1.
2.
3.
4.
5.
6.
7.
4
5
8.
16
15
6
14
7
13
8
12
9
9.
10.
11.
12.
13.
14.
11
10
15.
16.
2.3
On/Off indicator light
On/Off push button ( )
VOX light: Lights up when the VOX function is activated
Sound indication light
Display
‘ZOOM’ key
Volume higher; also key to move image up when in
zoom mode
volume lower : also key
to move image down when in
zoom mode
Built-in loudspeaker
Built-in microphone
Folding table stand
Power adapter socket
Talk-back button : also key to move image to the left
when in zoom mode
Menu push button ( ); also key to move image to the
right when in zoom mode
Battery compartment
Belt clip (attached to table stand).
DISPLAYED ON SCREEN OF THE PARENT UNIT:
Indication of signal strength
Indication of battery strength
Talk-back function is active
1
Display volume level (0-7), level 0 ( x) = no sound)
4
Display level of brightness (1-5)
Settings menu (opened by pressing the key
)
Zoom menu (shows which keys to use to move the image).
5
3
HOW TO INSTALL
3.1
BABY-UNIT: (CAMERA)
Power adapter:
1. Connect one of the included 6V power adapters with the 6V DC jack on the back of the baby
unit. Optionally, you can use the adapter with the long (3m) connection cord or the short (1.8m)
connection cord.
2. Plug the adapter into a 230V socket.
Only use the supplied adapter with model number CS6D060080FG.
Make sure the baby is unable to touch the baby unit or
connection cord. Place the baby unit at least 2 meters
away from the baby and bundle the long wires with tape or
specially purposed wire ties.
>2m
Table top or wall model:
The baby unit can be placed on a table, cabinet or desk or be mounted onto the wall.
To mount on the wall:
Drill two holes in the wall next to each other with a mutual distance of 2.1cm, inserting a plug and
screw into each one.
Let the head of the screw protrude by a few millimeters.
Hang the baby unit up by sliding the holes already made in the camera stand, over the screws in the
wall, pushing downwards.
Finally, work the adapter cord neatly away using the cable brackets.
Positioning tips
• When using the unit as a baby monitor: position the camera unit at a minimum distance of 2
metres from your baby and make sure that the power cable is safely tucked away.
• To ensure an optimum range, it is best to position the camera unit as high as possible, away
from large metal surfaces.
• The camera is not waterproof and is therefore only suitable for indoor use. If used outdoors, the
camera unit must be protected from moisture and sand.
6
3.2
MONITOR UNIT:
Power supply:
The monitor unit may be powered directly by the supplied rechargeable battery or via the supplied
mains adapter. As soon as you connect the mains adapter, the battery will be charged, so that you
can also use the monitor unit in a mobile manner.
Battery:
1. Open the battery compartment of the parent unit by clicking open the battery cover on the back
of the parent unit.
2. Connect the plug as shown in the battery compartment and insert the battery.
3. Click the battery cover back onto the parent unit.
Do not use force when connecting the plug and inserting the batteries.
Only use the provided rechargeable Li-ion batteries (3.7V, 1000mAh).
Power Adapter:
1. Connect the other 6V power adapter to the DC 6V jack on the left side of the parent unit.
2. Plug the adapter into a 230V socket.
Use only the power adapter provided with model number CS6D060080FG. Ensure that the power
cable cannot be stumbled over causing a fall. Bundle the long wires with tape or specially purposed
wire ties.
Charger:
To charge the battery, connect the power adapter to the parent unit and insert the power adapter
into a 230V wall socket.
• For the first time use, charge the battery for at least 15 hours before, even though the indicator
shows the battery is full.
• The charging circuit for the battery is controlled electronically. There is no danger of overcharging
which means the adapter can be left connected continuously.
• In case the set is not used for long time (> 2 months), it is advisable to remove the adapter from
the wall socket and remove the battery from the parent unit. When resuming operation, first
properly charge the battery.
The parent unit is not waterproof and therefore only suitable for indoor use. When used outdoors,
protect the parent unit against moisture and sand.
7
4
HOW TO USE
4.1
ON/OFF:
Baby-unit:
• To turn on, slide the switch on the back of the baby unit to ON.
• To turn off, slide the switch on the back of the baby unit to OFF
Parent-unit:
• To activate the parent unit, press the button for 2 seconds.
• To turn the parent unit off, press the button again for 2 seconds.
4.2
PARENT-UNIT:
Receiving Volume:
• To increase the volume, repeatedly press the button .
• To lower the volume, repeatedly press the button .
• You can choose from 7 different volume levels and volume off.
• While setting the volume, the level is shown at the bottom of the display.
Sound lights:
• If the baby cries, three sound lights will flash at the above right of the display. This enables you
to keep an eye on your baby when the volume is low or off or if the baby monitor is further away
in the room.
Talk back:
• Press button to talk back to the camera unit. You can talk for as long as you hold the button
pressed down.
•
lights up at the top of the screen while talking back.
• The call volume in the baby unit is fixed and cannot be changed by you.
•
•
•
•
8
Zoom in:
Press the
button to see a close-up of the image.
Use the , ,
or
buttons to move up, down, left or right.
Press the
button again for normal viewing.
4.3
CONTROLLED FUNCTIONS & SETTINGS MENU:
To open the menu of the parent unit, press the button
bottom of the screen.
. The following icons will be displayed at the
Setting the brightness of the display:
1. To select this function, use the keys
and
2. Press the button
3. To set the brightness, use the keys
and
4. To store the setting and exit the menu, press twice on the button
Sound automatically off when baby is sleeping:
1. To select this function, use the keys
and
2. To turn this feature ON or OFF, press the button
= this function is disabled, there is always noise.
= this function is disabled, if the baby is sleeping, the sound is turned off until the baby
is crying.
3. To store the setting and exit the menu, press the button
Image and sound automatically off when baby is sleeping:
1. To select this function, use the keys
and
2. To turn this feature ON or OFF, Press the button
= this function is disabled, there is always an image and sound.
(The VOX light at the top of the display is now also lit up) = this feature is enabled. If
the baby is sleeping, the picture and sound will be muted until the baby is crying.
3. To store the setting and exit the menu, press the button
Setting the sensitivity of VOX and AUTO MUTE:
1. To select this function, use the keys
and
2. Press the button
3. To set the sensitivity, use the keys
and
= Sound (+ image) is enabled when baby is crying softly(= high sensitivity)
= Sound (+ image) is enabled when baby is crying normally (=average sensitivity)
= Sound (+ image) is enabled when baby is crying loudly (= low sensitivity).
4. To store the setting and exit the menu, press twice on the button
9
4.4
10
AUTOMATIC NIGHT VISION:
The camera unit includes 8 built-in infrared LEDs; these LEDs are automatically switched on when it
becomes dark around the camera unit, and automatically switched off when it becomes light.
These LEDs can illuminate objects up to a distance of approximately 2 meters.
Please note that in the darkness, i.e. when the night vision LEDs are switched on, the image on the
monitor will appear in black and white.
Please note: Infrared light cannot be perceived by the human eye; this means that you
cannot see that these LEDs are on with the naked eye. Depending on the type of infrared
LED, a red glow may, however, be visible.
5
TIPS AND WARNINGS
5.1
GENERAL:
• Read the manual carefully and follow all the instructions.
• Never place or use the camera or the monitor in a wet or damp room or environment.
• Make sure that heat can be adequately dissipated; never cover the monitor unit, the camera unit
and/or the mains adapter(s) or place them immediately next to a source of heat.
• Use only the supplied mains adapter(s); connecting another type of adapter may damage the
electronic equipment.
• Make sure that the adapter cables cannot be damaged and that they cannot cause tripping or
falling.
• Never disassemble the monitor unit, the camera unit and/or the mains adapter(s); this may only
be done by qualified personnel.
5.2
INSTALLATION:
• The mains adapter should only be connected or disconnected when it has been unplugged from
the wall socket.
• Do not install the DVM-240 during a thunderstorm.
• Do not touch uninsulated adapter cables unless the adapters have been disconnected from the
mains power supply.
5.3
RECEPTION INDICATION /OUT OF RANGE REPORT:
The strength of the signal received from the baby unit indicated at the top left of the image shown
on the parent unit:
: very good reception
: good reception
: moderate to good reception
: bad reception
• In all cases, the picture and sound are shown with the same quality.
• Once the parent unit fails to receive a signal from the baby unit (out of range or the baby unit is
turned off), the “no camera” and “ ” (no reception) symbol will appear on the display and an
alarm tone will go off every 15 seconds.
• Once the parent unit has regained the signal from the baby unit, the display will light up again.
11
5.4
DELAYS IN VIDEO AND AUDIO:
• The camera unit sends the video and audio to the monitor unit in digital blocks. The monitor unit
recreates a recognisable image and a comprehensible sound from these signals. This may mean
that there is a short delay between the movement or sound taking place and seeing/hearing it on
the monitor unit.
• In addition, the video and the audio on the monitor unit may not be exactly in sync with each
other.
5.5
POWER SUPPLY:
• Baby-unit:
The baby unit draws its power only from the 6V power adapter supplied. The baby-unit has no
built-in battery for portable use.
• Parent Unit:
The parent units is powered by a 3.7V Lithium-Lion rechargeable battery which can supply power to the parent unit from 5 to 7 hours.
The battery charging is shown at the top right of the display:
: Battery is full
: battery is 2/3 full
: battery is 1/3 full, charging is desired
: battery is empty and the parent unit will shut down.
Approx. 30 minutes before the battery is completely empty, the lamp lights in the orange color
and the icon
will start to blink. Every 30 seconds a sound will beep, the adapter must now be
connected immediately.
Within around 3 hours the adapter will have re-charged the empty battery regardless of whether
or not the parent unit is ON or OFF. If the parent unit is turned ON, you can follow the charging
through the expiration of the battery symbol. If the parent unit is turned OFF, the lamp will light
in the orange color and will turn green once the battery is charged.
5.6
12
FREE FROM INTERFERENCE:
• This Digital Video Monitoring System is digitally encoded. You should therefore never receive a
signal from other equipment, nor will the signal from your camera unit appear on, for example,
your neighbors’ monitor.
• If the camera or monitor are located in close proximity to electromagnetic fields, this may cause
some disturbance to the signal (audio or video). In this case, try a different location for the camera or the monitor or, if possible, remove the source of the interference.
5.7
RANGE:
• The range of the video monitor is up to 300 meters in the open and 50 meters indoors; the range
is dependent on local circumstances. If the units move out of range of each other, the image first
freezes for a few seconds (no motion), followed after a few seconds by the message ‘No link’,
after which the screen goes black.
5.8
EAVESDROPPING/INTERCEPTION:
• It is virtually impossible to eavesdrop on/intercept these Digital Video Monitor signals. Not only
would one need to be in range of the video monitor, very expensive equipment would also be
required.
5.9
MAINTENANCE:
• Clean the video monitor with a damp cloth only; do not use chemical cleaning products. Before
cleaning, make sure that the mains adapters are disconnected.
5.10
ENVIRONMENT AND DISPOSAL:
• The packaging of this video monitor may be recycled as used paper. We recommend,
however, that you should retain this packaging so that the equipment can be adequately
packed when it is being transported.
• Defective or dead batteries should be taken to your local depot for small chemical waste
or to the special battery collection points. Never dispose of batteries in your household
waste.
• If you are replacing the video monitor, hand in your old equipment to your supplier; they will
ensure that it is recycled in an environmentally-friendly manner.
5.11
IN CASE OF NO PICTURE AND NO SOUND:
– Is the parent unit and the baby unit turned on? (adapter connected, battery full?)
– Is the parent unit within range of the baby unit?
– Is the right camera selected?
– Has the baby unit not been disabled under the influence of silence? (VOX)
– Has the volume of the parent unit not been set to 0 (off)?
• If all of the above is in order, take the adapter out of the wall socket and remove the rechargeable battery from the parent unit. Now wait for a minute or more and then put everything back.
Turn the parent unit and baby unit back ON.
• If you still have no picture or sound, please contact your dealer.
13
6
DECLARATION OF CONFORMITY
The Alecto DVM-70 complies with the essential requirements and provisions as described in European Directive 1999/5/EC. The declaration of
conformity is available on the website www.alecto.info.
Usage is allowed in all countries of the EU. In France, Italy, Russia and Ukraine only indoor use is
allowed.
7
SPECIFICATIONS
Range:
up to 50m indoors
up to 300 metres outdoors
Power supply monitor unit:
3.7V Lithium Polymer battery (included)
mains adapter (included)
6VDC 800mA
model: CS6D060080FG
Power supply camera unit:
6VDC 800mA
mains adapter (included)
model: CS6D060080FG
Frequency:
2.4GHz, digital frequency hopping (FHSS) / 52 channels
Camera
Cmos, 640x480
Display
2.4” colour LCD display
640*480 pixels
Charging time for monitor unit battery: < 3 hours * (whether the monitor unit is switched on or off)
Battery life for monitor unit battery:
7~8 hours *
*: these times are approximate and are dependent on usage and on the condition and quality of the
batteries.
14
8
WARRANTY
The Alecto DVM-240 comes with 24 months warranty from the date of purchase. During this period
we guarantee that any defects caused by errors in materials or construction will be repaired free of
charge. This at the importer’s discretion.
WHAT TO DO: If you notice a defect, first consult the manual. If the manual gives you no definitive
answer, consult the Alecto service department through WWW.ALECTO.INFO or the supplier of this
video monitor.
THE WARRANTY IS VOID: In the event of improper usage, incorrect connections, leaking and/
or incorrectly installed batteries, use of non-original parts or accessories, negligence and defects
caused by moisture, fire, flood, lightning strikes or natural disasters. In the event of unauthorized
modifications and/or repairs by third parties. In the event of incorrect transportation of the equipment
without appropriate packaging or if the equipment is not accompanied by this warranty card and the
receipt of purchase.
Connection cables, plugs and batteries are not covered by the warranty. Any further liability, in particular for any consequential damages, is excluded.
15
6HUYLFH
$]LsODDQ
µV+HUWRJHQERVFK
+HOS
WWW.HESDO-SERVICE.NL
[email protected]
1/
)5
16
ver1.0