1
1
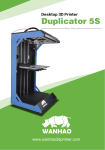
Duplicator 5 Desktop 3D Printer
USER MANUAL
Resolution 0.02mm
Speed 300mm/second
Software: Wanhao Maker
© 2014 Wanhao USA
2
3
Table of Contents
Welcome
1
Printer Specifications
2
Unboxing
3
What's In the Box
4
Component Layout
5
Powering On the Printer
6
Calibrating the Build Plate
7-8
Loading Filament
9
Installing Wanhao Maker Software
10-11
Wanhao Maker Interface
12
Using Wanhao Maker Software
13-14
Safety
15
1
Welcome
We at Wanhao USA are proud to introduce the Duplicator 5 3D printer.
Boasting a large build capability, blazing printing speed, and a robust
proprietary software... the Duplicator 5 simplifies large format 3D printing.
This user manual will guide you through the setup of your Duplicator 5
and the installation/usage of the Wanhao Maker software.
Please visit our website (www.wanhaousa.com) for more guides, tips, and
support contact information.
Welcome to the world of Wanhao 3D printing!
Wanhao USA Team
[email protected]
2
Printer Specifications
Fused Filament
Fabrication (FFF)
Build Volume
305*205*575 mm
(~ 12*8*23 in)
Layer Resolution
20 microns (0.02 mm)
Position Precision X
Y
Z
12.5 microns
12.5 microns
5 microns
3MM +/-0.15mm
SD Card
Connectivity
USB cable(firmware updates)
Length 460mm
Width 400mm
Height 860mm
Shipping Box Dimensions
0.4 mm
30mm/s-300mm/s
30mm/s-350mm/s
Wanhao Maker
STL, I file
Windows (XP32 bit/7+)
Mac OS X (10.6 64bit +)
AC Power Input
Power Requirements
100-240V
4 AMPS
50-60Hz
200Watt max
24V [email protected]
Length 550mm
Width 490mm
Height 940mm
35kg(77lbs)
44kg(96lbs)
Ambient Operating
Temperature
Storage Temperature
10°- 38°C
0° - 40°C
180°- 260°C
48dBA
3
Unboxing
1. Place the Duplicator 5 box on a
stable surface. Placing it centrally
on the floor will provide the best
accessible position for unpacking.
3 . Place the open end on the floor,
and ensure that the cardboard flaps
lay outward.
2. Lay the box on a long side and
carefully cut open the bottom side of
the box with a box cutter.
4. Lift the box upwards to
reveal your new WANHAO
Duplicator 5.
4
What's in the Box
Please check the contents of your printer box to make sure that all of the following components
have been included:
1x
Printer
1x
USB Cable
1x
Power
Supply Unit
1x
Build Plate
1x
Spool Holder
1x
Print Scraper
1x
Hex Key
1x
SD Card
1x
3mm
Filament Roll
1x
Tweezers
1x
SD Card
Adapter
5
Component Layout
1. Menu Display
2. Click and Rotary Dial
3. Extruder Cable
4. Filament Tube
5. Extruder
6. Build Plate
7. Build Plate Wingnuts
8. Spool Holder
9. USB Socket
10. Power Switch
11. Material/Filament Feeder
12. Power Socket
6
Powering On the Printer
1. There are two parts to your AC adapter.
Connect these two cables together, and
connect the three-pronged end to a wall
socket.
2. Take the other end of your AC adapter
and plug it into the circular socket on the
back of your printer.
3. Once your cables are properly plugged in,
press the
symbol on your power switch
to turn your printer on.
To turn your printer off press the
symbol.
CAUTION: Execessive force (Pushing or Pulling)
on your power cables may result in damage to your
printer.
7
Calibrating the Build Plate
1. Before printing, you must calibrate
your build plate. From the main info
screen click the rotary dial and
scroll the down to UTILITIES.
2. Click the rotary dial again and
scroll down to CALIBRATE PLATE.
3. Click the rotary dial again and
your extruder will proceed to the
home position.
4. Click the rotary dial again and
the extruder will move to the first
nozzle height check position.
8
Calibrating the Build Plate (continued)
5. Slide a name card (or a sheet of
copy paper) in between the nozzle
and the build plate. You will want the
sheet of paper to slide back and forth
with no or minimal friction.
7. After adjusting the height at
your first position, click the rotary dial
and follow the same procedure for the
next two nozzle height check positions.
6. To raise and lower your build plate,
look underneath the platform for
three seperate wingnuts. Adjust only
the wingnut underneath your current
nozzle position. To raise the
platform, turn the wingnut counterclockwise. To lower the platform,
turn it clockwise.
8. After you adjust the wingnut in the third
height check position, your build plate
will be properly calibrated.
9
Loading Filament
1. Once you have calibrated your build plate,
you are going to load filament onto your
printer.
From the main info screen, click the rotary dial
and scroll down to UTILITIES. Click the dia once
more and scroll down to LOAD.
3. At this point, make sure you have already
loaded a filament spool onto the spool holder.
You will want to load your filament spool
with filament unraveling towards the center
of the printer spine.
2. Your extruder will begin to heat up until it
reaches 220' C.
WARNING: Do not touch the extruder heating
block. Doing so can cause severe burns.
4. Once your heating block reaches 220' C,
the large gear on the drive block assembly will
begin to spin. At this point, feed the filament via
the circular entry (hole) at the bottom of the drive
block assembly. An internal filament feed gear
will engage the filament and begin to pull it
through. You will notice the filament being
guided through the clear tube in between the
drive block assembly and the extruder.
Once your filament reaches the extruder, you will
notice melted filament exiting the nozzle. Click
the rotary dial once more to finish procedure.
Your machine is now ready to print.
10
Installing Wanhao Maker Software
Your Duplicator 5 is designed to work with our proprietary software called Wanhao Maker.
Developed by the Wanhao International Team, this software was created to make 3D printing
as easy as possible. Wanhao Maker can be used to manipulate 3D printing files into a file
format that the Duplicator 5 understands. This file type is called an I file (example_object.i).
Preconfigured to work on every Duplicator 5, Wanhao Maker contains all of the functions
needed to prepare a file for 3D printing. In addition to translating other 3D printing files, you
can also use this software to scale, position, and fix models. While you make decisions on
the look and quality of your 3D model, Wanhao Maker’s slicer engine prepares the proper
parameters in the background. Via the software interface, you can also upgrade firmware
and modify settings for future component upgrades... Wanhao Maker is truly forward
capable.
You can download the Wanhao Maker software from our website (www.wanhaousa.com) or
by downloading it from the SD card included with your printer.
1. If you are downloading the software from the
internet, you will need a program to extract zip
files. We recommend WinZip. Once WinZip is
installed right click on the downloaded zip file
and click EXTRACT ALL. Locate the extracted
Wanhao Maker .exe file and double click the icon
to open the installation wizard.
2. Once the installation begins, you will be
asked to select a langauge. Select your
preference and click OK.
The Wanhao Maker .exe file is also already
provided on the SD card included with your
printer.
Periodic software updates are posted to our
website (www.wanhaousa.com) as soon as
revisions are made. We recommend updating the
software regularly
3. Follow the instructions on the Setup prompt
window and click NEXT when you are ready to
continue the installation.
11
Installing Wanhao Maker Software (continued)
4. The Choose Install Location prompt
will ask you to choose a location for the
Wanhao Maker Software. Select where
you would like the software program to
be stored, and click NEXT.
5. The Choose Components prompt will ask
you to choose the particular software
components you wish to install. Check off
all of the options, and click INSTALL.
6. The installation wizard will automatically
install all of the necessary files. When the
installation is complete, click NEXT.
7. Click FINISH on the last prompt when
you are ready to begin using the Wanhao
Maker software.
12
Wanhao Maker Interface
1. Add File (Quick Button)
Click this icon to load an object to your
print area. You can add as many objects
as you can fit on the plate.
6. View
To view your object from different agles,
click this icon, and use your mouse
buttons to manipulate the 3D viewer.
11. Mirror X
Click on an object, and then on this icon
to flip along the X-axis.
12. Mirror Y
Click on an object, and then on this icon
to flip along the Y-axis.
7. Pan
2. Start Slicing (Quick Button)
Click this icon to start slicing. Once you Click this icon to get a different view with a
13. Mirror Z
click the icon, you will be given further fixed rotation.
Click on an object, and then on this
slicing options.
8. Move
icon to flip along the z-axis.
Click
on
an
object,
then
on
this
icon
to
3. Save I File (Quick Button)
14. Duplicate
move that object around the plate.
W h e n y o u c l i c k t h i s i c o n t h e sliced
Click on an object, and then on this icon
I file will be saved to your chosen 9. Rotate
to duplicate that object on the build plate.
destination.
Click on an object, and then on this icon to
15. Reset
bring up three rotational rings. Click and
Click
on an object, and then on this icon
4. Add file
drag on these rings in whatever direction
to reset that object's position on the plate
Click this icon to load an object to your you wish to rotate the object.
print area. You can add as many objects
16. Start Slicing
10. Scale
as you can fit on the plate.
Click this icon to start slicing. Once you
Click on an object, and then on this icon to
click the icon, you will be given further
change the dimensions of that object. You can slicing options.
5. Delete
click on an object and drag in any direction to
To delete an object, click on the object
18. Build Plate
change size, or you can enter precise
and then click this delete icon.
measurements in the left slideout menu.
This is your build plate.
13
Using Wanhao Maker Software
1. Most 3D printing files are in the STL file
format. In addition to finding 3D printing
files on the internet you can also create
your own STL file using a CAD program.
We recommend Google Sketchup.
3. When your STL file has been sliced, you will
be shown an Estimated Print Result with information
about your print.
2. After you have added and manipulated your
STL file in Wanhao Maker, click the slice icon to
begin slicing. You will be given the option to
store your file in your chosen location.
4. Your converted STL file has now been
saved as an I file at your chosen location.
14
Using Wanhao Maker Software (continued)
5. The Duplicator 5 is designed for long prints,
and the best way to transfer data during a long print
is via an SD card. We recommend you save your I
files directly to the SD card included with your
printer.
7. From your printer's main info screen, click
the rotary dial and scroll down to PRINT
FROM SD.
9. The status on your main info screen will
display as "Heating...". Once the correct
temperature is reached, the Duplicator 5
will begin printing your model.
6. Once you have saved your I file
to your SD card, safely eject your SD
card from your computer and insert it
into your printer's SD card reader.
8. On the following screen, select the file
you wish to print.
15
Safety
WARNING: The components on the Duplicator 5 generate high temperatures and move
extremely fast. Reaching inside of the Duplicator 5 while it is in operation may cause
injury. Stay clear of the printer frame perimeter while the machine is in operation.
Always control the Duplicator 5 from the rotary dial on the front of the printer or with the
power-switch located on the back. Never push or pull any of the components by hand.
After a print, make sure your printer is off and that your nozzle is no longer hot before
removing the build plate from the printer.
WARNING: The Duplicator 5 is an extremely heavy machine and extra caution is
advised when lifting/moving the printer. Failure to properly lift/move the printer can
result in injury.
CAUTION: When opening the Duplicator 5 for service, ensure that the power supply
is turned off and the power cord is disconnected from the wall socket. Failure to do so
can result in electrical shock.
CAUTION: Only use the stock power supply provided with your Duplicator 5 .
© 2014 Wanhao USA