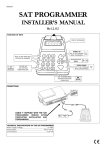
1
Volume 1 EMSCHARTS.COM User Manual EMSCHARTS.COM User Manual emsCharts, Inc. 600 Mifflin Rd, Suite 102 Phone 866.647.8282 • Fax 412.461.3270 v. 3.1.0, 9/30/2009 Content Provided by: David Nicholas Pete Goutmann David L. Webb Table of Contents 1. 1.1. Web Page Basics.................................. 4 1.1.1. 1.1.2. 1.1.3. 1.1.4. 1.1.5. 1.1.6. 1.1.7. 1.1.8. 1.1.9. 1.1.10. 1.2. 1.2.1. 1.2.2. 1.2.3. 1.2.4. 1.2.5. 1.3. 1.4. 2. 3. 4. Home Page.......................................... 8 Header Bar.............................................. 9 Menu System .......................................... 9 At a Glance ............................................. 9 Service Login......................................... 10 Quick Statistics ...................................... 11 Performing a Search........................... 12 Logging Out ...................................... 13 Quality Assurance Levels .................... 17 Special Reports .................................. 17 Data Validation .................................. 17 Configuration...................................19 5.1. 5.2. 5.3. 5.4. 5.4.1. 5.4.2. 5.4.3. 5.5. 6. Web Browser........................................... 4 Software and Hardware Requirements ...... 4 HTML...................................................... 4 Toolbars.................................................. 4 Printing ................................................... 5 Window Behavior / Taskbar...................... 6 Use of the Tab Key .................................. 7 Text Boxes .............................................. 7 Select Boxes............................................ 7 Multi-Select Boxes ................................... 8 6.7. 6.8. 7. 8. Region .............................................. 19 Command Fac.................................... 19 Service.............................................. 19 User.................................................. 19 General................................................. 19 Certifications ......................................... 19 User Preferences ................................... 20 Activity Audit ..................................... 23 Patient Care Record.........................25 6.1. 6.2. 6.3. 6.4. 6.5. 6.6. 6.6.1. 6.6.2. 6.6.3. 6.6.4. 6.6.5. 6.6.6. Incomplete Charts.............................. 25 Charts Flagged for QA ........................ 25 Charts for Review............................... 27 Charts Missing Followup Letters........... 27 Create Chart ...................................... 27 Creating a New PCR ........................... 27 Page 1 - Dispatch Information ................ 27 Patient Information................................ 34 Page 2 - CC/HPI Page ............................ 42 Page 3 - Neurological Exam / Airway ...... 47 Page 4 - Respiratory / Cardiovascular ..... 50 Page 5 - Secondary Survey .................... 54 Other entries on Menu System ............ 78 Additional Entries on the Header Bar.... 79 Procedure Logs .................................. 83 8.1.1. 8.1.2. 8.1.3. 8.2. 8.3. 9. Page 6 - Labs & Fluids Intake / Output.... 58 Page 7 – PTA IVs & Medications ............. 60 Page 8 - Activity Log .............................. 62 Page 9 - Miscellaneous Forms................. 65 State Export .......................................... 69 Supply Form .......................................... 69 Reason for Transport ............................. 70 Activity Audit ......................................... 72 Utilization Review .................................. 74 Followup Letter...................................... 74 Hospital Pt. Notes .................................. 75 Special Reports...................................... 76 Chart Summary ..................................... 77 Research ............................................... 78 Quality Assurance Levels ........................ 78 Patient Record Search .....................81 Logs .................................................83 8.1. Login Process...................................14 How to use this manual ...................16 System Concepts .............................17 4.1. 4.2. 4.3. 5. 6.6.7. 6.6.8. 6.6.9. 6.6.10. 6.6.11. 6.6.12. 6.6.13. 6.6.14. 6.6.15. 6.6.16. 6.6.17. 6.6.18. 6.6.19. 6.6.20. 6.6.21. System Fundamentals .......................4 Searching / Drilling Down ....................... 83 Procedure Report by Crew...................... 84 Adding a non-chart Procedure ................ 85 Response Times ................................. 85 QA Flag Search .................................. 86 Other Patient Record Options .........88 9.1. 9.2. 9.3. State Export ...................................... 88 F/U Letter Queue ............................... 88 Patient Management........................... 89 9.3.1. 9.3.2. 9.3.3. 9.4. Patient Search ....................................... 89 Duplicate Search.................................... 91 Merge Two ............................................ 92 Patient Record Archiving ..................... 93 9.4.1. 9.4.2. Archive Download .................................. 93 Database Download ............................... 94 10. Special Reports................................96 10.1. 10.2. Home Page........................................ 96 Viewing a Special Report..................... 96 10.2.1. 10.3. 10.4. Flags..................................................... 98 Creating a Special Report.................... 98 Searching .......................................... 98 11. Forums ...........................................100 12. Continuing Ed. ...............................101 13. Supplies .........................................102 13.1. Setup .............................................. 102 13.1.1. 13.1.2. 13.1.3. Supply Categories ................................ 102 Supply Sub-Categories ......................... 103 Supplies .............................................. 104 13.1.4. 13.1.5. 13.1.6. 13.1.7. 13.1.8. 13.1.9. 13.2. Vendors ...............................................105 Locations .............................................105 Medications ..........................................106 Inventory By Supply .............................107 Inventory By Location ...........................107 Minimum Levels....................................108 Supply Requests ...............................108 14. Chart Summary..............................110 14.1. 14.2. 14.3. Chart Summary Search ......................110 Payors..............................................116 Fee Schedules ..................................118 15. Phone Messages ............................119 15.1. 15.2. 15.3. New Message ...................................119 Viewing Messages .............................119 Search .............................................120 16. Reports ..........................................122 16.1. 16.2. 16.3. 16.4. Std. Reports .....................................122 Cross-Tabular ...................................124 Hour of Day......................................126 Custom Reports ................................127 16.4.1. 16.4.2. 16.4.3. 16.4.4. 16.4.5. 16.4.6. 16.4.7. 16.4.8. Create New Report ...............................128 Group By Tab .......................................138 Cross-tabular Reports ...........................140 Run Report...........................................141 Schedule Report ...................................142 Edit Report...........................................143 Copy Report .........................................143 Delete Report .......................................143 17. Human Resources..........................144 17.1. 17.2. 17.3. 17.4. Payroll .............................................144 Calloff - New ....................................148 Calloff - Search .................................149 Document Warehouse .......................151 18. Calendar ........................................152 18.1. Adding Events...................................153 19. Links ..............................................155 20. Support ..........................................156 20.1. Questions & Problems .......................156 20.1.1. 20.1.2. 20.1.3. 20.1.4. 20.2. 20.3. 20.4. My Questions & Problems......................156 Log a Ticket .........................................157 View Closed Tickets ..............................158 Feature Request ...................................159 Download Documentation ..................159 Download Software ...........................160 FAQ .................................................161 emsCharts.com User Manual 1. System Fundamentals 1.1. Web Page Basics 1.1.1. Web Browser A web browser is an application which allows a user to view content over the World Wide Web (WWW). The first web browser was named Mosaic, and was quickly surpassed by Netscape. Microsoft then developed its own web browser called Internet Explorer (IE). IE eventually surpassed Netscape in popularity, and today is the default web browser for most people. emsCharts.com must be accessed using Internet Explorer version 5.0 or above. 1.1.2. Software and Hardware Requirements The following information is the MINIMUM configuration for Internet Explorer. Memory listed is for IE alone, not including the operating system requirements. Windows 2000 or XP with 128Mb or 256Mb of RAM is recommended. CPU should be Pentium-class or equivalent. 17” monitor recommended, 15” is minimum. Sound card is required for use of continuing education module. Windows 98: 16 MB of RAM minimum Full install size: 11.5 MB Windows NT® 4.0 with SP 6a and higher: 32 MB of RAM minimum Full install size: 12.7 MB Windows 98 Second Edition: 16 MB of RAM minimum Full install size: 12.4 MB Windows Me: 32 MB of RAM minimum Full install size: 8.7 MB Windows 2000: 32 MB of RAM minimum Full install size: 12 MB Windows XP: 32 MB of RAM minimum Full install size: 12 MB 1.1.3. HTML HTML, short for Hyper-Text Markup Language, is the standard computer language used for creating web pages. Internet Explorer and Netscape implement this standard differently, and emsCharts.com has been designed to comply with the IE implementation. 1.1.4. Toolbars There are several toolbars in Internet Explorer, and they have various uses. They are a. Menu Bar: The menu bar (Figure 1) allows access to all the features of IE. The most important elements for using emsCharts.com is “File”, which allows access to the print feature, and “Tools”, which allows access to the IE configuration options located under “Internet Options…”. The uses of these features will be discussed below. Figure 1 b. Button Bar: This bar (Figure 2), normally located right under the Menu Bar, provides quick access to the most commonly used features of the Menu Bar. Some of the important buttons are the Back button, which allows you to return to the previous page you were viewing, and the Print button, which allows you to print the current page. The Back button has an arrow pointing to the left on it, while the Print button has a picture of 9/30/2009 Page 4 emsCharts.com User Manual a printer. Depending on how IE is configured, there may also be text to describe what each button does. Figure 2 c. Address Bar: This bar is normally located right under the Button Bar, and allows you to type in the web address you are trying to reach, i.e. www.emscharts.com (Figure 3). Figure 3 d. Links Bar: This bar provides a space to store the internet sites you most frequently visit. A new site can be saved by clicking and on the icon to the left of the address in the address bar, and dragging it over the links bar. When you release the mouse button, the link will appear in the links bar (Figure 4). Figure 4 1.1.5. Printing There are many ways to print data from emsCharts.com. The pages that will commonly be printed already include a Print button on the page itself. If the page that needs to be printed does not include a print button, it can also be printed by clicking the Print button on the Button Bar (the one with the printer on it). Finally, a page can also be printed by clicking on File on the Menu Bar, and then clicking on Print…. If you would like custom headers and footers on your printed pages, you can click on File, and then click on Page Setup…. This brings up the Page Setup window (Figure 5) which will allow you to modify the headers and footers. 9/30/2009 Page 5 emsCharts.com User Manual Figure 5 The codes for headers and footers are listed in the table below: Desired Text Code Window title &w Page address (URL) &u Date in short format (as specified by Regional Settings in Control Panel) &d Date in long format (as specified by Regional Settings in Control Panel) &D Time in the format specified by Regional Settings in Control Panel &t Time in 24-hour format &T Current page number &p Total number of pages &P Centered text (following &b) &b Right-aligned text (following &b&b) &b&b A single ampersand (&) && Table 1 It is important to note that when printing charts, the header and footer will be set by emsCharts.com. 1.1.6. Window Behavior / Taskbar Sometimes, by clicking a button or some other method, a new window will appear. But sometimes you will click on another window, or something else will happen, and this new window will disappear. If this happens, don’t panic! At the very bottom of the screen is the taskbar. By clicking on one of the entries on the taskbar, it will bring that window to the front of all the others. If it is a new window, it will most likely be the farthest entry on the right. 9/30/2009 Page 6 emsCharts.com User Manual Other times, a new window will appear, and if you try to go back to the main page you were working on, nothing happens. If the computer has speakers that are turned on, you will also hear an error sound. This means that you must deal with this new window before you go back to the main window. You should either fill out the data needed by the window, or you can close the window if you don’t need it or want to come back to it later. As a final note, emsCharts.com does not employ any type of popup advertising! If ads are appearing while using this program, you have what is called Adware installed on your computer. Typically, this software monitors your surfing habits, and then displays ads designed to appeal to your interests. There are many programs designed to eliminate this type of software, including Ad-aware (http://www.lavasoftusa.com) and SpyBot (http://security.kolla.de). Note: emsCharts.com offers these programs as two examples of software to deal with adware. This is not a recommendation for these programs, and emsCharts.com takes no responsibility for any damage which might occur due to the use of these programs! Virus protection and the prevention of adware is the responsibility of the user, and emsCharts.com is not responsible for and does not provide help dealing with it. 1.1.7. Use of the Tab Key The most common way of moving around a web page is with the mouse. However, there is an alternate method in the Tab key. This key, located in the upper left-hand section of your keyboard, lets you move from one page element to the next. Also, if you go past the element you were trying to reach, you can hold the Shift key and press Tab to move backwards through the page elements. 1.1.8. Text Boxes Text boxes allow you to type information directly into the web page (Figure 6). Some boxes also enforce a maximum length to the amount of data that can be entered into them, so if you are typing and no more text is appearing in the box, chances are that you have exceeded the amount of data the box can hold. These are also referred to as free text boxes in this manual. Figure 6 As discussed in the section Performing a Search, fields in which searches are required have the same color as the background immediately surrounding them. These text boxes are read-only and have an icon to their right. 1.1.9. Select Boxes Select boxes look similar to text boxes, but with a downward pointing arrow on the right side (Figure 7). When a user clicks on this arrow, a list will drop down, allowing the user to make a selection by clicking on an item in the list (Figure 8). The list will then disappear, with the selection appearing in the main part of the box (Figure 9). These are also referred to as dropdown lists in this manual. 9/30/2009 Page 7 emsCharts.com User Manual Figure 7 Figure 9 Figure 8 1.1.10. Multi-Select Boxes A multi-select box allows a user to select one or more items from a list (Figure 10). A user can select one item simply by clicking on it, or make multiple selections by holding down the CTRL key and clicking on multiple items. Also, a range of selections can be made by clicking on the first item in the range, then holding down the SHIFT key while clicking on the last item in the range. Figure 10 1.2. Home Page Once you log in to emsCharts.com, your Home Page (Figure 11) will appear with various selections in the menu system down the left side of the page and two boxes in the active portion of the screen titled At a Glance and Service Login. 9/30/2009 Page 8 emsCharts.com User Manual Figure 11 If this is the first time logging in to emsCharts.com, you will be presented with a modified version of Figure 11. The Service Login box will contain all of the services to which you belong. Selecting one will transform your home page to one similar to Figure 11. The various elements of the login page are: 1.2.1. Header Bar With few exceptions, every page you see in emsCharts.com will display the header bar. This bar is located just under the emsCharts.com logo. This bar contains the following elements: a. >> home: This link allows the user to return to the login page at any time. b. Username: The name the user is logged into the system under. c. Login: The name of the service, command facility, or region the user is logged into the system under. d. Date: The current date. e. Logout: Log out of emsCharts. Depending on the location of the user within the system, other data may appear in this bar. 1.2.2. Menu System With few exceptions, every page you see in emsCharts.com will display the menu system. The menu system is located on the left side of the screen, and allows the user to navigate between the different sections of the Intranet. The options presented at any given time will depend upon your location within the system, the security privileges defined by your administrator, and the roles that have been assigned to you. 1.2.3. At a Glance The first box on the home page is labeled “At a Glance” (Figure 12). 9/30/2009 Page 9 emsCharts.com User Manual Figure 12 It is comprised of the following sections: a. At a Glance: This section offers a brief summary of various items of interest to the user. It will include one or more of the following: 1. Incomplete Charts: The number of charts the user still needs to complete. 2. QA Charts Flagged: The number of charts the user is listed on that have QA Flags. 3. New Special Reports: The number of special reports the user has not reviewed. 4. Phone Message: The number of phone messages the user has not reviewed. 5. Ticket Replies Needed: The number of support tickets the user has entered that emsCharts technical support is requesting more information from the user. b. Seminars: This section will only appear if the service administrator has enabled seminars, and the user has uncompleted seminars. c. Calendar: This section will only appear if the service administrator has enabled calendars. It contains a list of events that pertain to your service such as training sessions, meetings, paydays, etc. The individual calendars can be viewed by clicking the Calendar link in the Menu System. d. System Message: This section lists various news items and notices from the service, command facility, region, or emsCharts. 1.2.4. Service Login The second box on the home page is the Service Login box (Figure 13 and Figure 14), and contains two sections which refer to the current user login information. The upper section contains the current users’ information, i.e.: UserName and the Service ID that the current user is logged in under. Figure 13 9/30/2009 The lower section indicates the service name the user is logged in under. It also allows the user to change services if they are also with another service using the system. This area also allows you to select the base site and unit number that you are on currently. Page 10 emsCharts.com User Manual The Login, Base and Unit information is stored and utilized when completing the patient care records. When you login and select patient records, the information is retained from the login and carried over to be entered in the new patient care record. Figure 14 Note that once the Base and Unit information is entered into the form, the scheduled crew for that Unit is listed under the Unit # Crew. This information is retrieved from the Base/Unit list that has been entered at the start of the shift (providing the crew members entered the data upon their initial login at the start of their shift). This Duty Roster (Figure 15) is viewed by clicking the button at the far left of this box. Figure 15 If the service administrator has defined extra info for that unit1,2, it will be displayed in red. Clicking the button next to the crew names will display the entry box for the crew names of the Unit specified during the individual’s login. Each crew member should login, select the Service, Base and Unit, and then check that they are listed as crew. If they are not listed, the scheduled crew should be modified by clicking . 1.2.5. Quick Statistics Users with the necessary privilege3 can view Quick Statistics on the home page (Figure 16). 1 2 Setup: Configuration -> Service -> Chart -> Unit extra info label (Enables/Disables extra info display) Setup: Configuration -> Service -> Code Tables -> Units (Define units) 3 Setup: Configuration -> Service -> Code Tables -> Security Roles -> role name -> Menu System -> View Statistics on Home Page (Configure if users with this role can view quick statistics on home page) 9/30/2009 Page 11 emsCharts.com User Manual Figure 16 Quick Statistics allow the user to quickly view call statistics by Unit, Medical Category, Base/Station, and Outcome for various time frames. To configure, please see section 5.4.3.2. 1.3. Performing a Search When changing crew names on the roster, you will have to execute a search. Searches are used to look up hospital names, public safety agencies (EMS, Fire, Police, Communications Centers), users, services, and command facilities. The reason for these searches is so that the database can store the ID number associated with an object rather than the name. This will eliminate incorrect spellings, poor data entry, and provide the ability to search efficiently. For example, when a user changes their last name, only the displayed name will change. The number “behind” the name will remain the same, thus allowing searches across the time span when the name changed. Fields in which searches are required are indicated by having the same color as the background immediately surrounding them. The text boxes will be read-only and will have an icon to their right. Clicking on this icon will display the search box. Search for Users Search for Hospitals, EMS and other Sample of Searchable Text Box Search boxes are divided into two sections. The top portion (Figure 17 and Figure 18) lists the possible criteria to search upon. The search is case-insensitive (does not distinguish between upper and lower case letter); however spaces do count! There are also two special characters you can use while searching. These are called the wildcards, and are listed in the tables below. S E A R C H W I L D C A R D S % (Percent Sign) None or more characters _ (Underscore)Exactly one character Univ% S%vin% _ob% 9/30/2009 Examples Starting with “Univ” Starting with the letter “S” and containing the letters “VIN” Second and third letters are “ob” (Rob, Bob, Robert,…as well as Jobe, etc) Page 12 emsCharts.com User Manual Figure 17 - Hospital Search Box Figure 18 - User Search Box You will notice that the user search box (Figure 18) has several additional items at the top. Most of the time you will be searching for a user who belongs to your service, so leave the “Only search your service” checkbox checked. Clicking the “Select me” link will quickly drop your name into the textbox. Clicking the “Select none” link will clear the textbox and leave it blank. After you have entered the search criteria, press the Search button or merely press the Enter key. A list of results will be displayed in the bottom portion of the search box. Click on one of the choices to use it in the textbox you are searching from. Your administrator will have procedures to follow if the desired object is not returned in the search results. 1.4. Logging Out To log out of emsCharts.com, the user simply needs to click the logout link in the upper right corner. If the system is automatically logging on a user, it is most likely due to a configuration setting in IE. To check this, on the menu bar, click on Tools, and then Internet Options, and then click on the Security tab in the window which appears. Click on the Internet icon just under the tabs, and then the Custom Level button. Scroll down to the User Authentication section in the Security Settings window which appears. Under this will be an option marked Logon. The options “Anonymous logon” and “Automatic logon with current username and password” can not be used! For greatest security, “Prompt for user name and password” should be selected, but “Automatic logon only in Intranet zone” can also be chosen. 9/30/2009 Page 13 emsCharts.com User Manual 2. Login Process Once the IE Browser is directed to www.emscharts.com, the user will see the following Login Screen requesting a Login and Password (Figure 19). Figure 19 Your Login, also known as your user name will be assigned by your System Administrator. The Password to be used for a first time user during your initial login is also assigned by your System Administrator. If you would like the system to remember your login name for future login attempts, click the Remember me checkbox. Only your user name will be saved, not your password. This is to prevent other people from logging on under your user name. The first time that you log in to use the system, the system will require you to change your password and answer a few questions about you personally (Figure 20). You will be required to enter a new password (case sensitive) and then to confirm the new password by entering it a second time. You will not be able to see the new password as it is typed; for security reasons only ●●●●●● will appear in the boxes. Select a password that is easy to remember. Figure 20 You will be required to enter your Social Security Number in the space required. Your SSN will only be able to be viewed by your service administrator, and not by other users. Several portions of your SSN will also be used to encrypt your security information in the database, thus further protecting your identity. You are then asked to enter a secret question that only you will know both the question and the answer, 9/30/2009 Page 14 emsCharts.com User Manual and then your Email address. This email address will be used by the system to notify you of various information including security events, error reports, and quality assurance flags. The last item on this screen is the Lost Password Procedure. This is the procedure that will be used in the event that you forget your password. Once you complete all of these sections, you must click on the Save Security Information button at the bottom. Note: Any time you change your password, you will be asked to login again using your new password. 9/30/2009 Page 15 emsCharts.com User Manual 3. How to use this manual This manual is intended to explain how to use the various features of emsCharts.com. This was a complete manual at the time of writing, but new features are constantly being added. For questions not covered in this manual, please contact technical support. Additionally, there are footnotes throughout this manual explaining where in the configuration those features can be enabled/disabled, defined, or configured. These allow for easy configuration changes by facility administrators without having to search through the entire Administration Manual for the desired setting. 9/30/2009 Page 16 emsCharts.com User Manual 4. System Concepts 4.1. Quality Assurance Levels Quality assurance levels are used to clarify documentation errors, improve future clinical issues, and to provide an easy way to follow up on unusual events during a transport. Every chart starts at the initial entry level, designated by S0 (Service, level 0). This is where the current crew can add and modify chart information. Once the chart is completed, it is advanced to the next service level by clicking on the Advance Chart button on page 9. This next level is defined by the service administrator4. For example, the next level could be a peer review level where the next shift coming on would review the charts, or an administrator level who reviews all charts. It is important to note every chart must pass through every service QA level, and once it has, it is then advanced to the first command facility QA level. However, the command facility will not be able to view or advance charts that are still in the service QA process. At any point during the review process, QA flags can be added to draw extra attention to the chart. Alternatively, the QA process can be automated by using Auto Advance5. This will automatically advance the chart through the QA levels unless an event defined for that level is listed in the chart. The chart then stops at that QA level. Auto Advance is discussed more in the Administration Manual in the QA Levels section. 4.2. Special Reports Special reports are used to provide additional information about unusual events during a transport. These reports are part of the quality assurance process, and thus are not legally discoverable, unlike the chart and any addendums. Special reports are usually created due to events during a transport, but they can also be created in response to other events. Special reports can fall into one or more categories, or perhaps none. This is important because individuals can be assigned to review transports with special reports of certain categories. For example, a clinical manager could be assigned to review all transports where a defibrillation occurred. For each special report category, each facility type (Service, Command Facility, and Region) can choose View, Modify, and Use rights for each facility type. For example, a Service could configure a category with the service having full rights, but the Command Facility and Region would not be able to view special reports with that flag (If the special report has another category that the Command Facility can view then they will still be able to view the report). Another use of this would be for a Command Facility to define clinical categories that all services can use. If a service does not want its employees to use categories that were defined by the Command Facility or Region, they can be excluded through the Special Report Exclusions code table6. The categories in the special report can be displayed in normal or italic text. If it is normal text, only people in that facility can view that report. If italic, anyone at or above that facility can view the report. 4.3. Data Validation Data Validation lets service, command facility, and region administrators define checks to be run on chart data before allowing the chart to be locked. These checks are run when a chart is in initial entry and the user clicks the Complete/Lock Chart button on page 9. Simple Data Validation lets administrators select fields which the crew are not allowed to leave blank for any transport. 4 5 Setup: Configuration -> Service -> Code Tables -> QA Levels (Define Service Quality Assurance Levels) Setup: Configuration -> Service -> Code Tables -> QA Levels -> Enable Auto Advance (Enables/Disables auto advance) 6 Setup: Configuration -> Service -> Code Tables -> Special Report Exclusions (Exclude use of Special Report Categories defined by the Command Facility and/or Region) 9/30/2009 Page 17 emsCharts.com User Manual In order to use complex Data Validation, rules must first be defined. These rules are a set of one or more criteria to check for on the chart. If all of the conditions of the rule are true, then any actions associated with that rule will be run. For example, if certain data points should be checked for all Trauma transports, then a rule would be defined to check if the medical category was Trauma. If all conditions for a rule are true, then all actions associated with that rule will be run. Actions are where the chart data is compared against the desired value(s). For example, an action could be created that checks to see if the dispatch id is blank. If the dispatch id is not blank, then the action passes. If the dispatch id is blank, then the action can be set up to require the user to fix the problem before the chart can be locked, or simply warn the user of the problem, but still allow the chart to be locked. Actions can be associated with multiple rules. If any conditions for a rule are false, then the On Fail response for that rule will be performed. 9/30/2009 Page 18 emsCharts.com User Manual 5. Configuration This option allows for the configuration of various aspects of emsCharts.com. It has the following sections: 5.1. Region Refer to the Administration manual. 5.2. Command Fac. Refer to the Administration manual. 5.3. Service Refer to the Administration manual. 5.4. User 5.4.1. General The General tab allows the user to enter demographic and contact information (Figure 21). Figure 21 The Phone Numbers section lets the user enter the following types of numbers: Fax, Home, Mobile, Pager, and Work. Information for the user’s Driver’s License can also be entered. Once all the information has been entered, it can be saved by pressing the Save Changes button. 5.4.2. Certifications The Certifications tab allows the user to enter general and state-specific certification information, as well as other data to be reported when exported to the state (Figure 22). 9/30/2009 Page 19 emsCharts.com User Manual Figure 22 The left side of the page allows the user to enter general Certifications from the list in Figure 23. After a selection is made, press the Add button to save. Figure 23 Figure 24 Figure 25 Figure 26 The right side of the page lists certification and export data for the states the service is set up to export to7. All states have a dropdown list for Certification Type, and the options for Maryland, Pennsylvania, and Ohio are listed in Figure 24, Figure 25, and Figure 26, respectively. Once all the information has been entered, it can be saved by pressing the Save button. 5.4.3. User Preferences The User Preferences tab allows the user to set preferences for various parts of emsCharts.com. These include: 5.4.3.1. Patient Charts Patient Charts (Figure 27) allows the user to configure the display of the Patient Record Search Results page (Figure 28). 7 Setup: Configuration -> Service -> Export (Configure which states the service exports to) 9/30/2009 Page 20 emsCharts.com User Manual Figure 27 Figure 28 5.4.3.2. Home Page Home Page (Figure 29) allows the user with the correct permissions8 to configure the quick statistics to display on the home page. 8 Setup: Configuration -> Service -> Code Tables -> Security Roles -> role name -> Menu System -> View Statistics on Home Page (Configure if users with this role can view quick statistics on home page) 9/30/2009 Page 21 emsCharts.com User Manual Figure 29 Available options include Unit, Medical Category, Base/Station, and Outcome. For each option, the user can choose to Show All, Show Collapsed, or Do Not Show. Each option can also be filtered to only show specific types. Finally, many time ranges are available for selection. Once all the settings have been entered, they can be saved by clicking the Save button. 5.4.3.3. Phone Messages Phone Messages (Figure 30) allows the user to configure which users they commonly take messages for. 9/30/2009 Page 22 emsCharts.com User Manual Figure 30 These names are then displayed when entering a new phone message (Figure 31). Figure 31 5.5. Activity Audit The Activity Audit lets users with the correct security privilege9 to search for activity by various criteria (Figure 32). 9 Setup: Configuration -> Service -> Code Tables -> Security Roles -> role name -> Security Activity Audit (Allows user to view security activity audit) 9/30/2009 Page 23 emsCharts.com User Manual Figure 32 The user can search by date range, user, PRID, template (actual page name in URL). The results can be sorted in ascending or descending order. The maximum number of results returned is 2000. 9/30/2009 Page 24 emsCharts.com User Manual 6. Patient Care Record To create a new Patient Care Record10, or to view previous charts, from the home page click Patient Records to bring up the Patient Records home page11 (Figure 33). Figure 33 The Patient Records home page displays information about PCRs requiring attention. There are five possible sections on this page: 6.1. Incomplete Charts This section lists charts that have not been completed. Incomplete charts are PCRs which have not yet been advanced to the first Quality Assurance level. Clicking on one of these charts will bring up the PCR for further additions and edits, so that the chart can be completed. 6.2. Charts Flagged for QA This section lists charts that have been completed but are flagged for quality assurance review. Only charts on which the current user is listed as a crew will appear. Clicking on an entry will open the chart. In the header bar will be a link marked View Flags. Clicking on this link will open a window with a list of the QA flags attached to the chart (Figure 34). 10 Setup: Configuration -> Service -> Code Tables -> emsCharts.com Modules -> Patient Records (Enables/Disables the Patient Records module) 11 Setup: Configuration -> Service -> Chart -> Display on home page (Configure ID displayed on home page) 9/30/2009 Page 25 emsCharts.com User Manual Figure 34 Clicking on a flag will bring up the details for that flag (Figure 35). Figure 35 The information page is composed of the following: a. QA Flag Details: Lists the details of the QA flag. b. Assigned To: A user with the correct permissions12 can assign the flag to an individual crew member. c. Back to list: Returns the user to the list of QA flags. d. Go To Page: Sends the main window to the chart page where the flag was created from. e. Cancel: Closes the QA Flag Window f. Handle via Addendum: Allows user to add an addendum to the chart in order to handle the QA flag. g. Handle via Special Report: Allows user to add a special report to the chart in order to handle the QA flag. h. Handle via Email Discussion: Allows user to send an email in order to handle the QA flag. Once a QA flag has been handled, the user will be returned to the list of QA Flags, where the handled QA flag will now appear in green to signify that it has been handled. If the QA Flag is now clicked on, the QA information page will again appear, but the three “Handle via…” buttons will be replaced with the users response to the QA flag (Figure 36). 12 Setup: Configuration -> Service -> Code Tables -> Security Roles -> role name -> Patient Record -> QA Flag: Assign if (not) on chart (Allows user to assign QA flags to an individual crew member) 9/30/2009 Page 26 emsCharts.com User Manual Figure 36 6.3. Charts for Review This section lists PCRs that have been completed and require review for Quality Assurance. The user will see any chart at their assigned QA level or below. If the service administrator has filtered the user’s QA level by base, then only PCRs which are assigned to the base listed on the home page will appear. The text can have the following appearances: a. Normal text: The chart is at your review level. b. Italic text: The chart is below your review level. c. Bold red text: The chart has outstanding flags. This can also be used with the normal or italic text. The actual display of the charts listed here is dependent on the QA level of the user, and is configured by the service and command facility administrators13,14. 6.4. Charts Missing Followup Letters These are PCRs that do not have a followup letter completed. This section will only appear if followup letters are required by the service administrator. 6.5. Create Chart This is where you create a new PCR. Full instructions are listed below. 6.6. Creating a New PCR 6.6.1. Page 1 - Dispatch Information 1. 13 14 Page 1 of the PCR will displays general dispatch information that will include a number of default entries (see Figure 37). If any of the information is incorrect, the crew member can correct the information. Setup: Configuration -> Service -> Code Tables -> QA Levels (Define and configure QA Levels for the service) Setup: Configuration -> Command Fac. -> Code Tables -> QA Levels (Define and configure QA Levels for the command facility) 9/30/2009 Page 27 emsCharts.com User Manual Figure 37 The PCR will not be added to the database until the “Add Patient” button is pressed. If the user backs out of the chart or navigates away from this page prior to pressing that button the PCR will not be created. Once the “Add Patient” button is pressed, the chart will need to be deleted if it was entered unintentionally. Page 1 is composed of the following sections: a. Patient Record ID (PRID): The number in this field is assigned by emsCharts.com to uniquely identify every transport entered. b. Dispatch ID15,16: Intended for services which receive assignments from dispatch centers, this field is used to identify the transport. The name of this field can be changed to one specific to the service, i.e. “Flight Number” or “Communications Number”. This feature can be disabled by the system administrator. c. Local ID17: This field is an ID services use internally to track transports. As with Dispatch ID, the name can be customized, and may be disabled by the system administrator. d. Basesite18: The basesite will be selected from the login information. e. Unit19: The unit identification will be selected from the login information. f. Staff Level20: The staff level is selected in this next box (ALS, BLS, etc.). g. Tail/Reg#21,22: The tail/registration number of the aircraft. 15 Setup: Configuration -> Service -> Chart -> Dispatch ID (Enables/Disables Dispatch ID display. Also customization of Dispatch ID label) 16 Setup: Configuration -> Service -> Chart -> Force Unique Dispatch ID (Force a unique Dispatch ID to be entered for every chart) 17 Setup: Configuration -> Service -> Chart -> Local ID (Enables/Disables Local ID display. Also customization of Local ID label) 18 19 20 21 22 Setup: Configuration -> Service -> Code Tables -> Base Sites (Define base sites) Setup: Configuration -> Service -> Code Tables -> Units (Define units) Setup: Configuration -> Service -> Chart -> Defaults -> Default staff level (Choose default staff level) Setup: Configuration -> Service -> Chart -> Dispatch -> Track Tail/Reg.# on chart (Enables/Disabled Tail/Reg# display.) Setup: Configuration -> Service -> Code Tables -> Unit Tail / Registration Numbers (Define unit tail / registration numbers) 9/30/2009 Page 28 emsCharts.com User Manual h. Response23: The response code. Will only appear if at least one response code has been defined. When selected, this will also set the Mode in the Referring box. i. EMD24: Selects if EMD was used. j. Ref Type25: Selects the type of trip (Scene run, interfacility transport, etc.). k. Mode26: Select whether the transport was scheduled or unscheduled. l. Medical Category27: The category of medical need that necessitated the transport (Burn, Obstetrical, etc.). If Dispatched As is enabled, this selection will be automatically selected in the Dispatched As dropdown box. m. Dispatched As28: The category of medical need that the call was dispatched as. (Burn, Obstetrical, etc.). n. Outcome29,30: What happened to the patient (Transported, DOA, etc.). o. Mass Casualty31: Select if the transport was due to a mass casualty incident. p. Vehc. Grid32,33: Grid location of responding vehicle starting location. q. Vehc. Loc.34: Location of responding vehicle starting location. r. Vehc. GPS35: GPS coordinates of responding vehicle starting location s. Crew Members36,37: The crew members who performed the transport. If the names are not correct, the crew member can click the icon and enter the correct name by searching for the individuals name and then clicking on that name. Up to four crew members can be added from the database. The initial names listed on a blank chart come from the crew listed on the home page. Other options include: 1) Crew Role38: Select the crew role (Driver, Primary, etc.) 2) Crew Level39: Select the crew level. 3) P/S40: Select if the crew member was a preceptor or a student. t. Other Crew: A free text box for a crew member not in the database. u. Specialty Team Information41,42: If the transport is a specialty team transport (Figure 38), the crew member can: 1) Select the team being transported 2) Identify who the primary care provider was and whether care was only provided by the team. 3) Select any specialty equipment utilized. 23 24 25 26 27 28 29 30 31 32 33 34 Setup: Configuration -> Service -> Code Tables -> Response Codes (Define response codes) Setup: Configuration -> Service -> Chart -> Dispatch -> Extra Dispatch Fields (Enables/Disables EMD display) Setup: Configuration -> Service -> Chart -> Defaults -> Default type (Choose default ref type) Setup: Configuration -> Service -> Chart -> Defaults -> Default mode (Choose default mode) Setup: Configuration -> Command Fac. -> Code Tables -> Patient Categories (Define patient categories) Setup: Configuration -> Service -> Chart -> Dispatch -> Extra Dispatch Fields (Enables/Disables Dispatched As display) Setup: Configuration -> Command Fac. -> Code Tables -> Transport Outcomes (Define transport outcomes) Setup: Configuration -> Service -> Chart -> Defaults -> Default outcome (Choose default outcome) Setup: Configuration -> Command Fac. -> Chart Fields -> Mass Casualty (Enables/Disables mass casualty display) Setup: Configuration -> Service -> Chart -> Track grid locations on Page 1 (Enables/Disables grid location display) Setup: Configuration -> Service -> Code Tables -> Geographic Zones (Define geographic zones) Setup: Configuration -> Service -> Chart -> Dispatch -> Track Dispatch Location (Enables/Disables Vehc. Loc. display) 35 Setup: Configuration -> Service -> Chart -> Dispatch -> Track GPS Locations on Page 1 (Enables/Disables GPS Location display) 36 Setup: Configuration -> Service -> Users (Add users to the service) 37 Setup: Configuration -> Service -> Chart -> Crew -> Crew Dropdown on New Chart (Possible crew members are listed in a dropdown box on new charts) 38 Setup: Configuration -> Service -> Chart -> Crew -> Crew Roles (Enables/Disables crew role display) 39 40 41 42 Setup: Configuration -> User -> Certifications -> state -> Certification Type (Select certification for the user for that state) Setup: Configuration -> Service -> Chart -> Crew -> Crew Preceptor/Student (Enables/Disables preceptor/student display) Setup: Configuration -> Service -> Chart -> Track ‘Team’ transports (Enables/Disables Specialty Team information display) Setup: Configuration -> Service -> Code Tables -> Specialty Teams (Define specialty teams) 9/30/2009 Page 29 emsCharts.com User Manual v. 43 44 45 46 47 Figure 38 For specialty teams, the service administrator may choose to have the crew bypass pages 28 of the PCR. If your service does not transport specialty teams, the service administrator may disable this section. Referring Box43: This box identifies the agency which requested the transport, or where the patient was located. There are three types: Hospital, EMS, and Other. Depending on the type selected, different information can be entered. This information includes: 1) Name: Selected from a dropdown list of common places for Other. For Hospital and EMS, the user can select from a dropdown list44,45, or search for names. 2) Location: For EMS, this can be entered as free text, and for Other this can be selected from common locations defined by the service administrator46 or entered as free text. Not used for Hospital. 3) Zip: This field contains the zip code of the referring location. If the referring is Hospital or Other, the Zip field can not be edited manually; It uses the zip code entered for the Hospital, or the zip code entered for the location in Other. For EMS referring, this field will be filled with the zip code for the EMS agency, or a zip code can be entered manually. When a zip code is entered, the County box will be automatically complete. 4) County: This field contains the county of the referring location. When a zip code is entered, the County box will be automatically complete. 5) Unit: Only used for Hospital to designate the specialty unit the patient was referred from. 6) Ref MD47: Only used for Hospital to designate the name of the MD who referred the patient for transport. Can be configured as a text box, or a lookup box48. 7) Ref RN49: Only used for Hospital to designate the name of the RN who referred the patient for transport. 8) Requester: Only used for Other, name of person requesting transport entered here. 9) Scene Grid50,51: Grid location of scene. 10) Scene GPS52: GPS location of scene. 11) Mode53: Notification mode used while transporting patient (Lights/Sirens, No Lights/Sirens, etc.) Not used for air units. 12) Moved Via54: Select how the patient was moved. 13) Position55: Select the position of the patient when moved. 14) RFT56: Text box to enter any RFT comments. Setup: Configuration -> Service -> Chart -> Defaults -> Default referring (Choose default referring) Setup: Configuration -> Service -> Code Tables -> Default Referring Hospitals (Define default referring hospitals) Setup: Configuration -> Service -> Code Tables -> Default Referring EMS Agencies (Define default referring EMS agencies) Setup: Configuration -> Service -> Code Tables -> Common Addresses (Define common addresses) Setup: Configuration -> Command Fac. -> Chart Fields -> Referring MD (Enables/Disables Referring MD display) 48 Setup: Configuration -> Command Fac. -> Chart Fields -> Use lookup table for ref/rec MD (Enables/Disables ref/rec MD lookup box) 49 Setup: Configuration -> Service -> Chart -> Referring -> Track ref/rec RN on Page 1 (Enables/Disables Ref RN display) 50 51 Setup: Configuration -> Service -> Chart -> Dispatch -> Track grid locations on Page 1 (Enables/Disables grid location display) Setup: Configuration -> Service -> Code Tables -> Geographic Zones (Define geographic zones) 52 Setup: Configuration -> Service -> Chart -> Dispatch -> Track GPS Locations on Page 1 (Enables/Disables GPS Location display) 53 Setup: Configuration -> Command Fac. -> Chart Fields -> Rec/Ref Modes (Enables/Disables rec/ref mode display) 54 55 Setup: Configuration -> Service -> Chart -> Referring -> Patient Movement (Enables/Disables Moved Via display) Setup: Configuration -> Service -> Chart -> Referring -> Patient Movement (Enables/Disables Position display) 9/30/2009 Page 30 emsCharts.com User Manual w. Receiving Box57: Similar to the referring box, but refers to the agency who patient care is transferred to. The differences between this and referring are: 1) Referring Name is now Receiving Name58,59. 2) Ref MD and Ref RN are now Rec MD60 and Rec RN61. 3) Destination Basis62: How the receiving agency was determined. 4) Dest. Grid63: Grid location of destination. 5) Dest. GPS64: GPS location of destination. 6) Moved Via is now Moved From. 7) Condition65: The condition of the patient at receiving. 8) Comment: A short comment can be entered here. x. Times66: Time configuration falls into the following categories: 1) Required by System: Dispatch, Available. 2) Service Configurable67: Received, Standby, Cancelled, and Disp. Notify. 3) Command Facility Configurable,68: Onset (formerly Injury), At bed, Lv bed, Xfer Care, First Resp. and In Qtrs. Times can be entered via an ActiveX Control or Text Boxes. 1) ActiveX Control: Note: If you have selected this option but do not see the ActiveX controls on page 1, please refer to the ActiveX time control TechNote. Placing a check in the box to the right of each label activates the control for that time, which can then be adjusted to the actual time of each event. The times can be typed in, or the time interval (minute, hour, day, month, or year) can be highlighted, and the up and down arrows to the right of the time can be used to increase or decrease that value. 2) Text Boxes: When this option is selected, the user will see a box marked Edit Times below the times. Clicking this button brings up the Edit Times window (Figure 39). 56 Setup: Configuration -> Service -> Chart -> Referring -> Include RFT comment box on page 1 (Enables/Disables RFT comment box display) 57 Setup: Configuration -> Service -> Chart -> Defaults -> Default receiving (Choose default receiving) 58 59 60 61 62 63 Setup: Configuration -> Service -> Code Tables -> Default Receiving Hospitals (Define default receiving hospitals) Setup: Configuration -> Service -> Code Tables -> Default Receiving EMS Agencies (Define default receiving EMS agencies) Setup: Configuration -> Command Fac. -> Chart Fields -> Receiving MD (Enables/Disables Receiving MD display) Setup: Configuration -> Service -> Chart -> Referring -> Track ref/rec RN on Page 1 (Enables/Disables Rec RN display) Setup: Configuration -> Command Fac. -> Code Tables -> Destination Basis (Define destination basis) Setup: Setup: display) 65 Setup: 66 Setup: 64 67 68 Configuration -> Service -> Chart -> Dispatch -> Track grid locations on Page 1 (Enables/Disables grid location display) Configuration -> Service -> Chart -> Dispatch -> Track GPS Locations on Page 1 (Enables/Disables GPS Location Configuration -> Service -> Chart -> Referring -> Patient Movement (Enables/Disables Condition display) Configuration -> Service -> Chart -> Chart Times -> Time Entry (Configure time entry as ActiveX control or text boxes) Setup: Configuration -> Service -> Chart -> Chart Times (Configure times) Setup: Configuration -> Command Fac. -> Chart Fields -> Chart Times (Configure times) 9/30/2009 Page 31 emsCharts.com User Manual Figure 39 The dates and times can be typed in, and a date/time combination can be copied to the lower times by clicking the green arrow. Urgency69: Select the response urgency of the transport. Odometer70,71: If applicable, the crew member can enter the appropriate odometer readings in the boxes. The Loaded and the Total mileage figures will be automatically calculated. aa. Max Altitude72: If applicable, the crew member can enter the maximum cabin pressure in the aircraft (Figure 40). Not used for ground units. y. z. Figure 40 bb. Flight Plan73: If applicable, the crew member can enter the type of flight plan filed, VFR or IFR (Figure 41). Not used for ground units. Figure 41 69 70 71 72 73 Setup: Configuration -> Command Fac. -> Chart Fields -> Response Urgency (Enables/Disables Urgency display) Setup: Configuration -> Service -> Chart -> Specialty -> Show Odometer Readings (Configure odometer display) Setup: Configuration -> Service -> Chart -> Specialty -> Show Calculated Miles (Configure calculated miles display) Setup: Configuration -> Command Fac. -> Chart Fields -> Max Altitude (Enables/Disables max altitude display) Setup: Configuration -> Command Fac. -> Chart Fields -> Flight Plan (Enables/Disables flight plan display) 9/30/2009 Page 32 emsCharts.com User Manual Once the above information has been entered, the crew member can click the Add Patient button at the bottom of Page 1 to continue to the Patient Page. If the user creating the PCR is not listed in the Crew Members section, he or she will be prompted if they want to add themselves to the chart (Figure 42). Figure 42 As a general note, the pages of the PCR can be navigated by the Back and Next buttons at the bottom of the screen, or by the Menu System on the left of the screen 9/30/2009 Page 33 emsCharts.com User Manual 6.6.2. Patient Information The Patient Information screen allows you to enter the pertinent information for a new patient. When the page is first loaded it will look similar to Figure 43. Figure 43 The options are: 1) Search for Existing Patient: Clicking this button will bring up the Patient Search window (Figure 44). Figure 44 From here the user can search for a patient, and then either select an existing patient or enter information for a new patient. 2) Add New Patient: Skips the search step and takes the user directly to the New Patient page. This button can be disabled in the service configuration74. 3) Patient Name Unknown: Skips the search step and takes the user directly to the New Patient page and checks the Unknown checkbox. This button can be disabled in the service configuration74. Add New Patient and Patient Name Unknown will take the user to the New Patient page (Figure 45) 74 Setup: Configuration -> Service -> Chart -> Patient -> Force Patient Search (Forces users to search for existing patients) 9/30/2009 Page 34 emsCharts.com User Manual Figure 45 Most of the a. b. c. fields are self-explanatory. The ones that need more explanation are: Patient ID75: The internal ID of the patient for the service. Pt. Run ID76: The internal ID for the run of that patient for the service. Unknown: If the patient’s identity is unknown, this box should be checked rather than filling in “John Doe” for a name. d. City/St/Zip: When a zip code is entered, the City and State boxes are automatically filled/selected. If a zip code is associated with more than one city and the wrong one is filled in, it can be edited by the user. If a service has one or more entries in the Default Ref/Rec/Patient Cities code table, a dropdown box of these entries will appear instead. e. DOB/Age: If a date of birth is entered, age is automatically calculated. Age should only be used if a DOB is not known. f. DNR: Do Not Resuscitate type. Only displays if at least one DNR type is defined77. g. DL State: Drivers License state. h. DL Number: Drivers License number i. Communication Barrier: Communication barriers of the patient (for example hearing handicap). Once completed, pressing the Save Patient button will add the patient to the record, as well as save the patient information to the database for future PCR needs. After a patient has been selected/entered, the patient data screen for the PCR that is being entered will be displayed (Figure 46). This page consists of the patient information previously entered, as well as Insurance and Medical information. 75 Setup: Configuration -> Service -> Chart -> Patient ID ID (Enables/Disables Patient ID display. Also customization of Patient ID label) 76 Setup: Configuration -> Service -> Chart -> Pt. Run ID (Enables/Disables Pt. Run ID display. Also customization of Pt. Run ID label) 77 Setup: Configuration -> Command Fac. -> Code Tables -> DNR Types (Define DNR types) 9/30/2009 Page 35 emsCharts.com User Manual Figure 46 Some additional buttons are now available. These include: a. Neonatal78: For patients under 2 years of age, click to complete the Neonatal Information page (Figure 47). 78 Setup: Configuration -> Command Fac. -> Chart Fields -> Neonate Button (Enables/Disables neonatal button) 9/30/2009 Page 36 emsCharts.com User Manual Figure 47 b. Immunizations: Click to complete the Immunization history (Figure 48). Figure 48 c. Employer: Click to complete employer information (Figure 49). 9/30/2009 Page 37 emsCharts.com User Manual Figure 49 d. Physician: Click to complete Physician information (Figure 50). Figure 50 If a service has defined at least one Notice of Privacy Practices form79, the NPP Form Given dropdown box will display, along with a link to see the history of NPPs given to that patient. If signatures on Consent and/or Medical Necessity forms were obtained, the appropriate box (Consent Form Signed or Medical Necessity Signed) should be checked. Directly under the consent area is the relationships and billing information area80. The Relationships/Guarantors section is intended for patients whose insurance is in the name of another person. To add/edit information, click on the Edit button to bring up the Edit Relationships window (Figure 51). 79 Setup: Configuration -> Service -> Code Tables -> Notice of Privacy Practices Forms (Define NPP forms) 80 Setup: Configuration -> Service -> Chart -> Patient -> Display Patient Billing Information (Enables/Disables patient billing information display) 9/30/2009 Page 38 emsCharts.com User Manual Figure 51 Clicking on a name in the upper section or the Add Relationship button will display the Relationship Details section, where you can enter the demographic data, and Relationship (Parent, Spouse, etc.). You can also choose if they are Next of Kin for the patient, and if they live in the Same Residence. When all the data has been entered, it can be saved by clicking the Save Relationship button. The relationship can be removed by clicking the Remove Relationship button. When done, click the Close Window button to return to the Patient Information page. The Billing Information section is where the actual insurance information is entered. To add/edit information, click on the Edit button to bring up the Edit Billing Information window (Figure 52). Figure 52 9/30/2009 Page 39 emsCharts.com User Manual Clicking on a name in the upper section or the Add Payor button will display the Billing Details section, where you can enter the Insurance Carrier, Group, and Policy information. The Insurance Carrier can be selected from a list of Payors defined by the service81 by clicking the icon. Alternately, the carrier icon. You can also choose who is Insured. The default name can be entered manually by clicking the entry is Patient, but you can also choose from the individuals entered in the Relationships/Guarantors section. When all the data has been entered, it can be saved by clicking the Save Payor button. The relationship can be removed by clicking the Remove Payor button. When done, click the Close Window button to return to the Patient Information page. The bottom portion of the Patient Information screen includes areas to enter the patient’s Previous Medical History (PMHX), Medications82, and Allergies (Figure 53). Figure 53 The crew member can click on the button in each of the three areas and select desired items from a list of predefined items (Figure 54). If an item is selected in error, the crew member may select that item and then click the button to delete the item. To quickly select “None”, click the PMHX, information as to the source of the PMHX can also be selected. icon. For Figure 54 81 Setup: Configuration -> Service -> Code Tables -> Payors (Define payors) 82 Setup: Configuration -> Command Fac. -> Chart Fields -> Reuse Pt. Info (If an existing patient is selected, select Yes to copy Medical History, Allergies, and Medications from the previous chart) 9/30/2009 Page 40 emsCharts.com User Manual An entry can be found in the Advanced Picklist in Figure 54 by clicking on the letter that the entry name begins with. For example, clicking on “A” displays the screen shown in (Figure 54). The user can then click on the name of the entry to add it to the Selected box. The user can then click the Add button to save the entry to a list of entries to be added to the chart. Only one entry can be in the Selected box at a time, so this procedure must be repeated for each entry. Entries not displayed when clicking on a letter can be added to the chart by typing the name into the Selected box and pressing Add. When all the entries have been selected, press Done to save the entries back to the chart. The Current Medications section can also be configured to allow entry of dosages and routes83 (Figure 55). Figure 55 If more than one patient was transported, and the displayed patient is not the first one listed, the patient can be deleted by clicking on the Remove Patient button. Deleting the first patient will be covered later in the discussion about the Chart Toolbox. Once completed, the crew member can click the Next button to move on to Page 2 of the PCR. 83 Setup: Configuration -> Service -> Chart -> Patient -> Pt. Medication Layout (Select patient medication layout) 9/30/2009 Page 41 emsCharts.com User Manual 6.6.3. Page 2 - CC/HPI Page Page 2 of the PCR (Figure 56) allows the crew to document the details which led to the trip. Figure 56 It includes: a. Chief Complaint: This is a free text section. It is used to describe the main injury ailment of the patient. These comments can be spellchecked by clicking on the “ABC” icon near the top right of the box. Clicking the pencil icon will auto-generate a chief complaint. b. Duration of Complaint (Chief)84: The duration of the chief complaint. c. Air Modifier85: The air modifier for the trip. d. CMS Condition86: The CMS condition. e. Anatomic Location87: The anatomic location of an extended impression. f. ALS Assessment88,89: Select appropriate choice for ALS Assessment. If “Completed for ruleout diagnosis” is selected in this field, a new field named Ruleout diagnosis will appear to allow the user to enter the relevant data. g. Secondary Complaint90: This is a free text section. It is used to describe the secondary injury ailment of the patient. These comments can be spellchecked by clicking on the “ABC” icon near the top right of the box. 84 85 86 87 Setup: Configuration -> Command Fac. -> Chart Fields -> Complaint Durations (Enables/Disables complaint duration display) Setup: Configuration -> Command Fac. -> Chart Fields -> Air Modifier (Enables/Disables air modifier display) Setup: Configuration -> Service -> Chart -> Other Pages -> CMS Condition (Enables/Disables CMS condition display) Setup: Configuration -> Command Fac. -> Chart Fields -> Extended Impression (Enables/Disables anatomic location display) 88 Setup: Configuration -> Service -> Code Tables -> Billing Setup -> ALS Assessment Field - Page 2 (Configure the display of the ALS Assessment field) 89 Setup: Configuration -> Service -> Code Tables -> Bill Patient Category Options (Configure the default value of ALS Assessment based on patient medical category) 90 Setup: Configuration -> Command Fac. -> Chart Fields -> Secondary Complaint (Enables/Disables secondary complaint display) 9/30/2009 Page 42 emsCharts.com User Manual h. Duration of Complaint (Secondary)91: The duration of the chief complaint. i. History of Present Illness: This is a free text section. It is used to describe the circumstances and events leading up to the transport. These comments can be spellchecked by clicking on the “ABC” icon near the top right of the box. j. Cardiac Arrest: If the patient suffered a cardiac arrest, the crew member will click on the Cardiac Arrest button, complete the Cardiac Arrest Registry box that appears (Figure 57), and click the Save button. Figure 57 Once all the data has been entered, it can be saved by clicking the Save button. The entered data can also be removed by clicking the Delete button k. 91 Motor Vehicle Incident92: Click this button to bring up the Motor Vehicle Incident Registry window (Figure 58). Setup: Configuration -> Command Fac. -> Chart Fields -> Complaint Durations (Enables/Disables complaint duration display) 92 Setup: Configuration -> Command Fac. -> Chart Fields -> Motor Vehicle Incident (Enables/Disables motor vehicle incident display) 9/30/2009 Page 43 emsCharts.com User Manual Figure 58 It is composed of the following sections: Impact Risk Factors93: Select what the risk factors were surrounding the impact. Vehicle Impact Site: Select the site(s) of impact. Law Enforcement Number: Enter the law enforcement record number for this MVI. Position of PT: Select what position the patient occupied in the vehicle (Driver, Right Front, Left Rear, etc). 5) # of Vehicles Involved: Enter the number of vehicles involved in the accident. 6) Seat Row # of Patient: Enter the row number of the seat the patient was in. Once all the data has been entered, it can be saved by clicking the Save button. The entered data can also be removed by clicking the Delete button. Drugs/Alcohol: Click this button to bring up the Drug/Alcohol Details window (Figure 59). 1) 2) 3) 4) l. Figure 59 93 Setup: Configuration -> Command Fac. -> Code Tables -> MVI Risk Factor (Configure motor vehicle impact risk factors) 9/30/2009 Page 44 emsCharts.com User Manual Once all the data has been entered, it can be saved by clicking the Save button. The entered data can also be removed by clicking the Delete button m. Add’l Injury Details94: Click this button to bring up the Injury details window (Figure 60). Figure 60 n. o. p. q. 94 95 96 97 98 99 It is composed of the following sections: 1) Intentional?: Select if the injury was intentional. 2) Injury Cause: Select the cause of the injury. The user can type part of an ICD-9 based Injury Cause e-code explanation then press the Find button and it will search for all similar e-codes. Alternatively you can push the Find button without typing anything and it will pull up the full list. 3) Mechanism95: Select the mechanism(s) by which the injury occurred. 4) Safety Equip96: Select the safety equipment used. 5) Fall Height: If the injury was caused by a fall, enter the height of the fall. 6) Fall Surface: If the injury was caused by a fall, select the hardness of the fall surface (soft, hard, etc.). 7) Landed On: If the injury was caused by a fall, select the part of the body the patient landed on (head, back, etc.). 8) Work Related: Select if the injury was work related. Once all the data has been entered, it can be saved by clicking the Save button. The entered data can also be removed by clicking the Delete button Scene Description: This is a free text section. It is used to describe the area in which the patient was found. These comments can be spellchecked by clicking on the “ABC” icon near the top right of the box. Other EMS97: Select other EMS agencies who assisted in the call. Other Agencies 98: Select other agencies who assisted in the call. Exposure99: Click this button to bring up the Exposure/Bioterrorism window (Figure 61). Setup: Configuration -> Command Fac. -> Chart Fields -> Injury Details (Enables/Disables additional injury details display) Setup: Configuration -> Command Fac. -> Code Tables -> Injury Mechanisms (Configure injury mechanisms) Setup: Configuration -> Command Fac. -> Code Tables -> Safety Equipment (Configure safety equipment) Setup: Configuration -> Command Fac. -> Chart Fields -> Other Agencies (Enables/Disables other EMS display) Setup: Configuration -> Command Fac. -> Chart Fields -> Other Agencies (Enables/Disables other EMS display) Setup: Configuration -> Service -> Chart -> Other Pages -> Exposure Button (Enables/Disables exposure button display) 9/30/2009 Page 45 emsCharts.com User Manual Figure 61 It is composed of the following sections: 1) Protective Equipment: Select the protective equipment used. 2) Contact with Blood/Fluids: Select if there was any contact with blood/fluids. 3) Type of Exposure: Select the type of exposure. 4) Exposed To (primary): Select the primary agent of exposure. 5) Personnel Exposed: Select the personnel who were exposed. r. Patient Belongings100: This is a free text section. It is used to describe any belongings that the patient had with them during the transport and the status of the belongings at the time the patient was transferred over to the receiving facility. These comments can be spellchecked by clicking on the “ABC” icon near the top right of the box. s. Forms Received/Delivered101: If configured by the system administrator, the checkboxes are used to document if the listed documents were received from the referring agency and/or delivered to the receiving agency. t. Factors102: Depending on the Command Facility configuration, there can be either one general entry for factors, or three specific categories for factors: Response Factors, Scene Factors, and Transportation Factors. u. Dispatch Factors103: Select any factors related to the dispatch of the call. v. Turn-Around Factors104: Select any factors related to the turn-around of the call. w. System/Symptoms/Impression105: Select any systems, symptoms, or impressions. Once the above sections have been completed, the user can click on the Next Page button to proceed to Page 3. 100 101 102 103 104 Setup: Configuration -> Command Fac. -> Chart Fields -> Belongings (Enables/Disables belongings display) Setup: Configuration -> Service -> Code Tables -> Paperwork Received/Delivered (Define paperwork received/delivered) Setup: Configuration -> Command Fac. -> Chart Fields -> Factors Affecting Care (Configures factors affecting care display) Setup: Configuration -> Service -> Chart -> Other Pages -> Dispatch Delay (Enables/Disables dispatch factors display) Setup: Configuration -> Service -> Chart -> Other Pages -> Turn Around Delay (Enables/Disables turn-around factors display) 105 : Configuration -> Command Fac. -> Chart Fields -> Extended Impression (Enables/Disables system, symptoms, and impression display) 9/30/2009 Page 46 emsCharts.com User Manual 6.6.4. Page 3 - Neurological Exam / Airway All documentation on Page 3 (Figure 62) should be representative of the crew member’s initial assessment findings. Figure 62 This page is comprised of the following sections: a. Neuro 1) Level of Consciousness: Select the level of consciousness of the patient (Alert, Restless, etc.) 2) Orientation: Select the orientation of the patient (Oriented, Disoriented, etc.) 3) Sensory106: This is a free text section. It is used for any comments about neurological deficits the patient may be experiencing. 4) Motor107: This is a free text section. It is used for any comments about the motor skills of the patient. 5) Neuro Exam108,109: Select or enter the findings of the Neuro Exam of the patient. 6) Neurologic Deficit110,111: Select or enter the Neurologic Deficit of the patient. 7) Thrombolytic112: Select thrombolytic data. 106 107 108 109 Setup: Configuration -> Command Fac. -> Chart Fields -> Sensory Comments (Enables/Disables sensory comments display) Setup: Configuration -> Command Fac. -> Chart Fields -> Motor Comments (Enables/Disables motor comments display) Setup: Configuration -> Command Fac. -> Chart Fields -> Neuro Exam (Enables/Disables neuro exam assessment display) Setup: Configuration -> Command Fac. -> Code Tables -> Neuro Exam Assessment (Configure neuro exam assessment) 110 Setup: Configuration -> Command Fac. -> Chart Fields -> Neurologic Deficit Assess (Enables/Disabled neurologic deficit assessment display) 111 Setup: Configuration -> Command Fac. -> Code Tables -> Neurologic Deficit Assessment (Configure neurologic deficit assessment) 112 Setup: Configuration -> Command Fac. -> Chart Fields -> Thrombolytic Screen (Enables/Disables thrombolytic display) 9/30/2009 Page 47 emsCharts.com User Manual b. c. d. e. f. g. 8) Patient chemically paralyzed: Used to document if the patient was chemically paralyzed. Selecting Yes will default the GCS to 3, and select Chemically Paralyzed in the Motor and Sensory lists. 9) Loss of Consciousness: Select Yes or No to document whether or not the patient lost consciousness. 10) Was Pt. Immobilized: Select Yes or No to document whether or not the patient was immobilized. 11) Pupils113,114: Document the size and reaction of each of the pupils. Size can be Normal, Dilated, etc., while reaction can be Reactive, Sluggish, etc. Any reaction comments can also be entered in the React text box. 12) Extremities115,116: Document the motor and sensory performance of each the patient’s extremities. Motor control can be Normal, Flaccid, etc., while sensory can be Normal, Absent, etc. 13) Stroke Scale117: Select the stroke scale used and result. Immobilization: Document how the patient was immobilized. Will only appear if the field Was Pt. Immobilized is set to Yes. Initial Glasgow Coma Score (GCS): This is used by the crew member to document the patient’s initial Glasgow Coma Score upon the crew’s arrival. The sections are: 1) Eye Opening: Can be Spontaneous, To Pain, etc. 2) Motor: Obeys Command, None, etc. 3) Verbal: Entries will differ depending on age of patient. 4) Total: This is the score automatically calculated from the previous selections. 5) Qual118: Select an option to qualify the GCS documented. Revised Trauma Score119: This area will only appear if the patient is a Trauma patient, and if enabled by the Command Facility. The crew member will document the Initial Systolic Blood Pressure and the Initial Respiratory Rate. The revised trauma score will be automatically calculated. Pediatric Trauma Score120: This area will only appear if the patient is a pediatric Trauma patient, and if enabled by the Command Facility. It includes the following: a. Size: Select the size of the patient in kilograms. b. Airway: Select airway status. c. Sys BP: Select BP. d. CNS: Select central nervous system status. e. Skeletal Injury: Select if there is any skeletal injury. f. Open Wounds: Select if there are any open wounds. g. Total: This is the score automatically calculated from the previous selections. The pediatric trauma score will be automatically calculated. Broselow Color: The Broselow Color of the patient. Only displays for pediatric patients. Airway: The sections are: 1) Status: Used to document the status of the patient’s airway (Patent, Compromised, etc.) 2) Secured Via: If needed, documents how the airway was secured (Endotracheal, Nasotracheal, etc.) 113 Setup: Configuration -> Command Fac. -> Chart Fields -> Pupil React Picklist (Enables/Disables pupil reaction picklist display) Setup: Configuration -> Command Fac. -> Chart Fields -> Pupil React Comments (Enables/Disables pupil react comments display) 115 Setup: Configuration -> Command Fac. -> Chart Fields -> Motor Picklist (Enables/Disables motor picklist display) 114 116 117 118 119 120 Setup: Configuration -> Command Fac. -> Chart Fields -> Sensory Picklist (Enables/Disables sensory picklist display) Setup: Configuration -> Command Fac. -> Chart Fields -> Stroke Scale (Enables/Disables stroke scale display) Setup: Configuration -> Command Fac. -> Chart Fields -> Page 8-GCS Qual (Enables/Disables GCS qualifier display) Setup: Configuration -> Command Fac. -> Chart Fields -> RTS (Enables/Disables revised trauma score display) Setup: Configuration -> Command Fac. -> Chart Fields -> RTS (Enables/Disables pediatric trauma score display) 9/30/2009 Page 48 emsCharts.com User Manual 3) Tube Size and Depth: These two areas are free text areas used to document the size and depth of penetration of a tube if used during the transport. 4) Performed By: Select who secured the airway. 5) Outcome: Select the outcome of securing the airway. 6) Comments: This is a free text section. It is used to document additional information. h. Default Button121: Inserts the default values defined by the Command Facility into the Pupils-React, Sensory, and Motor text boxes. Once the above sections have been completed, the user can click on the Next Page button to proceed to Page 4. 121 Setup: Configuration -> Command Fac. -> Chart Defaults -> Pupils-Reactive, Sensory, and Motor (Define defaults for these text boxes) 9/30/2009 Page 49 emsCharts.com User Manual 6.6.5. Page 4 - Respiratory / Cardiovascular All documentation on Page 4 (Figure 63) should be representative of the crew member’s initial assessment findings. Figure 63 This page is comprised of the following sections: a. Respiratory: 1) Effort: Select the effort required by the patient to breathe (Apneic, Distressed, etc.) 2) Breath Sounds122,123: Select the breath sounds of the patient from both the left and right lungs (Clear, Wheeze, etc.) If enabled by the Command Facility, comments can also be entered in a text box. 3) O2: The rate at which the patient is receiving oxygen. 4) Via: The method by which the patient is receiving oxygen (BVM, Room Air, etc.) 5) Comments: This is a free text section. It is used to document additional information. 6) Ventilator124: If the patient is on a ventilator upon the crew’s arrival, the crew member can click on the Ventilator button. The Ventilator box will be displayed (Figure 64), and the crew member can complete the information regarding the ventilator settings for the patient. 122 123 124 Setup: Configuration -> Command Fac. -> Chart Fields -> Breath Picklist (Enables/Disables breath picklist display) Setup: Configuration -> Command Fac. -> Chart Fields -> Breath Comments (Enables/Disables breath comments display) Setup: Configuration -> Command Fac. -> Chart Fields -> Vent Info (Enables/Disables ventilator button display) 9/30/2009 Page 50 emsCharts.com User Manual Figure 64 Once completed, the crew member can click the SAVE button to save the information, and return to page 4. b. Cardiovascular: 1) Pulses: Select the quality of pulse taken from the left and right for each of the Carotid, Radial, Femoral, and Dorsalis125 arteries (Strong, Absent, etc.). 2) Art Line126: If enabled, select Art Line (Brachial – Left, Femoral – Right, etc.). 3) PA Line127: If enabled, select PA Line (Interior Jugular – Left, Subclavian – Right, etc.). 4) Temp128: Enter the patient’s temperature, scale, and method obtained. 5) IABP Settings129,130: If enabled, this button brings up the IABP window (Figure 65). Once completed, the crew member can click the SAVE button to save the information, and return to page 4. 125 126 127 128 129 Setup: Configuration -> Command Fac. -> Chart Fields -> Dorsalis Pulse (Enables/Disables dorsalis pulse display) Setup: Configuration -> Command Fac. -> Chart Fields -> Art Line (Enables/Disables art line display) Setup: Configuration -> Command Fac. -> Chart Fields -> PA Line (Enables/Disables PA line display) Setup: Configuration -> Command Fac. -> Chart Fields -> Temperature (Enables/Disables temperature display) Setup: Configuration -> Command Fac. -> Chart Fields -> IABP Settings (Enables/Disables IABP Settings button) 130 Setup: Configuration -> Command Fac. -> Code Tables -> IABP Triggers, IABP Frequencies, and IABP Insertion Appearance (Configure IABP properties) 9/30/2009 Page 51 emsCharts.com User Manual Figure 65 6) 7) 8) 9) 10) Jugular Vein Distension (JVD): Select Not Appreciated, Not Checked, or Present. Cap Refill: Select Brisk or Delayed. Edema131: Select Not appreciated, Pitted, etc. Comments: This is a free text section. It is used to document additional information. Pacemaker: If the patient is on a Pacemaker upon the crew’s arrival, the crew member can click on the Pacemaker button. The Pacemaker box will be displayed (Figure 66), and the crew member can complete the information regarding the pacemaker settings for the patient. Once completed, the crew member can click the SAVE button to save the information, and return to page 4. Figure 66 131 Setup: Configuration -> Command Fac. -> Chart Fields -> Edema (Enables/Disables edema display) 9/30/2009 Page 52 emsCharts.com User Manual Defaults Button: Inserts the default values defined by the Command Facility132 into the Breath Sounds text box. Once the above sections have been completed, the user can click on the Next Page button to proceed to Page 5. c. 132 Setup: Configuration -> Command Fac. -> Chart Defaults -> Breath Sounds (Define defaults for the breath sounds text box) 9/30/2009 Page 53 emsCharts.com User Manual 6.6.6. Page 5 - Secondary Survey If the Command Facility option Anatomical Exam133 is set to No, Page 5 of the PCR will appear similar to Figure 67. Figure 67 If the Command Facility option Anatomical Exam134 is set to Yes, Page 5 of the PCR will appear similar to Figure 69. 133 134 Setup: Configuration -> Command Fac. -> Chart Fields -> Anatomical Exam (Configure anatomical exam display) Setup: Configuration -> Command Fac. -> Chart Fields -> Anatomical Exam (Configure anatomical exam display) 9/30/2009 Page 54 emsCharts.com User Manual Figure 68 Regardless of configuration, the following data can be entered: a. Head135,136: Select/free text section. All physical findings related to the head should be documented in this section. b. Neck: This is a free text section. All physical findings related to the neck should be documented in this section. Findings related to the Trachea137 are documented in the dropdown list (Midline, Deviated to Left, etc.) c. Chest138,139: Select/free text section. All physical findings related to the chest should be documented in this section. d. Pelvis140,141: Select/free text section. All physical findings related to the pelvis should be documented in this section. e. Abdomen142,143: Select/free text section. All physical findings related to the abdomen should be documented in this section. If text entry is selected, the fields Appearance, Palpation, Bowel Sounds144, and Comments will be displayed. If select is chosen, Left Upper, Right Upper, Left Lower, and Right Lower select boxes will be displayed. f. Heart Tones145,146: Select. All physical findings related to heart tones should be documented in this section. 135 136 137 138 139 140 141 142 143 144 145 Setup: Configuration -> Command Fac. -> Chart Fields -> Head Assess (Configure head assessment display) Setup: Configuration -> Command Fac. -> Code Tables -> Head Assessment (Configure head assessment options) Setup: Configuration -> Command Fac. -> Chart Fields -> Trachea (Enables/Disables trachea display) Setup: Configuration -> Command Fac. -> Chart Fields -> Chest Assess (Configure chest assessment display) Setup: Configuration -> Command Fac. -> Code Tables -> Chest Assessment (Configure chest assessment options) Setup: Configuration -> Command Fac. -> Chart Fields -> Pelvis Assess (Configure pelvis assessment display) Setup: Configuration -> Command Fac. -> Code Tables -> Pelvic Assessment (Configure pelvic assessment options) Setup: Configuration -> Command Fac. -> Chart Fields -> Abdomen Assess (Configure abdomen assessment display) Setup: Configuration -> Command Fac. -> Code Tables -> Abdomen Assessment (Configure abdomen assessment options) Setup: Configuration -> Command Fac. -> Chart Fields -> Bowel (Enables/Disables bowel sounds display) Setup: Configuration -> Command Fac. -> Chart Fields -> Heart Assess (Configure heart assessment display) 9/30/2009 Page 55 emsCharts.com User Manual g. Back147: Select/free text section. All physical findings related to the back should be documented in this section. If text entry is selected, the field Findings will be displayed. If select is chosen, Spine148, Thoracic149, and Lumbar150 select boxes will be displayed. h. Extremities151,152: Select/free text section. All physical findings related to the extremities should be documented in this section. Any restraint devices placed on the patient prior to the crew’s initial assessment should be documented in the restraint section. If text entry is selected, the fields Findings and Restraints will be displayed. If select is chosen, LA, RA, LL, and RL will be displayed. i. Skin153,154: Select/free text section. All physical findings related to the skin should be documented in this section. j. Additional Information: Includes the following: a. Obstetrics: Will only appear for female patients. Click to display the Obstetrics window (Figure 69). Figure 69 Once completed, the crew member can click the SAVE button to save the information, and return to page 5. b. Burns: Click to display the Burns window (Figure 70). 146 147 148 149 150 151 152 153 154 Setup: Configuration -> Command Fac. -> Code Tables -> Heart Assessment (Configure heart assessment options) Setup: Configuration -> Command Fac. -> Chart Fields -> Back Assess (Configure back assessment display) Setup: Configuration -> Command Fac. -> Code Tables -> Spine Assessment (Configure spine assessment options) Setup: Configuration -> Command Fac. -> Code Tables -> Thoracic Assessment (Configure thoracic assessment options) Setup: Configuration -> Command Fac. -> Code Tables -> Lumbar Assessment (Configure lumbar assessment options) Setup: Configuration -> Command Fac. -> Chart Fields -> Extremity Assess (Configure extremity assessment display) Setup: Configuration -> Command Fac. -> Code Tables -> Extremity Assessment (Configure extremity assessment options) Setup: Configuration -> Command Fac. -> Chart Fields -> Skin Assess (Configure skin assessment display) Setup: Configuration -> Command Fac. -> Code Tables -> Skin Assessment (Configure skin assessment options) 9/30/2009 Page 56 emsCharts.com User Manual Figure 70 Once completed, the crew member can click the SAVE button to save the information, and return to page 5. c. Drains & Tubes: Click to display the Drains & Tubes window (Figure 71). Figure 71 Once completed, the crew member can click the SAVE button to save the information, and return to page 5. k. Defaults Button: Inserts the default values defined by the Command Facility155 into the following text boxes: 1) Head Findings 2) Neck Findings 3) Chest Findings 4) Pelvis Findings 5) Abdomen Appearance 6) Abdomen Palpation 7) Bowel Sounds 8) Back Findings 9) Extremities Findings 10) Skin Findings Once the above sections have been completed, the user can click on the Next Page button to proceed to page 6. 155 Setup: Configuration -> Command Fac. -> Chart Defaults -> Head Findings, Chest Findings, Neck Findings, Abdomen Appearance, Abdomen Palpation, Bowel Sounds, Pelvis Findings, Back Findings, Extremities Findings, and Skin Findings (Define defaults for these text boxes) 9/30/2009 Page 57 emsCharts.com User Manual 6.6.7. Page 6 - Labs & Fluids Intake / Output Page 6 of the PCR (Figure 72) is comprised of the following sections: Figure 72 a. Lab Results: If there are lab results to be added to the chart, pressing the Add Labs button will display the Lab Values window (Figure 73). Figure 73 9/30/2009 Page 58 emsCharts.com User Manual The BE156, SAT157, and Troponin158 boxes will only appear if enabled by the Command Facility. The lab information can now be entered, and saved by pressing the Add Labs to Chart button. b. Intake and Output: This section is for the documentation of all intake and output values for the patient. The crew member will document the amount in the appropriate box. If the crew is not aware of the specific amount, UNK should be documented for unknown. The number “0” should only be documented if the known amount is actually 0. c. Defaults: Pressing this button will enter 0 into all of the intake and output boxes except for CRYS Intake During transport. Once the above sections have been completed, the user can click on the Next Page button to proceed to Page 7. 156 157 158 Setup: Configuration -> Command Fac. -> Chart Fields -> Lab-BE (Enables/Disables Lab-BE display) Setup: Configuration -> Command Fac. -> Chart Fields -> Lab-SAT (Enables/Disables Lab- SAT display) Setup: Configuration -> Command Fac. -> Chart Fields -> Lab-Troponin (Enables/Disables Lab- Troponin display) 9/30/2009 Page 59 emsCharts.com User Manual 6.6.8. Page 7 – PTA IVs & Medications Page 7 of the PCR (Figure 74) is comprised of the following sections: Figure 74 a. IVs Initiated prior to Assessment: This section is for the documentation of all IVs and solutions initiated prior to the crew’s initial assessment. It includes: a. Gauge: The gauge of the IV. b. Site: The site of the IV. c. Solution: The solution of the IV. d. Rate: The rate of the IV. e. Performed By159: Select who performed the IV. f. Outcome160: Select the outcome of the IV. Once the information is entered into the appropriate boxes, click the Add button to save. This sequence must be completed for each individual IV. b. Medications/Infusions prior to Assessment: This section is for the documentation of all medications and/or medication infusions administered prior to the crew’s arrival and initial assessment. It includes: a. Time: The time the medication was given. b. Medication: The medication that was given. It can be entered by clicking the icon and selecting the medication given, or simply typed into the text box. c. Concentration: The concentration of the medication. d. Dose/Rate161: The dose and rate of the medication. 159 160 Setup: Configuration -> Service -> Chart -> Other Pages -> Priors Performed By (Enables/Disables performed by display) Setup: Configuration -> Service -> Chart -> Other Pages -> Priors Outcome (Enables/Disables outcome display) 161 Setup: Configuration -> Service -> Chart -> Other Pages -> Prior Dosage Unit (Enables/Disables rate display as a dropdown box) 9/30/2009 Page 60 emsCharts.com User Manual e. IV#/Other Route: How the medication was administered. The user can select a route from the dropdown box, or click the magnifying glass icon to select an IV entered in the previous section. f. Performed By162: Select who administered the medication/infusion. g. Outcome163: Select the outcome of the medication/infusion. h. Drip: If the medication was given via a Drip, this box should be checked. Once the information is placed in the appropriate boxes, click the Add button to save. This sequence must be completed for each individual Medication and/or Infusion. Once the above sections have been completed, the user can click on the Next Page button to proceed to Page 8. 162 163 Setup: Configuration -> Service -> Chart -> Other Pages -> Priors Performed By (Enables/Disables performed by display) Setup: Configuration -> Service -> Chart -> Other Pages -> Priors Outcome (Enables/Disables outcome display) 9/30/2009 Page 61 emsCharts.com User Manual 6.6.9. Page 8 - Activity Log 2. Page 8 of the PCR (Figure 75) is displayed below: Figure 75 This page is the activity log, used for the documentation of the patient care provided by the crew. The crew should enter each activity and information utilizing the Date and Time of each occurrence. Many fields are self explanatory, but some require more information. These include: a. BP Method164: Select how blood pressure was obtained. b. MAP165: Mean Arterial Pressure. Calculated automatically, but can be edited. c. EKG Rhythm166: User can select from the dropdown box, or click the pencil icon to manually enter a rhythm. Regular or Irregular rhythm can also be selected. d. Custom Vital Signs167: Enter a Label (IABP, VAD, etc.), and then a Value. Custom vital signs will only be added to the chart if both a label and value are entered. e. Repeat Vital Signs: Duplicates the last set of data entered. One use would be if all the vital signs were the same with the exception of a change in blood pressure, then all that would be required of the user is to press this button, change the blood pressure readings, and then save. f. No Change: Enters “No change in patient status” in Comments section. g. GCS168: Enter the GCS of the patient at the time of the recorded activity. h. Pain169: Select the amount of pain the patient was feeling. i. Protocol170: Select the protocol that was followed. 164 165 166 167 168 169 Setup: Configuration -> Command Fac. -> Chart Fields -> BP Method (Enables/Disables BP method display) Setup: Configuration -> Command Fac. -> Chart Fields -> Page 8-M.A.P. (Enables/Disables M.A.P. display) Setup: Configuration -> Command Fac. -> Code Tables -> EKG Rhythms (Define EKG Rhythms) Setup: Configuration -> Command Fac. -> Chart Fields -> Page 8-Custom Vitals (Enables/Disables custom vitals display) Setup: Configuration -> Command Fac. -> Chart Fields -> Page 8-GCS (Enables/Disables page 8 GCS display) Setup: Configuration -> Command Fac. -> Chart Fields -> Page 8-Pain (Enables/Disables pain display) 9/30/2009 Page 62 emsCharts.com User Manual j. k. Assessed By171,172: Select which crew member performed the assessment. Graph: Displays a graph of the patient’s vital signs over time. Once the Information is entered into the appropriate sections, the crew member will click the Add Line button. The screen will refresh and the activity will be displayed in chronological order in the upper part of the screen (Figure 76). This sequence must be completed for each activity to be entered. Figure 76 The other important field on this page is Add Action. This field is used to document all procedures and actions performed by the crew. It can be used by itself, or in conjunction with a set of vitals. Once the action has been selected from the dropdown box, the crew member will click the Add Line button. The screen will refresh and the Add Procedure Log window will appear. The following procedures are available: 1) Medication: for the documentation of all medications administered by the crew. Up to five medications can be entered at one time. 2) Titrate: for the documentation of any titration of an infusion. 3) Intubation: for the documentation of all intubations performed by the crew. 4) Airway-Other: for the documentation of all airway adjuncts and maneuvers performed by the crew. These include Abdominal Thrust, Back Blow, Bag Valve Mask, Demand Valve, Needle Thoracotomy, Oxygen and Suction. 5) Initiate IV: for the documentation of all IV insertions performed by the crew. 6) Cardiac: for the documentation of the following actions: Cardioversion, Defibrillation, Internal Pacing, External Pacing and CPR. Can also document Energy Setting and Heart Rate if appropriate to selected action. 170 171 172 Setup: Configuration -> Command Fac. -> Code Tables -> Protocols (Define protocols) Setup: Configuration -> Service -> Users -> user name -> Allowed to Perform ALS (Define if user can perform ALS) Setup: Configuration -> Command Fac. -> Chart Fields -> Page 8-Assessed By (Enables/Disables assessed by display) 9/30/2009 Page 63 emsCharts.com User Manual 7) 8) 9) 10) 11) 12) Immobilization: for the documentation of all immobilization devices applied by crew. Medical Consult173,174: for the documentation of all medical command consultations. Labs: for the documentation of all labs. Drains: for the documentation of all drains. Ventilator: for the documentation of ventilator settings. Hosp. Notify: for the documentation of hospital notifications. There is NOT a massive narrative section in this software. There are two comment boxes: one on the activity page, and one in the procedure log. Comments can be listed in both or neither of these boxes. A new line will be added if the comment box on the activity page is used. The final comment that appears on screen will be built by first listing the activity log comment, then the procedure itself, then the procedure log comment. To edit a set of vitals, click on a log entry anywhere except the Action column. To edit a procedure, click on the Action column of a log entry. Either action will open up a new window containing the details of that entry. From this window, the user can edit the details of the log entry, or delete the entry by clicking the Delete button. Deleting an entry from the activity log also deletes the associated procedure. Once the above sections have been completed, the user can click on the Next Page button to proceed to Page 9. 173 Setup: Configuration -> Service -> Code Tables -> Command Facilities (Define command facilities for medical consultations) 174 Setup: Configuration -> Command Fac. -> Code Tables -> Command Physicians (Define command physicians for medical consultations) 9/30/2009 Page 64 emsCharts.com User Manual 6.6.10. Page 9 - Miscellaneous Forms Page 9 of the PCR (Figure 77) is comprised of the following sections: Figure 77 a. Miscellaneous Forms175: This section is for the documentation of all required post trip information. Each form that the service administrator has configured as required will appear as “Required”. Required forms must be completed before the chart can be advanced. Forms can also be configured as “Optional”, which means that the forms may be completed, but this is not required. To complete the forms, the crew member will click on the form name and the form will appear (Figure 86-Figure 92). Once the form is completed, the crew member will click the Save button and the screen will refresh and Page 9 will reappear to continue with other forms. You will note that the “Required” in red text now has changed to “Completed” in green text. Each form will be covered in more detail below. b. Attached Files: This section displays the number of attachments on the current chart, as well as the Attached Files button. Clicking this button brings up the Attach File page (Figure 78). Figure 78 175 Setup: Configuration -> Service -> Chart -> form name (Configure forms) 9/30/2009 Page 65 emsCharts.com User Manual Both services and command facilities can attach files to a chart. To attach a file, click the Browse button, navigate to the file you want to attach, and click Open. If you wish to rename the file, enter the new name in the Rename file area. If this is blank, the current file name will be used. Services can select a category from a list defined by their service administrator176, while command facilities can select a category from a list defined by their command facility administrator177. When finished, click the Upload button to attach the file. After some files have been attached, the Attach File page will look similar to Figure 79. Figure 79 c. For each file under Files Currently Attached, you can see the file name, size, date it was attached, service level, and category. To download a file, click on the file name. On the far right side of each file name is a Delete button. You can delete an attachment from a chart by clicking the Delete button, and clicking OK in the confirmation box that appears. For any file deleted, a record of the file name, date of deletion, and user who deleted the file will be displayed. Signatures178179: This section allows users to electronically sign charts. When a user presses the Sign Chart button, the electronic signature window appears (Figure 80). The user then enters their system password and social security number. If the user can sign the chart in more than one capacity, they can choose the correct title from the Sign Chart As dropdown box. When the Save Signature button is pressed, the signature is saved to the chart. It can then be viewed by pressing the View button, along with the date and time the chart was signed, and the IP address of the computer the user was logged into at the time of signing (Figure 81). It is also possible for a user to add addendums to the chart after signing it. Should the user create an addendum after signing the chart, they would then be able to sign it a second time, with the corresponding new date and IP. 176 Setup: Configuration -> Service -> Code Tables -> Chart Attachment Categories (Define Chart Attachment Categories for service) 177 Setup: Configuration -> Command Fac. -> Code Tables -> Chart Attachment Categories (Define Chart Attachment Categories for command facility) 178 Setup: Configuration -> Service -> Chart -> Page 9 -> Electronic Signatures (Configure electronic signatures) 179 Setup: Configuration -> (Service/Command Fac.) -> Code Tables -> QA Levels -> QA level -> Electronically Sign Charts, Sign chart at, and Print Page Label (Define if, when, and how that QA level can electronically sign charts) 9/30/2009 Page 66 emsCharts.com User Manual Figure 80 Figure 81 d. Print Chart: There are three buttons in the Print Chart section: 1) Chart: Pressing this button generates a print preview of only the chart. 2) Forms: Pressing this button generates a print preview of only the forms that have a check to the left of them (Figure 77). 3) Chart & Forms: Pressing this button generates a print preview of the chart and the forms that have a check to the left of them. After one of the above buttons have been pressed, the output may be printed by clicking on the Print Chart button or by clicking the File drop down menu and selecting Print. e. Quality Assurance180,181: After the user has completed all required steps, and is satisfied that the chart is complete, he or she will advance the PCR to the next review level. This is accomplished by clicking the Complete/Lock Chart button. If any Data Validation Rules are defined, then the Data Validation window will appear (Figure 82). Figure 82 There are two main sections, one for fields that must be corrected before the chart can be locked, and another for fields that corrections are recommended. Any fields which failed the check will appear in red, and will include a link to take the user to the chart page where that field is located so that it can be corrected. If a link is clicked, the Data Validation window 180 181 Setup: Configuration -> Service -> Code Tables -> QA Levels (Define QA levels) Setup: Configuration -> Command Fac. -> Code Tables -> QA Levels (Define QA levels) 9/30/2009 Page 67 emsCharts.com User Manual will remain open behind the other windows so that the user can refer back to this window and correct multiple errors before trying to lock the chart again. If the Data Validation window is open when the user returns to page 9, then it will be brought to the front and automatically refreshed. Once all the required fields are corrected, the Continue button will appear in the Data Validation window (Figure 83). Figure 83 When the Continue button is clicked, the chart will continue to close normally. If there are no fields to be checked, then the Data Validation window will close automatically, and the chart will continue to close. After the data validation check is performed, the End-of-Record Verification window will appear (Figure 84). This page checks data in the chart to make sure that it exists/is correct. The data that is checked is: Figure 84 9/30/2009 Page 68 emsCharts.com User Manual f. 1) Advancing Privileges: Verifies user has sufficient privileges to advance the chart. 2) Date/Time Sequence: Verifies the dates and times on page 1 are in sequence (i.e. the On Scene time is not later than the Dispatch time). 3) Electronic Signatures182: Verifies that the required electronic signatures are on the chart. 4) Patient183: If required, checks that a patient is listed on the chart, or ‘unknown’ is checked. 5) Export: If required, exports will be generated. 6) Summary Information: If a summary should be automatically created, this is where it occurs. 7) Advancing Chart: If a chart passes all of the above checks, it is advanced to the next QA level. If a chart fails one or more of these tests, Failed will be displayed in red under Result, and a more detailed explanation of the problem will appear in the Errors section. If there is a problem, the chart will not be advanced, and the user will have to fix the problem and again try to advance the chart by pressing the Complete/Lock Chart button. Addendums: This section is for the documentation of any necessary addendums. Once the PCR has been forwarded to the Quality Assurance (QA) process, it can not be edited by the crew members. Therefore, any clarifications and/or additions must be added utilizing the addendums function. To create an addendum, the crew member simply clicks the Addendums button, and the comment box for adding addendums appears (Figure 85). The crew member can then add the appropriate information and click on the Add Addendum button to save. Figure 85 6.6.11. State Export This form provides all the remaining data elements that must be completed in order to comply with state EMS legislation. Please refer to the Data Interchange Manual for more details. 6.6.12. Supply Form The Supply Form184 allows the user to document what supplies were used during the transport (Figure 86). 182 Setup: Configuration -> Service -> Chart -> Electronic Signatures (Configure if and how many electronic signatures are required) 183 Setup: Configuration -> Service -> Code Tables -> Transport Outcome Options (Configure if a patient is required for the outcome listed on the chart) 184 Setup: Configuration -> Service -> Chart -> Supply Usage (Configure supply form) 9/30/2009 Page 69 emsCharts.com User Manual Figure 86 The available supplies are generated from the configuration of the service185. Clicking on the category names with show/hide the options in that category. The user can enter the quantity of each supply used, and if it was restocked at the receiving facility. When the mouse is moved over the various supplies, that line will highlight in yellow. Clicking on a highlighted supply will place a check in the Restocked box, as well as adding 1 to the Quantity. Subsequent clicks will continue adding to the Quantity. For example, if an item is clicked 3 times, the Quantity will be 3, and the Restocked box will be checked. When finished, click the Save Supplies button to save. The user is then taken to the Supply Summary page (Figure 87). Figure 87 From here, the user can click the Edit Supplies button to return to the supply form and make changes, or Return to page 9. 6.6.13. Reason for Transport The Reason for Transport form186,187,188 is a series of checkboxes defined by the service administrator used to document the reasons which led to the transport (Figure 88). 185 186 Setup: Configuration -> Service -> Supplies -> Setup (Configure supplies) Setup: Configuration -> Service -> Chart -> Reason for Transport (Configure reason for transport form) 9/30/2009 Page 70 emsCharts.com User Manual Figure 88 Once completed the crew member will click on the Enter button. The screen will refresh and Page 9 will reappear to allow the crew to complete any remaining required forms. If it is necessary to edit the Reason for Transport Form, links to add new reasons or to delete existing reasons will appear instead of checkboxes (Figure 89). 187 188 Setup: Configuration -> Service -> Code Tables -> Reason For Transport (Define reasons for transport) Setup: Configuration -> Command Fac. -> Code Tables -> Reason For Transport (Define reasons for transport) 9/30/2009 Page 71 emsCharts.com User Manual Figure 89 6.6.14. Activity Audit The Activity Audit189,190,191 is a list of questions to be answered about the current trip (Figure 90). 189 190 191 Setup: Configuration -> Service -> Chart -> Activity Audit (Configure activity audit form) Setup: Configuration -> Service -> Code Tables -> Activity Audit (Define activity audit questions) Setup: Configuration -> Command Fac. -> Code Tables -> Activity Audit (Define activity audit questions) 9/30/2009 Page 72 emsCharts.com User Manual Figure 90 The questions are answered by the crew member clicking on the appropriate answer for each question. The Yes/No fields are defaulted to a No value. If the question does not apply to the current trip, the question may be ignored. Once completed the crew member will click on the Save button and the information will be saved. If any area that was answered Yes requires that a special report be filed, the required special report listing will appear (Figure 91). Otherwise, the screen will refresh and Page 9 will reappear to allow the crew member to continue completing the Required Forms. Figure 91 To complete a required special report, the crew member points to the required special report which will highlight the report name. The crew member then clicks on the highlighted report which will open the report for completion. The report will be saved by clicking on the Enter Incident Report button. 9/30/2009 Page 73 emsCharts.com User Manual Once all of the Special Reports are completed, the crew member will click on the Completed – Return to Page 9 button. The screen will refresh and Page 9 will reappear to allow the crew to complete any remaining required forms. 6.6.15. Utilization Review The Utilization Review form192 (Figure 92) is used to justify transport to insurance carriers for billing purposes. The information that is provided will assist billing personnel to make necessary decisions and follow the proper procedures in billing the patient. Figure 92 The form is a simple check box type of form with free text areas to allow for comments or explanations to be provided where necessary. Once the form is completed the crew member can click on the Print Preview button to print a copy of the Utilization Review form. Then the crew member will click on the Save button to return to Page 9. 6.6.16. Followup Letter The Followup Letter form193,194 is a simple and quick way to create a form letter for the referring agency or patient’s family after a transport (Figure 93). The user can select a Template from those defined by the system administrator, and the relevant information is filled in from the PRC. If allowed by the system administrator, the user can also select the Delivery Method. Once the user is satisfied with the information entered, they continue by pressing the Accept button. 192 193 194 Setup: Configuration -> Service -> Chart -> Utilization Review (Configure utilization review form) Setup: Configuration -> Service -> Chart -> Followup Letter (Configure followup letter form) Setup: Configuration -> Service -> Code Tables -> Form Letter Templates (Define form letter templates) 9/30/2009 Page 74 emsCharts.com User Manual Figure 93 Depending on the delivery method, a second screen may appear which will allow the user to preview the letter. The user can then make changes, spell check the letter with the Check Spelling button, view the chart with the View Chart button, and when satisfied, save the letter with the Save Letter button. Followup letters can also be created by pressing Chart Toolbox from the menu on the left side of the screen, and pressing Create Form Letter from the window which appears (the chart toolbox is covered in more detail in section 6.7). The service administrator can also configure different templates to appear depending on whether the user selected the chart toolbox from the menu, or followup letter from page 9. Once completed the crew member will click on the Enter button. The screen will refresh and Page 9 will reappear to allow the crew to complete any remaining required forms. 6.6.17. Hospital Pt. Notes The hospital patient notes form (Figure 94) allows users to enter post-transport information. 9/30/2009 Page 75 emsCharts.com User Manual Figure 94 6.6.18. Special Reports The special reports form195 allows users to add additional documentation to a transport record (Figure 95). Figure 95 195 Setup: Configuration -> Service -> Chart -> Incident Report (Configure special report form) 9/30/2009 Page 76 emsCharts.com User Manual A Special Report can be generated from anywhere in the chart by clicking on the Special Report link near the bottom of the Menu System on the left hand side of the screen. It is composed of the following sections: a. Date/Time: The date and time the Special Report form was opened. b. Record Number: The record number of the transport; automatically inserted. c. Base/Unit: The base and unit recorded in the chart; automatically inserted. d. Supervisor: The supervisor of the crew member; can be selected by clicking on the people icon. e. Your Name/Crew: The users name and the crew associated with the chart, automatically inserted. f. Subject: A brief description of the contents of the special report. g. Mark as Urgent/Flag Report: Optional tags used to draw more attention to the special report. h. Type196,197: General categories that the special report may fall into. This is discussed in greater detail below. i. Narrative: This is where the user documents the circumstances/events of the special report. The Narrative can be spellchecked by clicking on the “ABC” icon near the top right of the box j. Auto Email198,199: If the service administrator has configured that certain users should receive an email when a certain type of special report is filed, their email addresses will appear here. k. Extra Email: Enter the email addresses of any other people who should receive a copy of the special report, with the addresses separated by semicolons (;). l. Enter Incident Report: Saves the special report. m. Clear Form: Clears any entries made in the form. When creating a special report, clicking a category which is displayed in italics will result in a special report which can be viewed by parties outside your organization (the command facility or region - depending on who created the category). Categories not in italics will only be seen by your organization. Administrators should ensure that they only create categories pertaining to their function, i.e. services should specify operational categories, command facilities specify clinical categories, and regions / state agencies specify regulatory categories. If one or more special reports have been filed for a chart, the number of reports will appear on the Special Reports line on page 9, and you will be able to review them by clicking that line. There is an important legal distinction between Addendums and Special Reports. By law, addendums are part of the official PCR, and are legally discoverable. Special Reports are part of the QA process, and are not legally discoverable. 6.6.19. Chart Summary The Chart Summary line is only available if the service is using the Chart Summary Module200, and has been configured to appear by the service administrator201,202. When shown, the user has 196 Setup: Configuration -> Service -> Code Tables -> Special Report Categories, Sub-Categories, and Exclusions (Define special report categories, sub-categories, and exclusions) 197 Setup: Configuration -> Command Fac. -> Code Tables -> Special Report Categories and Sub-Categories (Define special report categories and sub-categories) 198 Setup: Configuration -> Service -> Code Tables -> Special Report Categories (Define email addresses for auto email) 199 Setup: Configuration -> Command Fac. -> Code Tables -> Special Report Categories (Define email addresses for auto email) 200 Setup: Configuration -> Service -> Code Tables -> emsCharts.com Modules -> Chart Summary (Enables/Disables the chart summary module) 201 Setup: Configuration -> Service -> Code Tables -> Transport Outcome Options -> Create Summary (Configure whether or not a summary is generated for the outcome listed on the chart) 9/30/2009 Page 77 emsCharts.com User Manual a choice of either printing the summary using the Print button, or to accept the displayed data by pressing the Accept button, which marks the form as complete (Figure 96). Figure 96 6.6.20. Research Please refer to the Research Manual for more details. 6.6.21. Quality Assurance Levels When all required forms are completed, the PCR can be advanced to the next Quality Assurance Level. If additional PCRs must be completed, the crew member can click on Patient Records in the Menu System along the left side of the screen and repeat the above process. 6.7. Other entries on Menu System a. Entire Chart: Displays the entire chart on the screen in a non-editable format. b. Print Preview: Opens a new window to displays the entire chart in a printable format. Also includes a Print button at the top of the page. c. Advance Chart: If the user has sufficient permissions, they can advance the chart from this menu item. d. Special Report: The Special Report item was described above in the section State Export. e. Chart Toolbox: The Chart Toolbox (Figure 97) contains various utilities. 202 Setup: Configuration -> Service -> Code Tables -> Chart Summary Setup -> Chart Summary Generation Method (Configure the chart summary generation method) 9/30/2009 Page 78 emsCharts.com User Manual Figure 97 These utilities include 1) Show QA Advances: Displays the user and time when a chart was created, modified, and advanced. 2) Show Full Audit: Displays all audit activity related to a chart. A brief version of this audit can also be printed by clicking on the Print button. 3) Create Form Letter: Described in the Followup Letter section. 4) Delete Chart: Only shown if the user has sufficient permissions. Deletes the chart from the database. 5) Delete Patient #1: This is used if there is more than one patient associated with a transport, and it is necessary to delete the first patient listed. Deleting any other patient is covered under Patient Information. When a chart is created, most of the transport information is associated with the first patient. In order to delete this patient, the information must first be associated with the next patient listed in the chart. Pressing this button moves the associated information to the second patient, and then deletes the first. 6) Chart Links: Allows the user to enter Medical Record Numbers for the referring and receiving facilities. 6.8. Additional Entries on the Header Bar While in a chart, some addition header bar entries will appear in addition to the standard entries listed in section 1.2.1 (Figure 98). Figure 98 These include: a. Chart Status: The chart status consists of the name of the status level203, followed by the shorthand representation in parentheses. b. Add QA Flag204: Clicking this link allows the user to add a QA flag to the chart (Figure 99). 203 Setup: Configuration -> Service -> Code Tables -> QA Levels (Configure the QA levels for the service) 9/30/2009 Page 79 emsCharts.com User Manual Figure 99 c. View Flags: The number after these words indicates the number of QA flags attached to the chart. Viewing QA flags was previously discussed in section 6.2. d. READ ONLY: If the user does not have permission to edit the chart, these words will appear. e. Patient: The name of the patient associated with this chart. 204 Setup: Configuration -> Service -> Code Tables -> Security Roles -> role name -> QA Flag: Create (Allows user to create QA Flags) 9/30/2009 Page 80 emsCharts.com User Manual 7. Patient Record Search You can search for a patient record by clicking on Search in the menu system. This will bring up the search page (Figure 100). Figure 100 It is composed of the following sections: a. Dates: Select the date or date range to search. All dates can be searched by checking the All Dates box. b. Record IDs: Search by PRID, Dispatch ID205, or Local ID206. Pennsylvania services can also search by PA Lithocode. c. Service: There are multiple search options associated with a service. These are: 1) Base(s)207: Select one or more bases to search. If no bases are selected, all will be searched. 2) Unit(s)208: Select one or more units to search. If no units are selected, all will be searched. 3) Crew: Select a crew member to search. If no crew member is selected, all will be searched. d. Other Criteria: These are other options that can be used to search for summaries. They are: 1) QA Levels: Options can refer to letter status or QA Level209. Default is Select All Charts. 205 206 207 208 209 Setup: Configuration -> Service -> Chart -> Dispatch ID (Enables/Disables Dispatch ID, and renaming of Dispatch ID) Setup: Configuration -> Service -> Chart -> Local ID (Enables/Disables Local ID, and renaming of Local ID) Setup: Configuration -> Service -> Code Tables -> Base Site (Define Base Sites for the service) Setup: Configuration -> Service -> Code Tables -> Units (Define Units for the service) Setup: Configuration -> Service -> Code Tables -> QA Levels (Define QA levels for the service) 9/30/2009 Page 81 emsCharts.com User Manual 2) Receiving Status: Designate the status of the chart as it relates to the receiving facility. Default is Select All Charts. 3) Medical Categories: Designate the Medical Category210 of the chart. Default is All Medical Categories. 4) Procedure Criteria: Designate any Procedures performed during the transport. Default is None/All Procedures. 5) Export Criteria: Designate if an export has/has not been performed for each state that a service exports to211. e. Patient Criteria: Search by patient demographic data. Includes name, address, date of birth and Social Security number. f. Referring/Receiving: Search by referring or receiving type. Default is All. If Other is selected, another dropdown box with a list of the services Common Addresses212 will appear. g. Custom Criteria: Search by a custom criteria. Options include almost all data points in emsCharts. h. Search Results Layout213: Configure the layout of the search results. i. Activity Audit Criteria214: Clicking this link will bring up a window where one or more Activity Audit Criteria can be selected to be used in the search. Once all the criteria has been entered, press the Search button to bring up the search results page (Figure 101). Figure 101 Clicking on an entry will bring up that chart. Pressing the Print All button will print all the charts listed. If the search was performed with a Receiving Status of “Rec. unable to receive chart”, a button labeled "Mark all as 'Sent to Receiving'" will appear, allowing the user to update the receiving status of the charts listed. Additionally, if a search is done at one QA level which is at or lower than the users QA level, and if configured by the service administrator215,216, a “Bulk Advance Charts” button will appear allowing the user to advance many charts at once. 210 211 212 213 214 Setup: Configuration -> Command Fac. -> Code Tables -> Patient Categories (Define patient categories) Setup: Configuration -> Service -> Export (Define states service exports to) Setup: Configuration -> Service -> Code Tables -> Common Addresses (Configure common addresses for the service) Setup: Configuration -> User -> User Preferences -> Patient Charts (Configure default display of chart search results) Setup: Configuration -> (Service/Command Fac./Region) -> Code Tables -> Activity Audit (Configure Activity Audit questions) 215 Setup: Configuration -> Service -> Code Tables -> Security Roles -> role name -> Bulk Advance Charts (Allows role to bulk advance charts) 216 Setup: Configuration -> Service -> Code Tables -> QA Levels -> Allow Bulk Advancing (Enables/disables bulk advancing of charts at the selected QA level) 9/30/2009 Page 82 emsCharts.com User Manual 8. Logs 8.1. Procedure Logs The procedure logs document each procedure performed by a crew member, and how many times that procedure was performed. They are accessed by clicking on Patient Records in the menu system on the home page, then clicking on Procedure Logs. This brings up the Procedure Logs page (Figure 102). Figure 102 8.1.1. Searching / Drilling Down A search is performed by choosing a crew member’s name in Crew, and a date or date range. Other options are: a. Charted procedures only: Only show procedures that were performed on a chart. This will exclude procedures entered with the Submit New Log functionality. b. Service name charts only: Only include charts entered under the current service. c. Show Medication logs: Include medications in the report. Afterwards, press the Create Report button to display the search results (Figure 103). 9/30/2009 Page 83 emsCharts.com User Manual Figure 103 The search results page displays the name of the user, the date range searched, and the date the search was performed. The procedure categories are also listed, and the individual procedures under each category. Only procedures that have been performed by the user will appear on the screen. To the right of each procedure, the number of successful attempts is listed, along with the total number of attempts. If Show Medication Logs was checked on the previous screen, medications will appear under the procedures in the same format. Clicking on a procedure line will bring up a list with more details about each procedure attempt (Figure 104). Figure 104 These details include date, PRID, success, attempts, and other info. Clicking on an entry on this page will take the user to page 8 of the associated chart. 8.1.2. Procedure Report by Crew A second option is to list procedure logs by user. To run this report, click on the Crew Selection icon, and in the popup window that appears click Select None. This will clear the Crew box and activate a dropdown list where you can select Aggregate Totals or By User. If you select By User you can then refine the results to only include specific procedures in the Filter field. If you leave the Filter field blank, then the main categories will be used (Intubation, IV, Cardiac, etc) rather than specific procedures (Orotracheal Intubation, Defib, Cardiovert, etc.) 9/30/2009 Page 84 emsCharts.com User Manual 8.1.3. Adding a non-chart Procedure If an employee performs a procedure in a setting other than their service, it can be documented on the right side of the Procedure Logs page (Figure 102). It is composed of the following sections: d. Type: The type of procedure performed. This selection will determine what fields are displayed in the bottom half of this section. e. Date/Time: The date and time the procedure was performed. f. Location: The location the procedure was performed. g. Details: This section displays additional fields specific to the procedure performed. h. Submit New Log: This button saves the procedure. 8.2. Response Times The times between any two standard events (listed under Times on page 1) can be determined from this page. It is accessed by clicking on Patient Records in the menu system on the home page, then clicking on Response Times. This brings up the Response Time Report page (Figure 105). Figure 105 It is composed of the following sections: a. From/To: Select the date or date range to search. b. Group By: Choose how the results are displayed (Display each transport, Group by unit, etc.). 9/30/2009 Page 85 emsCharts.com User Manual c. d. e. f. g. h. i. j. k. l. m. n. o. p. q. 1st Time: Choose the event to use as the start time. Defaults to “Time Dispatched”. 2nd Time: Choose the event to use as the end time. Defaults to “Time Enroute”. Base(s): Select one or more bases to search. Defaults to all bases. Unit(s): Select one or more units to search. Defaults to all units. Only show charts where times exist: Checking this option will only display charts where the selected times exist. Ignore time differences of “0”: Checking this option will ignore charts where the same time is entered for both 1st and 2nd time. Ignore time differences greater than x mins: Entering a number in this box will cause any charts where the time difference is greater than the entered number to be ignored. Ignore time differences less than x mins: Entering a number in this box will cause any charts where the time difference is less than the entered number to be ignored. Include custom (continuous/discrete) percentile: Entering a number in this box will cause the chosen percentile to appear on the report output. Scene/IH: Select type of transport. Options are “Scene”, “Interhospital”, and “All”. Team: If the service takes teams on trips, choose team status for trips. Medical Category: Select the medical category. Defaults to All. Response Code: Select the response code. Default to All. Display Options: Select the fields to display on the search results page. Generate Report: Press this button to display the search results page (Figure 106). Figure 106 The response times search results page displays the PRID, dispatch ID (if applicable), the date and time, the unit, and the time between the two events. Below the listing is the average response time, and the average response time of the records which have a response time between 0 and 15 minutes. Any other options chosen for display will also appear. Clicking on a line will open a new page containing the associated chart. 8.3. QA Flag Search Quality Assurance flags can be searched by clicking on Patient Records in the menu system on the home page, then clicking on QA Flag Search. This brings up the QA Flag Report page (Figure 107). 9/30/2009 Page 86 emsCharts.com User Manual Figure 107 It is composed of the following sections: a. From/To: Select the date or date range to search. b. Crew: Search for flags on charts which list a specific crew member. c. Flag Author: Search for flags set by a specific user. d. Type: Select the type of flag. Options are “Clinical”, “Documentation”, and “Either”. e. Status: Select whether the flags are complete or incomplete. f. Include Response: Checking this box will include responses to the flag on the results page. g. Search: Press this button to display the search results page. The search results page lists the transport id, the flag author, the crew members on the transport, how a response was made, and any comments. Clicking on a line will open a new page containing the associated chart. 9/30/2009 Page 87 emsCharts.com User Manual 9. Other Patient Record Options 9.1. State Export The State Export page217 (Figure 108) allows you to review data about chart exports to states for the current month. Figure 108 It is composed of the following sections: a. State: The state charts are exported to. b. Charts to export: The number of charts that need to be exported. c. From/To: The date range for the charts. d. Rejects: For Pennsylvania only, the number of charts rejected. e. Download Export File: Generates and downloads an ASCII file containing the chart data for the region or state. f. Upload PA Reject File: For Pennsylvania only, uploads and processes a rejected file. g. Review PA Rejected Charts: For Pennsylvania only, review charts which have been rejected. 9.2. F/U Letter Queue The Followup Letter Queue (Figure 109) lets you search for followup letters which are still queued to be dealt with. Figure 109 It is composed of the following sections: a. From/To: The date range to search. b. Base: Select the base name to search, or All Bases for all bases in the service. 217 Setup: Configuration -> Service -> Chart (Configure state export) 9/30/2009 Page 88 emsCharts.com User Manual c. Exported: Choose to search charts that have been exported, have not been exported, or either. d. Author: Search for letters with a specific author. Once all the information has been entered, click Search to display the search results page (Figure 110). Figure 110 The dropdown box lets you choose what action is performed when the user clicks on a letter. The letter can either be downloaded or edited. If the CTRL key is held while clicking on a letter, the chart associated with that letter will open. For each chart, the search results will display the PRID, Date Created, Template Name, Created By, and Status. 9.3. Patient Management The Patient Management section allows users to perform maintenance on their patient database. This maintenance includes updating information, consolidating patients, and managing subscriptions. This option will only appear if the user has Patient Management privileges218. 9.3.1. Patient Search The Patient Search page lets users search for patients to manage. Figure 111 After entering search criteria, click on the Search button to bring up the search results page (Figure 112). 218 Setup: Configuration -> Service -> Code Tables -> Security Roles -> role name -> Patient Management: (Consolidate Patients/Delete Patients) (Configure if role can consolidate/delete patients) 9/30/2009 Page 89 emsCharts.com User Manual Figure 112 In addition to standard patient information, this page also displays the number of charts that each patient is listed on, as well as whether or not the patient is a current subscriber. A new patient or relative can be entered by clicking on the Add new Patient/Relative button. Clicking on a line brings up the details page for that patient (Figure 113). Figure 113 The top two sections are the same as on the patient page on the chart with the exception of the Verified checkbox. If this box is checked, a warning will appear on the patient page of the chart that this information has been verified and should not be changed. The Subscription Information section is where subscriptions for that patient are managed. A new subscription can be added by entering a start and end date, and clicking the Add New Subscription button. If the patient is currently a subscriber, the subscription can be renewed for one year by clicking the Renew (1 yr) button. A subscription history is listed on the right side of this section. Currently subscription information must be entered for every patient, even if a family plan has been purchased from the service. 9/30/2009 Page 90 emsCharts.com User Manual If the current patient information has been obtained by consolidating patient information, a log of these consolidations will appear in the bottom section. The View Charts button allows users to view a summary of all the charts the patient is listed on (Figure 114). The total number of these charts is the number in parentheses on the button. Figure 114 A new patient or relative can be entered by clicking on the Add new Patient/Relative button. If the user has permission to consolidate patients, two patients can be consolidated into one from the search results page. This is done by checking the checkboxes for two patients, and then clicking on the Consolidate Patient button. This will bring up the Patient Consolidation window (Figure 115). Figure 115 For each data category, the user can select which piece of data to use for the new patient. After all the selections have been made, the patients can be consolidated by clicking the Save button. 9.3.2. Duplicate Search The Duplicate Search page allows the user to search for duplicate patients using various criteria (Figure 116). 9/30/2009 Page 91 emsCharts.com User Manual Figure 116 After selecting a criteria and clicking Search, the Duplicate Patients Search Results page is displayed (Figure 117). Figure 117 This page lists each of the matching results, and the number of patients for that result. Clicking on one of the lines will take the user to the Patient Search Results page described in the previous section. 9.3.3. Merge Two The Merge Two page allows the user to quickly select two patients for consolidation (Figure 118). Figure 118 9/30/2009 Page 92 emsCharts.com User Manual After a patient has been selected, details for that patient will appear in the box below the name. Once two patients have been selected, click the Consolidate Patients button to bring up the Patient Consolidation window described earlier. 9.4. Patient Record Archiving Patient Record Archiving allows services to download archived copies of charts, and to download Microsoft Access databases of the raw data219,220. Archives and Database Exports can be scheduled in advance, and will run starting at 1am ET to reduce activity on servers. No more than a one year timeframe is permitted, and busier services are urged to keep archives less than 5-6000 charts. Utilities will be posted soon to assist in merging two downloaded databases together to allow administrators to store all data in one file. Only 4 Access files and 10 archives can be stored online at once. Files should be deleted from the web once no longer needed 9.4.1. Archive Download The PCR Archive is a ZIP file which contains HTML (web) files of the printed chart as it appears in the print preview window, minus the service's logo. These files are zipped along with a web based menu and navigation system. Archive creation is scheduled from the Archive Download page (Figure 119). Figure 119 It is composed of the following sections: a. From: The starting date. b. To: The ending date. c. Scheduled: The date to create the archive. d. Date Basis: The date to use to determine which charts are included in the archive. e. Include charts with addendums created within this date range: Choose if charts with addendums created in this date range are included in the archive. f. Include attachments: Choose whether or not attachments are included in the archive. Once all the options have been entered, click Schedule Archive to schedule the archive creation. The archive details will be added to the PCR Archives box on the right, along with a link to remove the archive schedule. After an archive has been created, it will appear in the PCR Archives box (Figure 120). 219 Setup: Configuration -> Service -> Account -> PCR Archiving / Database Export (Enable PCR Archiving / Database Export) 220 Setup: Configuration -> Service -> Code Tables -> Security Roles -> role name -> Patient Record Archiving -> Download Patient Record Archives (Configure if role can download Patient Record Archives) 9/30/2009 Page 93 emsCharts.com User Manual Figure 120 This box shows the date range covered by the archive, the number of charts in the archive, the filesize, and the date it was created. The user can click on either date link to download the archive, or click the Delete link to delete the archive. 9.4.2. Database Download The Database Download creates a Microsoft Access database containing the de-normalized (field code numbers have been translated) data and associated code tables. This is meant for offline querying on the raw data. Database exports are scheduled from the Database Download page (Figure 123). Figure 121 It is composed of the following sections: a. From: The starting date. b. To: The ending date. c. Scheduled: The date to create the archive. d. Date Basis: The date to use to determine which charts are included in the archive. e. Include charts with addendums created within this date range: Choose if charts with addendums created in this date range are included in the archive. Once all the options have been entered, click Schedule Export to schedule the database creation. The export details will be added to the Database Exports box on the right, along with a link to remove the export schedule. After an archive has been created, it will appear in the Database Exports box (Figure 122). 9/30/2009 Page 94 emsCharts.com User Manual Figure 122 This box shows the date range covered by the export, the number of charts in the export, the filesize, and the date it was created. The user can click on either date link to download the export, or click the Delete link to delete the export. 9/30/2009 Page 95 emsCharts.com User Manual 10. Special Reports 10.1. Home Page The Special Reports home page221 can be accessed by clicking on Special Reports in the menu system. This page displays the special reports which have not been reviewed by the user (Figure 123). Figure 123 It is composed of the following sections: a. Show unreviewed only/Show All: The user can choose to view all special reports, or only those that he or she has not reviewed. b. Show all flagged: Clicking this link will only display the reports that have been flagged. c. Display past: This dropdown list lets the user change the time frame of special reports to be displayed, up to a maximum of 10 weeks. Selecting a new time frame causes the page to be automatically updated. Special reports older than 10 weeks can be viewed by using the Search option, described in greater detail in the Searching section below. Whenever a user changes the number of weeks to view, that setting is saved for subsequent use. d. Reports waiting review: This is where the special reports are listed. Each line includes the date and time the report was created, the subject (if one was provided), the PRID (if applicable), and the name of the user who filed the special report. If a report is marked as urgent, a red exclamation point (!) will appear to the left of the date. If a report is flagged, a red flag will appear to the left of the date. Also, if a line appears in gray, that signifies that a user has already reviewed that report. 10.2. Viewing a Special Report Clicking on a special report on the special reports home page allows the user to view that special report (Figure 124). 221 Setup: Configuration -> Service -> Code Tables -> emsCharts.com Modules -> Special Reports (Enables/Disables the special reports module) 9/30/2009 Page 96 emsCharts.com User Manual Figure 124 It is composed of the following sections: a. Date Reported/Occurred: The date and time the incident leading to the special report form occurred, and when it was reported. b. Related Record: If the special report deals with a transport, the record number of that transport will appear. Clicking on the related record line will open a new window displaying the entire chart related to that transport. If the special report does not deal with a transport, the word “None” will appear. c. Base/Unit: The base and unit recorded in the chart d. Supervisor: If applicable, the supervisor of the crew member who filed the special report. e. Personnel Issue: If the user has sufficient permissions, the name of an employee can be entered in this field to signify that the special report pertains to that person. f. Filed By/Crew: The name of the user who filed the special report, and the crew associated with the transport, if applicable. g. Type222: General categories that the special report may fall into. All categories are available while the special report is being written. However, it is possible for the Command Facility and/or Region of a service to prevent categories from being changed after a special report is filed. This prevention applies to anyone on the service level, including service administrators. The checkboxes of these categories will be disabled. h. Flag Report/Remove Flag: If the report is not flagged, the Flag Report link will appear, allowing the user to flag the report. If the report is flagged, the Remove Flag link will appear, allowing the user to remove the flag from the report. Flags are discussed in greater detail below. i. Sub-Categories223: If the user has sufficient privileges, and sub-categories have been defined by the system administrator, a link to display these sub-categories will appear. j. Subject: A brief description of the contents of the special report. 222 Setup: Configuration -> Service -> Code Tables -> Special Report Categories, Sub-Categories, and Exclusions (Define special report categories, sub-categories, and exclusions) 223 Setup: Configuration -> Command Fac. -> Code Tables -> Special Report Categories and Sub-Categories (Define special report categories and sub-categories) 9/30/2009 Page 97 emsCharts.com User Manual k. l. m. n. o. p. Narrative: This is where the circumstances/events of the special report are documented. Comments: Any comments/replies to the special report will appear in this section. Report Reviewed By: Lists the names of the users who have reviewed this report. If the user’s name appears in red, the report is flagged for that user. If the user has sufficient privileges, they can also flag a report for another user by clicking on their name in this list. Flags are discussed in greater detail below. Actions: This is where the user can leave comments on the special report. These comments can be spellchecked by clicking on the “ABC” icon near the top right of the box. Save Comments: This button saves the comments to the special report, and marks it as reviewed. The user is then returned to the list where he or she selected the special report. Mark as reviewed only (no comments): This button marks that a user has reviewed the special report, and has no comments to add. The user is then returned to the list where he or she selected the special report. 10.2.1. Flags Flags are used to draw greater attention to a special report, and as a way for a user to make sure they read any replies to that report. For example, if a special report is flagged by John Doe, and Jane Smith comments on it, the special report will be displayed on John Doe’s special reports home page. This will occur even if John has already marked that special report as reviewed. Also, the author of a report has an inferred flag on that special report, even though it will not explicitly appear 10.3. Creating a Special Report Creating a special report relating to a transport is covered in the section on creating a new chart, under the Special Report section. Other types of special reports can be created by clicking Create in the menu system. This will bring up a screen similar to Figure 95. However, on this screen, a record number will not be displayed. Also, if the user has sufficient privileges, a text box for entering extra email addresses will be available. 10.4. Searching Special Reports can be searched by clicking Search in the menu system. This will bring up the Search Special Reports page (Figure 125). 9/30/2009 Page 98 emsCharts.com User Manual Figure 125 It is composed of the following sections: a. Date: The user can select the date or date range for the creation of the special report. b. Only show unreviewed reports: Checking this option will only show reports which have not been reviewed by the user currently logged in. c. IDs: Allws the user to specify a PRID and/or Report ID to search. These fields override the date fields. d. Report Categories: Dropdown boxes which allow users to select the category224,225 and/or sub-categories226,227 of the special report. e. Users: Allows the user to specify the author of the special report, a crew member listed on the chart, and/or a supervisor. Also, if a user has the View Personnel Field security privilege228, they can search by Personnel Issue. f. Search: Clicking this button will bring up a page similar to the special reports home page containing the special reports which matched the parameters of the search. From this page, a special report can be clicked to show it on the screen. Alternatively, if the CTRL key is held while the special report is clicked, the report will appear in a new window. 224 225 226 Setup: Configuration -> Service -> Code Tables -> Special Report Categories (Define special report categories) Setup: Configuration -> Command Fac. -> Code Tables -> Special Report Categories (Define special report categories) Setup: Configuration -> Service -> Code Tables -> Special Report Sub-Categories (Define special report sub-categories) 227 Setup: Configuration -> Command Fac. -> Code Tables -> Special Report Sub-Categories (Define special report subcategories) 228 Setup: Configuration -> Service -> Code Tables -> Security Roles -> role name -> View Personnel Field (Define if security role can view Personnel Field for Special Reports) 9/30/2009 Page 99 emsCharts.com User Manual 11. Forums The Forums can be accessed by clicking on Forums in the menu system. This brings up the Forums page (Figure 126). Figure 126 Three forums will always be displayed. They are: a. Enhancement Requests: Describe requests for enhancements to emsCharts.com. b. General: General posts. c. Recent Changes and Updates: Brief descriptions of updates to emsCharts.com. The service administrator can also create other forums229 only for the use of the service. For example, in Figure 126, the forum “Demo Service Operations Forum” can only be viewed by members of the Demo Service. More specific help on actually using the forums can be obtained by clicking on the help and faq buttons. 229 Setup: Configuration ->Service -> Code Tables -> Forum Categories (Define forum categories) 9/30/2009 Page 100 emsCharts.com User Manual 12. Continuing Ed. The Continuing Education page230 (Figure 127) lists seminars which can be viewed online. Figure 127 This page has the following sections: a. Created: The date the seminar was created on. b. Seminar Title: The title and a brief summary of the contents of the seminar. c. Speaker: The name of the person presenting the seminar. d. Length: The length of the seminar. e. Assessment: Shows whether or not a skill assessment is required. f. View: Allows a user to view the seminar. If the user has sufficient privileges, he or she can also modify the seminar. 230 Setup: Configuration -> Service -> Code Tables -> emsCharts.com Modules -> Seminars (Enables/Disables the seminars module) 9/30/2009 Page 101 emsCharts.com User Manual 13. Supplies The supplies section231 allows administrators and other users with appropriate permissions to manage supplies for the service. The following options are available: 13.1. Setup Setup is performed via a series of code tables (Figure 128). Figure 128 These tables include 13.1.1. Supply Categories The Supply Categories page allows the user to define supply categories for the service (Figure 129). 231 Setup: Configuration -> Service -> Code Tables -> emsCharts.com Modules -> Supplies (Enables/Disables the supplies module) 9/30/2009 Page 102 emsCharts.com User Manual Figure 129 Options include: a. Name: The name of the category. b. Default Category: Select if this category contains default supplies for every trip. c. Use On Chart: Select if the supplies in this category will be available on the supply form. If this category is used for non-chart supplies such as paper towels, set this option to No. d. Hidden: Hide this supply category. Once all the information has been entered, it can be saved by pressing the Save button 13.1.2. Supply Sub-Categories The Supply Sub-Categories page allows the user to define supply sub-categories for the service (Figure 130). 9/30/2009 Page 103 emsCharts.com User Manual Figure 130 Options include: a. Name: The name of the sub-category. b. Parent Category: The parent category. c. Hidden: Hide this supply sub-category Once all the information has been entered, it can be saved by pressing the Save button 13.1.3. Supplies The Supplies page (Figure 131) allows the user to define supplies used by the service. Figure 131 9/30/2009 Page 104 emsCharts.com User Manual Options include: a. Name: The name of the supply. b. Category: The category the supply falls into. c. Vendor: The vendor that provides this supply. The list of vendors is defined in the Vendors section. d. Manufacturer: The manufacturer of the supply. e. Part Number: The part number of the supply. f. Serial Number: The serial number of the supply. g. Model Number: The model number of the supply. h. Packaging: How the supply is packaged. This is a free text section, but some common entries include case, box, and each. i. Units in Package: The number of units in the package. j. Price per package: The service’s cost for each package. k. Price to charge per unit: The price the service charges for each unit. l. Purchase Date: The date the supply was purchased. Once all the information has been entered, it can be saved by pressing the Save button. 13.1.4. The Vendors page Vendors 232 (Figure 132) lists vendors that sell supplies to the service. Figure 132 All of the fields are self-explanatory. Once all the information has been entered, it can be saved by pressing the Save button. 13.1.5. Locations The Locations page (Figure 133) lets the user define locations where inventory can be stored. 232 Setup: Configuration -> Service -> Code Tables -> Vendors (Define vendors) 9/30/2009 Page 105 emsCharts.com User Manual Figure 133 The location name is entered in Location, and the base site of that location is picked from the Base Site drop down list. Once all the information has been entered, it can be saved by pressing the Save button. 13.1.6. Medications The Medications page (Figure 134) lets the user define medications used by the service. Figure 134 Only medications approved for use by the command facility233 will be accessible on the left side, all others will be grayed out. The rest of the page is composed of the following sections: a. Vendor: The vendor that provides this medication. The list of vendors is defined in the Vendors section. b. Part Number: The part number of the medication. c. Price: The service’s cost for each unit of the medication. 233 Setup: Configuration -> Command Fac. -> Code Tables -> Medications in use (Define medications in use) 9/30/2009 Page 106 emsCharts.com User Manual d. Price to Charge: The price the service charges for each unit of the medication. Once all the information has been entered, it can be saved by pressing the Save Details button. 13.1.7. Inventory By Supply The Inventory By Supply page (Figure 135) lets the user select a supply and define the quantity of that supply at each location. Figure 135 The available supplies234 and medications235 are listed on the left side of the page. For each defined location, a quantity box will appear allowing the user to enter the quantity of that supply/medication at that location. Once all the information has been entered, it can be saved by pressing the Save button. 13.1.8. Inventory By Location The Inventory By Location page (Figure 136) lets the user select a location and define the quantity of each supply234 and medication235 at that location. 234 235 Setup: Configuration -> Service -> Code Tables -> Supplies (Define supplies) Setup: Configuration -> Command Fac. -> Code Tables -> Medications in use (Define medications in use) 9/30/2009 Page 107 emsCharts.com User Manual Figure 136 Once all the information has been entered, it can be saved by pressing the Save button. 13.1.9. Minimum Levels The Minimum Levels page (Figure 137) lets the user define minimum acceptable levels for each supply236 and medication237 at each location. Figure 137 If the current supply level is less than the minimum quantity, the current number will be displayed in red. Once all the information has been entered, it can be saved by pressing the Save button. 13.2. Supply Requests The Supply Requests page (Figure 138) lets the user request supplies. 236 237 Setup: Configuration -> Service -> Code Tables -> Supplies (Define supplies) Setup: Configuration -> Command Fac. -> Code Tables -> Medications in use (Define medications in use) 9/30/2009 Page 108 emsCharts.com User Manual Figure 138 It is composed of the following sections: a. Supply: The name of the supply236/medication237. b. Location: The location the supply/medication is being requested for. c. Quantity: The quantity being requested. d. Unit(s): This is a combination of the Packaging and Units in Package fields on the Supplies page. Once all the information has been entered, the request can be submitted by pressing the Submit Request button. 9/30/2009 Page 109 emsCharts.com User Manual 14. Chart Summary 14.1. Chart Summary Search If a service is using the chart summary module of emsCharts.com238, summaries generated by emsCharts.com can be reviewed. This is accomplished by clicking on Chart Summary in the menu system on the home page. This brings up the Chart Summary Search page (Figure 139). Figure 139 It is composed of the following sections: a. Dates: Select the date or date range to search. All dates can be searched by checking the All Dates box. 1) Service Dates: Search for summaries with a service date in the date range specified. 2) QA Dates: Search for summaries that were advanced to the QA level specified in QA Level in the date range specified. 238 Setup: Configuration -> Service -> Code Tables -> emsCharts.com Modules -> Chart Summary (Enables/Disables the chart summary module) 9/30/2009 Page 110 emsCharts.com User Manual b. Record IDs: Search by PRID, Dispatch ID, or Local ID. c. Service: Search by base(s) and/or unit(s). d. Miscellaneous Data: These are other options that can be used to search for summaries. They are: 1) Subscriber: If the service employs a subscription service, this option can be used to search by subscriber status. Options are “Yes”, “No”, and “Either”. 2) Anonymous: Designate if patient data is known. Options are “Yes”, “No”, and “Either”. 3) Billable: Designate if summary is marked as billable. Options are “Yes”, “No”, and “Either”. 4) Blank referring zip: Medicare requires at least a zip code for the referring agency. This option lets the user designate if the referring zip is blank. Options are “Yes”, “No”, and “Either”. 5) Exported: If the service is using a billing export239,240, this option can be used to search by exported status. Options are “Yes”, “No”, and “Either”. 6) Ambulance Service Level: Designate an Ambulance Service Level. Options are “All”, “ALS1”, “ALS1-emergency”, “ALS-2”, “BLS”, “BLS-emergency”, “SCT”, and any custom summary charges241 defined by the service. 7) Minimum QA Level242: If a service has at least one QA Level defined243, designate a minimum QA Level for the search. e. Patient Data: Search by patient demographic data. Includes name, address, date of birth and Social Security number. f. Chart Summary Status: Designate the status of the summary (Summary created, not dealt with, Summary complete, etc.). g. Search: Press this button to display the search results page (Figure 140). Figure 140 239 Contact your distributor to enable this module for an extra fee Setup: Configuration -> Service -> Code Tables -> Chart Summary Setup -> Export to Billing Package (Select an electronic billing package to export to) 241 Setup: Configuration -> Service -> Code Tables -> Custom Chart Summary Charges (Define custom chart summary charges) 242 Setup: Configuration -> Service -> Code Tables -> Chart Summary Setup -> Minimum QA Level allowed in Chart Summary search (Define minimum QA Level that can be searched) 243 Setup: Configuration -> Service -> Code Tables -> QA Levels (Define QA levels for the service) 240 9/30/2009 Page 111 emsCharts.com User Manual The top of the search results page displays the transport date and id, the patient name (if available), the summary status, and the number of chart attachments for that summary. If a billing export has been enabled, it will also display an Exported column. The checkboxes allow the user to select individual summaries to print, export, or change status. Moving the mouse pointer over the different lines will cause that line to be highlighted in different colors according to the summary status. If the summary has not yet been created, the row will be highlighted in red. If the summary is complete, the row color will be green. Any other summary status will highlight in yellow. Clicking on a line will open a new window with the summary displayed (Figure 141). Figure 141 The display of various items on the summary can be configured in the Chart Summary Setup code table244. The Supply form, Utilization Review form, Activity Audit form, Chart, and any attached files can be viewed by clicking on the appropriate buttons. If the user has permission to view the Full Audit of the chart, they can click View Full Audit to view/print the audit. If the transport should not be billed, this can be accomplished by pressing the Make Unbillable button. The Print button prints the summary, and if the summary is correct and complete, it can be approved by clicking the Accept button. A QA Flag can be added to the chart by clicking on the Add QA Flag button. If there are problems and/or missing information, and the user has the needed privileges245, the summary can be edited by clicking on the individual sections. For 244 Setup: Configuration -> Service -> Code Tables -> Chart Summary Setup (Enables/Disables display of various items on the summary) 9/30/2009 Page 112 emsCharts.com User Manual example, if you move the mouse pointer anywhere within the box to the right of the word Patient, the outline of that box will turn red, and clicking on the box will open the Patient Data window (Figure 142). Figure 142 Any of the data on this page can be edited, and then saved by clicking on the Update button. Under the Details section, not all of the categories are displayed by default. All of the categories can be displayed by pressing the Show All button, which will expand the display to show all the categories, similar to Figure 141. The extra categories can then be hidden be pressing the Hide Extra button. The individual procedures are listed under the Details section. A user with the appropriate permissions246 can also add, edit, and delete the items on the summary. To add an item, click the Add new item link. To edit or delete an item, click on the item line. These actions will pull up the edit item window (Figure 143). 245 Setup: Configuration -> Service -> Code Tables -> Security Roles -> role name -> Chart Summary -> Modify Chart Summary (Define if role can modify summary details) 246 Setup: Configuration -> Service -> Code Tables -> Security Roles -> role name -> Chart Summary -> Modify Summary Charges (Define if role can modify summary charges) 9/30/2009 Page 113 emsCharts.com User Manual Figure 143 This window has the following options: a. Procedure: The name of the procedure. b. Suffix: The suffix to add to the name of the charge. c. Quantity: The quantity of the charge. d. Unit Charge($): The charge in dollars for each unit of the procedure. e. Total Charge($): Automatically calculated by multiplying the quantity by the Unit Charge. f. Comment247: A comment box to explain why the charge was edited. Items which have been manually added/edited will appear with an asterisk (*) to the left of the item name to indicate the change. An audit of all item changes for a summary can be viewed by clicking on the View Item Audit button (Figure 144). 247 Setup: Configuration -> Service -> Code Tables -> Chart Summary Setup -> Require comment when editing item (Require the user to enter a comment when editing an item) 9/30/2009 Page 114 emsCharts.com User Manual Figure 144 Beneath the search results are various buttons. These include: a. Print All: Print data for all listed summaries. Options include Chart Summary, Utilization Review, Supplies, Activity Audit, Chart, and Supplies w/Prices248. When pressed, a status bar will appear to let the user view the progress of the generation of the print job. b. Print All In New Window: Opens a new window and loads the summaries. They can then be printed using the print function of the browser. c. Export Summaries To...249,250: Export summaries to the chosen billing software. This button will only appear if the user has the Export Summaries privilege. d. Mark All Summaries As: Change the summary status of the displayed summaries. For a more in-depth discussion of the export process, please refer to the Export to Billing Manual. 248 Setup: Configuration -> Service -> Code Tables -> Chart Summary Setup -> Chart Summary Search - Check by Default (Choose which of the forms are checked by default) 249 Setup: Configuration -> Service -> Code Tables -> Chart Summary Setup -> Export to Billing Package (Select an electronic billing package to export to) 250 Setup: Configuration -> Service -> Code Tables -> Security Roles -> role name -> Chart Summary -> Export Summaries (Define if role can export summaries) 9/30/2009 Page 115 emsCharts.com User Manual 14.2. Payors The Payors page (Figure 145) is where you enter details for payors251,252. Figure 145 Options include: a. Name: The name of the payor. b. Payor Type: The type of payor (Auto, Medicaid, Medicare, etc.). c. Address 1 & 2, City, State, and Zip: Payor address information. d. Use Policy Num: Select if payor uses a policy number. Optionally, the display name for this field can be renamed. e. Use Group Num: Select if payor uses a group number. Optionally, the display name for this field can be renamed. f. Phone 1 & 2, Fax 1 & 2: Phone and Fax numbers. g. Contact Last Name, First Name, and Title: Contact information. h. Provider Number: The provider number of the service. i. If Mileage > 20, use: Select whether to bill loaded miles or total miles if loaded miles are great than 20. The reasoning behind this field is that Medicaid allows a service to bill for total miles if the loaded miles are greater than 20. j. Fee Schedule: Select a fee schedule to use with this payor. For more information, see 14.3. k. Priority: The priority this payor has in relation to the other payors. If a patient has insurance from more than one payor, the payor with the highest priority (lowest number) will be used to determine charges. Clicking the See Current Priority List link opens a list of all the payors in order of priority (Figure 146). 251 Setup: Configuration -> Service -> Code Tables -> Chart Summary Setup -> Chart Summary Generation Method (Configure the summary generation method) 252 Setup: Configuration -> Service -> Code Tables -> Security Roles -> role name -> Chart Summary -> Modify Payors (Define if role can modify payors) 9/30/2009 Page 116 emsCharts.com User Manual Figure 146 If a priority is entered that already exists, that existing priority will be decreased to make room for the new payor priority. l. Comments: Comments about the payor. m. Export: If a billing export has been selected, a field allowing the user to enter an export name will be displayed. Once all the information has been entered, it can be saved by pressing the Save button. 9/30/2009 Page 117 emsCharts.com User Manual 14.3. Fee Schedules The Fee Schedules page (Figure 147) is where you enter charges that can be used for specific insurance companies253,254. Figure 147 Schedule Name is where the name of the fee schedule is entered. For each procedure, a Charge and Alternate Code can be entered. If a billing export has been selected, a field allowing the user to enter an export name will be displayed. Once all the information has been entered, it can be saved by pressing the Save button 253 Setup: Configuration -> Service -> Code Tables -> Chart Summary Setup -> Chart Summary Generation Method (Configure the summary generation method) 254 Setup: Configuration -> Service -> Code Tables -> Security Roles -> role name -> Chart Summary -> Modify Fee Schedules (Define if role can modify fee schedules) 9/30/2009 Page 118 emsCharts.com User Manual 15. Phone Messages This section255 allows phone messages to be taken in an electronic format instead of on slips of paper. 15.1. New Message The New Message page (Figure 148) allows the user to enter a new message. Figure 148 It is composed of the following sections: a. Date/Time: The date and time of the message. b. Type: The type of message (Phoned or Visited). c. For: If User is selected, the icon will appear, allowing the user to search for the name of the user the message is for. If Other is selected, the name/title the message is for can be entered in a free text box. d. Caller: The name of the person who left the message. e. Caller Phone: The phone number of the person who called. f. Action Requested: The action the caller requested the message taker to perform (Page, Return Call, etc.). g. Action Taken: The action the message taker performed (Conference, Voice Mail, etc.). h. Message: A free text box where a message or any other notes can be taken. The name of the message taker will be automatically recorded. Once all the information has been entered, it can be saved by pressing the Save button. 15.2. Viewing Messages When a user has one or more new phone message, an entry will appear in that user’s home page (Figure 149). 255 Setup: Configuration -> Service -> Code Tables -> emsCharts.com Modules -> Phone Messages (Enables/Disables the phone messages module) 9/30/2009 Page 119 emsCharts.com User Manual Figure 149 The message summary page (Figure 150) can then be viewed by clicking on Phone Messages in the menu system of the home page. Figure 150 The individual messages can then be viewed by clicking on them to bring up the Message Window (Figure 151). Figure 151 This window displays all the information entered in the New Message window, as well as the name of the user who took the message. Once the user has read the message and does not want to see it any more, he or she can press Reviewed. If the user wants to save the message for a later date, he or she can press Cancel. 15.3. Search Messages can also be viewed by searching for them (Figure 152). 9/30/2009 Page 120 emsCharts.com User Manual Figure 152 The user selects a date range, and optionally a user name, and presses Search to display the search results page (Figure 153). Figure 153 This screen displays the date and time of the message, who it was for, the caller, the caller’s phone number, and the action requested. The individual messages can then be viewed by clicking on them to bring up the Message Window (Figure 151). 9/30/2009 Page 121 emsCharts.com User Manual 16. Reports Reports256 allow you to view overall statistics about the transports being performed by the service. 16.1. Std. Reports Standard reports are generated from the Report Criteria page (Figure 154) by selecting a date range and a report type. The Standard Reports that can be generated are listed in Figure 155. Figure 154 Figure 155 As an example of standard reports, this guide will generate a report of all transports sorted by Receiving Hospital. Using the data listed in Figure 154, the following screen is generated: Figure 156 This screen displays the search criteria, the receiving hospitals, the number of transports that went to each hospital, and the percentage of total transports that number represents. If we then click on UPMC – Presbyterian, a page containing details for transports to that hospital will be displayed (Figure 157). 256 Setup: Configuration -> Service -> Code Tables -> Security Roles -> role name -> Reporting Module (Allows user to access the reporting module) 9/30/2009 Page 122 emsCharts.com User Manual Figure 157 This page again displays the search criteria, along with details about each transport. The chart for that patient can be viewed by clicking on that entry. If a patient was the second patient on a transport, the parent PRID of the transport will be listed in parentheses beside the PRID of the secondary patient. From the main results page, the data can also be viewed as a pie graph by clicking on the This will display a screen similar to Figure 158. icon. Figure 158 Alternately, the data can be viewed as a bar graph by clicking on the screen similar to Figure 159. 9/30/2009 icon. This will display a Page 123 emsCharts.com User Manual Figure 159 Clicking on the icon will return the user to the main report page (Figure 156). 16.2. Cross-Tabular Cross-Tabular reports (Figure 160) allow the user to select two criteria to compare. The criteria that can be used to generate Cross-Tabular Reports are listed in Figure 161. 9/30/2009 Page 124 emsCharts.com User Manual Figure 160 Figure 161 As an example of cross-tabular reports, this guide will generate a report of Medical Categories compared to Receiving Hospitals. Using the data listed in Figure 160, the following screen is generated: Figure 162 This screen displays the search criteria, the medical categories, and the receiving hospitals. The data view can be changed by selecting a new option in the View dropdown box. Options include bar, line, and pie graphs, as well as Compressed Tabular (wrap tables on to multiple lines to fit on one page wide). The intersection of each medical category and hospital name displays the number of patients in that category transported to that hospital. Clicking on a category name will display a Standard Report for that medical category sorted by receiving hospitals (Figure 163). Figure 163 9/30/2009 Page 125 emsCharts.com User Manual Clicking on a hospital name will display a Standard Report for that hospital sorted by medical category (Figure 164). Figure 164 Finally, clicking on a number at an intersection displays a details page for those transports (Figure 165). Figure 165 16.3. Hour of Day Hour of Day reports (Figure 166) allow the user to generate reports sorted by time of day. The criteria that can be used to generate Cross-Tabular Reports are listed in Figure 167. Figure 166 Figure 167 As an example of Hour of Day reports, this guide will generate a report of Level of Consciousness. Using the data listed in Figure 166, Figure 168 is generated: 9/30/2009 Page 126 emsCharts.com User Manual Figure 168 Clicking on the No Data category generates Figure 169. Figure 169 Alternately, clicking on a number at an intersection displays a details page for those transports. Figure 170 16.4. Custom Reports Custom reports allow the user to generate highly customized reports from most data points tracked by emsCharts. The Custom Reports screen (Figure 171) lists all reports the user has created and/or has permission to access. 9/30/2009 Page 127 emsCharts.com User Manual Figure 171 Clicking on a saved report will enable the buttons for the tasks the user is allowed to perform, as well as bringing up a summary of information about that report in the Report Details area. 16.4.1. Create New Report Clicking the Create New Report button257 brings up the General page of the report designer (Figure 172). Figure 172 257 Setup: Configuration -> Service -> Code Tables -> Security Roles -> role name -> Custom Reports: Create (Allows user to create custom reports) 9/30/2009 Page 128 emsCharts.com User Manual Options include: 1. Report Title: The title of the report. This title is displayed in the list of saved custom reports. 2. Description: The description of the report. 3. Output Type: The output type of the report. Options are Regular and Cross-Tablular. 4. Display Running Count: Displays a running count of records returned in the first column of the report output 5. Disable Run: Disables the Run Report button in the list of saved custom reports. 6. Security Permissions: Choose which security roles are allowed to view and/or edit the report. The creator of the special report will always have full access to the report. After all the information has been entered, it can be saved by clicking the Save button. The general page will now reload, showing the rest of the tabs used to build a custom report (Figure 173). Figure 173 The name of the report will appear at the top of the page, with the words “Not Validated” below it. A report must be validated before it can be scheduled. If a report runs successfully when the Test tab is clicked, it will be automatically validated. If a report has been validated, the “Not Validated” will not appear. The second step in creating a custom report is selecting the criteria to be used to limit the amount of data returned. This is done by clicking on the Criteria tab to bring up the Criteria screen (Figure 174). 9/30/2009 Page 129 emsCharts.com User Manual Figure 174 From here, a Category can be selected to narrow down the list of data available. The categories are chosen to represent the major sections of the PCR, such as the individual pages and the specialty exams. Once a category has been chosen, additional fields will appear (Figure 175). Figure 175 Since Page 1 was selected as the category, the data points collected on page 1 of the PCR are listed in the Column dropdown box. Next to this is a link marked Common. Clicking on the link will bring up a new window with the 10 most popular columns for the selected category. This allows users to quickly pick popular columns. Depending on the column selected, different options will appear in the Operator dropdown box. These options may include: a. Equals: Field must equal criteria. b. Not Equal To: Field must not equal criteria. 9/30/2009 Page 130 emsCharts.com User Manual c. d. e. f. g. h. i. j. k. Greater Than: Field must be greater than criteria. GT or Equal to: Field must be greater than or equal to criteria. Less Than: Field must be less than criteria. LT or Equal to: Field must be less than or equal to criteria. Like: Field must be like criteria. Wildcards are accepted. Blank: Field must be blank. Not Blank: Field must not be blank. Does Not Exist: This operator allows the user to find charts where a specified record type does not exist. For example, to find all charts where oxygen was not given, go to the Criteria tab and enter the following selections: Category: Page 8 Column: Action Operator: Does Not Exist Criteria: Oxygen and click the Add button to save. This can also be used in conjunction with other criteria such as Medical Category in order to create QA reports Is One Of: This operator allows the user to select more than one Criteria for a given column. For example, to do a report on more than 1 Basesite, go to the Criteria tab and enter the following selections: Category: Page 1 Column: Basesite Operator: Is One Of Criteria: Click on the magnifying glass to bring up a list of all your basesites. Place a check next to the basesites you want to run the report on and click Save and click the Add button to save. This helps to cut down on the use of the Criteria Grouping tab in order to write complicated criteria requirements The Criteria section will also change depending on the column selected. For fields where data is searched for or selected from a dropdown box, you will be able to search for those values. For fields where data is typed in, you will be able to type in data to search on. As an alternative to selecting an operator and criteria, the Prompt box can be checked. When this box is checked, the user will be prompted to enter an operator and criteria when the report is run. When the criteria have been selected, it can be added to the report by clicking the Add button. The criteria page will now reload, showing a summary of the criteria selected for the report (Figure 176). Figure 176 9/30/2009 Page 131 emsCharts.com User Manual As you can see from the summary, the first criteria selected for this report is charts where the Dispatch Date is greater than January 1, 2004. Just to the right of this summary is the Edit icon for this criterion, followed by the Delete Icon. Also, a Final Criteria Statement is listed at the bottom of the page. A few more criteria can now be entered in the same way as above, to give a criteria page similar to Figure 177. Figure 177 As currently written, the report is looking for trips where the unit listed on the trip was both Unit 1 and WhlChr1, but the report should actually return trips where the unit is either Unit 1 or WhlChr1. This can be handled in the Criteria Grouping tab (Figure 178). Figure 178 9/30/2009 Page 132 emsCharts.com User Manual The Criteria section lists the criteria picked earlier, along with shorthand for each criterion to be used on this page. This report should show all charts with either Unit 1 or WhlChr1, which is expressed in shorthand as “$B OR $C”. With this in mind, the Criteria Grouping statement can be written many ways. • $A AND ($B OR $C) AND $D • ($B OR $C) AND $A AND $D • $A AND $D AND ($B OR $C) • $D AND ($C OR $B) AND $A These statements will all give the same result, and there are many other ways this could be written. After the statement has been entered, it can be saved by clicking the Save button. The criteria grouping page will now reload (Figure 179). Figure 179 If you compare Figure 179 with Figure 178, will see that the Final Criteria Statement has changed to reflect the grouping statement. For report with many criteria, the Auto Generate button is available. Clicking this button will generate a Criteria Grouping statement with ANDs between all the available criteria, which can then be edited to produce the desired statement. Reminder: A blank Criteria Grouping statement is the same as a Criteria Grouping statement with ANDs between all the available criteria. For the above report, clicking the Auto Generate button would yield the statement $A AND $B AND $C AND $D. The next tab is the Group By tab. It is not applicable to the example we are developing, so it will be covered later. The next step in building a custom report is the Output tab (Figure 180). 9/30/2009 Page 133 emsCharts.com User Manual Figure 180 There are already three columns defined for output. This is because whenever a column is added to the Criteria, it is automatically added to the Output. Each line has the Edit and Delete icons that were also seen on the Criteria tab. Additionally, each line has one or two arrows used to change the order in which the output columns will be displayed when the report is run. To demonstrate the functionality of this page, the Edit icon of the Date Dispatched line will be clicked on to bring up Figure 181. Figure 181 This page has the following entries: a. Category: This dropdown box is the same as on the Criteria tab. b. Column: This dropdown box is the same as on the Criteria tab. There is also a Common link that functions the same as the one on the Criteria tab. c. Display Title: The column title in the report output. Default is the Column name. d. Date/Time Format: Allows users to format dates and times for date fields. Click on each title for a list of available fields, as well as usage examples. e. Align: Choose where in the column the data should be displayed. Options are Left, Center, and Right. Default is Left. f. No Wrap: Forces data in column to be displayed on one line, regardless of length. This can cause reports to become wider than the screen and/or page. Default is off. 9/30/2009 Page 134 emsCharts.com User Manual g. Order: Choose how the results in this column will be ordered. Options are blank, Ascending, and Descending. Default is blank. If an order is chosen for more than one column, the column higher in the summary list will be processed first. Once the data has been entered, it can be saved by clicking the Modify button. The Output page will then reload (Figure 182). Figure 182 Notice that the display title for Date Dispatched has been changed to “Date Disp”, and that it will be displayed in ascending order. The next step is to test the report. This is done by clicking on the Test tab. If the report is set up to prompt the user for data, the prompt screen will appear (Figure 183). Figure 183 The report is set up to prompt for a value for Medical Category. If more prompts were set up, they would also appear on this page. For this example, Medical Category Not Equal To Weakness has been chosen. Once values have been entered, click the Continue button to move on to the results page. At this point, only the first 10 results are shown. Below this report the words “Report Validated” are displayed. Since the report has been run successfully, it has been validated and can now be scheduled if desired. Below this is a link marked Click here to see full results. Clicking this link will run the report again, but this time all results will be shown (Figure 184). 9/30/2009 Page 135 emsCharts.com User Manual Figure 184 You can see that the output is ordered by Date Disp, with no trips that list a Medical Category of Weakness, and both Unit 1 and WhlChr1 are represented. For this example we would now like to center the unit name in that column, and also see the receiving facility for each of these trips. To do this, click on the Output tab, and follow the steps listed above to add Receiving Facility. At the same time, the alignment of the Unit column is going to be changed to Center. When finished, the Output tab will look like Figure 185. 9/30/2009 Page 136 emsCharts.com User Manual Figure 185 Clicking on the Test tab and again selecting Medical Category Not Equal To Weakness will produce the following output: 9/30/2009 Page 137 emsCharts.com User Manual Figure 186 The output of the report can be saved to a variety of formats. To save, choose a format in the Save output as dropdown box, then click Save. The user will then be prompted for a location to save the output. 16.4.2. Group By Tab The Group By tab is used when the use of a grouping function is desired. An example would be the number of charts for each Medical Category. After creating a new report and choosing any desired Criteria, click on the Group By tab (Figure 187). Figure 187 Choose Page 1 – Dispatch Information, and then for column choose Medical Category. Then click Save (Figure 188). 9/30/2009 Page 138 emsCharts.com User Manual Figure 188 The next step is to click on the Output tab, and select PRID. There will also be an option for Grouping Function (Figure 189). Figure 189 Because the number of charts is desired, the Count option should be selected. This output criteria can now be saved by clicking the Add button (Figure 190). Figure 190 Clicking on the Test tab will display the desired results (Figure 191). 9/30/2009 Page 139 emsCharts.com User Manual Figure 191 Although the second column is labeled PRID, a more accurate label would be Number of Charts. 16.4.3. Cross-tabular Reports Cross-tabular reports allow the user to select two data points, and then display a grid of the number of charts for each junction. An example is the number of charts per basesite for each medical category. To create this report, make sure to select an Output Type of Cross-tabular on the General tab. After entering any desired Criteria, click on the Output tab (Figure 192). Figure 192 Unlike regular reports, only two parameters can be selected for cross-tabular reports. For this report, select Medical Category for Parameter 1 and Basesite for Parameter 2, then click Save (Figure 193). Figure 193 To see the output, click on the Test tab (Figure 194). 9/30/2009 Page 140 emsCharts.com User Manual Figure 194 16.4.4. Run Report When the name of a report is clicked on, if the user is the author of the report, or they have a role that has been assigned rights to view the report, the button will be enabled. Clicking this button will run the report, and the output will be displayed in a similar manner to clicking the Test tab while creating a report. However, the output screen will not show the emsCharts logo, menu system, or footer (Figure 195). Figure 195 9/30/2009 Page 141 emsCharts.com User Manual 16.4.5. Schedule Report When the name of a report is clicked on, if the user is the author of the report, or they have a role that has been assigned rights to edit the report, the Schedule Report button will be enabled. Schedule Report is used to run a report on a fixed schedule, and have the results emailed to a list of users. Clicking this button will bring up the Schedule Report page (Figure 196). Figure 196 The following options are available: a. Schedule task to run: A report can be scheduled to run Never, Once, Daily, Weekly, or Monthly. b. On/At: Depending on the option chosen in Schedule task to run, various options will appear for when the report should be scheduled to run. c. process charts: Depending on the option chosen in Schedule task to run, various options will appear for the date range to be included in the report. A report run weekly will always process one week of charts, a monthly report will always process one month of charts. d. Report output: The format of the report output file to be emailed. Available options are HTML, Comma Separated, and PDF, Tab Delimited, and XML. e. Email error notification to: If an error occurs when running the report, an email will be sent to this address. The Delivery Method Details section will change depending on the Report output chosen. The options are: a. E-mail: Figure 197 1. Email report to: A list of email addresses separated by semicolons that the report output will be emailed to. b. FTP: Figure 198 1. Server Name: The domain name or IP address where the FTP server is located. 9/30/2009 Page 142 emsCharts.com User Manual 2. 3. 4. 5. Username: The username to use to log into the FTP server. Password: The password to use to log into the FTP server. File Path: The file path relative to the default directory where the file should be stored. Test Connection: After the information has been entered, this button can be used to make sure the file can be sent to the FTP server. c. HTTP(S) Post: Figure 199 1. 2. 3. 4. Server Name: The domain name or IP address where the server is located. Username: The username to use to log into the server. Password: The password to use to log into the server. File Path: The path and name of a file under the web root that will process the incoming data, i.e. ‘reports/grabReport.asp’. The following data is submitted: i. ReportName: A Form Field containing the name of the report. ii. ReportOutput: A Form Field containing the report. 5. Use Secure Connection (HTTPS): Use this checkbox to connect via HTTPS instead of HTTP. 16.4.6. Edit Report When the name of a report is clicked on, if the user is the author of the report, or they have a role that has been assigned rights to edit the report, or they have the security privilege to edit all reports258, the Edit Report button will be enabled. This button is used to edit an existing report. 16.4.7. Copy Report When the name of a report is clicked on, if the user has the security privilege to create reports259, the Copy Report button will be enabled. This button is used to copy an existing report into a new report with a new name. 16.4.8. Delete Report When the name of a report is clicked on, if the user is the author of the report, or they have the security privilege to delete all reports260, the Delete Report button will be enabled. This button is used to permanently delete an existing report. 258 Setup: Configuration -> Service -> Code Tables -> Security Roles -> role name -> Custom Reports: Edit All (Allows user to edit any custom report) 259 Setup: Configuration -> Service -> Code Tables -> Security Roles -> role name -> Custom Reports: Create (Allows user to create custom reports) 260 Setup: Configuration -> Service -> Code Tables -> Security Roles -> role name -> Custom Reports: Delete All (Allows user to delete any custom report) 9/30/2009 Page 143 emsCharts.com User Manual 17. Human Resources The Human Resources module261 of emsCharts.com allows you to perform some basic human resources duties. 17.1. Payroll emsCharts.com provides a payroll system for entering and tracking employee’s hours. It is accessed by selecting Human Resources from the menu system, and then selecting Payroll from the menu system on the new screen which loads. This will bring up a screen allowing the user to select a pay period to view or edit262 (Figure 200). Figure 200 The current pay period is displayed in bold text. The pay periods are configured by the service administrator by selecting the day the pay period begins on, the number of weeks in the pay period, and a start date to calculate the pay periods from. The user selects a pay period by clicking on the desired period, which brings up a screen similar to Figure 201. 261 Setup: Configuration -> Service -> Code Tables -> emsCharts.com Modules -> Human Resources (Enables/Disables the human resources module) 262 Setup: Configuration -> Service -> Code Tables -> Payroll Settings (Configure payroll settings) 9/30/2009 Page 144 emsCharts.com User Manual Figure 201 The pay period can be changed by clicking on the Change Period link under Actions in the upper right of the screen. The payroll categories displayed on this screen are configured by the service administrator263. This sample includes entries for Regular, Overtime, Sick, Vacation, and Standby. Time is entered on the bottom part of the screen. You first select the date work was started (defaults to current day), and then enter the time work was started, and the number of hours worked. From this, the date and time out are automatically calculated. The payroll division, also configured by the service administrator264, is then selected. A comment can also be added if desired. The time entered in the hours box is assumed to be regular time, but the category can be changed in the lower line listing all the pay categories. If the number of hours in the lower boxes does not equal the number of hours in the hours box, the text in the hours box and under Total in the lower line will be displayed in red. When the page initially loads, the page displays in summary view where only the total hours of each type for each day is shown (the 10/28/02 entry in Figure 202). The individual entries can be viewed by clicking on the sign to the left of the date, which displays each individual entry for that day (The 10/31/02 entry in Figure 202). The individual lines may be edited by clicking on them. 263 264 Setup: Configuration -> Service -> Code Tables -> Payroll Categories (Configure payroll categories) Setup: Configuration -> Service -> Code Tables -> Payroll Divisions (Configure payroll devisions) 9/30/2009 Page 145 emsCharts.com User Manual Figure 202 Depending on their security permissions, users may have one or more of the following options listed in the Actions section: a. Lock Period265: This is the first step in closing a pay period. When the period is locked, only those users with the Lock Pay Period or Close Pay Period permissions can modify the data entered for that pay period. When a period is locked, the Unlock Period option will appear so that a period can be unlocked if necessary. b. Close Period266: This is the second step in closing a pay period. When a period is closed, only those users with the Close Pay Period permissions can modify the data entered for that pay period. When a period is locked, the Re-Open Period option will appear so that a period can be re-opened if necessary. c. Approve Pay267: This will cause the hours in the paysheet to display in green instead of black. This can be used in conjunction with the Reports section to view, for example, which employees have had their hours approved by their supervisors. d. Verify Pay268: Marks the pay period as verified. e. Reports269: Clicking this link brings up the Reports page (Figure 203). 265 Setup: Configuration -> Service -> Code Tables -> Security Roles -> role name -> Lock Pay Periods (Allows user to lock pay periods) 266 Setup: Configuration -> Service -> Code Tables -> Security Roles -> role name -> Close Pay Periods (Allows user to close pay periods) 267 Setup: Configuration -> Service -> Code Tables -> Security Roles -> role name -> Add Approval Entry (Allows user to approve hours worked) 268 Setup: Configuration -> Service -> Code Tables -> Security Roles -> role name -> Verify Final Pay for Period (Allows user to verify pay periods) 269 Setup: Configuration -> Service -> Code Tables -> Security Roles -> role name -> Access Admin Features (Allows user to access the paysheet reports page) 9/30/2009 Page 146 emsCharts.com User Manual Figure 203 It is composed of the following sections: 1) Pay Period: This lists the year of the pay period, followed by the number of the pay period. 2) Status: The status of the pay period (Open, Locked, Closed). 3) Summary Report270: Displays a summary report of hours worked in the pay period, broken down by user, pay type, and pay division (Figure 204). Figure 204 Hours which have been approved appear in green. 4) Summary with Sub/Page Totals270: The same as a Summary Report, but with Page and Running totals appearing at the bottom of each page (Figure 205). Figure 205 Hours which have been approved appear in green. 5) Detail Report: Week x270: Displays a summary report of hours worked in week x of the pay period, broken down by user, date, pay type, and pay division (Figure 206). 270 Setup: Configuration -> Service -> Code Tables -> Security Roles -> role name -> View Summary Report (Allows user to view summary reports) 9/30/2009 Page 147 emsCharts.com User Manual Figure 206 6) Base by Employee270: After making a pay division selection from the dropdown box, click this link to display a Summary Report of only the users who entered time for the selected pay division. 7) Base by Date270: After making a pay division selection from the dropdown box, click this link to display a report of only the users who entered time for the selected pay division, sorted by date (Figure 207). Figure 207 8) Edit User271: After selecting a user name, click this link to edit the paysheet of that user. 9) Period Summary: Displays a summary of the number of hours worked by all employees during that pay period, sorted by pay type. 17.2. Calloff - New Calloffs can be made by clicking on Calloff – New under the Human Resources section of the menu system272. This brings up the Create Calloff Matrix screen (Figure 208). 271 Setup: Configuration -> Service -> Code Tables -> Security Roles -> role name -> Edit all employees (Allows user to edit the paysheets of all employees) 272 Setup: Configuration -> Service -> Code Tables -> Security Roles -> role name -> Human Resources -> Create Calloffs (Allows user to create new calloffs) 9/30/2009 Page 148 emsCharts.com User Manual Figure 208 It is composed of the following sections: a. Date/Time/User: The date and time the entry is being made, as well as the name of the user entering the calloff is automatically displayed on the screen. b. Calloff Taken By: The name of the user who receives the calloff. This entry defaults to the name of the user who is entering the data, but can be changed by clicking on the icon. c. Calloff Made: The date and time the calloff was made d. Shift: The date and time shift of the called off user starts. e. Length of Shift: The length of the shift. f. Calloff Made By: The name of the employee who called off. g. Base: The employee’s base. h. Calloff Method: The calloff method (Phone – Live, Person, etc.) i. Comments: Any comments. j. Emp. Type/Division Type/Clinical Type: The employee, division, and clinical types. Once the data has been entered, it can be saved by pressing the Save button. 17.3. Calloff - Search Calloffs can be searched by clicking on Calloff – Search under the Human Resources section of the menu system273. This brings up the Search Calloffs screen (Figure 209). This allows searching by a date or date range, date type, base, and employee name. 273 Setup: Configuration -> Service -> Code Tables -> Security Roles -> role name -> Human Resources -> Search Calloffs (Allows user to search calloffs) 9/30/2009 Page 149 emsCharts.com User Manual Figure 209 After the Search button has been pressed, the Calloff Details page is displayed (Figure 210). Figure 210 This page allows the user to view the details of the calloff by clicking on the appropriate line, as well as the ability to sort the results by Name, Base, Employment Type, and Position. 9/30/2009 Page 150 emsCharts.com User Manual 17.4. Document Warehouse To view the Categories274 in the Document Warehouse click the Human Resources link on the main page and then click the Document Warehouse link. Figure 211 Once there you will see Figure 211, click a category to view the files within. Or click View all Documents to view every document your service has entered. Figure 212 After you click a category you will be taken to the list of files in that category. Click on a file to download it or to view it. The Calendar module275 of emsCharts.com provides an easy way to share upcoming events with employees. 274 Setup: Configuration -> Service -> Code Tables -> Document Warehouse Categories (Configure document warehouse categories) 9/30/2009 Page 151 emsCharts.com User Manual 18. Calendar The Calendar page can be accessed by clicking on Calendar in the menu system. This brings up the Calendar page (Figure 213). Figure 213 It is composed of the following sections: a. Calendar: The calendar is displayed in a monthly view, with any events listed color coded to the key at the bottom. If the user has sufficient privileges, they can edit the event by clicking on it in the calendar. b. Select New Calendar: Select a new view by changing any of the following: 1) Calendar Name276: The service administrator can define more than one calendar. 2) Month: The month to be displayed. 3) Year: The year to be displayed. c. Key: A color coded key to distinguish between different types of events. One of two events can occur when a user clicks on an event in the calendar. If the user has sufficient privileges, the Event Details page (Figure 215) will appear, allowing the user to view and/or edit the event. If the user does not have sufficient privileges, then a read-only version of the page will be displayed. Also, clicking on the number in the upper left corner of a day will bring up a view of that day displayed in 15 minute increments (Figure 214). 276 Setup: Configuration -> Service -> Code Tables -> Calendars (Configure calendars) 9/30/2009 Page 152 emsCharts.com User Manual Figure 214 18.1. Adding Events If the user has sufficient privileges, he or she can add events to the calendar by clicking on Add Event in the menu system. This brings up the Event Details page (Figure 215). Figure 215 It is composed of the following sections: a. Title (Long): This is the text that will be displayed on the user’s home page if that option is chosen. 9/30/2009 Page 153 emsCharts.com User Manual b. Title (Short): This is the text that will be displayed on the calendar. c. From/To: Select the date or date range and times for the event. The user can also choose whether the event occurs at the “Same time each day”, or if the “Time is continuous”. d. Recurring: If this box is checked, the following options appear: 1) Time Span: The span of time between recurrences. The options are “Every x Days”, “Every x Weeks”, “Every x Months (date)”, and “Every x Months (day)”. 2) Interval: For the first three time span option, the user simply enters a number into this text box. For the “Every x Months (day)” option, a dropdown box will appear with the options “First”, “Second”, “Third”, “Fourth”, and “Last”. 3) Occurrences: The number of times this event should repeat, i.e. a daily event every day for one week would require an entry of 7. e. Calendar277: The name of the calendar this event should be saved to. f. Location278: The location of the event. A location defined by the service administrator can be chosen from the dropdown box, or a location can be entered by clicking the icon to the right of the box. g. Category: The category of the event. h. Show on home page: Choose whether or not the event is displayed on the user’s home page. i. Comments: Further comments about the event. j. Save: Press this button to save the event. The user will be returned to the calendar page. 277 278 Setup: Configuration -> Service -> Code Tables -> Calendars (Configure calendars) Setup: Configuration -> Service -> Code Tables -> Calendar - Locations (Configure calendar locations) 9/30/2009 Page 154 emsCharts.com User Manual 19. Links The Links page can be accessed by clicking on Links in the menu system. This brings up the External Links page (Figure 216). Figure 216 This page displays links outside of emsCharts.com, and a description of the link. The links are defined by the service administrator279. 279 Setup: Configuration -> Service -> Code Tables -> External Links (Configure external links) 9/30/2009 Page 155 emsCharts.com User Manual 20. Support The Support page can be accessed by clicking on Support in the menu system. This brings up the Support and Training page (Figure 217). Figure 217 This screen contains the phone numbers and extensions for contacting different areas of emsCharts.com technical support. You can enter a technical support problem by clicking the Log a Ticket link on the page. A ticket can also be logged under Questions & Problems in the menu system. Logging a ticket will be explained in the Questions & Problems section below. 20.1. Questions & Problems 20.1.1. My Questions & Problems Clicking on the Questions & Problems link brings up the Open Tickets page (Figure 218). Figure 218 If a ticket is marked with **, it means that emsCharts technical support is waiting for more information from the user. Clicking on a ticket will bring up the details and activity log for that ticket (Figure 219). 9/30/2009 Page 156 emsCharts.com User Manual Figure 219 From here new information can be added to the ticket. This new information can be spellchecked by clicking the “ABC” icon near the upper right corner of the text box. This information can then be saved by clicking the Update button. 20.1.2. Log a Ticket To enter a new ticket, click Log a Ticket. This will bring up the Log a Ticket page (Figure 220). 9/30/2009 Page 157 emsCharts.com User Manual Figure 220 It is composed of the following fields: 1. Username: The username. This field is automatically completed. 2. E-Mail: The e-mail address the user has entered in emsCharts. This field is automatically completed. 3. Phone Number: The phone number(s) the user has entered in emsCharts. If only one number is found, the number is displayed as a text box. 4. Service: The service the user is logging the ticket under. 5. Contact Method: How the user should be contacted in response to the ticket. Options are Phone and E-mail. 6. Module: The emsCharts module where the problem is occurring. 7. Operating System: The operating system the computer is running. 8. Multiple PC Problem: Enter if the problem is occurring on more than one computer. 9. Multiple User Problem: Enter if more than one user is experiencing the problem. 10. Question: Enter a detailed description of the problem. 11. IE Version: Enter the version of Internet Explorer the computer is running. 12. PRID: Enter the PRID of the chart where the problem is occurring. 13. Recurring: Enter if it is a recurrent problem. Any fields marked with a * are required. Once all the data has been entered, it can be saved by clicking the Submit button. The user is then returned to the Open Tickets page. 20.1.3. View Closed Tickets Clicking on the View Closed Tickets link brings up the Closed Tickets page (Figure 221). 9/30/2009 Page 158 emsCharts.com User Manual Figure 221 This screen allows the user to view any closed tech support tickets. Clicking on a ticket will bring up the activity log for that ticket. 20.1.4. Feature Request Clicking Feature Request will take the user to the Enhancement Requests forum (Figure 222). Figure 222 20.2. Download Documentation Clicking on the Download link brings up the Download Documentation page (Figure 223). 9/30/2009 Page 159 emsCharts.com User Manual Figure 223 To download documentation, click the Download button to the right of the file name. The date each file was updated is also displayed. If a file was updated in the past 7 days, it will be marked as New. Adobe Acrobat Reader is required to view these files, and can be downloaded by clicking the link below the file names. 20.3. Download Software Clicking on the Download Software link brings up the Download Software page (Figure 224). 9/30/2009 Page 160 emsCharts.com User Manual Figure 224 To download software, click the Download button to the right of the file name. The date each file was updated is also displayed. If a file was updated in the past 7 days, it will be marked as New. 20.4. FAQ FAQ is short for Frequently Asked Questions. If you are having problems, please check here for answers before contacting technical support. 9/30/2009 Page 161