1
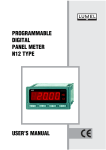
DIGITAL PANEL METER
N30U TYPE
USER’S MANUAL
1
2
Contents
1. APPLICATION AND METER DESIGN ........................................5
2. METER SET..................................................................................6
3. BASIC REQUIREMENTS, OPERATIONAL SAFETY .................7
4. INSTALLATION ............................................................................8
5. SERVICE ....................................................................................11
6. RS-485 INTERFACE ..................................................................28
7. UPDATING OF SOFTWARE ......................................................42
8. ERROR CODES .........................................................................44
9. TECHNICAL DATA ....................................................................45
10. ORDER CODES .........................................................................48
11. MAINTENANCE AND GUARANTEE .........................................50
User’s manual for meters with firmware version ³ 2.00
3
4
1. APPLICATION AND METER DESIGN
The N30U meter is a programmable digital panel meter destined for
measurements of signals originating from standard sensors destined
for temperature measurements and for the measurement of analog
standard signals applied in automation. Additionally, the meter enables
the indication of the current time. The readout field is a LED display,
which allows the exposition of results in colours: red, green and orange.
The measured input signal can be arbitrary converted by means of a
21-point individual characteristic.
Features of the N30U meter:
l display colour individually programmed in three intervals,
l programmable thresholds of displayed overflows,
l 2 NOC relay alarms operating in 6 modes,
l 2 switched relay alarms with a switching contact operating
in 6 modes (option),
l signaling of measuring range overflow,
l automatic setting of the decimal point,
l programming of alarm and analog outputs with the reaction on the
selected input quantity (main or auxiliary input),
l real-time clock with the function of the clock supply support in case
of the meter supply decay,
l programmed averaging time – function of walking window with the
averaging time up to 1 hour,
l monitoring of set parameter values,
l locking of introduced parameters by means of a password,
l recount of the measured quantity on the base of the 21-point
individual characteristic,
l service of the interface with MODBUS protocol in the
RTU mode (option),
l conversion of the measured value into a standard – programmable
current or voltage signal (option),
l highlight of any measuring unit acc. to the order,
5
l
l
signaling of alarm operation – switching the alarm on causes the
highlight of the output number,
galvanic separation between connections: alarm, supply, input,
analog output, output of the auxiliary supply, RS-485 interface.
Protection grade from frontal side: IP65
Meter overall dimensions: 96 x 48 x 93 mm (with terminals).
The meter casing is made of plastic.
Fig. 1 View of the N30U Digital Meter
2. METER SET
The set is composed of:
- N30U meter ........................................................................1 pc
- User’s manual ....................................................................1 pc
- Guarantee card ..................................................................1 pc
- Set of clamps to fix the meter in the panel.........................4 pcs
- Set of labels with units .......................................................2 pcs
- Seal ....................................................................................1 pc
When unpacking the meter, please check whether the type and execution code on the data plate correspond to the order.
6
3. BASIC REQUIREMENTS,
OPTIONAL SAFETY
In the safety service scope, the N30U meter meets the requirements of
the EN 61010-1 standard.
Mentioned below applied symbols mean:
- especially important , one must acquaint with this
information before connecting the meter. The nonobservance of notices marked by this symbol can
occasion injures of the personnel and a damage of the
instrument.
- One must take note of this when the instrument is
working inconsistently to the expectations. Possible
consequences if disregarded.
Observations concerning the operational safety
· All operations concerning transport, installation, and commissioning
as well as maintenance, must be carried out by qualified, skilled
personnel, and national regulations for the prevention of accidents
must be observed.
· Before switching the meter on, one must check the correctness of
connections.
· Do not connect the meter to the network through an autotransformer.
· Before removing the meter housing, one must switch the supply off
and disconnect measuring circuits.
· The meter is designed to be installed and exploited in
electromagnetic industrial environment conditions.
· When connecting the supply, one must remember that a switch
or a circuit-breaker should be installed in the building. This switch
should be located near the device, easy accessible by the operator, and suitably marked as an element switching the meter off.
· Non-authorized removal of the housing, inappropriate use, incorrect
installation or operation, creates the risk of injury to personnel or
meter damage. For more detailed information, please study the
User’s Manual.
7
4. INSTALLATION
The meter has separable strips with screw terminals, which enable the
connection of external wires of 1.5 mm2 cross-section for input signals
and 2.5 mm2 for other signals.
One must prepare a hole of 92+0,6 ´ 45+0,6 mm in the panel, which the
thickness should not exceed 6 mm.
The meter is adapted to be mounted in a panel. The meter must be
introduced from the panel front with disconnected supply voltage. Before the insertion into the panel, one must check the correct placement
of the seal. After the insertion into the hole, fix the meter by means of
clamps (fig.2).
Fig. 2. Meter Fixing
Fig. 3. Overall Dimensions
8
4.1. Lead-out of Signals
Signals led out on the meter connectors are presented on the fig. 4.
Circuits of successive groups of signals are separated between them.
Fig. 4. Description of Signals on Connection Strips
·
·
·
·
0...10 V – input for the measurement ±10 V voltage,
GND – mass for the 0...10 V input and 0...20 mA input,
0...20 mA – input for the measurement of ±20 mA current,
60 mV TC – input for the measurement of 60 mV voltage, or for the
connection of RTD sensors,
· R, PT – input for the resistance measurement or for the connection
of RTD sensors. The compensation wire has been marked by
a broken line,
· OC – open collector output of npn type– signaling of the measuring
range overflow.
9
4.2. Examples of Connections
An example of the N30U meter connection to different signals is presented on the fig. 5.
Fig. 5. Ways of the meter Connection
For the connection of input signals in environments with a high noise
level, one must apply shielded wires.
10
5. SERVICE
5.1. Display Description
Fig. 6. Description of the Meter Frontal Plate
5.2. Messages after Switching the Supply on
After switching the supply on, the meter displays the meter name N30U
and next the program version in the „r x.xx” shape – where x.xx is the
number of the current program version or the number of a custom-made
execution. Next, the meter carries out measurements and displays the
value of the input signal. The meter sets up automatically the decimal
point position when displaying the value. The format (number of places
after the decimal point) can be limited by the user.
11
5.3. Functions of Buttons
- Acceptation button:
Þ entry in programming mode (hold down ca 3 seconds)
Þ moving through the menu – choice of level,
Þ entry in the mode changing the parameter value,
Þ acceptation of the changed parameter value,
Þ stop the measurement – when holding down the button, the result
is not updated. The measurement is still carried out.
- button increasing the value:
Þ display of maximal value, The pressure of the button causes the
display of the maximal value during ca 3 seconds.
Þ entry in the level of the parameter group,
Þ moving through the chosen level,
Þ change of the chosen parameter value – increasing the value.
- Button to change the digit:
Þ display of minimal value, The pressure of the button causes the
display of the maximal value during ca 3 seconds.
Þ entry in the level of parameter group,
Þ moving through the chosen level,
Þ change of chosen parameter value – shift on the next digit,
- resignation button:
Þ entry in the menu monitoring the meter parameters (by holding
down ca 3 seconds),
Þ exit from the menu monitoring meter parameters,
Þ resignation of the parameter change,
Þ absolute exit from the programming mode (by holding down
ca 3 seconds).
12
The pressure of the
button combination and holding
them down ca 3 seconds, causes the reset of alarm signaling. This
operation acts only when the support function is switched on.
The pressure of the
sing of the minimal value.
button combination causes the era-
The pressure of the
sing of the maximal value.
button combination causes the era-
The pressure and holding down the
button ca 3 seconds causes the entry in the programming matrix. The programming matrix can
be protected by the safety code.
button during 3 seconds
The pressure and holding down the
causes the entry in the menu monitoring meter parameters. One must
move through the monitoring menu by means of
and
buttons. In this menu, all programmable meter parameters are only available for readout. In this mode, the menu Ser is not available. The exit
from the monitoring menu is carried out by means of the
button.
In the monitoring menu, parameter symbols are displayed alternately
with their values.
The service algorithm of the meter is presented on the fig. 7.
13
14
Fig. 7. Service Algorithm of the N30U Meter
5.4. Programming
The pressure of the
button and holding it down through ca 3
seconds causes the entry to the programming matrix. If the entry is protected by a password, then the safety code symbol SEC is displayed
alternately with the set value 0. The write of the correct code causes the
entry in the matrix, the write of an incorrect code causes the display of
the ErCod symbol. The matrix of transitions to the programming mode
is presented on the fig. 8. The choice of the level is made by means of
button, however the entry and moving through the parathe
meters of the chosen level is carried out by means of the
and
buttons. Parameter symbols are displayed alternately with their
current values. In order to change the value of the chosen parameter,
button. For resignation from change, one must
one must use the
use the
button. In order to exit from the chosen level, one must
button. To exit from the
chose the ----- symbol and press the
programming matrix, one must press the
button during ca 1
second. Then, the symbol End appears for ca 3 seconds and the meter
transits to the display of the measured value. In case of leaving the
meter in the parameter programming mode, the automatic abandon of
the programming mode follows (parameter, and next the menu) after 30
seconds and the meter transits to display the measured value.
5.4.1. Value Change Way of the Selected Parameter
In order to increase the value of the selected parameter, one must
press the
button. A single pressure of the button, causes the
increase of the value of 1. The increase of value when displaying the
digit 9 causes the set of 0 on this digit. The change of the digit follows
after pressing the
button. In order to accept the set parameter,
one must hold down the
button. Then, the write of the parameter
follows and the display of its symbol, alternately with the new value. The
button during the change of the parameter value
pressure of the
will cause the resignation of the write.
15
Fig. 8. Programming Matrix.
16
5.4.2. Changing Floating-Point Values
The change is carried out in two stages (the transition to the next stage
follows after pressing the
button):
1) setting the value from the range -19999M...99999, similarly as for
integral values;
2) setting of the decimal point position (00000., 0000.0, 000.00,
button shifts the decimal point to the
00.000, 0.0000); the
left, however the
button shifts the decimal point to the right;
button during the change of the parameter
The pressure of the
value will cause the resignation of the write.
5.4.3. Characteristic of Programmed Parameters
Programmed parameters and the range of their quantity changes are
presented in the table below.
Table 1
InP 1
Parameter
symbol
tYP1
Description
Kind of the connected input
signal
Range of changes
Pt1 – Pt100
Pt5 – Pt500
Pt10 – Pt1000
rEZL – measurement of
resistance up to 400 W
rEZH – measurement of
resistance up to 4000 W
tE-J – J (Fe-CuNi)
tE-h – K (NiCr-NiAl)
tE-n – N (NiCrSi-NiSi)
tE-E – E (NiCr-CuNi)
tE-r – R (PtRh13-Pt)
tE-S – S (PtRh10-Pt)
0_10U – voltage measurement,
range 10 V.
0_20A – current measurement,
range 20mA
0_60n – voltage measurement,
range 60mV.
HOUr – current time.
17
cd. Table 1
Con
Cnt1
Choice of the measured value
compensation. Concerns only the
work in the mode of temperature
or resistance measurement. The
wire linking the meter with the
sensor defines the resistance
for RTD sensors, however for
thermocouples, the compensation is defined by the cold junction temperature. The choice of a
value beyond the range causes
the switching of the automatic
compensation on.
-19999...99999
Introduction of values:
0..20 W - causes the switching
of the manual compensation on
for the resistance or temperature measurement by means of
RTD (resistance thermometers).
0...60oC – causes the switching
of the manual compensation on
for thermocouples.
The measurement time is
expressed in seconds. The result
on the display presents the mean
value counted in the Cnt1 period. 1...3600
This parameter is not taken into
consideration during the
measurement in counter modes.
Table 2
Ind
Parameter
symbol
Description
IndCp
Number of points of the individual
characteristic. For a value lower than 2,
the individual characteristic is switched
off. The number of segments is the
number of points decreased of one.
The individual characteristic is not taken
into consideration in the CountH and
HoUr modes.
1...21
Hn
The point value for which we will expect
Yn (n-point number)
-19999...99999
Yn
Expected value for Xn.
-19999...99999
18
Range of changes
Table 3
dISP
Parameter
symbol
d_P
CoLdo
CoLbE
CoLuP
CoLLo
CoLHi
ovrLo
Description
Range of changes
Minimal position of the decimal point
When displaying the measured value
- display format. This parameter is not
taken into consideration during tCountH
and HoUr modes.
Display colour, when the displayed
value is ower than CoLLo
Display colour, when the displayed
value is higher than CoLLo and lower
than CoLHi
Display colour when the displayed value
is higher than CoLHi
Lower threshold of colour change
0.0000 –
00.000 –
000.00 –
0000.0 –
00000 –
Upper threshold of colour change
-19999..99999
Lower threshold of display narrowing
Values below the declared threshold
are signaled on the display by the
symbol.
-19999..99999
Upper threshold of display narrowing
Values above the declared threshold
are signaled on the display by the
----- symbol.
-19999..99999
0
1
2
3
4
rEd – red
grEEn – green
orAnG - orange
-19999..99999
-----
ovrHi
Table 4
ALr1, ALr2, ALr3, ALr4
Parameter
symbol
P_A1
P_A2
P_A3
P_A4
Description
Range of changes
InP1 – Main input (indicated
value).
Input quantity, steering the alarm.
HoUr – Real-time clock.
19
cd. Table 4
n-on – normal (transition from
0 na 1),
n-oFF – normal (transition
from 1 na 0),
on - switched on,
tYP1
tYP2
tYP3
tYP4
oFF – switched off,
Alarm type. Fig. 11 presents the
graphical imaging of alarm types
H-on – manually switched
on; till the change time of the
alarm type, the alarm output
remains switched on
H-oFF – manually switched
off; till the change time of
the alarm type the output
alarm remains switched off
for good.
20
PrL1
PrL2
PrL3
PrL4
Lower alarm threshold.
-19999...99999
PrH1
PrH2
PrH3
PrH4
Upper alarm threshold.
-19999...99999
dLY1
dLY2
dLY3
dLY4
Delay of alarm switching.
0...32400
cd. Table 4
LEd1
LEd2
LEd3
LEd4
Support of alarm signaling. In
the situation when the support
function is switched on, After the
alarm state retrea, the signaling
diode is not blanked. It signals
the alarm state till its blanking moment by means of the
button combination. This function concerns
only and exclusively the alarm
signaling thus relay contacts will
operate without support according to the chosen type of alarm.
oFF – function switched off
on – function switched on
Table 5
out
Parameter
symbol
P_An
Description
Input quantity, which the analog
output has to react on.
Range of changes
InP1 – main input (indicated
value).
Hour – real-time clock.
tyPA
Type of analog output
0_10U – voltage 0...10 V
0_20A – current 0...20 mA
4_20A – current 4...20 mA
AnL
Lower threshold of the analog
output. give the value, on which
we want to obtain the minimal
value of signal on the analog
output.
-19999...99999
AnH
Upper threshold of the analog
output. give the value on which
we want to obtain the maximal
value of signal on the analog
output(10 V or 20 mA).
-19999...99999
21
cd. Table 5
bAud
prot
Addr
Baud rate of the RS485 interface
4.8 – 4800 bit/s
9.6 – 9600 bit/s
19.2 – 19200 bit/s
38.4 – 38400 bit/s
57.6 – 57600 bit/s
115.2 – 115200 bit/s
r8n2
Type of transmission frame of the r8E1
RS-485 interface.
r8o1
r8n1
Address in the MODBUS net0...247
work. The write of the value 0
switches the interface off.
Table 6
SEr
Parameter
symbol
SEt
SEC
HOUR
unIt
22
Description
Write of manufacturer’s settings.
The setting of the value YES
causes the write of standard
parameters into the meter.
The value of manufacturer’s
parameters is presented in the
table 7.
Introduction of a new password.
The introduction of the value 0
switches the password off.
Range of changes
no – do nothing.
YeS – causes the write of
manufacturer’s settings.
0...60000
Setting of the current time.
The introduction of a wrong time
cancels the introduction of time.
The introduced value is not
taken.
0,00...23,59
Highlight of the unit.
On – unit highlight switched
on.
Off – unit highlight switched
off.
tESt
Display test. The test consists in
a successive lighting up of digital
display segments. Alarm diodes
and unit highlighting diodes
should be lighted.
YeS – causes the test start
The pressure of the
button ends the test.
no – do nothing.
5.4.4 Individual Characteristic
N30U meters can recalculated the measured value into any value
thanks to the implemented individual characteristic function. The individual characteristic rescales the input signal measured according to the
set characteristic. The way of the individual characteristic interaction on
the meter operation has been presented on the fig. 9.
Fig. 9. Action of the Individual Characteristic.
The user can introduce maximally twenty functions through giving intervals and expected values for successive points.
The programming of the individual characteristic consists on the definition of the number of points which the input function will be linearized
by. On must remember that the number of linearizing functions is of one
23
smaller than the number of points. Next, one must program successive
points by giving the measured value (Hn) and the expected value corresponding to it, – value which has to be displayed (Yn). The graphic interpretation of the individual characteristic is presented on the fig. 10.
Rys. 10. Individual Characteristic.
During the function approximation, one must remember that for the approximation of functions strongly differing from the linear characteristic,
higher the number of linearizing segments, smaller the error related to
the linearization.
If measured values are smaller than H1, recalculations will be made
on the base of the first straight line calculated on the base of points
(H1,Y1) an (H2,Y2). However, for values higher than Hn (where n – the
last declared measured value) the value to display will be calculated
on the base of the last assigned linear function.
Note: All introduced points of the measured value (Hn) must be arran-
24
ged in the increasing sequence, such to preserve the following dependence:
H1<H2<H3...<Hn
If the above is not fulfilled, the individual characteristic function will be
automatically switched off (will not be realized) and a diagnostic flag
will be set in the status register.
5.4.5 Alarm types
The N30U meter is equipped with 2 alarm outputs with NOC contact
(make contact) and two alarm outputs with NOC/NCC contact (make
and break contact) (option). Each of alarms can work in one of the six
modes. The work of alarms in modes is presented in the fig. 12: n-on, noff, on, off. Two remaining modes: h-on and h-off mean suitably, always
switched on and always switched off. These modes are destined for the
manual simulation of alarm states.
a) n-on
c) on
b) n-off
d) off
Fig. 11. Alarm Types: a) n-on, b) n-off c) on d) off.
25
Caution !
In case of alarms of n-on, n-off, on, off types the write of PrL>PrH will
cause the alarm switching off.
l In case of a measuring range overflow, the reaction of the relays is
compatible with written PrL, PrH, tYP parameters. In spite of the displayed overflow, the meter still carries out the measurement.
l The meter controls currently the value of the introduced parameter
at the moment. In case when the introduced value overflows the upper
range given in the table 1, the meter will make automatically the change
into the maximal value. Similarly, in case when the introduced value
overflows the lower change range given in the table 1, the meter will
make automatically the change into the minimal value.
l
5.4.6 Display Format
The N30U meter adapts automatically the display format (precision) to
the value of measured quantity. So that the function could be fully used,
one must choose the format 0.0000, then the meter will display the measured value with the possible highest accuracy. This function does not
operate for the time display, where the format is set automatically. The
current time (mode HOUr) is displayed in the 24 hours’ format, in the
shape hh.mm, where hh – current hour, and mm – current minute.
Caution: Remember that the display with a higher resolution is not always desired, it can conduct to a deterioration of the indication stability.
26
5.5. Manufacturer’s Parameters
Standard settings of the N30U meter are presented in the table 7.
These settings can be restored by means of the meter menu through
the choice of the option Set from the menu Ser.
Table 7
Parametru symbol
Level in the matrix
Standard value
tYP1
1
Pt1
Con
1
0
Cnt1
1
1
indCP
2
no
H0
2
0
Y0
2
0
H1
2
100
Y1
2
100
...
...
...
Hn
2
(n-1)*100
Yn
2
(n-1)*100
d_P
3
00000
CoLdo
3
grEEn
CoLbE
3
orAng
CoLuP
3
rEd
CoLLo
3
5000
CoLHi
3
8000
ovrLo
3
-19999
ovrHi
3
99999
P_A1, P_A2,
P_A3, P_A4
4, 5, 6, 7
InP1
tYP1, tYP2,
tYP3, tYP4
4, 5, 6, 7
h-off
PrL1, PrL2,
PrL3, PrL4
4, 5, 6, 7
1000
27
PrH1, PrH2,
PrH3, PrH4
4, 5, 6, 7
2000
dLY1, dLY2,
dLY3, dLY4,
4, 5, 6, 7
0
LEd1, LEd2,
LEd3, LEd4
4, 5, 6, 7
oFF
P_An
8
InP1
tYPA
8
0_10U
AnL
8
0
AnH
8
99999
bAud
8
9.6
prot
8
r8n2
Addr
8
1
SEt
9
no
SEC
9
0
HOUR
9
Not defined
unit
9
off
tESt
9
off
6. INTERFACE RS-485
N30U programmable digital meters have serial links in RS-485 standards for the communication in computer systems and with other devices fulfilling Master function. An asynchronous communication character protocol MODBUS has been implemented on the serial link. The
transmission protocol describes ways of information between devices
through the serial link.
6.1. Connection Way of the Serial Interface
The RS-485 standard allows to a direct communication of 32 devices
on a single serial link of 1200 m long (at baud rate 9600 b/s). For the
28
connection of a higher quantity of devices, it is necessary to apply additional intermediate-separating systems (e.g. PD51 converter).
The lead out interface line is presented on the fig. 4. To obtain a correct transmission, it is necessary to connect lines A and B in parallel
with their equivalents in other devices. The connection must be made
through a shielded wire. The wire shield must be connected to the protection terminal in the nearest possible neighbourhood of the meter
(connect the shield only in a single point to the protection terminal).
The GND line serves to the additional protection of the interface line at
long connections. Then, one must connect GND signals of all devices
on the RS-485 bus.
To obtain the connection to the computer, a RS-485 interface card or a
suitable converter is indispensable, e.g. PD51 or PD10.
The connection way of devices is shown on the fig. 12
Fig. 12. Connection Way of the RS-485 interface
The designation of transmission lines for the card in the PC computer
depends on the card producer.
29
6.2. Description of the MODBUS Protocol
Implementation
The implemented protocol is in accordance with the PI-MBUS-300 Rev
G of Modicon Company specification.
Set of the serial link parameters of N30U meters in MODBUS protocol:
l
meter address:
1...247,
l
baud rate:
4800, 9600, 19200, 38400,
57600, 115200 bit/s,
l
work mode:
RTU z ramk¹ w formacie 8n2, 8e1,
8o1, 8n1,
l
maximal response time:
100 ms.
The parameter configuration of the serial link consists in the settlement
of the baud rate (bAUd parameter), device address (Addr parameter),
and the format of the information unit (prot parameter)
Notice: Each meter connected to the communication network must
have:
l unique address, different from addresses of other devices connected to the network,
l identical baud rate and type of information unit.
6.3 Description of Applied Functions
Following MODBUS functions have been implemented in the N30U
meter:
l 03 – readout of the register group
l 04 – readout of input registers
l 06 – write a signle register
l 16 – write of the register group
l 17 – identification of the slave device.
30
6.4 Register map
The register map of the N30U meter is presented below
Notice:
All given addresses are physical addresses. In some computer programs logic addressing is applied, then addresses must be increased
of 1.
Table 8
Range
of address
Value type
4000-4049
integer (16 bits)
Description
Value placed in a 16-bit register.
float (32 bits)
Value placed in two successive 16bit registers. Registers include the
same data as 32-bit register from
the area 7500. Registers are only for
readout.
7200-7326
float (32 bits)
Value placed in two successive 16bit registers. Registers include the
same data as 32-bit register from
the area 7600. Registers can be
read out and written.
7500-7519
float (32 bits)
Value placed in a 32-bit register.
Registers are only for readout.
float (32 bits)
Value placed in a 32-bit register.
Registers can be read out and
written.
7000-7039
7600-7663
31
6.5. Registers for Write and Readout
4000
Symbol
tYP1
write (w)/readout (r)
The value is placed in
16-bit registers
Table 9
Range
Description
w/r
0...14
Input type
Value
0
Pt1 – Pt100
1
Pt5 – Pt500
2
Pt10 – Pt1000
3
rEZL – Resistance, range 400 W
4
rEZL – Resistance, range 4000 W
5
tE-J – J – thermocouple of J type
6
tE-h – K – thermocouple of K type
7
tE-n – N – thermocouple of N type
8
tE-E – E – thermocouple of E type
9
tE-r – R – thermocouple of R type
10
tE-S – S – thermocouple of S type
11
0_10U – voltage measurement, range 10 V
12
0_20A – current measurement, range 20 mA
13
0_60n – voltage measurement, range 60 mV
14
HoUr – current time
4001
w/r
Reserved
4002
w/r
Reserved
w/r
Measurement time expressed in seconds. This
time defines the averaging time of the measured
value. The displayed value is the mean value
calculated from the Cnt1 period.
4003
Cnt
1...3600
4004
w/r
Reserved
4005
w/r
Reserved
4006
w/r
Reserved
4007
w/r
Reserved
32
4008
4009
IndCp
d_P
w/r
w/r
1...21
0...4
Number of points of the individual characteristic.
For the value 1, the individual characteristic
is switched off. Segments of the individual
characteristic are defined by parameters Xn and
Yn, where n – point number.
Minimal position of the decimal point when
displaying the measured value.
Value
Description
0
0.0000
1
00.000
2
000.00
3
0000.0
4
00000
Display colour when the displayed value is smaller
than coLLo
4010
CoLdo
w/r
0...2
Description
Value
0
red
1
green
2
orange
Display colour when the displayed value is higher
than coLLo and smaller than coLHi
4011
CoLbE
w/r
0...2
Description
Value
0
red
1
green
2
orange
Display colour when the displayed value is higher
than coLHi
4012
4013
CoLUp
P_a1
w/r
w/r
0...2
Value
Description
0
red
1
green
2
orange
0, 1
Input quantity controlling the alarm
Value
Description
0
Main input
1
clock
33
4014
tyP1
w/r
0...5
Type of alarm 1 (description – fig. 6)
Description
Value
0
n-on
1
n-off
2
on
3
off
4
h-on
5
h-off
4015
dLY1
w/r
0...32400
Delay of alarm 1 (in seconds)
4016
LEd1
w/r
0...1
Support of alarm 1 signaling
Description
Value
4017
P_a2
w/r
0
Support switched off
1
Support switched on
0, 1
Input quantity controlling the alarm
Value
4018
tyP2
w/r
Description
0
Main input
1
clock
0...5
Type of alarm 2 (description – fig. 6)
Value
Description
0
n-on
1
n-off
2
on
3
off
4
h-on
5
h-off
4019
dLY2
w/r
0...32400
Delay of alarm 2 (in seconds)
4020
LEd2
w/r
0...1
Support of alarm 2 signaling
Value
4021
P_a3
w/r
Description
0
Support switched off
1
Support switched on
0, 1
Input quantity controlling the alarm
Value
34
Description
0
Main input
1
clock
4022
tyP3
w/r
0...5
Type of alarm 3 (description – fig. 6)
Value
Description
0
n-on
1
n-off
2
on
3
off
4
h-on
5
h-off
4023
dLY3
w/r
0...32400
Delay of alarm 3 (in seconds)
4024
LEd3
w/r
0...1
Support of alarm 3 signaling
Value
4025
P_a4
w/r
Description
0
Support switched off
1
Support switched on
0, 1
Input quantity controlling the alarm
Value
4026
tyP4
w/r
Description
0
Main input
1
clock
0...5
Type of alarm 4 (description – fig. 6)
Description
Value
0
n-on
1
n-off
2
on
3
off
4
h-on
5
h-off
4027
dLY4
w/r
0...32400
Delay of alarm 4 (in seconds)
4028
LEd4
w/r
0...1
Support of alarm 4 signaling
Value
4029
P_an
w/r
Description
0
Support switched off
1
Support switched on
Input quantity, which the analog output
has to react on.
0, 1
Value
Description
0
Main input
1
clock
35
4030
tYPa
w/r
0...2
Type of analog output
Description
Value
4031
bAud
w/r
0
voltage input 0...10 V
1
current input 0...20 mA
2
current input 4...20 mA
0...5
Baud rate
Value
4032
prot
w/r
Description
0
4800 bit/s
1
9600 bit/s
2
19200 bit/s
3
4
5
38400 bit/s
57600 bit/s
115200 bit/s
0...3
Transmission mode
value
0
1
2
3
Description
RTU 8N2
RTU 8E1
RTU 8O1
RTU 8N1
4033
Addr
w/r
0...247
Meter address. The write of the value 0 causes the
interface switching off
4034
sAvE
w/r
0...1
Update transmission parameters. Causes the
application of introduced RS-485 interface settings.
4035
SEt
w/r
0...1
Write of standard parameters
Value
0
1
4036
SEc
w/r
0...6000
0
...
hour
w/r
0...2359
without changes
set standard parameters
Password for parameters
Value
4037
Description
Description
without password
Entry in parameters preceded by a
request about the password
Current time
This parameter occurs in the ggmm format, where:
gg - means hours,
mm – means minutes.
The introduction of a wrong hour will cause the
setting of 23, however the introduction of wrong
minutes will generate the setting of the value 59.
36
4038
unit
4039
...
4048
...
Status1
w/r
0, 1
w/r
0, 1
...
...
w/r
0...65535
Switch on/off the unit highlight
Description
Value
0
highlight swiched off
1
highlight swiched on
Reset of extrem values
Description
Value
0
no change
1
Reset of min. and max. values
Reserved
Meter status. Describes the current state of the
meter. Successive bits represent the given event.
The bit set on 1 means, that the event took place.
Events can be only erased.
Bit 15
Break of the supply
Bit 14
Re-set of the RTC clock
Bit 13
Not used
Bit 12
Lack of communication with data memory
Bit 11
Wrong settings
Bit 10
Manufacturer’ s setting restored
Bit 9
Lack of measured values in data memory
Bit 8
Not used
Bit 7
Output plate is detected
Bit 6
Output plate – error or lack of calibration
Bit 5
Not used
Bit 4
Not used
Bit 3
Wrong configuration of the individual
characteristic
Bit 2
Not used
Bit 1
Not used
Bit 0
Averaging period is not elapsed
Meter status. Describes the current state of the
meter. Successive bits represent the given event.
The bit set on 1 means, that the event took place.
Events can be only cancelled.
Bit 15
Not used
4049
Status2
w/r
Bit 14
Not used
Bit 13
Not used
Bit 12
Not used
Bit 11
Not used
Bit 10
Not used
Bit 9
Not used
Bit 8
Not used
37
4049
Status2
z/o
Bit 7
LED4 – Signaling of alarm nr 4.
Bit 6
LED3 – Signaling of alarm nr 3.
Bit 5
LED2 – Signaling of alarm nr 2.
Bit 4
LED1 – Signaling of alarm nr 1.
Bit 3
Status of the alarm relay nr 4.
Bit 2
Status of the alarm relay nr 3.
Bit 1
Status of the alarm relay nr 2.
Bit 0
Status of the alarm relay nr 1.
38
The value is placed in 32-bit
registers
The value is placed in two successive 16-bit registers. These
registers include the same data as
32-bit registers from the area 7600
Table 10
write
(w)
Symbol
/
Range
Description
readout
(r)
7200
7600 CoLLo
w/r
-19999...99999
Lower threshold of the display colour
change
7202
7601 CoLHI
w/r
-19999...99999
Upper threshold of the display colour
change
7204
7602
ovrLo
w/r
-19999...99999
Lower threshold of the display
narrowing
7206
7603
ovrHI
w/r
-19999...99999
Upper threshold of the display
narrowing
7208
7604
PRL 1
w/r
-19999...99999
Lower threshold of alarm 1
7210
7605
PrH 1
w/r
-19999...99999
Upper threshold of alarm 1
7212
7606
PRL 2
w/r
-19999...99999
Lower threshold of alarm 2
7214
7607
PrH 2
w/r
-19999...99999
Upper threshold of alarm 2
7216
7608
PRL 3
w/r
-19999...99999
Lower threshold of alarm 3
7218
7609
PrH 3
w/r
-19999...99999
Upper threshold of alarm 3
7220
7610
PRL 4
w/r
-19999...99999
Lower threshold of alarm 4
7222
7611
PrH 4
w/r
-19999...99999
Upper threshold of alarm 4
7224
7612
AnL
w/r
-19999...99999
Lower threshold of analog output
7226
7613
AnH
w/r
-19999...99999
Upper threshold of analog output
7228
7614
Con
w/r
-19999...99999 Reserved
7230
7615
w/r
0...60000
Reserved
7232
7616
w/r
0...60000
Reserved
7234
7617
w/r
-19999...99999 Reserved
7236
7618
w/r
-19999...99999 Reserved
7238
7619
w/r
0...60000
Reserved
7240
7620
w/r
0...60000
Reserved
7242
7621
w/r
-19999...99999 Reserved
7244
7622
H1
w/r
-19999...99999
Point of the individual characteristic.
Point nr 1
7246
7623
Y1
w/r
-19999...99999
Expected value for the point nr 1
7248
7624
H2
w/r
-19999...99999
Point of the individual characteristic.
Point nr 2
7250
7625
Y2
w/r
-19999...99999
Expected value for the point nr 2
7252
7626
H3
w/r
-19999...99999
Point of the individual characteristic.
Point nr 3
7254
7627
Y3
w/r
-19999...99999
Expected value for the point nr 3
7256
7628
H4
w/r
-19999...99999
Point of the individual characteristic.
Point nr 4
7258
7629
Y4
w/r
-19999...99999
Expected value for the point nr 4
7260
7630
H5
w/r
-19999...99999
Point of the individual characteristic.
Point nr 5
7262
7631
Y5
w/r
-19999...99999
Expected value for the point nr 5
7264
7632
H6
w/r
-19999...99999
Point of the individual characteristic.
Point nr 6
7266
7633
Y6
w/r
-19999...99999
Expected value for the point nr 6
7268
7634
H7
w/r
-19999...99999
Point of the individual characteristic.
Point nr 7
7270
7635
Y7
w/r
-19999...99999
Expected value for the point nr 7
7272
7636
H8
w/r
-19999...99999
Point of the individual characteristic.
Point nr 8
7274
7637
Y8
w/r
-19999...99999
Expected value for the point nr 8
7276
7638
H9
w/r
-19999...99999
Point of the individual characteristic.
Point nr 9
39
40
7278
7639
Y9
w/r
-19999...99999
Expected value for the point nr 9
7280
7640
H10
w/r
-19999...99999
Point of the individual characteristic.
Point nr 10
7282
7641
Y10
w/r -19999...99999
7284
7642
H11
w/r
-19999...99999
Point of the individual characteristic.
Point nr 11
7286
7643
Y11
w/r
-19999...99999
Expected value for the point nr 11
7288
7644
H12
w/r
-19999...99999
Point of the individual characteristic.
Point nr 12
7290
7645
Y12
w/r -19999...99999
7292
7646
H13
w/r
-19999...99999
Point of the individual characteristic.
Point nr 13
7294
7647
Y13
w/r
-19999...99999
Expected value for the point nr 13
7296
7648
H14
w/r
-19999...99999
Point of the individual characteristic.
Point nr 14
7298
7649
Y14
w/r
-19999...99999
Expected value for the point nr 14
7300
7650
H15
w/r
-19999...99999
Point of the individual characteristic.
Point nr 15
7302
7651
Y15
w/r
-19999...99999
Expected value for the point nr 15
7304
7652
H16
w/r
-19999...99999
Point of the individual characteristic.
Point nr 16
7306
7653
Y16
w/r
-19999...99999
Expected value for the point nr 16
7308
7654
H17
w/r
-19999...99999
Point of the individual characteristic.
Point nr 17
7310
7655
Y17
w/r -19999...99999
7312
7656
H18
w/r
-19999...99999
Point of the individual characteristic.
Point nr 18
7314
7657
Y18
w/r
-19999...99999
Expected value for the point nr 18
7316
7658
H19
w/r
-19999...99999
Point of the individual characteristic.
Point nr 19
7318
7659
Y19
w/r -19999...99999
7320
7660
H20
w/r
-19999...99999
Point of the individual characteristic.
Point nr 20
7322
7661
Y20
w/r
-19999...99999
Expected value for the point nr 20
7324
7662
H21
w/r
-19999...99999
Point of the individual characteristic.
Point nr 21
7326
7663
Y21
w/r
-19999...99999
Expected value for the point nr 21
Expected value for the point nr 10
Expected value for the point nr 12
Expected value for the point nr 17
Expected value for the point nr 19
6.6.
Registers Only for Readout
The value placed In two successive
16-bit registers. These registers include
the same data as 32-bit registers from
the area 7500
The value is placed in 32-bit registers
Table 11
7000
7500
Identifier
O
—
Constant identifying the device.
The value 183 means the N30U meter
7002
7501
Status
O
—
Status is register describing the current
state of the meter
7004
7502
Control
O
%
It is a register defining the control of the
analog output
7006
7503
Minimum
O
—
Minimal value of the currently displayed
value
7008
7504
Maximum
O
—
Maximal value of the currently
displayed value
7010
7505
Displayed
value
O
—
Currently displayed value
7012
7506
Current time
O
—
Current time
7014
7507
Wire
resistance
O
W
Password of analog-to-digital
transducer
7016
7508
ADC
O
—
S³owo przetwornika analogowo-cyfrowego
°C
Temperature of terminals – the measurement is only carried out during the
temperature measurement by means of
thermoelectric sensors or during time
measurements
7018
7509
Name
Terminal
temperature
Write
(w)
/readout
(r)
Unit
O
Name of the quantity
41
Table 11
7020
7022
7024
7510
7511
7512
Measured
value
EMF
Resistance
O
Measured value - not recalculated
in relation to the individual characteristic, a.s.l.
O
EMF measured on meter terminals,
when measuring temperature by
means of thermocouples.
O
mV
Ohm
Resistance measured on the mean
line – only for the resistance measurement or when measuring temperature
by means of resistance thermometers
(RTD)
7. UPDATING OF SOFTWARE
Function enabling updating of software from the computer of the PC
with software LPCon was implementation in meter N30U (from version of software 1.10) in the realization with the interface RS485. Free
software LPCon and update files are accessible on the side www.lumel.
com.pl . The connected to the computer convertor RS485 is required
on USB to the updating, e.g.: the convertor PD10.
a)
b)
Pic. 13. Program view: a) LPCon, b) updating of software
42
Warning! Before doing update, currently settings of meter should be
saved by program LPCon, because when software is updated default
settings of meter are restored.
After starting LPCon’s software COM port, baudrate, transmission
mode and adress should be set. It can be done in Options. Then, N30U
meter should be selected from Device. Push icon Load to read and
save current settings. Open window Lumel Updater (LU) – figure 13b
from Updating->Updating of devices firmware. Push Connect. Update
progress is shown in Messages section. Text Port opened appear after
correctly opened port. Putting meter in update’s mode can be done in
two ways: remote from LU (with settings from LPCon – port, baudrate,
transmission mode and adress) or by turning power on while button
pressed (updating by standard communication parameters baudrate 9600 kb/s, mode 8N2). AL1 led signals that device is ready
for update. LU will show message „Device found” with name and current version of firmware. Using button ... a valid file should be selected.
If the file is correct, message File opened will show. Send button should
be pressed. During firmware update AL1-AL4 leds indicate process
progress. If firmware update is successful device starts normal operation and message Done and update duration will show. Close LU and
go to Restoration of manufacturer’s parameters. Select checkbox and
press Apply button. Next press Send button to restore previously read
parameters. Current firmware version can be checked when meter is
power on.
Warning! Power loss during firmware update could result permanent
meter damage!
43
8. ERROR CODES
After switching the meter to the network or during the work, messages
about errors can appear.
Messages about errors and their reasons are presented below.
Table 12
Error message
ErFrt
ErPar
ErdEF
44
Description
Overflow of upper value of the measuring range value
or the programmed indication range. The message can
also mean a break in the sensor circuit (thermocouples or
resistance thermometers).
Overflow of lower value of the measuring range value or
the programmed indication range. The message can also
mean a shorting in the sensor circuit (thermocouples or
resistance thermometers).
Communication error with the data memory. Contact the
service workshop.
Parameter error. Wrong configuration data.
Manufacturer’s settings will be restored after pressing any
button.
Default settings have been restored. Press any button to
transit to a normal work.
ErFPL
Error of measured values stored by the meter (measured,
maximal and minimal values). Press any button to transit
to a normal work. After pressing the button during 1 sec,
the ErdEF message will be displayed.
ErCAo
Lack of calibration of analog outputs. Press any button
to transit to the normal work. Analog outputs will not be
serviced. Contact the service workshop.
ErCAL
Error of calibration. The work is stopped – The meter is
not in the state to carry out measurements in a correct
way. Incorrect checksum of calibration coefficients or
lack of calibration.
9. TECHNICAL DATA
Measuring ranges
Kind of input
Pt100
Pt500
Pt1000
400 W
4000 W
Thermocouple of J type
Thermocouple of K type
Thermocouple of N type
Thermocouple of E type
Thermocouple of R type
Thermocouple of S type
Voltage input 0...10 V
Current imput
Voltage input 60 mV
Current time
Table 13
Indication range
Class
- 205...855°C (-200...850°C)
0...410 W (0...400 W)
0...4010 W (0...4000 W)
-200...1200 °C (-100...1200 °C)
-200...1370 °C (-100...1370 °C)
-200...1300 °C (-100...1300 °C)
-200...1000 °C (-100...1000 °C)
-50...1768 °C (-50...1760 °C)
-50...1768 °C (-50...1760 °C)
-13...13 V (-10...10 V)
-24...24 mA (- 20...20 mA)
-10...63 mV (0...60 mV)
00.00...23.59
0.1
0.5 sec/24 h
Additional error:
- of automatic thermocouple cold junction temperature compensation:
£1 °C
- of automatic wire resistance compensation for thermoresistors:
£ 0,5 °C
- of automatic wire resistance compensation for resistance measurement:
£ 0,2 W
- of temperature changes:
for analog outputs 50 % of the class / 10 K
for analog inputs 100 % of the class / 10 K
Inputs parameters:
- resistance of the supply input [V]:
>1MW
- resistance of the current input [mA]:
12 ±1 W%
- current flowing through the resistance thermometer
270 ± 10 uA
- resistance of wires connecting the resistance thermometer with transmitter: <10 W
45
Relay outputs
- relays, NOC voltageless contacts load
capacity 250 V~/0.5A~
- relays, switched voltageless contacts
load capacity 250 V~/0.5A~ (option)
Analog outputs (option)
- rogrammable, current 0/4..20mA
load resistance £ 500 W
- programmable, voltage 0..10V
load resistance ³ 500 W
Output of auxiliary supply 24 V d.c./30 mA
Alarm output OC (option)
output of OC type, passive npn,
30 V d.c./30 mA.
Serial interface
RS-485 (option)
Transmission protocol
MODBUS RTU
Error of analog output
0.2% of the set range
Protection level ensured
by the casing:
- frontal side
- terminal side
IP65
IP10
Weight
< 0.2 kg
Overall dimensions
96 ´ 48 ´ 93 mm (with terminals)
Reference conditions and rated
operating conditions:
- supply voltage
85...253 V d.c./a.c. 40...400 Hz or
20...40 V a.c. (40...400 Hz), 20...60 V d.c.
- ambient temperature
- 25...23...+55oC
- storage temperature
- 30...+70oC
- relative air humidity
25...95% (inadmissible condensation of water vapour)
- work position
any
46
Standards fulfilled by the meter:
Electromagnetic compatibility:
l
l
noise immunity acc. to EN 61000-6-2
noise emissions acc. to EN 61000-6-4
Safety requirements:
acc. to EN61010-1 standard:
l isolation between circuits: basic,
l
installation category: III,
l
pollution level: 2,
l
maximal phase-to-earth work voltage:
- 300 V for the supply circuit and,
- 50 V for remaining circuits.
l
altitude above sea level: < 2000 m.
47
10. ORDER CODES
Table 14
DIGITAL PANEL METER
N30U -
X
X
XX XX
X
X
Supply:
85... 253 V a.c. (45...65 Hz) or d.c. .......................... 1
20...40V a.c. (40...400 Hz ) , 20...60 V d.c. ............... 2
Additional outputs:
lack .................................................................................. 0
OC output, RS485, analog outputs ................................. 1
OCoutput, RS485, analog outputs,
switched relay outputs .................................................... 2
Unit:
unit code number acc. tab. 15 .............................................. XX
Version:
standard ........................................................................................ 00
custom-made* .............................................................................. XX
Language:
Polish ..................................................................................................... P
English ................................................................................................... E
other* ..................................................................................................... X
Acceptance tests:
without extra quality requirements ............................................................... 0
with an extra quality inspection certificate ................................................... 1
acc. to customer’s request* ......................................................................... X
* - after agreeing with the manufacturer.
ORDER EXAMPLE:
the code: N30U - 1 0 26 00 E 0 means:
N30U – programmable digital meter type,
1 – supply: 85...253 V a.c/d.c.(45...65 Hz),
0 – lack of additional outputs,
26 – unit „°C” acc. to the table 3,
00 – standard version,
E – English language,
0 – without extra quality requirements.
48
Code of the highlighted unit
Code
00
01
02
03
04
05
06
07
08
09
10
11
12
13
14
15
16
17
18
19
20
21
22
23
24
25
26
27
28
Unit
Lack of unit
V
A
mV
kV
mA
kA
W
kW
MW
var
kvar
Mvar
VA
kVA
MVA
kWh
MWh
kvarh
Mvarh
kVAh
MVAh
Hz
kHz
W
kW
o
C
o
F
K
Table 15
Code
29
30
31
32
33
34
35
36
37
38
39
40
41
42
43
44
45
46
47
48
49
50
51
52
53
54
55
56
XX
Unit
%
%RH
pH
kg
bar
m
l
s
h
m3
obr
szt
imp
rps
m/s
l/s
rev/min
r.p.m.
mm/min
m/min
l/min
m3/min
szt/h
m/h
km/h
m3/h
kg/h
l/h
on order1)
1) - after agreeing with the manufacturer.
49
11. MAINTENANCE AND GUARANTEE
The N30U digital panel meter does not require any periodical maintenance.
In case of some incorrect operations:
1. From the Shipping Date, During the Period Given in the Annexed
Guarantee Card
One should take the meter down from the installation and return it
to the Manufacturer’s
Quality Control Dept.
If the meter has been used in compliance with the instructions, the
Manufacturer warrants to repair it free of charge.
2. After the Guarantee Period:
One should turn over the meter to repair it in a certified service
workshop.
The disassembling of the casing causes the cancellation of the
granted guarantee.
Our policy is one of continuous improvement and we
reserve the right to make changes in design and specifications of any products as engineering advances or
necessity requires and revise the above specifications
without notice.
50
51
N30U-09A
“LUMEL” S.A.
ul. Słubicka 1
65-127 Zielona Góra - Poland
Tel.: (48-68) 45 75 100 (exchange)
Fax: (48-68) 45 75 508
http://www.lumel.com.pl
52
Export Department:
Tel.: (48-68) 45 75 302 or 304
Fax: (48-68) 325 40 91
e-mail: [email protected]