Download 9004 DVR User Manual
Transcript
V1.1
USER MANUAL
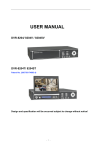
SDVR-9004EVH/9004EVTS
Design and specification will be occurred subject to change without notice!
CATALOGUE
CHAPTER 1 Introduction……………...………………………………3
CHAPTER 2 Features………………………………….……...……. ... 4
CHAPTER 3 Instruction……………………………….……….…..…..6
1
V1.1
3.0 Menu…………………...……………….….….….……...7
3.1 Network……………………………………….………….9
3.2 HDD………..…………………………….……………...11
3.3 Record……………………………………..…………....12
3.4 Playback………………………………….……………..13
3.5 Alarm……………..……………………….……………..17
3.6 PTZ………………………...………….……….………..18
3.7 PTZ Ctrl……………………………………..…………..18
3.8Log……………………………………………….…….…19
3.9 System ………………………..……………….………..19
CHAPTER 4 Screen …………………………….....………….….……20
CHAPTER 5 IE Operations……………...…………………………….23
5.1 Requirements……………………………….……………23
5.2 Login ……………………………………………………...23
5.3 Real Monitor…………………………………...…………24
5.4 Remote Search…………………………………………..26
5.5 PTZ ………………………………………………………..26
5.6 PTZ Setting…………………………………………...…...27
5.7 IE direct X Remote Tool………………….……….……....27
Chapter 6 Upgrade...……………….…….……………...…….………...27
Appendix 1 DVR Back panel …………………………………...…….….33
Appendix 2 Alarm. Relay. PTZ Ports Contents ……….…….……….…34
Appendix 3 9004 CBR Stat. ……………………………………………..35
Appendix 4 Panel Illumination..............................................................35
A p p e n d i x
5
R e m o t e
C o n t r o l
Ill um i na ti o n… … …… … …… .. …. … …… .. .. 3 7
Solution to DVR’S Problems…………………………….………….….....39
Chapter 1 Introduction
Embedded DVR is designed into embedded structure, possess characteristic of high
definition, low cost, steady capability, simple operation ect. Support 4ch audio/video real time
2
V1.1
detection and kinescope, is use in the public and diversified private houses of super market.
Park. High way . Flat. Town street ect. And will your high-tech security electronic products with
buy and use in setting heart free.
There into, the model of 9004EVH/9004EVTS even has the 7inch TFT LCD, user can
watch without any outside monitor. LCD can hide free by himself, possess super transferring.
Additionally, LCD has the detection and entertainment function of the PAL/NTSC, audio control
(speaker inside), games ect.
Features:
● PAL/NTSC
● 4ch RT Audio/Video Input/Output
● Mouse control: PS/2
● 4ch Alarm input, 1ch alarm output.
● Simplified/traditional Chinese, English are selectable, H.264/MJPEG compression, support
Half-D1. CIF;
● Network: Support PPPoE, DDNS
● USB to Upgrade
● Recording Mode: Manual, Schedule, Alarm, Motion and Detection;
● Perfect alarm and operation log for convenient analyses and detection
● Resolution: NTSC: 640*480, PAL: 720*576
NTSC: 640*240, PAL: 640*272
● Watch-dog built-in;
● Multi-languages support
● Built -in 7 inch hidden LCD monitor, convenient for using
Chapter 2 Features
3
V1.1
DVR-9004EVH/9004EVTS
-SPECIFICATION
9004EVH
Operation System
Embedded Linux
Compression
H.264
Video I/O
Audio I/O
Displaying Speed
Recording Speed
9004EVTS
MJPEG
NTSC: 4CH BNC Input/1CH BNC output. 1CH
S-video output
PAL: 4CH BNC Input/1CH BNC output. 1CH S-video output
4CH BNC input/ 1CH BNC output
NTSC:120 FPS(4*30 FPS )
PAL: 100 FPS(4*25 FPS )
NTSC:30 FPS
4*30=120FPS
PAL: 25 FPS
4*25=100FPS
Recording Mode
Manual, Scheduling, Alarm, Motion &Detection
Image Quality
High, Middle, Low are selectable
Recording Resolution
704*240,352*240(NTSC)
Playing Mode
1CH or 4 CH
Search Mode
By Time/ Event /Channel
HDD
﹥200G,ATA-100(Without HDD)
Alarm I/O
4CH Input/1CH Output
Network
IE/PPPOE/DDNS
Remote Control
YES
Mouse Control
PS/2
USB Backup
USB2.0
PTZ Control
PELCO-D,PELCO-P,B01,SAMSUNG
Language Support
Simplified Chinese, Traditional Chinese, English
monitor
7 inch hidden LCD monitor
SATA Backup
YES
Software Upgrade
USB
Power Supply
12V/ 4A DC
Temperature
-10℃~+50℃
Humidity
10%-90%
G.W/N.W:
6.1KG/3.5KG
Size(L*W*H)
360*330*60mm
704*288, 352*288(PAL)
(Dualplex)
4
V1.1
Chapter 3 Instructions
Windows is the Host Computer’s style, the system will display the menu related information
when you move the mouse to operation interface, but if the mouse left, the menu will hide them.
Special Note: All the DVR we sell is with PS/2, which is convenient for you to operate.
3.0 Menu
Note: All the menu will be in English, → the right menu was the left menu’s
submenu .We will mostly introduce the panel/remote control operation menu in
simple way as follow:
● 1CH/4 CH interchange
Ø
When mouse is in the 4CH, if you click one channel, it will show full screen; if you click left
mouse, and then will be back.
Ø
Panel/Remote control for 4 CH, press CH4 to show full screen of related channel, press
QUAD back to 4CH.
● Forcedly shut down
Turn “NO/OFF” button at the back of host computer can meet your will.
Note: forbidden to forcedly shut down in usual time to protect the hard disk!
● Soft shut down
Shut up in Menu: System Shutdown to shut down operation, choose Shutdown or Reset,
5
V1.1
and then press “OK”, system will shut down or reset.
● Multi-languages
Ø
The
system
support
multi-
languages
in
display,
it
support
English,
simplified/traditional Chinese. Right button of the screen displays the currently using
language; use the mouse to click Change to other languages.
Panel/remote control operation: in the browse time, press “menu” to back to the main
Ø
menu, press right and left directions keys to dynamic page to the languages place, and
then use the up and down direction keys to interchange languages versions.
● MAC address setup
Ø
System support setting up the MAC address of net card in the SATA, see the setting
mode as below:
1) After system opening, input “abc”, then press the “OK”, you will see the DOS prompt
“abc”: Bad command or file name”, then press “OK” several times until you can see the
“9004>”
2) Input MAC address(if were 00:16:17:30:C9:3A), operation as follows:
Input the order after DOS prompt “9004>” as below:
9004>setmac00:16:17:30:C9:3A
Then will see the following information:
Command String: SETMAC 00:16:17:30:C9:3A
Set MAC to: 00:16:17:30:C9:3A
Success to set mac.
So it means setup ok, or failure.
3) Mac inure when system restart.
Ø
Into menu mode
In the preview mode, press menu key to come back the shortcut menu; press again
the menu key to come back main menu list; press play key, into play back the inquiry page
layout; press rec key, into the operation by man page layout; press the ptz shortcut key, into
PTZ operation control page layout.
Ø
Menu form instruction
6
V1.1
There is a little rectangle in the menu page layout, call it “shift cube”, use the
fluctuate key can make the “shift cube” from this link to the other link, when the “shift
cube” go to one link, you can press the panel/remote control key into this menu of link.
Such as move the “shift cube” to “record” icon, press the panel/remote control key into
“record” second grade menu.
Each menu include sorts of setting, thereinto “shift cube” mean that setting are operated.
Use the right and left key can move the “shift cube” mentioned. The main parts form
cells are like these:
(1) Check box: offer up to 2 options, “V” means availability, “X” means shield, use the
enter key or fluctuation key to interchange.
(2) Combo box: offer over 2 options, but just can choose one, use the fluctuation key
can choose one item from the menu list. Such as at the right of “channel” were your
gate combo boxes.
7
V1.1
(3) List box: display the search result in the menu list, use the fluctuation key can
choose one item from the list, if you press the enter key to play the file information in
the playback search result list.
(4) Edit box: offer one character to input rectangle, use the right and left key to move
or go to this edit box, press the enter key go into the fettle of edit. You can do like
this:
a) Can use the fluctuation key to rejigger content in cursor or press the mouse right
and left key to rejigger it.
b) Use the right and left key can move the position of sensor.
c) Use the mouse’s mid-key can cancel cursor’s character.
d) Press enter key can exit the fettle of edit.
(5) Button: use for carry out a special function or go into next grade menu list, such as
“manual Rec” can go into next grade menu. In the next grade menu, interchange to
“OK” shift button and press the enter key to post the parameter of setting to go back
last menu at the same time.
Ø
Shortcut menu instruction
The system offer the PIP, QUAD, audio adjust and languages select shortcut menu
in the screen last line. Use the right and left key interchange “shift cube” to the
correspond icon, press the enter key can realize correspond functions. Otherwise,
panel/remote control have the PIP and QUAD shortcut key in the preview menu, this
can directly go into the PZP and full screen gate interchange; in other page layout, you
can press the QUAD shortcut key directly come back the QUAD preview.
Ø
Exit menu mode
Press quad key can exit menu mode and interchange to the preview mode.
● User validating
Input the code when the system start, after validating just can go to the menu list
interface. The original system code is 888888.
(IE users must input the user name and code at the same time, login the system after validating,
the user name fix up admin)
● Logout
Ø
Automatism logout: set the password as enable in the menu of System →
Configure, if after the system starting, in the System →Comfiture’s lock time over,
the system will automate to logout.
8
V1.1
Logout by man: in the page layout of System →shutdown choose logout can
Ø
logout the user at once.
Ø
The users have to relogining the system after system shutdown.
● Configuration copy function
The system offer “Apply to” button press this to have configuration copy function.
Support copies the configuration of current page to the option place. For example:
RecordàAfter setting relative configuration of Channel 1 in RecParam menu interface,
select Channel2 on right side of “Apply to” CH2,Click “Apply to” to realize copy
configuration information from Channel 1 to Channel 2.
3.1 Network
3.1.1 Network Parameter Setting
Network à NetPara menu use for setting basic network information contain:Ip address,
Netmask , Gateway , Web server Port, DNS and MAC address of display system
mainframe .
DHCP Function:Select DHCP check box,then press OK .When religion the menu,
System will show relative information from DHCP like IP address, Netmask, Gateway. If
IP address, Netmask and Gateway showed 0, means system failed to attain information
from DHCP server temporarily.
After setting network parameter successfully, input http://IP:Port in client server IE
browser to view the system long-distance. For example, supervise real time,
long-distance playback etc.
9
V1.1
● Setting Net Frame Rate
Setting Net Frame Rate by Record à RecPara. The actual Net FrameRate calculates
as follow:
Actual Net FrameRate = (FrameRate) x (Net FrameRate)
Note:To assure not to lose wrap when network busy and avoid DVR mainframe
data transferring abnormal The user shall setting right Net FrameRate and image
quality according to their difference Network for DVR and Long-distance Network
for PC. CBR. Data please refer to Appendix 3
● Support more client server(Multicast)
This DVR can support many client servers through Multicast. No limited for user use
this function. Can open Multicast in menu: Network à NetPara and input opposite
Multicast address, then can support connecting more users.
Note:
1.
Pls make sure to input the right Multicast address.
Multicast address
range: 224.0.0.0 – 239.255.255.255. Suggest setting: 224.3.4.5
2.
After open Multicast, the formerly connected client server will cut
automatically. Have to reconnect to view surveillance image.
3.
System would not support public browse if open Multicast.
4.
Be likely to induce local area network busy.
3.1.2 PPPoE
Network à PPPoE use for setting PPPoE Dail connect. Input user and Password,
then press OK. Max User name and domain name is 31 characters. Max Password 16
10
V1.1
characters. After Dail successfully, you can see relative connecting information on the
button of menu.
3.1.3 DDNS
DDNS (Dynamic Domain Name Server)
!DDNS is to mapping the user’s dynamic IP
address to a fixed domain name resolution server. The client server program will transfer
the dynamic IP address to server program of client’s host computer when the users
connect to network. The server item program will offer DNS service and realize dynamic
domain name resolution.
Function for DDNS:The broad band server almost only offer dynamic IP address,
DDNS can capture client’s variation IP address and correspond the relative domain name .
Then clients can communicate with each other by different domain name.
Network à DDNS Menu to setting DDNS .This DVR only support 3322.org DDNS
server .User should register to become a member on www.3322.org, and apply a domain
name. It will begin to work after then setting relative information on this DVR.
Setting method for this DVR: Open DDNS, Input user name, password and domain
name. Max User name and domain name is 31 characters. Max Password 16 characters.
User can visit this DVR directly after setting successfully.
Note:Have to use DDNS and assure the DVR can visit exterior network.
Configure right DNS or open PPPoE.
● Support public view DVR(Use Port mapping)
Currently, This DVR only supports connecting to public network by other Router. It has
to use Port mapping to make long-distance user view DVR9004 system.
Suppose there’s a board with network setting as follow:
IP: 192.168.1.73
11
V1.1
Netmask: 255.255.255.0
Gateway: 192.168.1.1
IE Port: 3180
Then the Router should setting as follow:
Thereinto,
54000 – 54030 is data transfer Port
6610 is command communication Port
3180 is IE Port
The 3 all needed.
Suppose Router address is 211.1.91.114.
After setting, outside network visit 2700 board as follow:http://211.1.91.114:3180
Note:Can not open PPPoE if use Port mapping, or it work abnormally.
As the streaming of the system very big, when using public network, pls adjust the
image quality of Channel to to low, Frame: 1/4, resolution: CIF. In addition, we suggest visit
one channel at a time, do not visit more channel same time to make sure the image quality
fluent. ,
12
V1.1
3.2 HDD
HDD menu support checking installed HDD capacity and format HDD. HDD Capacity
include: status, capacity, free. One system can support 2 HDD with max to 500G each.
Be sure to install same type HDD. 48bit or 28bit .System can only recognize the main HDD
when 2 HDD installed not matching.
Note:When recording, can not format HDD. Have to stop recording by handand then
format.
One system only support install 2 same types HDD. That is the 2 HDD is 28bit or 48bit.
System can only recognize the main HDD when 2 HDD installed not matching.
3.3 Record:
The System contains 4 recording mode: Recording by hand, Schedule recording, recording
parameter and image parameter. The following is guide for how to use each recording mode.
4 recording mode use same image setting: Record à RecPara. The parameter description
as follow:
13
V1.1
3.3.1 Rec Parameter setting:
● Channel:
● Quality:
●Media Stream:
●Frame Rate:
●Net Frame Rate:
●Resolution:
●Record Delay:
Note: when one of the channels is recording, don’t revise the picture parameter, and
need to close all recording, then revise the relative picture parameter.
3.3.2 Image parameter
Record----Image Para it is available to set brightness, contrast, and saturation and channel
name of the picture.
14
V1.1
3.3.3 Manual Rec
Ø
Starting Rec: Record---Manual Rec, choosing the record channel as “V”, press
the key OK and the relative channel start to record. On the preview page, you
can see the record sign of the relative channel, on the Record---Manual Rec
interface you can see the channel has changed to Rec or RETR.
Note: setting “V”, show the user use Manual Rec, whether starting to record or not,
HD play a key role. When the HD is out of using, being not formatted or being saturation
and the covering isn’t settled, system will not start to Manual Rec.
Ø Stopping Rec: Record---Manual Rec, choosing the relative record channel as “X”, press
the key OK, the relative channel will stop Manual Rec at once, on the Record---Manual
Rec interface you can see the channel has changed to IDLE or TRAN separately.
Ø REC States: Record---Manual Rec interface can display States and system four states,
they are IDLE, REC, TRAN and RETR .and respect leisure, and recording, cyber
sending and recording add cyber sending.
3.3.4 Schedule Rec:
15
V1.1
Ø
Starting to record: Record---Schedule, choosing the need setting channel number,
then setting the schedule time, gridding respect seven days and twenty-four hours, red
respects recording will start in the setting time.
Ø
Stopping Rec: Record---Schedule, choosing the need setting channel number, then
setting the schedule time, gridding respect seven days and twenty-four hours, green
respects recording will not start in the setting time.
Mouse operation: press the left key of the mouse you can do choosing/cancelling
scheduling. Press OK key you can save the setting.
Board and Remote Control operation: when changing motion frame to time list, the key
menu of Board or Remote Control can do choosing/cancelling schedule in the gridding. Up,
Down, Left and Right key can choose gridding in motion. Press Enter key back from time
list .when back to OK key, press OK key to save setting.
Note: you can set time from starting time to end time by pressing mouse left key
to draw between starting time and end time and then release the mouse.
When channel message is settled, you can use Apply to key to copy the message to others
channels.
3.4 Playback
Ø
Search Files
16
V1.1
Input inquirement conditions on the Search Files page in Playback, search condition
contains: channel number, record style, and starting and end time of record, press
Search key to search relative record file, and the system will return the right record file
note.
On searching result of file list, through Go to key you can switch to appointed page fast,
and can switch free between revious and next pages through PREV and NEXT.
Note: the maximum displaying of searching result is five hundreds, it will
display the pioneer five hundreds search result according to relative condition if
the searching result is beyond five thundreds.if you want to see the searching
result behind the previous five thundreds,must revise the inquiry condition to
search again.
Mouse operation: choosing the recording file with left key of the mouse, then press
PLAY key to display the file;
Board and Remote Control operation: when changing motion frame to recorded file
list, the UP and DOWN key of Board and Remote Control can switch among the relative
files. Playback files by pressing OK key or PLAY key.
17
V1.1
Ø
File Playback operation:
You can control the displaying conditions when files are play backing.
Pausing/displayin speed/slow, fast retrea/slow retreat, stop.
Mouse operation: clicking the right key of mouse to display the control list, clicking the
relative key to operate as following:
1.
”>>”means adjust the speed, when you click it, the speed will cycle as following:
normal---two times---four times---eight times---sixteen times---half time---one
quarter time---one eighth time---one sixteenth time---one twenty-fifth
time---normal.
2.
”<<”means adjust the speed of the reverse direction, when you click it, the
speed will cycle as following: normal---two times---four times---eight
times---sixteen times---half time---one quarter time---one eighth time---one
sixteenth time---one twenty-fifth time---normal.
3.
”11” is used to pause/display file. When it is playing normally, clicking it will
pause; when it is playing in innormally, click it will switch to play normally. When
pause playing files, click it will switch to play normally.
4.
“■”is used to retreat play backing files.
5.
“▲”is used to increase volume.
6.
“▼”is used to reduce volume.
Board and Remote Control operation: PLAY key is used to control speed, BACK key is
used to control reverse speed, PAUSE key is used to pause/play files. STOP key is used
to retreat play backing files.
When playback, D1 is default, clicking right key of mouse close control list. Then
click the left key of mouse will reduce the picture to CIF.if click again, it will return to
D1.through board operation, using menu key to close the play backing control bar at first,
then pressing ENTER key to switch the size of picture.
Ø
Schedule playback
Input requirement conditions on the Search Files page in Playback, search condition
contains:channel number,record style, and starting and end time of record, clicking Play
key or switching motion frame to Play key then press OK key, all meeting condition record
files will playback from starting time to end time.
Schedule play backing, you can choose any channels to playback, if the four
channels are all choosed; the four channels will all playback at the same time.
Ø
Schedule playback operation
18
V1.1
When it is play backing according to time sequence, four states are under control:
pause/play, speed/low, fast retreat/slow retreat, stop.
Mouse operation: clicking the right key of mouse to display the control list, clicking the
relative key to operate as following:
1.
”>>”means adjust the speed, when you click it, the speed will cycle as following:
normal---two times---four times---eight times---sixteen times---half time---one
quarter
time---one
eighth
time---one
sixteenth
time---one
twenty-fifth
time---normal
2.
”<<”means adjust the speed of the reverse direction, when you click it, the
speed will
cycle as
following: normal---two times---four
times---eight
times---sixteen times---half time---one quarter time---one eighth time---one
sixteenth time---one twenty-fifth time---normal.
3.
”11” is used to pause/display file. When it is playing normally, clicking it will
pause, when it is playing in abnormally, click it will switch to play normally.
When pause playing files, click it will switch to play normally.
4.
”
“is used to retreat play backing files.
Board and Remote Control operation: PLAY key is used to control speed, BACK key
is used to control reverse speed, PAUSE key is used to pause/play files. STOP key is
used to retreat play backing files.
When playback, If is defaulted by all channels, clicking the right key of mouse will
close control list, if clicking the left key of mouse at relative channel place, it will increase
the picture to D1, click it again, it will return to CIF. Through board operation, using menu
key to close the play backing control bar, then click CH—4 key, it will magnify/reduce the
appointed channel; press Quad key will return to play backing interface.
● USB Backup Record
Input requirement conditions on the Search Files page in Playback, search condition
contains: channel number, record style, and starting and end time of record, press Search
key to search relative record file, and the system will return the right record file note.
Mouse operation: using the left key of mouse to choose the relative record files, then click
COPY key to save the appointed files to USB equipment;
Board and Remote Control operation: when changing motion frame to recorded file
list, the UP and DOWN key of Board and Remote Control can switch among the relative
files to choose the right file, then switch the motion frame to COPY key, press enter key to
save the appointed files to USB equipment.
19
V1.1
Attachment player can play the files saved successfully.
● Video supporting
Video monitor: when previewing multi-pictures interface, the voice messages from
monitor channel 1 is defaulted; using the left key of mouse to click the relative channels or
CH1-4 to choose relative channels. System will show the channel full screen and play the
audio information of the channel.
Ø
Full screen display this channel and play the audio
Ø
Audio recording: RecordàParametersàMedia StreamàAV,then all the recording file
with audio and video
Ø
Audio playback:select the “Media stream” AV file to playback .
Ø
Volume control : The “speaker” can control the Volume : Mouse left/right can
increase/reduce volume, the middle key control mute .Up/down key of the panel can
adjust the volume too. Enter control the mute.
Notes:
1.
Audio recording and playback can't process at the same time, when
recording , the playback will stop automatically .So sometimes like this
problem will be happened, Audio playback without audio output;or the
audio disappear suddenly during playback, because audio recoding start
at the same time
2.
Only select file display then audio display can process, Time display can’t
support audio display
l
System support
Switch turn right(close to the power)to select PAL;turn left(close to internet port)to select
NTSC
Note:NTSC file playback just can do under the NTSC system, otherwise it can't
display the natural picture, the same with PAL
3.5 Alarm:
20
V1.1
3.5.1 Alarm type:
Ø
Alarm type setting:Alarm à Sensor Type use for setting alarm input, select “X”
means low-voltage alarm effective. “V” means high-voltage alarm effective, need
corresponding with the actual connecting alarm
Note:When not connect alarm, the alarm system default for the high-voltage
input signals
3.5.2 Motion detection recording:
Ø
Motion detection sensitivity and regional settings:Alarm à Motion Area, switch
the channel need for setting, then select the sensitivity and enter sub-menu to set
motion detection area, click the OK button to save configuration information after
setting
Ø
Motion detection area setting:Alarm à Motion Area ,click set menu to enter area
setting page, by mouse drag to select the motion detection area .The whole
picture was divide up 16x12 small panes, red means that area need for checking
motion detection, green means not need check
Mouse action .click the left mouse button to select / cancel the motion detection
area, click right mouse button to save and exit after setting, click the middle
21
V1.1
button to cancel the setting and exit.
Panel and remote operation: panel or remote menu button can select /cancel
motion detection area, Top ,bottom, left, right button can shift to select grid, click enter
button to save setting and exit, click stop button to cancel setting and exit.
After setting current channel, please use “apply to” to copy all the same setting to
other channels.
3.5.3Alarm Association:
Ø
Alarm Related:Alarm à Alarm Related, use for setting alarm input when system
needs to be done, Optional approach as follows
1.
Spring the appointed channel recording, It will record when the trigger
condition setting is ok, it will stop record if the settings expired
2.
Trigger buzzer, and provide input trigger for alarm after the alarm output
also continued to set the output time, the range is 1-99 seconds
3.
Trigger alarm output, and provide input trigger for alarm after the alarm
output also continued to set the output time, the range is 1-99 seconds
Note:Here also can set motion detection and video lost operation related.
Notes: please test the alarm input by a wire to connect input port with the ground,
please refer to the attachment of alarm input defines.
Ø
Motion detection linkage :Alarm à Alarm Related, use for setting alarm input,
Optional approach as follows
1.
Spring the appointed channel recording, It will record when the trigger
condition setting is ok, it will stop record if the settings expired.
2.
Trigger buzzer, and provide motion detection trigger conditions after the
buzzer also continued to set the output time, a range of 1-99 seconds.
22
V1.1
3. Trigger alarm output, and provide motion detection trigger conditions
after the alarm output also continued to set the output time, a range of
1-99 seconds.
3.5.4 Alarm setting:
Ø
Alarm time setting:Alarm à Schedule, switch the alarm which need for setting,
then set the valid time range, grip marks 7days 24 hours, blue mark it can't timing
recording at the corresponding time . Blue means the alarm is invalid, red means
valid. Click ok button to save when finish it
Panel and remote operation: Switch the shift
Note:
1. The default time of alarm is 24 hours each day
2. Can also set the time of motion detection and video loss
3.6 PTZ
PTZ menu use for setting as 485 parameter, there are 4 protocols are available: b01,
Samsung, pelco -d and pelco-p
23
V1.1
Please refer to the attachment of ptz connection method.
3.7 PTZ Ctrl
PTZCtrl use for ptz controlling.
Control method:aspect . Focus. Lens .And supports the speed adjustment function.
Mouse operation: by the mouse right button to click the corresponding button
Panel and remote operation:Switch the shift cube by the left and right button, press
the enter button to make these function work .Click the stop button to exit directly
3.8 Log
Click log menu to enter log page, Select the relevant log type and start-end time, click search
button, then the system will get back to the relevant log information page
Logo Type :Alarms and Operation .
Support max 1024 piece log, it will cover the first log to record when exceeding.
3.9 System
3.9.1 Configure
24
V1.1
SystemàConfig provide the system config information, config including: Device ID,
AUTO switch, PIP config, VGA type. HDD overwrite etc.
Ø
Device ID:Choice for remote operation of equipment .
Ø
AUTO switch:Auto Switch with Time and Skip parameter, after setting ,Through
mouse clicks Auto switch shortcut icon button or by panel, QUAD button of remote
to start/stop the auto switch function .Auto switches is the corresponding picture
switch full screen automatically in the Time interval, choice skip button to skip the
no video input channel or not, select V to skip the no video input channel, select X
to display all channels pictures whatever video input or not
Ø
VGA resolution:select the corresponding resolution of monitor to set .
Ø
PIP Config:PIP Config is picture in picture function, with setting of background
and foreground access .The first selection frame is the foreground access number,
the second is the back ground access number Through mouse clicks PIP shortcut
icon button or by the PIP button of remote and panel to start PIP function .Click
the mouse right button or the Ch1~Ch4, QUAD button to exit PIP function
Ø
HDD overwrite: cover and not cover. Cover means it can continue to record when
HDD be full
3.9.2 Password
Ø
setting:Enable . Disable .Enable setting means to use password, disable setting
means to cancel password.
Ø
Time setting:if enable choosed, time is also need to setup, if disable choosed,
the settled time is invalid.
25
V1.1
Ø
Modify password:to modify password as per the instruction SystemàPassword
3.9.3Date&Time Setting
To setup date time as per the instruction SystemàDate Time
Note:it is not permit to modify time and date for recording(include manual .
Schedule. Motion detection and alarm).
3.9.4 Default
Default configuration:to default all Para as per the instruction System à Default,
3.9.5 Upgrade
To upgrade software as per the instruction SystemàUpdate, main board and panel
board are selectable.
Ø
main board
Copy update.img to USB:\,insert device USB into the port, then choose main
board from target.
Ø
panel board
Copy AP.bin toUSB: \,insert device USB into the port, then choose panel board
from target.
Ø
Logo
To upgrade logo by providing two photos for PAL and NTSC, setup names and
sizes as logo_p.jpg &logo_n.jpg and 720x576&720x480, copy them toUSB:\,insert
device USB into the port, then choose logo from target.
3.9.6Shutdown
u Operation:to shutdown . reset and logout as per the instruction SystemàShutdown
3.9.7About
u System version:to find system version as per the instruction SystemàAbout
26
V1.1
Chapter 4 Monitor
7 inch LCD monitor (16:9TFT LCD)
” to start
Note:only press“
9
1
2
3
4
8
7
5
6
1.direction(M)stands for menu;
4. function setup
7.time
2.power;
5. function setup
8.time setting
3.LED;
6. function setup
9. .time setting
● MENU:
Menu settings as below:
Image
volume
function
system
Description
time
Suggested value
1. BRIGHT
1 ~ 100
2. COLOR
1 ~ 100
3. CONTRAST
1 ~ 100
4. SHARPNESS
1 ~ 100
1.Press “MENU” to enter into setup interface
2.Press “←” “→” to select contents
27
V1.1
3.Press up and down can choose the segment;
l
Voice
1. Press Menu to choose Voice setting;
2. Press left and right to choose operation item;
l
Description
Suggested Value
VOLUME
1 ~ 100
Function setting
1. Press Menu to setting:Language . Calendar. Game;
2. Press up and down to choose segment;
3. Press left and right to choose operation item;
Item
1. LANGVAGE
Content
CHINESE. ENGLISH. DEUTSCH. FRANC. PORTUG ETC.
2. CALENDAR
3. GAME
l
16 : 9
System setting
28
4 ::3
V1.1
1. Press Menu to choose system setting:color system . Voice system. Game
2. Press up and down to choose segment;
3. Press left and right to choose operation item;
4. Press Menu to sign out system setting;
Item
Description
1. C.SYS
AUTO. PAL. PALN. NTSC. SECAM
2. CALENDAR
BG. DK. I. M. L
3. GAME
l
Time
1. Press Menu to choose time setting:Sleep . Time. Off time. On time
2. Press up and down to choose segment ;
3. Press left and right to choose operation item;
4. Press Menu to sign out system setting;
5. Menu will quit out automatically if without operation for 10 seconds.
Item
Description
1. SLEEP
0~240
2. TIME
-- : --
3. OFF TIME
-- : --
24 hours
24 hours
29
V1.1
4. ON TIME
-- : --
24 hours
Note: LCD Monitor is an extractable high-tech precise product.
Not allow you to touch screen when it’s working. In order to keep long life-time that
It’s better to close when there is no need for it over one hour.
Chapter 5 IE Operations
Please input server’s address to IE, after verification, and then go to main interface. Real
monitor, remote search, remote PTZ are only for you for setting in IE.
5.1 Requirements:
Please install DirectX9.0, then run it(It can be downloaded from internet)
Please select low rank for security level from IE options, and complete it.
5.2 Login
Please input IP address with port to IE(http://IP:Port), System will back to login menu, and
then insert user name: admin, and password(it’s the same password with server).It will back to
main screen after verification.(See picture as below) Real monitor and remote search are only
for you for setting in IE. If default port is 80, then only input IP address (http://IP).
DVR9004 Sever Default IP: 192.168.1.163, port: 80 like http://192.168.1.163
Picture 1 IE Main Screen
5.3 Real Monitor:
Click “Real-monitor “to enter main interface. It will remind you to install DirectX when first
entering the real time recording. (Pleas allow program pop up when system is going to block)
IE security level is available to set default after IE’s installation.
30
V1.1
Real Monitor Main Interface
Picture 2 Real Monitor Main Screen
Ø
Monitor:
31
V1.1
Picture 3 Real Monitor Operation
From the picture 3, we can select the above channel by mouse, and then you can
select CIF or Half D1 from resolution settings, and complete it at last.
Notice:Please keep the same resolution between server and IE, or the picture
will be abnormal.(Like as: server is CIF, client is Half D1, it will only have half
picture, or server is Half D1, client is CIF, it will have no picture, but only have data
transmission)
Ø
Stop:
Please select required channel, and click “stop” to stop it.
Ø
Zoom:
Please select required channel, and click “switch” to enlarge or minimize it. .
Ø
Monitor after resolution settings:
If your server’s resolution changes, IE’s resolution also need to change, then it will
work properly. Please check the following steps:
1.
Select required channel
2.
Click “stop”
3.
Click “resolution” to choose same resolution with server
4.
Click “play” to start monitor
Notice:All the operations in this menu are only for selected channel.
5.4 Remote Search
Click “Remote Search” to enter main interface, as picture 4 in the following. Input
search requirements, then click “search”, system will find your required record files. Search
requirements are: Channel No., Start Time, End Time, Record Type.
15 record files will be in one page, you are able to revise page number. Click “search”
to back to required page and click” playback” to play required record files.
Notice:Only can playback one record file in a time. Please close the current playback
window before starting a new record file.
32
V1.1
Picture 4 Remote Search
5.5 PTZ
PTZ is able to control in IE. Pleas do the settings in the selected channel.(Like direction
arrow, camera zoom and focus control)
You can press button continually to control PTZ until release mouse
Notice:Only with required PTZ parameters to control PTZ.
5.6 PTZ Setting
Click “PTZ Setting” to enter main screen as picture 5 as below:
Please select required channel number, then do the settings as required, and click “Ok” to
complete it.
33
V1.1
Picture 5 PTZ Setting
5.7 IE DirectX Remove Tool
Chapter 6 Update
They are two ways for DVR update: SATA and USB. It’s recommended to choosing USB.
SATA is only for system errors that it can’t open operation menu.
l
l
Requirement:
1.
422/232 Converter, which support 115200 Baud rate
2.
SATA and Cable
3.
PC
4.
Sever Default IP Add:192.168.1.166
Operations:
1.
Default Baud rate is 115200, Data digits is 8,Odd and Even is No, Stop digits is 1,
Database is No, please check the details as the following picture:
34
V1.1
2.
Please according the following messages press “STOP” will enter boot loader
alternation interface as follows:
3.
Files for SATA Upgrade:
Put the upgrade files “update.img” in U: / & split tool “SplitImage.exe” in a same
content. Then running “SplitImage.exe”, there will be two files “fs.zip” & “linux2.zip” for
SATA upgrade.
4.
Downloading “fs.zip” file.
Ø
Delete primary file:under “boot loader” input command: del 6
Ø
Under “boot loader” input command:ft 6 romps 0x7f0C0000 0xd00000 -acz
35
V1.1
Ø
Switch to upgraded files under PC end command model, then input command: tftp
-i 192.168.1.166 put fs.zip
Notice: Please confirm DVR Board connected with PC.
5.
Download files “kernel”:
Ø
Delete primary file “kernel”: under “bootloader” input command: del 7
Ø
Under “boot loader” input command:ft 7 Linux 0x7f020000 0x8000 -aczx
Ø
Switch to upgraded files under PC end command model, then input command: tftp
-i 192.168.1.166 put linux2.zip
Notice: Usually only upgrade “fs.zip”.
6.
Upgrade “boot loader”(usually no need upgrade)
Ø
Under “boot loader” input command:mt
Ø
Switch to upgraded files under PC end command model, then input command::
tftp -i 192.168.1.166 put bootloader.bin
Ø
After files transfer done, Under “boot loader” input command:g.
Ø
Then according SATA prompt operate.
Notice: The system can’t off line after administer command “g”, otherwise can’t
start-up.
7.
Input boot under the command boot loader
8.
Operation step as follows::
36
l
SATA upgrade system
1.
Download “fs.zip”:
Ø
Delete primary file:under “bootloader” input command: del 6
Ø
under “bootloader” input command:fx 6 romfs 0x7f0C0000 0xd00000 -acz
Ø
According super terminal TXD: select: “send” à “send files”choose files
“fs.zip”, then choose “Xmodem”protocol, then press send.
2.
Download files “kernel”:
Ø
Delete primary file “kernel”: under “bootloader” input command: del 7
Ø
under “bootloader” input command:fx 7 Linux 0x7f020000 0x8000 -aczx
37
Ø
According super terminal TXD: select: “send” à “send files”choose files
“linux2.zip” ,then choose “Xmodem”protocol, then press send.
3.
Upgrade “bootloader”:
( usually no need upgrade)
Ø
Under “bootloader” input command:mx
Ø
According super terminal TXD: select: “send” à “send files”choose files
“bootloader.bin”, then choose “Xmodem”protocol, then press send.
Ø
After files transfer done, Under “bootloader” input command:g
Ø
Then according SATA prompt operate.
Notice: The system can’t off line after administer command “g”,
otherwise can’t start-up.
4.
Key in boot at bootloader.
5.
Operate step as follows:
Notice: sending the files need relatively with the flash command
otherwise will be error.
Send files sketch map:
Download “Kernel” sketch map:
38
Steps of FS Download
Close all the IE, it can uninstall ActiveX file when run CAB-Uninstall.exe, open
“IE---internet---attribute” and delete the temporary files
Appendix 1. DVR Back panel
39
Illumination:
1. Audio in: audio sign input ( audio1,2,3,4);
2. Video in: video sign input( video1, 2,3,4);
3. Audio out: audio sign output, can connect with all kind of audio equipments;
4. Video out: video sign output, can connect with TV, MONIOTR and so on;
5. VGA: VGA port system: such as MONITOR( 9004/9004EVH/9004EVTS have no
VGA function);
6. S-VIDEO: can connect with S port output system;
7. PS/2: support PS/2 mouse;
8. USB: support USB2.0, to backup and upgrade;
9. NET: internet port;
10. N/P : Means PAL or NTST ;
11. DC 12V: for adaptor;
12. ON/OFF: the power switch.
Appendix 2. Alarm, Relay, PTZ ports contents
Illumination:
1.
GND:grounding wire;
2.
ALMIN 1-4:1-4CH alarm in;
3.
NO1. COM1:Relay port, it will turn-on when working;
4.
485T+. 485T-: 422/485 sending port;
40
5.
485R+. 485R-: 422/485 receiving port;
6.
If connect With PTZ, then only need connect with 485T+. 485T-;
7.
If connect with cluster port, then need to connect with 485R+. 485R- .
485T+ and 485T-.
41
Appendix 3. 9004 CBR Stat.
Stat. way:
Choose one more complex but quiet picture, and then do the pictures setup that on
the server. And can browse each channel through IE browser, Stat. the CBR through DU
Meter. Choose one channel to count the yard speed under the condition of full frames.
Picture quantity
Media types
Resolution
CBR(mbps)
Low
Video
CIF
2.0
Low
AV
CIF
2.1
Middle
Video
CIF
2.47
Middle
AV
CIF
2.53
High
Video
CIF
2.7
High
AV
CIF
2.72
Low
Video
HD1
3.2
Low
AV
HD1
3.3
Middle
Video
HD1
3.98
Middle
AV
HD1
4.01
High
Video
HD1
4.4
High
AV
HD1
4.5
Appendix 4. Panel illumination
DVR-9004/9004V/ 9004SV
DVR-9004EVH/9004EVTS
42
Number
1
2
3
Key
name
Appellation
CH 1-4
Figure bond
1-4
QUAD
MENU
Four picture
Main menu
Function illumination
1.
2.
it shows four channels on the screen
when backup by time, it shows four channels
backup,
1.
2.
3.
to switch to QUAD
to start-up picture switch automatically
when backup by time, it used to resume to
QUAD
1.
2.
enter the menu
When motion detects setup, it means pitch
on or cancels the area.
When time setup condition, it means pitch on
or cancel the area.
when backup, it means display /cancel
“control bar function”
3.
4.
4
REC
Recording
5
PLAY
Play/Forward
6
means enter” manual recording interface”
1.
2.
Start-up backup searches function
when backup, it’s to adjust displaying speed
1.
when backup, it’s to adjust reverse displaying
speed
when edit, it used to delete current character
REW
2.
7
8
PAUSE
Pause
STOP
when backup, it’s used to pause / resume display
key to stop
1.
2.
3.
9
OK
Ok
4.
5.
6.
10
Direction
key
UP
1.
2.
3.
4.
5.
6.
means OK
Means pitch on or cancel check box
Means display the recording files that
choosed.
Means finished edit
Means SAVE and EXIT when MOTION
DETECTS SETUP.
Means EXIT, when do the TIME SETUP.
to switch functions setup in the menu
can edit different numerical value
change password
choose documents when searching
move cursor position when motion detect
setup or time setup
Used to switch to channel 1 when browse the
website or backup by time.
43
11
DOWN
1.
2.
3.
4.
5.
6.
12
LEFT
1.
2.
3.
4.
5.
6.
13
RIGHT
1.
2.
3.
4.
5.
6.
to switch functions setup in the menu
can edit different numerical value
change password
choose documents when searching
move cursor position when motion detect
setup or time setup
Used to switch to channel 2 when browse the
website or backup by time.
to switch functions setup in the menu
can edit different numerical value
change password
choose documents when searching
move cursor position when motion detect
setup or time setup
Used to switch to channel 3 when browse the
website or backup by time.
to switch functions setup in the menu
can edit different numerical value
change password
choose documents when searching
move cursor position when motion detect
setup or time setup
Used to switch to channel 4 when browse the
website or backup by time.
Appendix 5 Remote controller illumination
44
Number
Key
name
1
Appellation
UP
Function illumination
1.
2.
3.
4.
5.
6.
2
DOWN
1.
2.
3.
4.
5.
6.
Direction
3
LEFT
1.
2.
3.
4.
5.
6.
RIGHT
4
1.
2.
3.
4.
5.
6.
1.
2.
3.
5
OK
OK
4.
5.
6.
to switch functions setup in the menu
can edit different numerical value
change password
choose documents when searching
move cursor position when motion detect
setup or time setup
Used to switch to channel 2 when browse the
website or backup by time.
to switch functions setup in the menu
can edit different numerical value
change password
choose documents when searching
move cursor position when motion detect
setup or time setup
Used to switch to channel 2 when browse the
website or backup by time.
to switch functions setup in the menu
can edit different numerical value
change password
choose documents when searching
move cursor position when motion detect
setup or time setup
Used to switch to channel 3 when browse the
website or backup by time.
to switch functions setup in the menu
can edit different numerical value
change password
choose documents when searching
move cursor position when motion detect
setup or time setup
Used to switch to channel 4 when browse the
website or backup by time.
means OK
Means pitch on or cancel
means display the recording files that
choosed
Means finished edit
Means SAVE and EXIT when MOTION
DETECTS SETUP.
Means EXIT, when do the TIME SETUP.
45
1.
2.
6
MENU
Menu
3.
4.
1.
2.
3.
7
ESC
Cancel
4.
5.
8
PTZ
PTZ
1.
2.
3.
9
PIP
Two pictures
10
REC
Recording
11
PLAY
Play/Forward
12
PAUSE
Pause
13
14
QUAD
Four picture
CH 1-4
Figure bond
1-4
enter the menu
When motion detects setup, it means pitch on
or cancels the area.
When time setup condition, it means pitch on
or cancel the area.
when backup, it means display /cancel
“control bar function”
Means EXIT from the menu
means EXIT from backup
when MOTION DETECT SETUP, it means
cancel area that choosed and EXIT
To switch to QUAD when preview one picture
to START-UP “automatically picture switch”
when browse QUAD
start-up PTZ function
To choose / cancel area when motion detect
area setup.
To choose /cancel area when time setup..
star-up PIP function
means enter” manual recording interface”
1.
2.
Start-up backup searches function
when backup, it’s to adjust displaying speed
when backup, it’s used to pause / resume display
1.
2.
3.
to switch to QUAD
to start-up picture switch automatically
when backup by time, it used to resume to
QUAD
1.
2.
it shows four channels on the screen
when backup by time, it shows four channels
backup,
Solution to DVR’s problem
Question: why no pictures display on the monitor?
Answer:
u
Check the video output line, does it well-connected? And does the monitor is
AV input?
u
If the monitor is well-connected, please check whether the main control board is
with power, if not, please checks the adaptor (power) output.
Question: why it shows no signal on the monitor of some channel?
Answer:
46
u
Check the video output line; you can try to insert the line twice. And rectify the
video line
u
If sometimes there have video, sometimes have no video, that is the problem of
the video output line, you can change another video output line
Question: why have no audio signal
Answer
u
Check the audio line; you can try to insert the line twice. And rectify the audio
line
u
If sometimes there have audio, sometimes have no audio, that is the problem of
the audio output line, you can change another audio output line
u
check does the audio output switch is “ ON”
u
Check does the video port that corresponding to audio is switch to single
picture display.
Question: why client software can not use
Answer:
u
check does the INTERNET SETUP is correct: for example if you choose multi
display protocol, then the IP address of client software and server is using the
same subnet mask and net sect; if you choose UDP protocol, must make sure
the Gateway setup is correct and active.
u
make sure the IP address is the unique one that on the internet
Question: why the remote controller can not control the menu, while the picture is ok but
can control through the panel menu?
Answer:
u
That is because the battery with weak electricity, you can change another new
battery.
Question: after long time working, the LCD has no pictures or maybe other problems.
Why?
Answer:
u
Please you can renew system and re- startup the DVR.
If with other questions or problems, please contact with our company directly, we
will try our best to help you.
47


