1
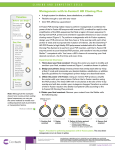
STT-03
(Simultaneous Tension/Torsion ’03)
User’s Manual
And Program Information
By: Darren Hartl
Undergraduate Research
Assistant
Table of Contents
Table of Contents............................................................................................................ 2
Introduction .................................................................................................................... 3
General Familiarization................................................................................................... 4
Hardware Setup:.......................................................................................................... 4
Software Setup:........................................................................................................... 6
Program Features ............................................................................................................ 8
Display: ...................................................................................................................... 8
Manual Motion: .......................................................................................................... 8
File Saving:................................................................................................................. 8
Test Specimen Property Setup:.................................................................................... 9
Motion Control: .......................................................................................................... 9
Initialization:............................................................................................................. 10
Pure Torque: ............................................................................................................. 10
Auto Stop (Non-Cyclic): ........................................................................................... 10
Graphing:.................................................................................................................. 11
Cyclic Options: ......................................................................................................... 12
Procedures .................................................................................................................... 13
Non-Cyclic: .............................................................................................................. 13
Cyclic: ...................................................................................................................... 15
Appendix I – SubVI Descriptions.................................................................................. 16
Introduction
The following manual and informational document is intended for use with the
STT-03 (Simultaneous Tension/Torsion ’03) LabView program as utilized in the Material
Structures Lab of the Aerospace Department, Texas A&M University. This program was
written over the course of five months, from January 16th, 2002 until May 14, 2002,
under the direction of the Dr. Dimitris C. Lagoudas.
The Adelaide Testing Machines frame for which this program was written was
purchased in the spring semester of 2000. At that time, Dr. Lagoudas and others were
interested in running material tests during which both tension and torsion could be
applied simultaneously. The Adelaide Testing Machine Model D100MK was the most
economical choice for this endeavor.
However, upon delivery of the machine it became evident that the software
employed to operate the machine was far outdated. It could be used in old DOS mode
only, and therefore was incompatible with all newer versions of Microsoft Windows. In
addition, the software had few features, including the inability to run the machine in
simultaneous tension/torsion. Because of this, several students attempted to complete a
Windows-based LabView program that would be capable of operating the machine in all
required modes. Due to additional responsibilities on these past students, the process of
converting the original machine and software to a more usable configuration remained
undone. Dr. D.C. Lagoudas finally decided in January of 2002 to dedicate a student to
this task alone. With very few other responsibilities to hinder the operation, the program
was completed in a few months. This document describes the method by which the
machine is controlled, describes several features of the program, and gives step-by-step
instructions on how to accomplish several different testing tasks.
General Familiarization
Hardware Setup:
The D100MK Model ATM (Adelaide Testing Machines) testing frame is a screwdriven materials testing machine with the additional capability of applying a torque to a
specimen by rotation of the lower grip. The frame has a tension/compression load limit
of 22,000 lb. with a torque limit of 10,000 in-lb. Two DC servo electric motors power
the machine. Axial displacement is provided via a gearbox and belt drive which are used
to drive two upright ball screws. Rotational motion utilizes the second DC motor driven
through a gearbox. The machine runs on 120 VAC.
Figure 1-First Simultaneous Tension/Torsion Test
Both axial and rotational motion are controlled by a Galil Motion Control DMC
card installed in the operating PC. Instructions are downloaded to this card via
commands written in Galil DMC format. Data is then sent from the card to the
applicable encoders at each DC motor, thus controlling both the speed and displacement
of the motion. It should be noted that there are no problems with simultaneous motion
using the Galil setup. In its present configuration, the maximum axial speed of the
machine is 3 inches/minute. The maximum rotational speed is 3 revolutions/minute.
However, the machine includes a high/low speed clutch which can be used to vary the
crosshead speed. This clutch is presently disconnected. The maximum axial
displacement is a condition of the maximum buffer size of the Galil DMC card. Any
entered displacement above 1.5 in will be ignored, and an arbitrary value will be sent to
the Galil card in its place.
Loads are read from the two transducers located on the moving crosshead. This
signals each passed through separate signal conditioner channels located in the white box
mounted on the side of the machine. These conditioners were assembled by ATM, and
require the 5 volts provided by the ATM card, which is separate from the Galil DMC
card but also located in the operating PC. However, the load signals output from the two
channels are not independent of each other. Specifically, any applied torque will induce
“crosstalk,” therefore causing the axial load to indicate a non-existent (false) load. For
this reason, there is a “crosstalk factor” written into the software to eliminate this
undesirable condition.
Volts-to-load conversions for each transducer reading are accomplished via
interpolation of their respective calibration tables. These tables are stored in STT-03 as
array constants and can be altered as necessary. If the load readouts are suspected to be
faulty, these calibration constants may need to be updated. The original calibration file
printouts can be found along with this document in the ATM folder.
Besides the aforementioned hardware attributes which were mostly unchanged,
there were several alterations made to the setup of the machine. The silver box mounted
above the white box is the summary of these changes. Inside this box is a National
Instruments AMUX-64 Multiplexer Board. This board is capable of reading many signal
channels and passes the information directly to LabView. It is presently used to read
both load cell voltages, as well as the voltages across each manual motion switch and
signals from the motion limiter switches (safety switches) located on the frame. At this
time, the AMUX-64T channels are set up as follows:
Channel Number
0
4
5
6
16
17
24
25
Description
Axial/Rotation
Up/CW
Down/CCW
Slow/Fast
Safety Up
Safety Down
DC1 Ax Load
DC2 Tor Load
The channels are set up to be read differentially, thus providing the maximum accuracy
for the load cell readings. Even in this state, over 20 channels remained unused.
Switch voltages for the AMUX-64 board are obtained by splicing into the original
wiring of the white control box and reading the voltages across each original switch.
Voltage for the additional Axial/Rotational switch is obtained by “stealing” 5 V from an
unused output of the control box. Finally, the original, unneeded AC conditioners have
been disconnected. The old AC input terminals are now used to output the various switch
voltages to the silver control box. As a note, all wiring changes can be found in the blue
Adelaide Testing Machines Operating Manual.
Software Setup:
The operating program for the ATM testing frame is written in National
Instruments’ LabView 6i. This format allows for the greatest flexibility and
compatibility with the available hardware, and can be easily be used by students at all
levels. LabView permits seamless communication with the AMUX board, thus ensuring
accurate data acquisition from the frame. It also outputs data easily to the Galil DMC
terminal (via dlls), which is the only method by which motion commands are sent to the
frame.
NOTE: Because this LabView program runs many subVI’s simultaneously, it is
recommended that one particular Windows setup option be selected. Under
Control Panel > System > Advanced > Performance Options, “Background
Services” should be selected as opposed to “Applications” in the optimization
area. This ensures that equal priority is given to all areas of the LabView
program. Such a setting should be enabled for all LabView uses as recommended
by National Instruments
A separate program was written for both cyclic and non-cyclic testing. This
allowed for the simpler non-cyclic program to be used easily without the complexity of
cyclic options (which will be described later). However, the foundations of each program
are identical. At the highest programmatic level is the main “sequence structure”. This
sequence allows for frame initialization and “Power On / Power Off” dialogs to occur
separately and at different times than the rest of the program. The bulk of the program is
within sequence frame 4. Included are three “while loops”, with no two ever running
concurrently. The top two are for axial and rotational manual movement. The third,
more complex loop controls all other movement of the frame, as well as all data
acquisition.
In the third loop, all load cell data is sampled in real time. It is then averaged over
five program iterations to reduce signal noise. This data is displayed and graphed on the
front panel, and can optionally be saved to files. The data output to the Galil card is set
by the various “Test Setup” fields of the STT-03 program. Motion commands are sent
when the “Start”, “Reverse”, or “Stop” buttons are pressed.
Program Features
Display:
Each program (cyclic or non-cyclic) is designed to use only one front panel
window. However, this requires that the operator must scroll horizontally in order to
utilize all features of the programs. At the bottom of each screen are pairs of letters (A-A
and B-B). These are to be used for guidance when scrolling to the proper setup and testrun positions.
Manual Motion:
Manual Motion can be accomplished by switching “Manual Motion” to ON. At
this point, all data acquisition operations are suspended, and either vertical are rotational
motion is selected accorded to the position of the silver toggle switch on the silver control
box. The selectors on the white control box are then used to control the speed and
direction of motion. Manual motion may then be cut off and data acquisition will
resume. .
File Saving:
Currently, a total of four text files will be saved for each test. This allows the
greatest accuracy (double precision). To analyze the data, each file most be opened in
Excel or similar program, and the data must then be combined. One load data file and
one displacement data file will be saved for both axial and rotational motion. All files
will have the same prefix, as determined by the “File Prefix” input field. Suffixes for
each of the saved files are as follows:
Axial Position
Axial Load
Torsional Position
Torsional Load
*ap.dat
*al.dat
*tp.dat
*tl.dat
Files are all saved in the D:/ drive within the “atmtests” folder. Always ensure that the
prefix assigned is original. Failure to do so will result in new data being appended to any
old file with the same prefix.
In addition, there are also several file sample rates. Users can select to save 30,
90, 260, or 530 data points per minute. 530 is the maximum that the program can allow.
Test Specimen Property Setup:
This selection generates a file which stores the date and time of the test run, as
well as the operators name, testing type, load limits, file names (as determined by the
“File Prefix” entry field), and specimen information. It also includes field for additional
notes.
Motion Control:
The motion of the ATM frame is controlled according to the inputs in each of the
speed and displacement fields. Because the displacement is often limited (stopped or
reversed) by load readings or operator input, displacement values that are intentionally
too high are commonly used. (Tests are often accomplished with a vertical and rotational
displacement of 1 inch and 6 radians respectively.) Direction of motion is dependent
only on the sign accompanying the displacement fields. Negative signs placed in the
speed field will be ignored. According to sigh convention, positive motion is that which
is upward and counter-clockwise. Motion will begin when either the “Start” or
“Reverse” buttons are pressed. For this reason, BEFORE PRESSING THE “START”
BUTTON, THE OPERATOR MUST ALWAYS ENSURE THAT THE PARAMETERS
IN THE “TEST SETUP” FIELDS TRULY REFLECT THE INTENDED MOTION OF
THE MACHINE.
Initialization:
The “Initialize” button is used to set up the program for proper operation. IT IS
VERY IMPORTANT THAT THIS BUTTON BE PRESSED BEFORE ANY TEST IS
RUN. IT MUST ALSO BE PRESSED IF THE ENTIRE PROGRAM HAS BEEN
STOPPED AND THEN RESTARTED. Its primary function is to zero the current frame
position. It also resets the step values for all iteration-dependent operations. Failure to
press “Initialize” after program restart will cause all iteration-dependent operations to
stagnate for a lengthy period of time. However, if “Initialize” is pressed at any time
during this stagnation, the stagnation will cease and the program will again run normally.
It might be noted that “Initialize” DOES NOT zero the load cells. This keeps users from
unintentionally zeroing the load cells at a high load. Zeroing is accomplished by way of
the “Zero Loads” button located below the loads reading.
Pure Torque:
The “Pure Torque” option allows for variable torque loading to be applied to a
specimen while the axial load remains constant. This can be used to keep the axial load
at zero, or at any other value entered in the applicable entry field. However, because the
program seeks and then maintains the given axial load, THE INDICATED REAL TIME
AXIAL LOAD MUST FIRST BE BROUGHT TO THE REQUIRED PURE TORQUE
AXIAL LOAD. This can be easily accomplished by using the Auto Stop option
(described below).
Auto Stop (Non-Cyclic):
This automatic stopping function is used to bring the load frame and test
specimen to a desired load before stopping motion in the given direction. The speed of
the motion will be determined b the standard speed input fields. Again, the displacement
settings should be set purposely high. Motion can be accomplished simultaneously, and
axial or rotational motion will stop individually when the respective load limit has been
reached. However, when entering the individual load limits, the “SET” button must be
pressed in order to save the new load limit value. Failure to do so will result in the field
being reset to the old value.
NOTE: The Auto Stop functions are restricted for use such that POSITIVE limits
must be reached through POSITIVE (upward or CCW) motion, and vice-versa.
Because of this, when attempting to bring the specimen back to zero load for any
reason, the operator must actually enter a stop load that is “past” zero. For
example, if the current load is 1000 lb, and the operator wishes to bring the load
to zero, the entered value must be -0.5 lb, -0.1 lb, or any other very small
negative value (Negative motion requires negative limit). If the current load is
–2500 lb, the operator must enter 0.5 lb or 0.1 lb (or some other small positive
value) in order to automatically stop the frame at (or very near) zero load.
Graphing:
STT-03 provides an output graph (load vs. displacement) for each of the
directions of motion. Graphing is accomplished by buffering many data points and
displaying them simultaneously. Because finite buffering is used, each graph can hold a
limited number of data points. For this reason, and to prevent the loss of plotted data
during lengthy tests, there are three graph resolution options. Each option provides a load
averaged over several data points. The highest resolution will display the most data
points and will update the most rapidly, but may begin to erase itself after the shortest
period of time. Again, this erasing is due to the buffer size of the graph. While the low
resolution can store the most data points on one screen, the 60-point average leads to
displayed data points that are slightly lagging behind the actual real time load value. The
resolution should be set depending on the needs of the operator. Resolution may also be
altered in the middle of a test. However, this will lead to a spike in the graph at the point
of resolution switch.
Graphs can also be cleared at any time. Lastly, there is an inverting option which
reverses the sign convention on the load and displacement axis.
Cyclic Options:
The separate cyclic program was written so that automated cyclic testing could be
easily accomplished. However, due to its many additional options, it was kept separate
from the original (simpler) STT-03 program. The chief differences in the cyclic program
are the upper and lower “switch” limits, and the ability to reverse motion when the limits
are reached. Reversing or stopping is selected with the upper “Cyclic Options” switch.
An additional reversing option is also available. This option either reverses immediately
when the first (axial or torsion) load is reached, or waits until both limits have been
reached. The upper and lower limits can be changed at any time provided that the load
readout (the current load of the specimen) is in between the limits. This allows for loops
of varying sizes to be created. Again, the “SET” button must always be used to enter
each limit or it will return to its old value. Of course, motion can always be reversed
manually by pressing the “Reverse” button. However, if only the “Reverse” button is to
be used, the simpler “non-cyclic” program can be used.
Procedures
Non-Cyclic:
This section includes a few procedures for use with the simpler “non-cyclic”
STT-03 program. Always use the “End Program” when all testing is complete.
Setting Up:
1) Scroll to the A-A sector of the front panel.
2) Before using manual motion to place the specimen, first press the “Initialize”
button to ensure that the various set up parameters of the frame have been set.
3) Press the “Zero Loads” button while there is no load on either transducer.
4) Switch ON “Manual Motion” and use the three switches on the control boxes
to jog the frame into position as needs. Position the specimen.
5) Switch OFF “Manual Motion.”
6) Press the “Initialize” button once more to zero the crosshead position.
Simple Test:
1) Set up the specimen.
2) Enter values for the axial and rotational speeds as well as their respective
displacements.
3) If saving, enter the “File Prefix” and select a file sample rate at this point.
4) Press “Setup” to create a test properties file.
5) Press the “Initialize button once more (unless you do not wish to zero the
crosshead position.)
6) Turn “Save Plot Data” ON.
7) Press the “Start” button.
8) Scroll to the B-B sector of the front panel. You can now clear the unneeded
setup data from the graph, set the resolution, or invert the graph as necessary.
9) Pressing “Stop” at any time will abort the test, while “Reverse” will reverse
the motion while maintaining the current speed.
10) At the end of the test, always turn “Save Plot Data” OFF.
Pure Torque:
1) Set up the specimen.
2) Select the file settings and create the test properties file as above.
NOTE: If a ZERO axial load will be used, steps 3-8 may be omitted
3) Determine the required CONSTANT axial load that will be present during the
torsion test, and enter this in the “Stop at Axial Load” entry field. Remember
to use the “SET” button.
4) Turn “Stop at Axial Load” ON.
5) Enter the required axial speed and a high axial displacement ONLY into their
respective input fields.
6) Press “Start”. Motion should cease when the required load is reached.
7) Turn “Stop at Axial Load” OFF.
8) Clear the axial displacement and axial speed fields to prevent accidental
motion.
9) Enter the required constant axial load into the “Pure Torque” entry field.
10) Turn “Pure Torque” ON. DO THIS ONLY IF THE INDICATED AXIAL
LOAD IS EQUAL TO OR VERY NEAR THE “PURE TORQUE” VALUE.
11) Enter the required rotational speed and displacement in their respective fields.
THE AXIAL ENTRY FIELDS SHOULD BE ZEROED.
12) Turn “Save Plot Data” ON.
13) Press “Start”.
14) As before, graphs may be manipulated and the “Stop” and “Reverse” buttons
may be used as needed.
15) When test has come to an end, turn “Save Plot Data” OFF.
Cyclic:
This section includes a few procedures for use with the cyclic STT-03 program. Always
use the “End Program” when all testing is complete.
Cyclic Testing:
1) Set up the specimen.
2) Select the file settings and create the test properties file as above.
3) Select “Stop at Limits” from the first “Cyclic Options” switch.
4) Select an axial and torque value as needed that lie IN BETWEEN the required
upper and lower limits for each direction. Use the “SET” button to sve these
values.
5) Turn “Switch at Axial Load” and “Switch at Torsional Load” ON.
6) Enter the required axial speed and a high axial displacement into their
respective input fields. Do the same for the rotational fields.
7) Press “Start”. Motion should cease when the required loads are reached.
8) Select “Reverse at Limits” from the first “Cyclic Options” switch.
9) Select preference from the second “Cyclic Options” switch.
10) Enter upper and lower limits for both the axial and torque loads.
11) Enter the required axial and rotational speeds into their respective fields. Be
sure that the entered displacements are higher than will be needed.
12) Turn “Save Plot Data” ON.
13) Press “Start”.
14) To change the upper and/or lower limits, first be sure that the indicated loads
are BOTH between BOTH the original upper and lower limits. Failure to do
may result in premature reversal.
15) Reversal may also be accomplished at any time via the “Reverse” button.
16) When test has completed, press the “Stop” button.
17) Turn the “Save Plot Data” OFF.
Appendix I – SubVI Descriptions
Following are descriptions for the SubVI’s written specifically for STT-03. These
descriptions do not include standard, NI-provided SubVI’s.
* - denotes files provided By Galil Motion Control (www.Galilmc.com).
Axgraph2.vi
Contains all clearing, inverting, and buffering operations used
to display the axial force vs. displacement graph
Axloadstop.vi
Monitors the displayed axial load against the “Stop at Axial
Load” entry. Issues the STX (Stop axial motion) command to
the Galil controller when the current load exceeds the stop
load.
Axloadstoplow.vi
Used in cyclic testing version of STT-03. Acts as
“Axloadstop.vi”, but monitors the lower limit (as opposed the
upper.)
Close.vi*
Closes communication with the DMC terminal.
Command.vi*
Sends commands to the Galil controller.
Filepref.vi
Applies the “File Prefix” entry to four output file paths.
Filerate.vi
Selects the rate (samples/min) at which data points are saved.
Getloads.vi
Queries the AMUX board for the load voltages, converts
voltages to load via interpolation of calibration constants, and
applies the “crosstalk” elimination constant to provide pure
axial and torque load readouts.
Init.vi
Initializes the DMC controller. Sets the current postion at 0,0.
Sets the axial and rotational gains, deadbans, etc.
Initfile.vi
Sets up and creates the test properties file which contains test
time and date, operator name, test specimen info, etc.
Loadavg.vi
Takes an average of both axial and torque loads over five
program iterations.
Manmovehor.vi
Monitors the manual motion switches and sends rotational
motion commands to the Galil card accordingly.
Manmovevert.vi
Monitors the manual motion switches and sends axial
motion commands to the Galil card accordingly.
Open.vi*
Opens communication with the Galil card.
Overload.vi
Monitors the current loads on the test specimen to ensure that
overload does not occur. An axial load greater than 22,000 lb
or a torque load greater than 10,000 in-lb will cease motion.
Puretourque.vi
When selected, monitors changes in the axial load. If such a
change is detected, axial motion commands are issued to
counteract this load.
Pwroff.vi
Causes dialog box which reminds user to cut off ATM frame.
Pwron.vi
Causes dialog box which reminds user to turn on ATM frame.
Reset.vi*
Resets the DMC controller card.
Revtestb.vi
Reverses test motion when “Reverse” is pressed. Reverses by
issuing motion commands that are the opposite of the
commands previously issued.
Rotgraph2.vi
Contains all clearing, inverting, and buffering operations used
to display the rotational force vs. displacement graph.
Rotpos.vi
Queries the Galil controller and obtains the current rotational
position.
Safestop.vi
Monitors the upward and downward motion limiter switches
on the frame. Aborts motion when either has been tripped.
Sendit.vi*
Used in conjunction with “command.vi” to send commands
to the Galil card.
Starttestb.vi
Starts the test motion with the “Start” button is pressed.
Test is started according to the motion parameters set by the
operator.
Torloadstop.vi
Monitors the displayed axial load against the “Stop at Axial
Load” entry. Issues the STY (Stop torque motion) command
to the Galil controller when the current load exceeds the stop
load.
Torloadstoplow.vi
Used in cyclic testing version of STT-03. Acts as
“Torloadstop.vi”, but monitors the lower limit (as opposed the
upper.)
Vertpos2.vi
Queries the Galil controller and obtains the current axial
position.
Write2file.vi
Writes axial and rotational displacement and load data to four
separate files at a set rate when “Save Plot Data” is turned
ON.