1
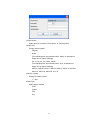
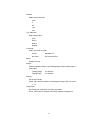
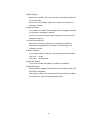
KM-3650w
Print Server
User’s Manual
Index
1.
REMOTE WEB MANAGER ........................................ 2
1.1.
2.
Remote Web Manager ........................................................................... 3
1.1.1.
System Configuration...................................................................................3
1.1.2.
Log-on to Remote Web Manager .................................................................3
CLIENT PREPARATION ............................................. 4
2.1.
Movement Confirmation ......................................................................... 5
2.1.1.
3.
Connection to Remote Web Manager ..........................................................5
OPERATION OF REMOTE WEB MANAGER .......... 8
3.1.
Function ............................................................................................... 10
3.1.1.
Spooler.......................................................................................................10
3.1.2.
Device ........................................................................................................ 11
3.1.3.
Web Client..................................................................................................12
3.1.4.
Filter ...........................................................................................................21
3.1.5.
Lpr..............................................................................................................29
3.1.6.
Option ........................................................................................................37
3.1.7.
Log .............................................................................................................46
3.1.8.
User ...........................................................................................................48
3.1.9.
System .......................................................................................................52
3.1.10. Scan...........................................................................................................58
4.
APPENDIX ................................................................ 63
4.1.
Trouble Shooting .................................................................................. 64
4.1.1.
Before conclude to malfunctioned ..............................................................64
4.1.2.
Output is not done from the Plotter.............................................................64
4.1.3.
Remote Web Manager does not start up....................................................65
1
1. Remote Web Manager
2
1.1.
Remote Web Manager
Remote Web Manager is a utility to monitor the operation, managing, organization and
configuration of Print Server. It is possible to operate all the functions related to Print
Server.
1.1.1.
System Configuration
Following Hardware or System Configuration is necessary in order to use Remote Web
Manager comfortably.
(1) Hardware and System, which are conforming to the system requirement of
Internet Explorer 6.0 SP1.
(2) Install Java software.
Download and install Java software (Free Download).
It is available at SUN Microsystems web site. (http://java.com/en/download/)
Remote Web Manager screen is not indicated correctly if Java Software is not
installed.
(3) Resolution of Display should be 1024 x 768 dots or more.
1.1.2.
Log-on to Remote Web Manager
Remote Web Manager allows browsing only for the registered user on Print Server.
Therefore, when it is connected at the first time through browser of remote client,
log-on dialog is always indicated to confirm the user.
3
2. Client Preparation
4
2.1.
2.1.1.
Movement Confirmation
Connection to Remote Web Manager
Connect to Remote Web Manager using Web browser.
(Our configuration is shown below as an example. Address is just the example.)
(1) Start up [Internet Explorer].
Make Internet temporary file setting to the browser.
Click [Tools] – [Internet Options].
Click [Settings] on “General” tab.
Select [Every visit to the page], and then click [OK].
5
Click [OK] on [Internet Option], and then close this.
Input [http://Server Name or Server IP Address] to the address.
(2) When User confirmation image is indicated at the first access from
browser, put the following User Name and the Password of shipping.
User Name administrator
Password
(blank)
6
If it is connected properly, the following Page is indicated.
This page is the main (Home) page of Remote Web Manager. Register this
page to [favorite] of Internet Explorer. Direct access to this main page becomes
available.
If above shown operation is done without problem, preparation of Remote Web
Manager is done.
For the further detail, refer to [Operation method of Remote Web Manager].
7
3. Operation
of
Remote Web Manager
8
Remote Web Manager is a Utility in order to operate, manage, create
configuration and observe background of Print Server. It is possible to
operate anything that is related to Print Server.
To use Remote Web Manager, usable functions differ by logging on as an
administrator or logging on as an added user. If the user has the right of
administrator, it is possible to use all of the functions of Remote Web
Manager.
9
3.1.
3.1.1.
Function
Spooler
Observe the situation of Printing job and control it in this Main configuration.
When user with the right of administrator logged on, it is possible to operate
such as reprinting or erasing against the entire job. In case of ordinal user,
operation against own job is possible.
z Printed queue
This is the list what was printed.
If it is double clicked, detail information of this job is known.
z Wait queue
This is the job list that is waiting for print.
z Pause queue
This is the job list, which is temporary held to print.
10
z Error queue
This is the job list what error occurred. If it is double clicked, it is
possible to know the detail of the error.
3.1.2.
Device
When Device Button is clicked, the Status of the device is indicated.
It is possible to observe the status of Printer with this dialog.
Roll 1
The kind of paper in the front of paper deck is indicated.
Roll 2
The kind of paper in the rear of paper deck is indicated.
11
3.1.3.
Web Client
Web Client can output the print job that consists of multiple image files.
Follow the instruction below.
1) Select the plot file.
Supported file types are HPGL, Calcomp, TIFF, CALS, BMP and PDF (option).
2) Click “Output Job (Step 2)” tab.
12
3) When “Print” button is clicked, output starts.
Setting
Items
[General Settings]
Job Count:
Number of Set Job
Collate:
Check
Collate ON
No check
Collate OFF
Density:
Set Image Density
When input value is smaller, it shows lighter image, and vice versa.
1 - 13
Header:
When Header output is set to effective, following information is
printed out at the leading or trailing edge of output.
Printed information:
Requester, Job Number, File Name, Date/Time
When button is clicked, following dialog is popped up.
13
Output Queue
Select print job is send to “Print queue” or “Pause queue”.
Output Size:
Usually select original
Original
Scale
(The following size are indicated when “Metric” is selected on
Paper Unit of Option Settings)
A0, A1, A2, A3, A4, 24x36, 36x48
(The following size are indicated when “Inch” is selected on
Paper Unit of Option Settings)
ANSI-A, ANSI-B, ANSI-C, ANSI-D, ANSI-E, ARCH-A, ARCH-B,
ARCH-C, ARCH-D, ARCH-E, 30 x 42
Number of prints:
Setting of number of print
1 – 999
Media Type:
Select paper material
Plain
Vellum
Film
Any
14
Rotation:
Select output direction
Auto
0
90
180
270
Tray Selection:
Select paper deck
Auto
Deck 1
Deck 2
Bypass
Cut Mode:
Select cut mode of paper
Check
Standard Cut
No check
Synchronized Cut
Mirror:
Setting of mirror
Margin:
Add a preferable margin to the leading edge and the trailing edge of
output print.
Leading Edge
0 to 500mm
Trailing Edge
0 to 500mm
Image Shift:
Set if Image is required to shift from the center.
When “Set” button is clicked, the following dialog is popped up.
15
Image placement is selectable up-shown 9 locations.
When fine adjustment of the location is necessary, enter the value to
move to Offset X and Y.
When X is set as a positive, it moves to right. (-500 to 500)
When X is set as a negative, it moves to left. (-500 to 500)
When Y is set as a positive, it moves to upper. (-500 to 500)
When Y is set as a negative, it moves to lower. (-500 to 500)
16
[HP-GL/2 Settings]
Pen Width Mode:
Grayscale Mode:
When “Values in file” is selected, the values of Pen Width and
Grayscale specified in the file are effective, respectively.
When “User defined values” is selected, the values of Pen Width
and Grayscale effect according to the following User setting,
respectively.
Pen Size:
When “User defined values” is selected, a value of Pen Size
specified by User is effective.
Grayscale:
When “User defined values” is selected, a value of Grayscale
specified by User is effective.
RTL Raster Density:
Adjust the density of HPGL RTL Image.
However, it is effective only if RTL image data are multi-valued
image.
Enable Clipping:
When this is checked, the value of HPGL PS command is taken as
the size of image.
When this is not checked, image size is taken from minimum to
maximum of image.
17
Enable Pen Scale
The pen width is also enlarged or reduced if output size is enlarged
or reduced.
If you do not check it, the pen width is same even if output size is
enlarged or reduced.
Cut and feed by SP/SP0:
Multi-files are outputted since SP/SP0 command is recognized as a
boundary of multi-drawing if it is included in the file.
18
[Calcomp Settings]
Pen Width Mode:
Grayscale Mode:
When “Values in file” is selected, the values of Pen Width and
Grayscale specified in the file are effective, respectively.
When “User defined values” is selected, the values of Pen Width
and Grayscale effect according to the following User setting,
respectively.
Pen Size:
When “User defined values” is selected, a value of Pen Size
specified by User is effective.
Grayscale:
When “User defined values” is selected, a value of Grayscale
specified by User is effective.
Synchronization Setting:
A preferable Synchronization can be specified by either
Automatically Setting or Manual Setting.
Step Setting:
The output size of image can be changed by setting of a step
number.
Usually, set to 800 for Step Setting.
19
[Original Size Compensation Settings]
It is possible to specify the magnification of x-direction and y-direction
independently for each media.
The print size can be compensated caused by media expansion and
contraction by this.
When “Enable Original Size Compensation” is checked, the
magnification compensation is effective for each media
(Plain/Vellum/Film).
It is possible for each media to compensate the magnification of
x-direction (Width) and y-direction (Length) independently.
The compensation ranges are guaranteed between 90% and 110%.
(0.1% step)
20
3.1.4.
Filter
[Output method]
The method to use ftp, and output.
Ex.
ftp “IP Address”
(Logon to ftp
User Name: auto 、Password: print )
bin
cd ftp01
put “File name”
Supported file types are HPGL, Calcomp, TIFF, CALS, BMP and PDF (option).
Setting
Items
[General Settings]
21
Output Size:
Usually select original
Original
Scale
(The following size are indicated when “Metric” is selected on
Paper Unit of Option Settings)
A0, A1, A2, A3, A4, 24x36, 36x48
(The following size are indicated when “Inch” is selected on
Paper Unit of Option Settings)
ANSI-A, ANSI-B, ANSI-C, ANSI-D, ANSI-E, ARCH-A, ARCH-B,
ARCH-C, ARCH-D, ARCH-E, 30 x 42
Number of prints:
Setting of number of print
1 – 999
Media Type:
Select paper material
Plain
Vellum
Film
Any
Rotation:
Select output direction
Auto
0
90
180
270
Tray Selection:
Select paper deck
Auto
Deck 1
Deck 2
Bypass
22
Cut Mode:
Select cut mode of paper
Check
Standard Cut
No check
Synchronized Cut
Mirror:
Setting of mirror
Margin:
Add a preferable margin to the leading edge and the trailing edge of
output print.
Leading Edge
0 to 500mm
Trailing Edge
0 to 500mm
Density:
Set Image Density
When input value is smaller, it shows lighter image, and vice versa.
1 - 13
Image Shift:
Set if Image is required to shift from the center.
When “Set” button is clicked, the following dialog is popped up.
23
Image placement is selectable up-shown 9 locations.
When fine adjustment of the location is necessary, enter the value to
move to Offset X and Y.
When X is set as a positive, it moves to right. (-500 to 500)
When X is set as a negative, it moves to left. (-500 to 500)
When Y is set as a positive, it moves to upper. (-500 to 500)
When Y is set as a negative, it moves to lower. (-500 to 500)
Note: If some of the above items are modified, click [Enter]
button, and register the configuration.
24
[HP-GL/2 Settings]
Pen Width Mode:
Grayscale Mode:
When “Values in file” is selected, the values of Pen Width and
Grayscale specified in the file are effective, respectively.
When “User defined values” is selected, the values of Pen Width
and Grayscale effect according to the following User setting,
respectively.
Pen Size:
When “User defined values” is selected, a value of Pen Size
specified by User is effective.
Grayscale:
When “User defined values” is selected, a value of Grayscale
specified by User is effective.
RTL Raster Density:
Adjust the density of HPGL RTL Image.
However, it is effective only if RTL image data are multi-valued
image.
Enable Clipping:
When this is checked, the value of HPGL PS command is taken as
the size of image.
When this is not checked, image size is taken from minimum to
maximum of image.
25
Enable Pen Scale
If you check “Pen Scale”, the pen width is also enlarged or reduced
if output size is enlarged or reduced.
If you do not check it, the pen width is same even if output size is
enlarged or reduced.
Cut and feed by SP/SP0:
When this is checked, multi-files are outputted since SP/SP0
command is recognized as a boundary of multi-drawing if it is
included in the file.
Note: If some of the above items are modified, click [Enter]
button, and register the configuration.
26
[Calcomp Settings]
Pen Width Mode:
Grayscale Mode:
When “Values in file” is selected, the values of Pen Width and
Grayscale specified in the file are effective, respectively.
When “User defined values” is selected, the values of Pen Width
and Grayscale effect according to the following User setting,
respectively.
Pen Size:
When “User defined values” is selected, a value of Pen Size
specified by User is effective.
Grayscale:
When “User defined values” is selected, a value of Grayscale
specified by User is effective.
Synchronization Setting:
A preferable Synchronization can be specified by either
Automatically Setting or Manual Setting.
Step Setting:
The output size of image can be changed by setting of a step
number.
Usually, set to 800 for Step Setting.
Note: If some of the above items are modified, click [Enter]
button, and register the configuration.
27
[Original Size Compensation Settings]
It is possible to specify the magnification of x-direction and y-direction
independently for each media.
The print size can be compensated caused by media expansion and
contraction by this.
When “Enable Original Size Compensation” is checked, the
magnification compensation is effective for each media
(Plain/Vellum/Film).
It is possible for each media to compensate the magnification of
x-direction (Width) and y-direction (Length) independently.
The compensation ranges are guaranteed between 90% and 110%.
(0.1% step)
Note: If some of the above items are modified, click [Enter]
button, and register the configuration.
28
3.1.5.
Lpr
Setting of Lpr
Standard setting
Individual setting is possible to save for every 16 setting value entry.
Set all of the following directories, push [Enter] button and package register all the
setting of directories.
Use following Printer name corresponding to each setting value entry.
Entry
Printer name
1
lpr01
2
lpr02
3
lpr03
4
lpr04
5
lpr05
6
lpr06
7
lpr07
8
lpr08
9
lpr09
10
lpr10
11
lpr11
12
lpr12
13
lpr13
14
lpr14
15
lpr15
16
lpr16
Example:
If you wish to output Entry 1 from Windows OS:
[ lpr –S 192.168.100.10 –P lpr01 –o l “output file name” ]
Supported file types are HPGL, Calcomp, TIFF, CALS, BMP and PDF (option).
29
Setting
Items
[General Settings]
Output Size:
Usually select original
Original
Scale
(The following size are indicated when “Metric” is selected on
Paper Unit of Option Settings)
A0, A1, A2, A3, A4, 24x36, 36x48
(The following size are indicated when “Inch” is selected on
Paper Unit of Option Settings)
ANSI-A, ANSI-B, ANSI-C, ANSI-D, ANSI-E, ARCH-A, ARCH-B,
ARCH-C, ARCH-D, ARCH-E, 30 x 42
Number of prints:
Setting of number of print
1 – 999
Media Type:
Select paper material
Plain
Vellum
Film
Any
30
Rotation:
Select output direction
Auto
0
90
180
270
Tray Selection:
Select paper deck
Auto
Deck 1
Deck 2
Bypass
Cut Mode:
Select cut mode of paper
Check
Standard Cut
No check
Synchronized Cut
Mirror:
Setting of mirror
Margin:
Add a preferable margin to the leading edge and the trailing edge of
output print.
Leading Edge
0 to 500mm
Trailing Edge
0 to 500mm
Density:
Set Image Density
When input value is smaller, it shows lighter image, and vice versa.
1 - 13
Image Shift:
Set if Image is required to shift from the center.
When “Set” button is clicked, the following dialog is popped up.
31
Image placement is selectable up-shown 9 locations.
When fine adjustment of the location is necessary, enter the value to
move to Offset X and Y.
When X is set as a positive, it moves to right. (-500 to 500)
When X is set as a negative, it moves to left. (-500 to 500)
When Y is set as a positive, it moves to upper. (-500 to 500)
When Y is set as a negative, it moves to lower. (-500 to 500)
Note: If some of the above items are modified, click [Enter]
button, and register the configuration.
32
[HP-GL/2 Settings]
Pen Width Mode:
Grayscale Mode:
When “Values in file” is selected, the values of Pen Width and
Grayscale specified in the file are effective, respectively.
When “User defined values” is selected, the values of Pen Width
and Grayscale effect according to the following User setting,
respectively.
Pen Size:
When “User defined values” is selected, a value of Pen Size
specified by User is effective.
Grayscale:
When “User defined values” is selected, a value of Grayscale
specified by User is effective.
RTL Raster Density:
Adjust the density of HPGL RTL Image.
However, it is effective only if RTL image data are multi-valued
image.
Enable Clipping:
When this is checked, the value of HPGL PS command is taken as
the size of image.
When this is not checked, image size is taken from minimum to
maximum of image.
33
Enable Pen Scale
If you check “Pen Scale”, the pen width is also enlarged or reduced
if output size is enlarged or reduced.
If you do not check it, the pen width is same even if output size is
enlarged or reduced.
Cut and feed by SP/SP0:
When this is checked, multi-files are outputted since SP/SP0
command is recognized as a boundary of multi-drawing if it is
included in the file.
Note: If some of the above items are modified, click [Enter]
button, and register the configuration.
34
[Calcomp Settings]
Pen Width Mode:
Grayscale Mode:
When “Values in file” is selected, the values of Pen Width and
Grayscale specified in the file are effective, respectively.
When “User defined values” is selected, the values of Pen Width
and Grayscale effect according to the following User setting,
respectively.
Pen Size:
When “User defined values” is selected, a value of Pen Size
specified by User is effective.
Grayscale:
When “User defined values” is selected, a value of Grayscale
specified by User is effective.
Synchronization Setting:
A preferable Synchronization can be specified by either
Automatically Setting or Manual Setting.
Step Setting:
The output size of image can be changed by setting of a step
number.
Usually, set to 800 for Step Setting.
Note: If some of the above items are modified, click [Enter]
button, and register the configuration.
35
[Original Size Compensation Settings]
It is possible to specify the magnification of x-direction and y-direction
independently for each media.
The print size can be compensated caused by media expansion and
contraction by this.
When “Enable Original Size Compensation” is checked, the
magnification compensation is effective for each media
(Plain/Vellum/Film).
It is possible for each media to compensate the magnification of
x-direction (Width) and y-direction (Length) independently.
The compensation ranges are guaranteed between 90% and 110%.
(0.1% step)
Note: If some of the above items are modified, click [Enter]
button, and register the configuration.
36
3.1.6.
Option
Option function of device is available by clicking Option Setting Button. Only
user who has the right of administrator can change this setting.
General Settings
Printer:
Setting of printer model to use
Paper Unit:
Setting of Metric(ISO) / Inch(ANSI) of paper size
Output Mode:
Setting of Output Mode
Mode1: Case of output by printer driver
Print an image to the paper which is same in size.
image size = paper size
Case of output by Filter (FTP and LPR), Web Client,
Print Client KM
Print an image to the paper which is same or large.
1. image size = paper size
2. image size < paper size
(not print when output size is selected standard size)
37
Mode2: Print an image to the paper which is same or large enough.
The Paper Priority in Selection:
1. image size = paper size
2. image size < paper size
Mode3: Print an image, if any paper exists.
The Paper Priority in Selection:
1. image size = paper size
2. image size < paper size
3. image size > paper size
Tolerance:
Even if output file size is larger than regular paper size, it is possible
to output on its regular size, up to the value of tolerance. When
paper size is selected, even if output file size is little bit larger than
regular paper size, it is possible to output on the paper or regular
size by changing the value of tolerance due to the allowance value
is expanded”
Screening:
Change print pattern of gray area. Adjust the gray area, which is
described in grid, by changing the number of lines and the angle. It
is possible to change the pattern of gray by changing the number of
lines per inch (lpi) and the angle of line”
Resolution Conversion:
The image can be printed with high quality if you check this item
when the resolution is not 600dpi (any resolution except for 600dpi).
However it takes longer time than usual until printing is finished.
Number of prints:
Setting of number of print
1 – 999
Rotation:
Select output direction
Auto
0
90
180
270
38
Tray Selection:
Select paper deck
Auto
Deck 1
Deck 2
Bypass
Cut Mode:
Select cut mode of paper
Check
Standard Cut
No check
Synchronized Cut
Mirror:
Setting of mirror
Density:
Set Image Density
When input value is smaller, it shows lighter image, and vice versa.
1 - 13
Image Shift:
Set if Image is required to shift from the center.
When “Set” button is clicked, the following dialog is popped up.
Image placement is selectable up-shown 9 location.
When fine adjustment of the location is necessary, put the value to
move to Offset X and Y.
39
When X is set as a positive, it moves to right. (-500 to 500)
When X is set as a negative, it moves to left. (-500 to 500)
When Y is set as a positive, it moves to upper. (-500 to 500)
When Y is set as a negative, it moves to lower. (-500 to 500)
Note: If some of the above items are modified, click [Enter]
button, and register the configuration.
40
HPGL Settings
Output setting of HPGL file is done.
When “HP-GL/2” tab is clicked, following dialog is popped up.
Setting items
Pen Width Mode:
Grayscale Mode:
When “Values in file” is selected, the values of Pen Width and
Grayscale specified in the file are effective, respectively.
When “User defined values” is selected, the values of Pen Width
and Grayscale effect according to the following User setting,
respectively.
Pen Size:
When “User defined values” is selected, a value of Pen Size
specified by User is effective.
Grayscale:
When “User defined values” is selected, a value of Grayscale
specified by User is effective.
RTL Raster Density:
Adjust the density of HPGL RTL Image.
However, it is effective only if RTL image data are multi-valued
image.
41
Enable Clipping:
When this is checked, the value of HPGL PS command is taken as
the size of image.
When this is not checked, image size is taken from minimum to
maximum of image.
Enable Pen Scale
If you check “Pen Scale”, the pen width is also enlarged or reduced
if output size is enlarged or reduced.
If you do not check it, the pen width is same even if output size is
enlarged or reduced.
Cut and feed by SP/SP0:
When this is checked, multi-files are outputted since SP/SP0
command is recognized as a boundary of multi-drawing if it is
included in the file.
Enable LA Setting:
If you check “Enable LA Setting”, line processing is fixed as below.
Line Ends:
Round
Line Joins:
Rounded Join
Enable MC Setting:
If you check “Enable MC Setting”, MC0/MC1 is validated.
Enable RP Setting:
RP Command is validated, and Number of print setting on both FTP
and LPR is invalidated.
This setting is valid on the outputs from FTP and LPR but invalid on
the outputs from Print Client KM and Web Client.
42
Halftone Screening:
Check “Enable MC Setting:” and this function is validate.
Select a preferable one between Screening 1 to Screening 5.
The proper image is available in the halftone image of HPGL file by
this.
Note: Select “Not Use” when you are satisfied with existing image.
Note: If some of the above items are modified, click [Enter]
button, and register the configuration.
Calcomp Settings
Output setting of Calcomp file is done.
When “Calcomp” tab is clicked, following dialog is popped up.
43
Setting items
Pen Width Mode:
Grayscale Mode:
When “Values in file” is selected, the values of Pen Width and
Grayscale specified in the file are effective, respectively.
When “User defined values” is selected, the values of Pen Width
and Grayscale effect according to the following User setting,
respectively.
Pen Size:
When “User defined values” is selected, a value of Pen Size
specified by User is effective.
Grayscale:
When “User defined values” is selected, a value of Grayscale
specified by User is effective.
Synchronization Setting:
A preferable Synchronization can be specified by either
Automatically Setting or Manual Setting.
Step Setting:
The output size of image can be specified by setting of a step
number.
Usually, set to 800 for Step Setting.
Note: If some of the above items are modified, click [Enter]
button, and register the configuration.
44
Original Size Compensation Settings
It is possible to specify the magnification of x-direction and y-direction
independently for each media.
The print size can be compensated caused by media expansion and
contraction by this.
Setting items
It is possible to specify the magnification of x-direction and y-direction
independently for each media.
The print size can be compensated caused by media expansion and
contraction by this.
When “Enable Original Size Compensation” is checked, the
magnification compensation is effective for each media
(Plain/Vellum/Film).
It is possible for each media to compensate the magnification of
x-direction (Width) and y-direction (Length) independently.
The compensation ranges are guaranteed between 90% and 110%.
(0.1% step)
Note: If some of the above items are modified, click [Enter]
button, and register the configuration.
45
3.1.7.
Log
Check the account log or the system log.
Account Log tab
In this Account log setting, term of Account information that is registered on
Account log is indicated, and the volume. Delete the contents of Account log also.
46
System Log tab
Select any of the latest 8 kinds of system log on “Generation Number”.
Click Download to down load the selected system log.
47
3.1.8.
•
User
Password
48
•
User Admin
Add User
Create a new user account. Click on "Add User" to display this dialog box.
* User Name can contain up to 20 uppercase or lowercase characters
except for the following:
/ \ [ ] : ; | = , + * ? < > A user name cannot consist solely of periods ( . ) and
spaces.
(50 user maximum)
49
Properties
Display the properties of a selected user account.
Delete
Delete the selected user account.
* administrator cannot be deleted.
Add Group
Create a new Group account. Click on "Add Group" to display this dialog
box.
50
Properties
Display the properties of a selected Group.
Delete
Delete the selected Group.
51
3.1.9.
System
Modify all the functions related to system management of Print Server in
this system dialog. Only the user who has the right of administrator can
modify.
Server Control tab
Reboot
Reboot Print Server through browser. If it is done from
Client, it is necessary to finalize the browser of client.
52
Spooler Control tab
Manage of printed jobs
Automatically delete the jobs when the number of jobs in 'Printed
Queue' has exceeded the specified number.
Empty Spooler
Remove all the data of queue that was spooled on Print Server
Spooler.
53
Spooler Setting
When “Load Paper” starts, it is spooled to the last queue of print waiting,
after a certain period later. (It becomes halt as it is, normally.)
Server Setting tab
Day and Time
Match Server’s time and date with client’s.
54
Network Setting
Set server's network configuration
Controller name:
Use DHCP server:
IP address:
Subnet mask:
Gateway:
DNS server:
55
License tab
License Item
KM-3650w
Option License items
Scan System 1
PDF
CGM
56
System Information tab
Version:
Indicate Print Server Version
57
3.1.10.
Scan
This chapter explains how to download the scan image files to client PC.
Get Scan File tab
Specify a folder where desired scan image files are located in.
Between BOX 1 to 6 correspond to Scan Folder 1 to 6 in Operation Panel.
BOX 1: Scan Folder 1
BOX 2: Scan Folder 2
BOX 3: Scan Folder 3
BOX 4: Scan Folder 4
BOX 5: Scan Folder 5
BOX 6: Scan Folder 6
58
To open any Scan Folder requires a password.
Enter it in the window shown below.
(Default P/W:0000)
Scan image files are listed.
Select a file, Click Download File.
59
Click Save if the window shown below appears.
The file name and destination can be changed at your option.
Two or more files can be selected at a time.
In this case the files will be packed together and compressed as a zip file.
Scan image files are stored in KM-3650w for 72 hours, and are subsequently
deleted.
60
Folder Setting tab
Each Scan Folder's name can be changed at your option.
Maximum number of letters available for Scan Folder’s name is 16.
"Input Password when browse Scan Folder" and "Input Password when scanning"
can be defined with the respective checkboxes.
Click Config Password to change the password.
61
Scan to FTP tab
Specify the destination for Scan to FTP.
BUTTON 7 and 8 correspond to FTP 1 and 2 in FTP Folders' names.
Each FTP Folder's name can be changed at your option.
Maximum number of letters available for FTP Folder’s name is 12.
"Input Password when scanning" can be defined with its checkbox.
Click Config Password to change the password.
62
4. Appendix
63
4.1.
Trouble Shooting
4.1.1.
Before conclude to malfunctioned
z
Read Users Manual, confirm if the contents of obstacle is the limited item.
z
Select the closest phenomenon from the following items, and confirm if the
operation is correct.
4.1.2.
Output is not done from the Plotter.
Major causes of no output from the Plotter are:
z
Remote Web Manager is not started up.
z
Network between Print Server and Client is physically down.
z
Network between Print Server and Client is logically down.
z
Output configuration of Client machine is not set properly.
As shown above. Check the following items.
(1) Perform the test print through Print Server. Confirm if Printer is ready to
print in this case. If test print is done properly, confirm if Print Server and
Printer is connected properly.
(2) Check if network cable is connected properly. If output was done without
any problem previously, there is a possibility that network connection
between Print Server and client has a problem. Confirm that network is
physically correct at first. Check if cables around hub and network support
are connected properly, and check the power source of them.
(3) Check if network service is proper. If those are connected properly, there is
a possibility that network service is not done properly. Check used protocol
(such as TCP/IP or Apple Talk), or network setting of Print Server. Confirm
that plotter and client are connected properly to network using such as
PING through Print Server. If they are correct, check if Print Server and
connected printer are possible to watch from Client. After this, check if
output is possible or not from the other client.
(4) Check if printer driver is installed properly. If not, printer driver is not set
properly. Confirm individual client following the setting of users manual, if
the setting is properly done.
(5) In case there are two or more printers, confirm if Print Server is set at as an
ordinary use printer from the client side, or Print Server is not set to use.
64
4.1.3. Remote Web Manager does not start up
The causes that Remote Web Manager does not start up is:
z
Print Server is not started up
z
Network between Print Server and client is physically down.
z
Network between Print Server and client is logically down.
z
Network configuration of Print Server is not properly set.
z
Network configuration of client machine is not properly set.
As shown above. Check the following items.
(1) Check if network cable is connected properly. Confirm if network is
physically correct. Check if cables around hub and network support are
connected properly, and check the power source of them.
(2) Check if network service is proper. If those are connected properly, there is
a possibility that network service is not done properly. Remote Web
Manager is working on the web browser that is used TCP/IP protocol.
Confirm to the network manager if TCP/IP of client machine is properly set,
such as installation of TCP/IP service, IP address of client machine,
gateway or masking of sub-net.
(3) Confirm if Web browser is used at Internet Explorer 6.0 SP1.
Remote Web Manager is confirmed its operation using Internet Explorer
version 6.0 SP1 or later. When other browser than this is used, there is a
possibility that indication is not indicated properly.
65
Print Server User’s Manual
2006.3 Rev. 1.0
The Copyright Act protects this manual.
It is prohibited to copy or duplicate all or a part of this manual without permission.
66