Transcript
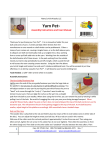
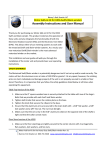
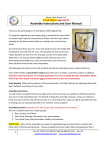
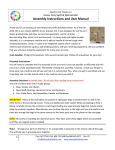
Nancy’s Knit Knacks LLC
__________________________________________________
Heavy Duty
Cone Winder™
User Manual
Heavy Duty Cone
Winder™
Thank you for purchasing our Heavy Duty Cone Winder. This unit is built on our Heavy Duty Ball Winder
platform and it will allow you to wind cones of yarn as well as balls (up to a certain size).
Instructions:
Please follow the ball winder instructions for setting up the unit. Since the Small Diameter Spindle is part of
this unit, you need to know how to best use the unit with that spindle mounted so please review the attached
section concerning Small Diameter Spindle use. To remove a spindle, loosen the set screw in the collar first.
O-rings
There are 2 O-rings provided with the kit. These are used to take up the slack in the cone when fitting a cone to
the Small Diameter Spindle (SDS). The Clear o-rings is used for the cones we sell (5 are included). The Black oring is used for cones that measure 1-3/16” to 1-1/4” inside diameter at the top of the cone.
The O-rings are simply inserted onto the thicker
portion of the spindle, about halfway up from the
bottom. They will stay in place when you are
inserting and removing cones. If they shift in
position, simply adjust them. The clear o-ring is
used with our cones.
Using theKnob/stopper assemblies
When winding onto the cones which are provided, you will use the clear o-ring and the knob with the smallest
stopper. You simply insert the cone onto the SDS and then screw the knob/stopper thru the top of the cone
and into the threaded metal inset in the top of the SDS. Do not over tighten the knob but do make it such that
the cone will not turn easily. If the stopper you are using does not fit properly then try another one.
When starting to wind, snugly wrap the yarn around the middle of the cone a few times in the direction of the
winding action (verify winding action by turning the handle or running the motor). Thereafter, as you wind the
yarn it should adhere to the cone surface and not slip. When done making the cone, unscrew the knob and
remove it from the cone and lift the cone off of the SDS.
Attach yarn to the cone by simply wrapping the yarn around the middle of the cone a few times. Be sure to
wrap it in the same direction that you will be winding yarn onto the cone.
Questions? Please visit our website or email or call us . Plus, watch our videos on Youtube.com that pertain
to this product and our Yarn Pet Cone holders which work great with this product.
1
Cary, NC 27518 USA 800-731-5648 Fax 866-445-4371 Rev.01
[email protected] www.nancysknitknacks.com