1
Part No. 09564-3, Rev A
December 1995
Page 1 of 8
MODULUS 9 -48VDC ENCLOSURE
Documentation Update
Overview
Introduction
This document contains update information for the -48 Volt direct-current (VDC)
Modulus 9 equipment enclosure. The Modulus 9 was previously available only in
alternating-current (AC) models.
Warning!
Only qualiÞed service personnel should perform the procedures described in this
notice. Use of these procedures by unqualiÞed personnel could result in personal
injury or equipment damage, and could jeopardize your warranty and maintenance
agreement.
Safety
The enclosures are approved in accordance with the following standards. Installation
as an ofÞce machine or an item of information technology equipment must comply
with these standards.
Compliance with Safety Standards
Standard
-48VDC Modulus 9
EN 60950:1992
Yes
EN41003
Yes
UL 1950
Yes
CSA C22.2, No. 950
Yes
IMPORTANT
The Modulus 9 enclosureÕs input voltage must be supplied by a Safety
Extra-Low Voltage (SELV) Isolated Secondary or Battery Circuit source.
09564-3 A
Part No. 09564-3, Rev A
December 1995
Page 2 of 8
Modulus Package
Contents
The Modulus 9 -48VDC shipping carton contains:
Tools Needed
The following tools and supplies are required for procedures in this notice:
¥ The Modulus 9 enclosure
¥ The Modulus 9 and 21 Installation and Operation Guide
¥ This document
Remove the parts and store the carton for later re-use. If parts are missing, contact
your Motorola ISG Customer Support representative.
¥
¥
¥
¥
Grounding wrist strap
Straight-blade screwdriver
Crimper
Multimeter
Part No. 09564-3, Rev A
December 1995
Page 3 of 8
Installing a Modulus 9 -48VDC Enclosure
Assembling an
Enclosure
The Modulus 9 is shipped from the factory in one of these ways:
Positioning an
Enclosure
The Modulus 9 can be positioned as follows:
Installing an
Enclosure
Install the enclosure as follows. Refer to the Modulus 9 and 21 Installation and
Operation Guide for general enclosure information.
¥ Unassembled, with a power supply
¥ Assembled, containing product cards and backplanes, Þller panels, and a power
supply module
Determine which way your enclosure was shipped. Follow the appropriate
instructions in the installation procedure below.
¥ On a ßat surfaceÑa tabletop or bench
¥ On a shelf in a standard 19-inch electrical-equipment rack
Determine which way your enclosure will be positioned. Follow the appropriate
instructions in the installation procedure below.
Warning!
Before beginning the installation procedure, ensure that the electrical power source
is disconnected from input wires to be connected to the Modulus.
Installing a Modulus 9 -48VDC Enclosure
Step
Action
1
Position the enclosure on:
¥ A ßat surface, for standalone operation
¥ An equipment-rack shelf, for rack-mount operation
Note the key, taped inside the front door, as shown in Figure 2. You can
lock the enclosure to prevent unauthorized access.
2
If the enclosure is empty, install communications-product backplane(s)
in it, as described in the Modulus 9 and 21 Installation and Operation
Guide, Chapter 3.
3
IMPORTANT
At the rear of the enclosure, ensure that the Power switch is in the OFF
(left) position.
4
At the rear of the enclosure, remove the terminal cover by unscrewing
the captive screw and pulling up and out (Figure 1).
Part No. 09564-3, Rev A
December 1995
Page 4 of 8
Installing a Modulus 9 -48VDC Enclosure
Installing a Modulus 9 -48VDC Enclosure (continued)
Step
Action
5
Obtain UL/CSA approved power cables and connectors with insulated,
crimp-on terminals. The power cables must be rated for at least 8A
input current. Use cable harnesses and terminal-connector assemblies
that conform to applicable electrical codes.
6
Connect the primary power input wires to the terminals marked
-48V A(-) and -48V Return (+). Bend the wires to the right, so that they
will trail through the terminal coverÕs right slot when you replace it.
7
IMPORTANT
Connect the ground wire to the terminal marked Chassis Ground ( ).
8
Optionally, connect the second set of input wires to the terminals
marked -48V B(-) and -48V Return (+). In this case, the
-48V Return (+) terminal accepts two wires.
9
Optionally, connect an alarm mechanism to the alarm-relay terminals,
marked 5 and 6.
10
If you connected an alarm mechanism in the step above, set the
rear-panel Failure Output switch to one of these options:
¥ FAIL=OPEN: Alarm-relay contacts 5 and 6 are open when the
power supply module fails
¥ FAIL=SHORT: Alarm-relay contacts 5 and 6 are shorted when the
power supply module fails
11
Replace the terminal cover as follows:
a) Trail the wires through the coverÕs right slot.
b) Hook the coverÕs tabs into the Modulus rear-panel holes.
c) Engage and tighten the captive screw until it is snug.
12
Connect the power cables to the SELV power source.
13
Apply power to the enclosure.
14
Set the circuit breaker switch, marked Power, to the ON (right) position.
15
From the front of the Modulus, note the LEDs, visible between the fan
blades (Figure 2). The LEDs show DC-voltage and cooling-fan status:
¥ When the LEDs are green, the enclosure is operating OK.
¥ When an LED is off, a component is not OK. Refer to the
Installation Troubleshooting procedure at the end of this notice.
Part No. 09564-3, Rev A
December 1995
Page 5 of 8
Installing a Modulus 9 -48VDC Enclosure
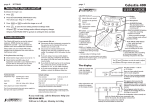
Figure 1 shows the Modulus 9 -48VDC enclosure rear panel.
2: -48V Return
3: Optional -48V Input
1: Primary -48V Input
4: Chassis Ground
Fan or Power Failure Terminal
C
wer Failure Terminal
Trail
throug
of Term
Captive Sc
Terminal Cover
Circuit Breaker Switch
OFF (open) ON (closed)
Failure Output
Rocker-Switch
+5VDC
Common
Ground
+12VDC
-12VDC
Test Terminals
Figure 1. -48VDC Modulus 9 Enclosure, Rear View
The rear-panel terminal connectors function as follows.
Rear-Panel Terminal Connectors (Left to Right)
This Terminal...
6
5
4
3
2
1
Connects to the:
Fan or power failure relay
Fan or power failure relay
Chassis ground
Optional, redundant -48VDC input
-48VDC return
Primary -48VDC input
Part No. 09564-3, Rev A
December 1995
Page 6 of 8
Installing a Modulus 9 -48VDC Enclosure
Figure 2 shows the Modulus 9 -48VDC enclosure front view.
Front View
Key, taped inside
front door
DC Output St
Input Voltage Status LED
Fan Status LED
Figure 2. -48VDC Modulus 9 Enclosure, Front View, Status LEDs
Part No. 09564-3, Rev A
December 1995
Page 7 of 8
Troubleshooting a -48V Modulus 9 Enclosure
Check the enclosure for proper operation as follows. Refer to Figures 1 and 2.
Troubleshooting a Modulus 9 -48VDC Enclosure
Step
Action
1
From the front of the Modulus, note the LEDs, visible between the fan
blades (Figure 2). The LEDs show component status:
¥ When the LEDs are green, the enclosure is operating OK. No
troubleshooting is needed.
¥ When the left LED is off, there may be a problem with the input
voltage, or the LED itself. Check the power source.
¥ When the upper right LED is off, there may be a problem with the
output voltage, or the LED itself.
¥ When the lower right LED is off, there may be a problem with the
cooling fan, or the LED itself.
If an LED is off, continue with this procedure.
2
Check the circuit breaker switch (Figure 2). Ensure that it is in the ON
(right) position.
3
From the front of the Modulus, note the fan blades. When power is
applied to the Modulus, the blades should rotate. If they do not, replace
the power supply module. Refer to the Modulus 9 and 21 Installation
and Operation Guide for details.
4
From the rear of the Modulus, with power applied to the unit, test the
power outputs with a multimeter, as follows:
a) Connect the multimeterÕs negative (-) probe to the Common
Ground (Comm) terminal and the positive (+) probe to the +5V
terminal. The meter should read about +5V.
b) Connect the multimeterÕs negative (-) probe to the Comm terminal
and the positive (+) probe to the +12V terminal. The meter should
read about +12V.
c) Connect the multimeterÕs negative (-) probe to the Comm terminal
and the positive (+) probe to the -12V terminal. The meter should
read about -12V.
If any power outputs are not correct, replace the power supply module.
Refer to the Modulus 9 and 21 Installation and Operation Guide for
details.
Part No. 09564-3, Rev A
December 1995
Page 8 of 8
Troubleshooting a -48V Modulus 9 Enclosure
Troubleshooting a Modulus 9 -48VDC Enclosure (continued)
Step
5
Action
From the rear of the Modulus, with power removed from the unit, test
the resistances with a multimeter, as follows. For all connections, the
meter should read ¥ W.
IMPORTANT
Ensure that power is removed from the unit by disconnecting the wires
from terminals 1, 2, and 3, and by setting the POWER switch to the
OFF (left) position.
Connect the multimeterÕs negative (-) probe to the:
a) Comm terminal, and the positive (+) probe to the +5V terminal
b) Comm terminal, and the positive (+) probe to the +12V terminal
c) Comm terminal, and the positive (+) probe to the -12V terminal
d) +5V terminal, and the positive (+) probe to the +12V terminal
e) +5V terminal, and the positive (+) probe to the -12V terminal
f) +12V terminal, and the positive (+) probe to the -12V terminal
If any resistance readings are not ¥ W, contact Motorola ISG Customer
Support. Contact information is listed at the back of this document.
6
Test the input voltage at the power source. If it is not within
specifications, have it corrected.
7
If the Modulus still does not operate correctly, contact Motorola ISG
Customer Support. Contact information is listed at the back of this
document.
PostScript error (--nostringval--, --nostringval--)