1
Publication: BI-IOM-009A
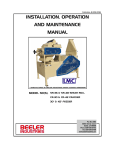
INSTALLATION, OPERATION
AND MAINTENANCE
MANUAL
*
* MANUFACTURED BY BEELER INDUSTRIES UNDER LICENSED AGREEMENT
MODEL NO(S). PH-48 & PH-72 PREHULLER
P.O. Box 380
4664 Kiernan Court,
Salida, CA 95368
Phone: 209-545-0740
Fax 209-545-0768
www.beelerindustires.com
BEELER INDUSTRIES
Publication: BI-IOM-009A
IMPORTANT SAFETY INFORMATION
Before installing, operating or maintaining this machine you must read and understand the contents of
this manual. Failure to do so may result in equipment damage, injury or death.
Antes de la instalación, funcionamiento o mantenimiento de este equipo debe leer y comprender el
contenido de este manual. El no hacerlo puede resultar en daño al equipo, lesiones o la muerte.
Safety Labels
Lock Out / Tag Out
Throughout this manual and on the machine,
safety labels have been placed to bring attention
to characteristics of this equipment that warrant
particular awareness.
There are potential
hazards on any device and care should be
exercised whenever installing, operating or
maintaining any equipment.
It is the user's responsibility to ensure that proper
LOCK OUT / TAG OUT procedures are
implemented throughout the facility.
Follow
your facilities Lock Out/Tag Out procedures.
Prior to any maintenance, service or cleaning of
any equipment it should be locked out and
tagged out from all potential sources of energy
(electrical, pneumatic, hydraulic, mechanical,
etc.) Failure to do so will endanger the user and
others and may lead to damage, severe injury or
even death.
Ensure that all original labels are maintained in
good condition. In the event that labels are
rendered illegible contact Beeler Industries for
replacement labels.
Danger:
Indicates an imminently
hazardous situation, which, if
not avoided, will result in
death or serious injury. This
signal word is to be limited to
the most extreme situations.
Caution:
Indicates a potentially
hazardous situation, which, if
not avoided, may result in minor
or moderate injury. It may also
be used to alert against unsafe
practices.
Warning:
Indicates a potentiall y
hazardous situation, which, if
not avoided, could result
in death or serious injury.
Take the time to
be safe!
2
BEELER INDUSTRIES
Publication: BI-IOM-009A
SECTION 1
TABLE OF CONTENTS
GENERAL INFORMATION
SECTION 1 - GENERAL INFORMATION
1-1 Introduction
Thank you for purchasing an LMC Prehuller.
Your new prehuller is built to the highest industry
standards. Great care has been taken to design
and manufacture a high quality, low
maintenance product that is economical to use
and maintain.
1-1 Introduction
1-2 Contacting Beeler
Industries
1-3 Purpose and Scope
This manual is intended to assist in the
installation, operation and maintenance of your
prehuller. The instructions in this manual are
general in nature and apply to a variety of
models. Each situation dictates the need for any
special precautions, and it is the user's
responsibility to ensure that adequate safety
measures are employed in installation, operation
and maintenance. As always, follow good safety
practices around all equipment.
1-4 Receipt of Product
1-5 Precautions of Use and
Installation
SECTION 2 - OPERATION AND
MAINTENANCE
2-1 Operation and Adjustments
2-2 Lubrication
1-2 Contacting Beeler Industries
SECTION 3 - VIEWS AND PARTS LIST
Beeler Industries, Incorporated
3-1 Serial Number Location
3-2 Parts Location Drawing
3-3 Maintenance Record Sheet
Mail:
P.O. Box 380
Physical:
4664 Kiernan Court
Salida CA 95368
Main Office:
(209) 545-0740
Sales:
(209) 613-0407
Parts:
(209) 545-0740
Service:
(209) 613-0407
Fax:
(209) 545-0768
email: [email protected]
Website: www.beelerindustries.com
1-3 Purpose and Scope
This manual provides installation, operation and
maintenance procedures for standard prehuller.
Due to variations in design and manufacture for
unique customer needs, not all prehullers might
be covered. For special assistance, please
contact Beeler Industries Service for additional
information.
3
BEELER INDUSTRIES
Publication: BI-IOM-009A
SECTION 2
1-4 Receipt of Product
OPERATION &
MAINTENANCE
All shipments should be immediately
checked for proper product and quantity
upon receipt and inspected for any
visible defects or damage.
Any
discrepancies should immediately be
reported to Beeler Industries and the
freight provider. If installation is provided
by Beeler Industries, this inspection may
be performed by Beeler personnel.
2-1 Operation and Adjustment
The prehuller removes loose hulls from in-shell
by impacting the hull with a rotating beater bar
assembly called the porcupine.
Removable
grates below the porcupine allow product to pass
through as it is hulled.
Dust aspiration is
achieved by connecting the dust extraction hood
to the customer supplied air system.
1-5 Precautions of Use and Installation
Adjustment
1. Use only qualified personnel for
installation and wiring of the prehuller.
Personnel are required to be familiar
with the general use of required tools
for installation of this unit. Should you
require assistance in the installation,
Beeler Industries offers such a service.
Please contact our Service Department
for estimates and scheduling.
2.
There are two adjustable features on the
prehuller, the grates and the porcupine to grate
clearance.
Grates
The grates are available in three spacings and
two styles. (see figure 2.1) To change grates
follow these steps:
1. Lock out power per your facilities lock out
tag out procedure.
Lifting/moving/positioning: The
prehuller may be lifted with a fork truck
under the base angles. Secure
prehuller to forks to prevent tipping.
Move slowly and descend grades in
reverse. When moving prehuller with
crane use lifting straps and clevises on
the four lift ears provided.
2. Remove the grate access cover by flipping
the red handled over-center clamps outward
until the hold down bolt clears the cover
edge. Grasp cover with both hands and
slightly tip and pull back to slide the cover
off of the grate support bars.
3. Grate support bars are held in position by
the two levers on the sides of the machine
near the grate access end. (see figure 2.3)
These levers, depending on their
adjustment, may bind the tops of the grate
and hinder the grates movement. If this is
the case, then push on the lever and lift the
catch hook. Slowly remove pressure from
lever allowing the support bar to sag.
3. The standard motor specifications
provided are listed in table 1.1 unless
otherwise specified in the purchase
contract. All wiring must be run in
conduit and installed per local and state
code by a qualified electrician.
A
manual electrical lock-out for
maintenance must be provided by the
owner prior to operation. Installations
may include a customer provided
variable frequency drive
MODEL
HP
V/F/PH
rpm
PH-48
15
230/460/60/3
1200
PH-72
20
230/460/60/3
1200
TABLE 1.1
4. The grates are approximately 24" long and
are heavy. Slide the first grate outward
approximately 18" (see figure 2.3) and with
the help of an assistant lift the grate and pull
out the remaining portion.
Repeat for
remaining grate(s). To access the second
or third grate use rod with a hooked end to
slide toward opening. Note that there is a
spacer between the grate approximately
3/4" wide. (see figure 2.4) This spacer
should be used between all grates and on
both support bars.
MOTOR SPECIFICATIONS
4
BEELER INDUSTRIES
Publication: BI-IOM-009A
FIGURE 2.1
FIGURE 2.2
PREHULLER GRATES
PREHULLER END WITH ACCESS COVER REMOVED
5
BEELER INDUSTRIES
Publication: BI-IOM-009A
SUPPORT LEVER
FIGURE 2.3
PREHULLER GRATE PARTIALLY REMOVED
Porcupine clearance
1. Lock out and tag out per your
facilities procedure.
2. Remove belt guard cover on drive
end.
FIGURE 2.4 GRATE SPACER
3. Loosen four (4) motor mount nuts.
4. Turn motor adjuster
clockwise to loosen v-belts.
machine.
bolts
12. Turn adjuster bolt clockwise to
increase gap and counter
clockwise to decrease gap.
Measure gap from porcupine
beater bar end pointing down to
the grate surface. Ensure that the
adjuster bolt is fully engaged in the
nut welded to the bearing adjuster
plate.
5. Remove v-belts.
6. Mark the location of the face of the
driven sheave bushing on the
porcupine shaft with a felt marker
or scribe. This mark will be used
to relocate the bushing during
reassembly.
7. Remove 3 bolts in driven sheave
bushing and screw them into the
three threaded holes in the
bushing. Once bolt ends make
contact with sheave turn each bolt
1/2-1 turn alternately so that even
pressure is applied to the bushing.
This will extract the bushing from
the sheave.
13. Check gap between bearing
adjuster plate and adjuster bolt
bracket on grate access end.
Ensure that the gap on the drive
end is the same.
14. Tighten jam nuts
15. Reinstall components in reverse
order.
Adjust v-belts so that
approximately 3/8" deflection is
achieved mid way between the
sheaves by applying 10-12 lbs of
force perpendicular to the belt.
8. Remove bushing and sheave.
9. Repeat steps 6-8 for drive sheave.
10. Remove 5 belt guard backing plate
retaining bolts and remove backing
plate
11. Loosen 3/4" jam nut on bearing
adjusters at each end of the
6
BEELER INDUSTRIES
Publication: BI-IOM-009A
FIGURE 2.5 MOTOR MOUNT
FIGURE 2.7 V-BELT DRIVE
2-2 Lubrication
1. Ball bearings equipped with grease (zerk)
fittings should be manually lubricated with
one half (½) pump of Food Grade NLGI 2
grease every one hundred twenty (120)
hours of operation. Bearings without fittings
should be replaced after five thousand
(5000) hours of operation.
2-3 Repair Parts
Necessary repair and maintenance parts
can be obtained through Beeler Industries
directly by contacting our Parts
Department at (209) 545-0740 or through
your Beeler Sales representative. When
ordering, please supply the nameplate
serial number information located on the
Beeler red tag secured to the frame of the
Shear roll/cracker.
FIGURE 2.6 BUSHING REMOVAL
Refer to section 3-2 for part identifying /
locating and for common part listing and
order identification number. Contact our
service department for required parts not
identified on those pages.
7
BEELER INDUSTRIES
Publication: BI-IOM-009A
3.1 SERIAL NUMBER LOCATION
It is important to have the serial number
information when contacting Beeler
Industries regarding service information or
parts ordering. The number is stamped on
the identification plate located per the
illustration below.
SERIAL
NUMBER
FIG. 3.1 SERIAL PLATE LOCATIONS
8
BEELER INDUSTRIES
Publication: BI-IOM-009A
FIG. 3.2 PREHULLER ASSEMBLY
9
BEELER INDUSTRIES
Publication: BI-IOM-009A
SECTION 3,3
NOTES
10
BEELER INDUSTRIES
Publication: BI-IOM-009A
Non-Liability
The information contained in this manual has
been compiled by Beeler Industries with high
diligence to ensure correct information.
injuries of body or health is based on deliberate
or careless delinquency of Beeler Industries.
Beeler Industries does not assume liability for
eventually wrong conclusions and results arising
from this. The notes given in the manual describe
the most common fault reasons. But often there
are further reasons for existing faults, which
cannot be listed here, or there are further
sources of error, which are unknown yet. Beeler
Industries does not assume liability for failed or
unnecessary repair work. Beeler Industries does
not assume liability for appliance of data and
information, which either turn out as wrong, were
incorrectly described or faults, which by mistake
appeared during data compilation. Without
restriction of the above mentioned facts, Beeler
Industries does not assume liability for any loss
regarding profits, company value or any other,
also economic, loss arising from this.
No matter which legal justifications are present,
Beeler Industries is liable for compensation only
in case of intention, gross negligence and in
warranty of assured quality. Warranties of
assured qualities require the explicit written
statement.
Liability according to product liability law shall
remain unaffected. Beeler Industries reserves the
right of user’s contributory negligence argument.
Beeler Industries is not liable to pay
compensation for damages, which arise from
misusage of the subject matter of the contract,
even if Beeler Industries has been informed on
the possibility of this damage. The liability of
Beeler Industries is confined to the real price paid
for the product. Beeler Industries takes no liability
for damage or operating troubles arising from
non-compliance of this user manual and the
special safety precautions mentioned there. The
burden of proof is on the user of the device, that
he has paid attention to technical explanations,
notes on operation, equipment care as well as
maintenance and safety without exception. This
non-liability does not hold, if any damage from
11