1
Initial Setup
Setting Year
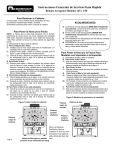
1. Remove top cover
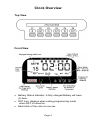
a. Locate buttons at the top of the clock labeled
P4, P5 and P6
i. P4 changes values down
ii. P5 changes values up
iii. P6 is used to save and select modes
2. Locate the program switch to the left of the finger
print reader. Move the switch to the down position,
you are now in setup mode
3. The mode indicator “01” will be flashing, press P6 to
select
4. Press P4 or P5 to select the current year
5. Press P6 to Save
Setting Month/Date
6. The mode indicator “02” will be flashing, press P6 to
select
7. Press P4 or P5 to select the current month
8. Press P6 to save
9. Press P4 or P5 to select the current date
10. Press P6 to save
Setting Time
11. The mode indicator “3” will be flashing, press P6 to
select
12. Press P4 or P5 to select the current hour
13. Press P6 to save
14. Press P4 or P5 to select the current minute
15. Press P6 to save
Page 5